
Jira to HubSpot (Automation)
Overview
HubSpot for Jira now supports automation between Jira and HubSpot, with these action rules available:
Create New HubSpot Object
Find HubSpot Object and Link
Link or Create and Link HubSpot Object
Find HubSpot Object and Unlink
Unlink all HubSpot Objects
Notify Linked HubSpot Objects
Action Rules Explained:
1. Create New HubSpot Object
Creates a new HubSpot object (e.g., Ticket, Deal, Contact or Company) based on data from the Jira issue that triggered the automation.
Purpose:
Used when a Jira event should generate a brand-new record in HubSpot.
2. Find HubSpot Object and Link
Searches for an existing HubSpot object using defined criteria (e.g., email or object name) and links it to the triggering Jira issue.
Purpose:
Used when the HubSpot object already exists and only needs to be associated with the Jira issue.
3. Link or Create and Link HubSpot Object
First attempts to find an existing HubSpot object.
If found → links it.
If not found → creates a new object and links it.
Purpose:
Used when you want to avoid duplicates but ensure a HubSpot record is always connected to the Jira issue.
4. Find HubSpot Object and Unlink
Searches for a linked HubSpot object and removes the association between the HubSpot object and the Jira issue.
Purpose:
Used when a Jira condition (e.g., status change) should break the connection to a specific HubSpot record.
5. Unlink All HubSpot Objects
Removes all existing HubSpot associations from the triggering Jira issue.
Purpose:
Used when a Jira event should fully disconnect the issue from all related HubSpot records.
6. Notify Linked HubSpot Objects
Sends a notification (via HubSpot) to all HubSpot objects (object owners) linked to the Jira issue.
Purpose:
Used to inform HubSpot users (e.g., Sales, Support, CSMs) about important Jira updates directly within HubSpot.
To set up the HubSpot for Jira Automation, please follow these steps:
How to create an automation action rule in HubSpot for Jira
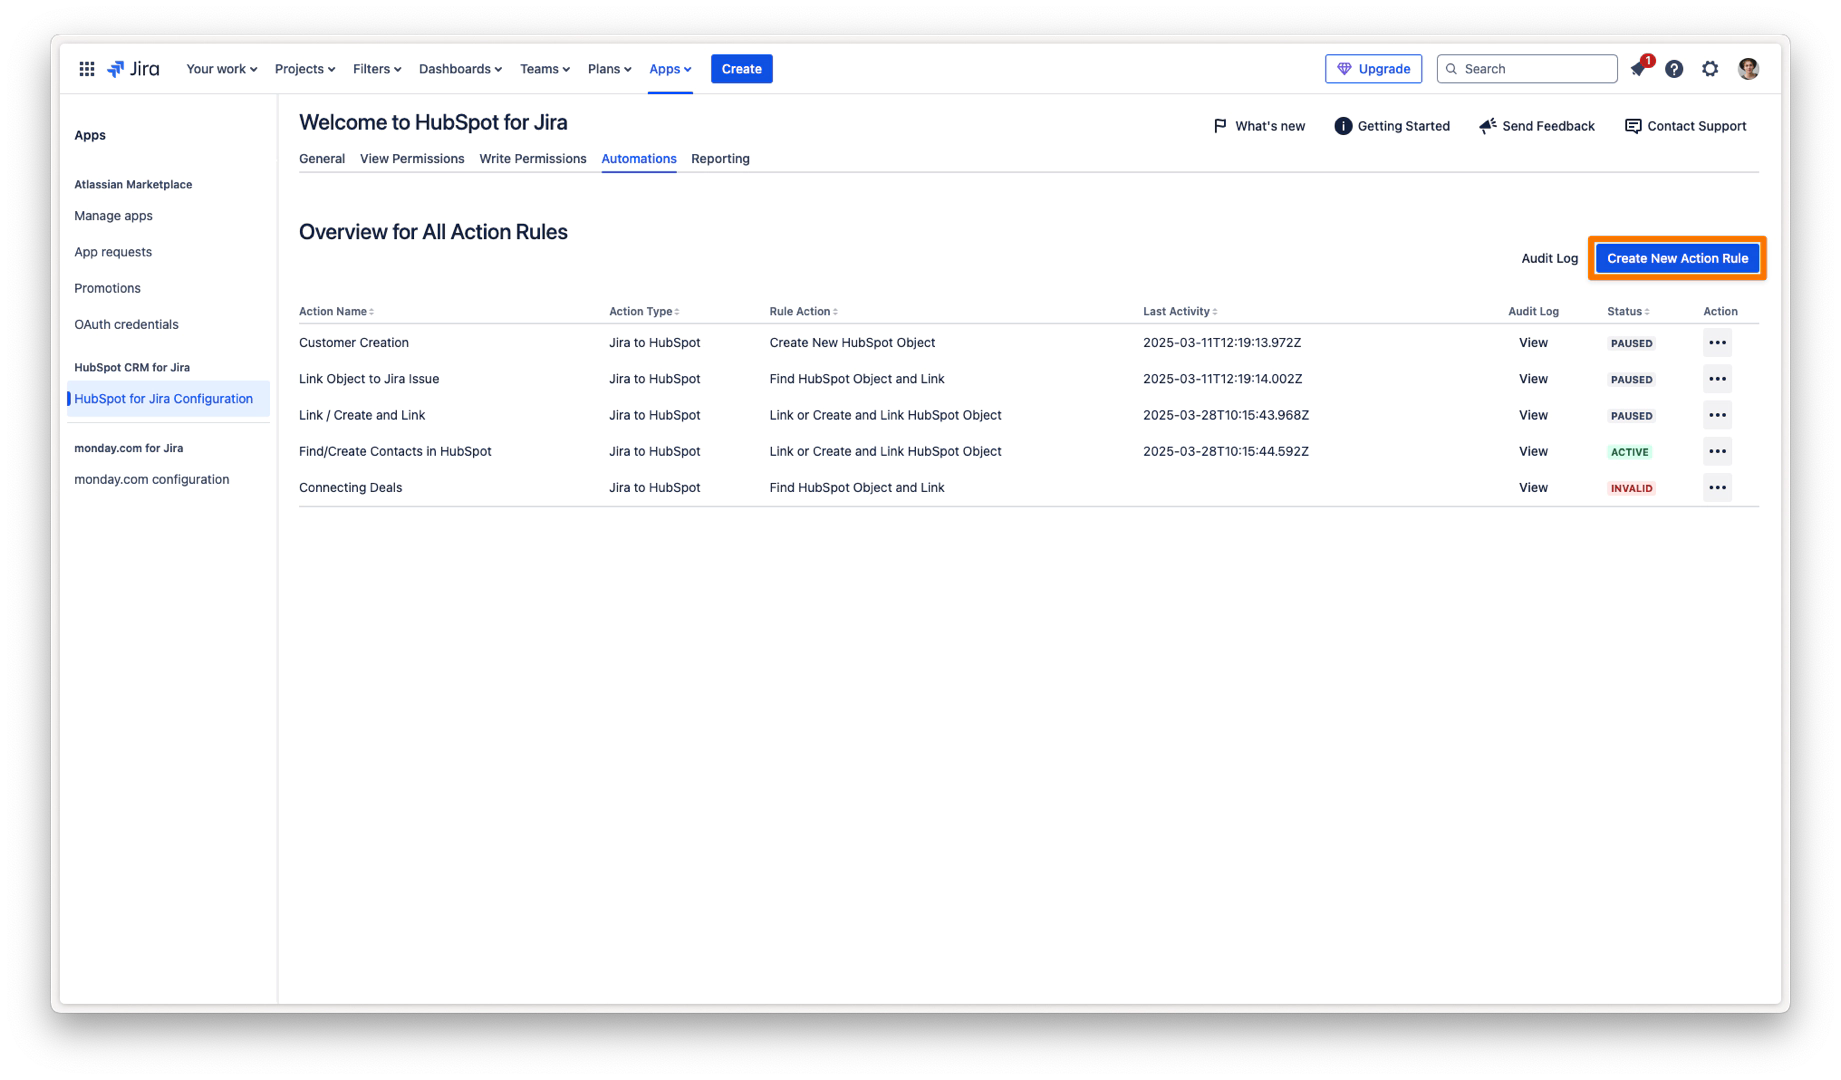
Step 1 - Access HubSpot for Jira Automation
Navigate to your “HubSpot for Jira Configuration” which can be found under “Manage Your Apps“, and click on “Go to Automations“
Step 2 - Creating an action
Click on “Create New Action Rule“ to open the automation action configurator where you will be prompted to:
Give your automation a name
Select an action
Select Jira Project
Step 3 - Configure objects and properties
First, define which HubSpot Object/s should be used in the action rule. Once the object/s has been selected, configure and map the HubSpot object properties with the desired Jira fields.
Important:
To find/link a HubSpot object based on a selected Jira field, the Jira field must be mapped to the correct HubSpot object properties (identifier). The HubSpot object properties that are being used as identifiers are as follows:
Contact = Email
Company = Company Name
Deal = Deal Name
Ticket = Ticket Name
Step 4 - Save the action rule
Save the action rule, once all of the previous steps have been completed as this will result in a pop-up window that will provide authorization value which will have to be copied for later use.
Important: Do not close the pop-up window without copying your authorization value, as this is a unique code that cannot be stored for security purposes. Losing it will result in having to regenerate a new one.
How to use your action rule in Jira automations
Step 1 - Creating a Jira automation rule
From within your Jira Project click on the Settings button and navigate to System under Jira Settings.Navigate to Global Automation and click “Create Rule“.
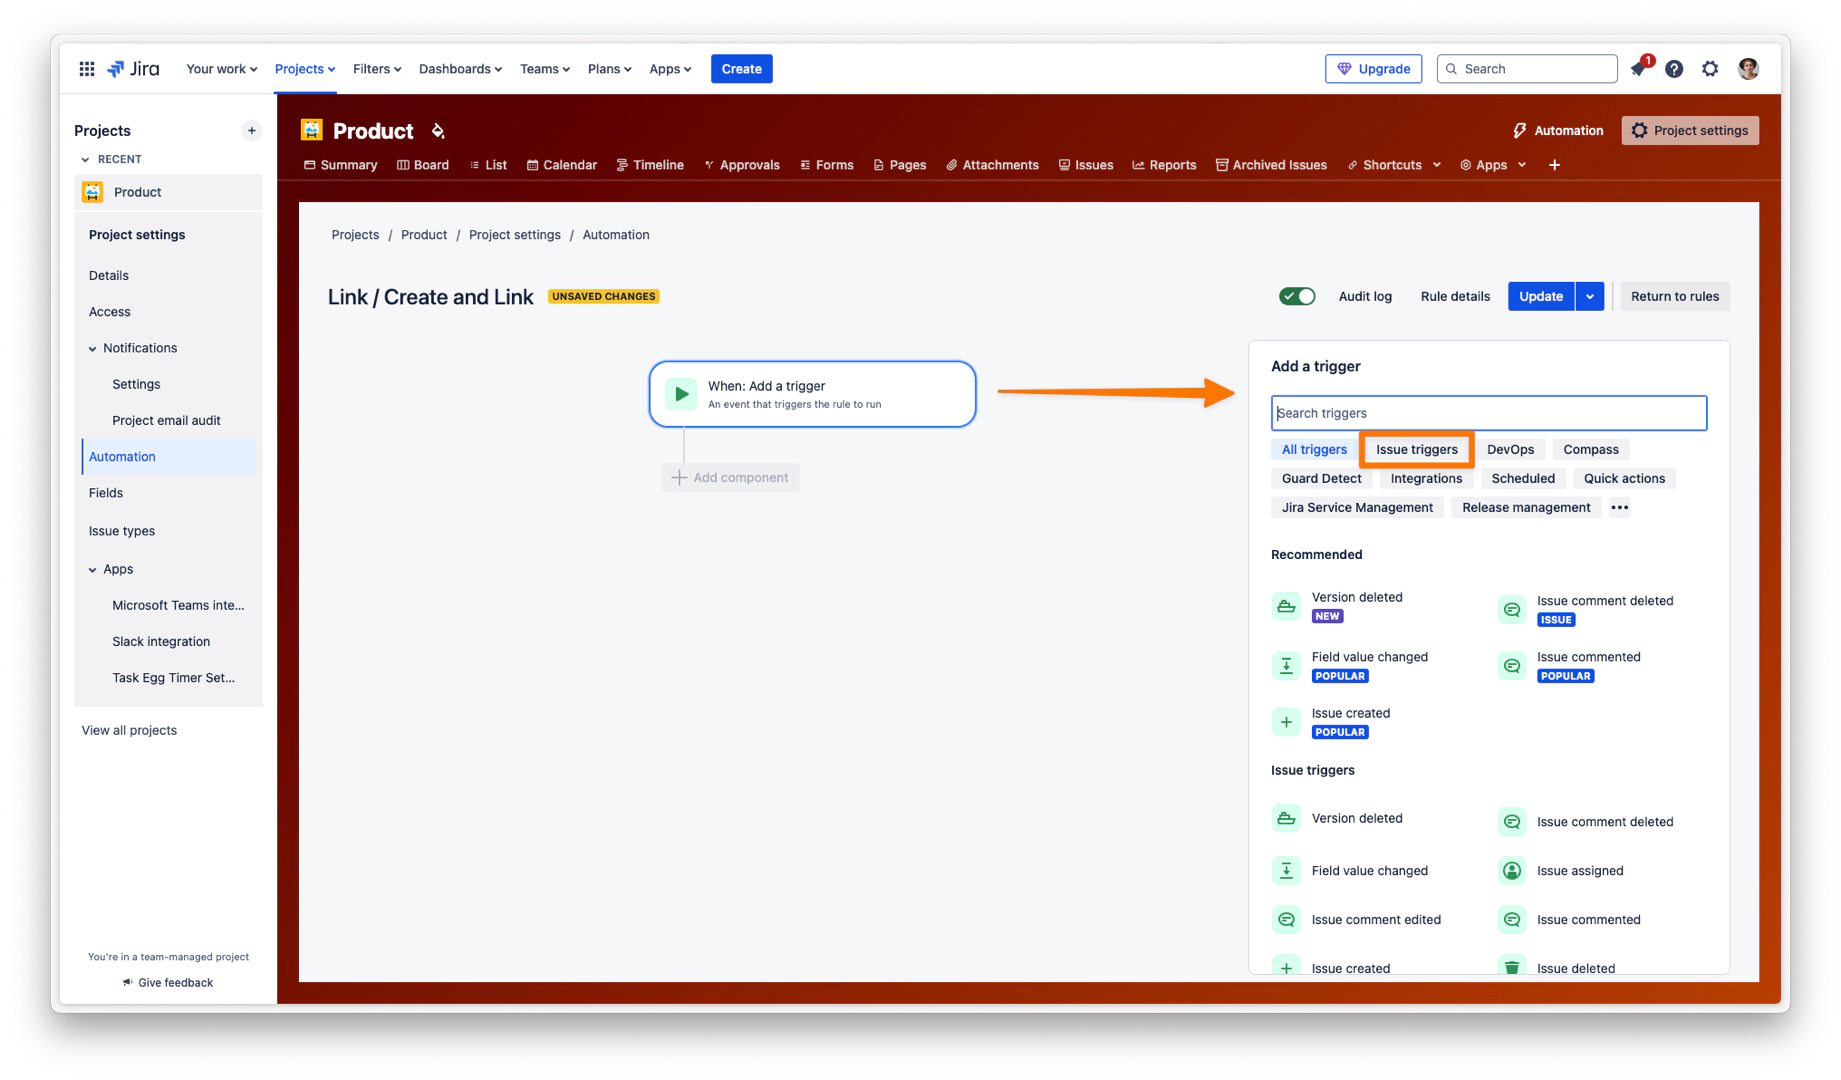
Step 2 - Setting up your automation trigger
Select the trigger for the automation. Ensure that the trigger is an Issue Trigger. The automation rule will execute every time the selected trigger event occurs.
Step 3 - Setting up the action
Select “Send web request“ as the action and complete the form:
Complete the form with the following information:
Web request URL -
https://embed-j-hubspot.resolution-cloud.com/api/automation/hubspot-for-jiraWeb request body: Issue data - Automation format
Under Headers add the key "authorization" and add the token with the structure
Bearer xxxxfrom the Automation Configuration Screen. The token should be kept hidden.
PLEASE NOTE: When making use of the “Notify Linked HubSpot Objects“ action rule, a secondary header should be added:
Header Key: changelog
Header Value: {{changelog}}Click Next.
IMPORTANT: The information mentioned above (Step 3) should be completed exactly as indicated for the workflow to run successfully.

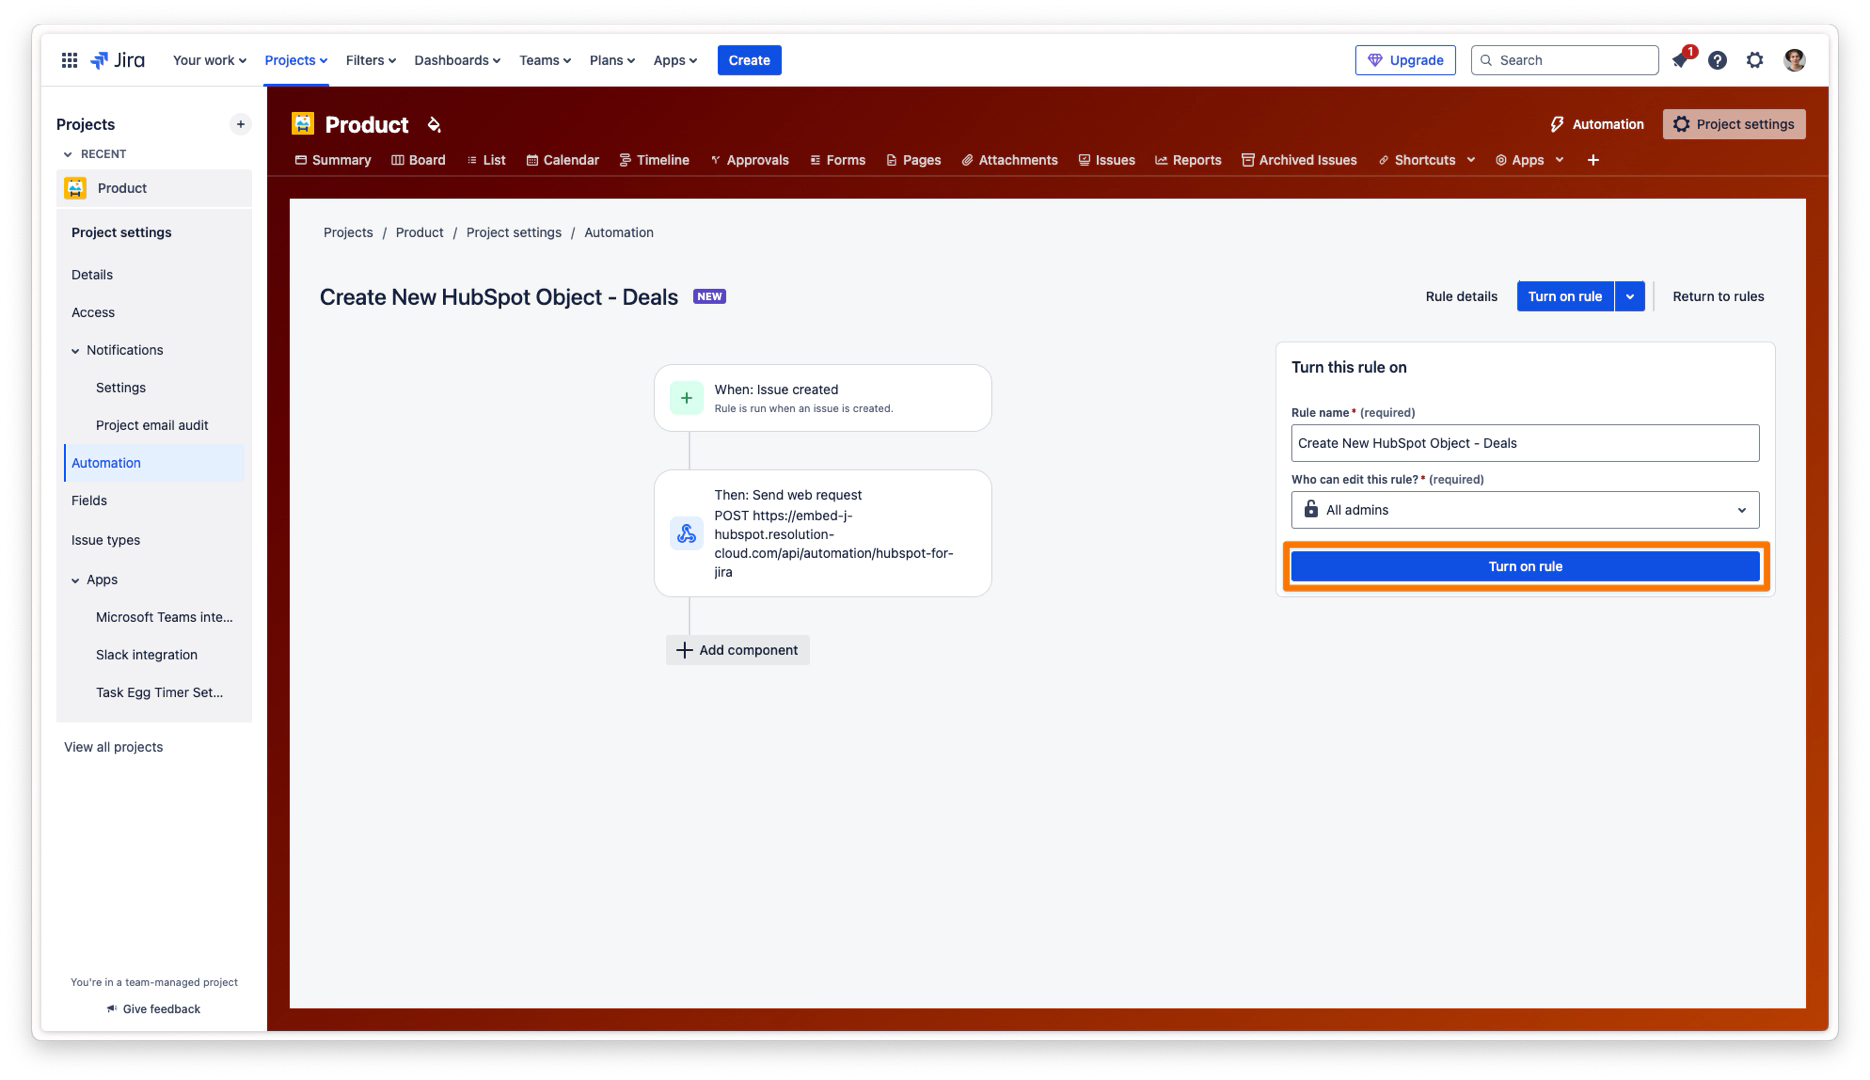
Step 4 - Turn on the Jira automation rule
Select "Turn on rule" and complete the required fields, followed by click "Turn on rule" below the completed fields.
Step 5 - Complete the automation setup
Navigate back to the HubSpot for Jira Automation screen where the HubSpot for Jira action rule was created before.
Activate the rule by clicking the “Action“ menu next to the created rule and then “Activate“.
The action rule can be activated or paused at any time in the rule overview without having to modify the Jira Automation setup.