

Jira to HubSpot (Automation)
Overview
HubSpot for Jira now supports automation between Jira and HubSpot, with these action rules available:
Create New HubSpot Object
Find HubSpot Object and Link
Link or Create and Link HubSpot Object
Find HubSpot Object and Unlink
Unlink all HubSpot Objects
Notify Linked HubSpot Objects
Action Rules Explained:
1. Create New HubSpot Object
Creates a new HubSpot object (e.g., Ticket, Deal, Contact or Company) based on data from the Jira work item that triggered the automation.
Purpose:
Used when a Jira event should generate a brand-new record in HubSpot.
2. Find HubSpot Object and Link
Searches for an existing HubSpot object using defined criteria (e.g., email or object name) and links it to the triggering Jira work item.
Purpose:
Used when the HubSpot object already exists and only needs to be associated with the Jira work item.
3. Link or Create and Link HubSpot Object
First attempts to find an existing HubSpot object.
If found → links it.
If not found → creates a new object and links it.
Purpose:
Used when you want to avoid duplicates but ensure a HubSpot record is always connected to the Jira work item.
4. Find HubSpot Object and Unlink
Searches for a linked HubSpot object and removes the association between the HubSpot object and the Jira work item.
Purpose:
Used when a Jira condition (e.g., status change) should break the connection to a specific HubSpot record.
5. Unlink All HubSpot Objects
Removes all existing HubSpot associations from the triggering Jira work item.
Purpose:
Used when a Jira event should fully disconnect the issue from all related HubSpot records.
6. Notify Linked HubSpot Objects
Sends a notification (via HubSpot) to all HubSpot objects (object owners) linked to the Jira work item.
Purpose:
Used to inform HubSpot users (e.g., Sales, Support, CSMs) about important Jira updates directly within HubSpot.
To set up the HubSpot for Jira Automation, please follow these steps:
How to create an automation action rule in HubSpot for Jira
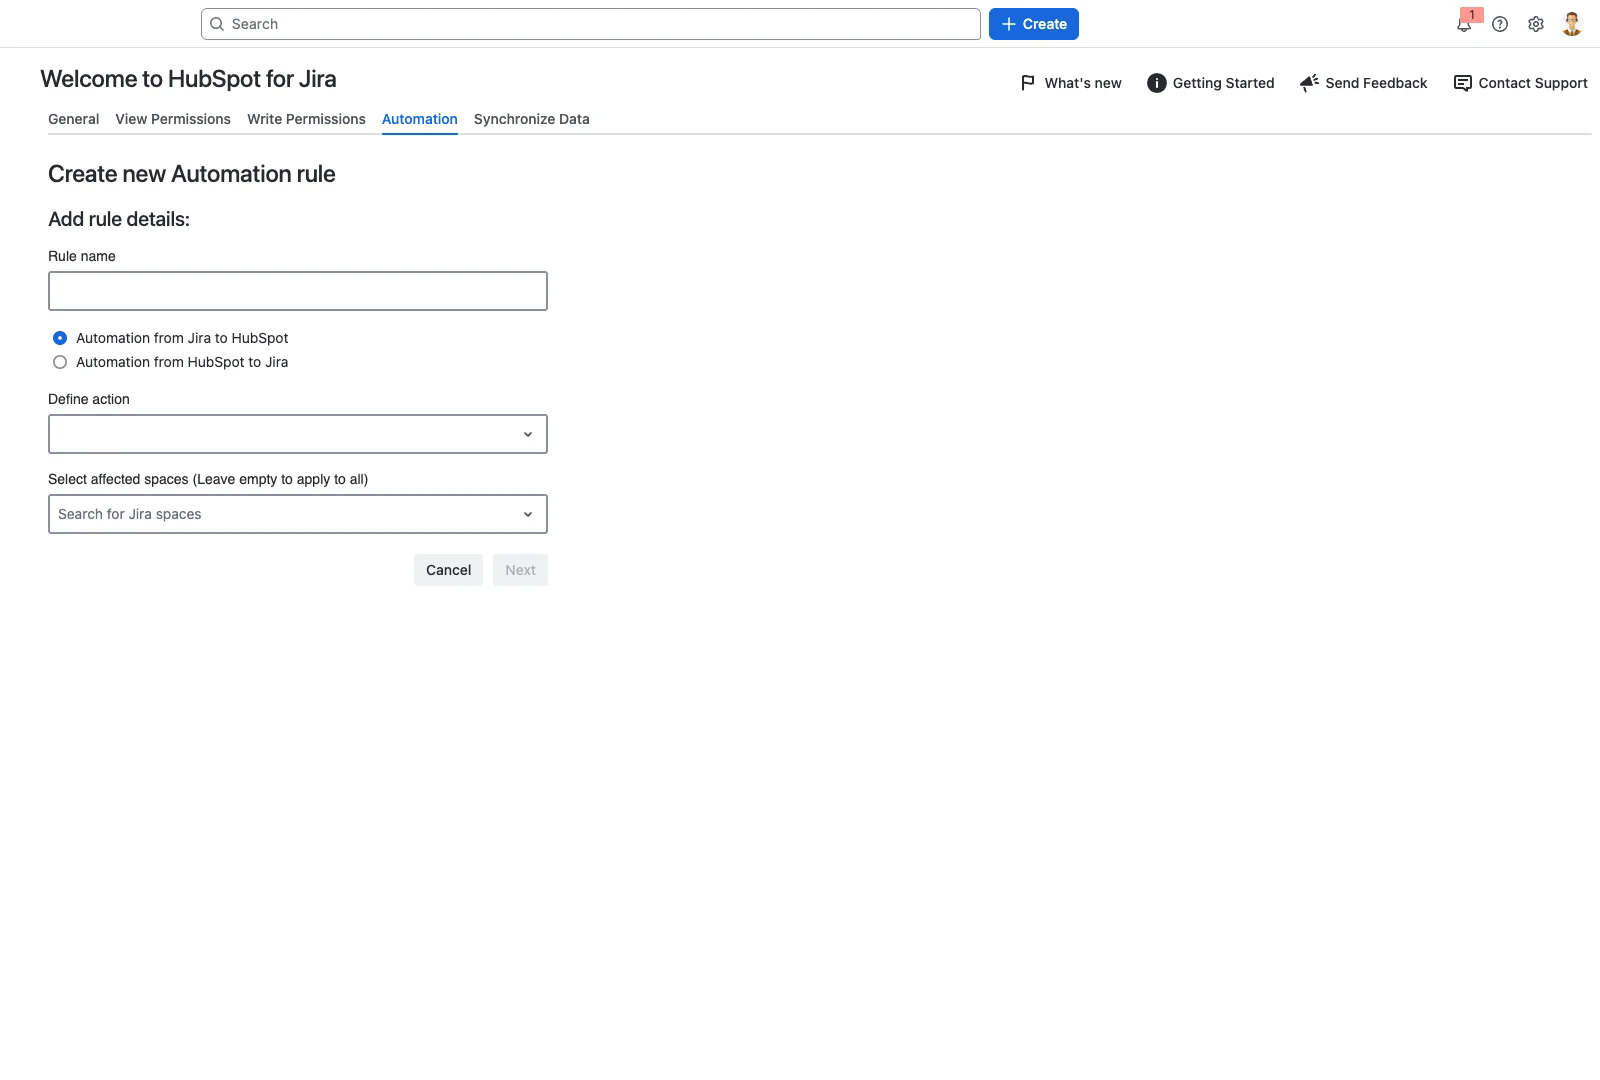
Step 1 - Access HubSpot for Jira Automation
Navigate to your “HubSpot for Jira Configuration” which can be found under “Manage Your Apps“, and click on “Go to Automations“
Step 2 - Creating an action
Click on “Create Automation Rule“ to open the automation action configurator where you will be prompted to:
Give your automation a name
Select an action
Select Jira Space
Step 3 - Configure objects and properties
First, define which HubSpot Object/s should be used in the action rule. Once the object/s has been selected, configure and map the HubSpot object properties with the desired Jira fields.
Important:
To find or link a HubSpot object from a Jira field, the Jira field must be matched against a HubSpot property that holds unique values. Each object type has a default:
Contact = Email
Company = Company Name
Deal = Deal Name
Ticket = Ticket Name
These are defaults, not the only options. Any HubSpot property marked Require unique values for this property in HubSpot is also offered in the rule’s HubSpot unique field list.
Step 4 - Save the action rule
Save the action rule once the previous steps are complete. The rule is created in a paused state and is activated later.
Choosing which HubSpot property the rule matches on
Every object type has a default unique property: Email for Contact, and the object name for Company, Deal and Ticket – Company Name, Deal Name and Ticket Name. The default is no longer the only choice.
Any HubSpot property can be offered to the rule by marking it as unique in HubSpot. When you create or edit a property, tick Require unique values for this property. HubSpot allows up to ten unique properties per object type.
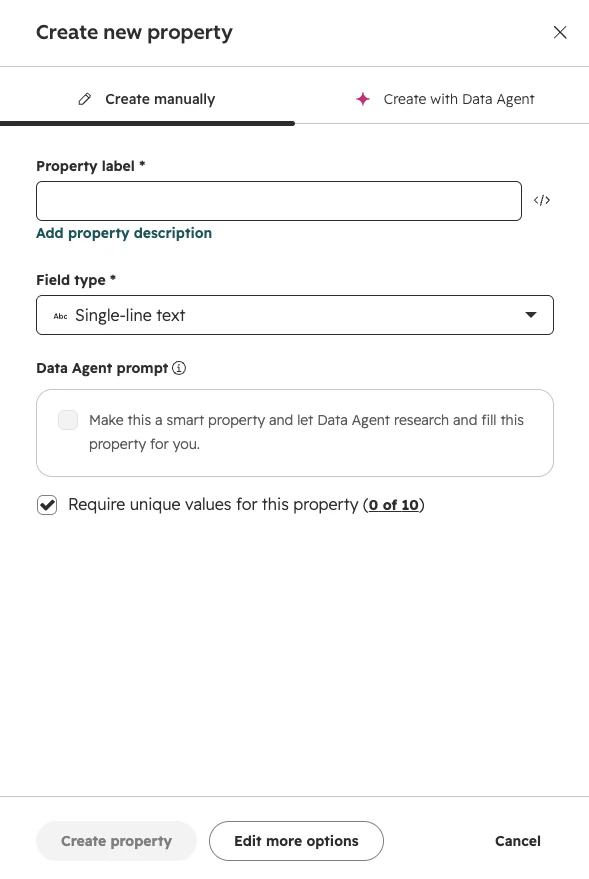
The property then appears in the rule’s HubSpot unique field list alongside the default. Under Find the HubSpot object where these field values match, choose the Jira source field to take the value from, and the HubSpot unique field to match it against.
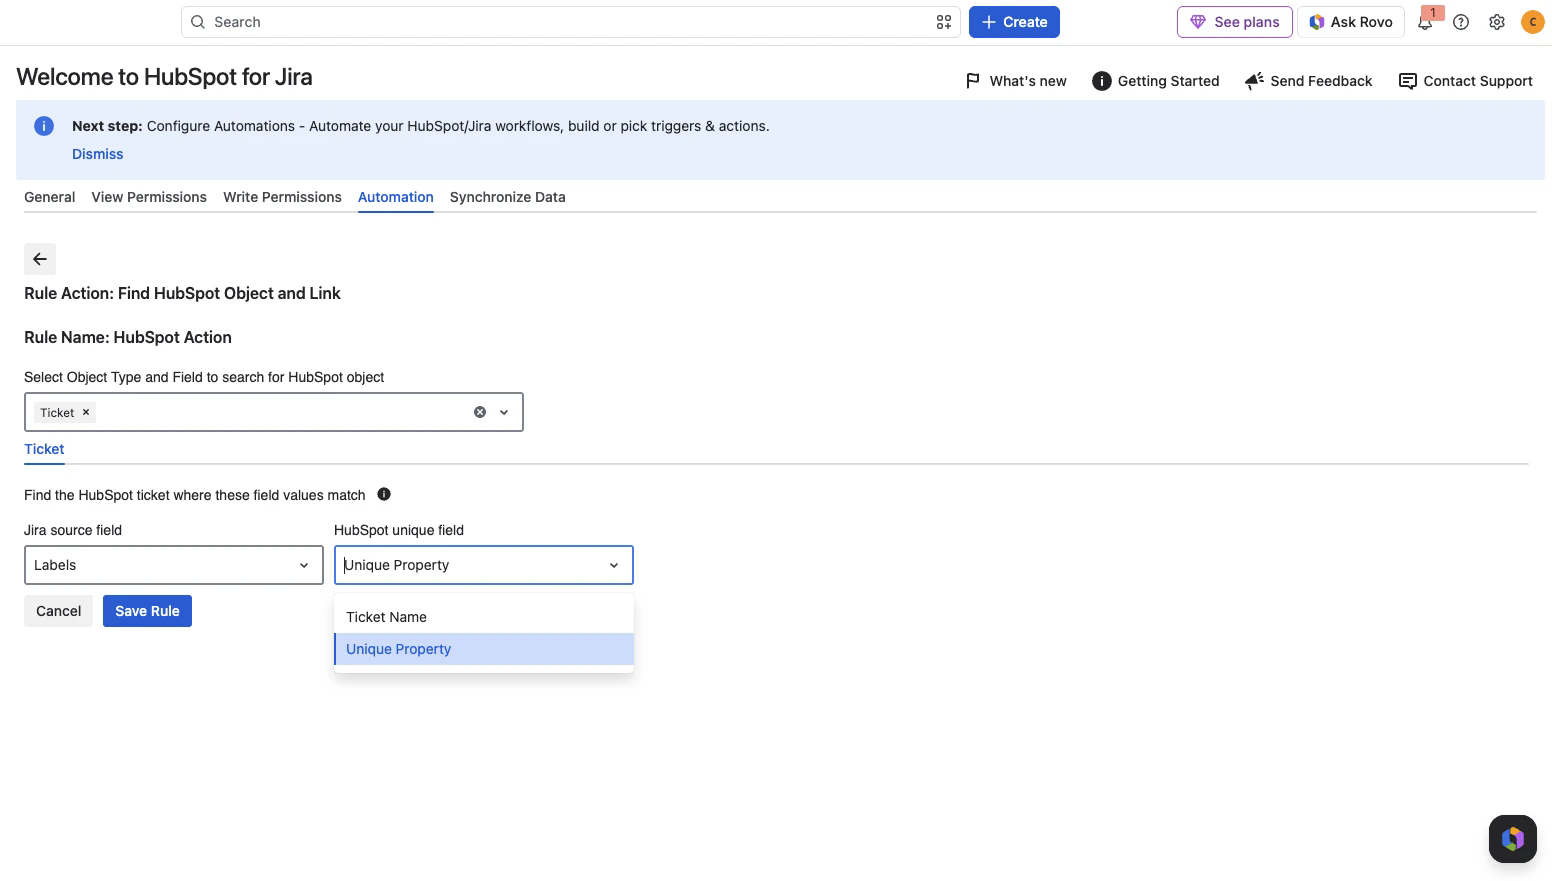
A property has to be marked unique in HubSpot before it appears here. If the property you expect is missing from the HubSpot unique field list, check that Require unique values for this property is ticked on the HubSpot side, then reopen the rule.
How to use your action rule in a Jira flow
Earlier versions of the app required a Send web request action pointing at a webhook URL, with an authorization token copied out of the app. The Forge version uses neither. The HubSpot actions appear directly in the Jira flow builder once the action rule exists.
Step 1 - Create a flow
Go to Jira settings → Automation and create a flow.
Step 2 - Add a trigger
Choose the event that should start the flow, for example Work item created or a status transition. The flow runs each time that event occurs.
Step 3 - Add the HubSpot action
Select Add step, then Action, and search for HubSpot. The six action types appear as HubSpot CRM for Jira - followed by the action name:
HubSpot CRM for Jira - Create new HubSpot Object
HubSpot CRM for Jira - Find HubSpot Object and Link
HubSpot CRM for Jira - Link or Create and Link HubSpot Object
HubSpot CRM for Jira - Find HubSpot Object and Unlink
HubSpot CRM for Jira - Unlink All HubSpot Objects
HubSpot CRM for Jira - Notify Linked HubSpot Objects
Step 4 - Connect Atlassian Automation to the app
The first time you add one of these actions, Jira asks you to connect Atlassian Automation to HubSpot for Jira. Select Connect and complete the prompt. This is a one-time step per site; later flows reuse the same connection.
Step 5 - Select your action rule
Choose the action rule you created in the Automation tab, then save and enable the flow.
Step 6 - Activate the action rule
Go back to the Automation tab in the app, open the Action menu next to the rule and select Activate. Rules can be activated or paused at any time without changing the Jira flow.