Configuring "Read/View" Settings
Configuring View Permissions and Field Visibility
Control exactly who can access the HubSpot for Jira integration, and which Jira and HubSpot fields are visible on either side of the connection.
Overview
This guide helps administrators configure view permissions, control project and comment visibility, and manage which Jira fields appear in HubSpot (and vice versa). Use these steps to ensure data privacy and a tailored integration experience for your teams.
Step-by-Step Instructions
Step 1: Edit the Connection and Set User Group Permissions
Navigate to the HubSpot for Jira app settings in your Jira instance.
Find your existing connection and click the pencil (edit) icon.
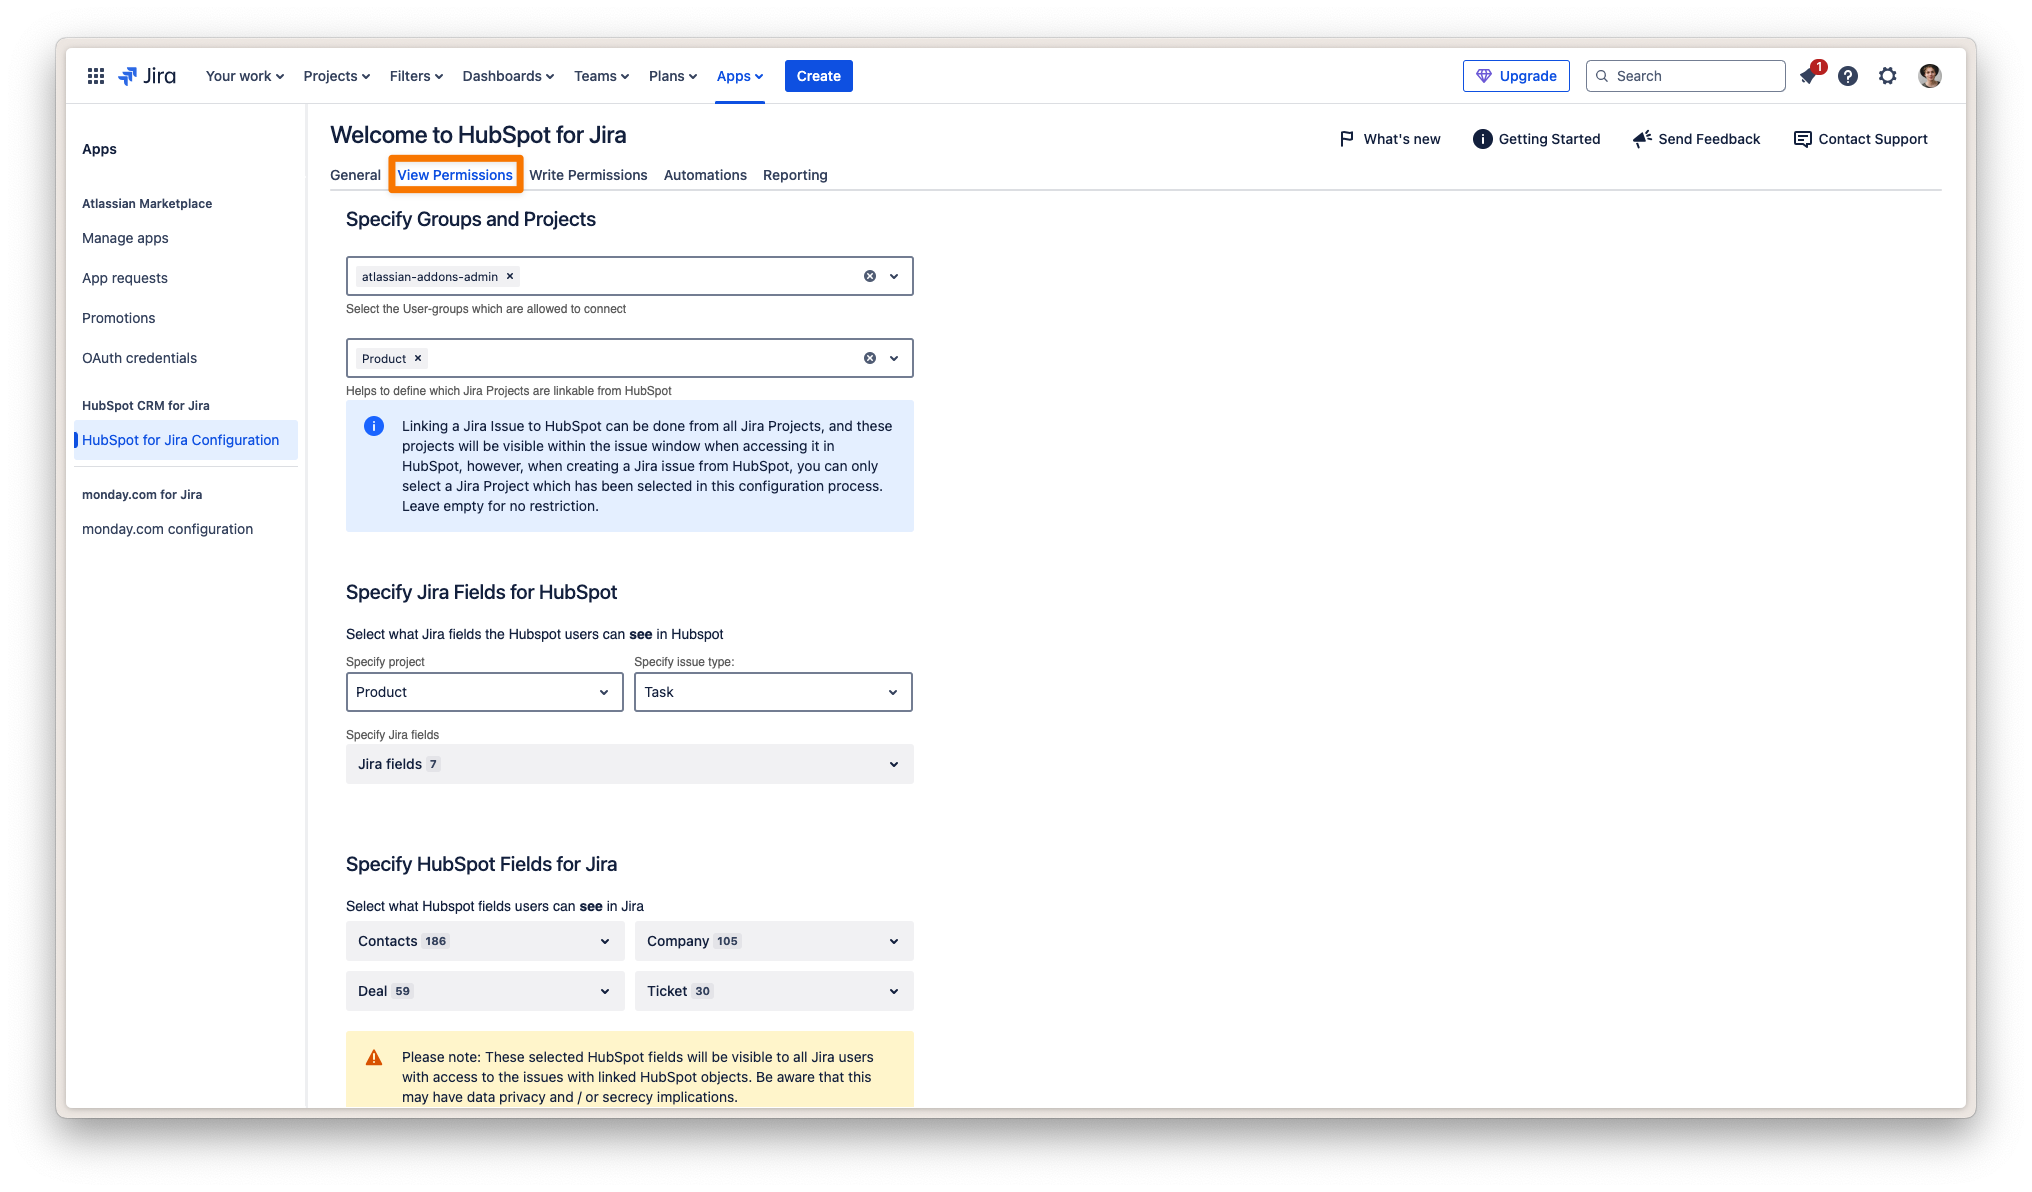
Go to the Read/View Permissions tab.
In the Specify Groups section, select the user groups that should be allowed to access and use the integration.
Only selected groups will be able to connect Jira with HubSpot through this integration.
Step 2: Specify Jira Projects Accessible from HubSpot
Under Specify Projects, choose the Jira projects where users can link and create Jira issues from HubSpot.
Leave this empty for no restrictions, or select specific projects to limit access.
Tip: Jira issues can be linked from any project, but only issues in the selected projects will be shown in HubSpot.
Info: Jira issues can be linked from all Jira projects, and only these linked issues will be visible in the HubSpot Card View when accessed from HubSpot.
Step 3: Hide Internal Jira Comments in HubSpot (Optional)
Enable the Hide Internal Jira Comments option to prevent internal (private) comments from being viewed or posted in HubSpot for all JSM (Jira Service Management) projects.
Optionally, select specific JSM projects to apply this setting.
For complete privacy, make sure all relevant JSM projects are included here, as issues from other projects may also be linked.
Info: You can select more projects here than in the 'Specify Projects' section, as Jira issues from other projects can still be linked to HubSpot. To keep internal comments hidden, ensure all relevant JSM projects are included here.
Step 4: Configure Jira Field Visibility (Fields Shown in HubSpot)
In the Specify Jira Fields for HubSpot section, click on "Jira Fields Settings."
Select the Jira project you want to configure.
Choose the issue type for which you want to define field visibility.
Select which Jira fields HubSpot users should be able to see in HubSpot cards (Please note: that fields marked by an asterisk “*“ are mandatory fields. They cannot be unchecked).
Drag and drop fields to set the order in which they appear.
The field order determines their appearance both in HubSpot cards and in the issue creation form within HubSpot.
Step 5: Configure Multiple Projects & Issue Types
Repeat Step 4 for each Jira project and issue type combination where you want to control field visibility.
This ensures your team sees the most relevant Jira information in HubSpot for each workflow.
Step 6: Configure HubSpot Object Properties Visible in Jira
Under Specify HubSpot Fields for Jira, use the dropdown menus to select which HubSpot properties should be accessible to Jira users.
You can specify Contacts, Companies, Deals, Tickets, and any other HubSpot objects you want to display.
Repeat this process for each object type as needed.
Note: The selected HubSpot fields will be visible to all Jira users with access to issues linked to HubSpot objects. Consider privacy and data security implications when configuring field visibility.
Saving and Next Steps
Once all permissions and field visibility settings are configured, click Save.
Proceed to Configure writable fields if you wish to control which fields can be edited between Jira and HubSpot.