Configuring "Write/Update" Settings
Configuring Write Permissions and Editable Fields
Control which user groups can edit data and define which Jira and HubSpot fields are editable across the integration.
Overview
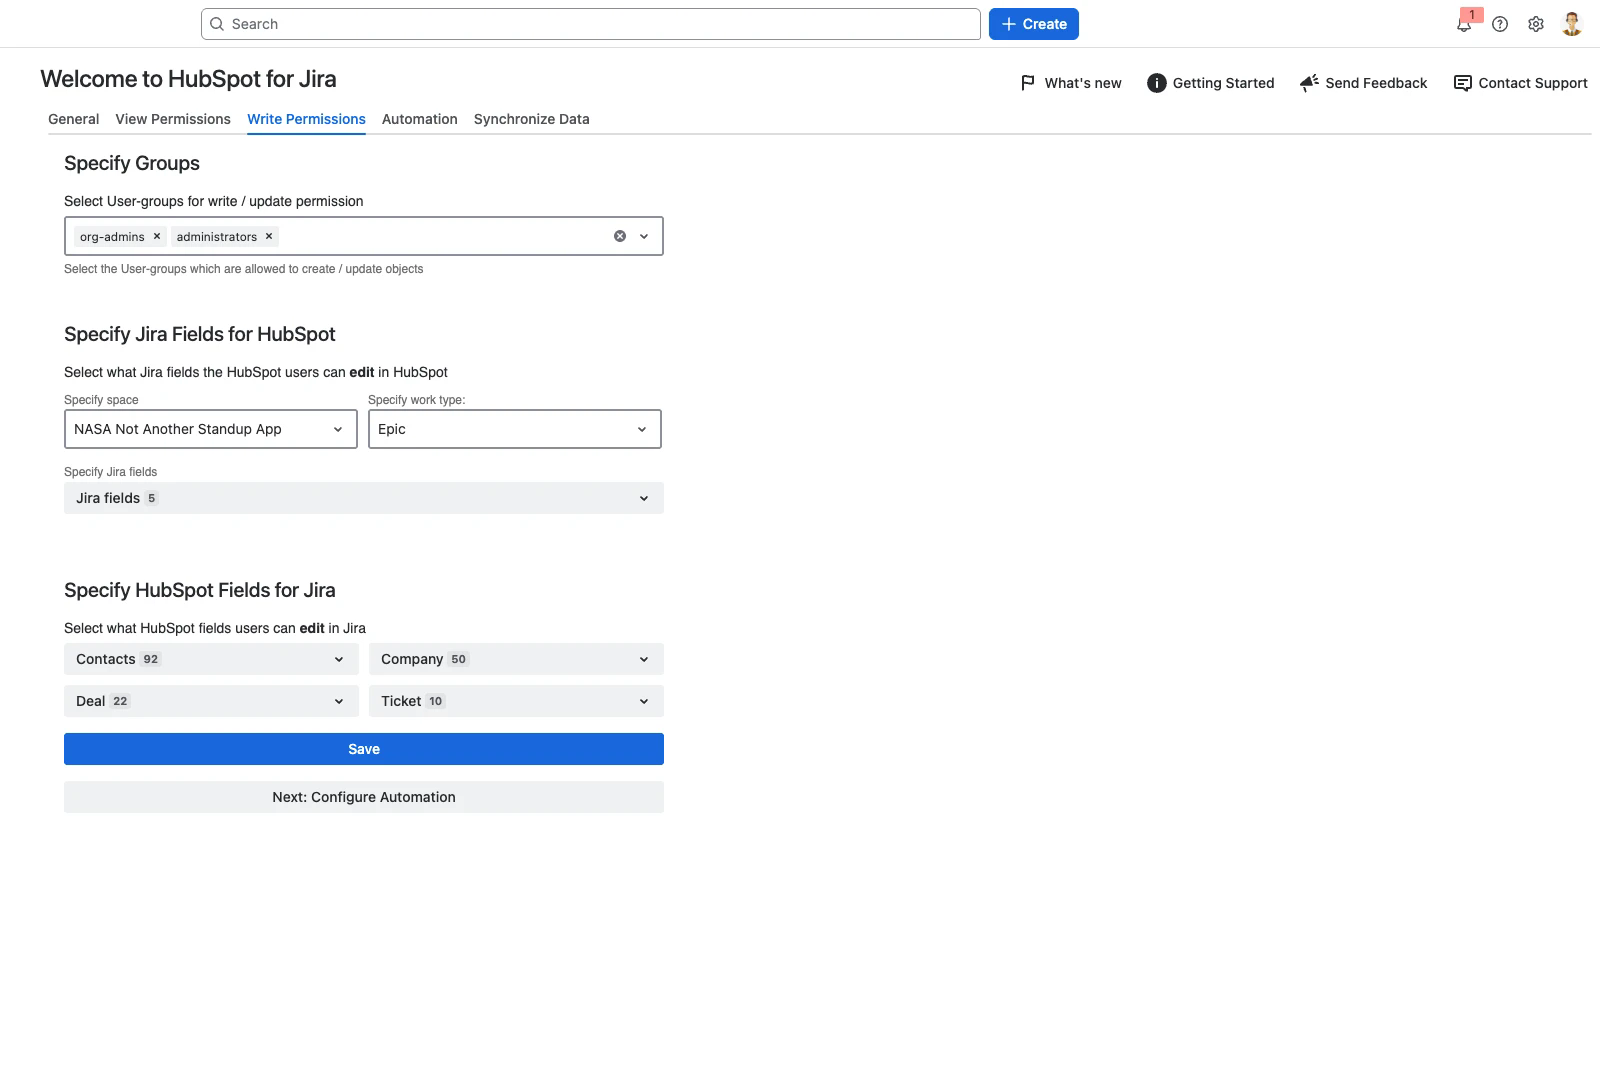
The Write Permissions tab determines who can create HubSpot records from Jira, who can create and update Jira work items from HubSpot, and which fields they can set. Existing HubSpot records are never updated by the app. Use these settings to keep control over sensitive data and ensure that users can only update the information you want them to.
Step-by-Step Instructions
Step 1: Assign Write/Update Permissions
Go to Jira settings → Apps → HubSpot CRM Configuration.
Open the Write Permissions tab.
In the Specify Groups section, select the user groups who should have permission to create HubSpot records, and to create or update Jira work items, through the integration.
Only selected groups will have write/update access between HubSpot and Jira.
Step 2: Configure Editable Jira Fields in HubSpot
Under Specify Jira Fields for HubSpot, click on Jira Fields Settings.
Select the Jira space you wish to configure.
Choose the work type for which you want to control field editability.
Select which Jira fields HubSpot users can edit directly from HubSpot.
Drag and drop the fields to arrange their order of appearance in the HubSpot object card and in the issue creation form within HubSpot.
Step 3: Configure Multiple Projects & Work Types
Repeat Step 2 for every Jira space and work type combination that you want to control field editability for.
This ensures your team can update the right Jira information from HubSpot, for all relevant projects and work types.
Step 4: Configure Editable HubSpot Object Properties in Jira
In the Specify HubSpot Fields for Jira section, use the dropdowns to select which HubSpot object properties should be editable for Jira users.
Choose from Contacts, Companies, Deals, Tickets, or other objects as available.
Repeat this process for each HubSpot object type as needed.
Saving Your Settings
After making your selections, click Save to apply your write/update permission and field settings.
To continue setup, click Next: Configure Automation to proceed to workflow automations.