
Creating Time-Based Rules Manually
You can now create out-of-office rules with specific start and end times directly in the Jira UI, giving you the same partial-day absence capabilities that were previously only available through integrations like Tempo Timesheets or Google Calendar.
Overview
Time-based rules allow you to specify exact hours for your absence, such as:
Morning appointments (e.g., 9:00 AM to 12:00 PM)
Afternoon meetings (e.g., 1:00 PM to 5:00 PM)
Multi-day absences with specific times (e.g., Monday 2:00 PM to Wednesday 10:00 AM)
Note: If you use the Tempo Timesheets or Google Calendar integrations, time-based rules are automatically generated from your calendar events or timesheet plans. This feature extends that capability to manual rule creation.
Creating a Manual Time-Based Rule
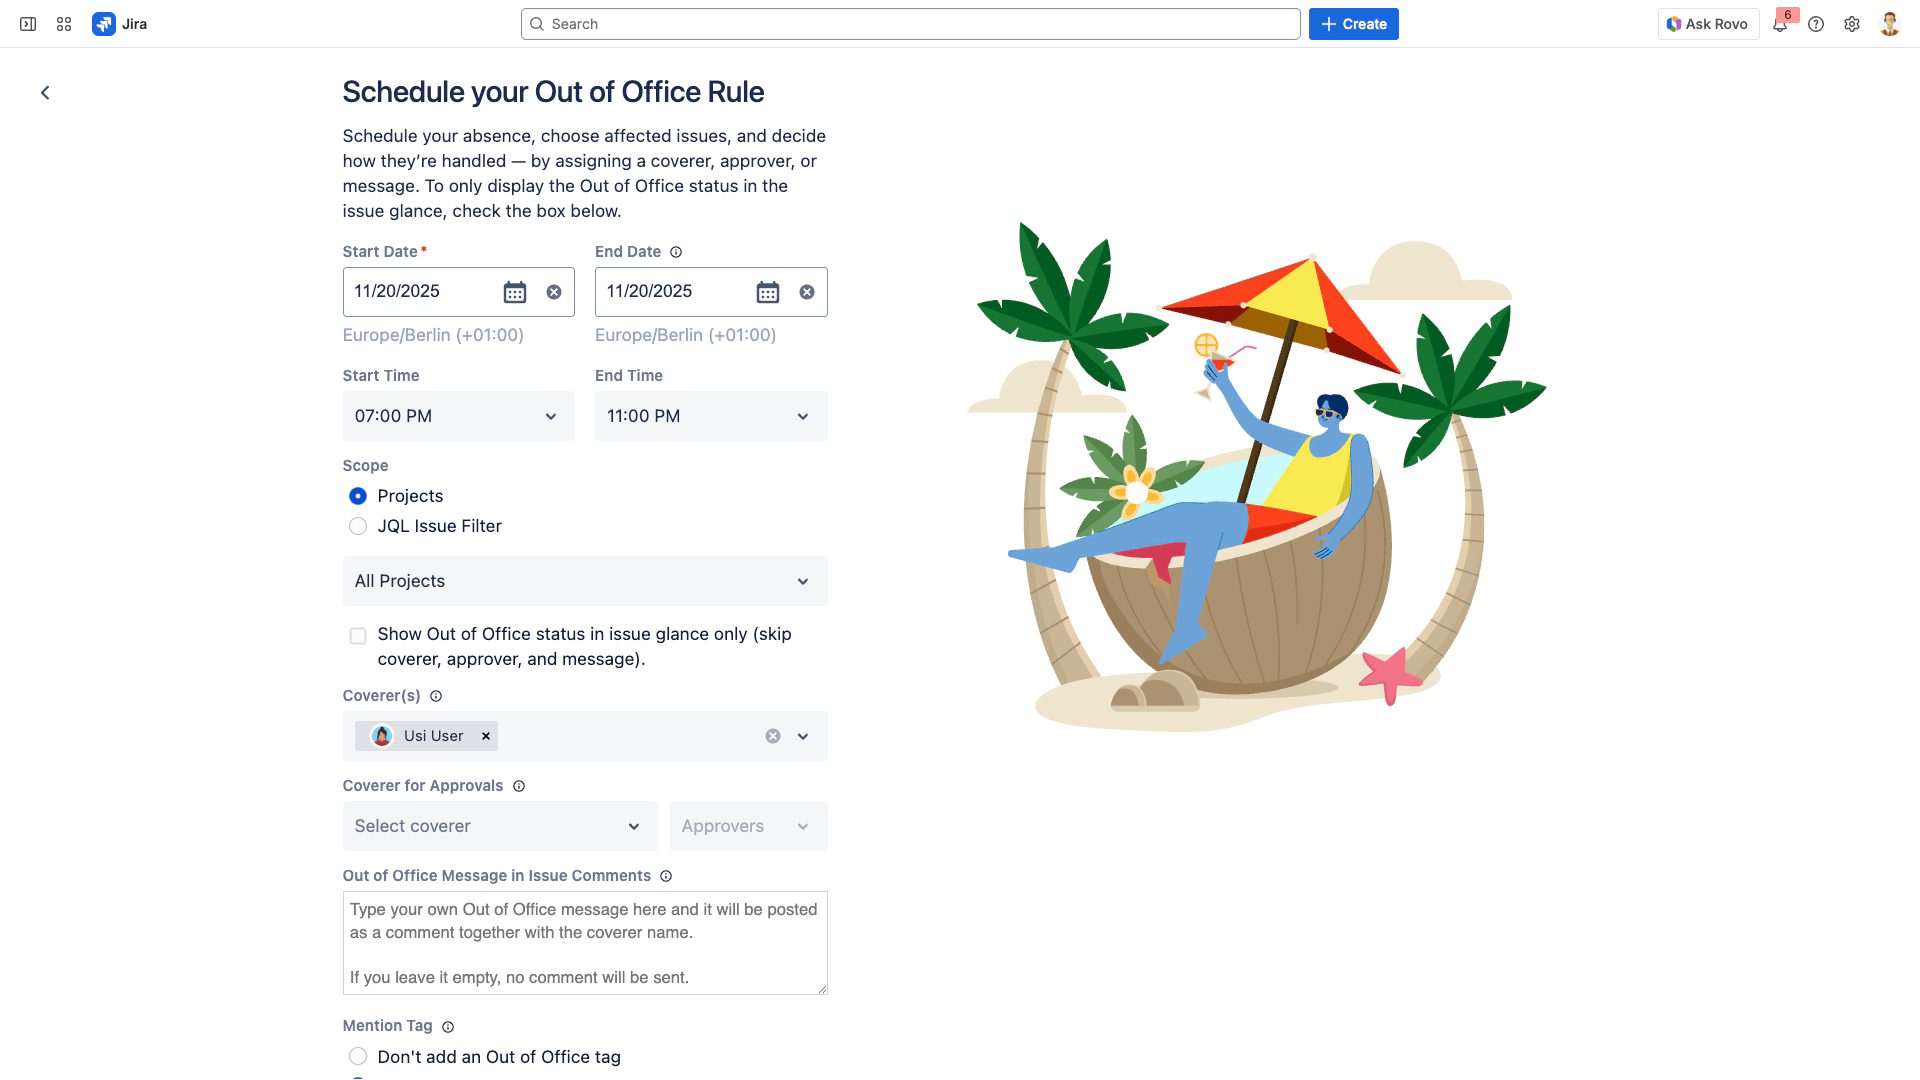
Navigate to Out-of-Office Assistant in Jira
Click +Add rule for myself
Select your Start Date and choose your start time
Select your End Date and choose your end time
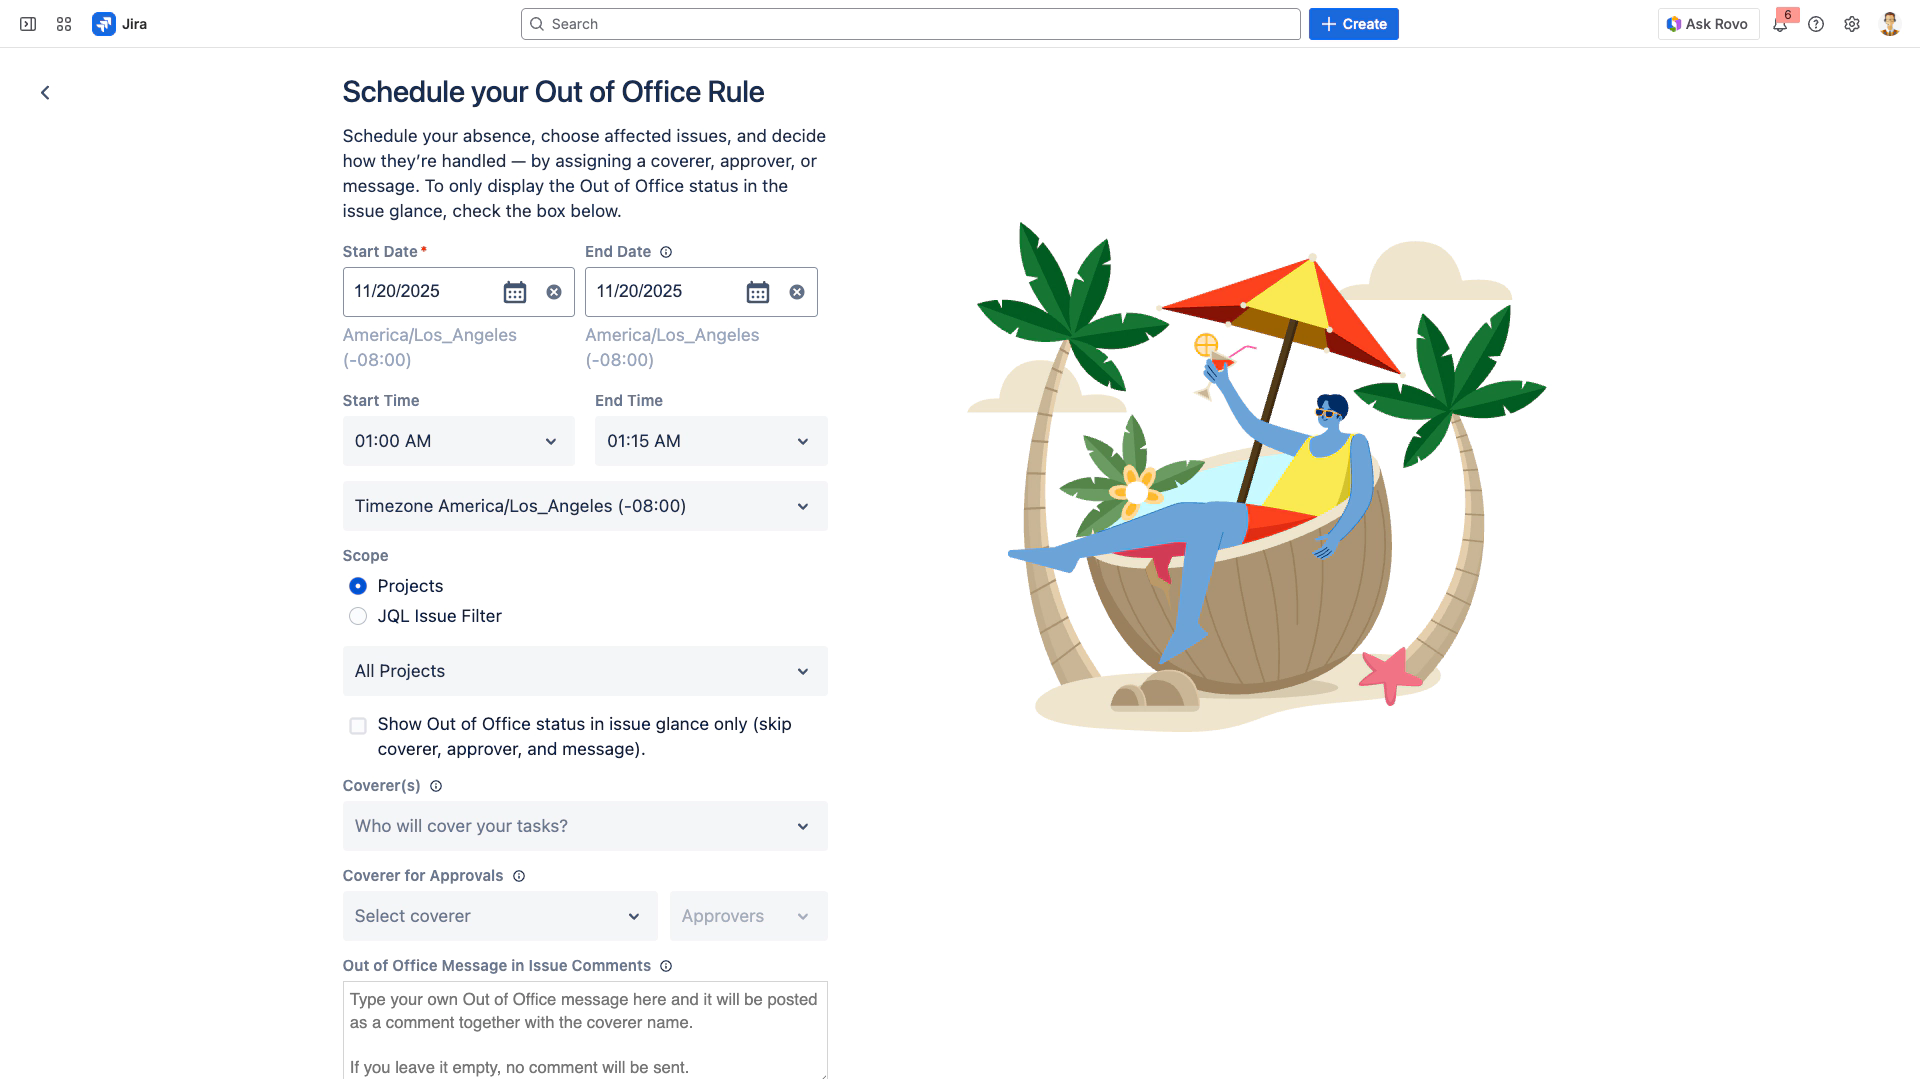
If prompted, select your timezone (see Timezone Selection below)
Configure other rule details (Coverer, Approvals, Auto Reply Message, etc.)
Click Submit
Available Time Range
The time picker supports:
24-hour availability: Select any time throughout the day
Flexible increments: Choose times that match your exact schedule
Timezone Selection
When creating time-based rules, you may see a timezone selector if:
Your browser timezone differs from your Jira instance timezone
You're working across time zones
The system uses this hierarchy:
Explicitly selected timezone (if you choose one)
Browser timezone (detected automatically)
Instance timezone (your Jira server's default)
A world icon (🌍) appears next to rules that have timezone information.
See Understanding Timezones for detailed information.
How Times Are Displayed
The system intelligently displays times based on rule duration and your Language Settings in Jira:
Short Duration (0-3 days)
Shows specific times:
"Jan 15, 9:00 AM - Jan 15, 5:00 PM"
"Feb 3, 2:00 PM - Feb 5, 10:00 AM"
Long Duration (4+ days)
Shows dates only:
"Jan 15 - Feb 20"
This prevents clutter for extended absences where specific hours are less relevant.
Examples
Example 1: Morning Appointment
Start: Today, 8:00 AM
End: Today, 12:00 PM
Result: Out of office for morning only
Display: "Jan 15, 8:00 AM - Jan 15, 12:00 PM"
Example 2: Multi-Day Conference
Start: Monday, 1:00 PM
End: Wednesday, 5:00 PM
Result: Out from Monday afternoon through Wednesday afternoon
Display: "Jan 15, 1:00 PM - Jan 17, 5:00 PM"
Example 3: Extended Vacation
Start: Jan 15, 9:00 AM
End: Feb 5, 5:00 PM
Result: Three-week absence
Display: "Jan 15 - Feb 5" (times hidden due to 4+ day duration)
Editing Time-Based Rules
To modify times in an existing rule:
Locate the rule in your rules list
Click Edit
Adjust the time values as needed
Click Submit
Some fields may be restricted after a rule becomes active. If you cannot edit times for an active rule, pause it first or create a new rule.
Conflict Detection
The system warns you if your new time-based rule overlaps with existing rules:
Check your existing schedule before creating rules
Adjust start/end times to avoid conflicts
Delete or modify conflicting rules if necessary
Best Practices
Use time-based rules for partial days: Instead of creating a full-day rule when you're only unavailable for a few hours
Check your timezone: Especially important for global teams
Consider integration options: If you already track absences in Tempo or Outlook, let the integration create rules automatically
Review the display: Remember that long absences (4+ days) show dates only