
Microsoft Outlook Integration
Overview
Microsoft Outlook integration automatically synchronizes your Outlook Automatic Replies events with Out of Office Assistant rules. When you schedule time off in Outlook, the system can automatically create corresponding absence rules in Jira, ensuring seamless coordination between your absence and project management workflows. Here is the corrected version of your text:
For more advanced workflows, it is possible to use multiple templates for the auto-reply trigger. These will be activated as soon as the auto-reply is enabled in Outlook.
Here are some examples of more advanced configurations:
a rule to delegate approvals to a coverer in a specific Jira Service Management project
a delegation rule to reassign specific requests, such as bugs, to a coverer
a generic out-of-office message for specific Jira projects
Integration Benefits
Automated Rule Creation
MS Outlook Automatic Replies: Automatically create Out of Office rules based on Outlook MS Automatic Replies
Templates define the details of the Out of Office rules activated by the Auto Replies.
Out Of Office Assistant connects a simple default template with a standard message at the first time. This can be adjusted later.
Workflow Efficiency
Single Source of Truth: Manage absence planning from familiar Outlook interface
Reduced Manual Work: Eliminate duplicate entry of absence information
Team Coordination: Consistent absence information across Outlook and Jira
Business Continuity
Automatic Coverage: Rules automatically activate based on Outlook Auto Replies
Consistent Process: Standardized absence management across organization
Prerequisites and Requirements
Microsoft Account Requirements
Personal Microsoft Account:
Active Microsoft 365 subscription account
Calendar access permissions for the account
OAuth consent capability for third-party app integration
Organizational Microsoft Account:
Microsoft 365 business subscription with active license
Outlook access within organization
Administrator consent for organizational OAuth applications (if required)
Appropriate permissions for the Scopes
Jira and Out of Office Assistant Requirements
Jira Access:
Active Jira Cloud account with Out of Office Assistant installed
Browse Projects permission minimum for creating absence rules
Valid subscription to Out of Office Assistant
Integration Setup Process
Step 1: Access Integration Configuration
Navigation Path:
Open Out of Office Assistant: Apps → Out-Of-Office Assistant
Navigate to Integrations: Click the “Integrations” tab
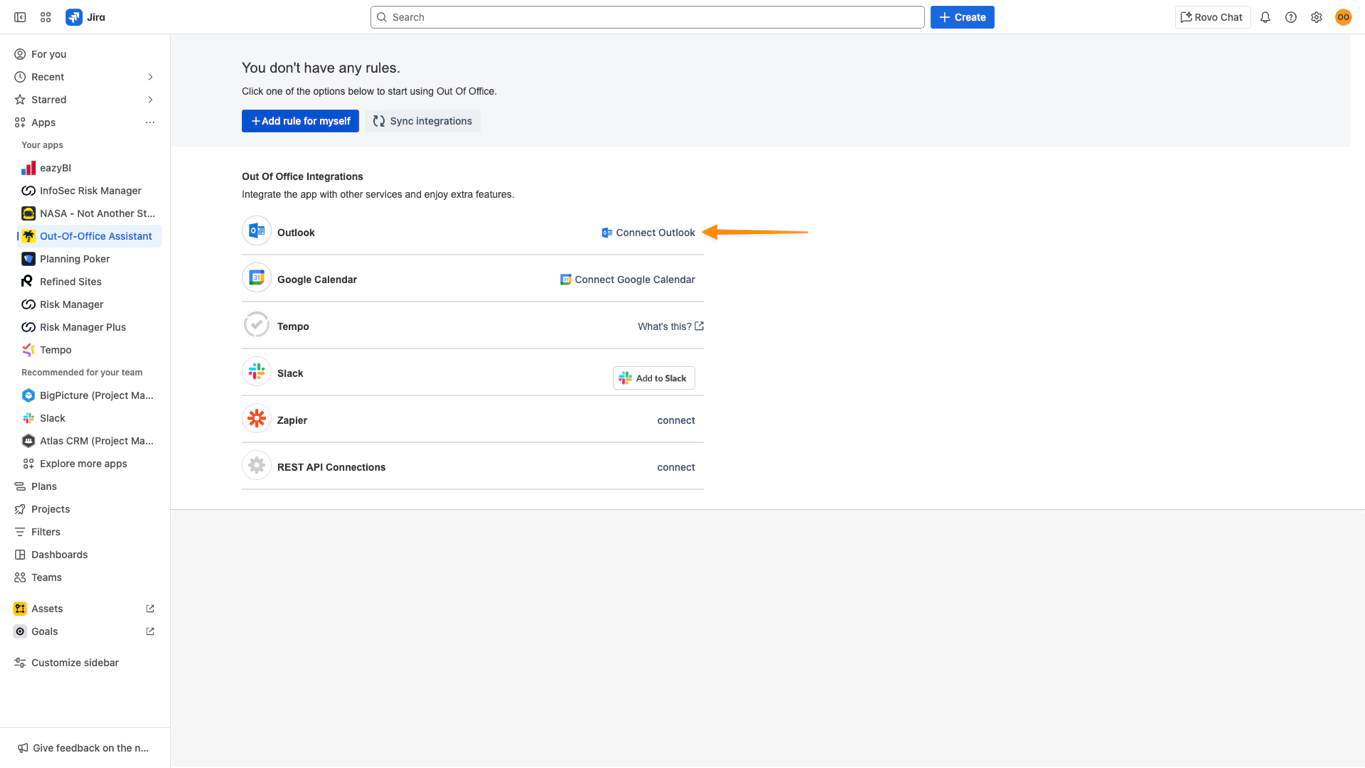
Locate Outlook Integration: Find “Outlook” section with Outlook logo
Step 2: Initial Authentication
OAuth Flow Initiation:
Click “Connect Outlook” Button: Located next to Outlook integration
OAuth Redirect: Browser redirects to Microsoft authentication page
Microsoft Login: Enter your Microsoft account credentials
Permission Review: Review requested permissions for access
Required Permissions:
Scopes: ‘User.Read’
‘MailboxSettings.Read’
‘offline_access’
Step 3: Permission Consent
Individual Consent Process:
Review Permissions: Carefully review all requested permissions
Grant Consent: Click “Accept” to approve integration
Redirect Confirmation: Return to Out of Office Assistant with success message
Step 4: Verify Connection
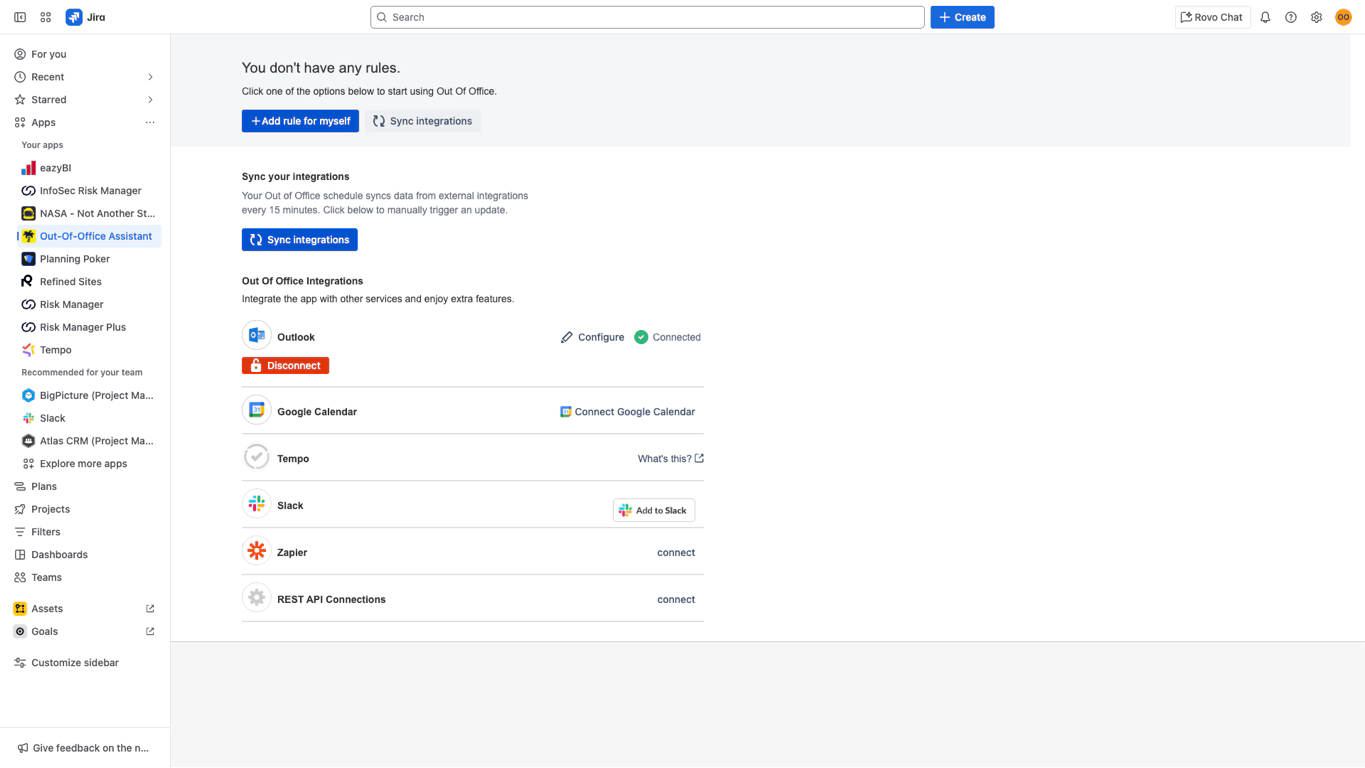
Connection Confirmation:
Status Update: “Connected” indicator appears with green checkmark
Disconnect Option: “Disconnect” button becomes available
Using Calendar Integration
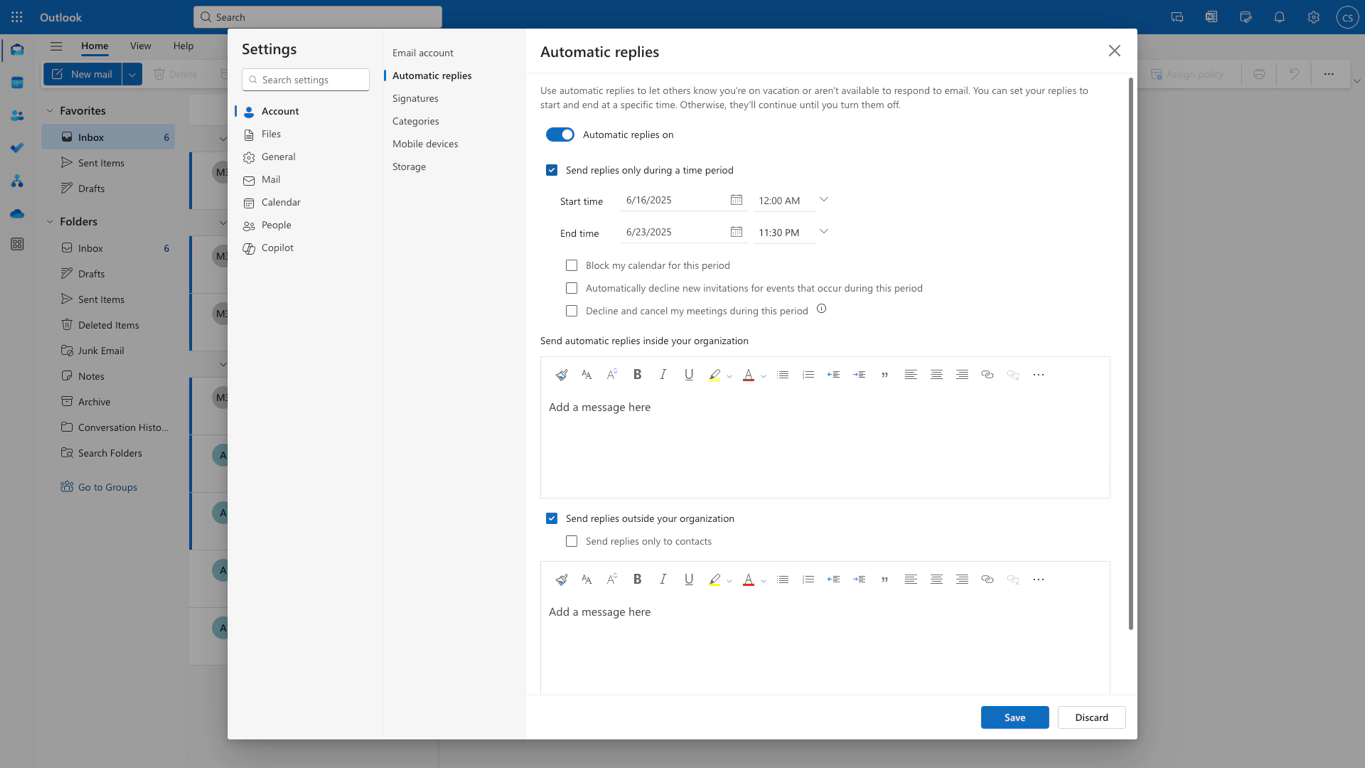
Creating Automatic Replies
Check Automatic replies on
Check "Send replies only during a time period" if you want to create an absence with a final date
Select start and end times. By default, Outlook will load your current time for the start and end times. Remember to edit them to have full coverage during your absence.
Save the Auto Reply
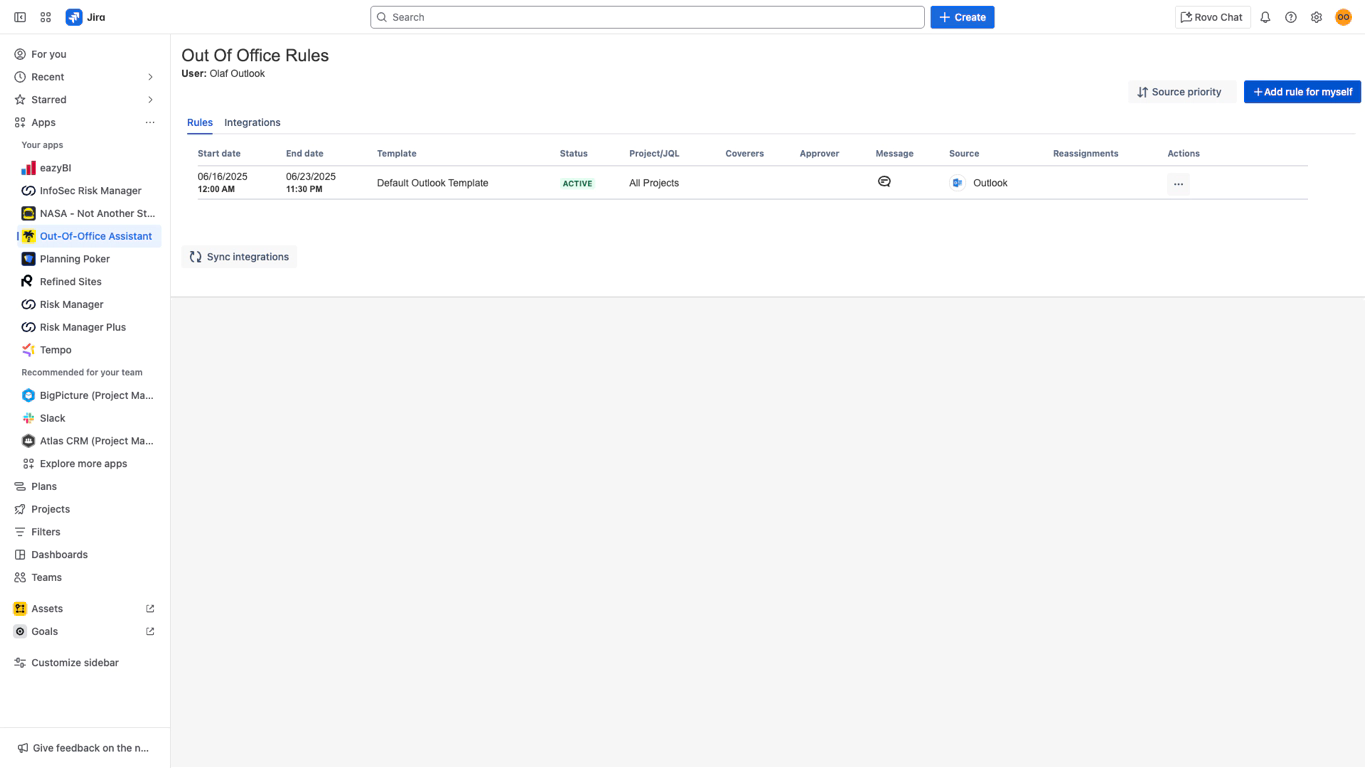
Access the Outlook rule in the Out of Office Assistant
To see the new rule from Outlook, click on the Rules tab
Modify Outlook rules
Note that Outlook rules are read only. The can be modified in two ways from the configuration page:
To modify the dates, change the defined interval in the Outlook Auto Reply settings
To modify the rule configuration, edit the template
Any of these changes will be automatically synced every 15 minutes or with the "Refresh integration" button
Configuring the Outlook integration
Upon its initial connection, Out of Office provides a default template that delivers a straightforward Out of Office message for the duration of the Automatic Replies in Outlook.
We recommend customizing the integration to facilitate automatic delegations and handovers.
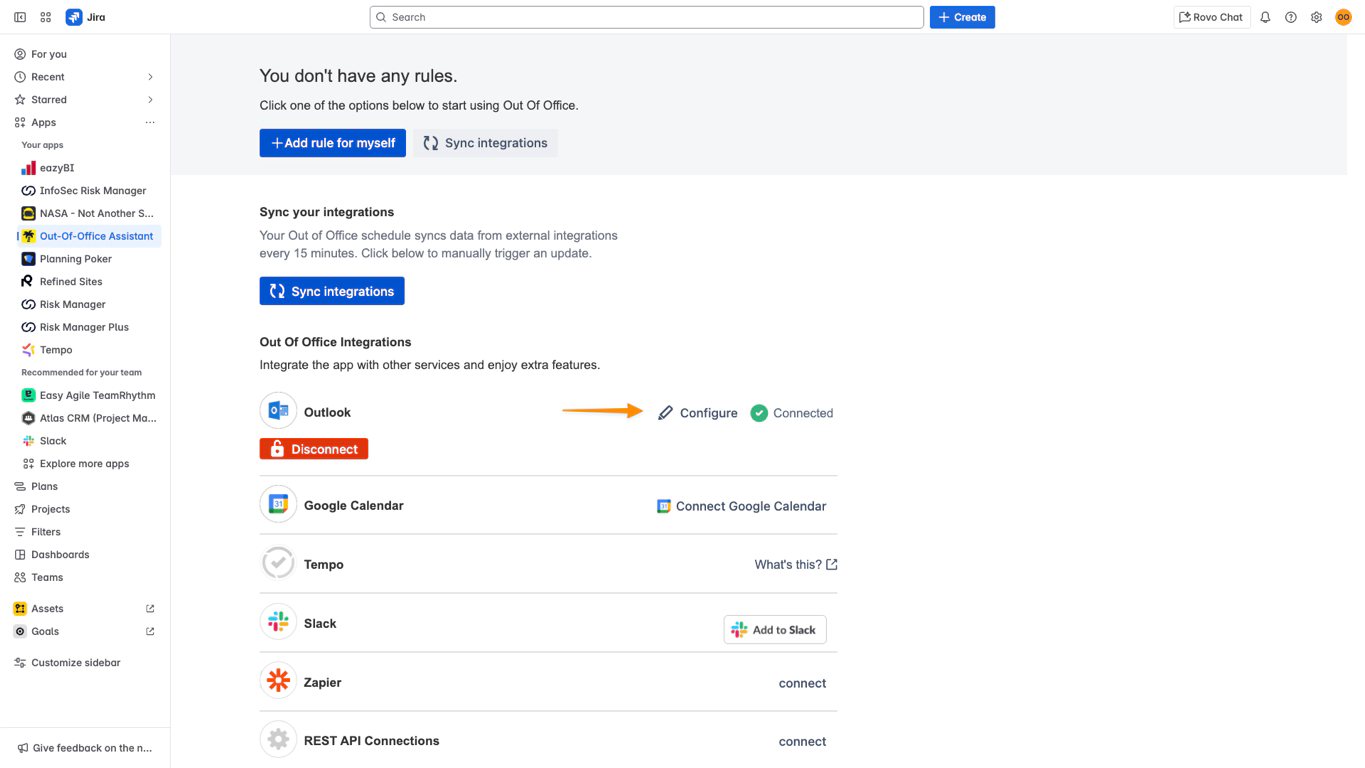
To access the configuration:
Click on the Integrations tab
Click on the Configure button next to the "Connected" badge.
Add or Edit Templates
After the initial connection, Outlook is always connected to a default template. You can edit this default template or add more templates.
Your Outlook auto-replies always trigger all activated templates. This means you can define multiple coverers for different projects in a granular way and have complex configurations.
Or you just added your default template for a simpler configuration.
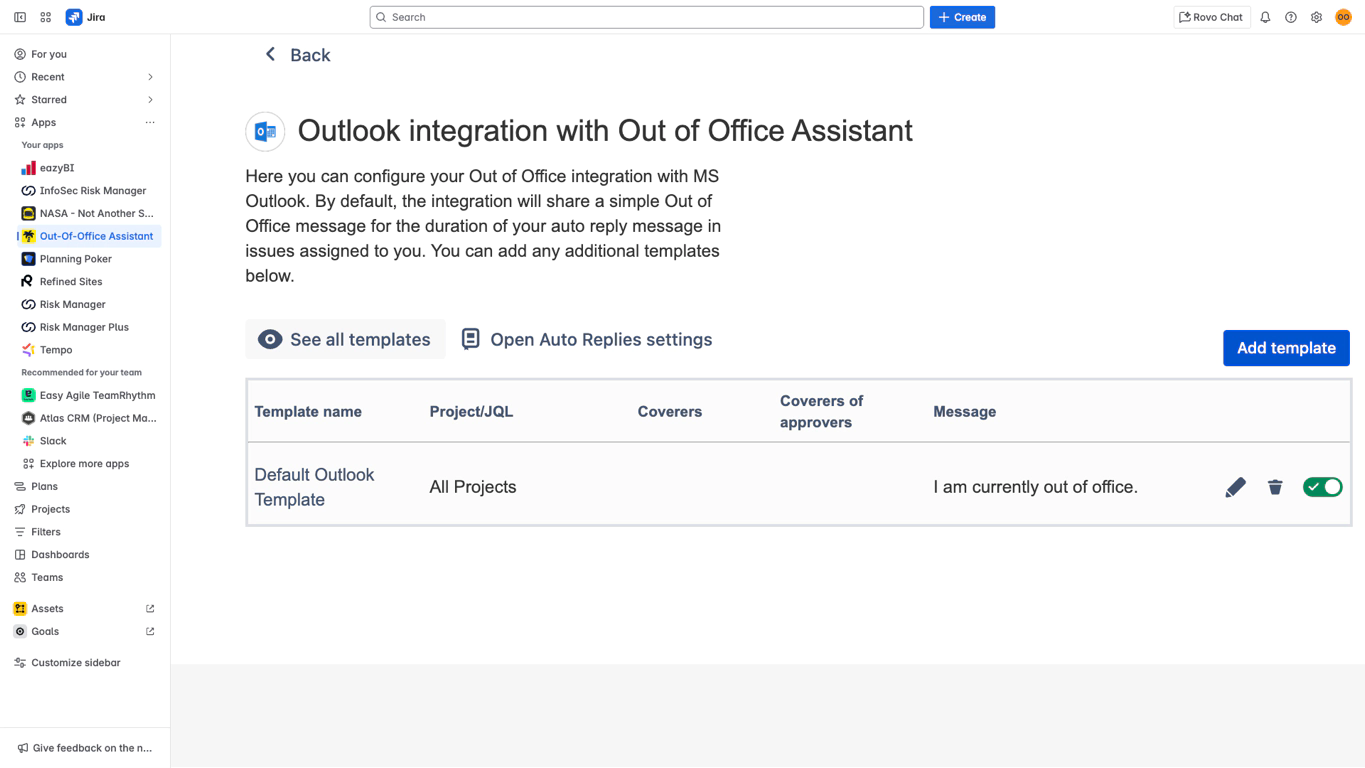
From this page you can:
Access the settings of the Outlook Automatic Replies
See all connected templates
Edit connected templates
Connect additional templates by adding them to the table
Remove connected templates from the table
Deactivate templates (without removing them from the table)
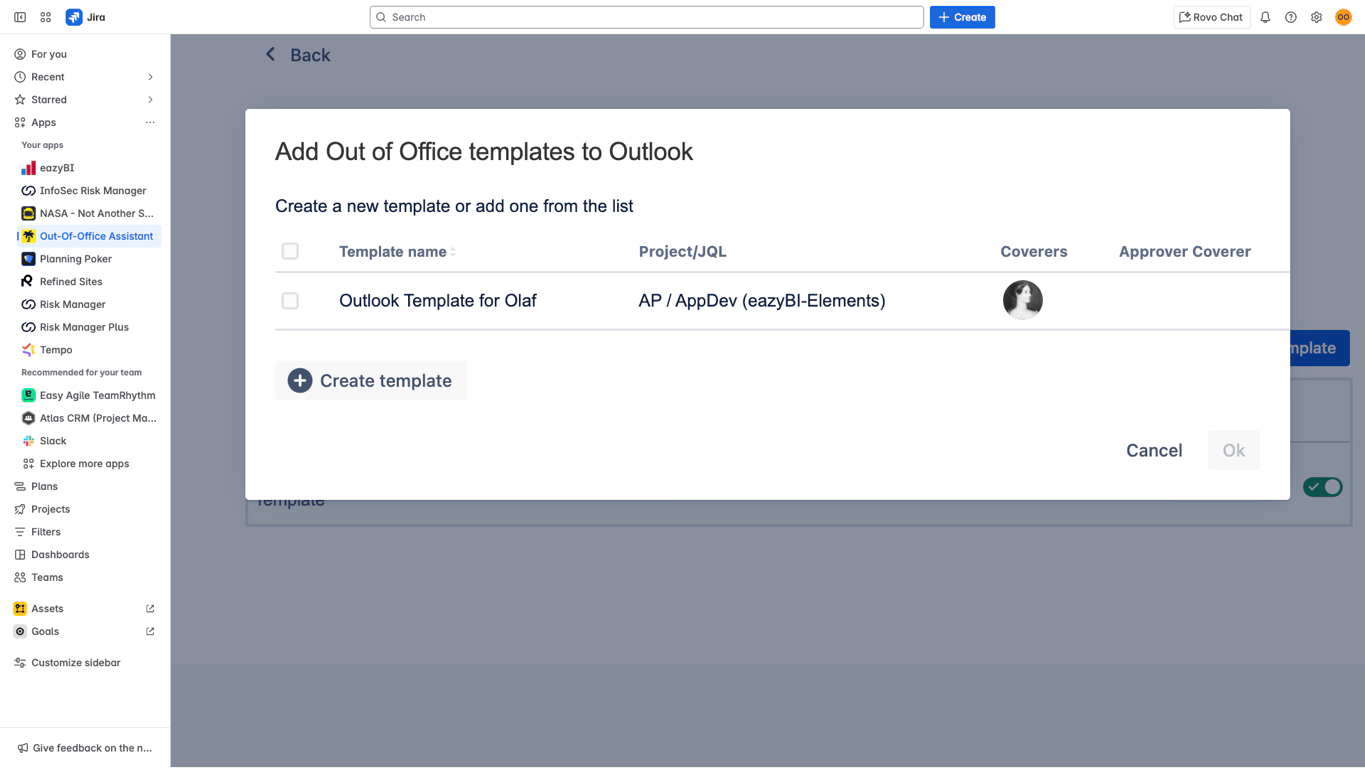
To add a Template:
Click on the "Add Template" button.
Please select from the existing templates
Or create a new template
You can connect an unlimited number of templates to the Auto Reply feature. For each template you connect, a unique rule will be established. Each rule will specify the dates and times for the Auto Reply functionality.
Be mindful when making changes to templates that are used in other connections, as any changes to the template will also affect those connections.
Integration Status: ✅ COMPLETE
Next Step: Out of Office Templates