

Integration with Tempo - Admin Setup
Setting up the Tempo integration takes steps in two products, and each one is done in a different place. Tempo decides which work items count as absences and issues the API token. Out of Office Assistant stores that token and decides which rule templates those work items drive. Every section below names the product it happens in.
For what the integration produces once it is running, see Tempo Timesheet Integration.
Before you start
Tempo Timesheets or Tempo Planner installed in the same Jira site as Out of Office Assistant.
Access to Tempo's Settings area.
An account that can open App Settings in Out of Office Assistant.
In Tempo: name the work items that stand for absences
Out of Office Assistant does not choose these. It reads the list Tempo already keeps, so this step happens in Tempo first.
Open Tempo and go to Settings.
Under Configuration, select Internal Work Items.
Choose Add and pick the Jira work item your teams book that absence against. Add one per absence type, for example a vacation item and a sick item.
The table lists each entry by Work item key and Work item summary. Only work items on this list can drive out of office rules.
Tempo calls these internal work items. Out of Office Assistant still labels the same list Internal Issues on its own screen. They are one list, read from Tempo.
In Tempo: create the API token
Still in Tempo Settings, under Data access, select API Integration.
Choose New Token.
Give it a Name, set Expiration, and choose Full Access or Custom Access. Out of Office Assistant only reads plans, so it needs no write access.
Choose Confirm and copy the token.
The token list shows each token's Access, Status and Expires date. Note the expiry date and replace the token in Out of Office Assistant before it is reached.
In Out of Office Assistant: store the token and assign templates
Open Out of Office Assistant and go to App Settings > Global Integrations.
On the Tempo Planner row, open the Actions menu and choose Edit.
Check Integration Name. This is the name the integration is listed under, both here and on each person's My Integrations tab.
Paste the token into Tempo API Token. It is validated against the Tempo API before it is saved. Once a token is stored, the field is replaced by a confirmation and a Replace Token button.
Under Internal Issues, every work item from the Tempo list has its own block. Use Add template to attach the rule templates that absences on that work item should produce, and the bin icon at the end of a row to detach one. At least one work item must carry a template.
Choose Save Changes.
The form shows the token status above the per-work-item template tables.
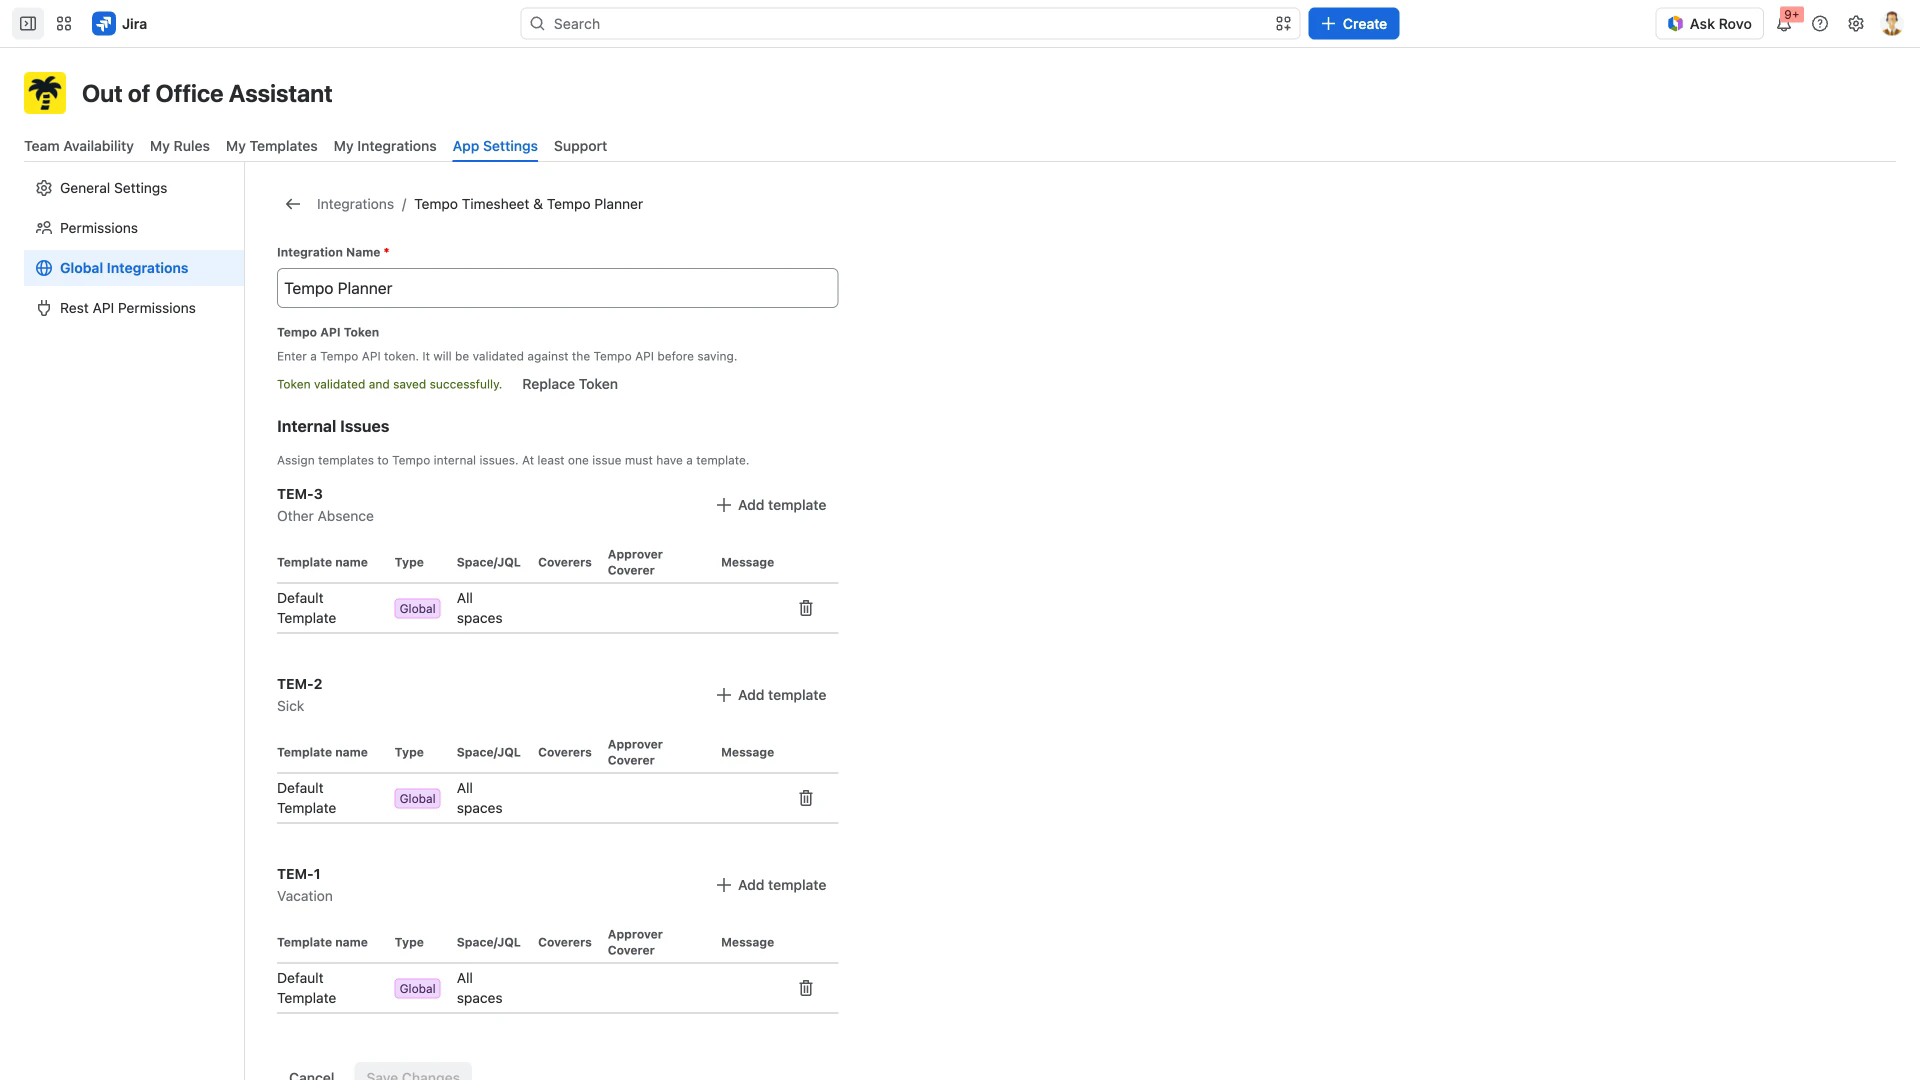
How many templates you attach here decides how many rules a single plan produces. Tempo Timesheet Integration explains that count.
Creating a template from inside the integration
Add template opens Add Out of Office templates to Tempo Timesheet & Tempo Planner, listing the templates that are not yet attached to that work item. Tick the ones you want and choose Confirm.
To build a new one instead, choose Create template. The dialog closes and the app opens its Create a Template form. Create Template stays disabled until the template has a name and at least one of a coverer, an approver coverer or a message, or has the glance-only box ticked.
Saving the new template returns you to the integration's configuration, but the template is not attached to the work item you started from. Open Add template on that work item again, tick the new template and choose Confirm.
Related pages
Tempo Timesheet Integration - what the integration produces, and how it is switched on and off.
Tempo Timesheets - User Configuration Process - the steps each person takes for their own account.
Templates for Out of Office Rules - what a template holds, and the difference between global and personal templates.