

Out of Office rules with Plans in Tempo Planner
Time you plan in Tempo can create your Out of Office rules for you, so an absence you have already booked does not have to be entered a second time in Jira. Planned time reaches Out of Office through a single integration covering both Tempo Timesheets and Tempo Planner, so these steps apply whichever of the two you plan in.
Before you start
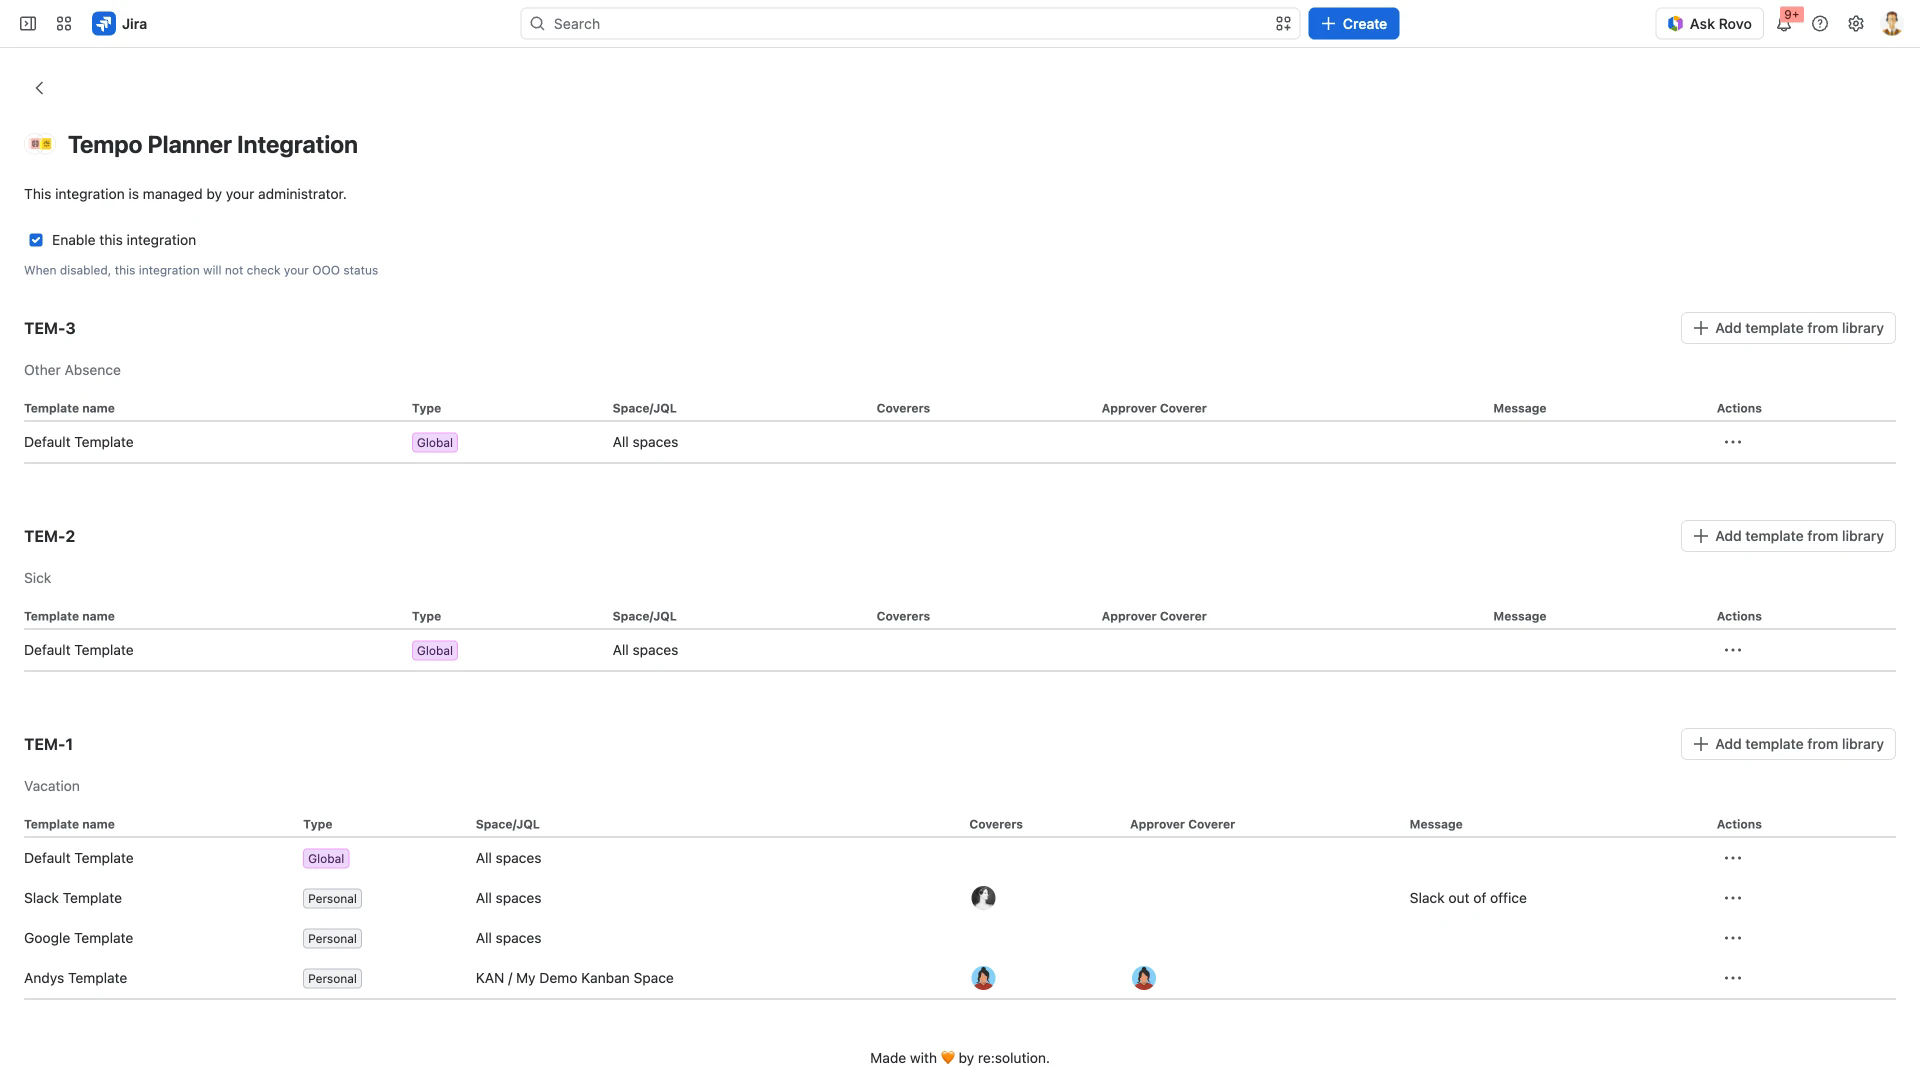
Open Out of Office Assistant, select the My Integrations tab, then Configure on the Tempo Planner card. The card shows how many rule templates you have across all absence work items; Configure opens Tempo Planner Integration, where the two things these steps depend on are set.
Enable this integration has to be ticked. Disabled, the integration does not check your Out of Office status.
Below it is one block per absence work item, listing the rule templates attached to that item. The number of templates in a block is the number of rules each plan on that work item creates. Add template from library beside a block attaches another, picked from your own templates or created in the dialog. A template typed Personal is one you attached yourself; one typed Global is part of your administrator's setup, and so is which work items appear at all - those are chosen in Tempo, not in Out of Office. See Integration with Tempo - Admin Setup.
Plan the time in Tempo
In Tempo, open My Work. Every day tile in the week carries a +.
Select + on the first day of your absence, then choose Plan Time. The tile also offers Log Time; logged time does not create rules, only planned time does.
In Plan item, pick the work item your organisation uses for this kind of absence. The picker has Work Item and Space tabs, with a Work Item Filters panel beside them for narrowing a long list.
Set Start Date and End Date. A range writes the plan onto every day it covers.
Set Start time, End time and Planned time. Leave the selector beside Planned time on Per day if the figure is for each day rather than for the whole range.
Select Plan Time.
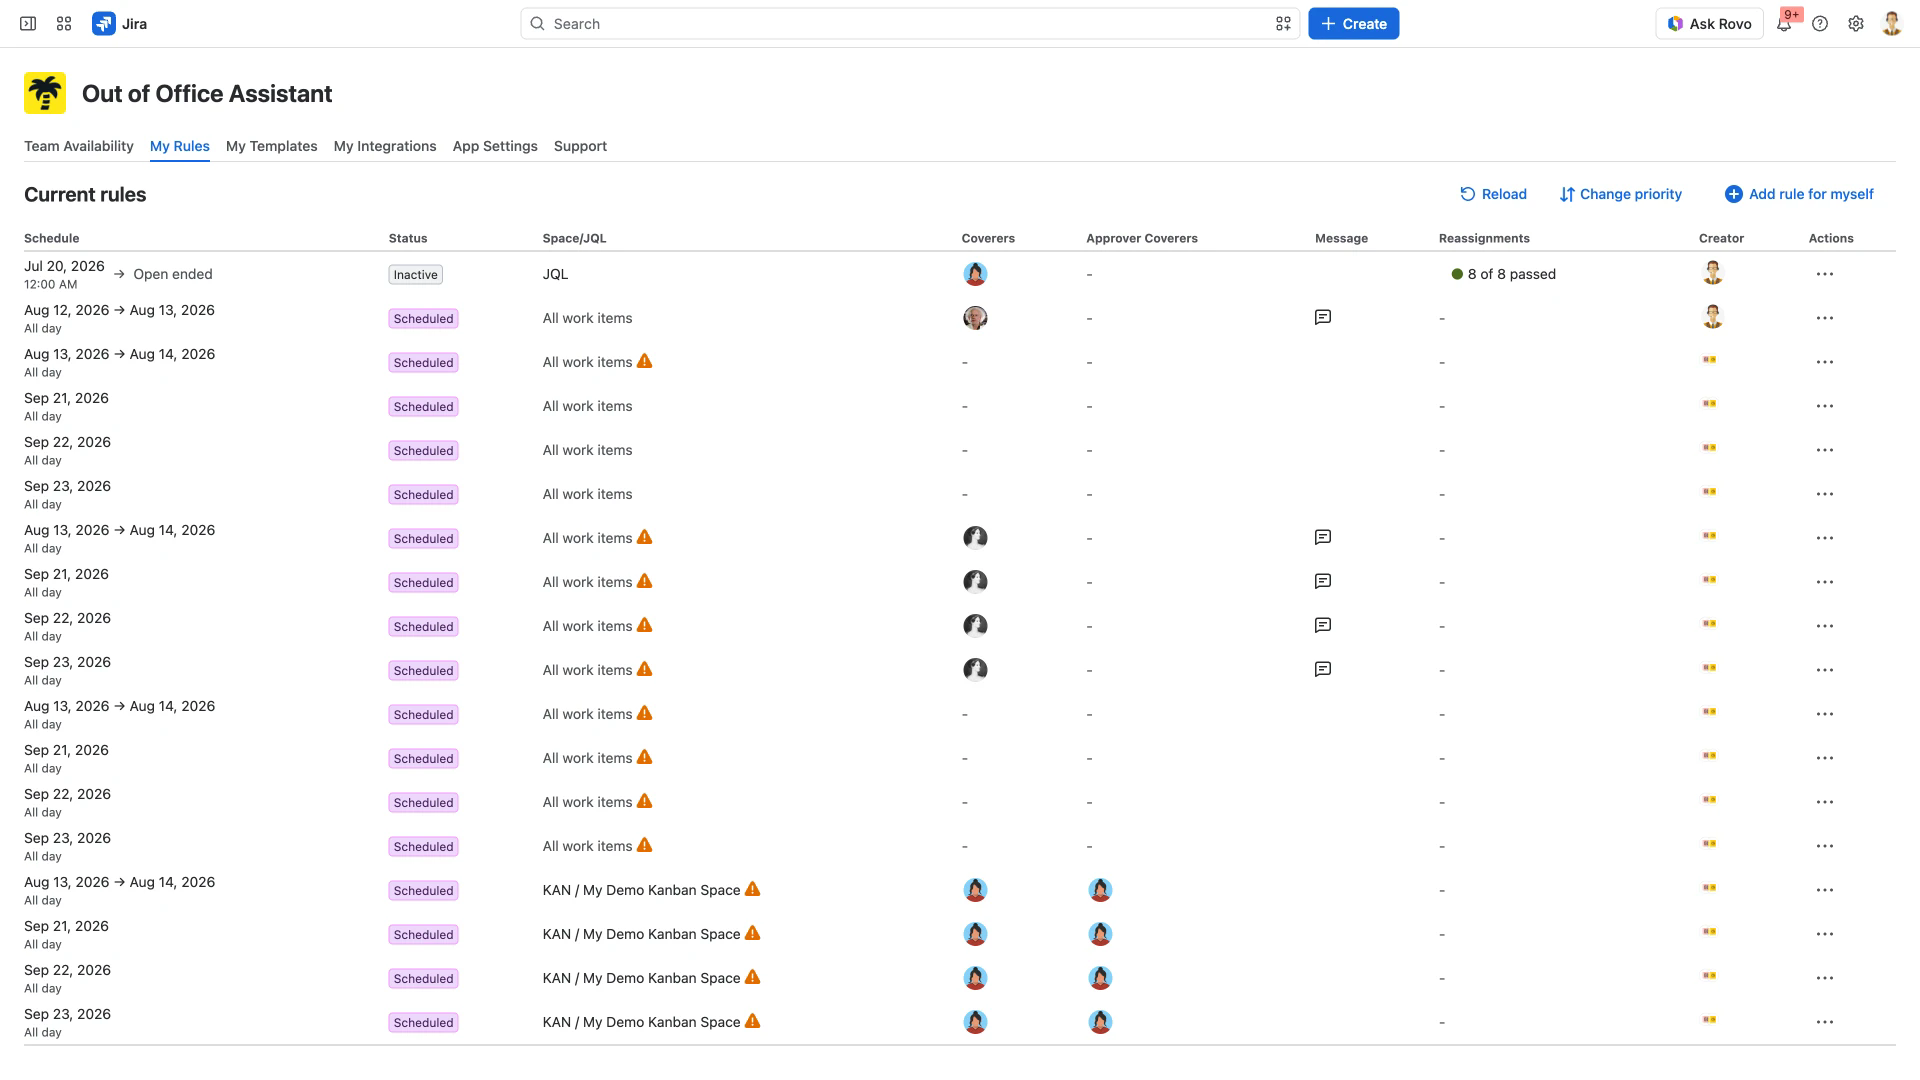
Saving writes the plan onto each day tile in the range. Out of Office then creates one rule for every template attached to the plan item you chose, each carrying that template's spaces, coverers and message, and lists them on My Rules. What those rules span, how their times are read and what happens when a second plan lands on the same day are covered in Out of Office Rules with Plan in Timesheets.
Related pages
Tempo Timesheet Integration - what the integration covers and how an administrator turns it on.
Templates for Out of Office Rules - the spaces, coverers and message a generated rule inherits.