

Creating Out of Office Rules for JSM Customers
Service management customers - the people who raise requests in the customer portal - can have out of office rules of their own. An administrator switches the feature on for the whole site, then creates and manages each customer's rules inside the app.
Allow customers to have out of office rules
The feature is off until someone turns it on. App Settings is open to Jira administrators and Out of Office admins.
Open Out of Office Assistant from Apps in the Jira sidebar.
Go to App Settings > General Settings.
Under Service Management, tick Allow customers to have out of office rules.
General Settings has no Save button. The change applies the moment you tick the box.
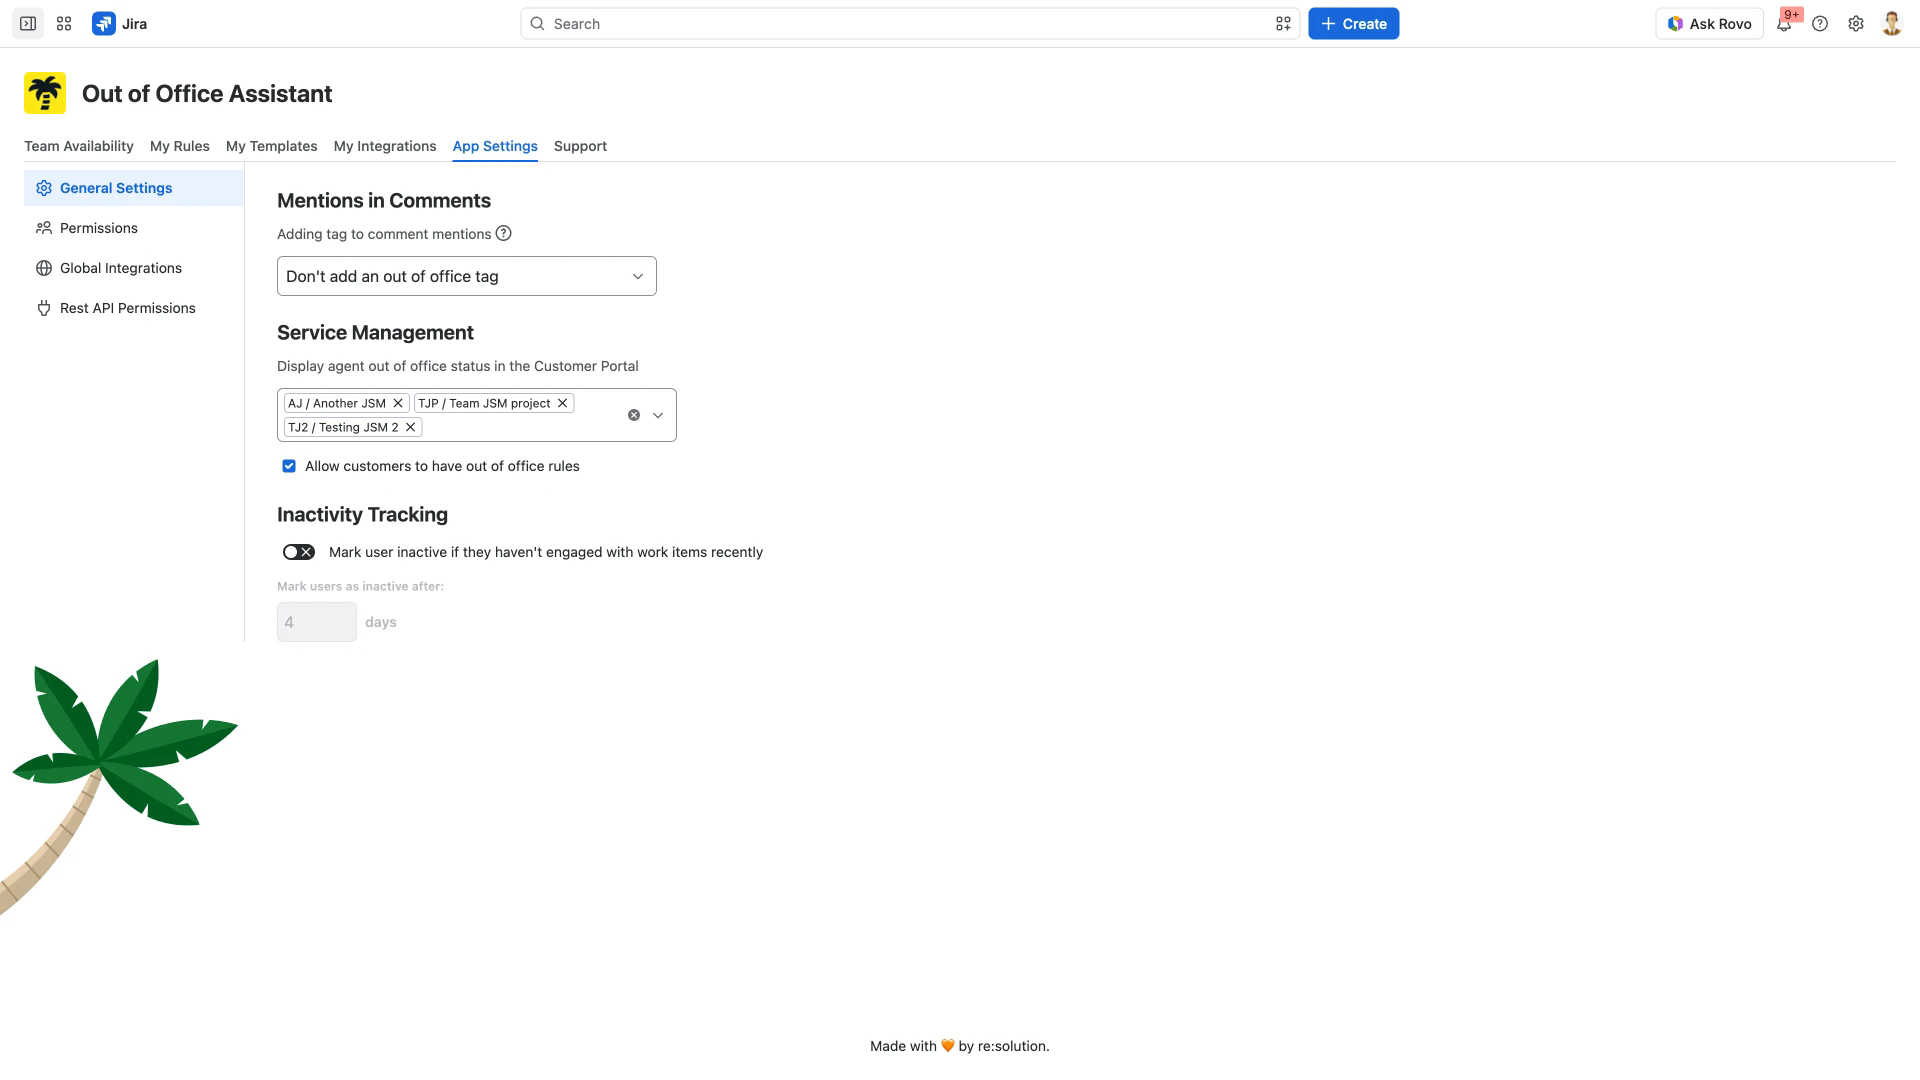
The space picker directly above the checkbox is a different setting - it controls which service spaces show an agent's out of office status to customers. See Agent Availability Display in JSM Customer Portal.
What a customer can and cannot do
A customer holds no Jira licence and the portal has no equivalent screen, so the app itself is out of reach.
Task | Service management customer | Licensed Jira user |
|---|---|---|
Open the Out of Office Assistant app | No | Yes, from Apps in the sidebar |
Create and edit their own rules | No. An administrator does it for them | Yes, on My Rules |
Have an out of office rule at all | Only while the setting above is ticked | Always |
See who is out of office | Only the agent assigned to a request they can see, in the portal | Team Availability, for people they share a space with. Jira admins and Out of Office admins see everyone |
The portal discloses only the assigned agent's name, an OUT OF OFFICE lozenge and the absence period. The message written on a rule stays internal to agents unless that rule has Share this message with service desk customers. ticked - see Service Desk Customer Notifications.
Create a rule for a customer
Open the Team Availability tab.
In the first column header, click Customer. The header changes to Customer / User and the table lists your service management customers with the same columns as the user list.
Find the person and click Show details.
On the Rules tab, select Add rule for this user. Until the person has a rule the tab reads No rules yet and that button sits beside Reload.
Fill in the form. It opens under Rule for: and the person's name, headed Schedule their Out of Office Rule, with the same fields as your own rules. Rule Configuration Guide describes each one.
Click Create Rule.
Create Rule stays disabled until the rule actually does something. Dates alone are not enough: name a coverer, name an approver coverer, write a message, or tick the glance-only box.
Only accounts that Atlassian holds as customer accounts appear under Customer. Someone who holds a Jira licence and is also listed as a customer of a service space stays under User. If the customer list reads No users found. and you expected to see somebody, switch back to User and search there.