

Out of Office Admin Quick Reference Guide
An Out of Office Admin manages Out of Office rules and templates for every user on the site, along with app settings and global integrations, without holding Jira administrator rights.
Where the role comes from
A Jira admin grants it in App Settings > Permissions, under Out of Office Admins, by naming users or a group; Jira admins hold it automatically and are not added to the list. Permissions and Access Requirements covers every role and what each one needs.
Where each task lives
To do this | Go here |
|---|---|
See who is away, who is leaving soon and who covers them | Team Availability |
Review one person's rules, templates and connected integrations | Team Availability > Show details |
Edit, pause or delete a rule that belongs to someone else | Team Availability > Show details > Rules, then that rule's Actions menu |
Create a rule on someone else's behalf | Team Availability > Show details > Rules > Add rule for this user |
Build a template the whole site can use | My Templates > Create new template, with Template Type set to Global Template |
Change how the app behaves site-wide | App Settings > General Settings |
Grant or withdraw app roles | App Settings > Permissions |
Set up Tempo or Microsoft 365 for the whole site | App Settings > Global Integrations |
Decide who may create REST API tokens | App Settings > Rest API Permissions |
Open one person's record
In Jira, open Apps in the left navigation and select Out of Office Assistant. The app opens on Team Availability.
Narrow the list with Search users and the All spaces, All users and Integration filters. The Status column reads AVAILABLE, LEAVING SOON or OUT OF OFFICE.
In the person's row, under Actions, select Show details.
Their page opens with status, absence period, active rule count, coverers and integrations in the header, and three tabs beneath: Rules, Templates and Integrations. Rules lists Current rules, then Expired rules below.
Act on the record from those tabs. Their rules table carries the same columns and the same per-row Actions menu as your own, so a rule of theirs is edited, paused or deleted there.
Their Rules tab is also where you create a rule for them: select Add rule for this user. On someone with no rules yet the tab shows No rules yet and offers that button beside Reload. The form is headed Schedule their Out of Office Rule, with Rule for: and their name above the fields; leave it with Back to Rules.
Select Back to users to return to the list.
In their rules table, the Creator column shows whether a rule is the person's own or an integration's, and a warning triangle beside Space/JQL marks a rule that overlaps another.
Site-wide settings
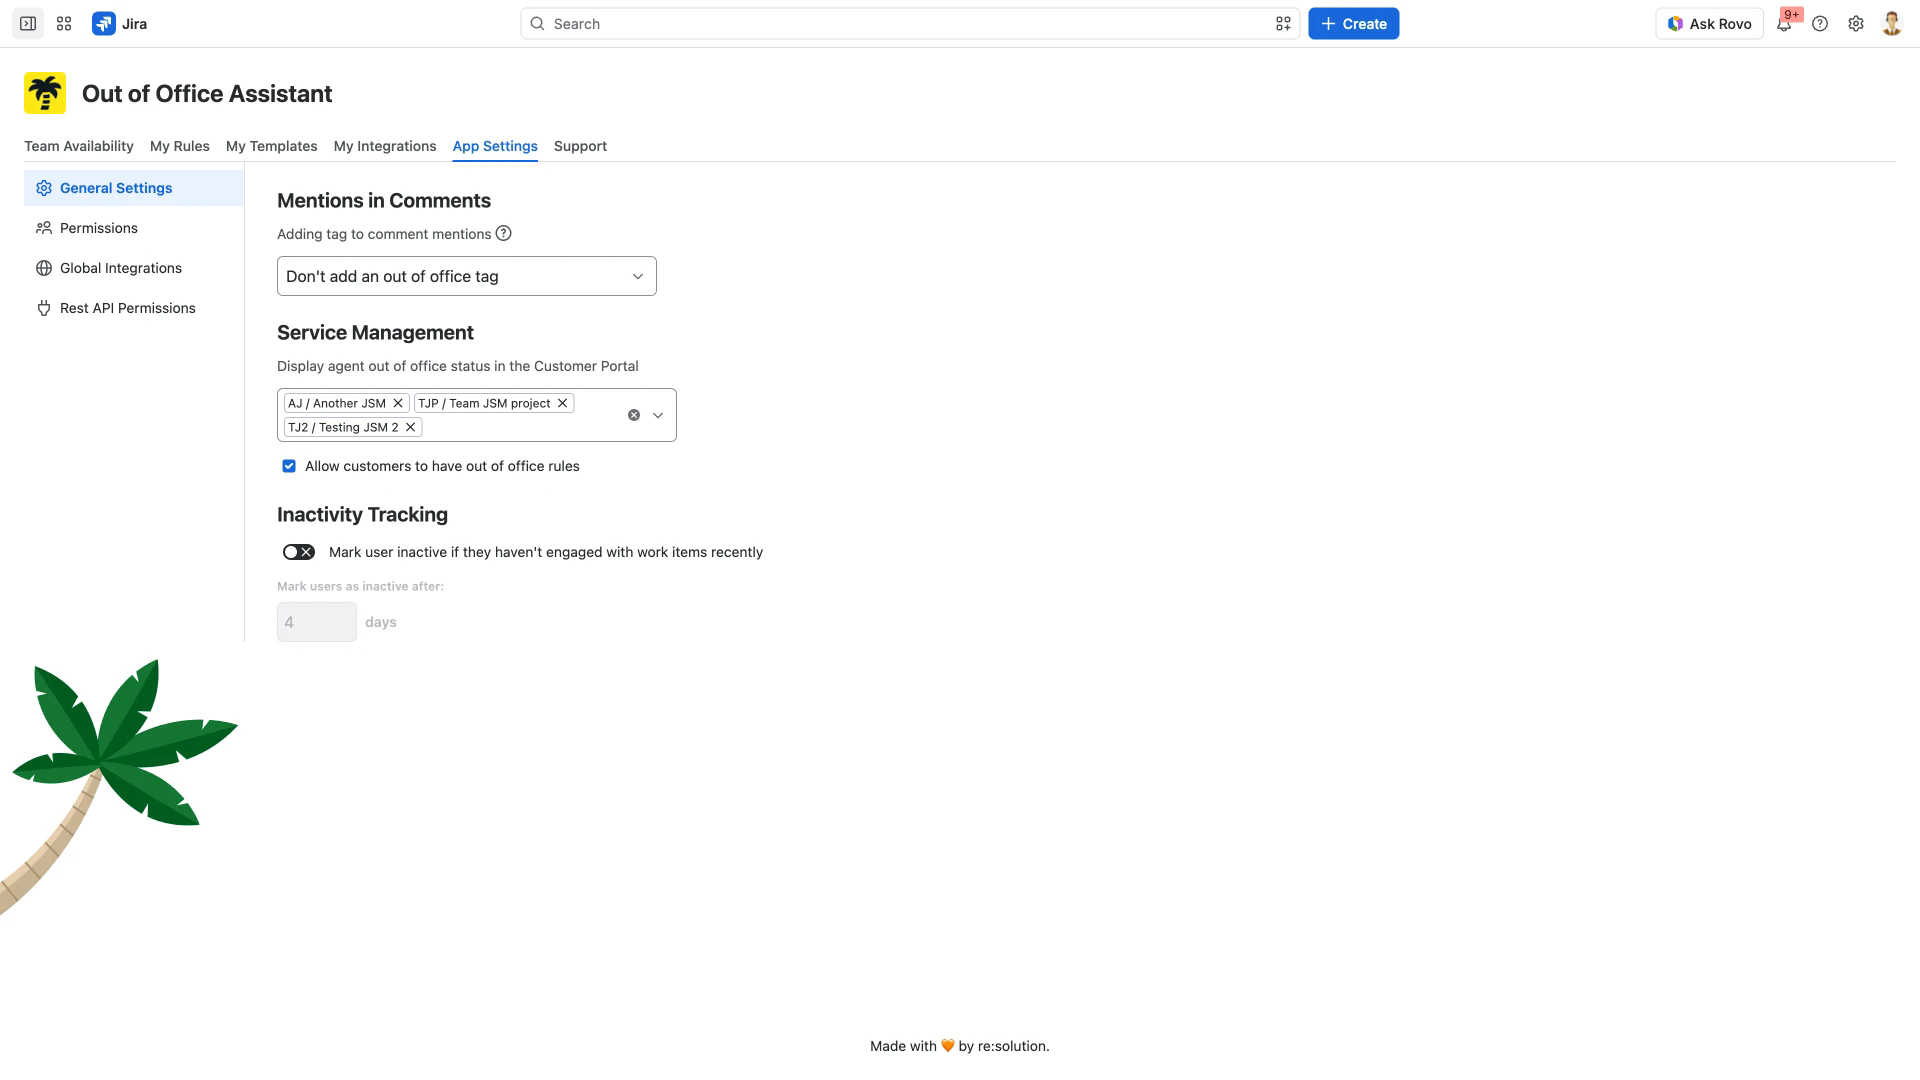
App Settings > General Settings holds three groups. Changes take effect as you make them, so there is no Save button.
Mentions in Comments - Adding tag to comment mentions sets the value new rules and templates start with: don't add an out of office tag, add one when the person is out of office, or add it 4 days ahead of the absence. Whoever creates the rule can still change it there.
Service Management - Display agent out of office status in the Customer Portal takes the service management spaces where portal customers see whether their agent is away. Allow customers to have out of office rules lets those customers keep rules of their own.
Inactivity Tracking - Mark user inactive if they haven't engaged with work items recently is off by default. Turn it on and set Mark users as inactive after a number of days; the day count stays greyed out until then.
All three sit on one screen, with the other App Settings sections down the left.
Related pages
Permissions and Access Requirements - who can do what, and how each role is granted.
Templates for Out of Office Rules - personal and global templates, and what a user can change about a global one.
The List of Out of Office Rules - the columns and row actions on a rules table.
Agent Availability Display in JSM Customer Portal - what the Service Management settings change for portal customers.
Interface Tour and Navigation Guide - the app's six tabs and what each one holds.