_SvIncludePlusContent-NEW - Microsoft Entra ID (formerly Azure AD) User Guide
Go to http://portal.azure.com and click the Microsoft Entra ID.
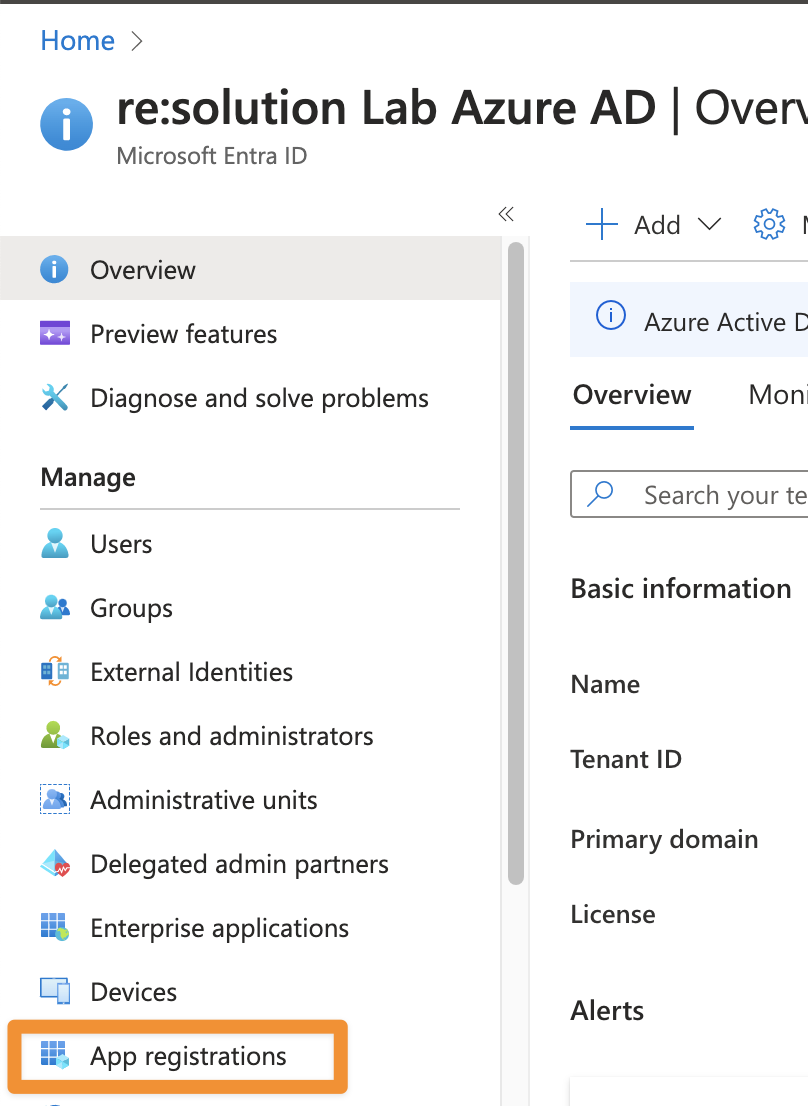
In the Microsoft Entra ID click App registrations.
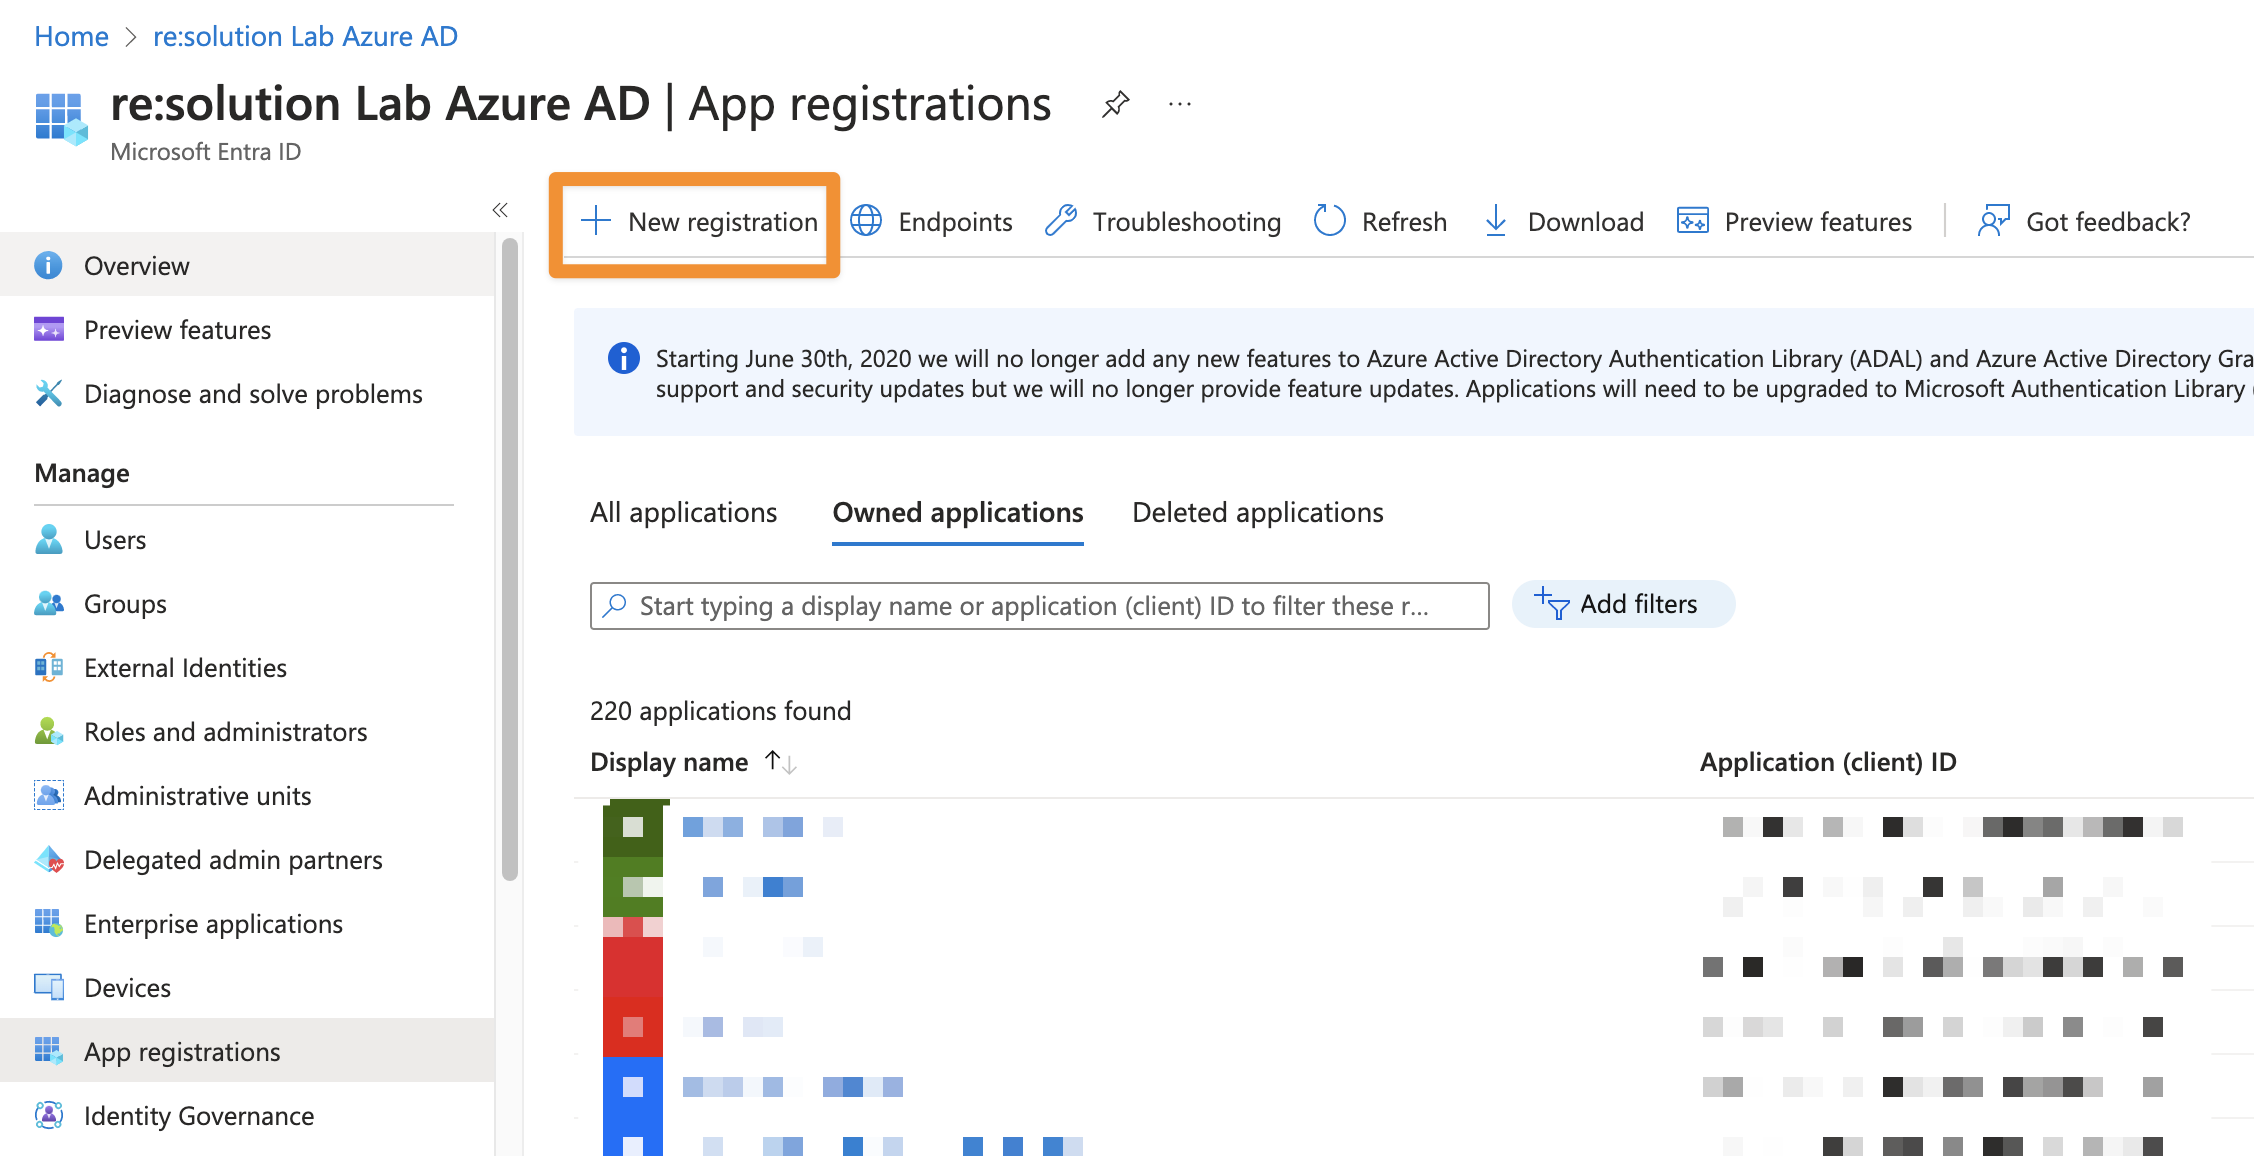
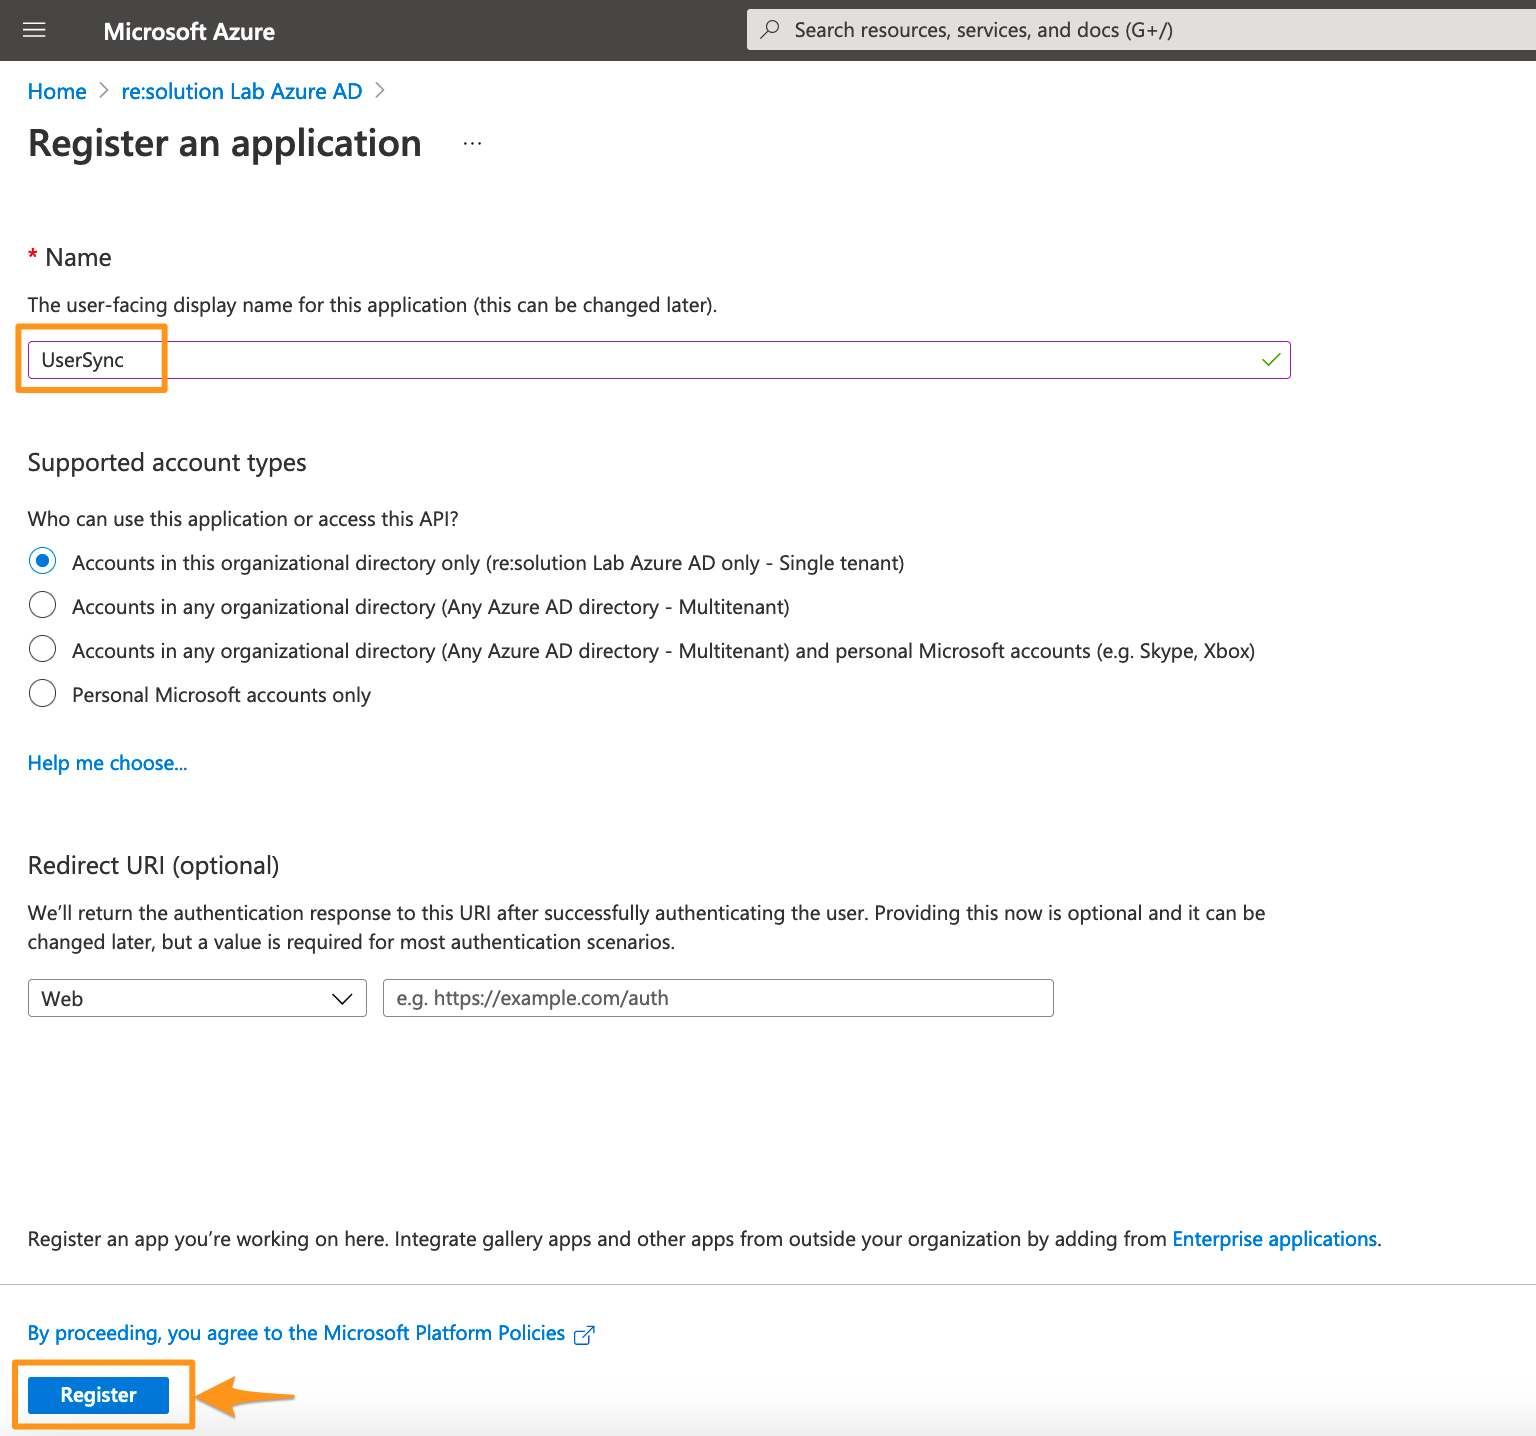
Click New registration to create a new app.
Enter a name for your application and click on Register to proceed.
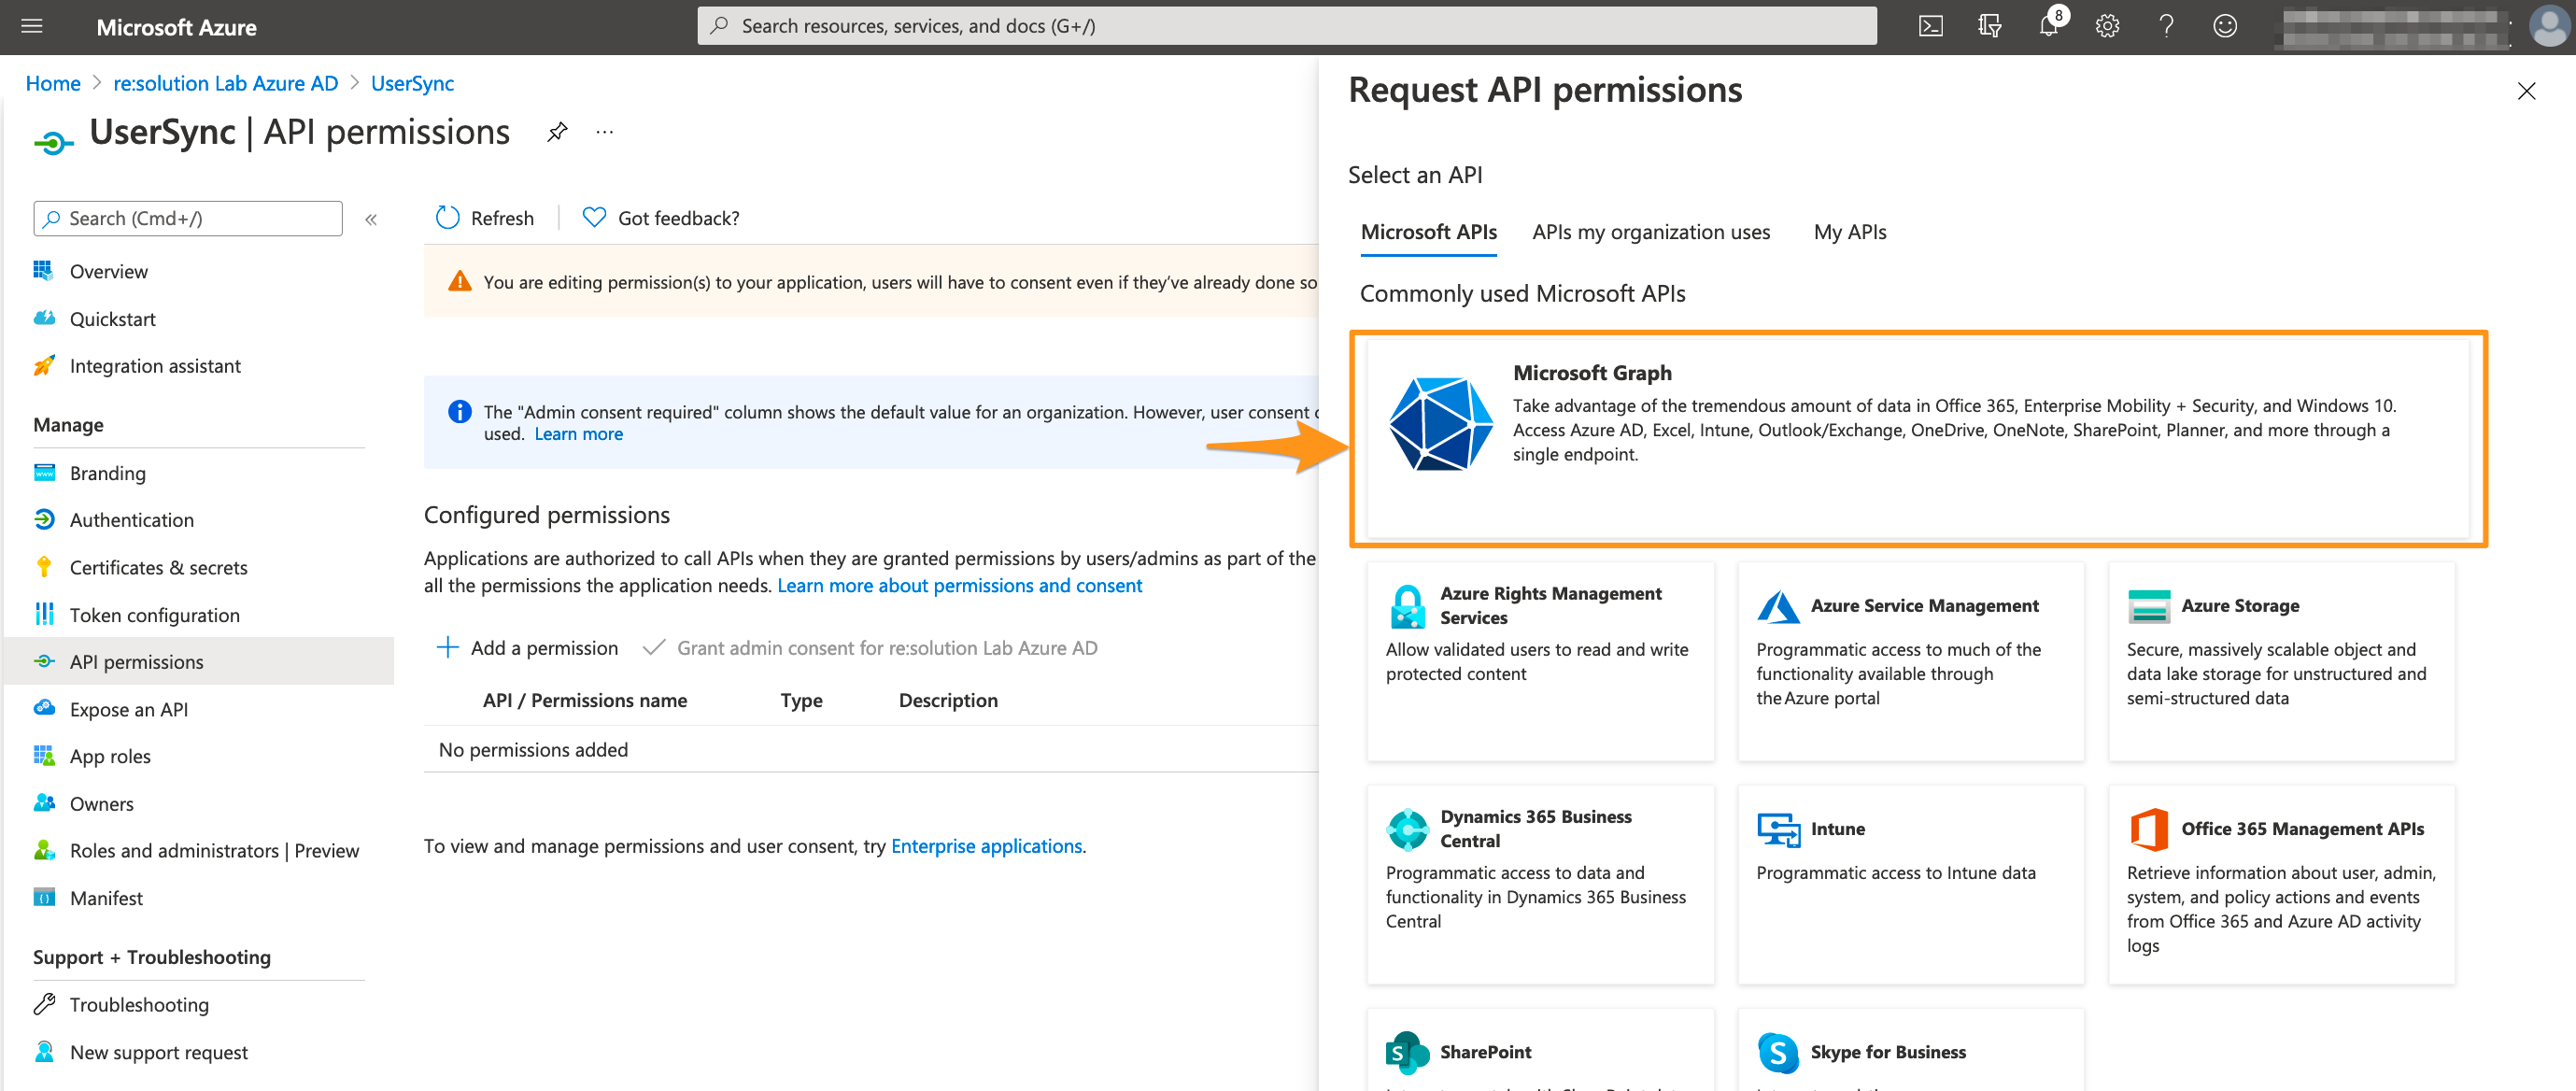
Click API permissions in the left panel.
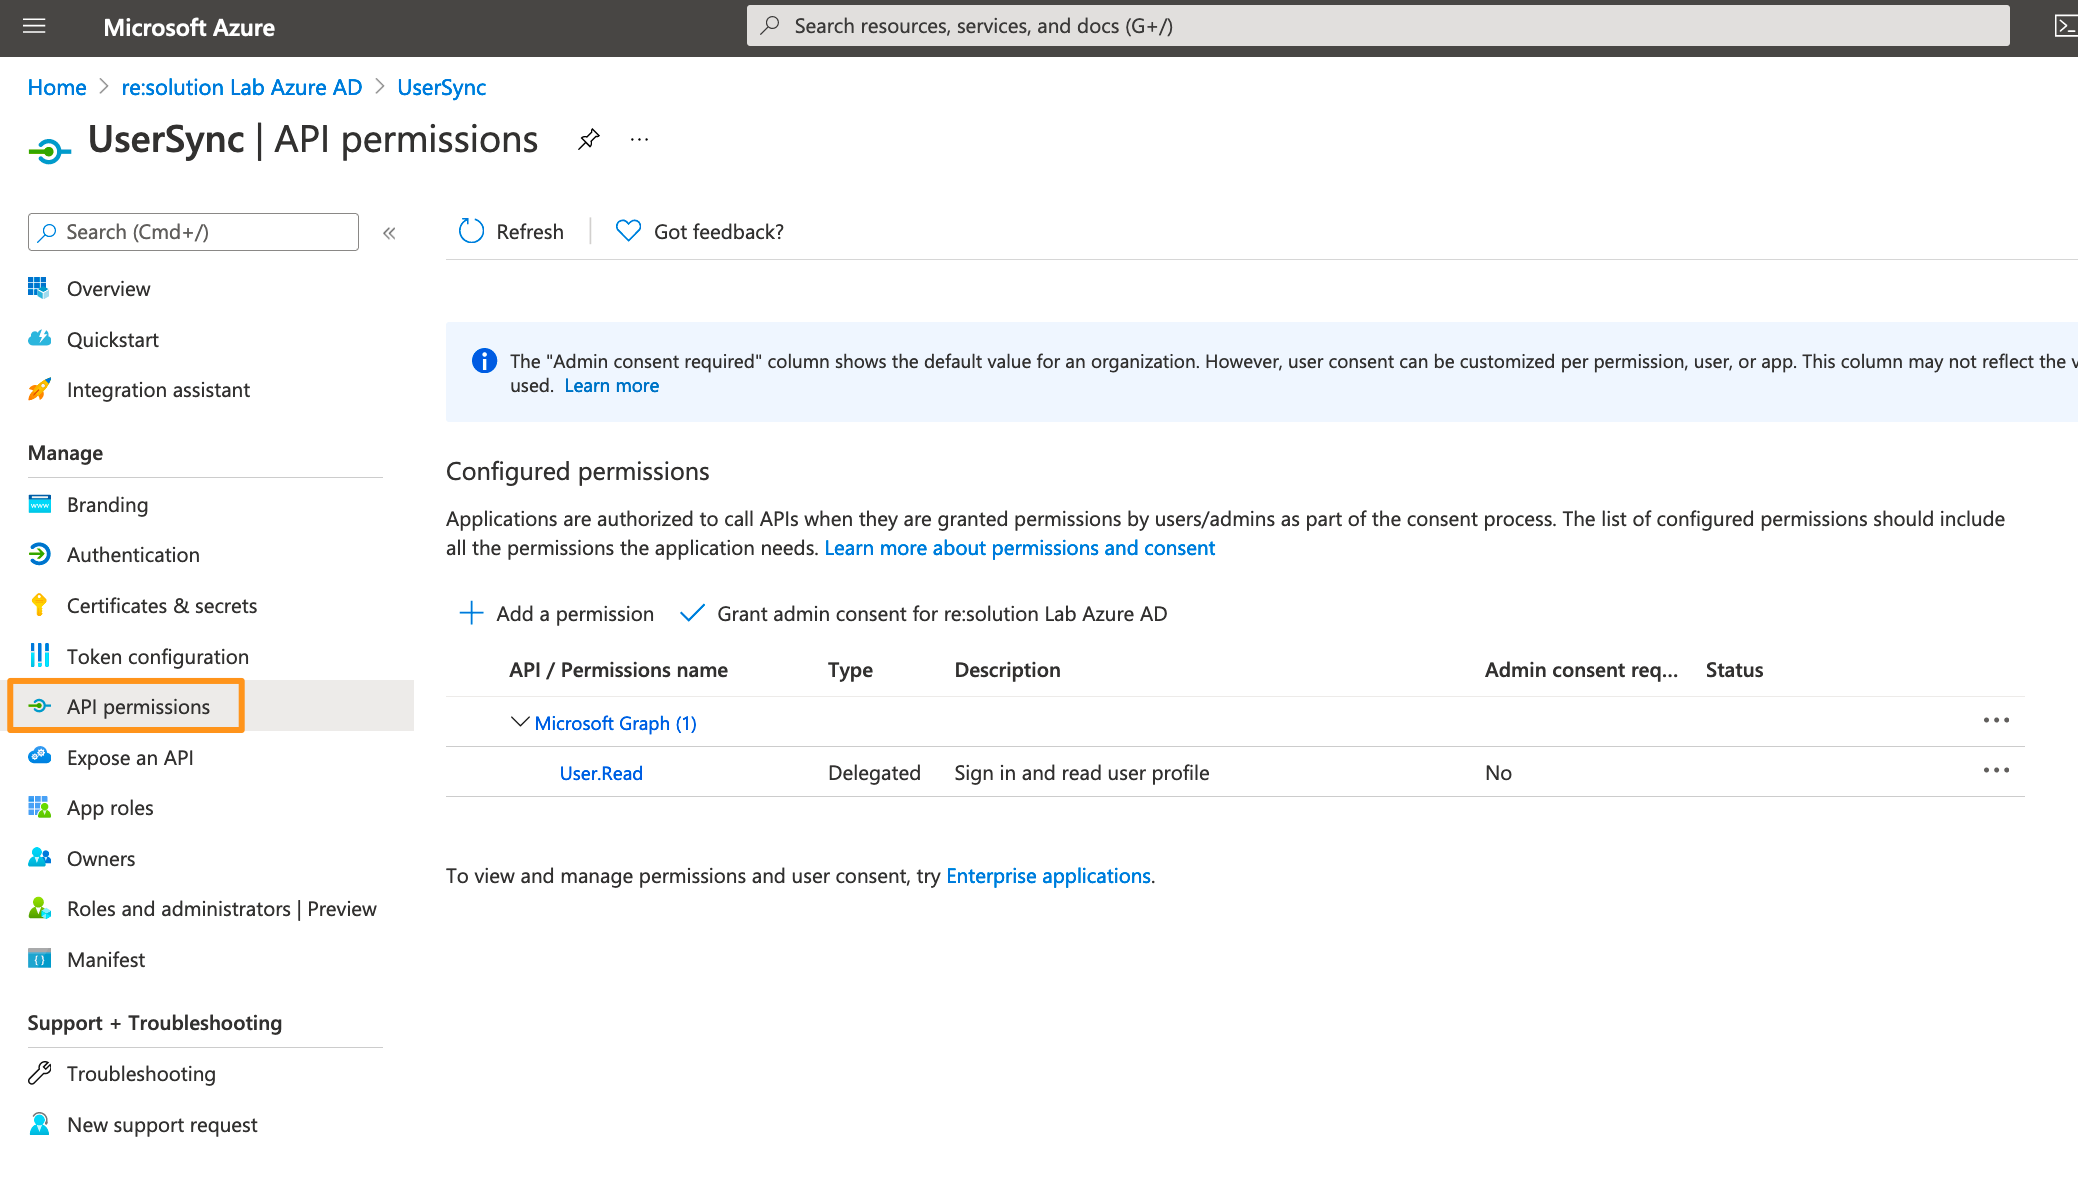
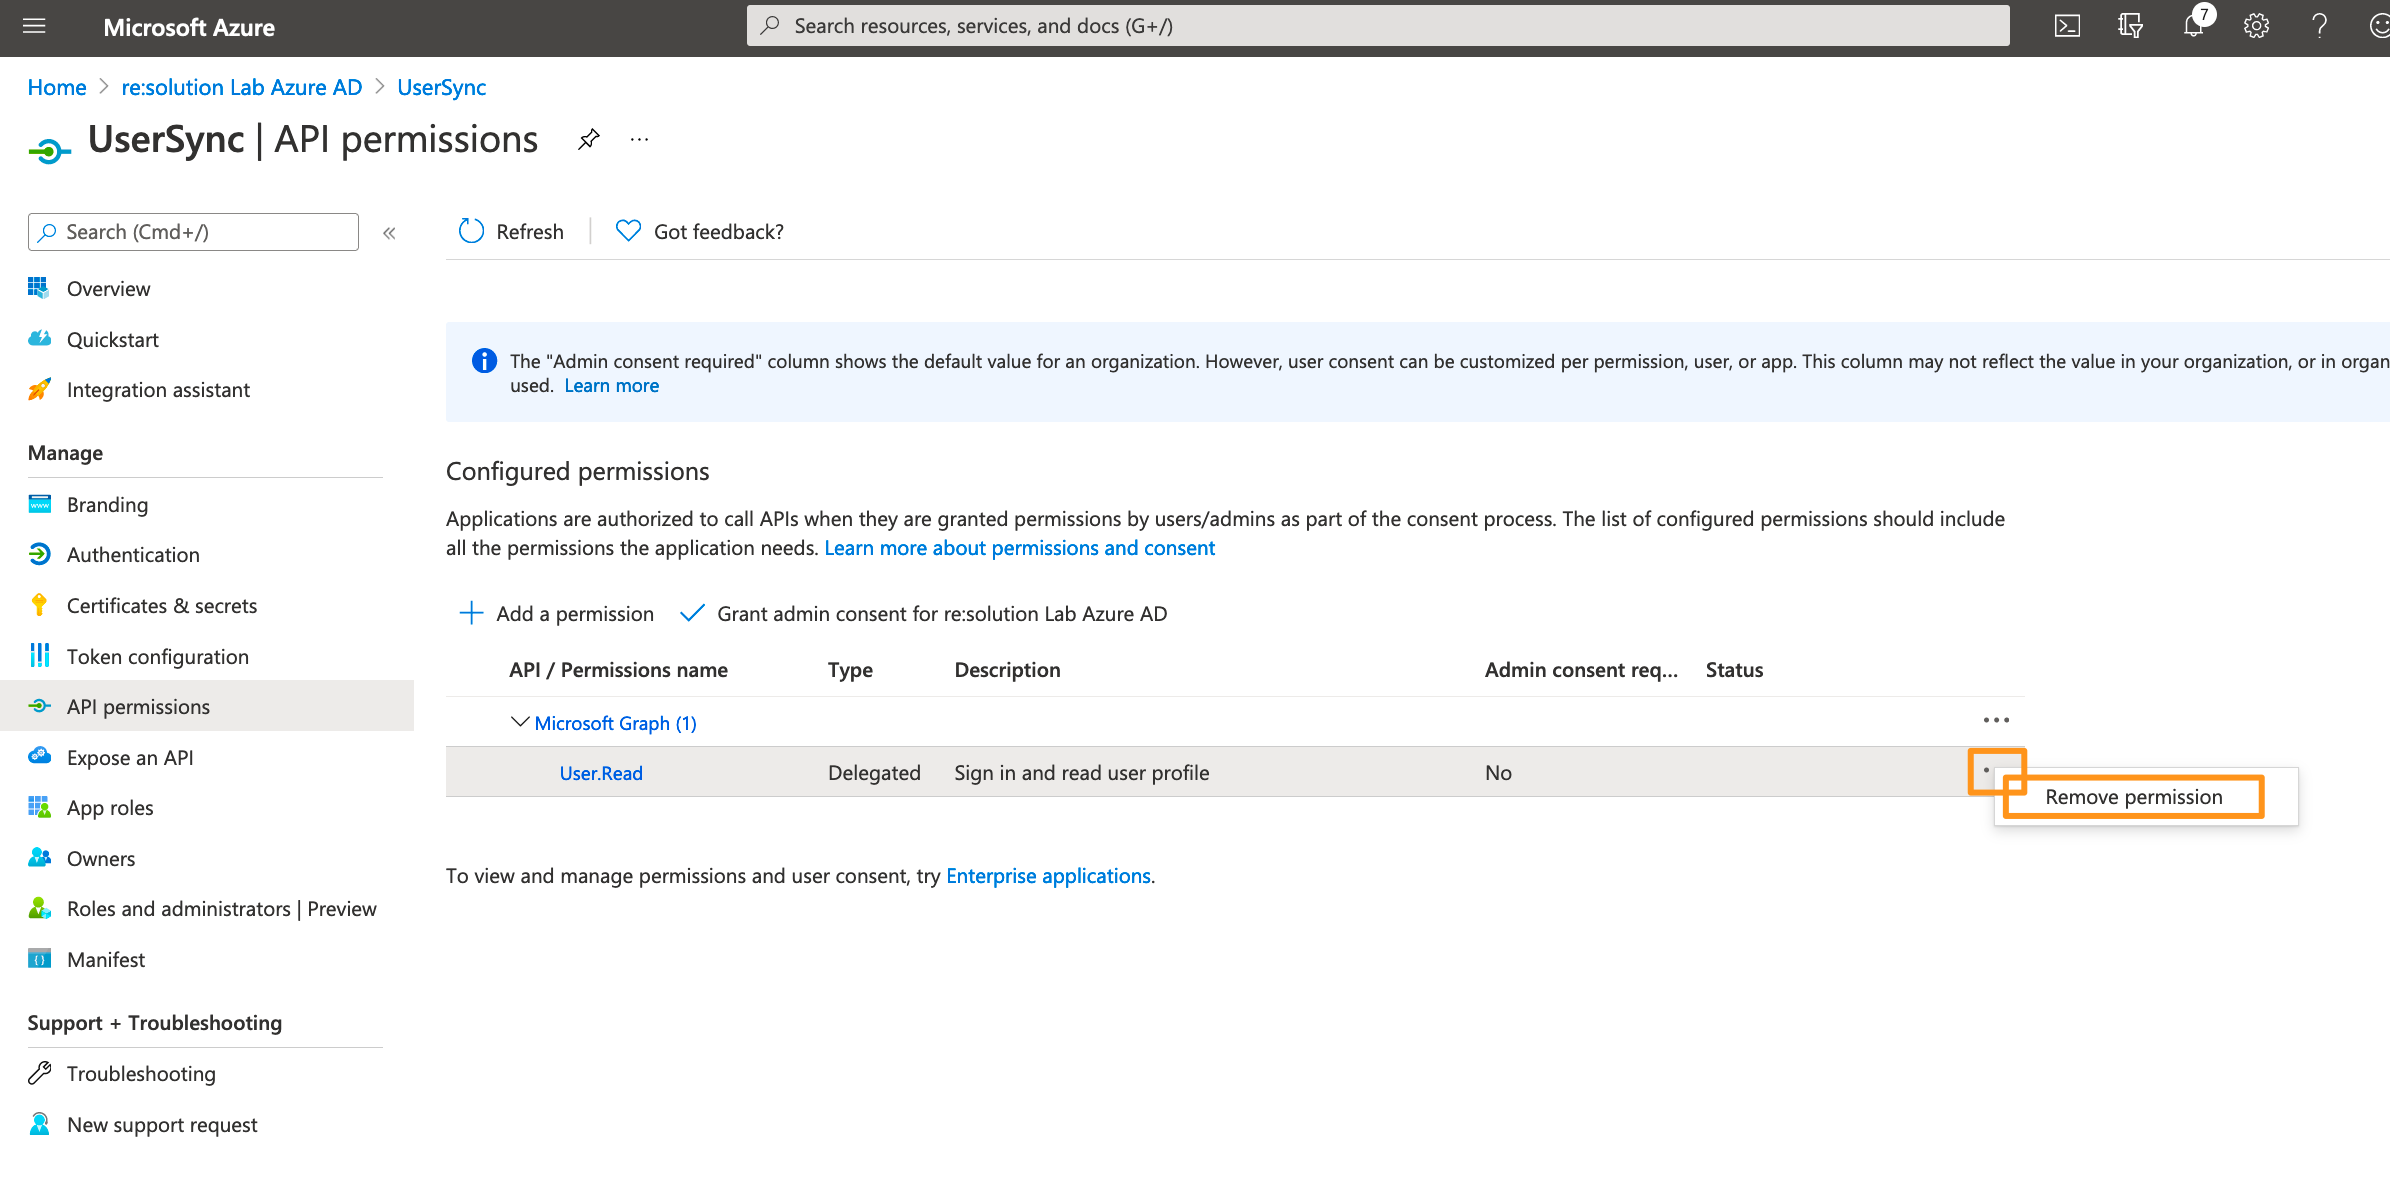
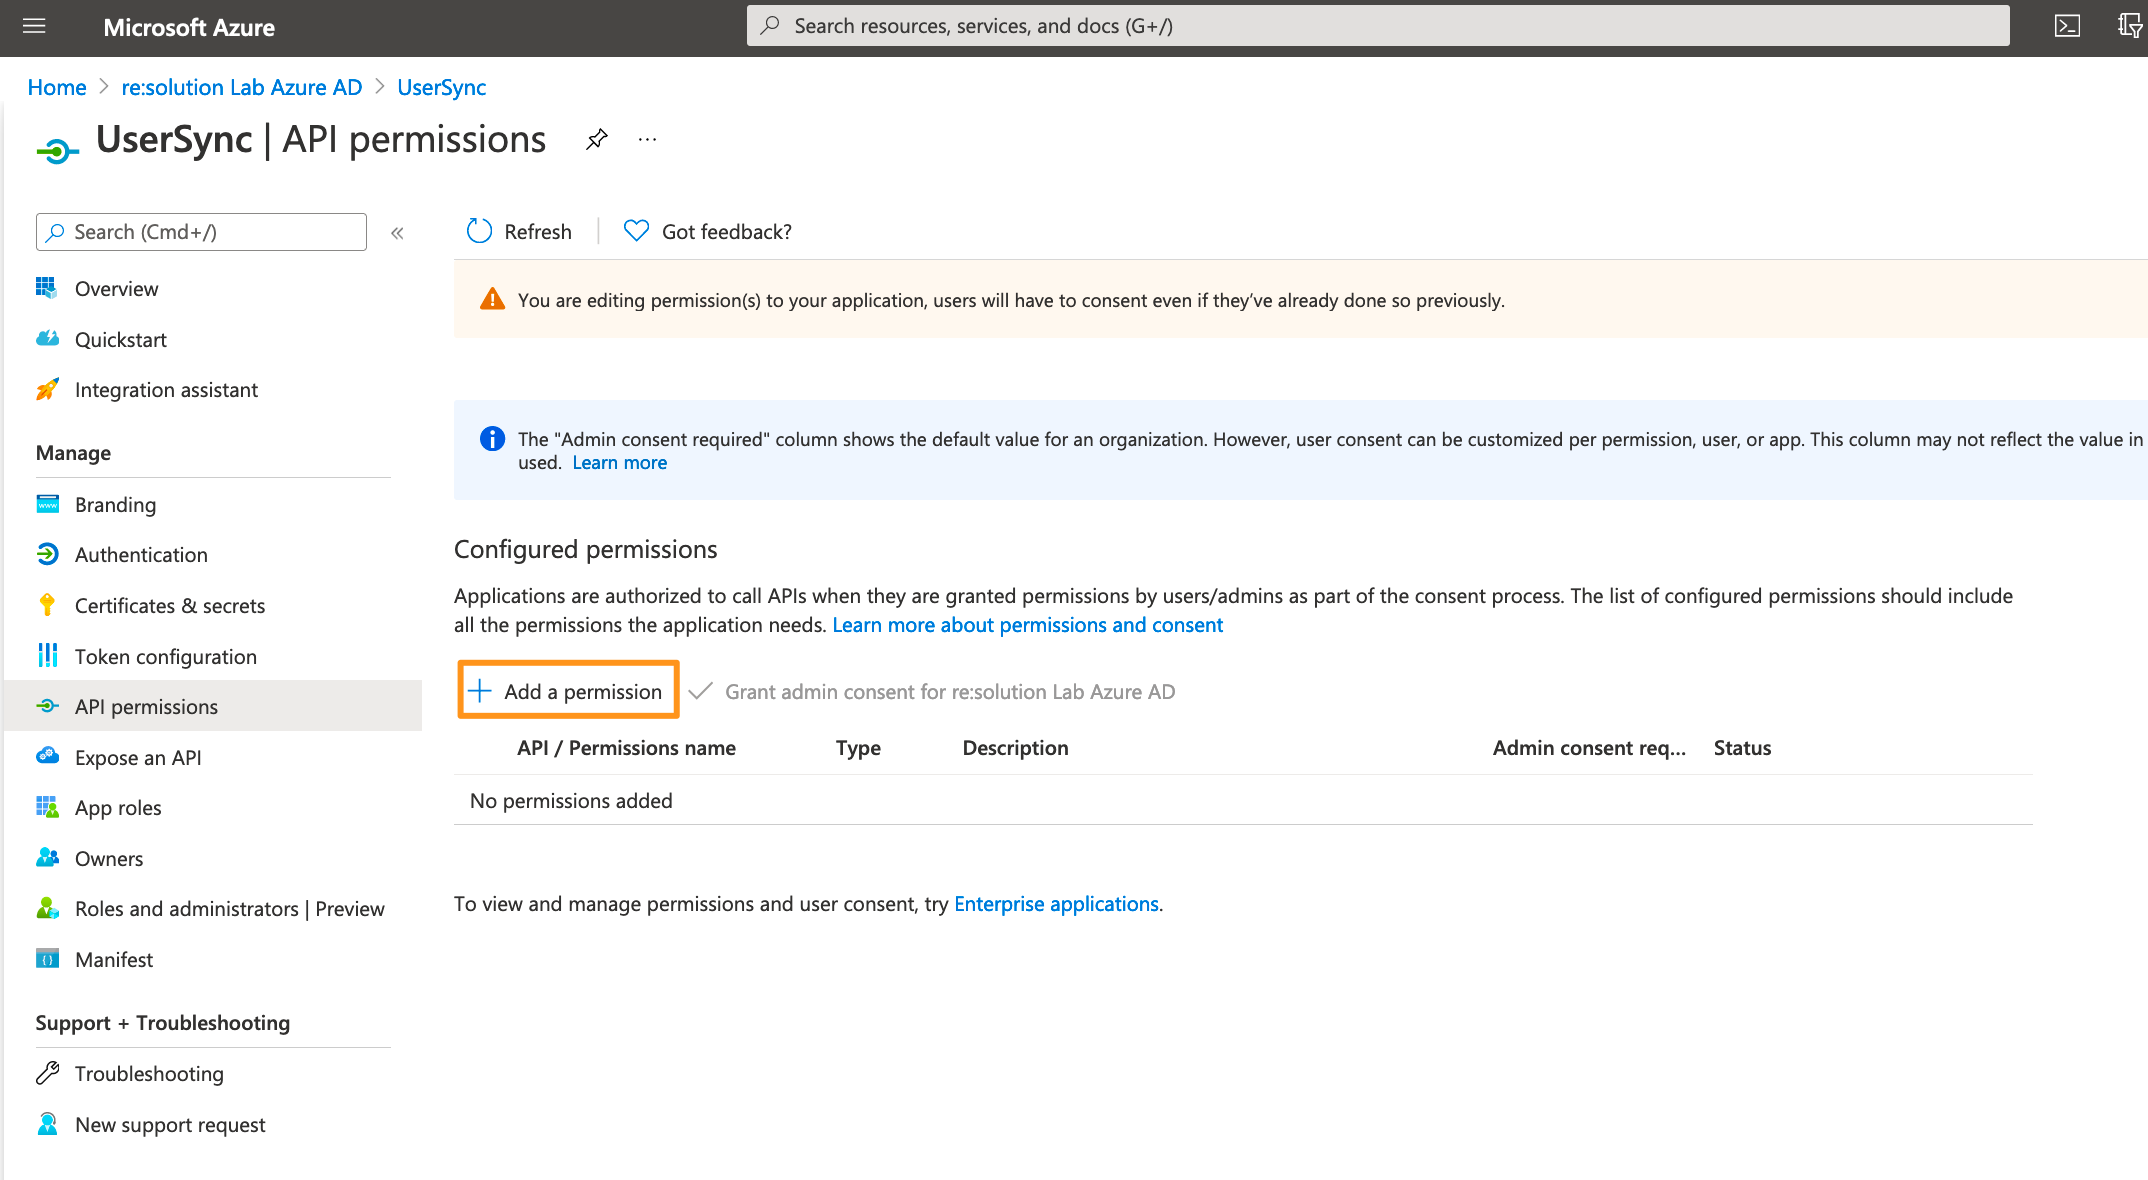
Delete the default created permission since it's not needed.
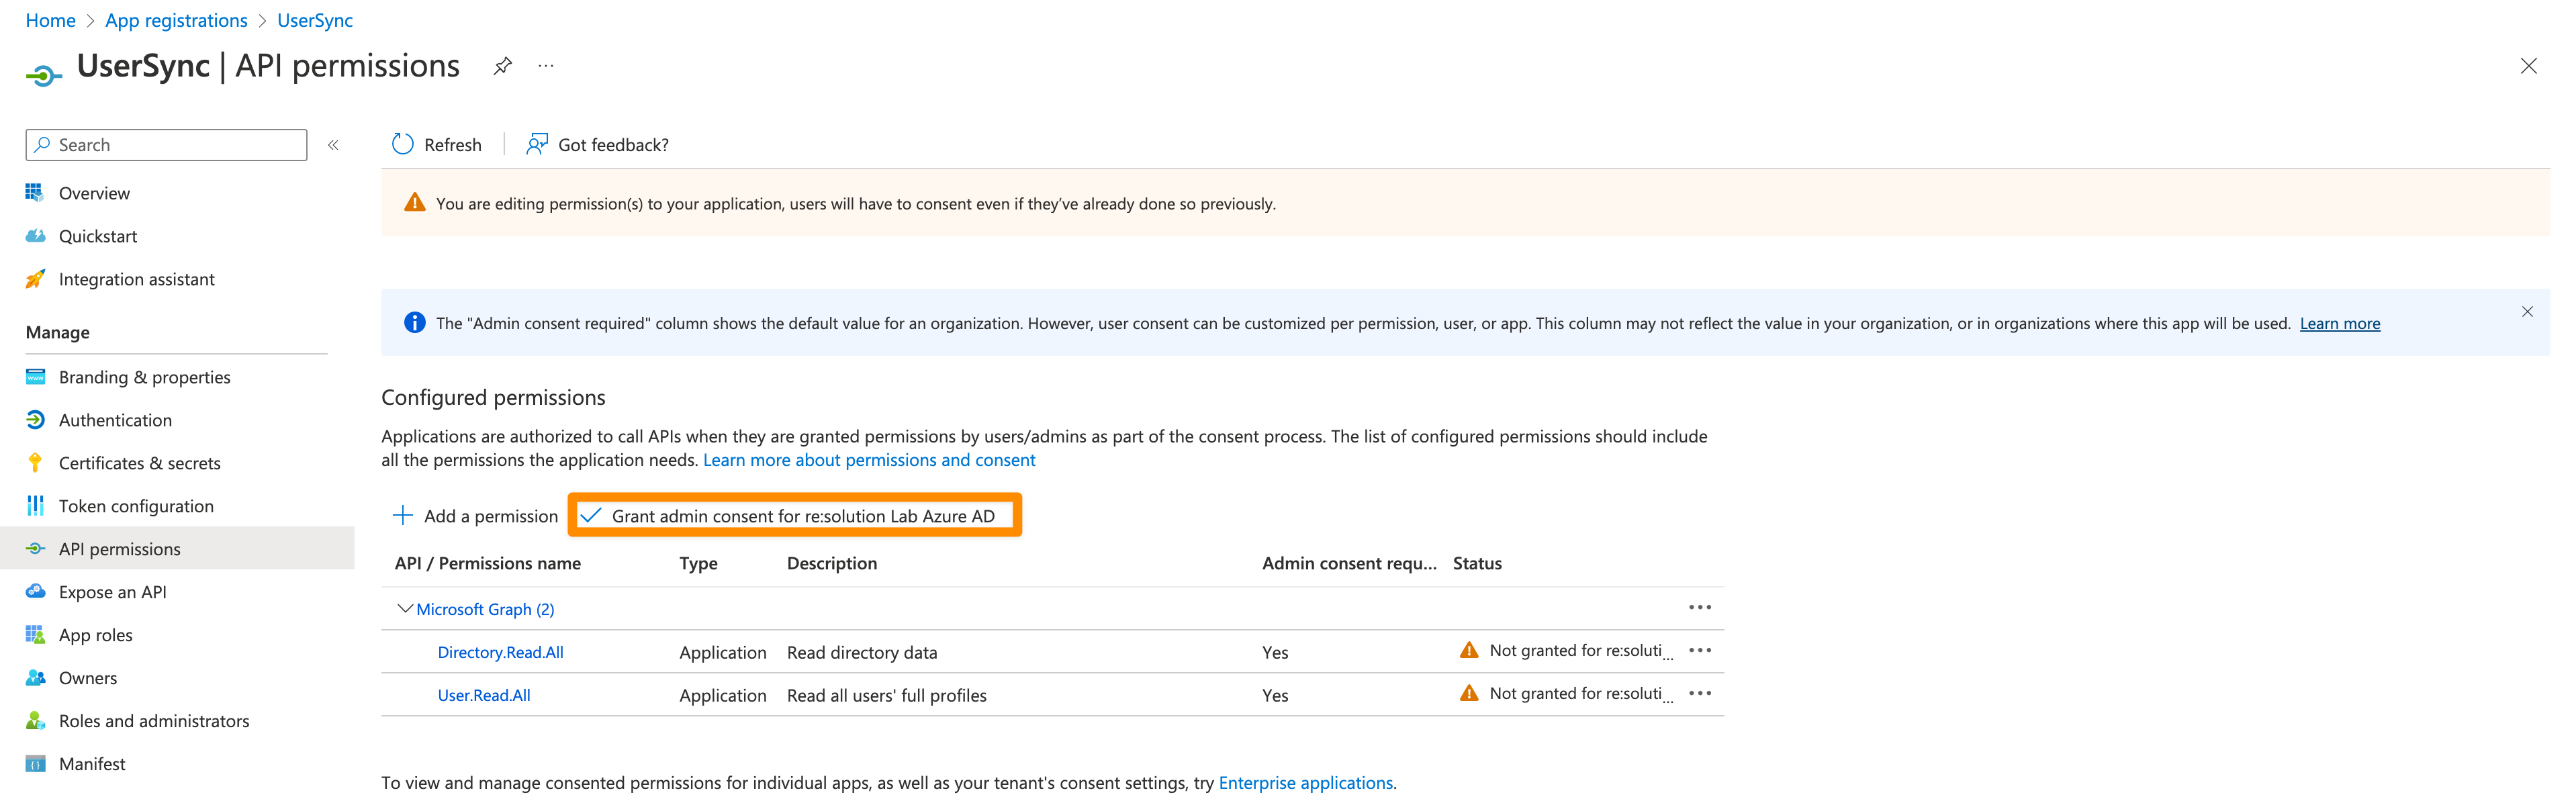
Click on Add a permission.
Select Microsoft Graph.
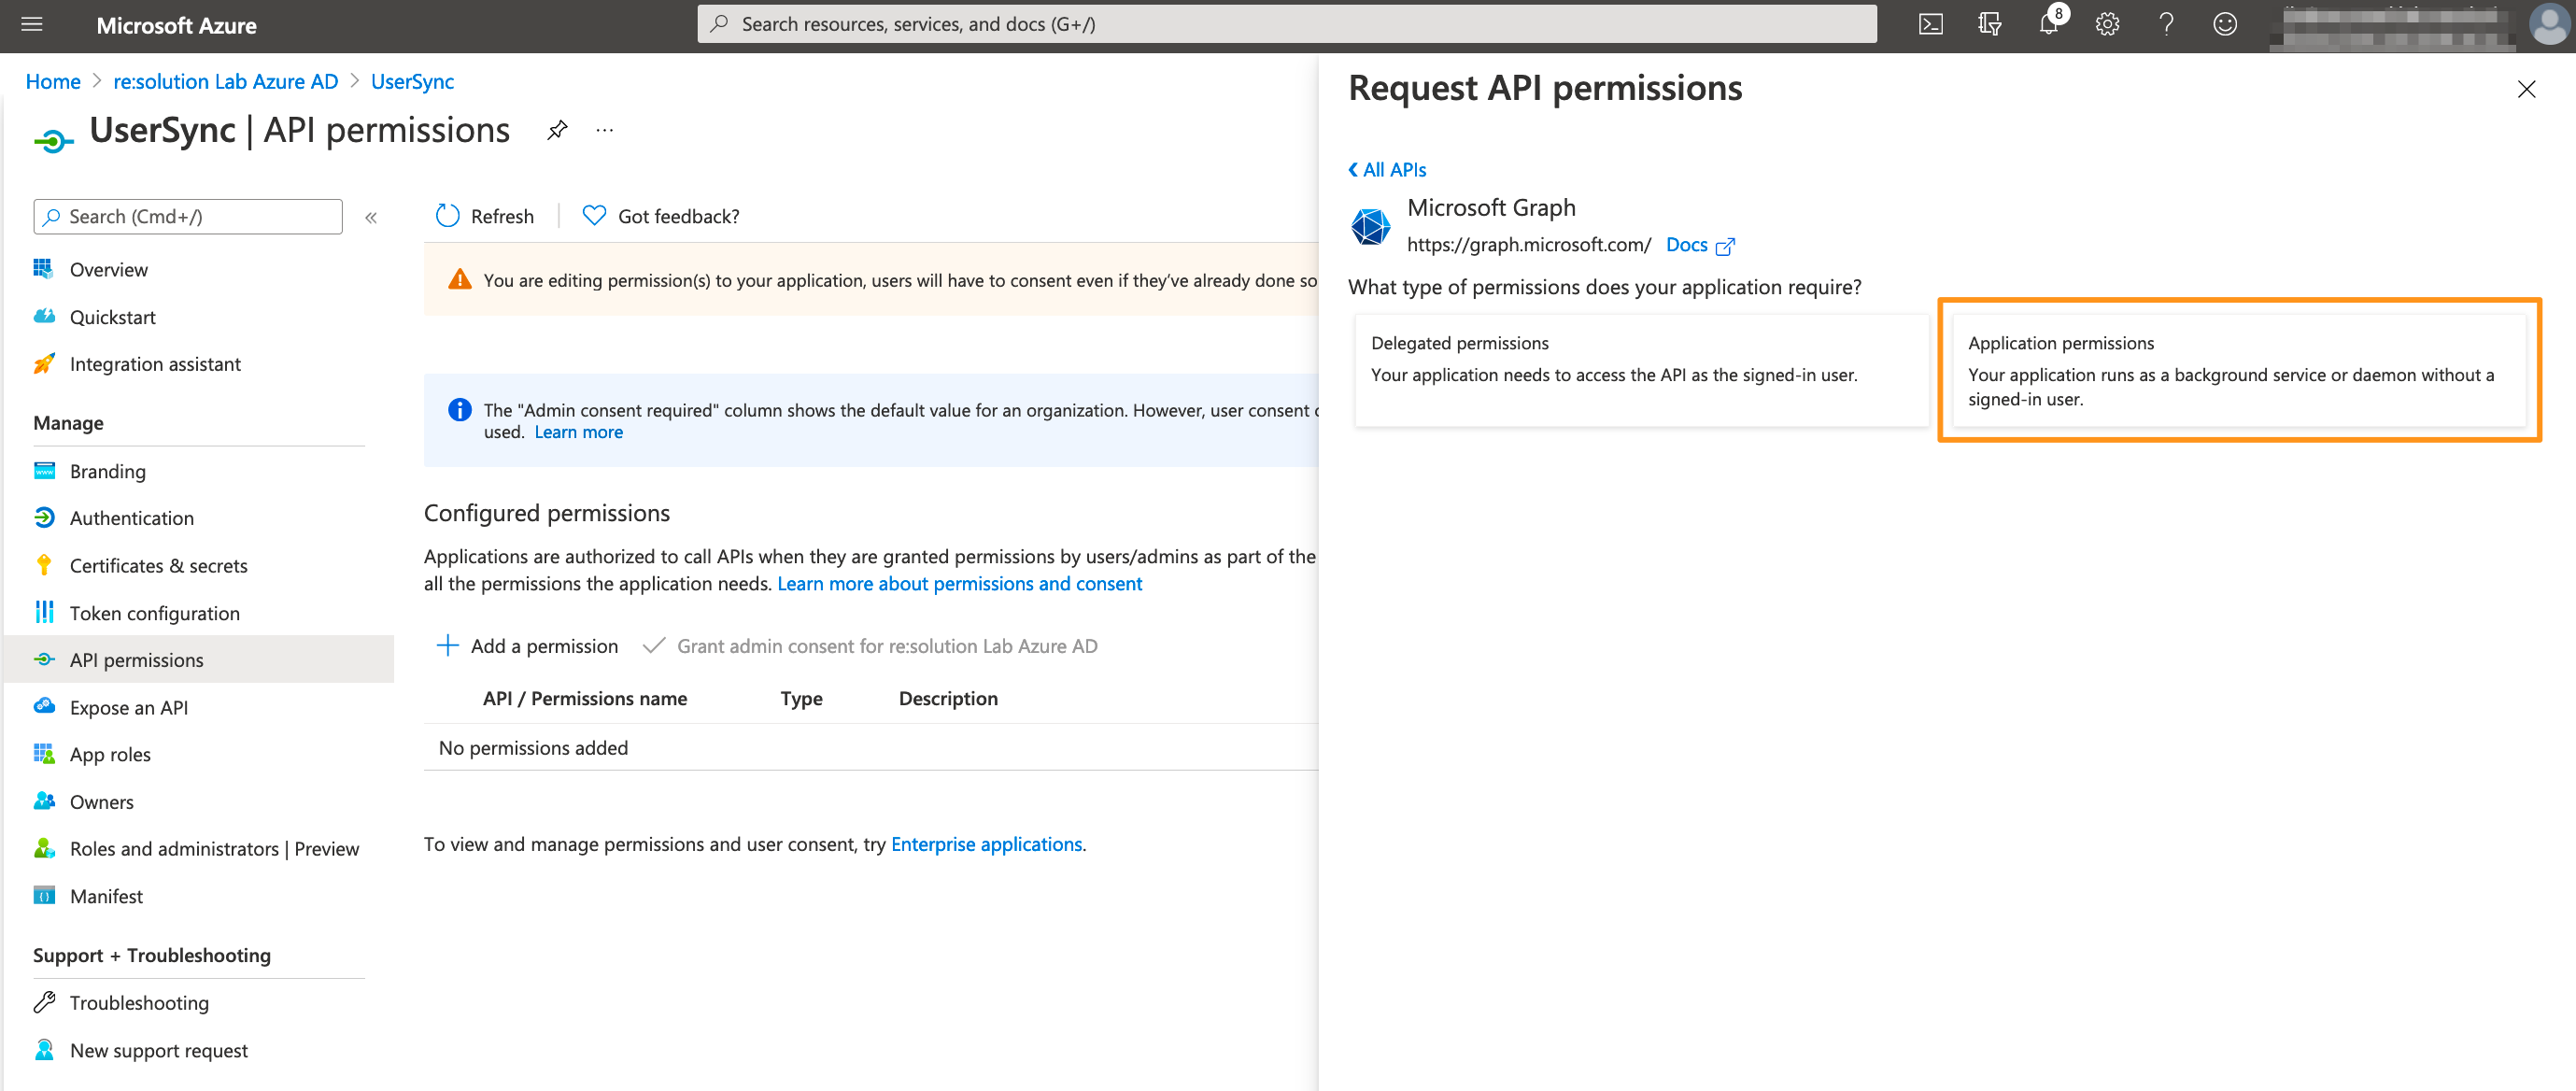
Choose Application permissions.
Expand Directory and tick Directory.Read.All
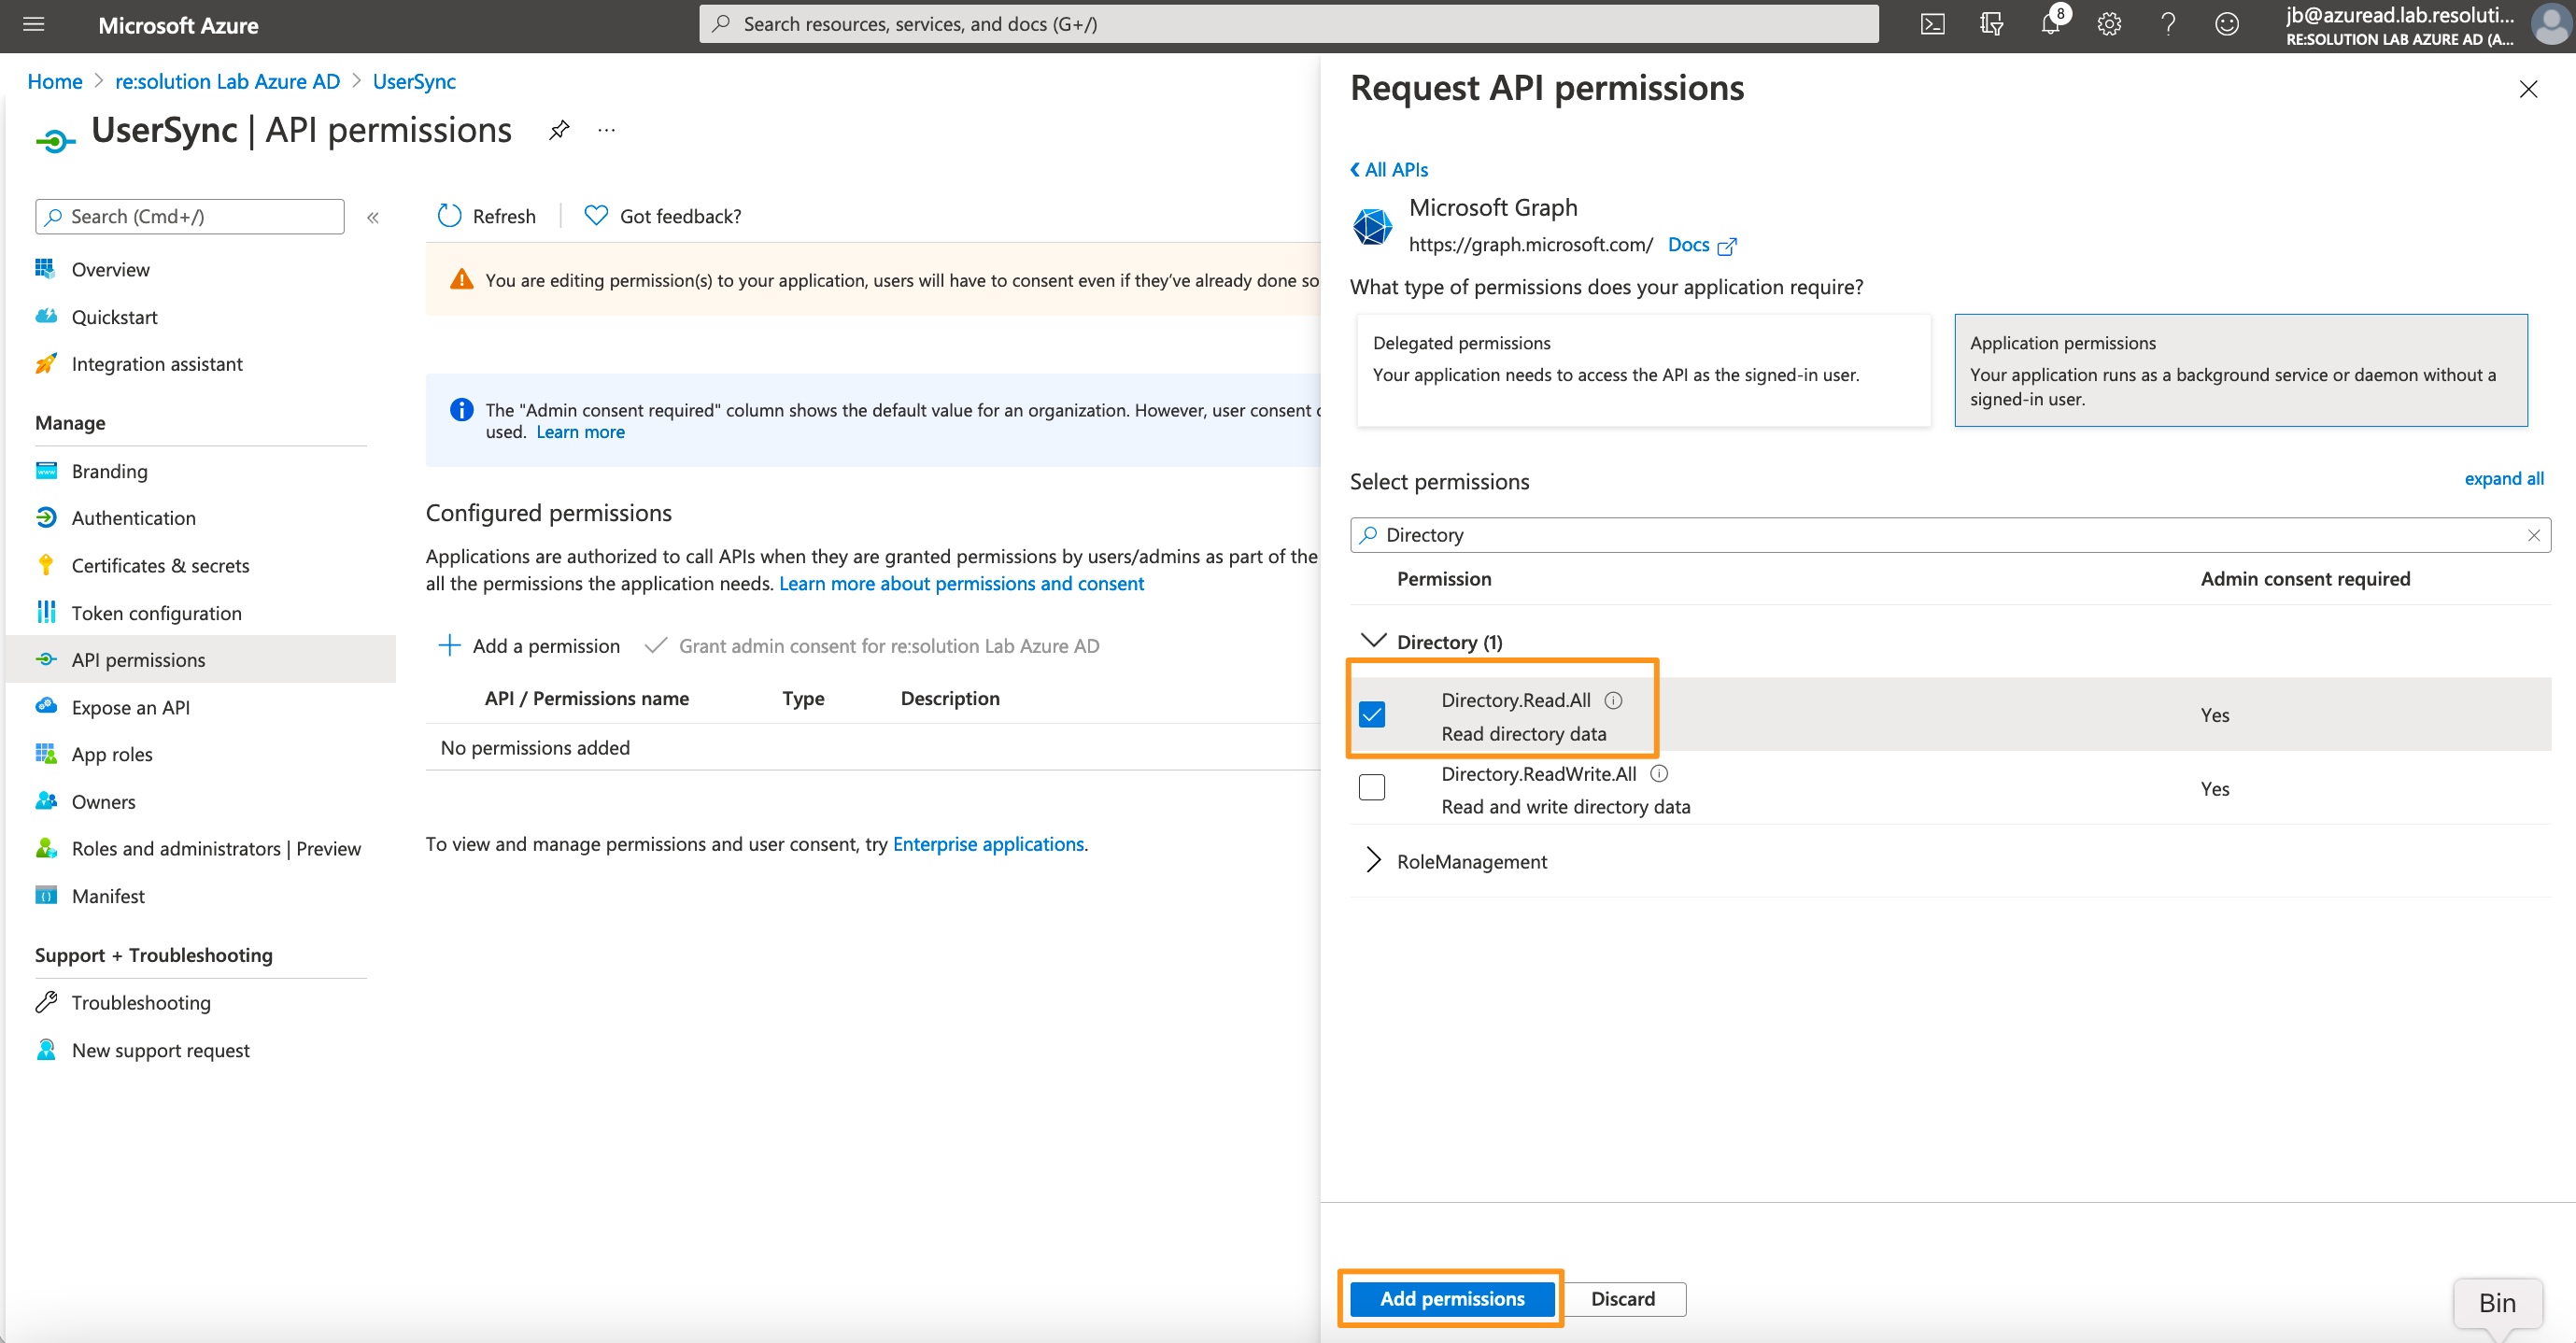
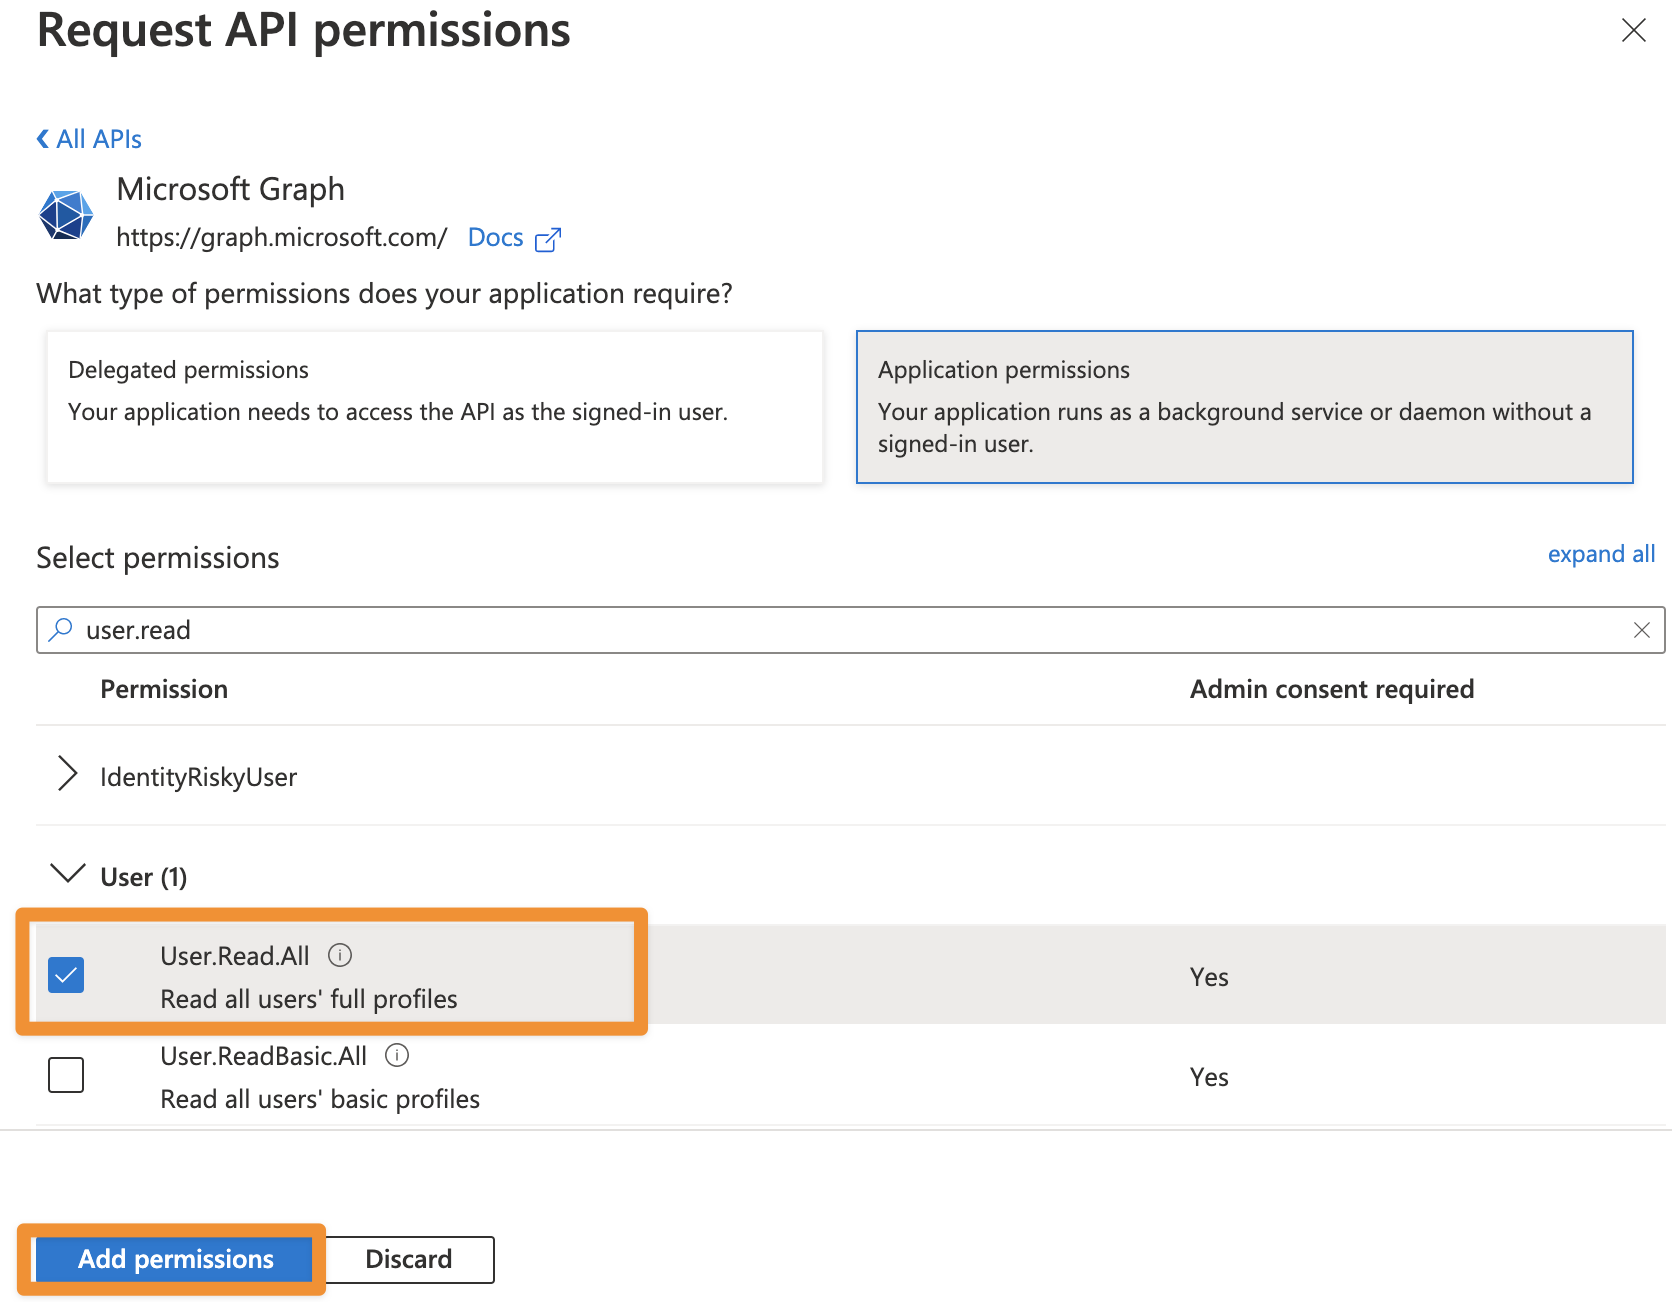
From SAML version 6.3.0 or User Sync 2.7.0 User Sync also supports syncing the profile pictures of users in Azure AD. To be able to use this feature, you additionally need to add User.Read.All as permission.
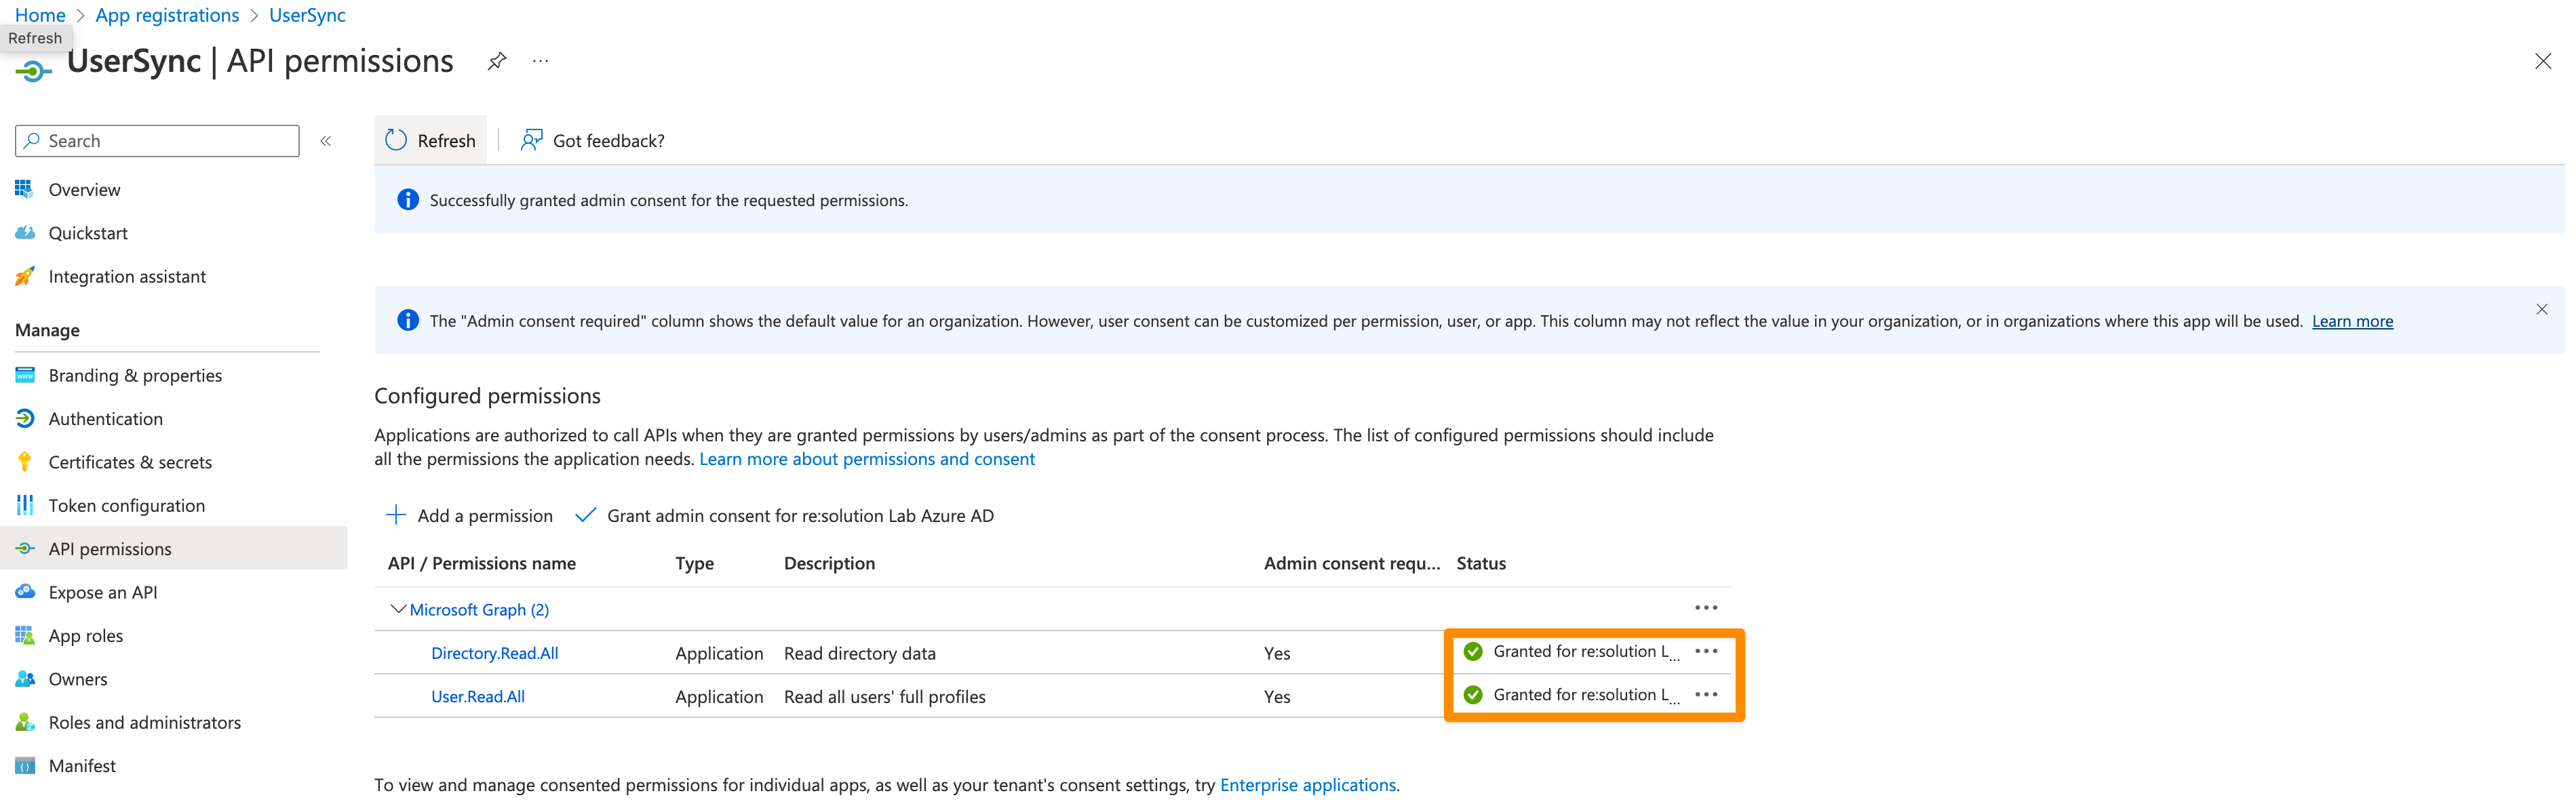
Click on "Grant admin consent for ...".
It should look like this after granting admin consent:
For the next step, click on Certificates & secrets in the left panel, and then click on New client secret.
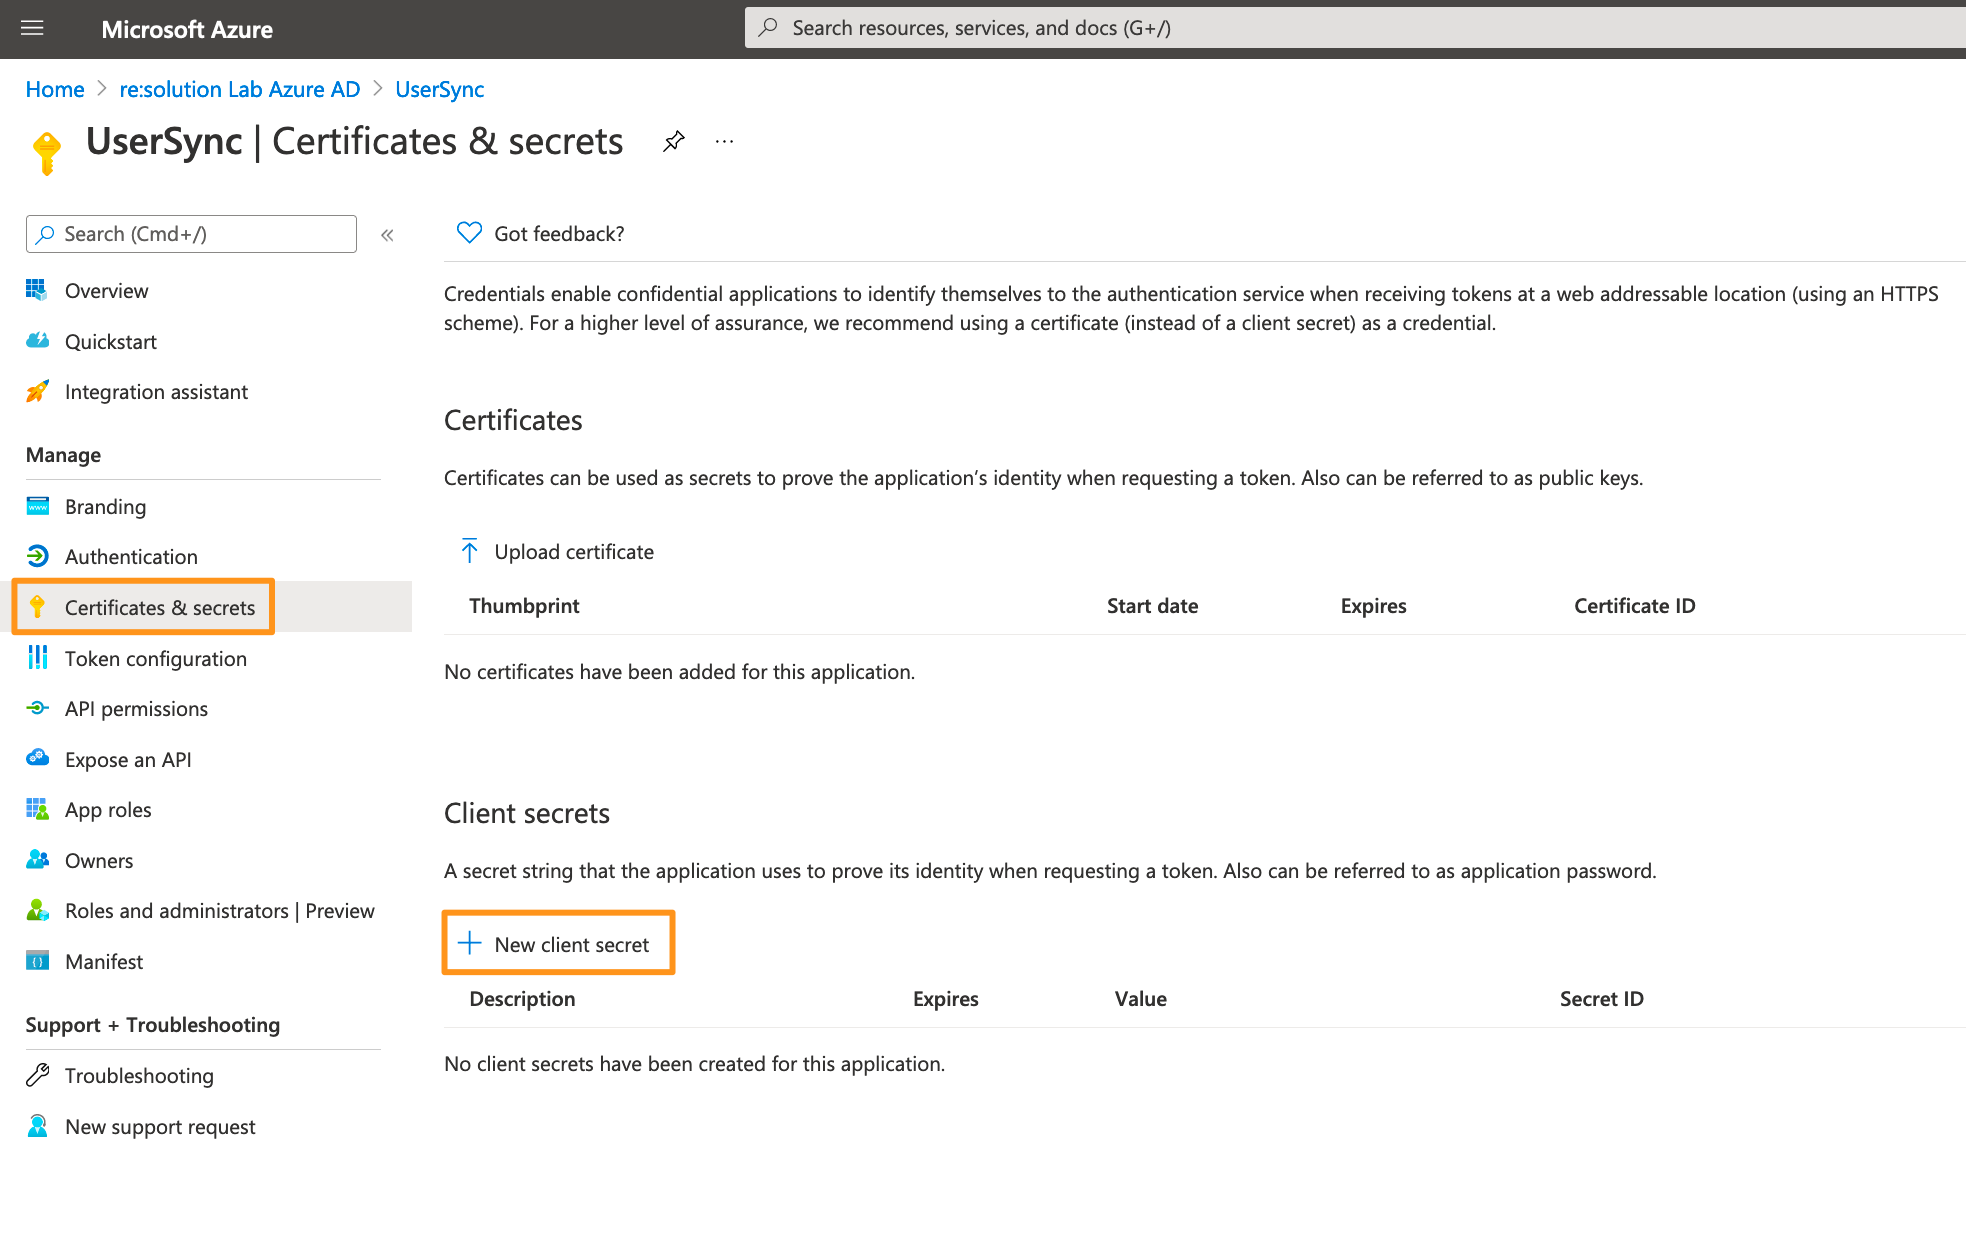
Enter a description for the secret and also set an expiry date. Click on Add to confirm.
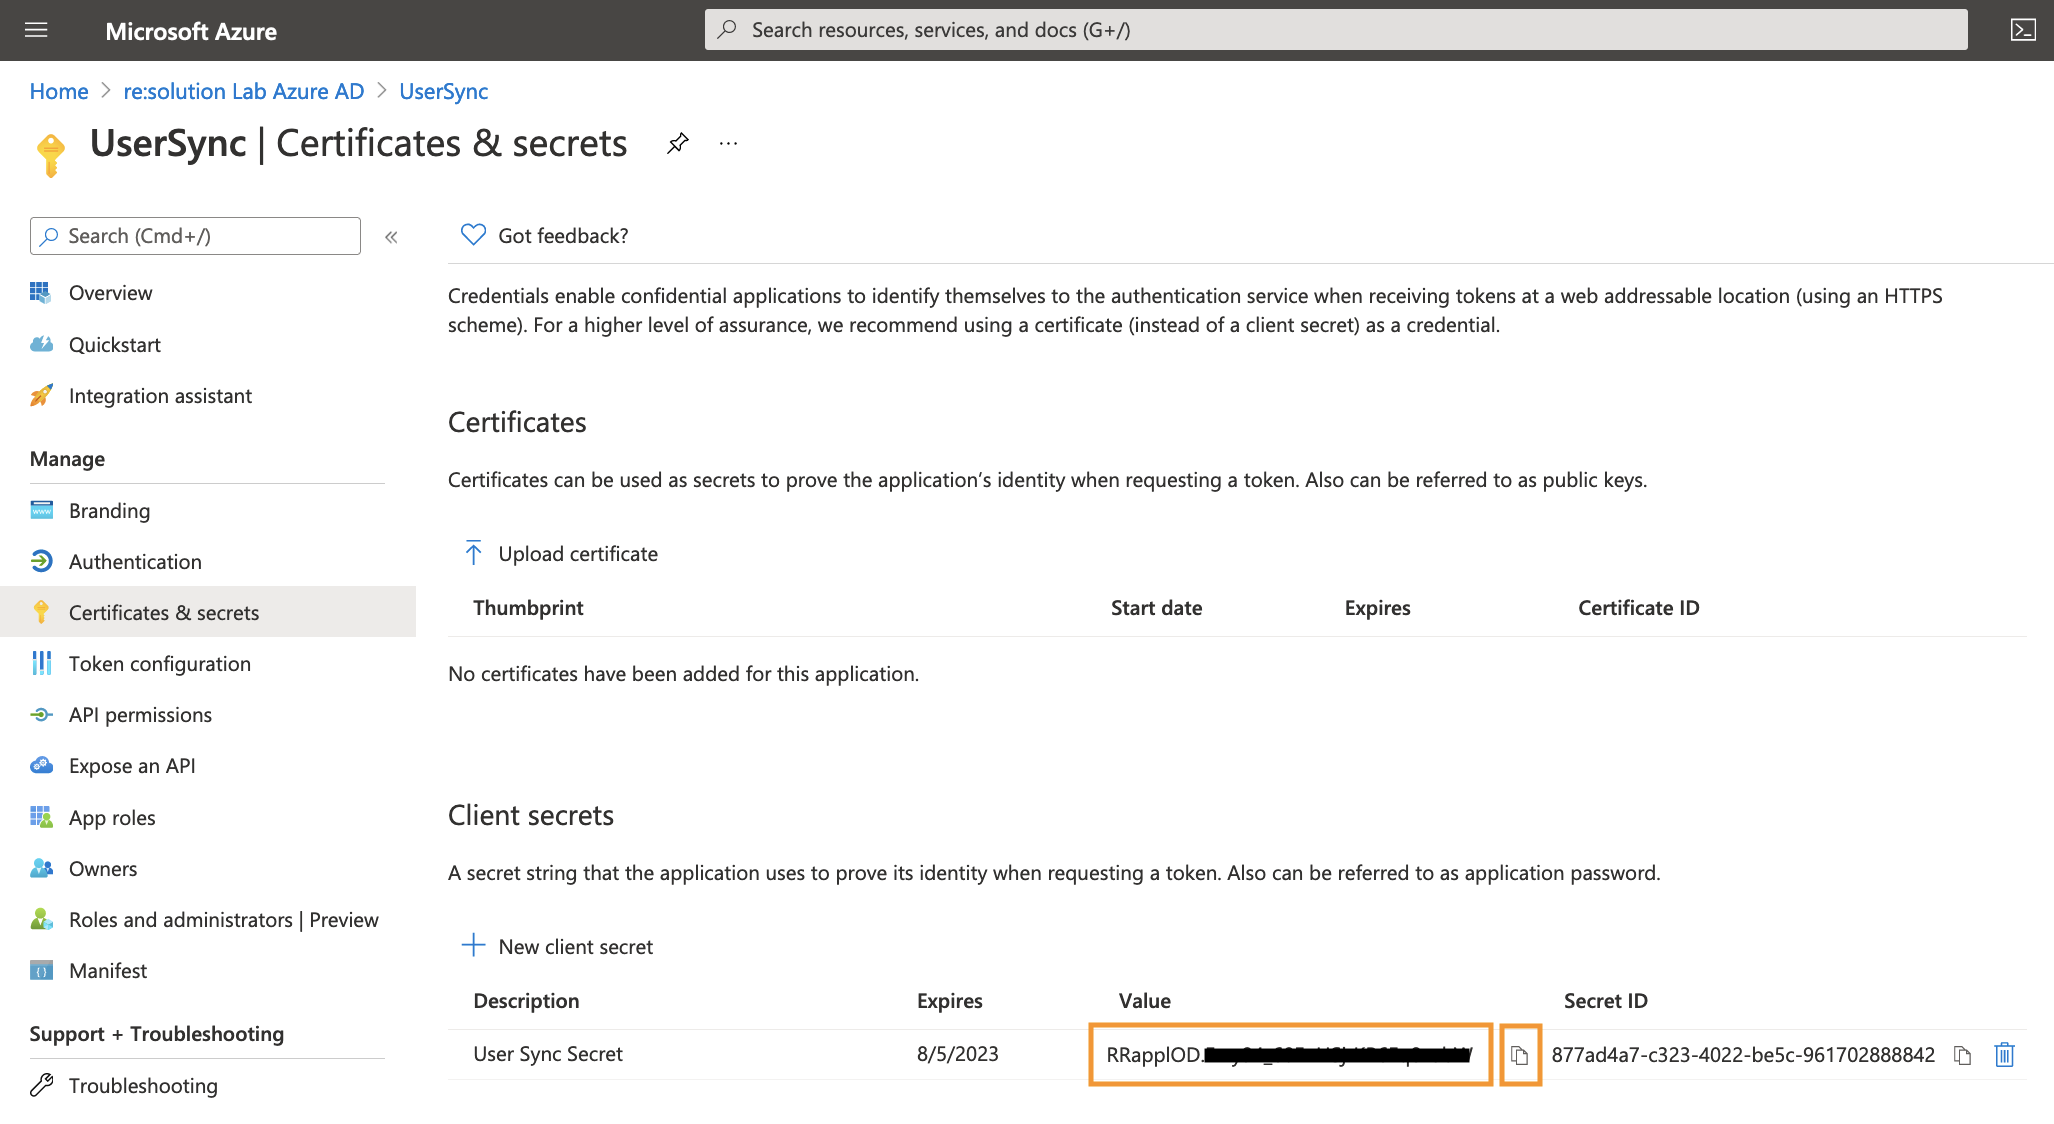
Please note that your secret will expire after 24 months. If syncs start failing in 24 months, you must create a new secret and update the secret in the connector.

Your Client secret will display only once, thus copy the secret. Of course, it is possible to create a new secret, if you lost your secret.
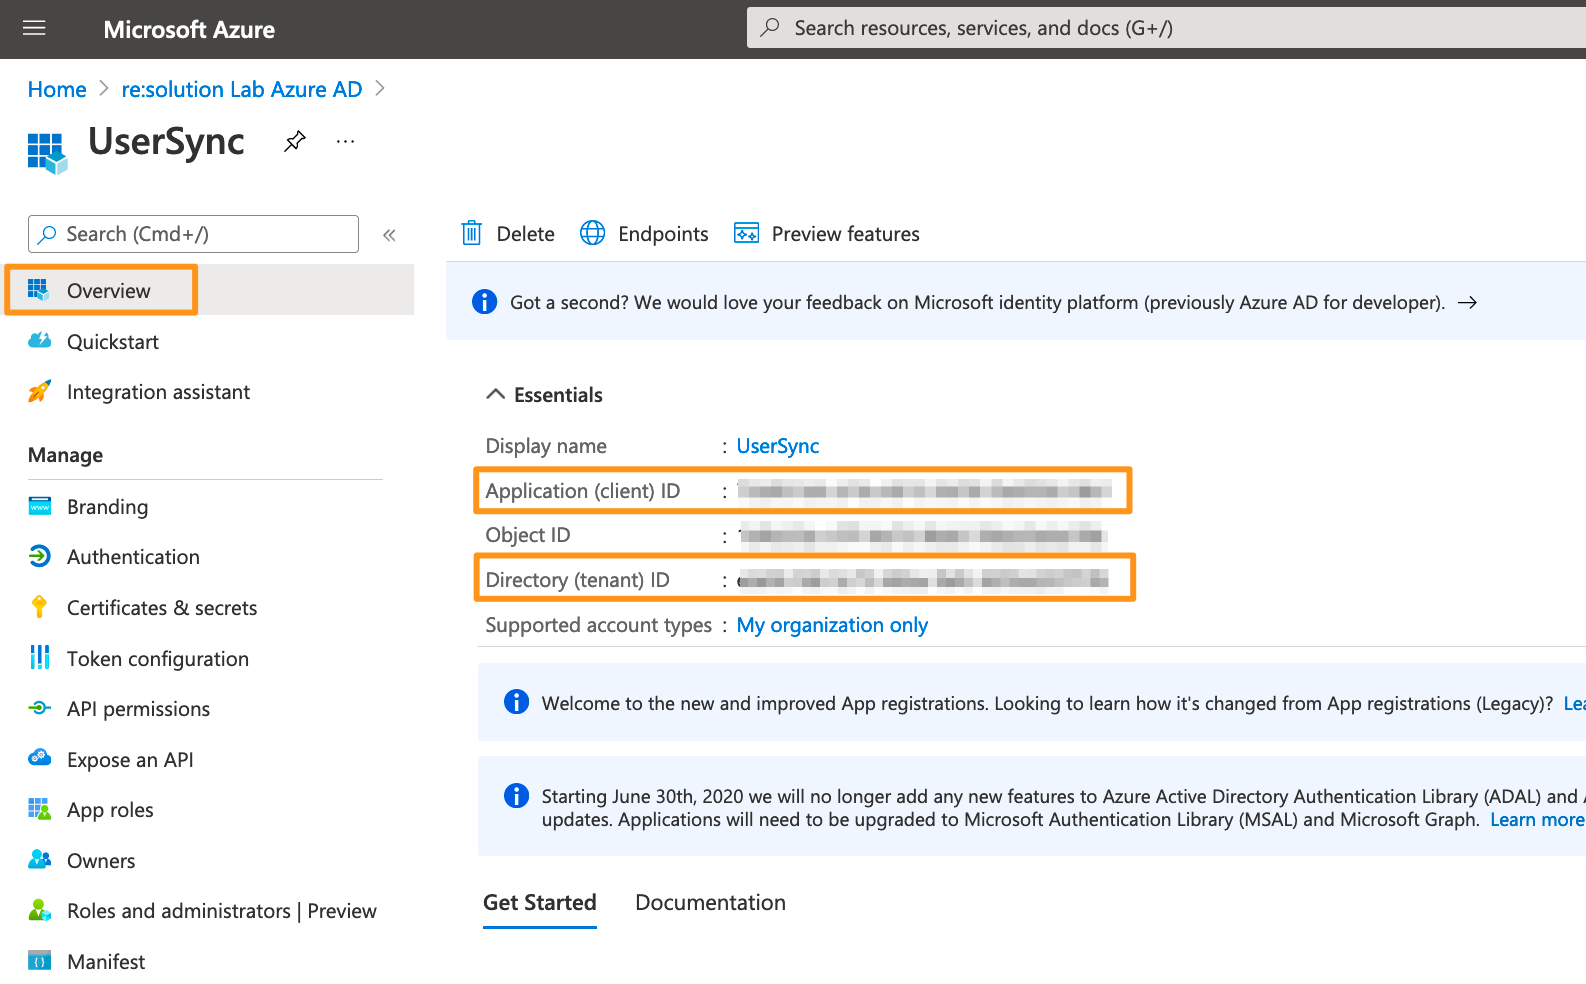
Go overview page of the Microsoft Entra ID app. Copy the Application ID and the Directory (tenant ID). Now, it is time to head over to your Atlassian application.
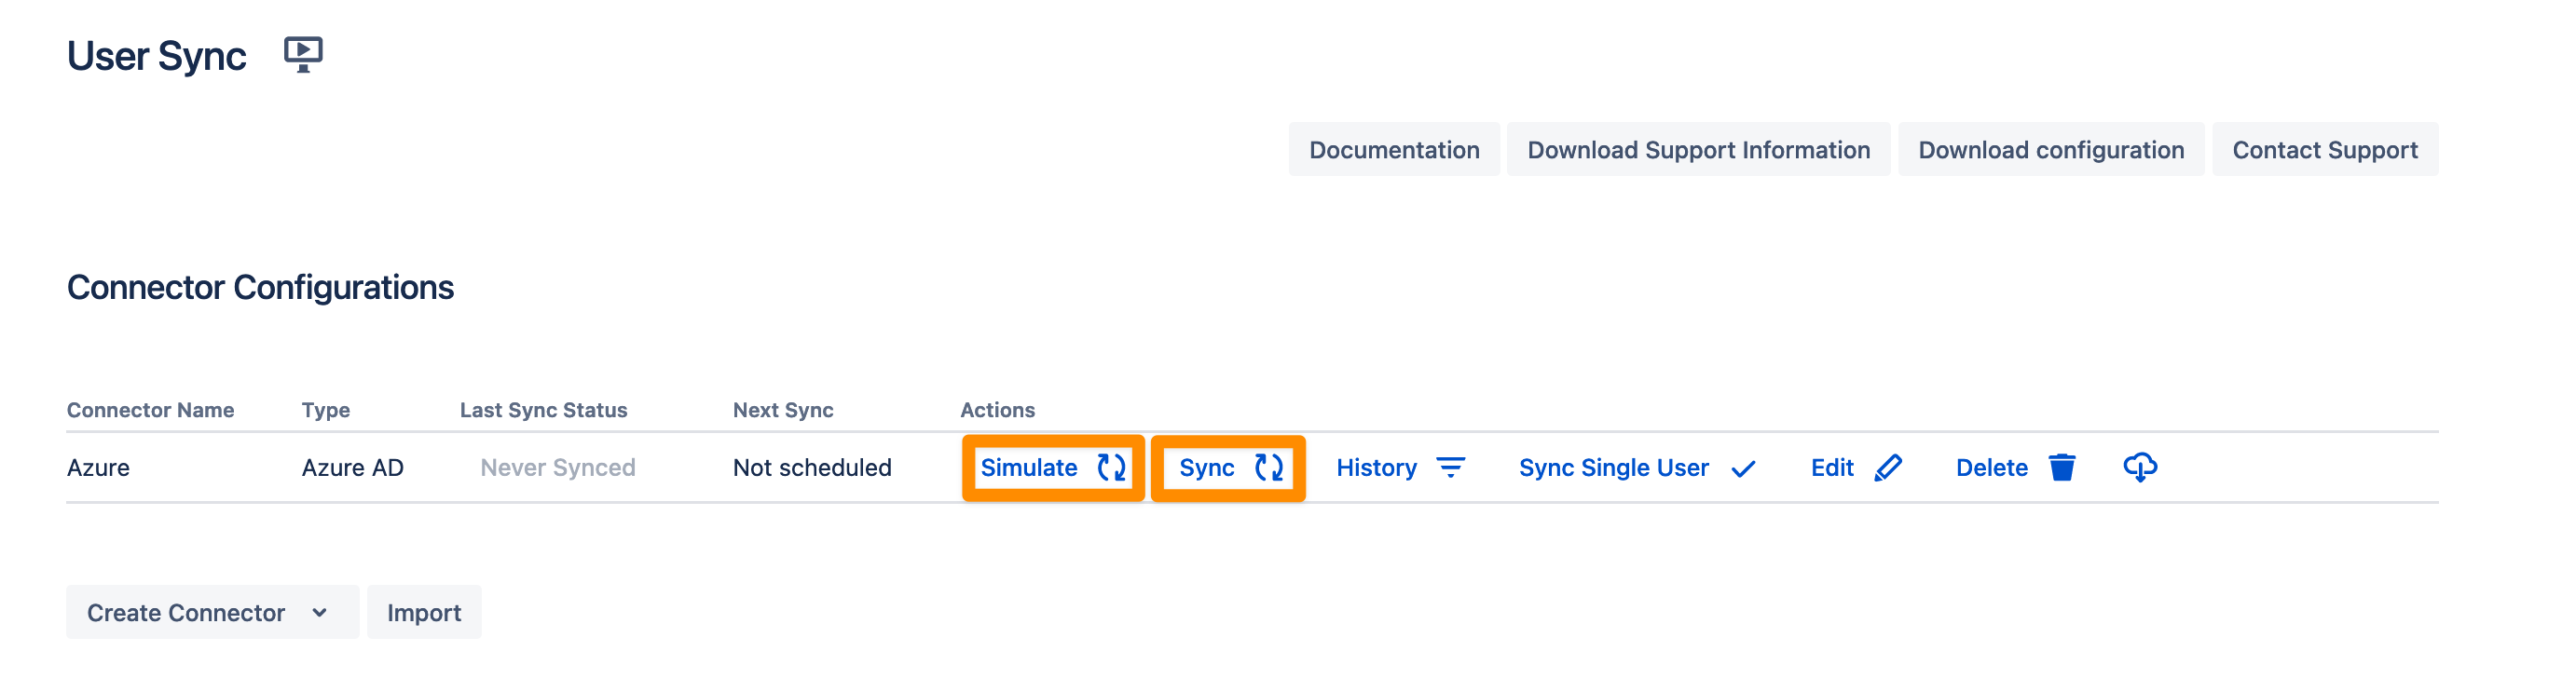
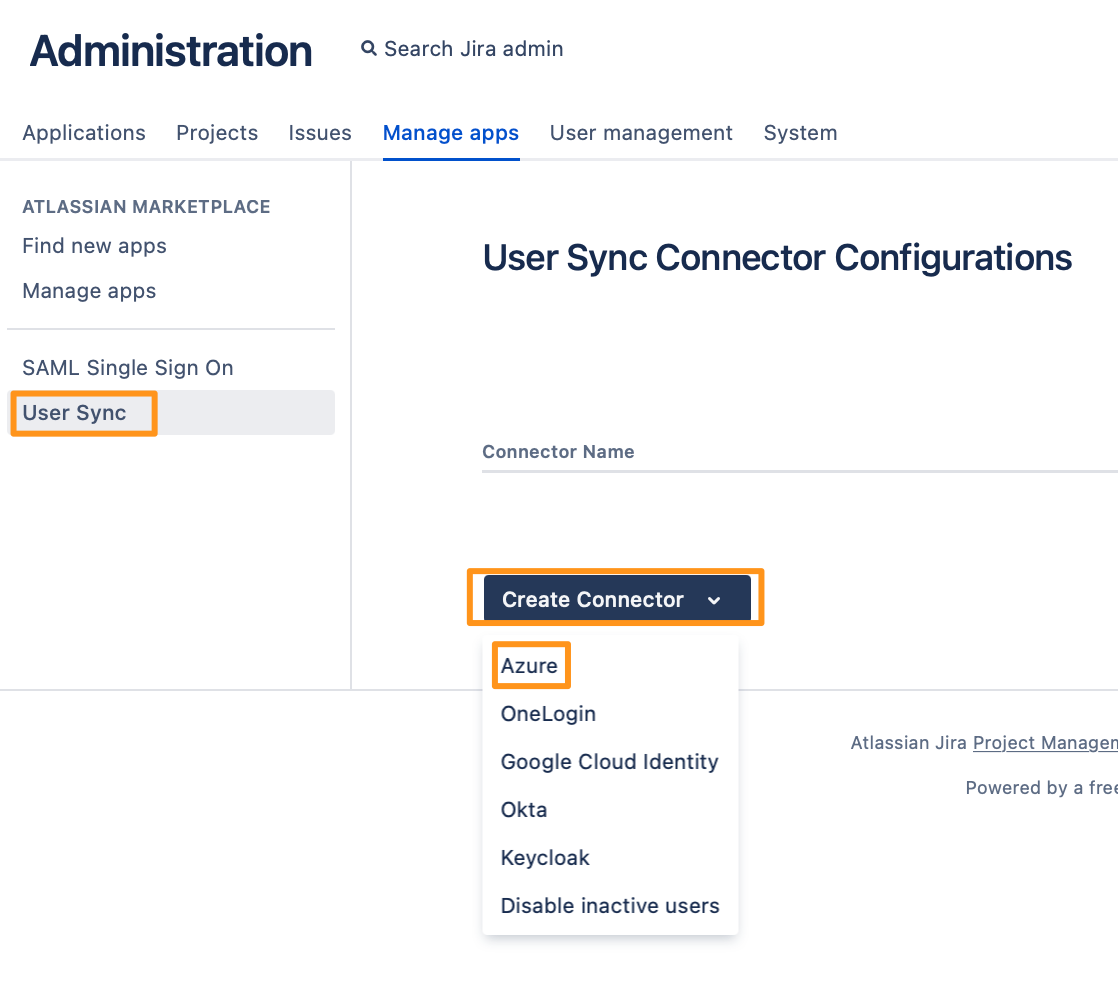
In your Atlassian application, go to User Sync, click Create Connector, and choose Azure.
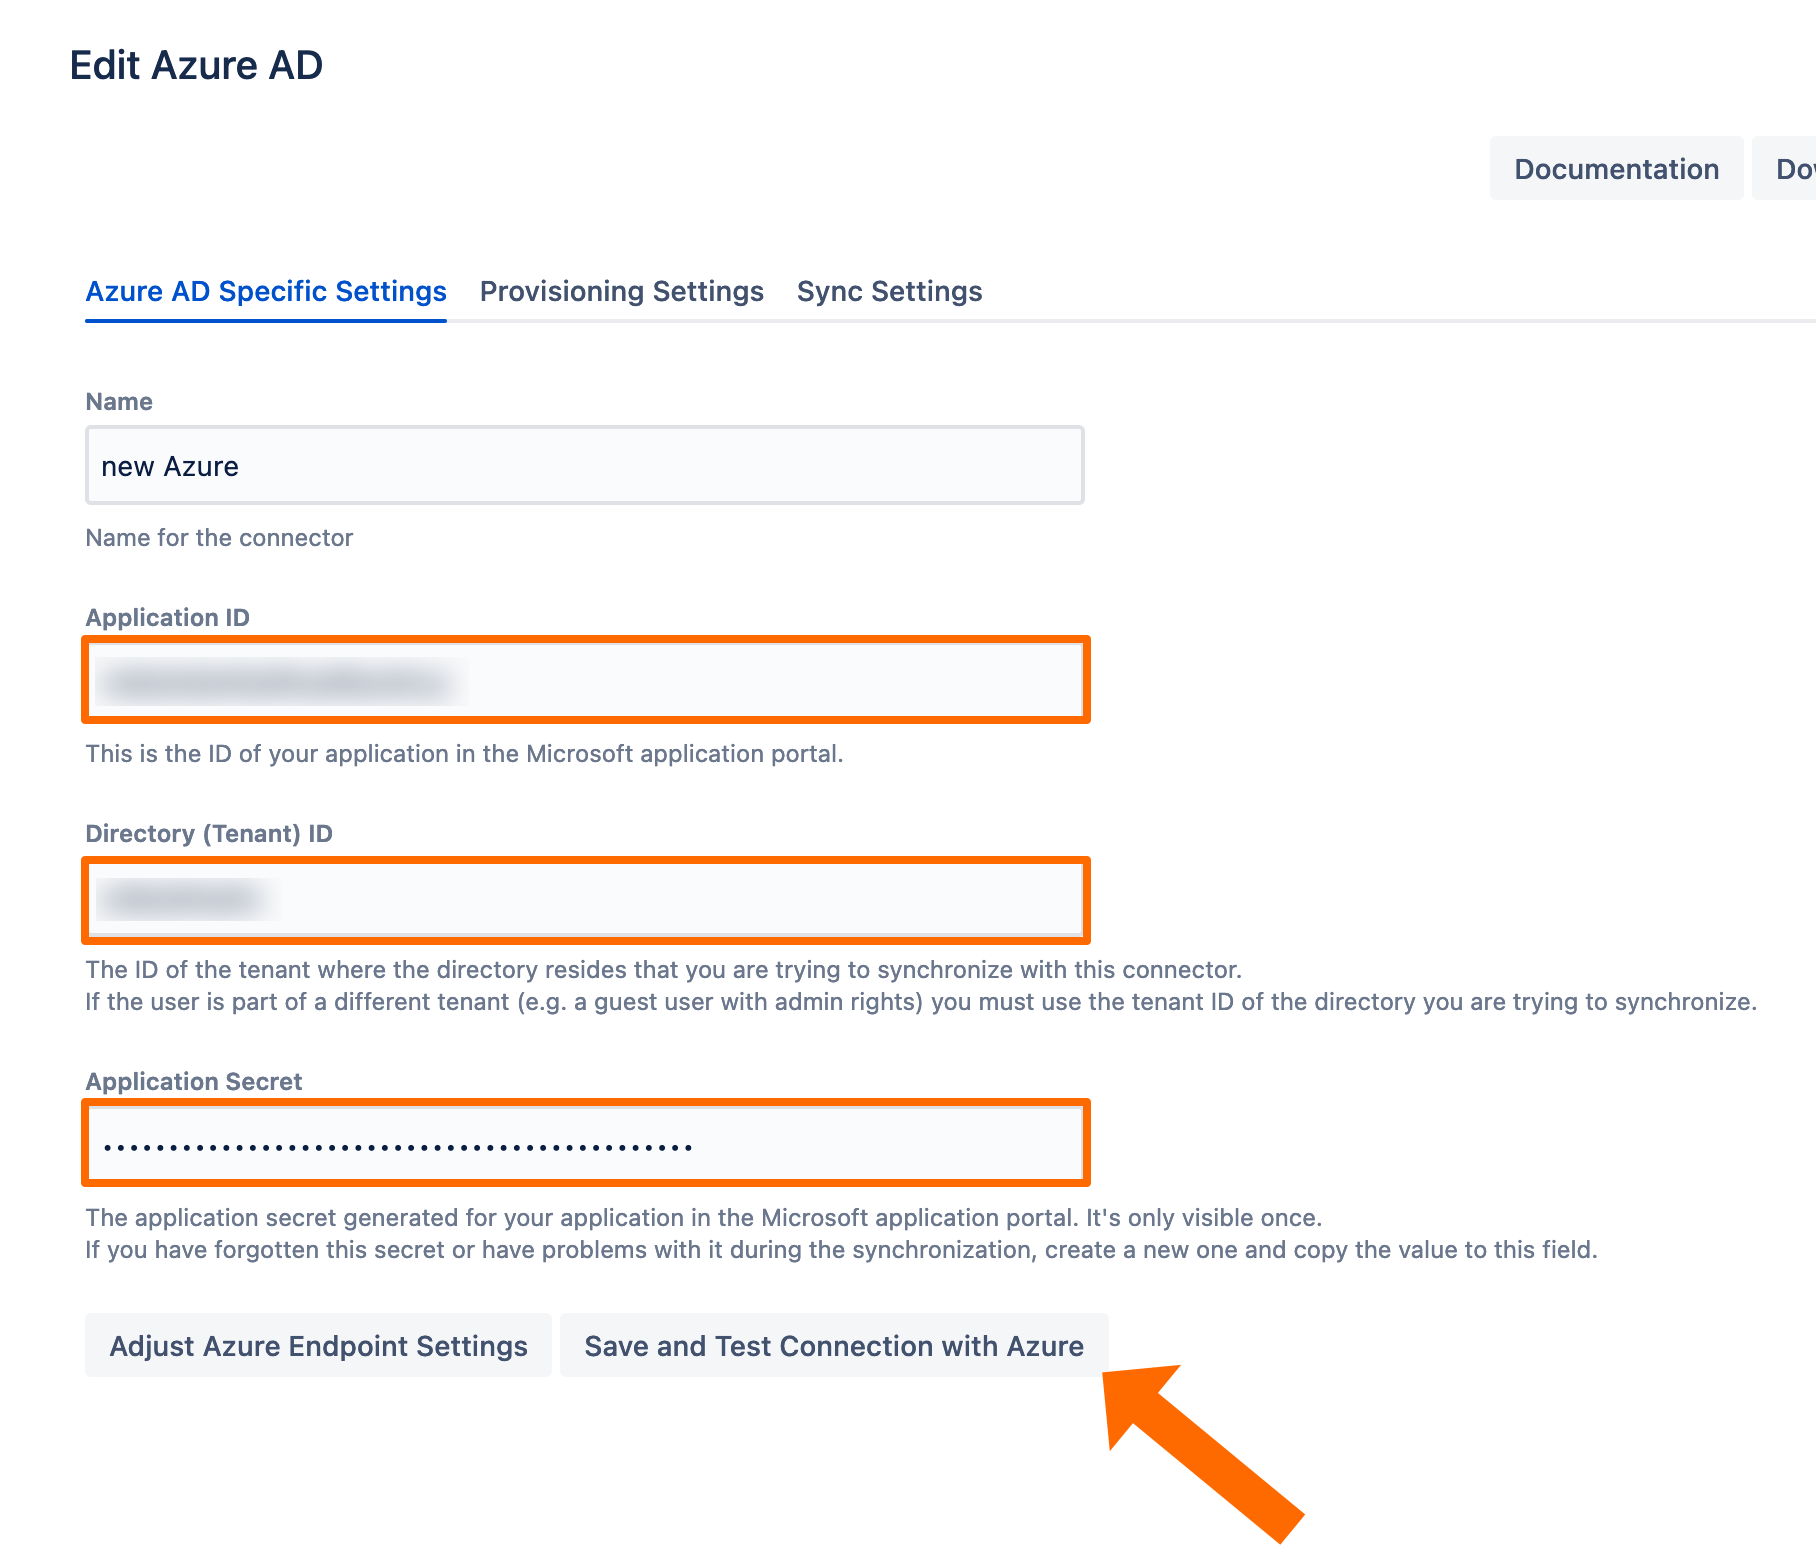
Add the Application ID, Directory ID, and the Application secret. Use the Save and Test Connection button to check whether Azure's API endpoints are reachable and API permissions are set correctly.
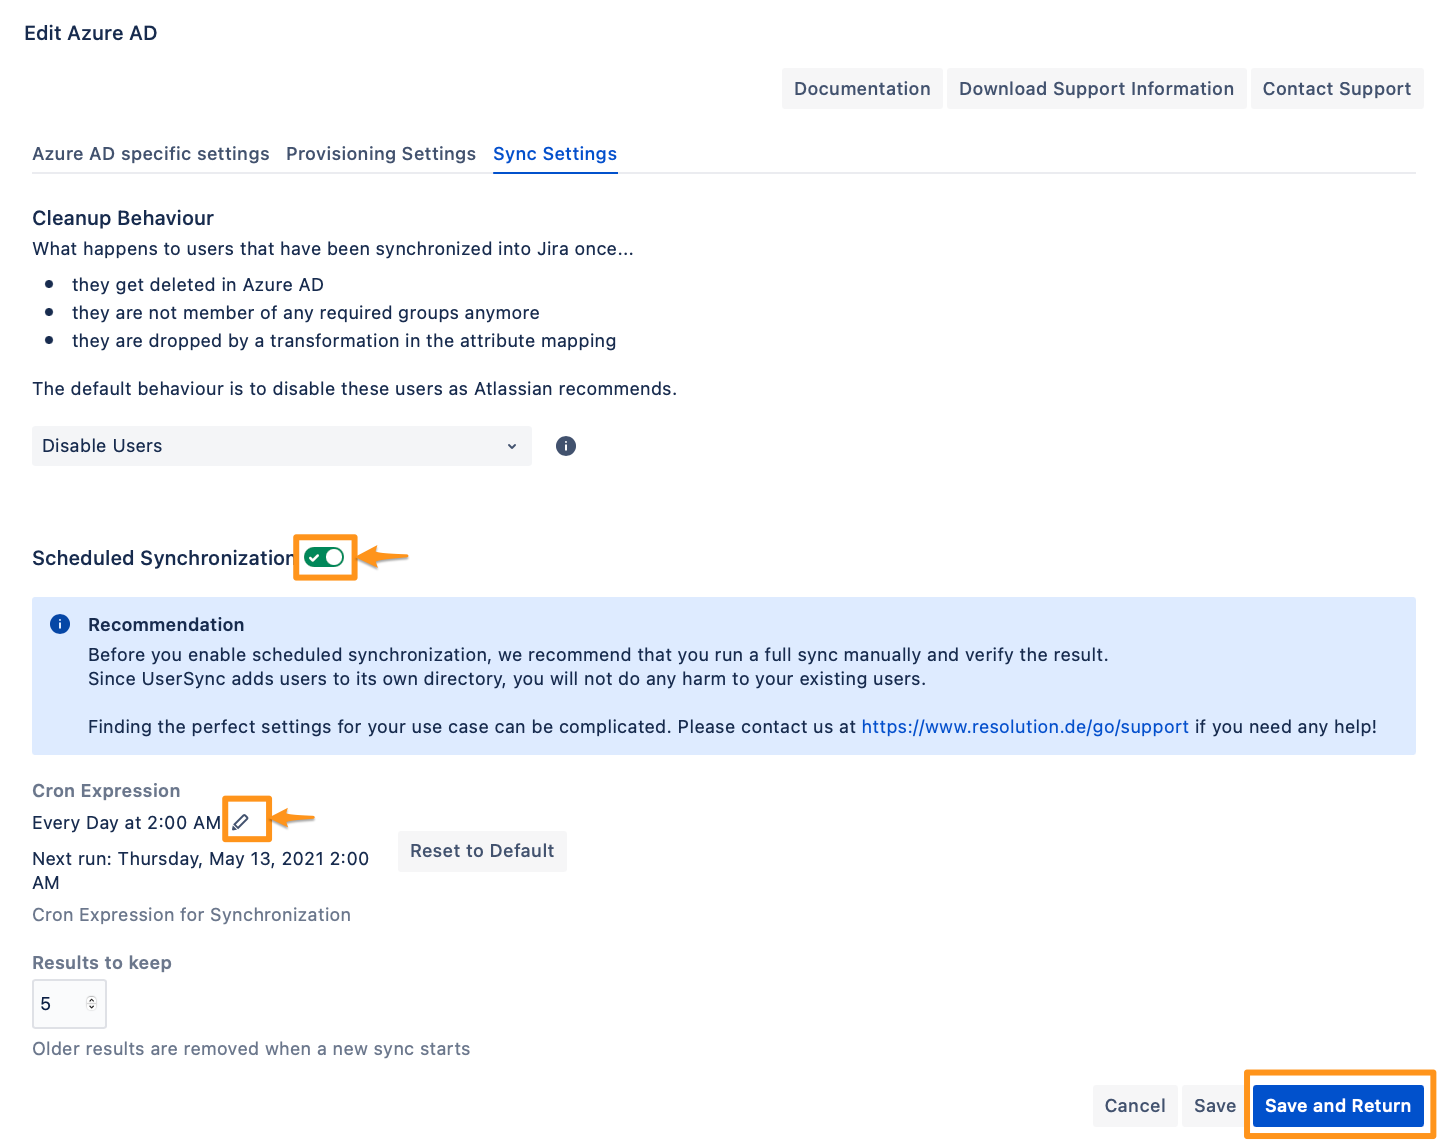
To take full advantage of User Sync, go to the Sync Settings tab and enable "Scheduled Synchronization". You can control the sync interval via a Cron Expression.
Do not forget to save your configuration by clicking on "Save and Return".
You are now ready to commence either a simulated or a full sync. By simulating the sync first you will be able to verify your configuration and see what changes User Sync would apply like what users will be added, modified, or not modified. With the full sync, User Sync will apply those changes. Both sync actions will run a full sync and will have the same sync duration. For more information on the sync simulation, please refer to Using the Simulated Sync Feature.