PingOne with Just-In-Time Provisioning
Goal
After completing this setup guide, you will have PingOne with Just-in-Time Provisioning and your Atlassian product for the SAML SSO for Atlassian Server or Data Center app set up. Additionally, you will enable the SSO redirection and test SSO.
Prerequisites
To use the SAML SSO app for Atlassian Server or Data Center with PingOne, you need the following:
A PingOne subscription
A (trial) subscription for the SAML SSO app
Admin access to your Atlassian product
Step-by-Step Setup Guide
Install the SAML SSO App for Atlassian Data Center or Server
In your Atlassian product, open the in-product marketplace as described in the Atlassian documentation.
Search for "resolution saml" and click "Install" for SAML Single Sign On (SSO) by resolution Reichert Network Solutions GmbH.
After the installation is complete, click on Manage, then choose Configure.
Now, you are on the Add-on / app configuration page and the first step of the setup wizard will appear.

First Steps - Wizard
After you clicked "Configure", the Wizard will be triggered. If not, or if you want to add another Identity Prover (IdP) to your existing configuration, click on "+ Add IdP". This guide assumes, that there is no IdP configured.
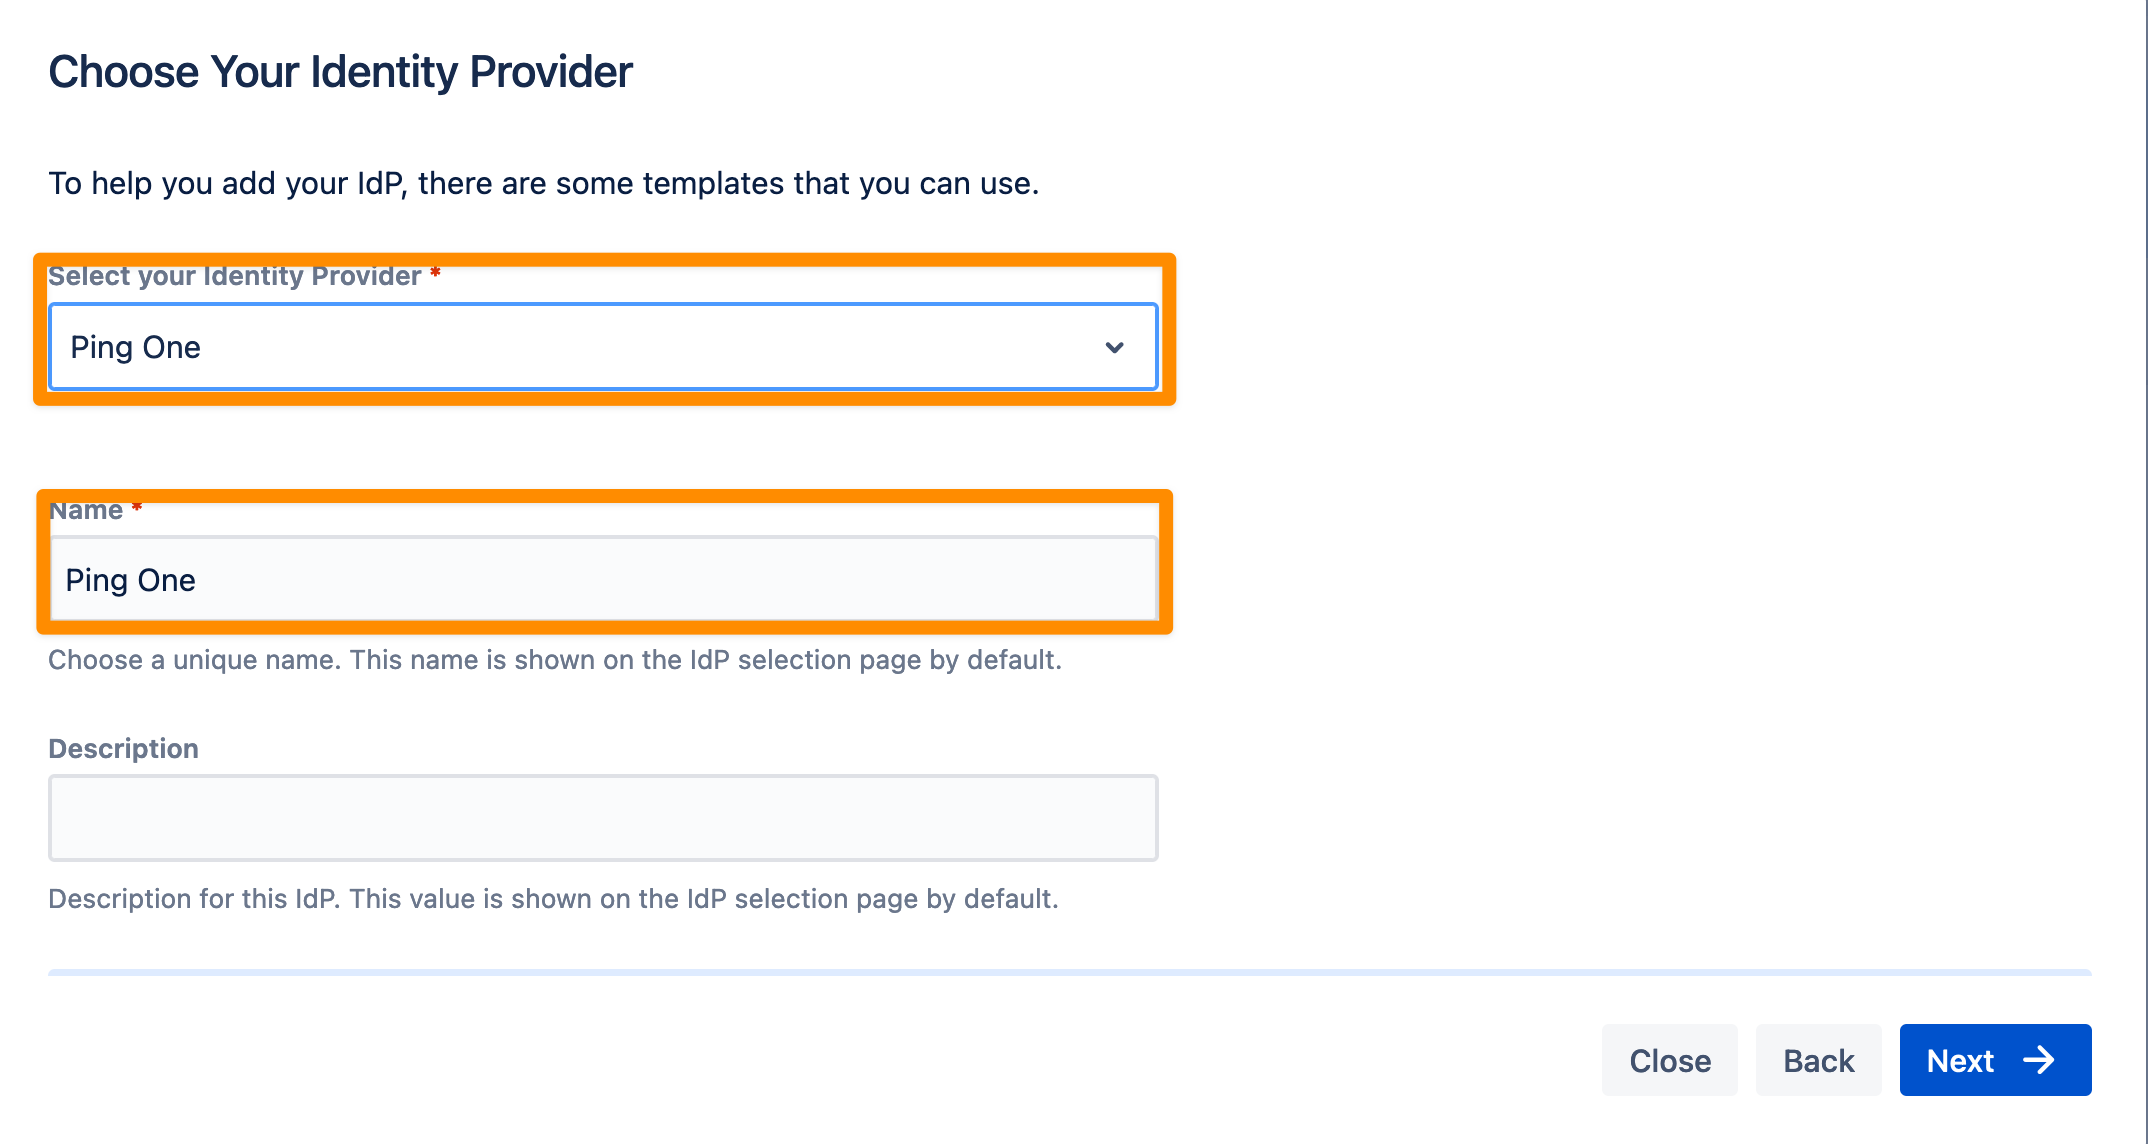
The Wizard greets you with information, click on "Add new IdP" to proceed.

For the IdP Type, choose "PingOne" and then add a name. You can also optionally add a description. Click on "Next" to continue.
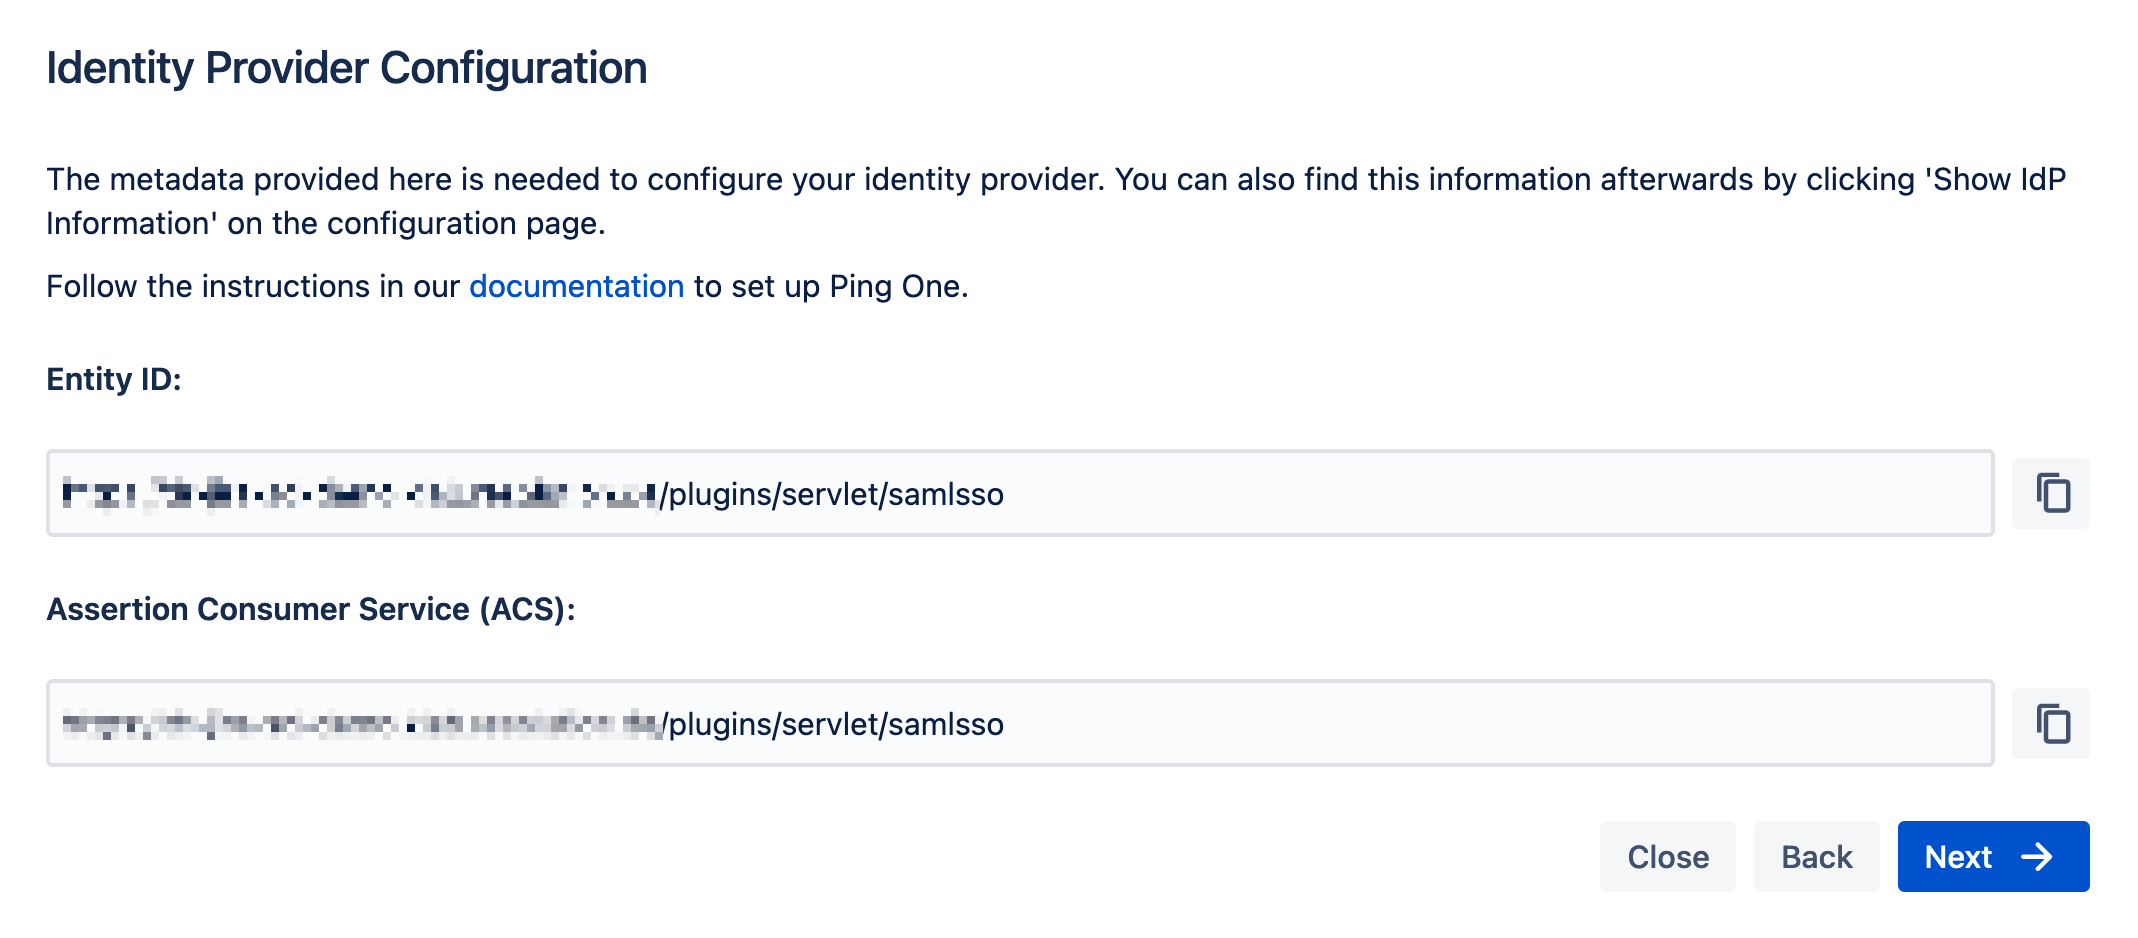
In the next step, you will configure PingOne. Please keep this tab open or copy the information.
Create and Configure a PingOne App for SAML SSO for Atlassian Data Center or Server
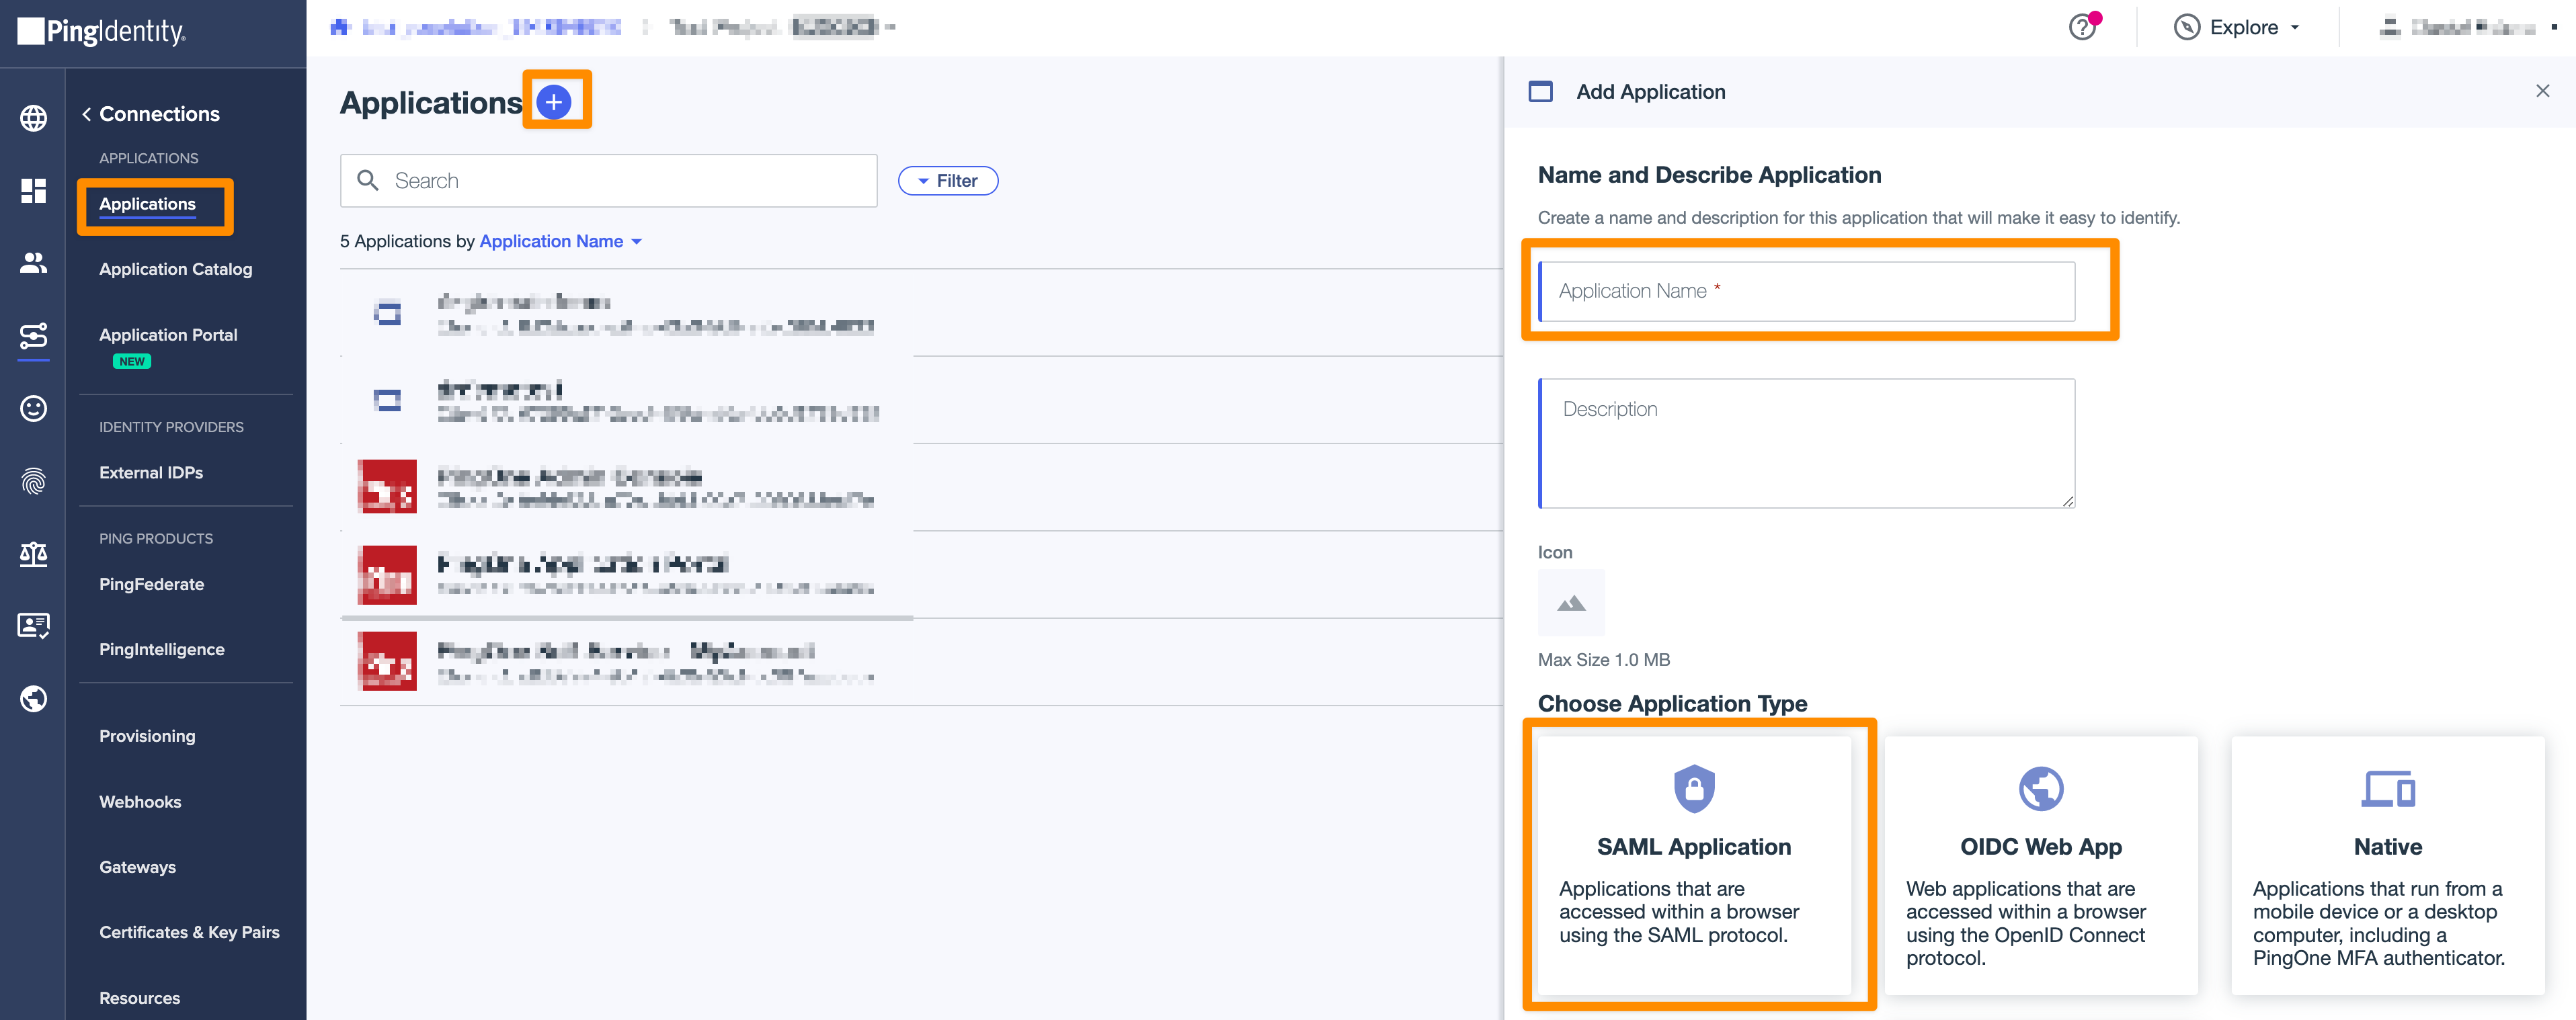
Adding an Application for the SAML SSO App
Log into the PingOne Portal as an admin. Go to Connections > Applications > Click "+" > Give it a meaningful name > Choose Application Type "SAML Application", and hit the "Configure" button.
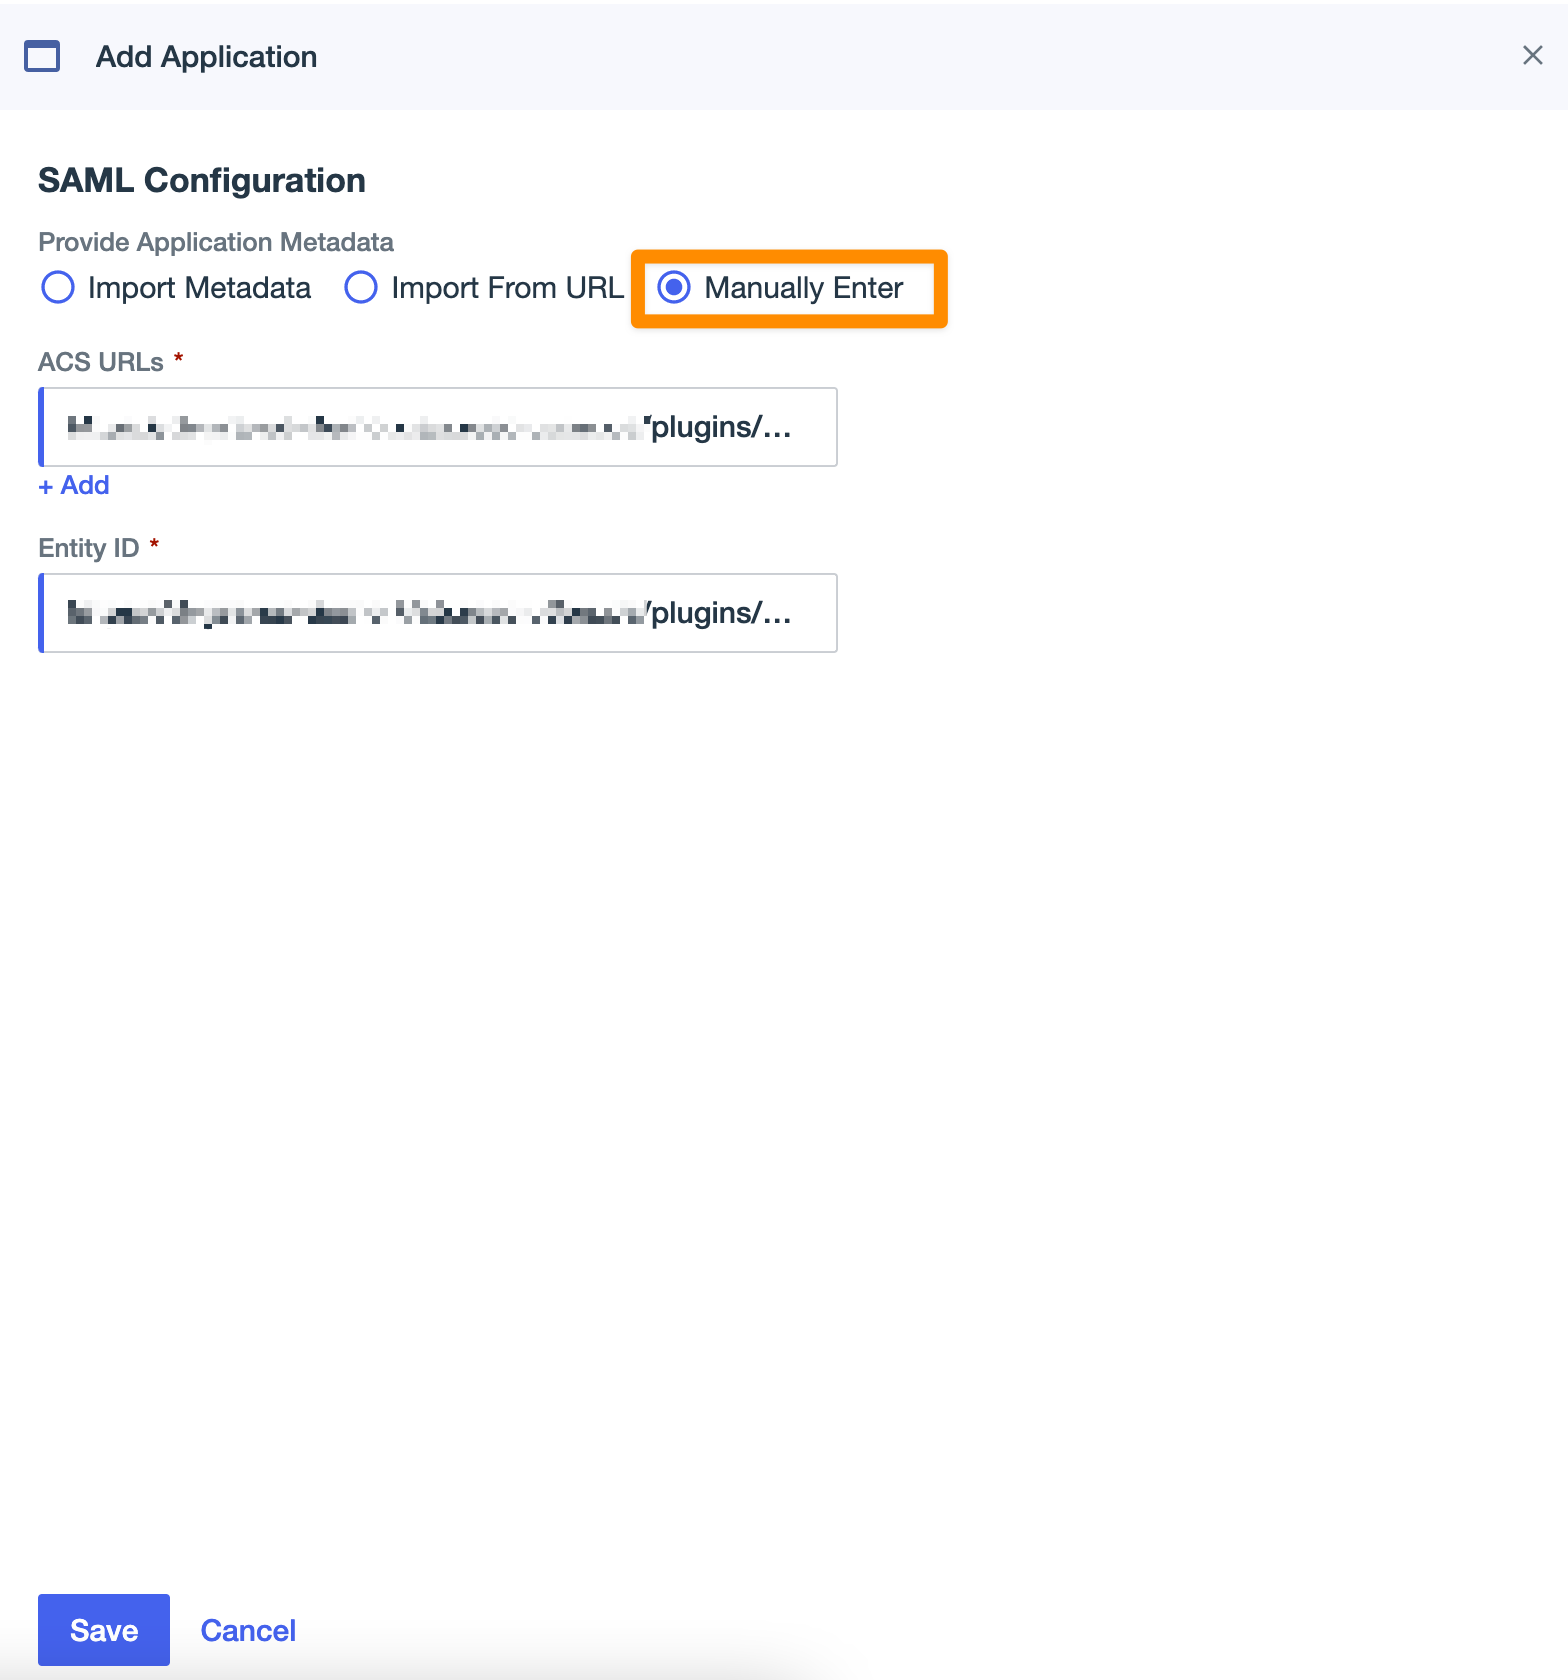
On the initial SAML Configuration tab, click Manually Enter and copy the ACS URL and Entity ID into the fields. After that, you can click Save.
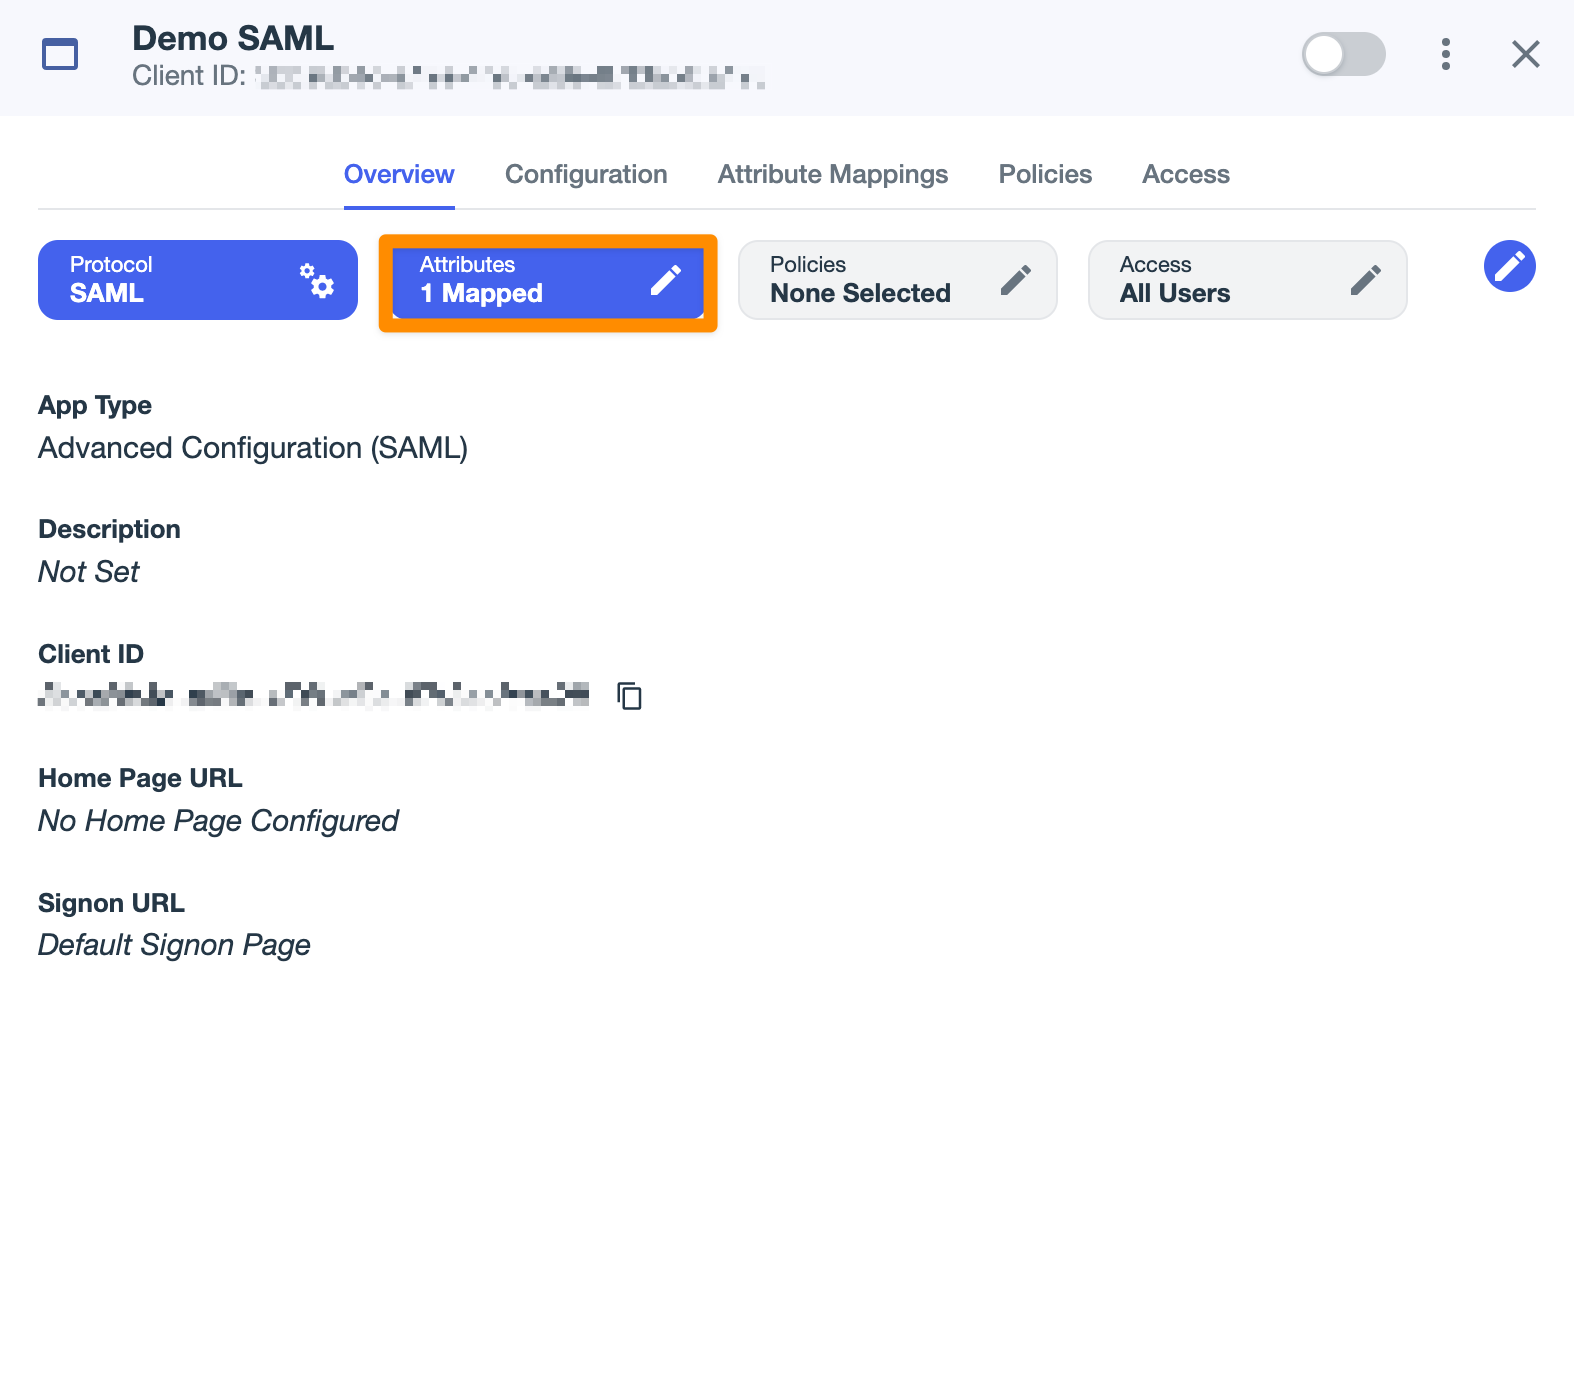
Go to the Attributes in the Overview tab and add the additional attributes you need to provision users. Atlassian requires at least a username, an email address, and a full name.
Go to Edit and click the Add button and add the following PingOne Mappings.
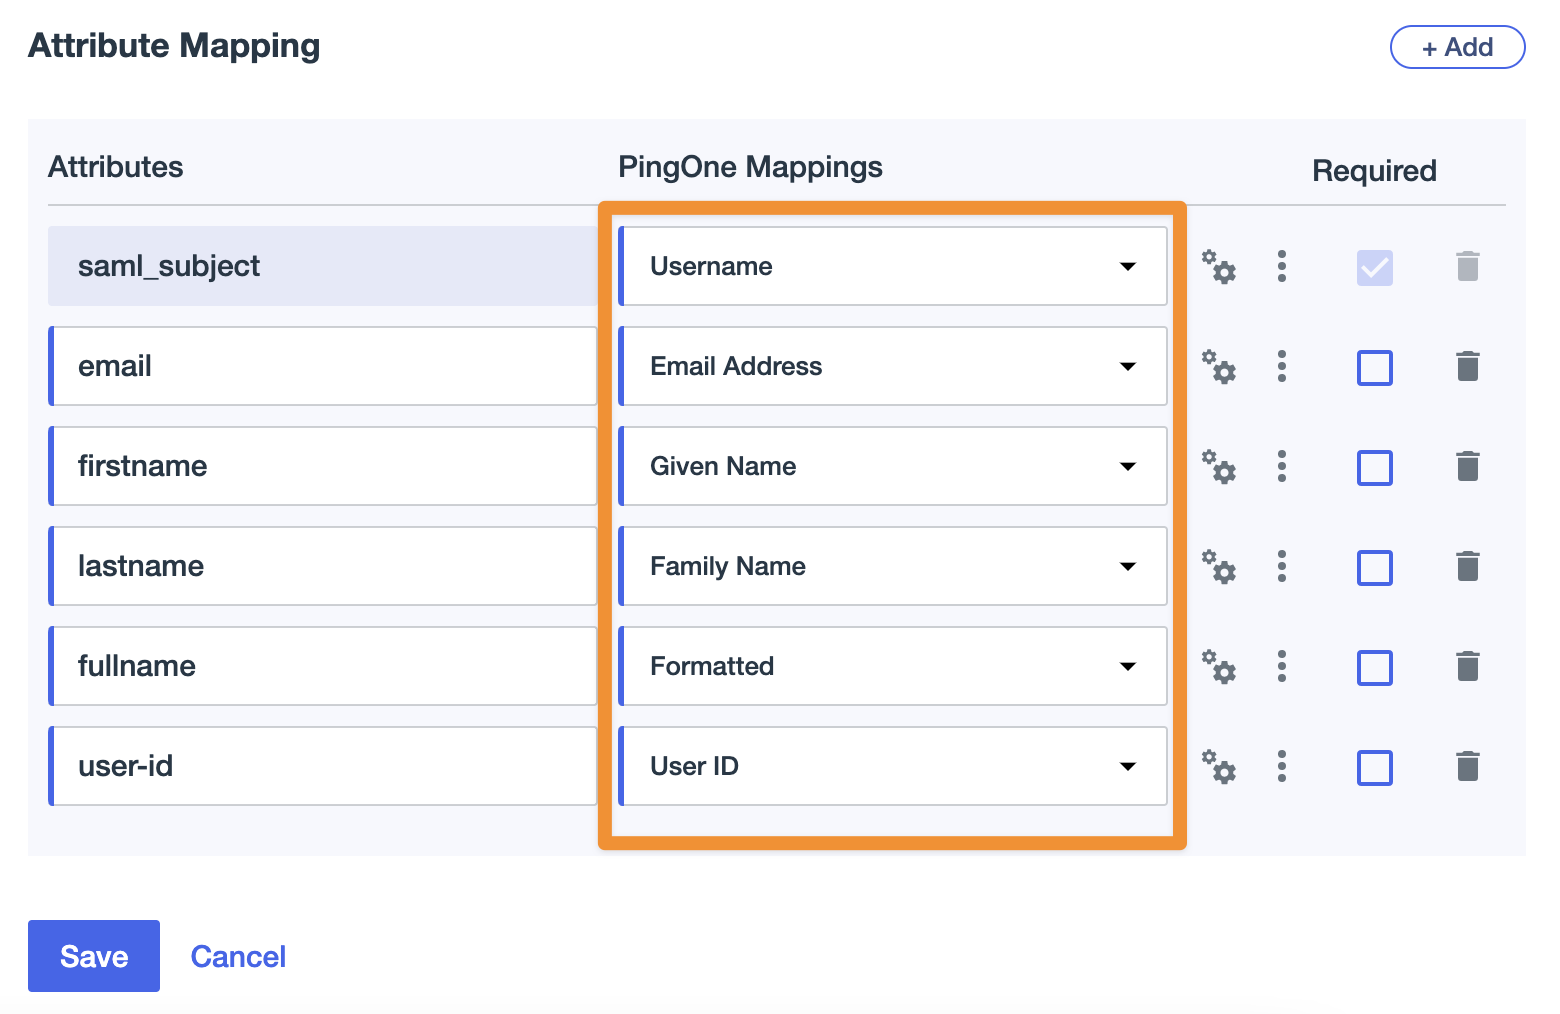
For the Attributes, you should give the same names as in the table below.
Attributes | PingOne Mappings |
|---|---|
saml_subjects | Username |
Email Address | |
firstname | Given Name |
lastname | Family Name |
fullname | Formatted |
user-id | User ID |
Please note, if you change a value, you need to also modify the SAML SSO configuration (later in this tutorial) accordingly.
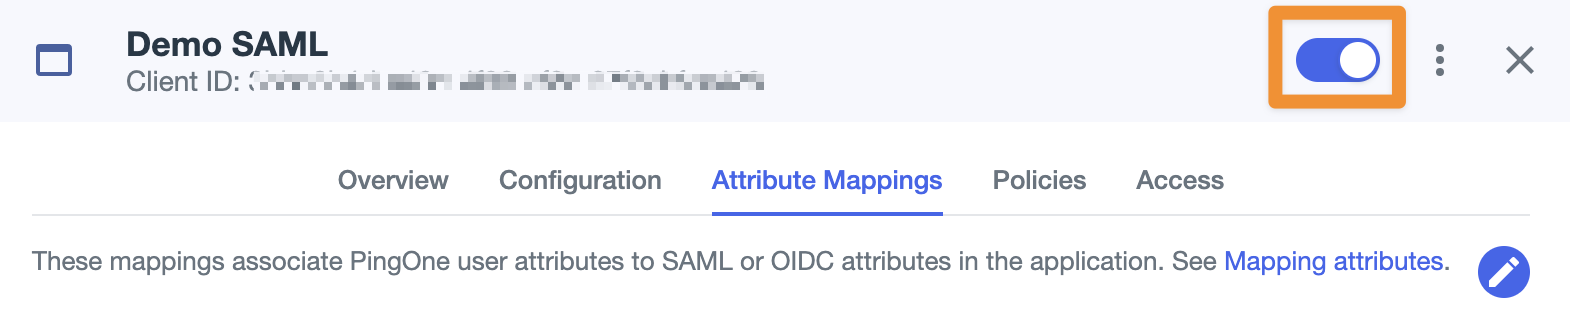
You can now enable the application.
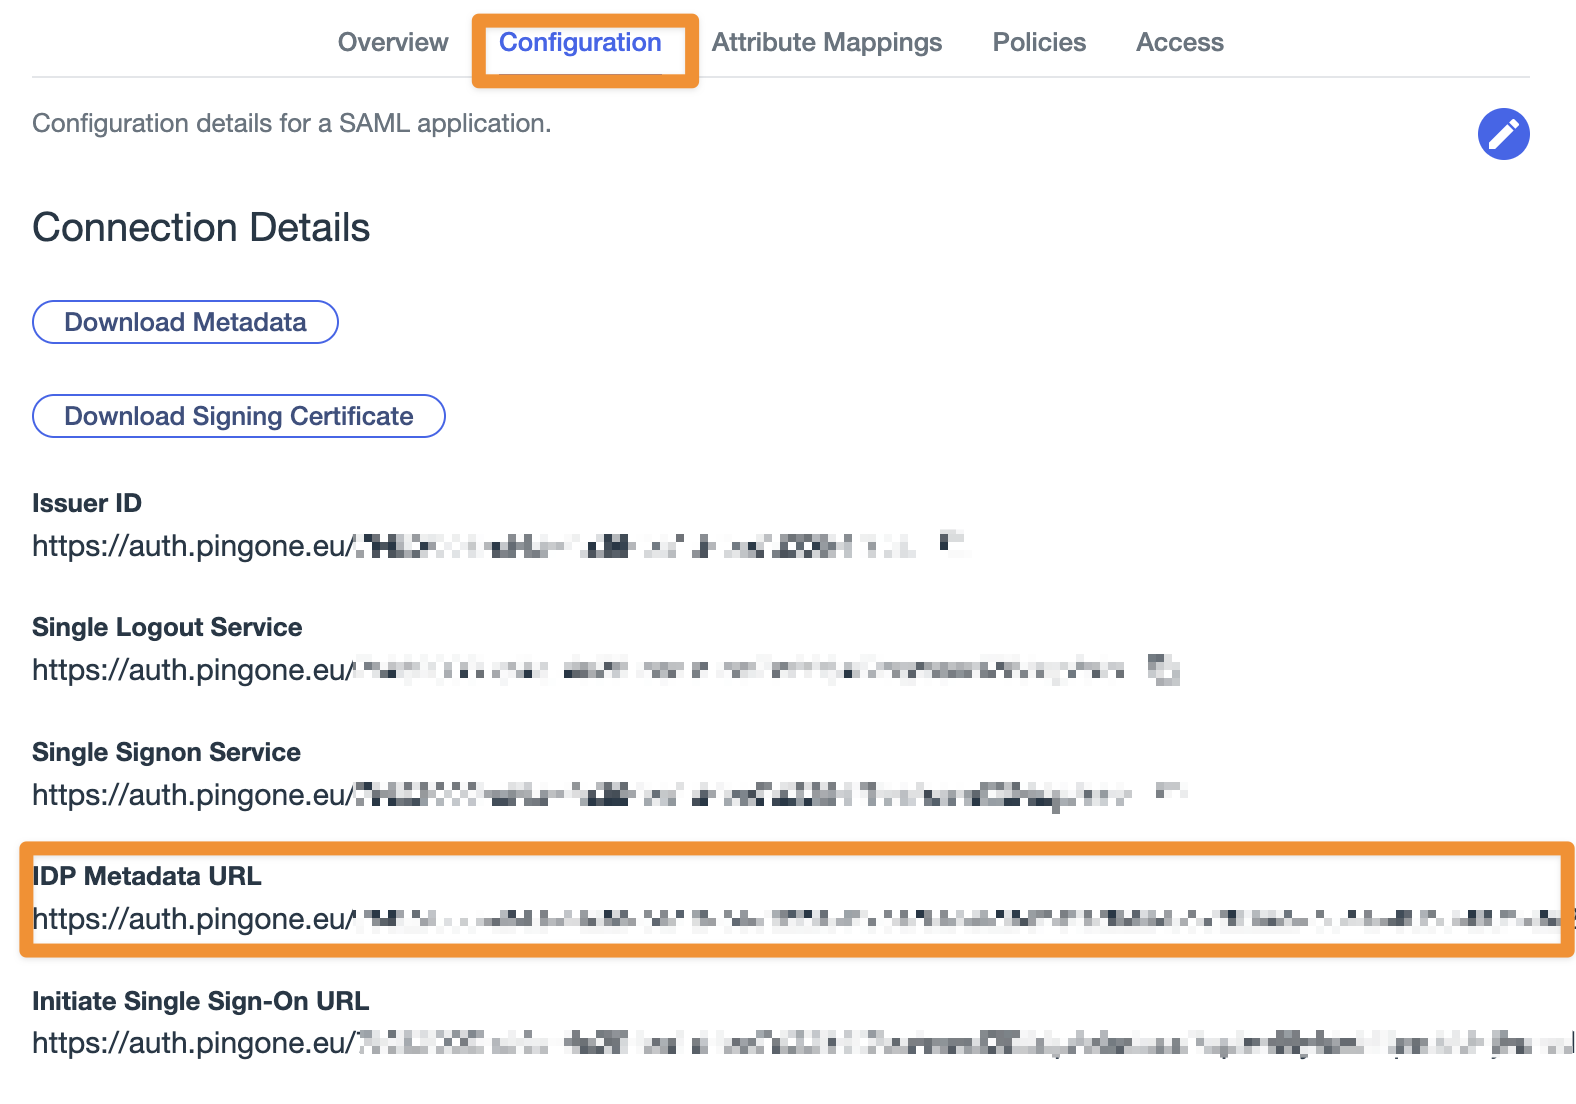
The next step is to copy the SAML Metadata. Just go to Configuration and copy the IDP Metadata URL.
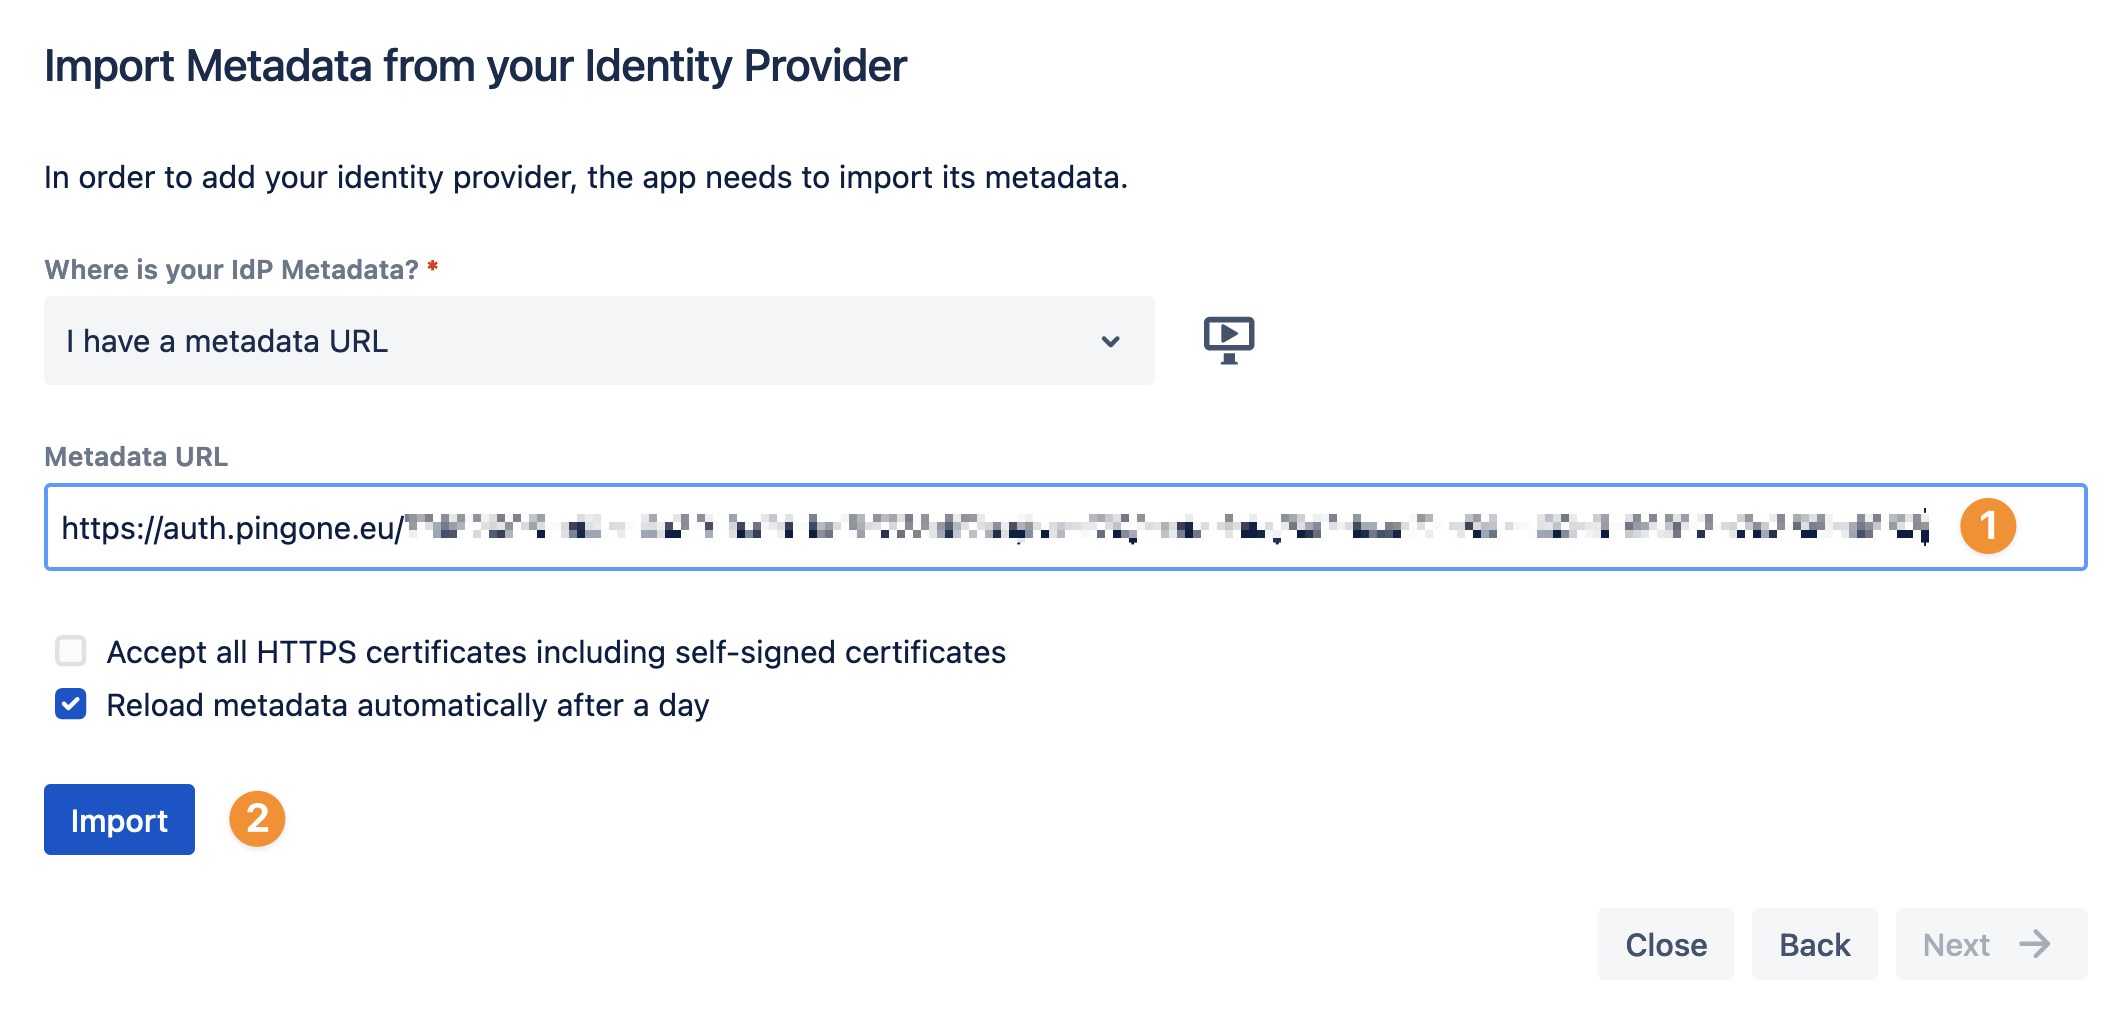
Now go back to the SAML SSO configuration, paste your Metadata URL, and click Import. After a successful import, click Next.
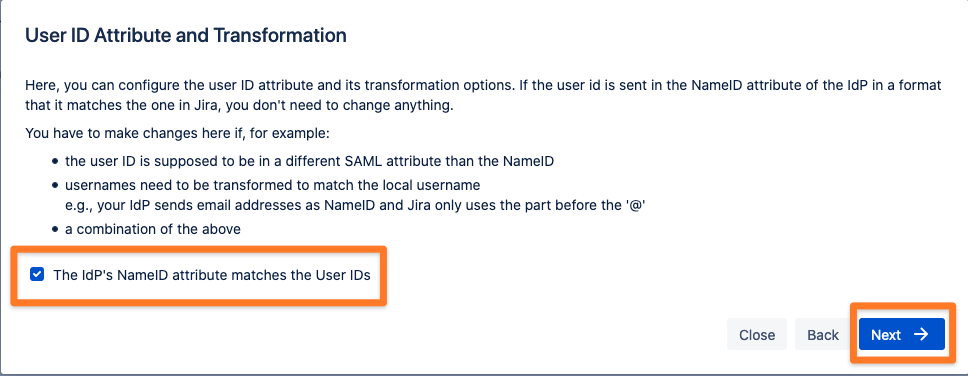
Now, you have the possibility to configure the user ID attribute and its transformation options. In our setup, the user ID is sent in the NameID attribute of the IdP in a format that matches the one in the Atlassian product, so we don’t need to change anything here.
In this tutorial, we will create and update users from SAML attributes (we call this user provisioning method Just-In-Time Provisioning). Please choose ‘Update from SAML attributes’ as the User Update Method.
Next to the User Update Method, enable the ‘Create New Users’ checkbox (based on the SAML attributes, SAML SSO will create a new user in your Atlassian instance if the user does not already exist).
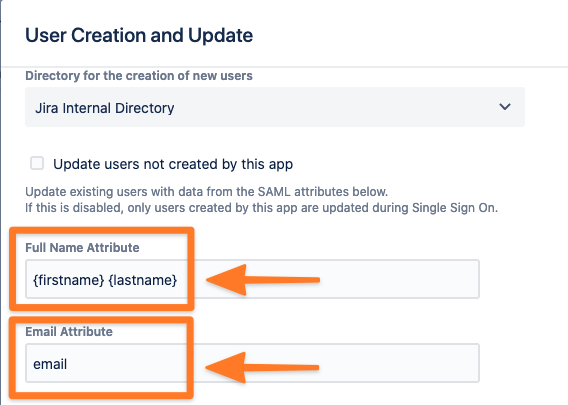
You also have to decide in which directory SAML SSO will create the new user account. In this tutorial, all new users will be created in the default Jira Internal Directory.

Then you need to configure a couple of attributes to be able to create/update the users. As a minimum, you need to add the Full Name and Email Attributes. These are already filled in based on the default PingOne Parameters configuration, but you can change them if needed according to the values of your PingOne Parameters configuration (you need to combine the firstname and the lastname to get the Full Name Attribute).
Our plugin can also take care of group management. In this tutorial, we will always assign any newly created user to the group ‘jira-users’. This will give the user application access to the Atlassian Jira instance.
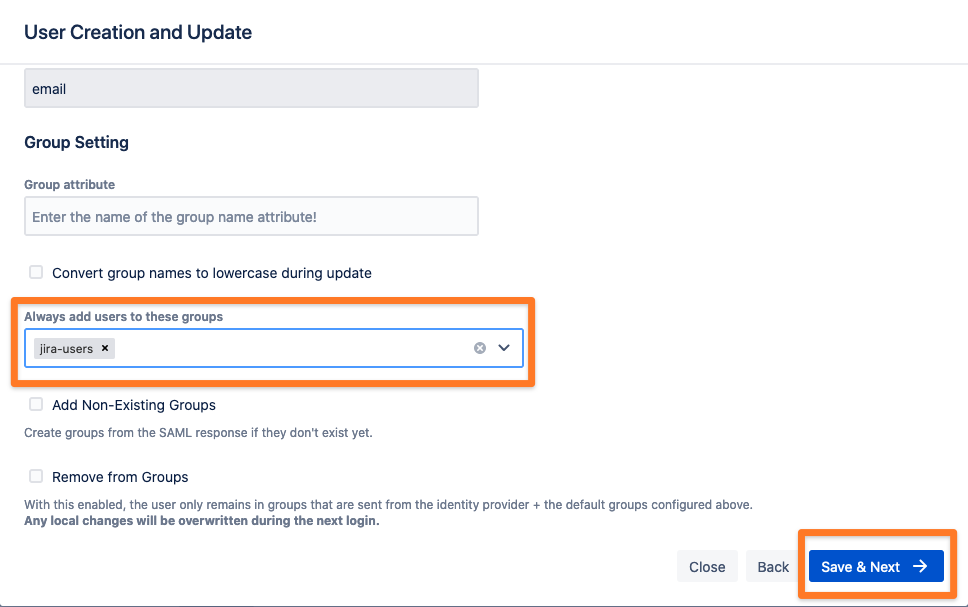
Now, you can save the configuration by clicking on the ‘Save & Next’ button.
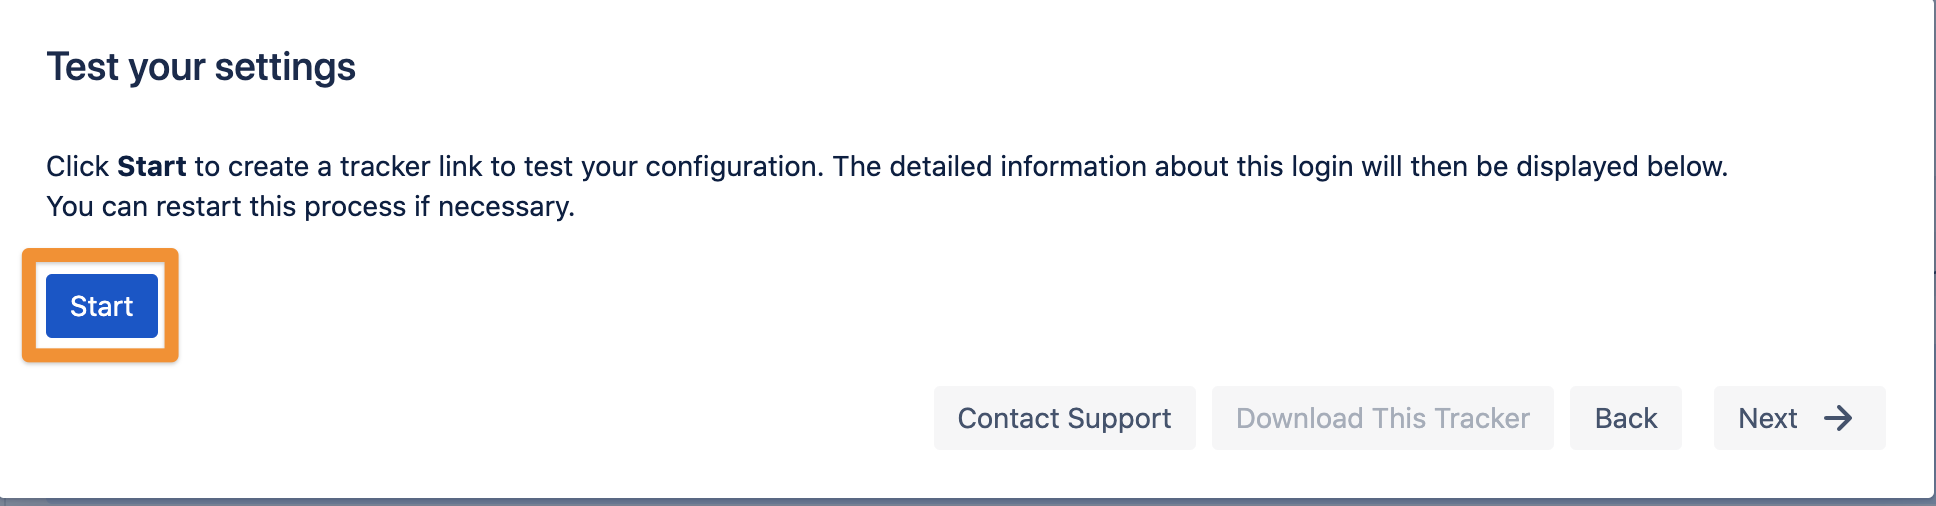
Test
It’s time to test your settings. Our plugin will create a tracker link to test your configuration. Please click ‘Start’ and follow the instructions.
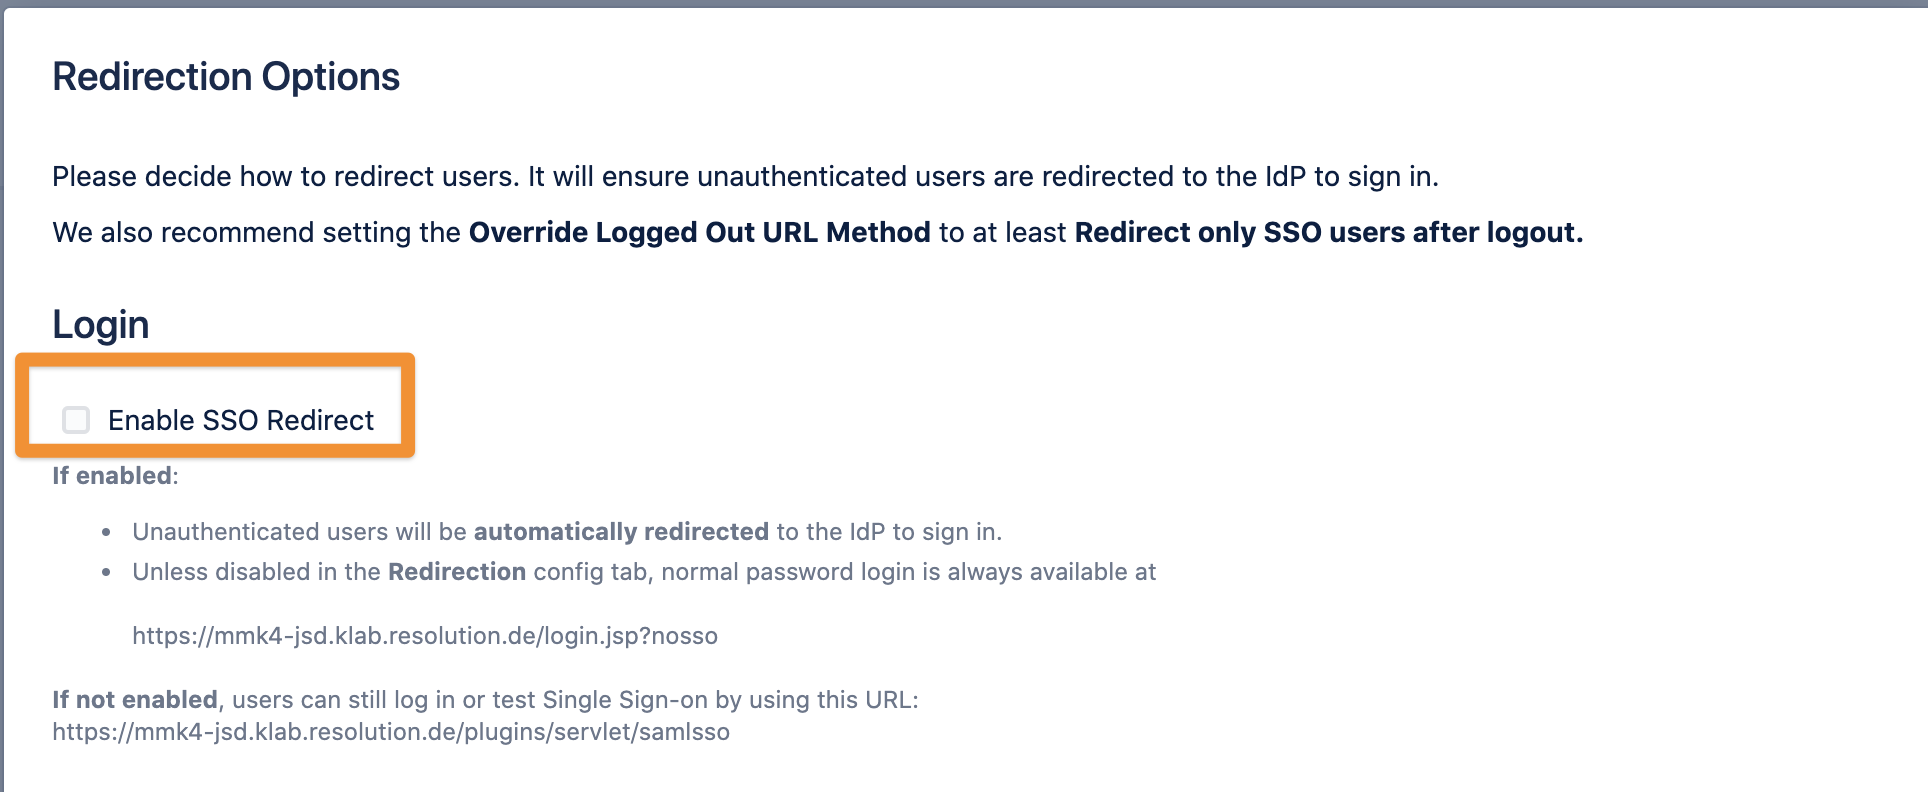
After a successful test, you can enable the ‘Enable SSO Redirect’ checkbox. From now on, every unauthenticated user will be automatically redirected to PingOne to sign in.