
Email Settings and Notification Templates
The Service Desk App sends notification emails to keep customers informed about ticket activity, like when a ticket is created, updated, or closed. These emails are one-way notifications only.
The app does not support creating or replying to tickets via email. All ticket communication happens exclusively through the Service Portal. Customers are notified by email, but they respond and interact via the portal interface.
This article explains how to configure your email account, customize email templates, and understand how these settings influence the notifications your customers receive.
Default Email Account
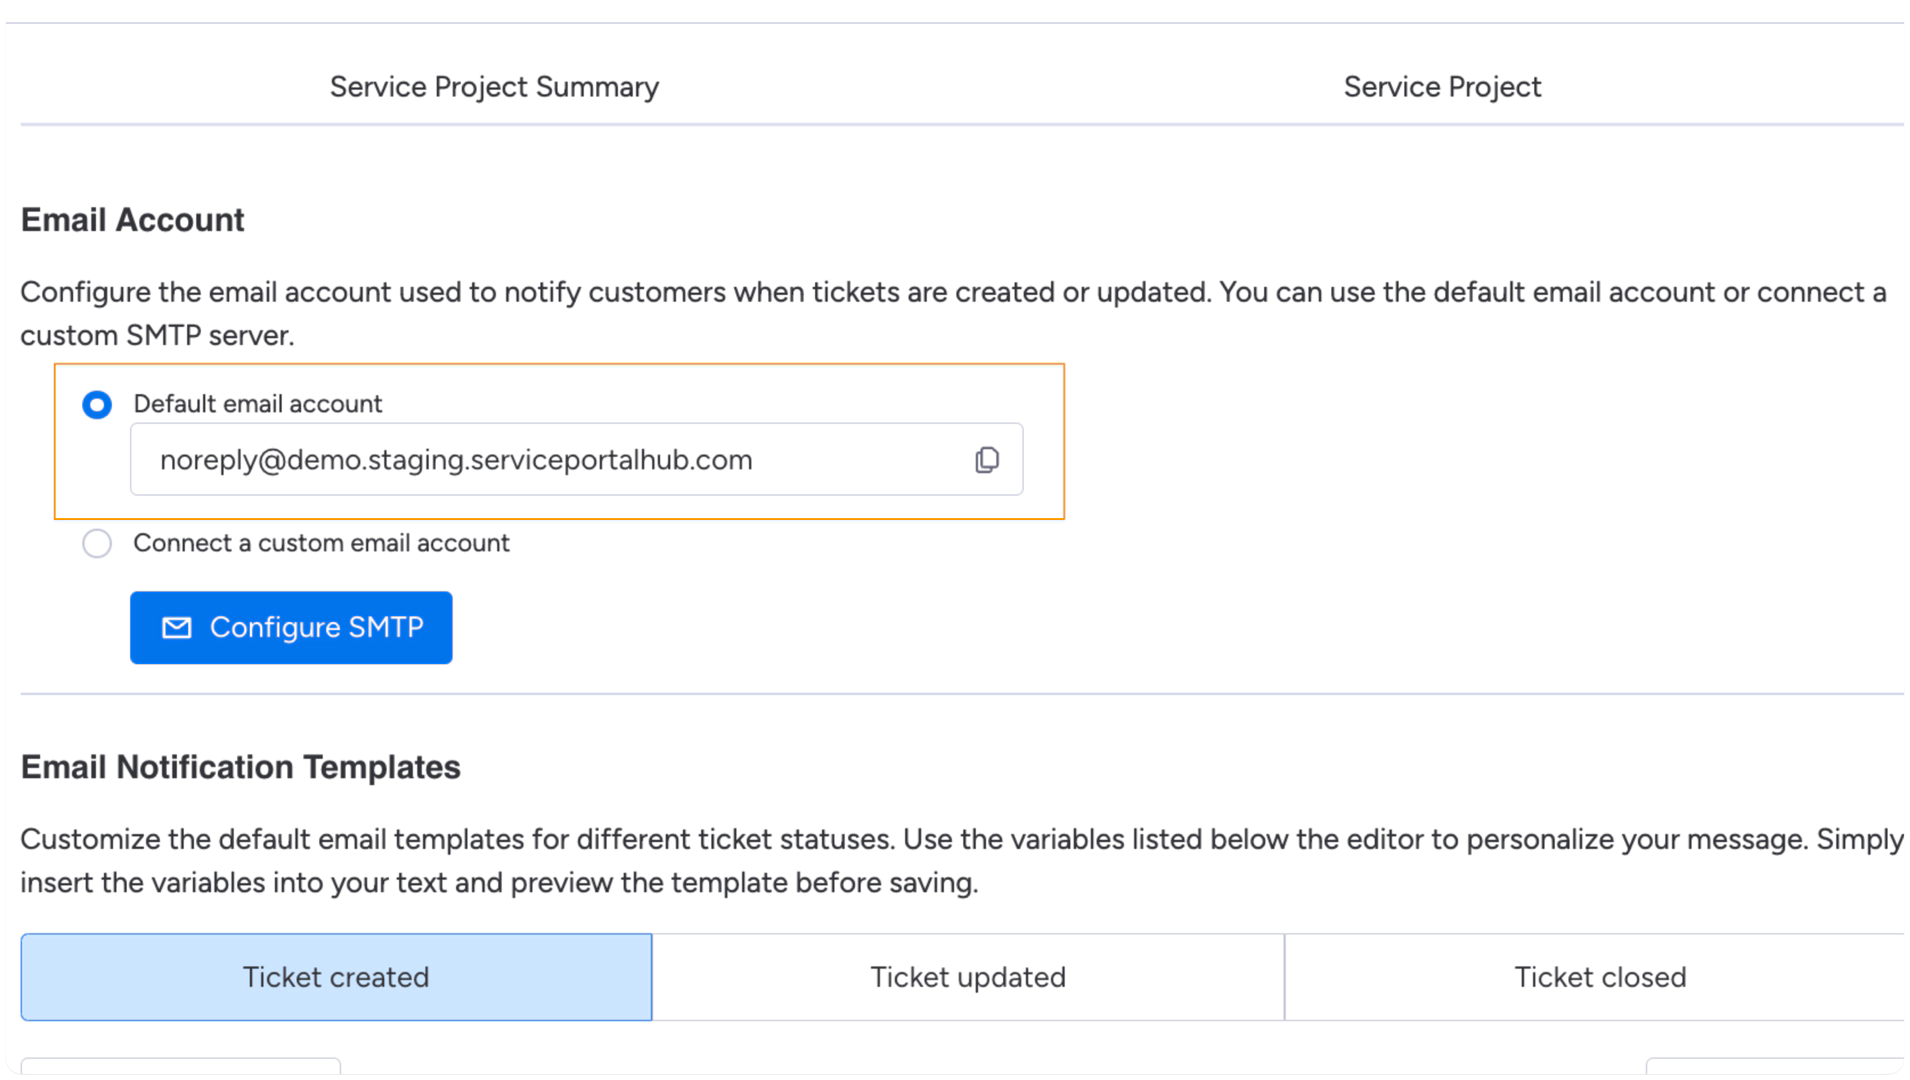
When you install the app and set a subdomain (e.g. demo.serviceportalhub.com), a default email account is automatically created. This account uses the format:
noreply@<your-subdomain>.serviceportalhub.com
This default address is used to send all customer notifications, like ticket updates and registration confirmations.
Using a Custom Email (SMTP)
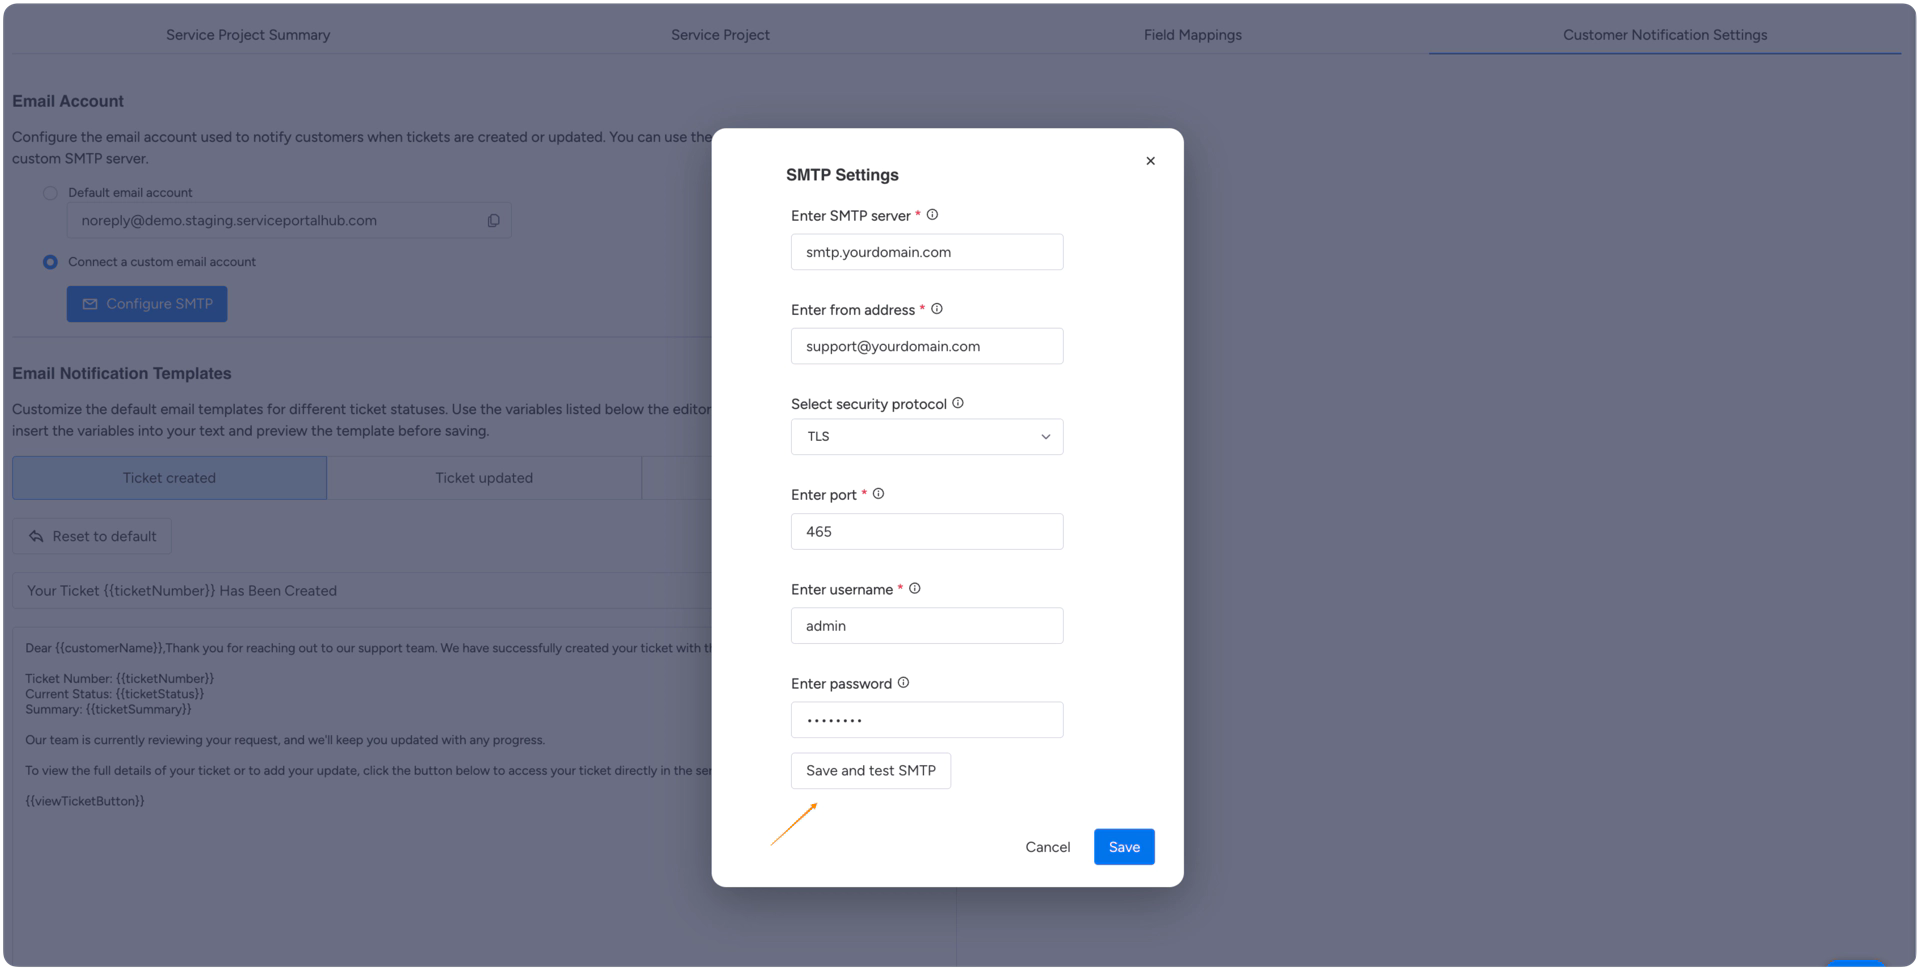
If you want to send emails from your own domain, you can connect a custom SMTP server. Click Configure SMTP, then fill in the required fields:
SMTP server
Address of your outgoing mail server (e.g. smtp.yourdomain.com)
From address
The email address that will appear in your sent messages (e.g. support@yourdomain.com)
Security protocol
Choose between TLS or SSL. This depends on how your mail server is configured.
Port number
Usually 465 for SSL or 587 for TLS. Check with your mail provider if unsure.
Username
Your mail account username, often the same as the from address.
Password
The password for the mail account. Make sure it’s up to date.
Once you’ve filled out all fields, click Save and test. The system will try to send a test email.
If successful, you’ll see a small confirmation text that the last test for this account was successful.
Email Notification Templates
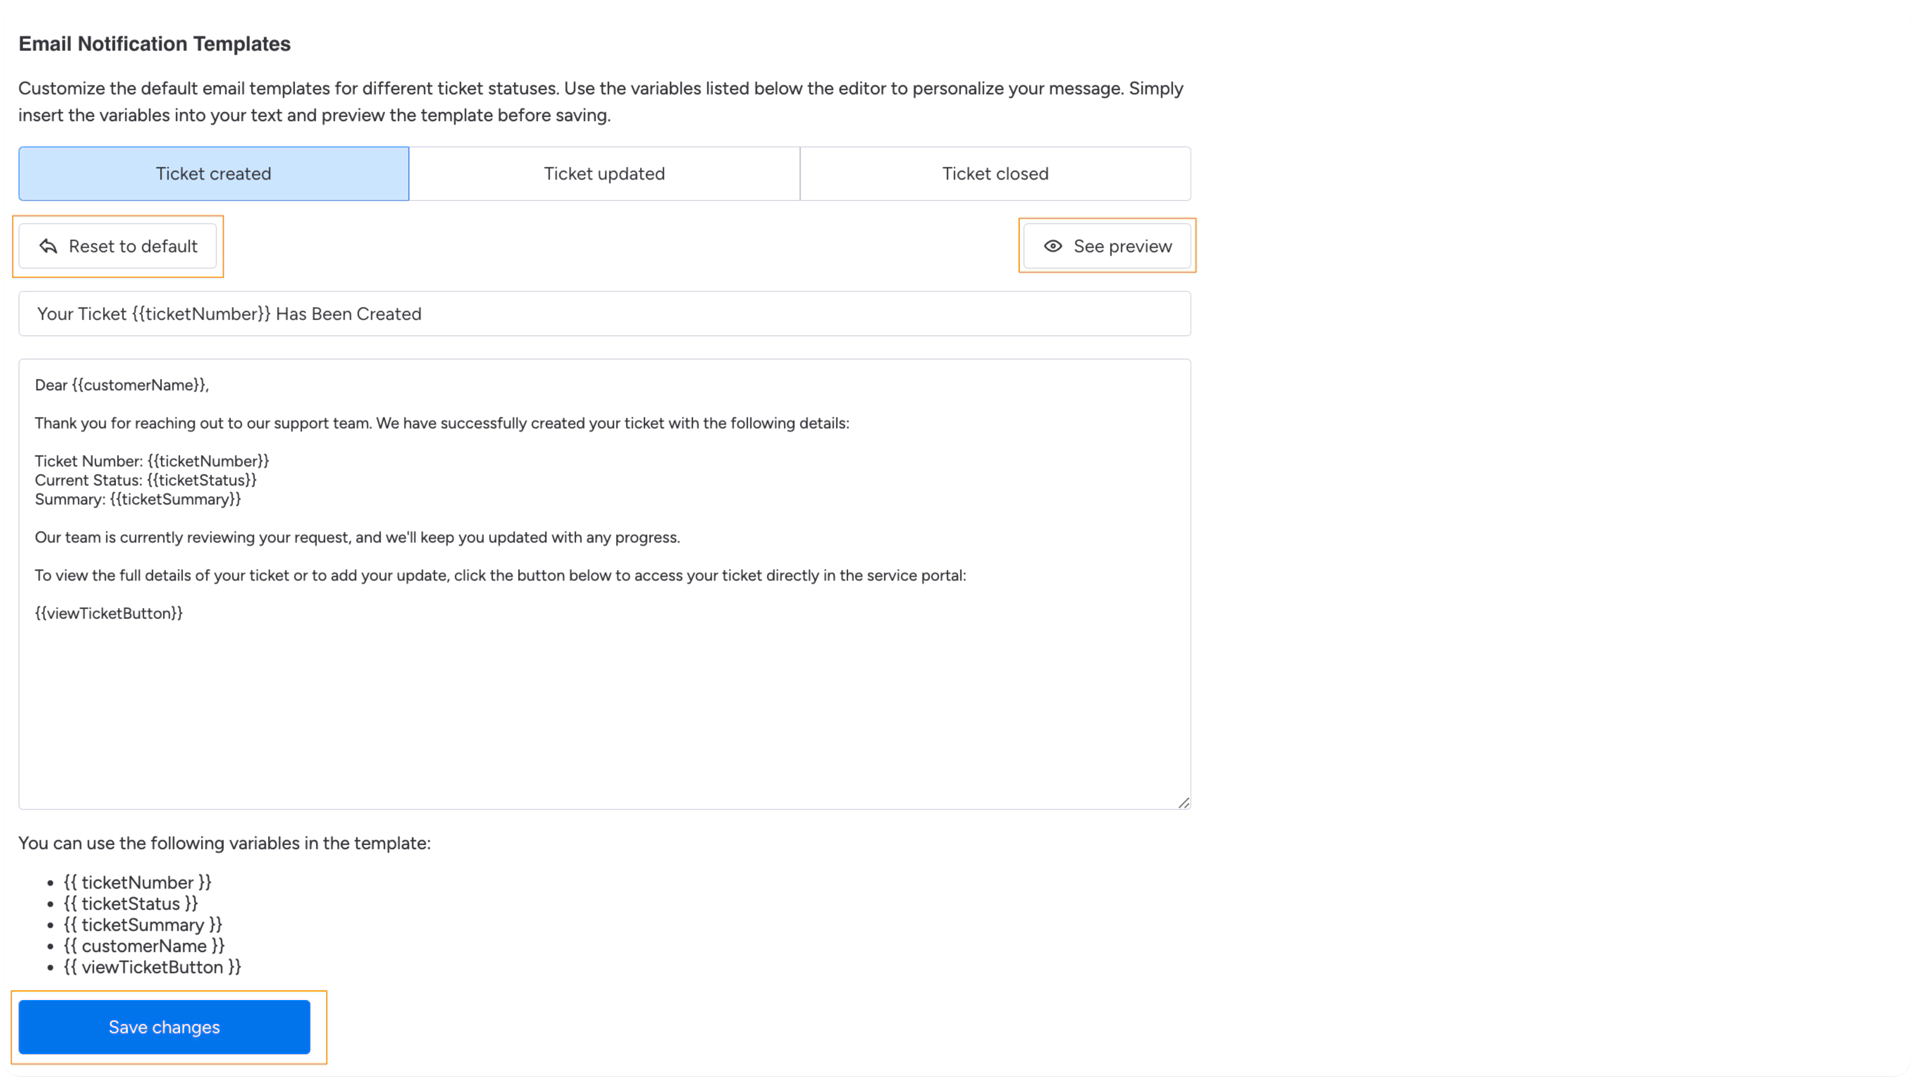
You can customize the email templates for the following events:
Ticket created
Ticket updated
Ticket closed
Each comes with a prefilled default message. You can change the subject line and the content. To personalize the messages, use dynamic variables like:
- {{ticketNumber}}
- {{ticketStatus}}
- {{ticketSummary}}
- {{customerName}}
- {{viewTicketButton}}
If you make changes and want to undo them, click Reset to default.
Use the Preview button to check how the email will look to the customer.
And don’t forget to click Save changes when you're done editing.
Example: How the Ticket created Email Looks
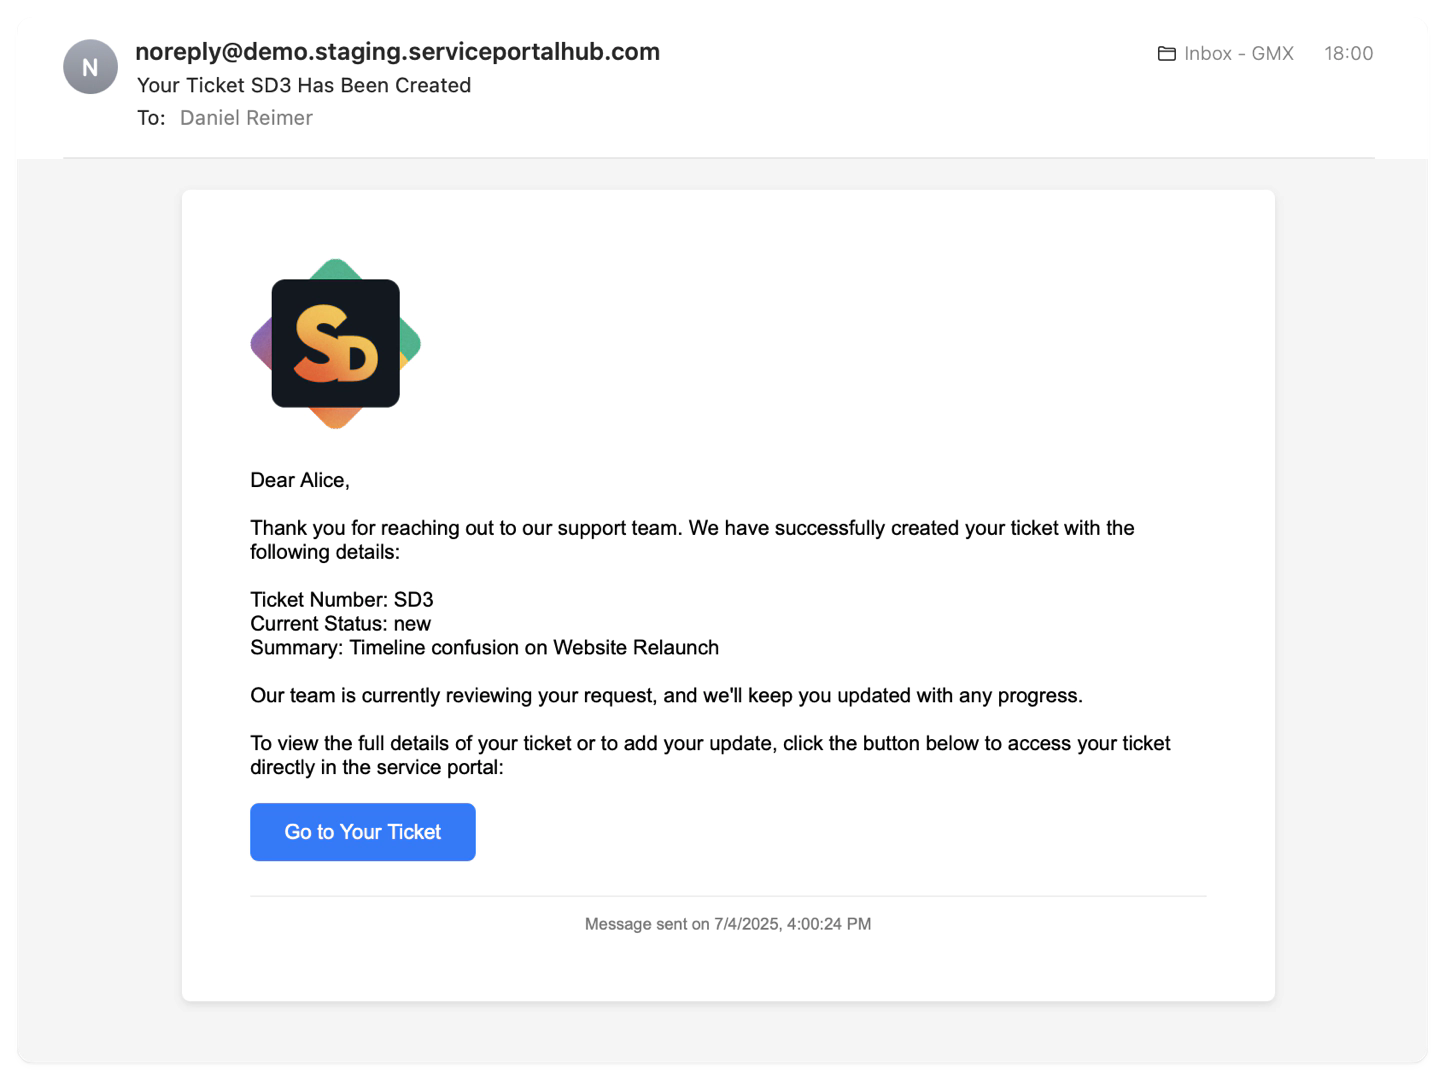
This is the email your customer receives when a new ticket is created.
At the top: the sender address. It’s based on the subdomain you configured earlier in the Email Account section (e.g. noreply@yourdomain.serviceportalhub.com).
The logo comes from your Appearance Settings. It’s shown in the portal and reused here as well.
The content of the email is defined in the Ticket Created template from the Notification Templates section. It includes variables like:
{{ticketNumber}}{{ticketStatus}}{{ticketSummary}}
They’re pulled directly from your board, so no manual input is required.
The blue button ({{viewTicketButton}}) links the customer straight to the service portal and the created ticket.