
Configuring the Connector App
This guide will help you create the connection from your Jira instance to your Umano workspace.
This should be performed simultaneously with the configuration of the Umano workspace.
Requirements
The Umano Connector App for Jira Data Center installed in your Jira instance.
A Umano workspace with admin access to it.
Configure the Umano Connector App
Make sure you're logged in to Jira Software as an Administrator.
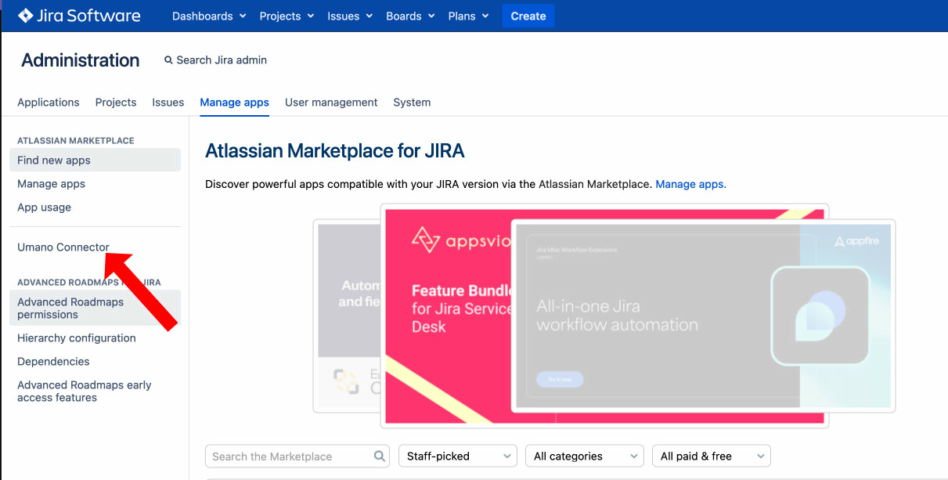
Go to Settings > Applications > Manage apps > Umano Connector.
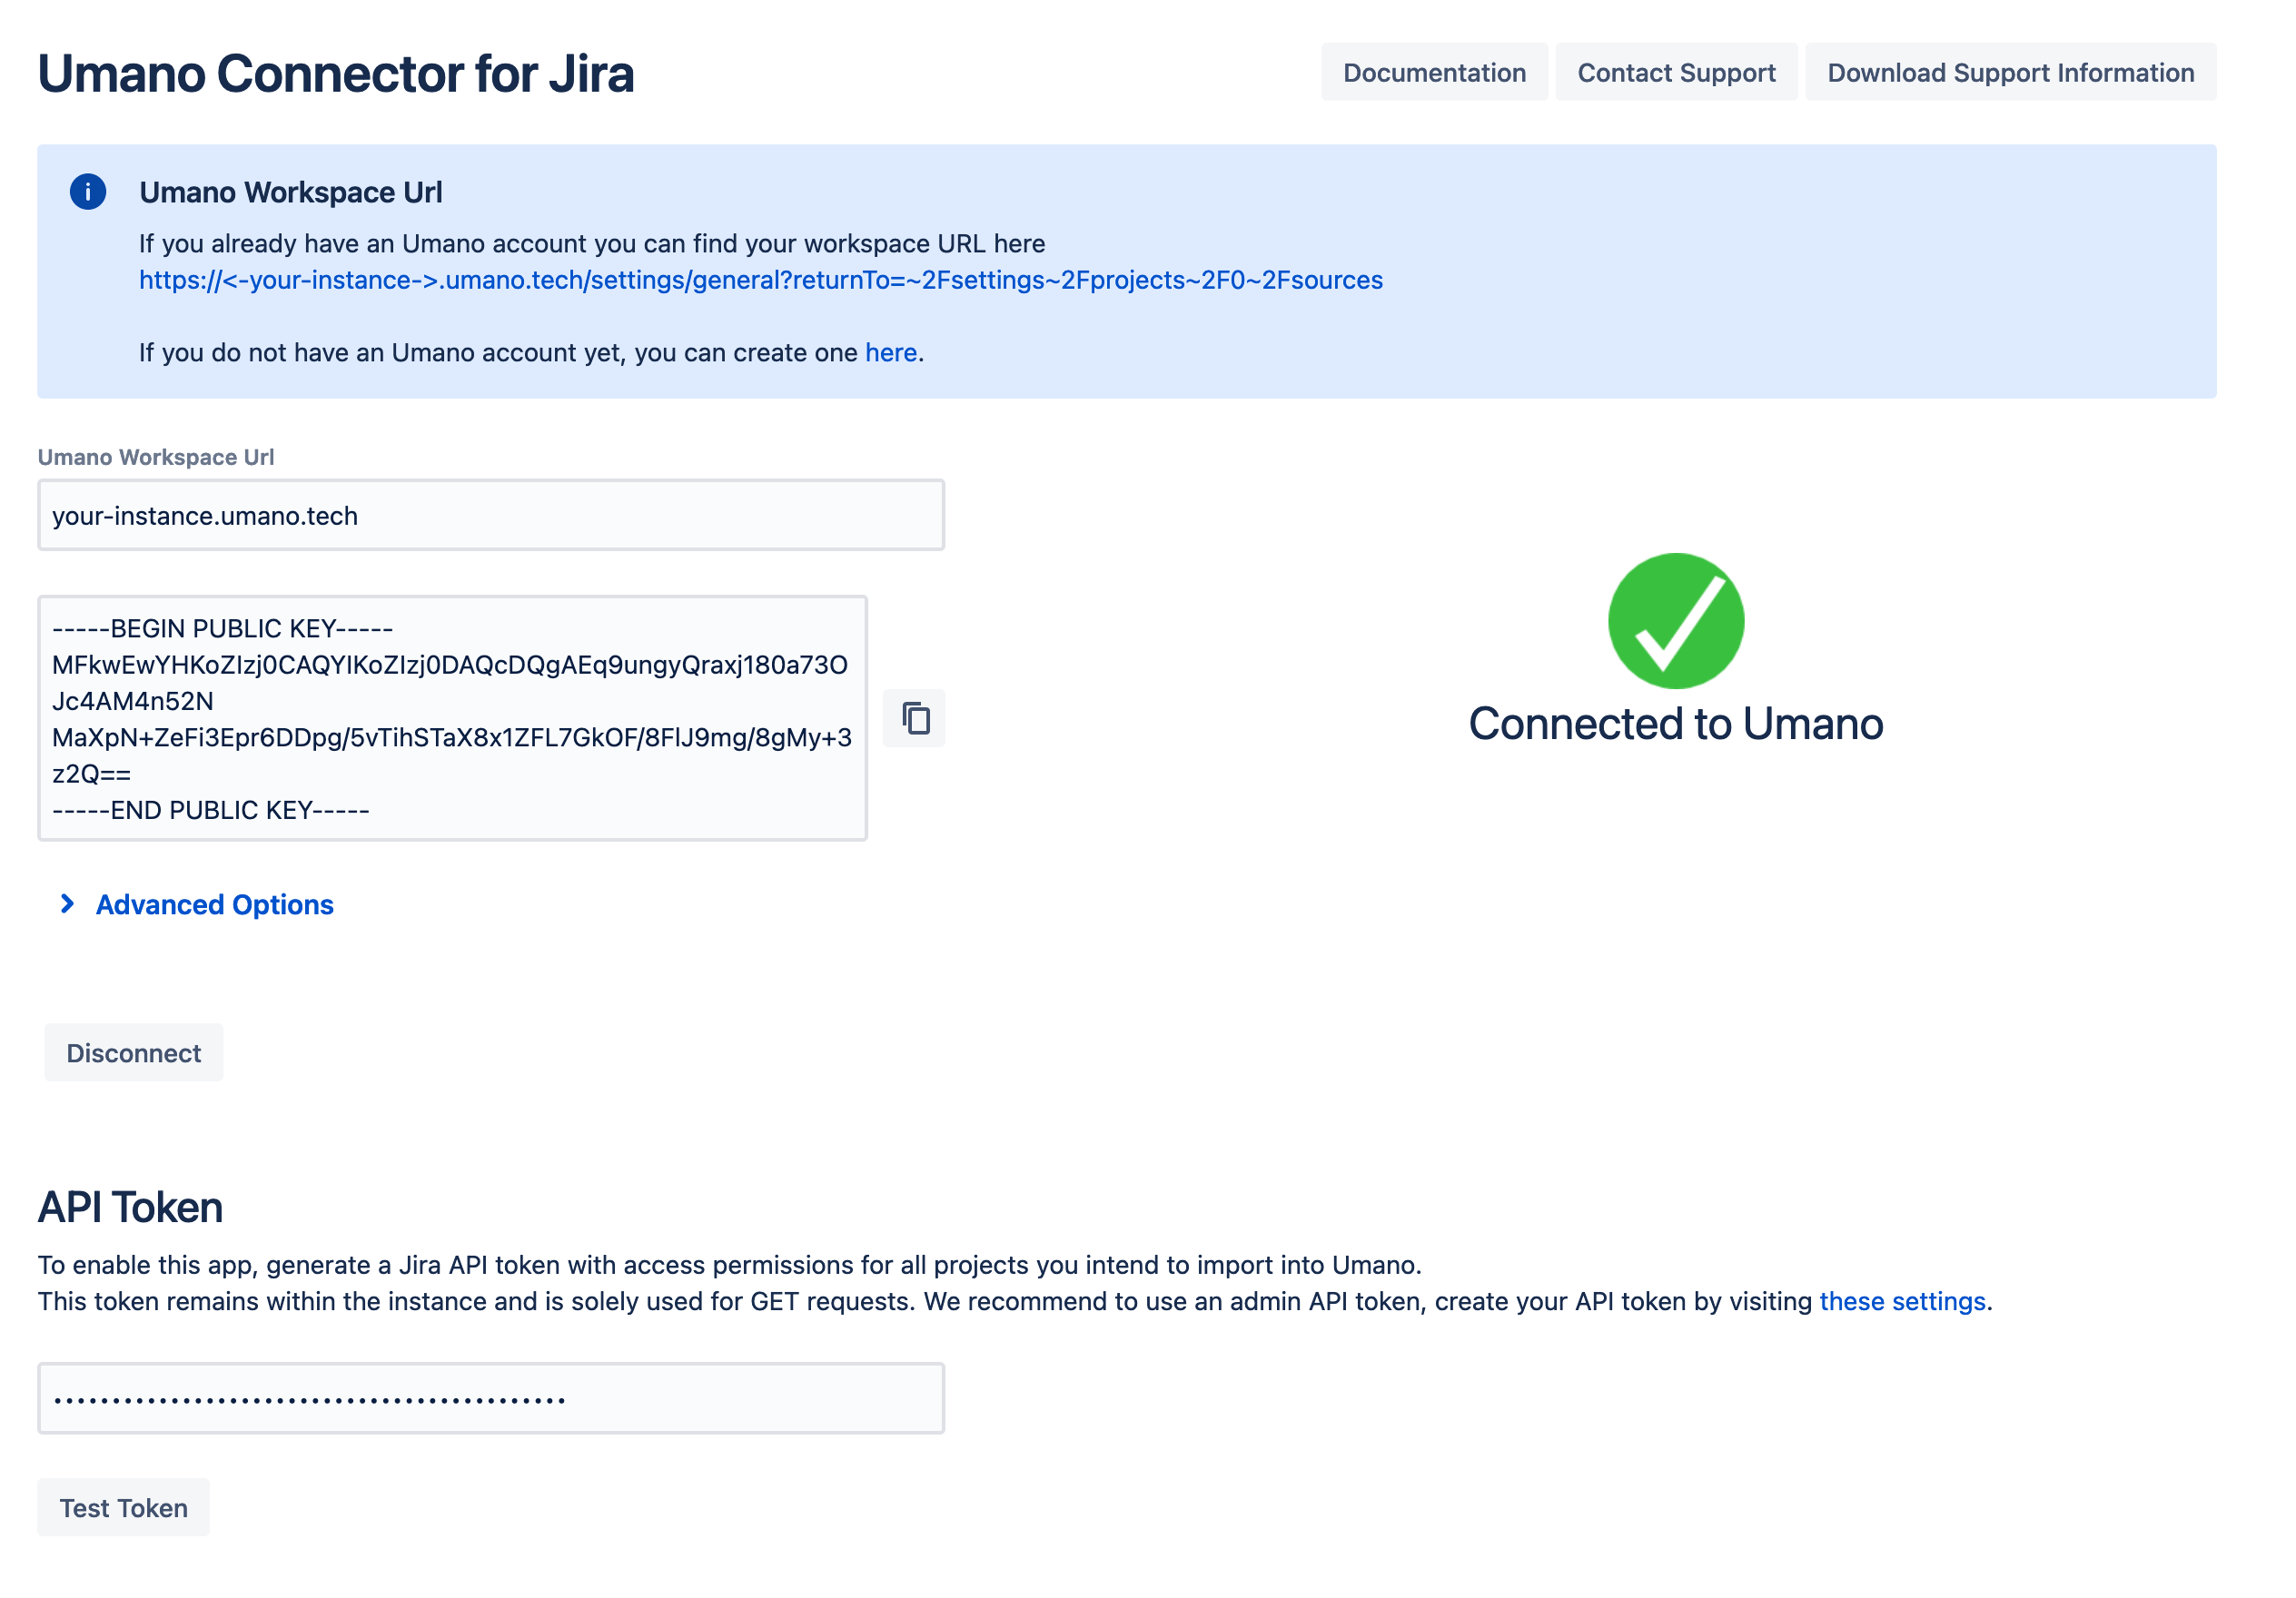
Enter your Umano workspace URL (1) (eg. <your-instance>.umano.tech)
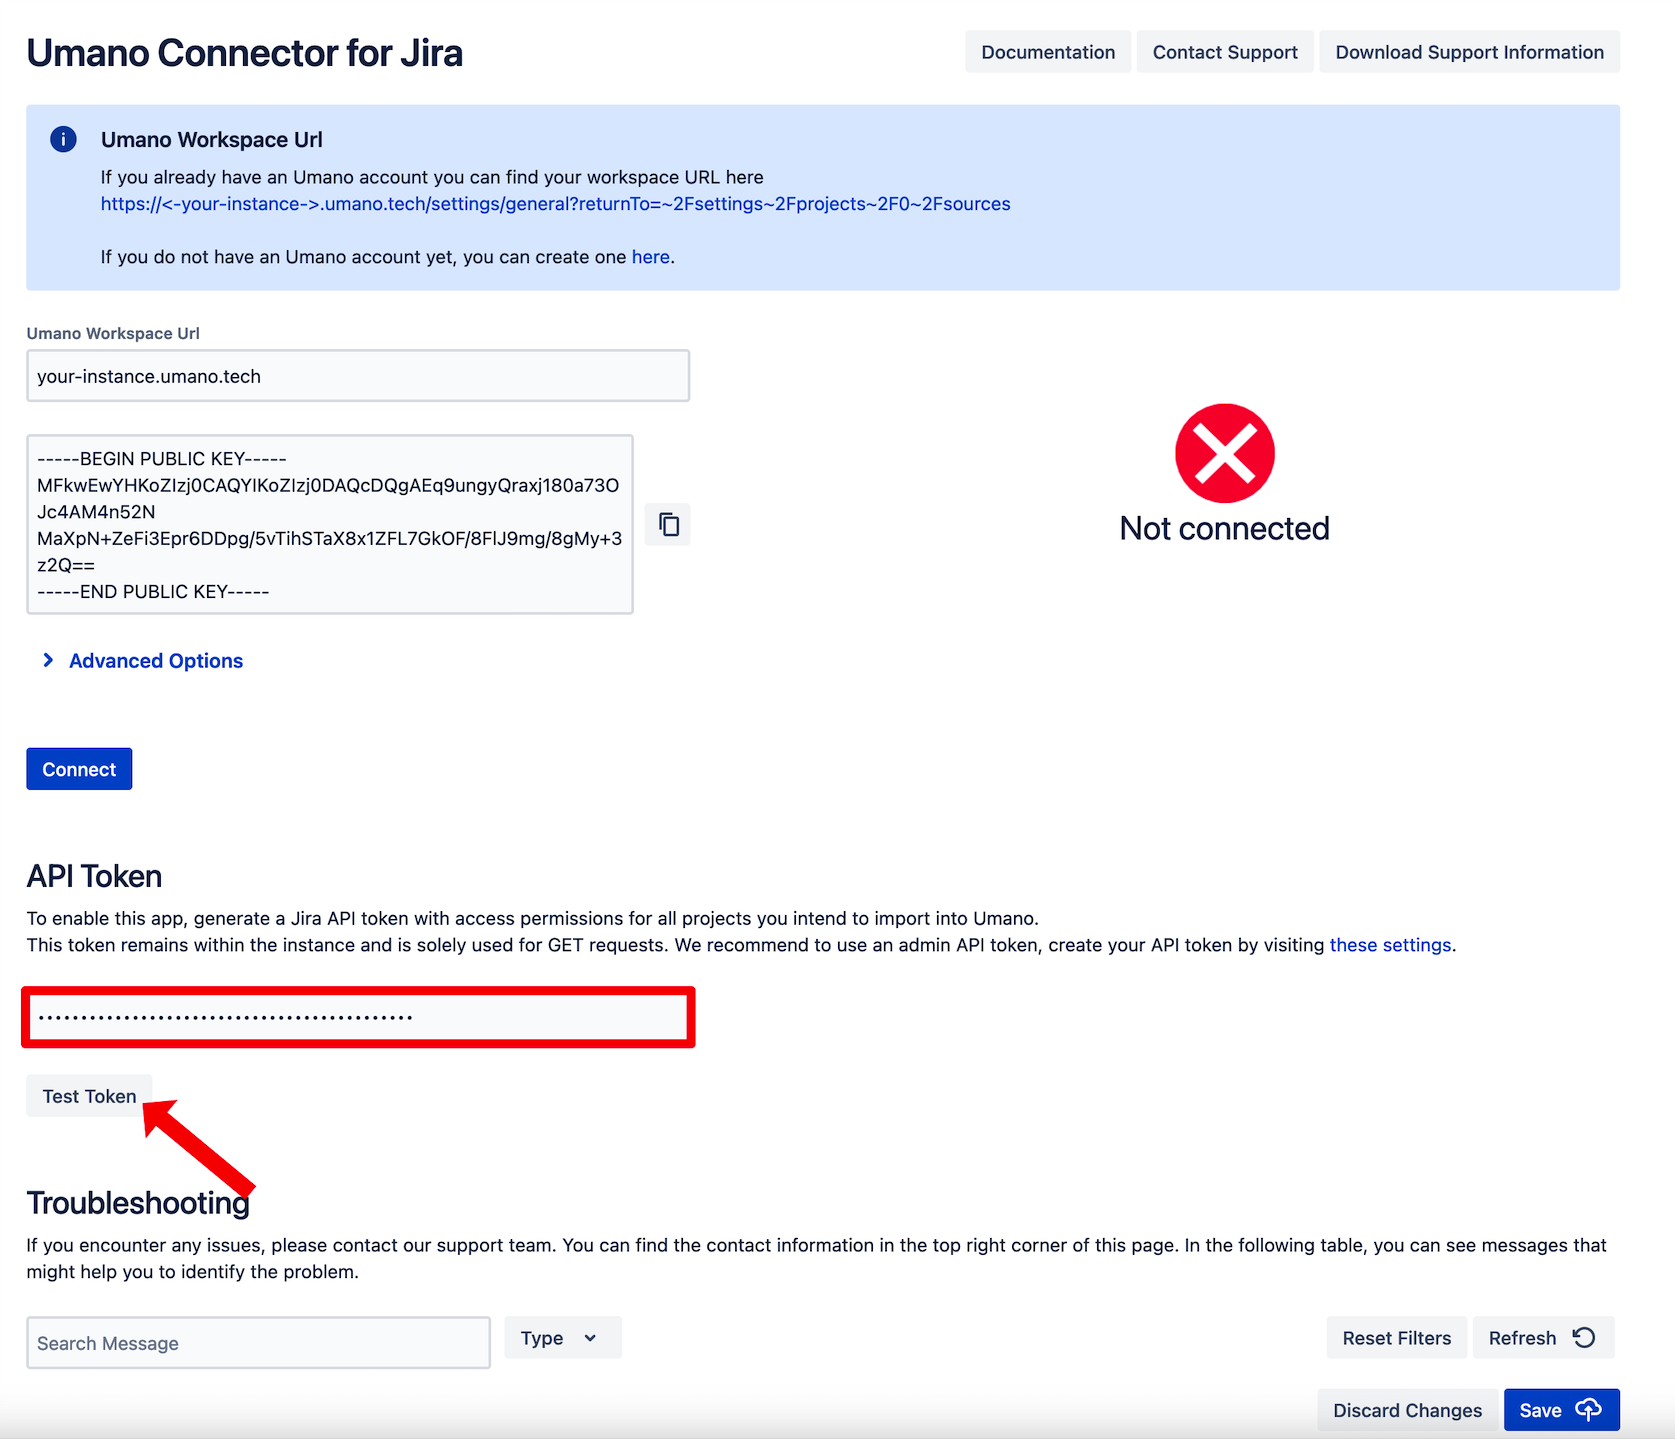
We need to provide a Jira API Token (2). If you don't have an API token yet, click the link at "these settings".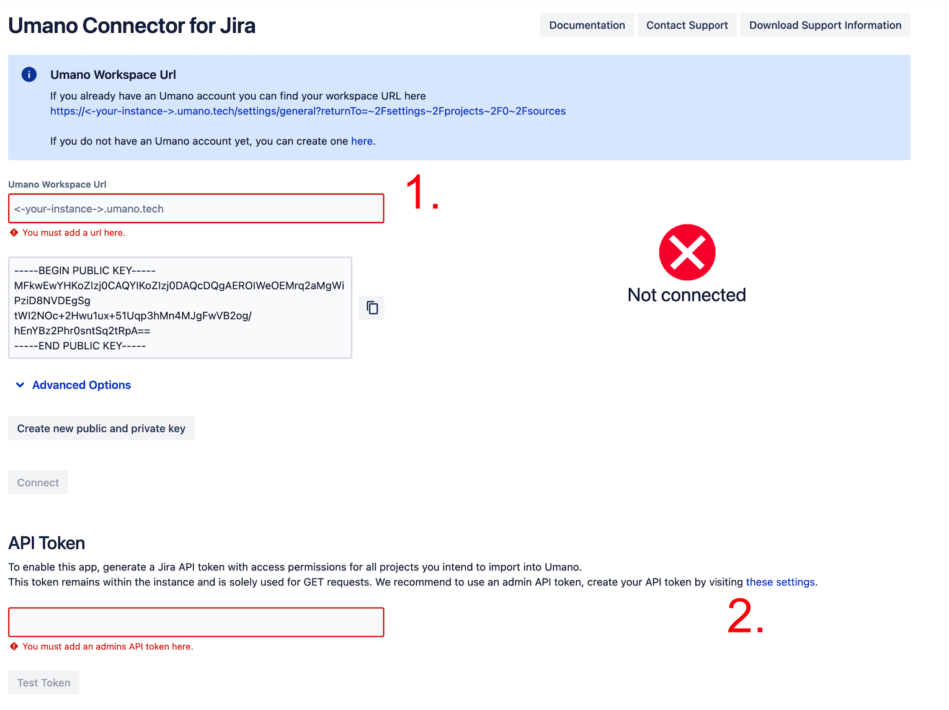
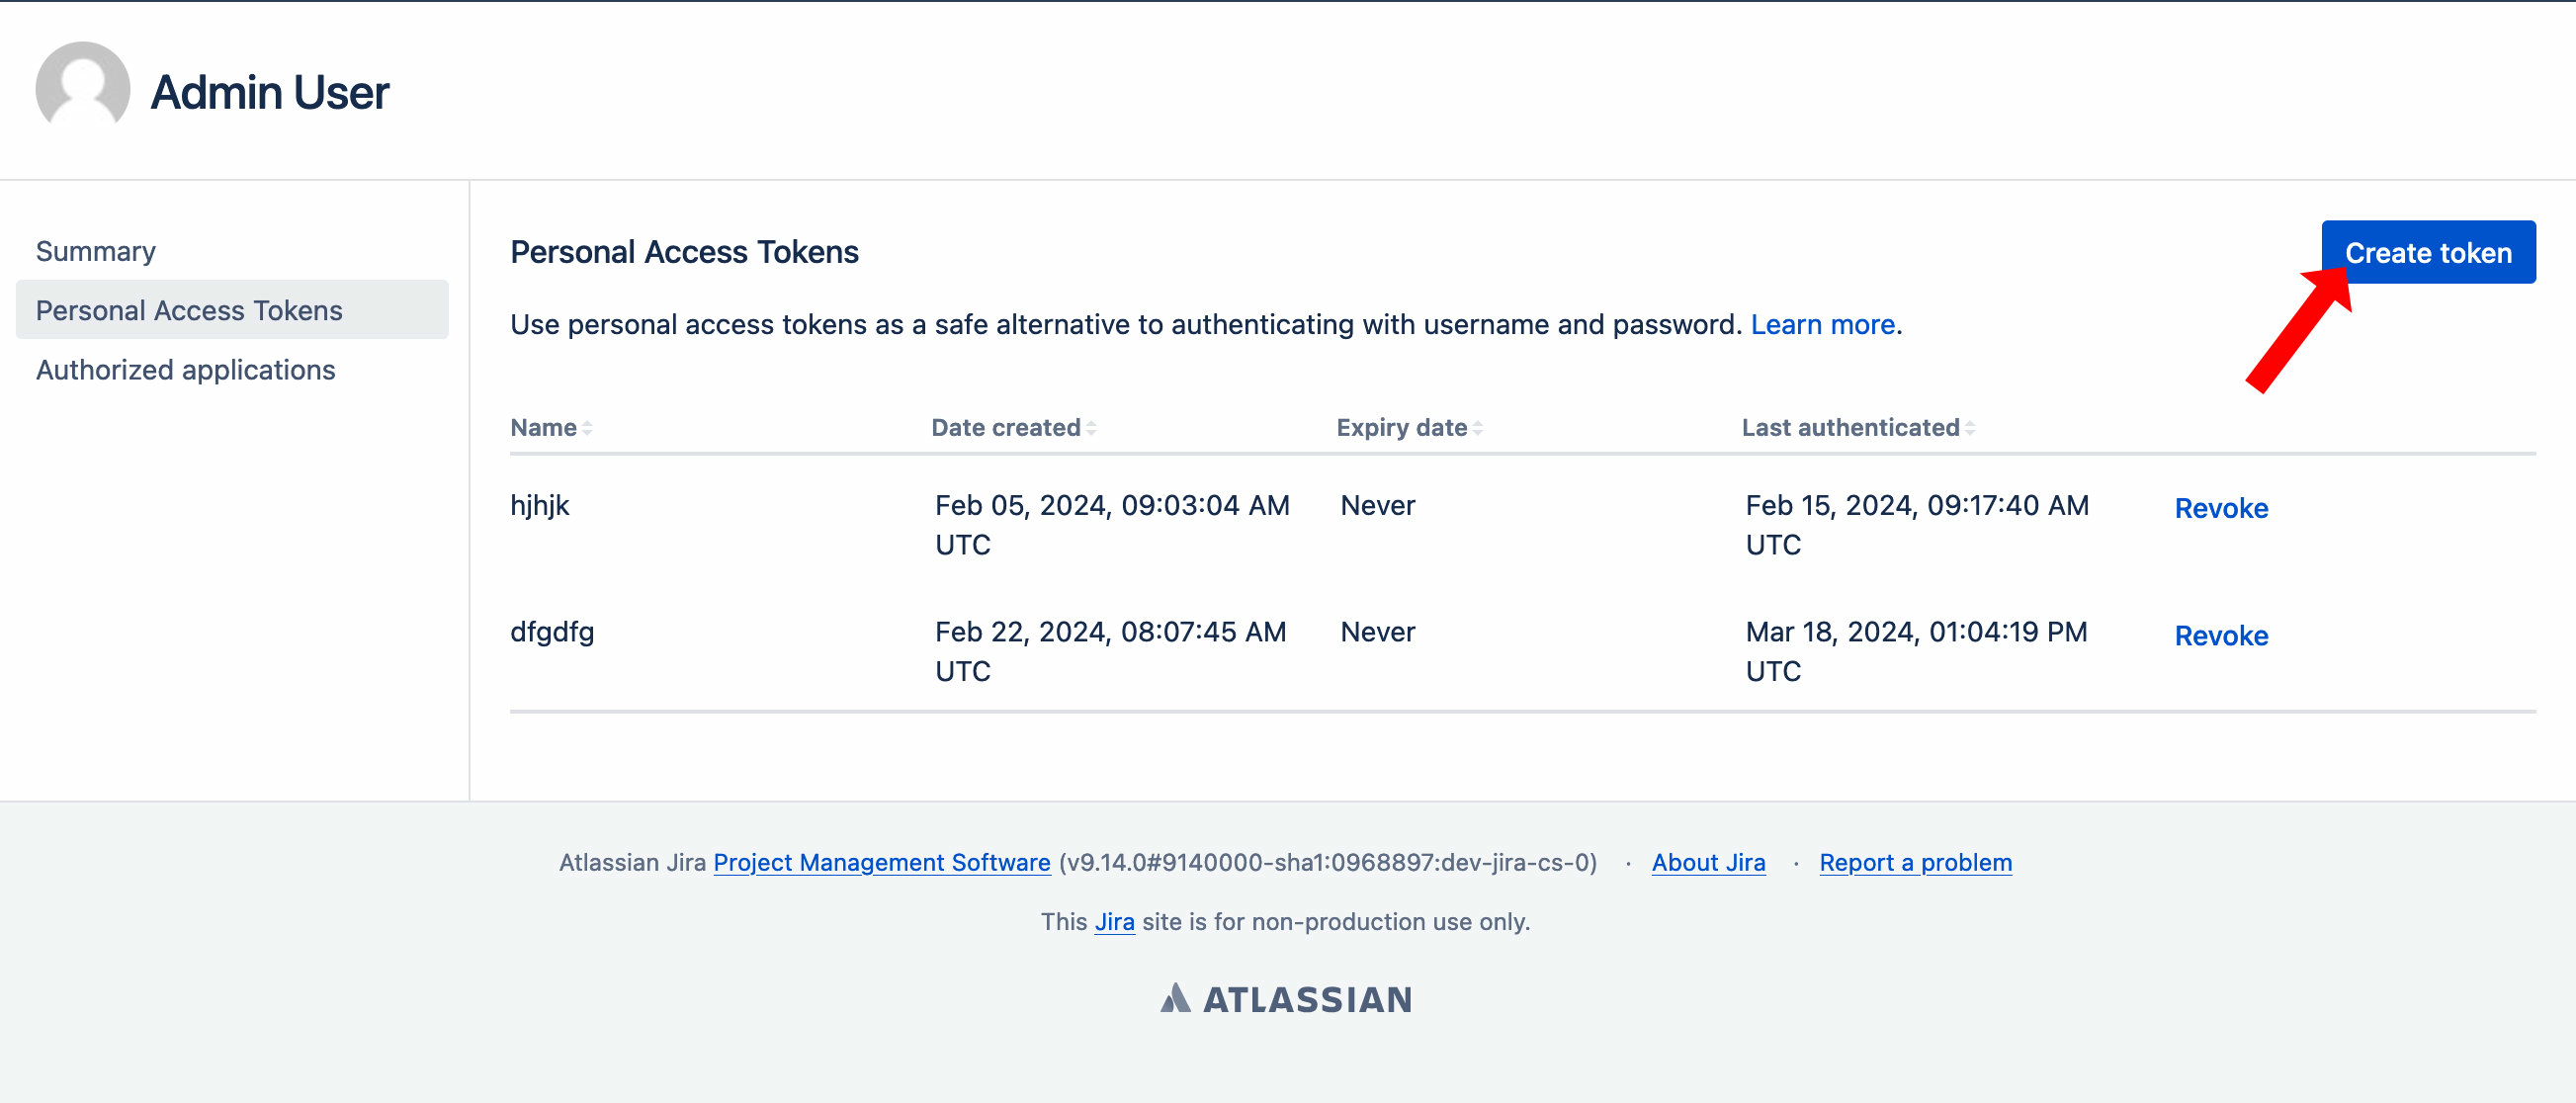
If you already have an API Token, go to step 6.A new tab opens to manage Personal Access Tokens. Click the "Create token" button.

Enter a Token Name (eg. "Umano Connector").
⚠️ Make sure to uncheck "Automatic expiry". Leaving it checked (not recommended) will require you to update the API token every time it expired.
An expired token will cause your Umano workspace to stop working until the token is renewed.
Click "Create" to continue.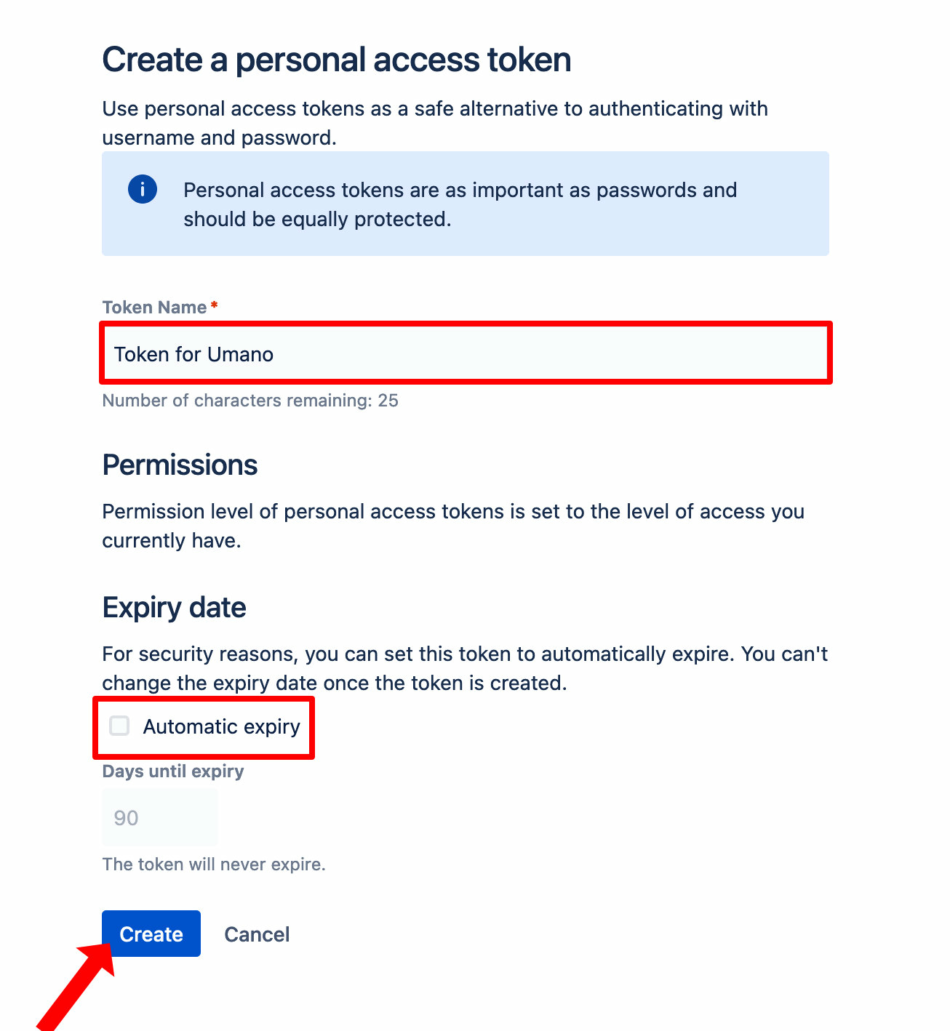
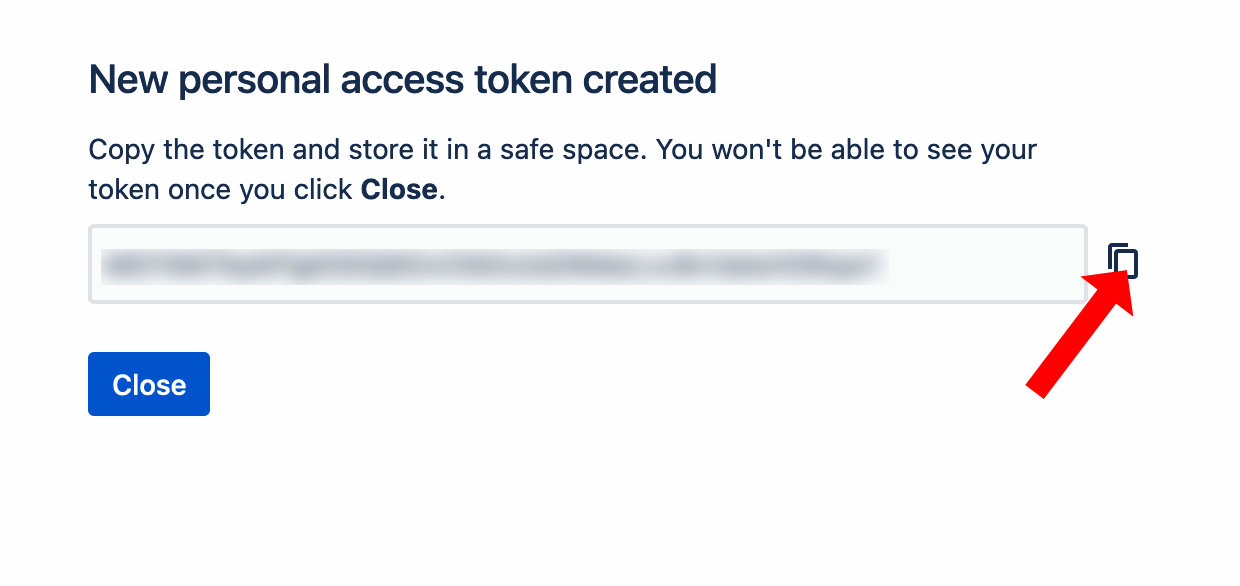
Once the token is created, click the "copy" icon.
⚠️ Make sure to keep the token somewhere temporarily until this configuration is finished.
Once this window is closed, you will not be able to see the API token again.
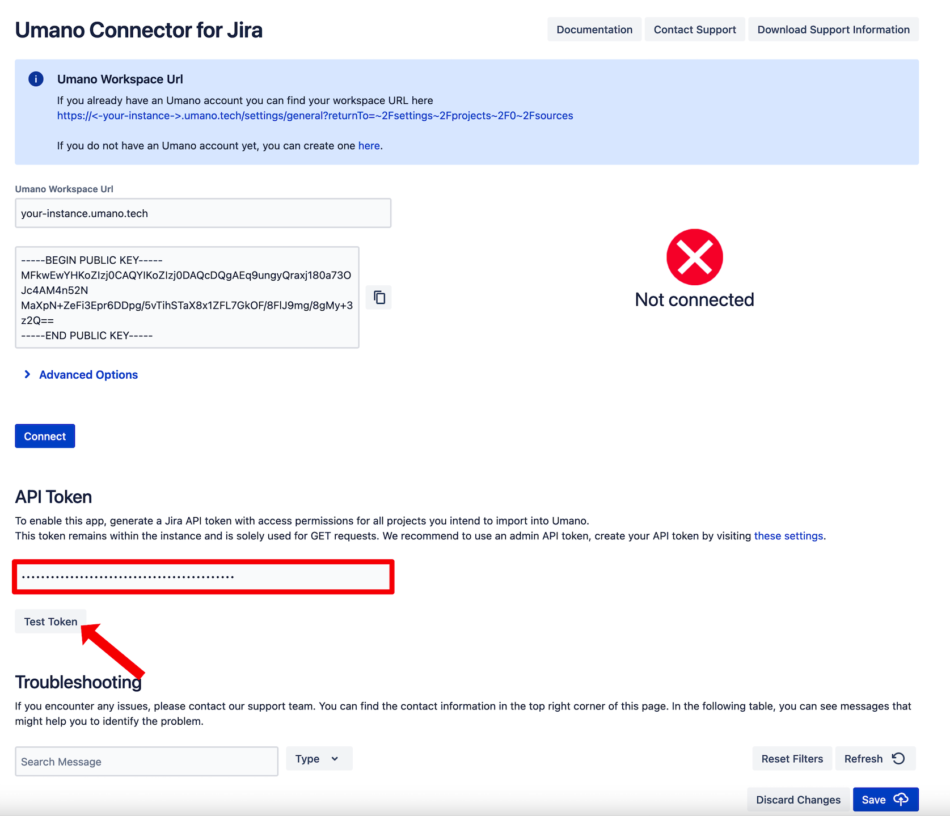
Once you have an API token, you can go to the tab with the Umano Connector App settings.Paste the API token into the API Token field of the configuration and click "Test Token" to perform a test.
If the test fails, you will see the following notification:
If the test is successful, you will see the following notification: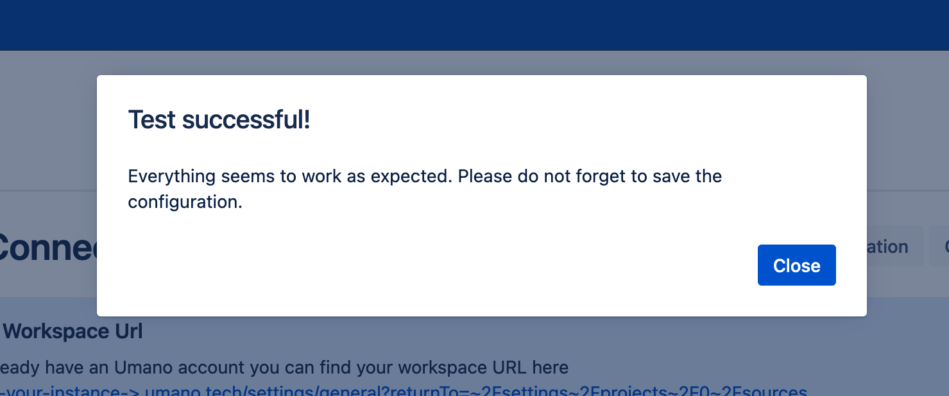
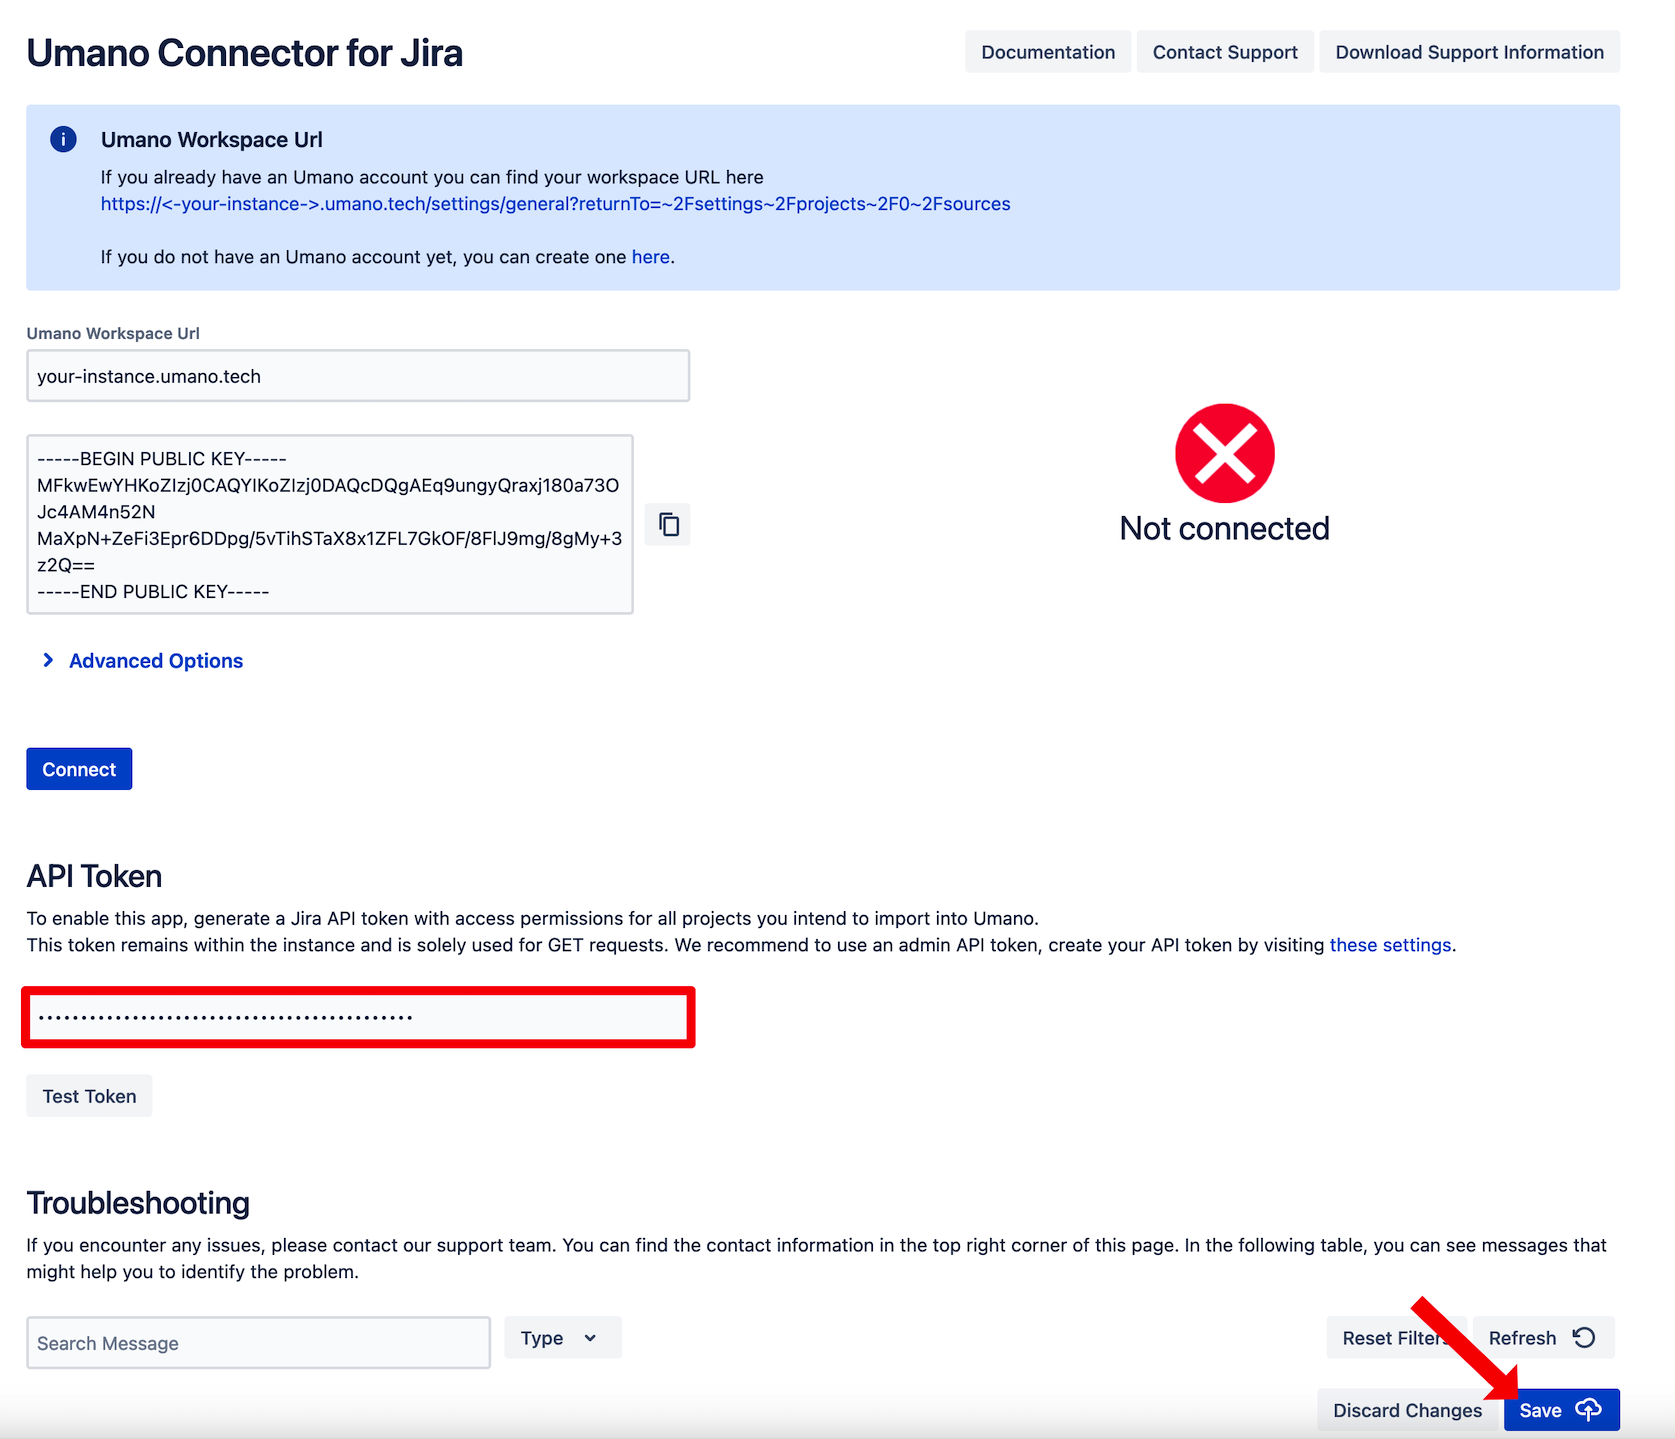
Once the API token test is successful, click on the "Save" button.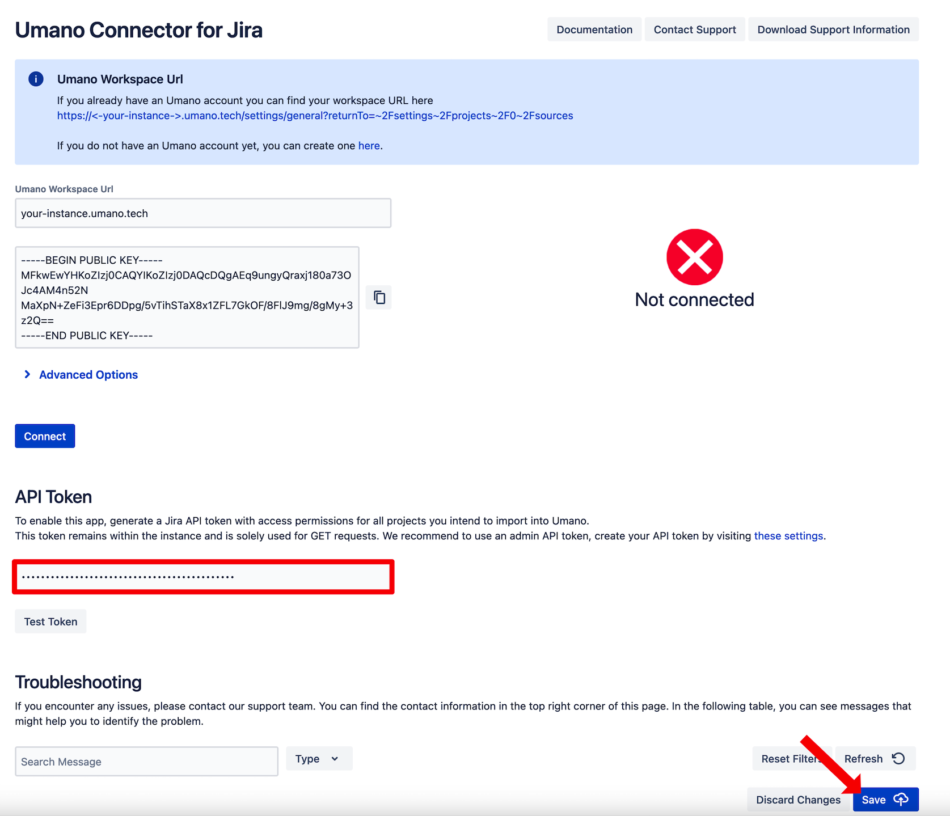
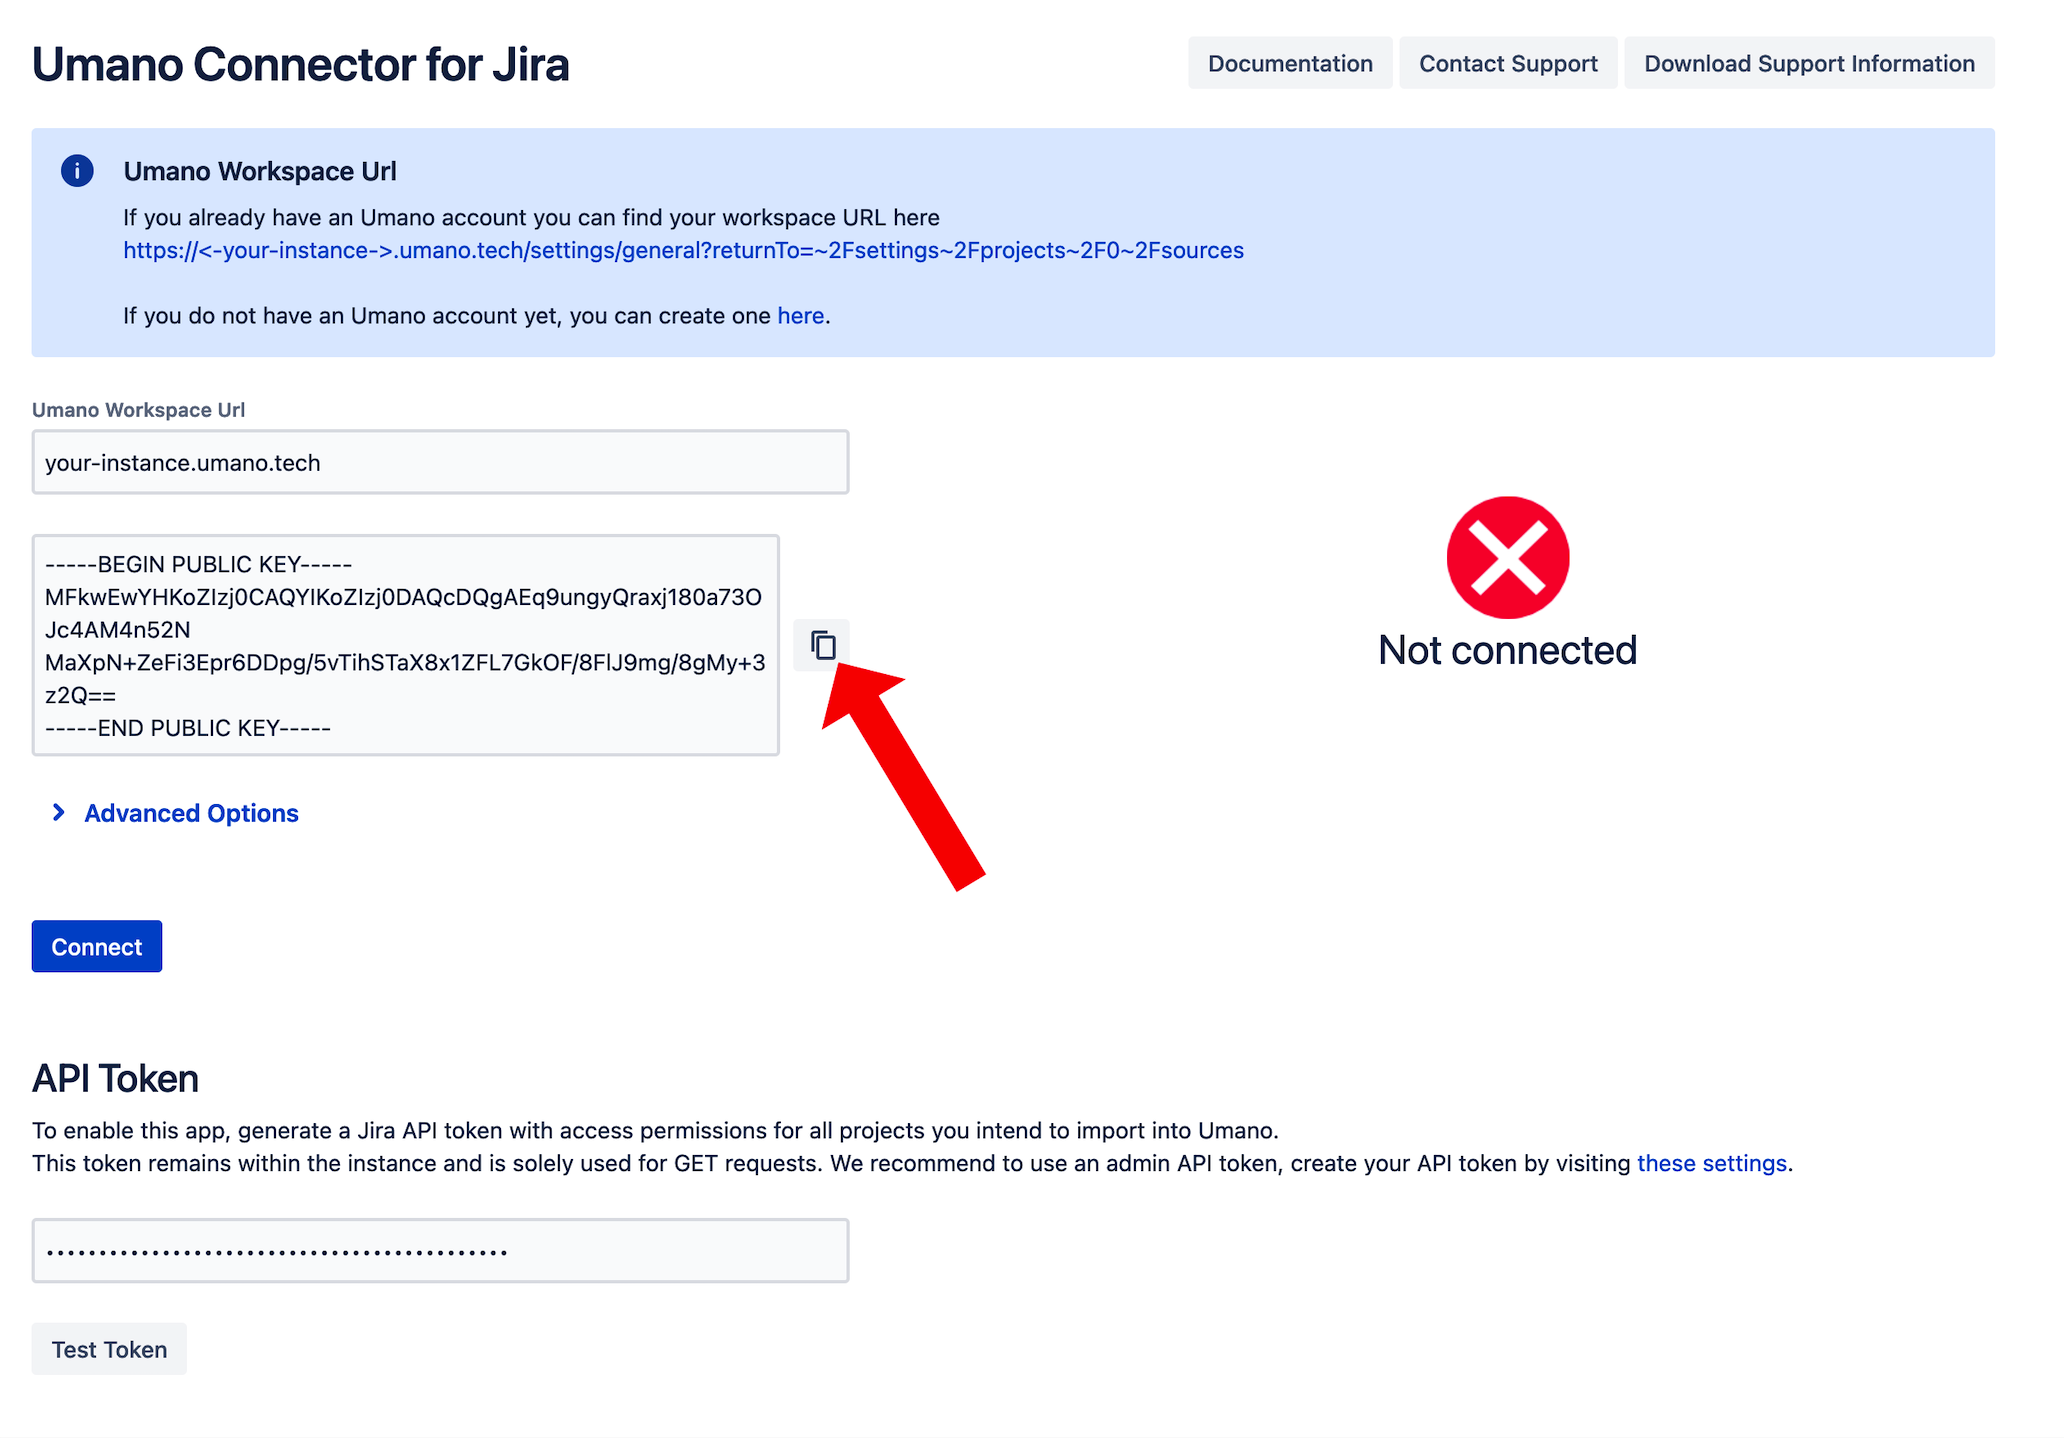
Click the "copy" icon next to the public key and go back to your Umano instance.

Go to your Umano workspace and provide the public key.
See Configuring the Umano Workspace for full details.


Establishing the Connection
Once the configuration is made on your Umano workspace, you can establish the connection to it.
Click on the "Connect" button and wait until you are connected.

Once the connection is established, you will see the "Connected to Umano" status appear:

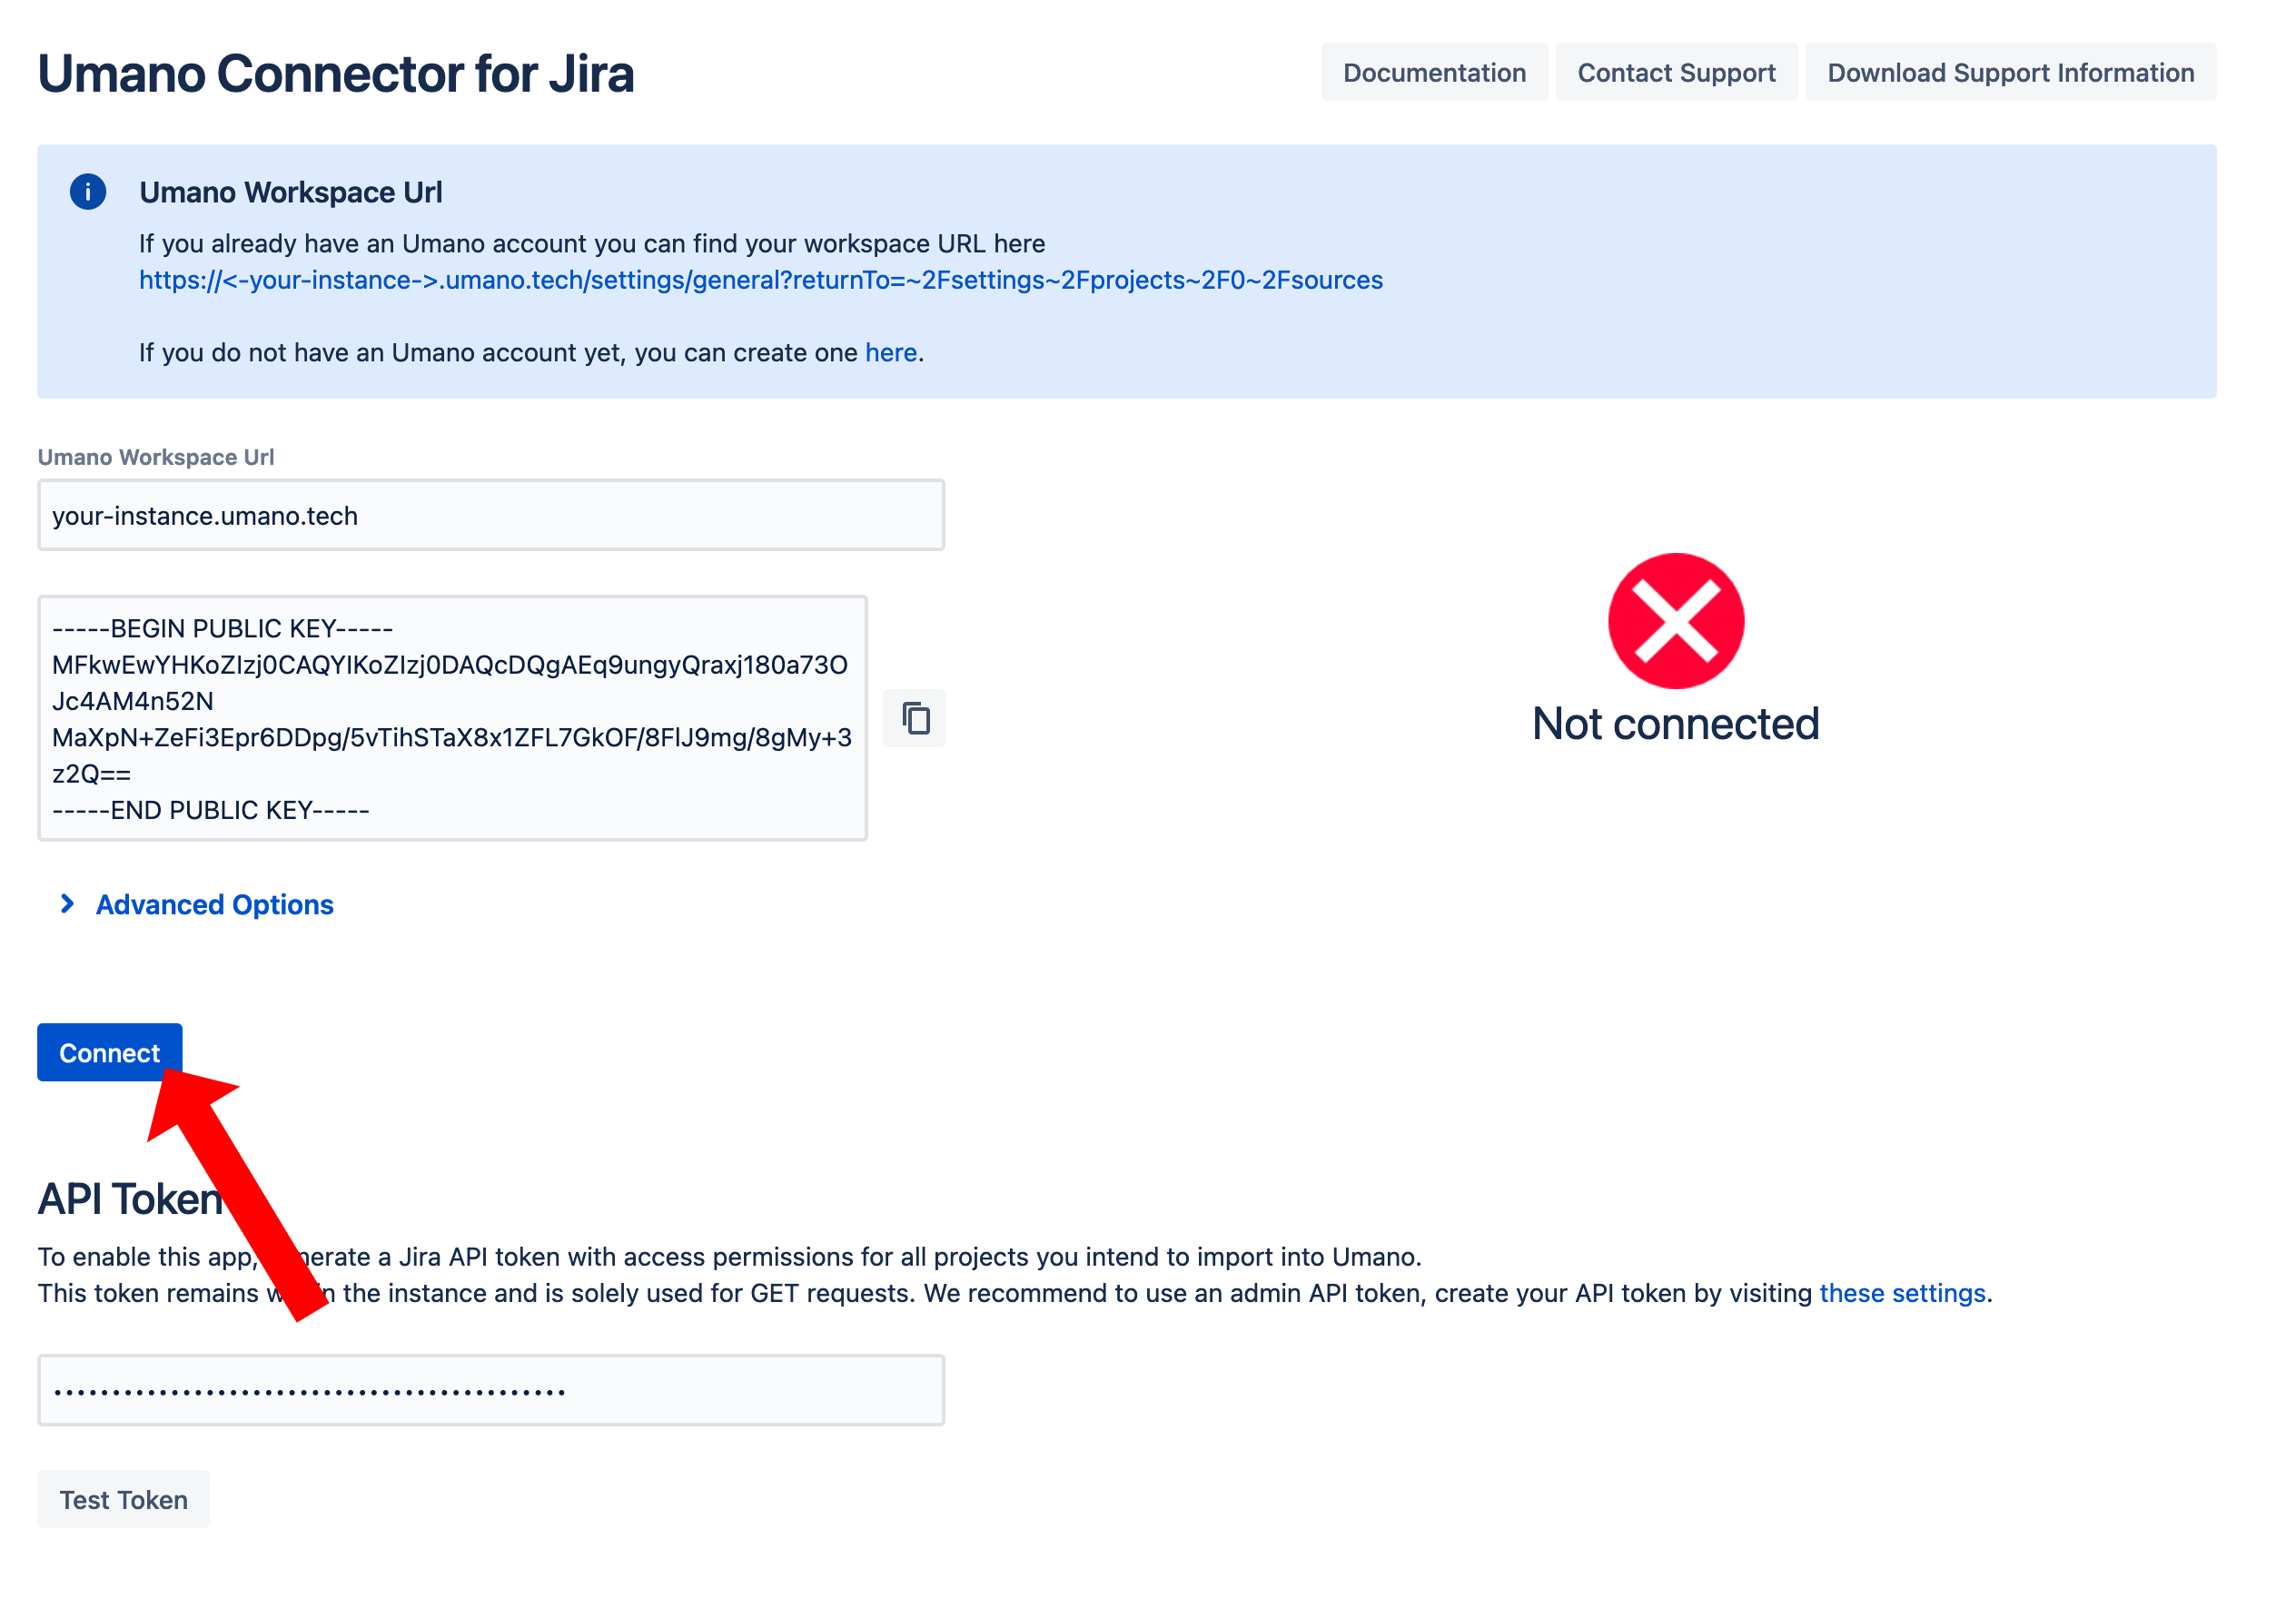
If the connection fails, you will see an error message with details of the reason for the failure.
Remember to make sure you have entered the correct Umano Workspace URL correctly, as well as having configured your Umano workspace correctly to receive the connection.
If issues persist, please contact support.