
Configuring the Umano Workspace
This guide will help you create the connection from your Umano workspace to your Jira Data Center instance.
This should be performed simultaneously with the configuration of the Connector App.
Requirements
A Umano workspace with admin access to it.
The Umano Connector App for Jira Data Center installed in your Jira instance.
Configure the Umano Workspace
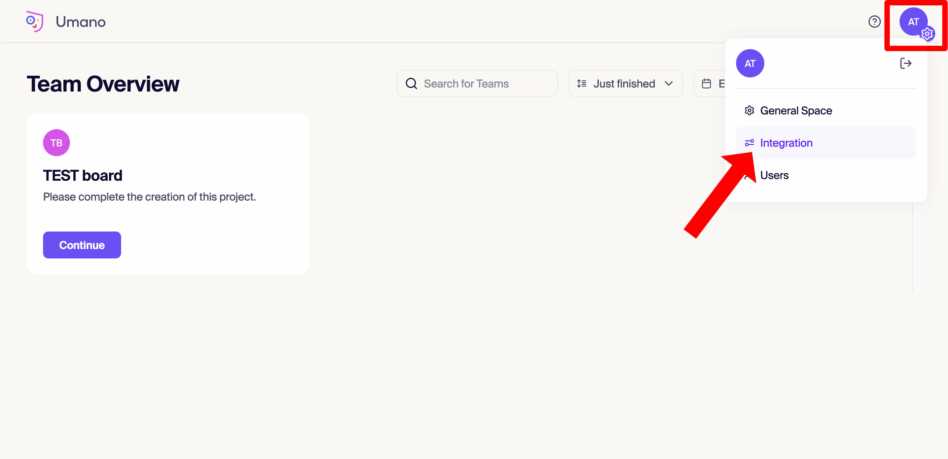
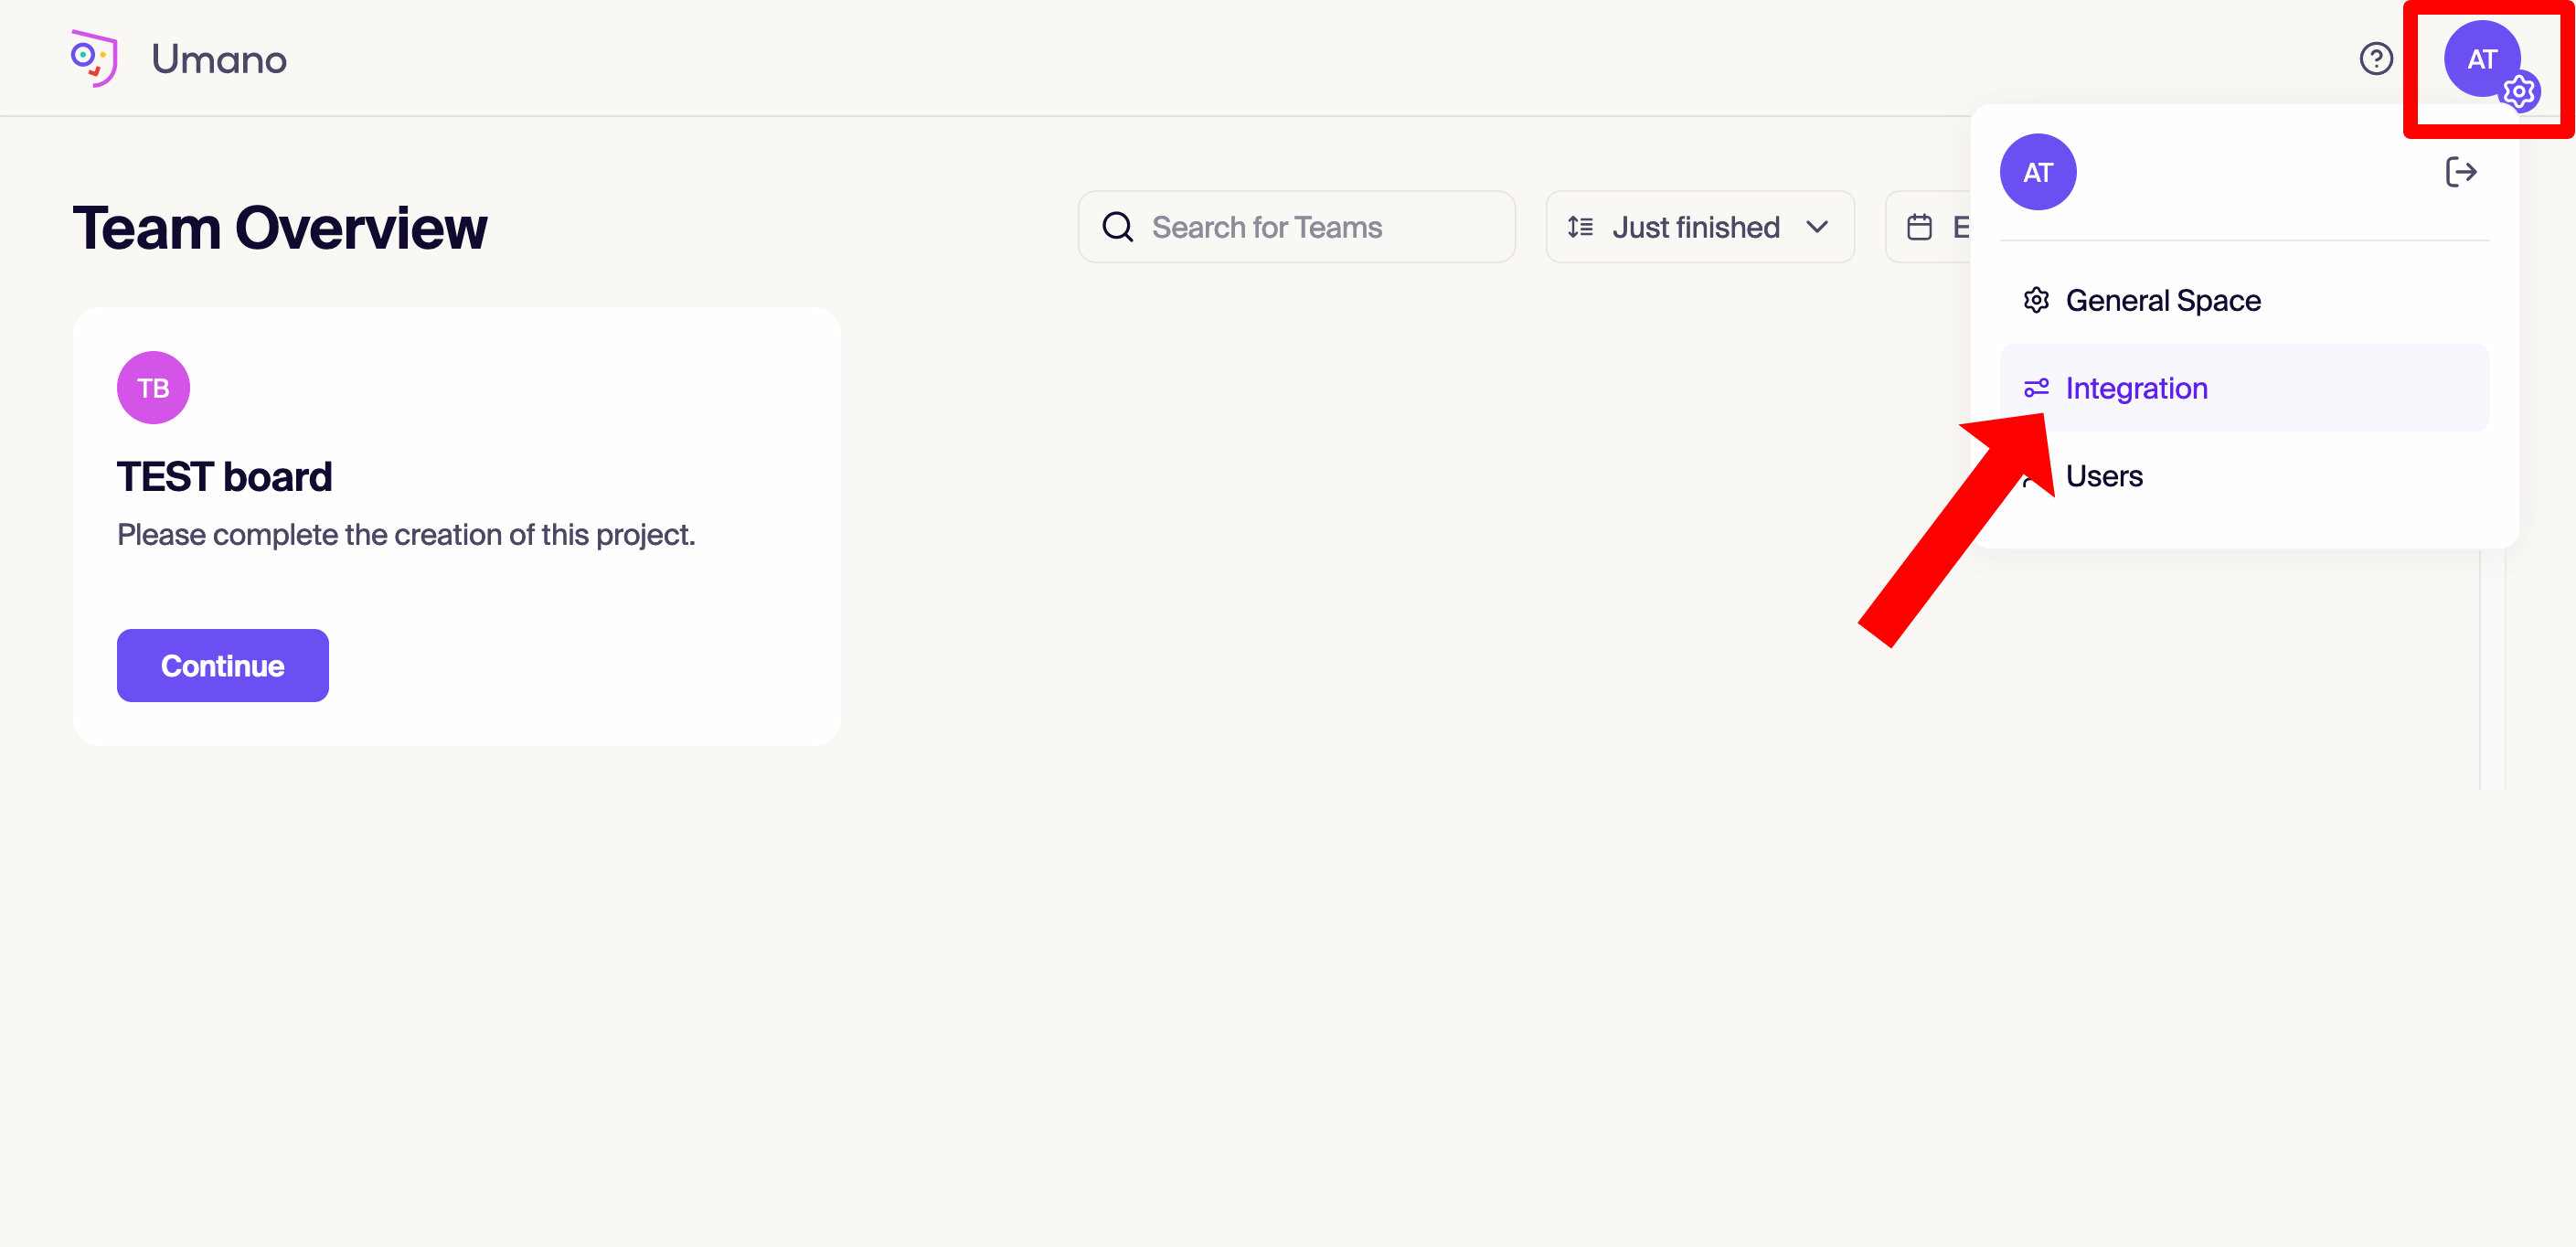
Navigate to your Umano workspace (eg. yourinstance.umano.tech) and sign in with your admin credentials.

Click on the settings icon in the upper right corner and then choose "Integration".
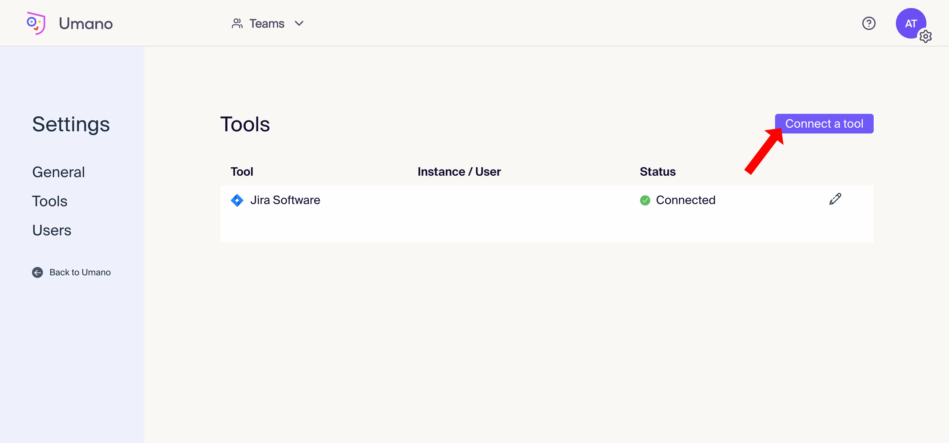
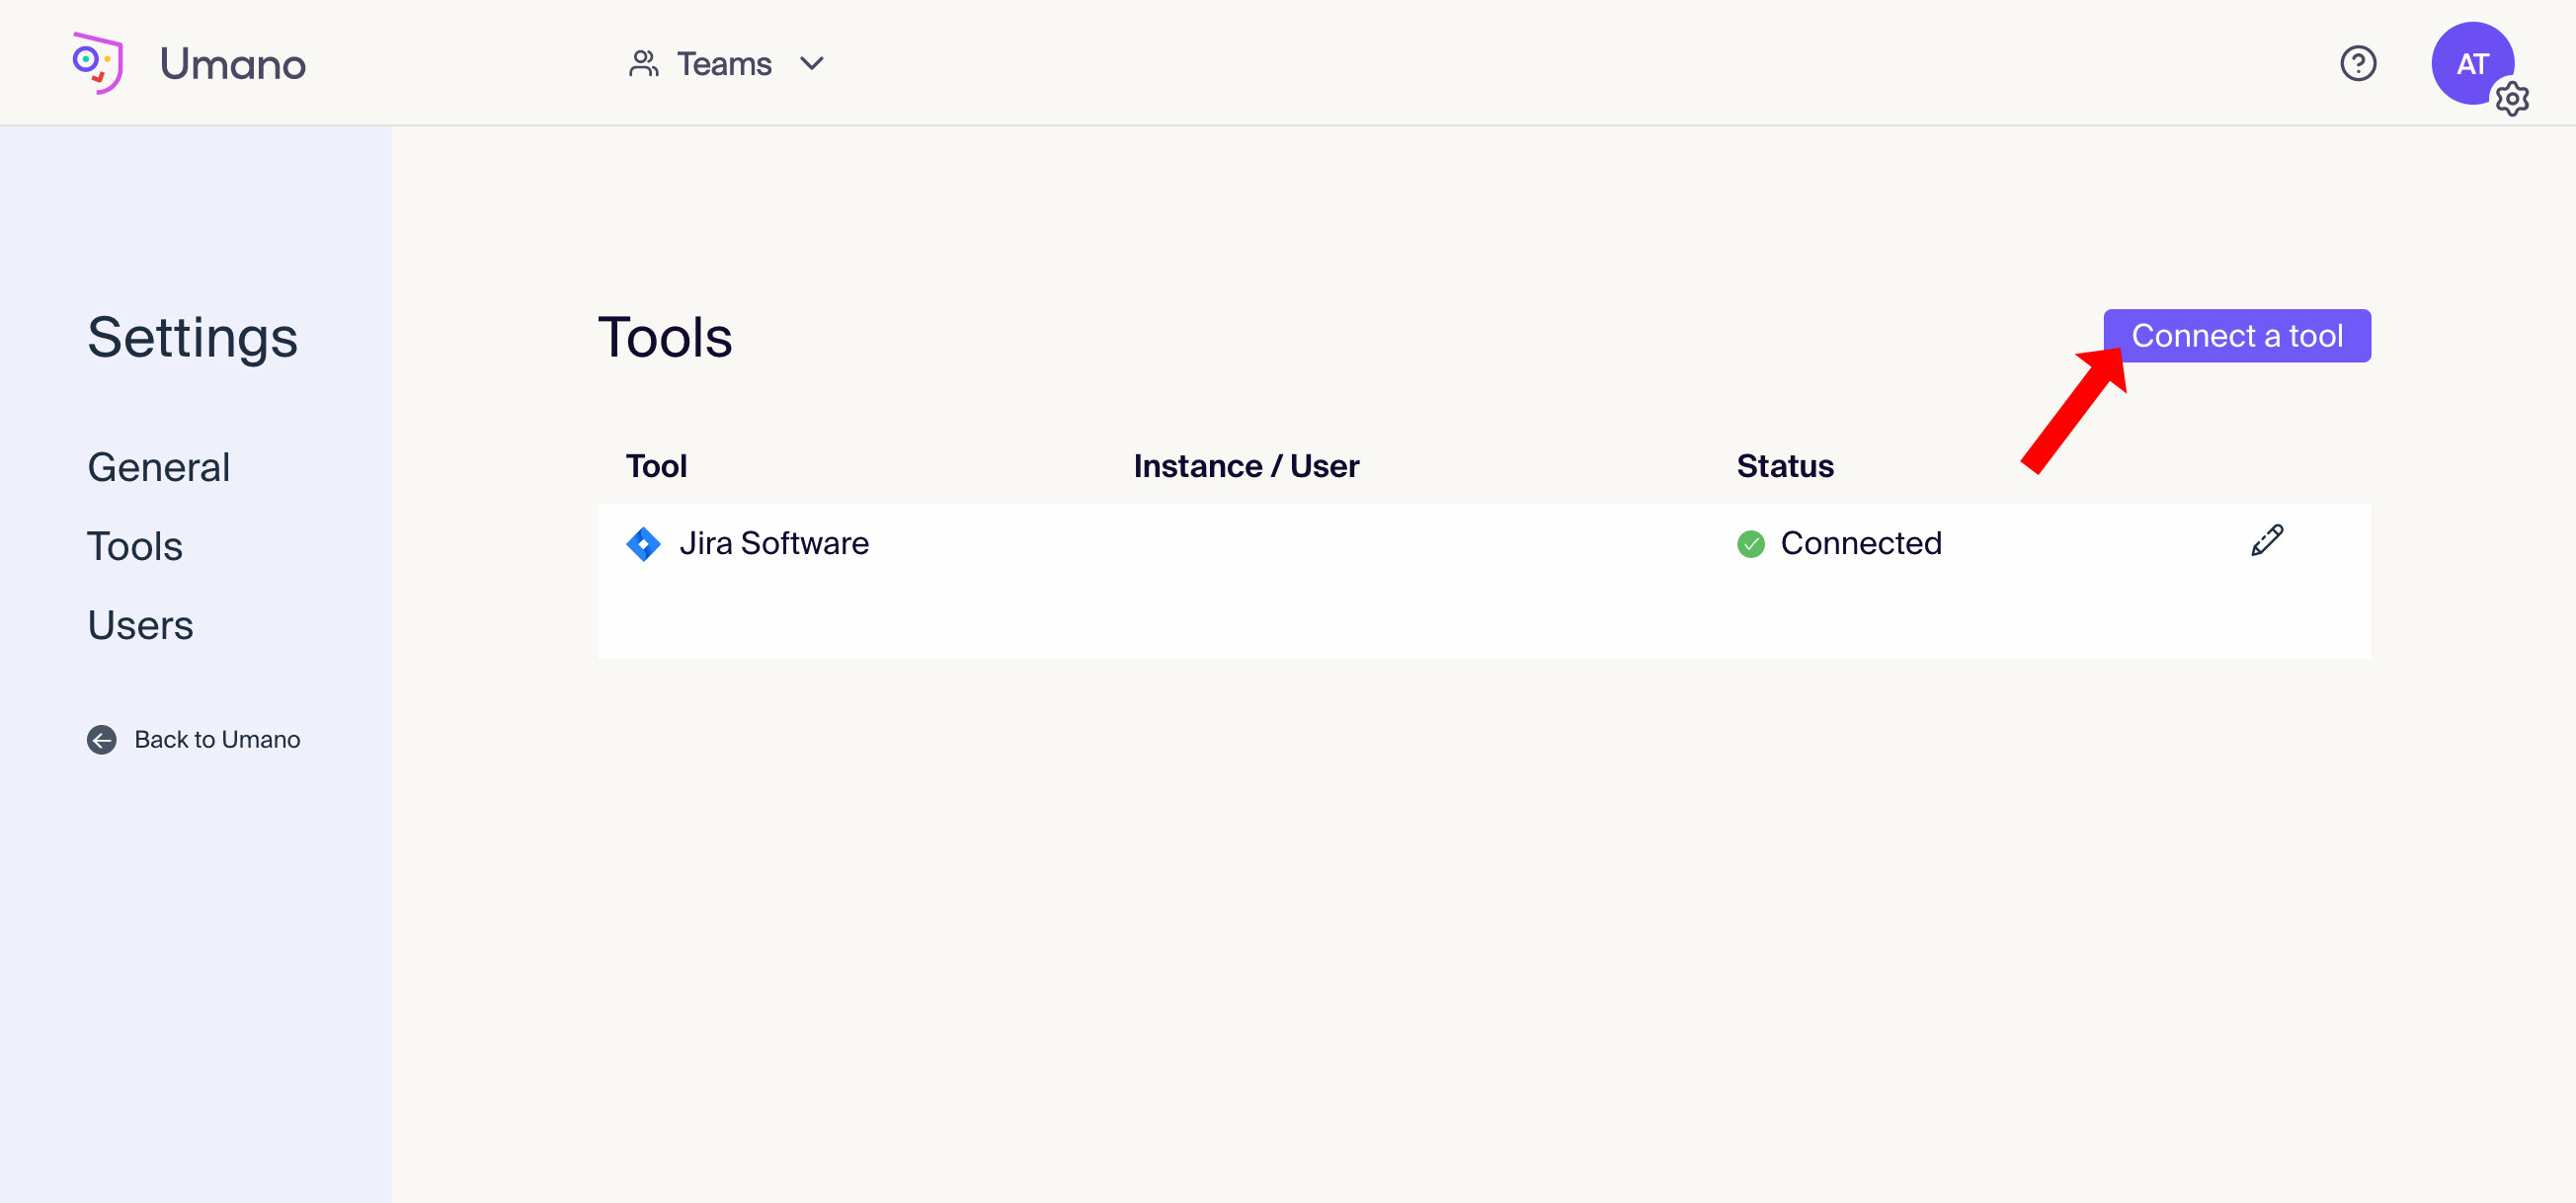
Click on the "Connect a tool" button.
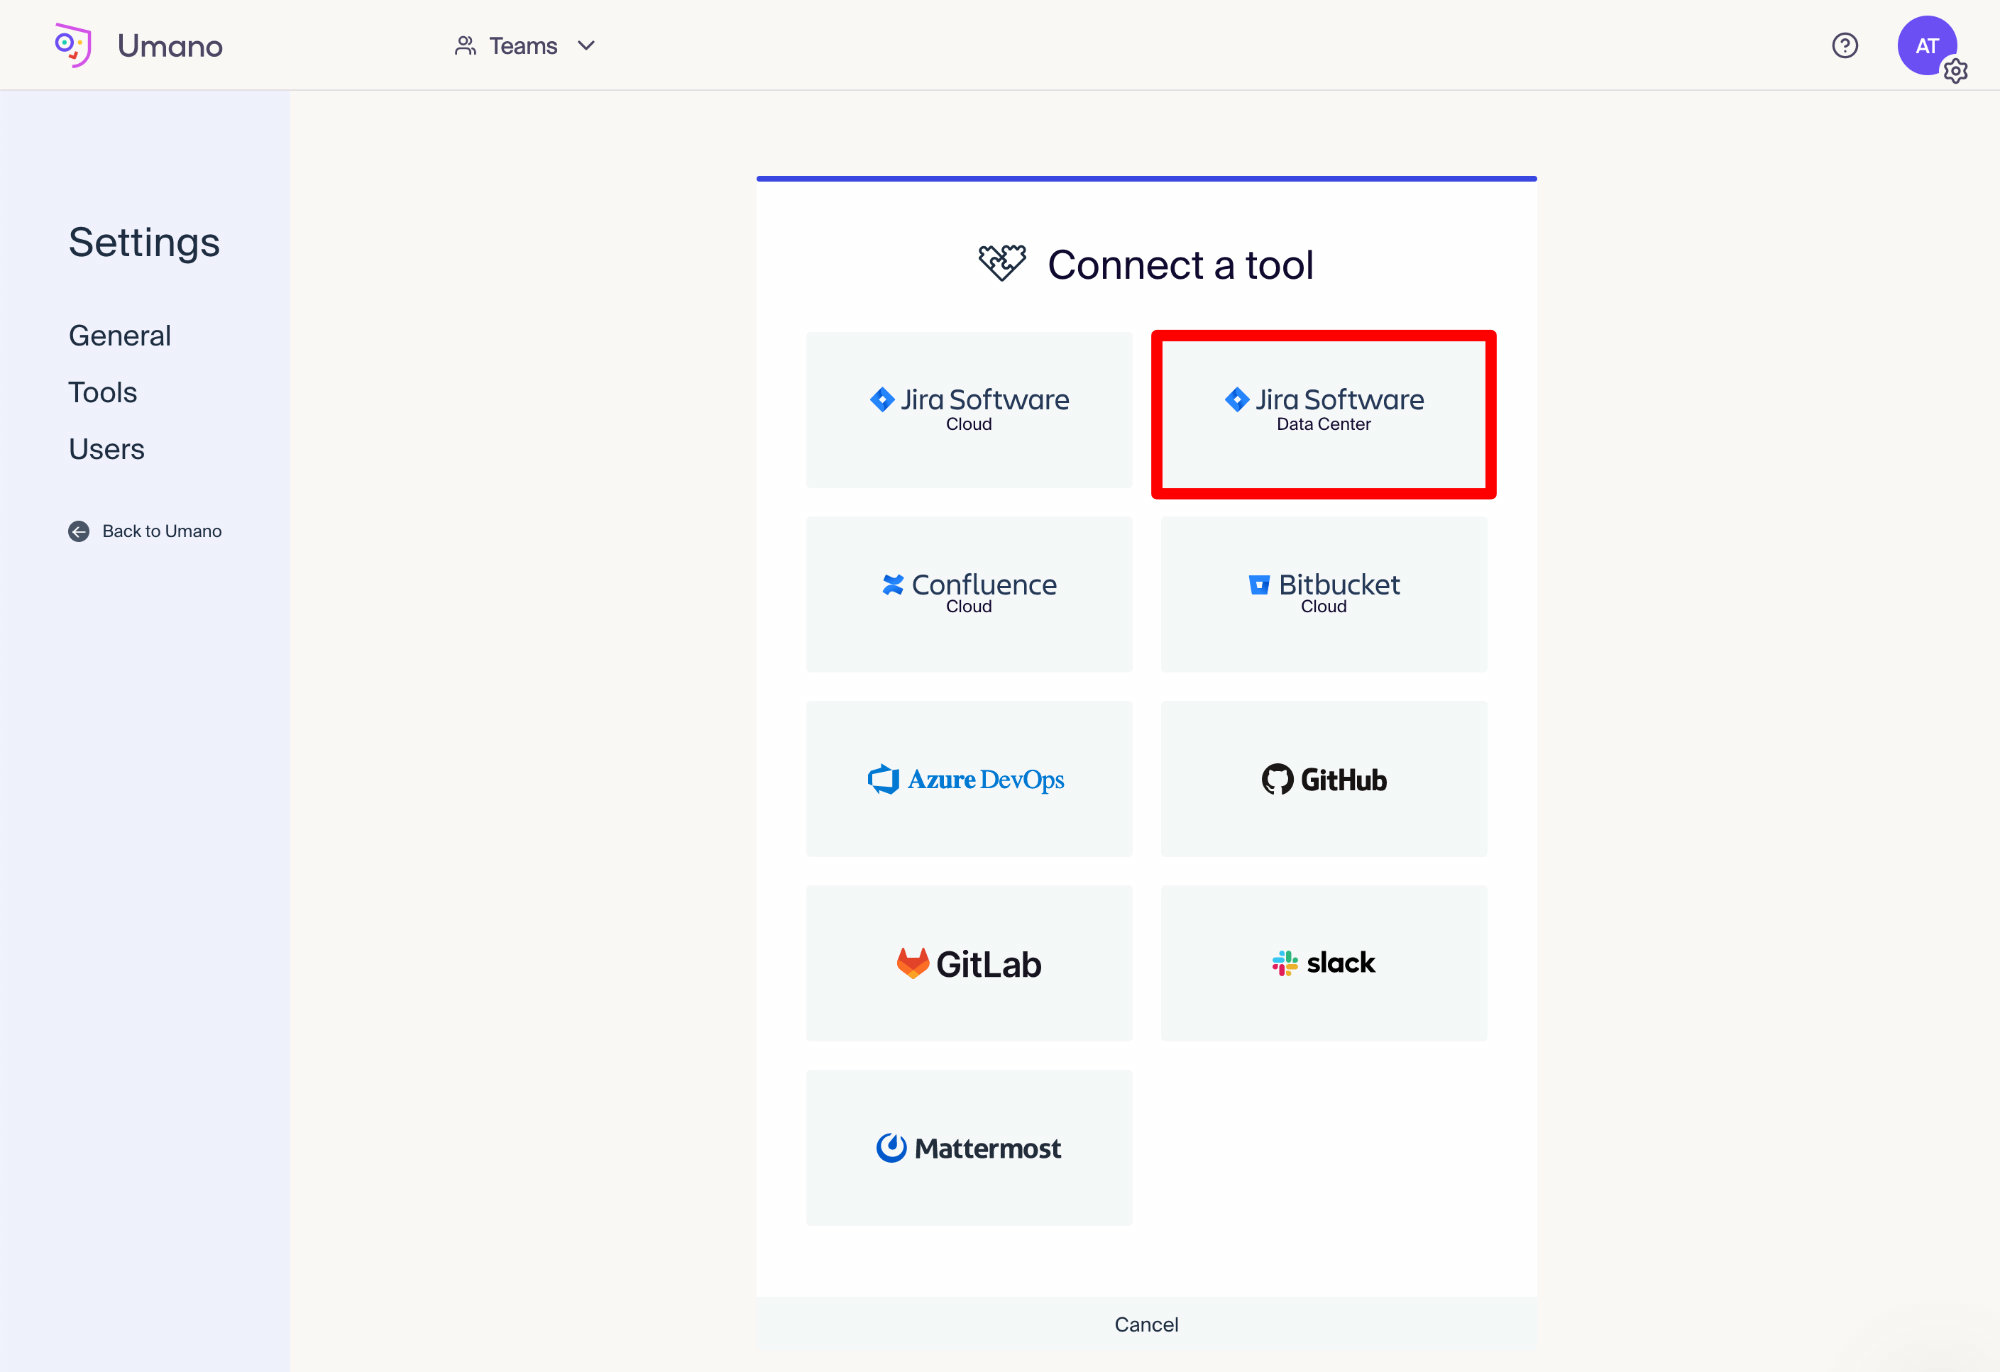
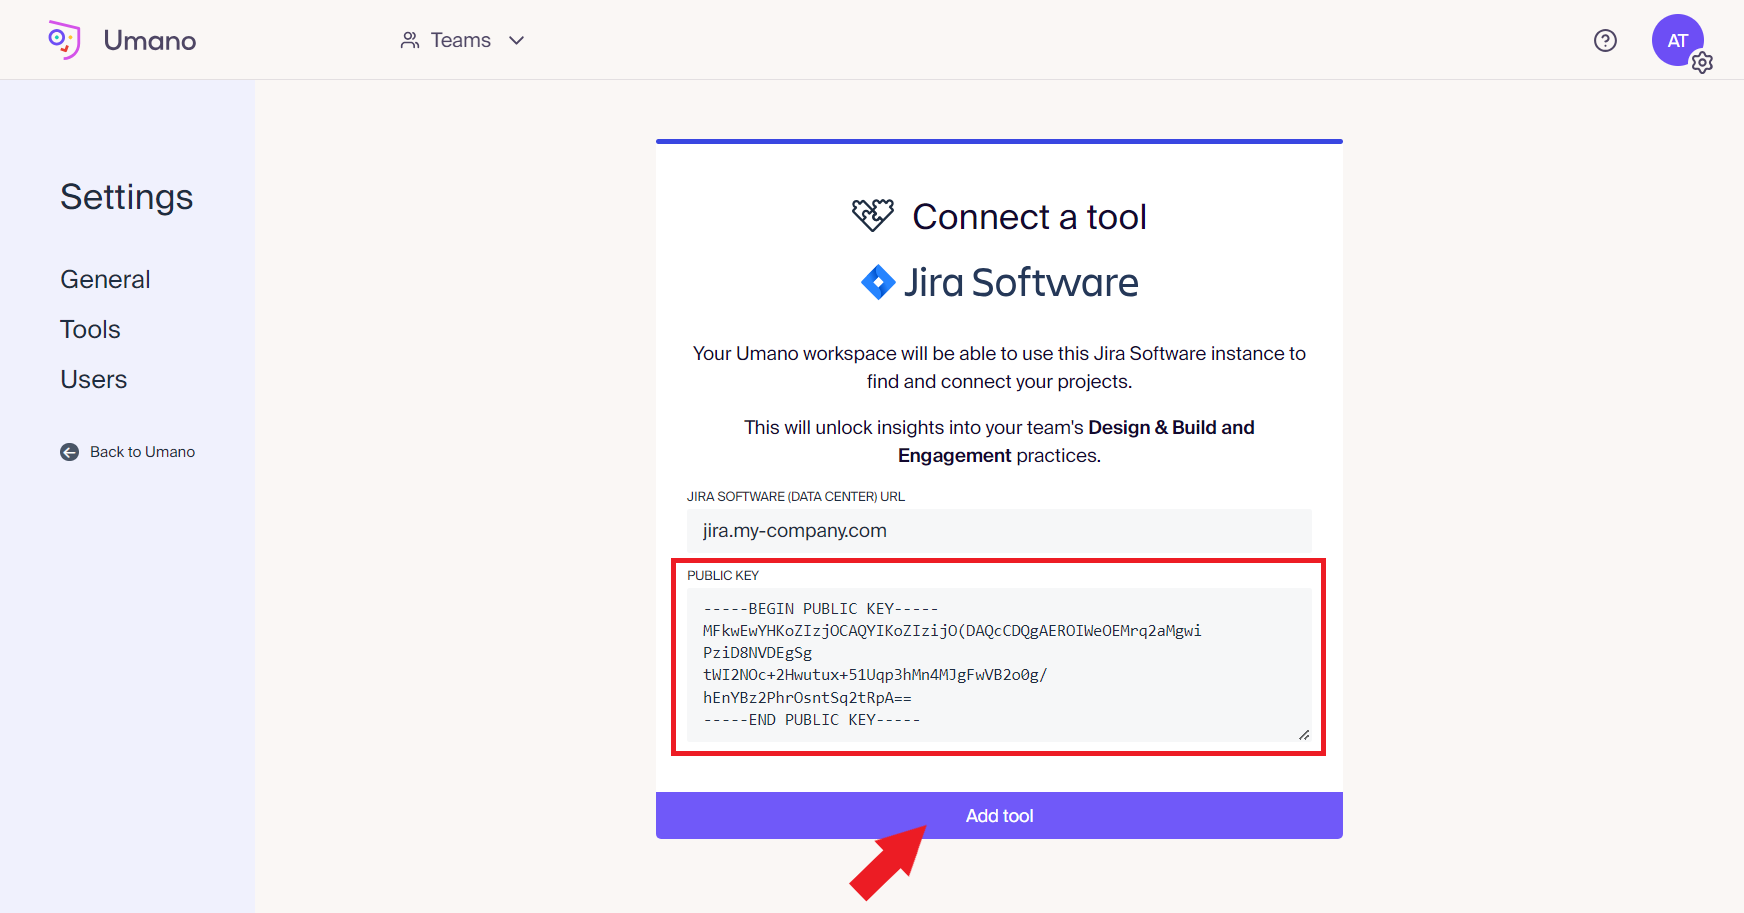
Select "Jira Software Data Center".

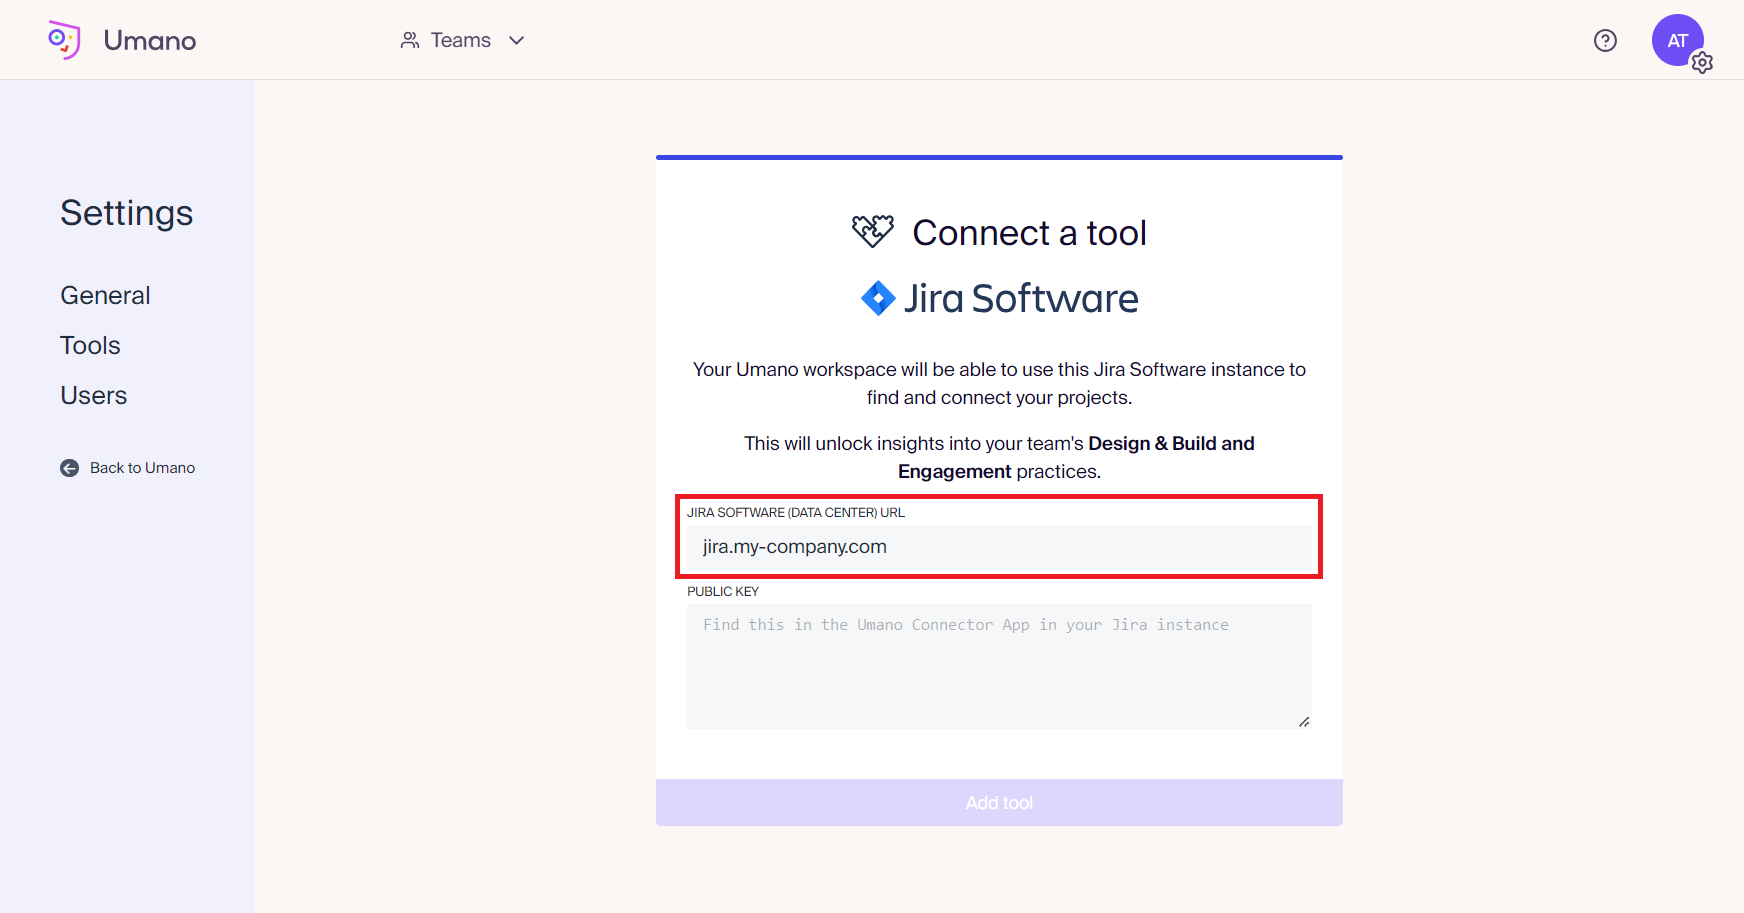
Enter the URL of your Jira instance.
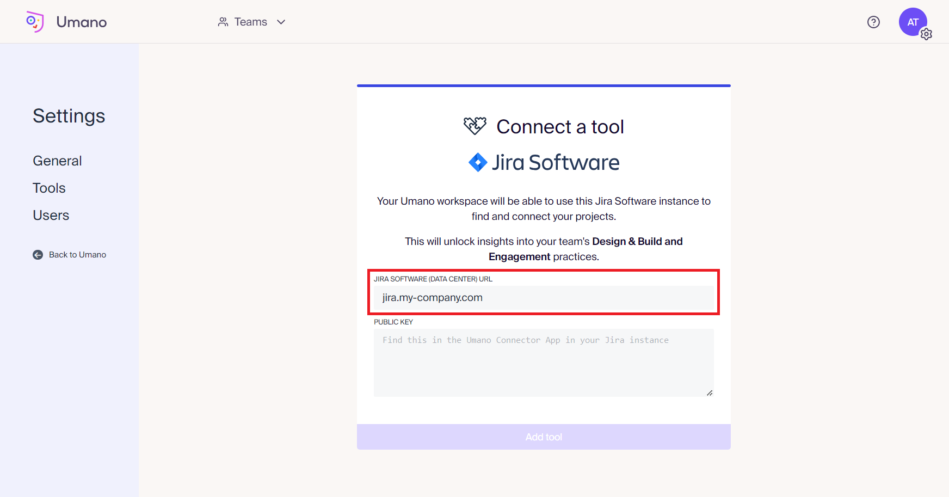
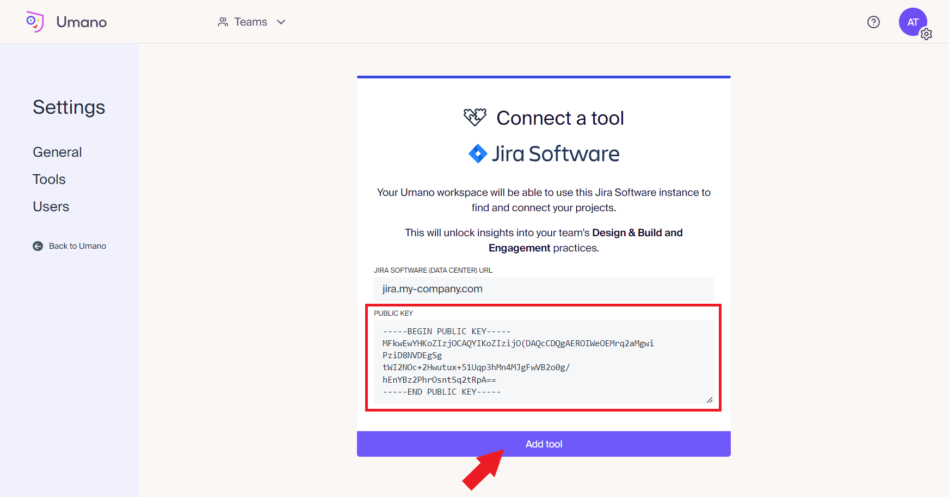
Go to Connector App in your Jira instance to retrieve the public key.
See Configuring the Connector App for full details.Paste the public key provided by the Connector App in the field and click on "Add tool".

Establishing the Connection
The new Jira connection will initially appear as "Waiting...".
⚠️ To finish establishing the connection, go back to the Connector App in your Jira instance.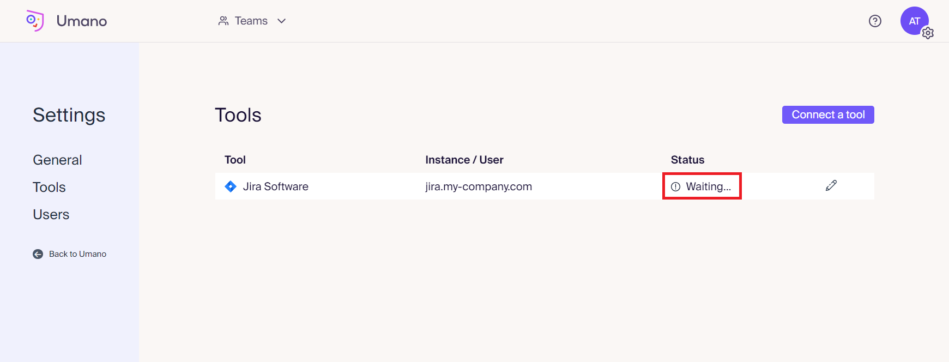
Once you have successfully established the connection in the Connector App, come back to Umano to double check it.
You should see the connection status now as "Connected".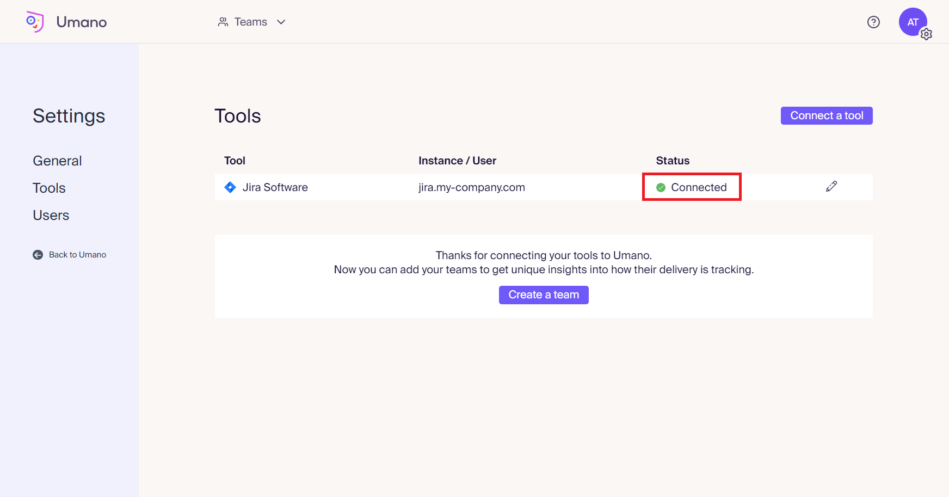


Creating Umano Teams
You're now ready to start adding teams to your Umano workspace.