Modify a Usersync Configuration Offline
This tutorial explains how to download an existing User sync connector configuration via REST, how to modify it and upload it back again via REST.
That way you could re-use parts of existing configurations, i.e. on a staging server, without creating everything again by hand.
Normally, this only makes sense, if you've added a lot of transformation rules across the config.
The steps below are intended for users who are familiar with REST and JSON, please contact our support, if you have any doubts.
Changing a configuration that way should be done with good care.
Find the User sync connector ID by clicking on the edit button first, the address bar will reveal that ID then, i.e. https://<basurl>/plugins/servlet/de.resolution.usersync/admin/editconnector?id=4
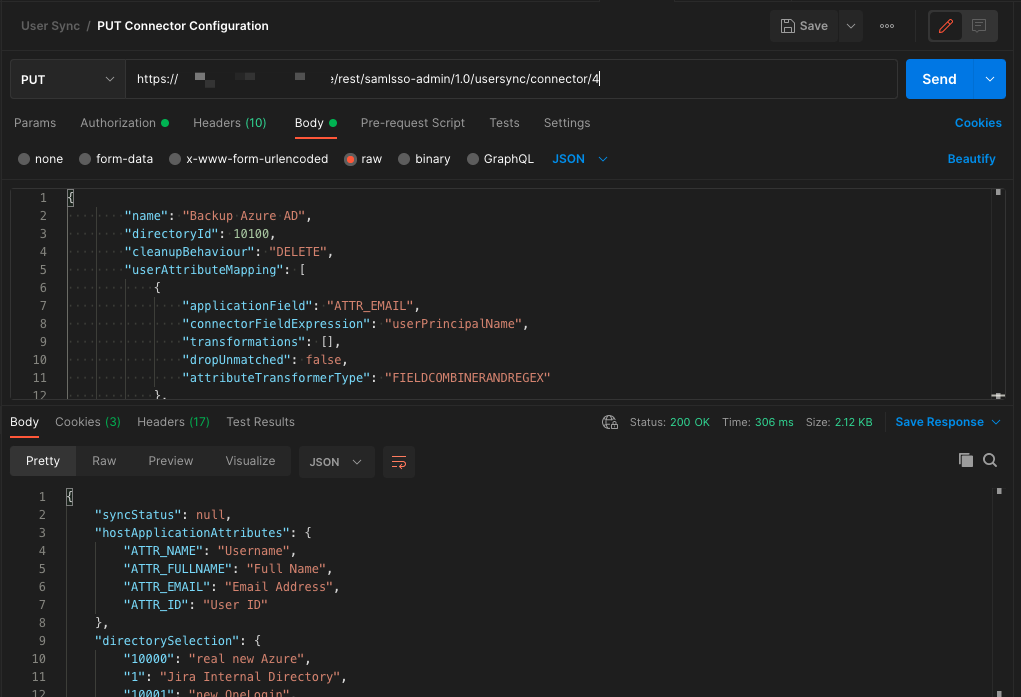
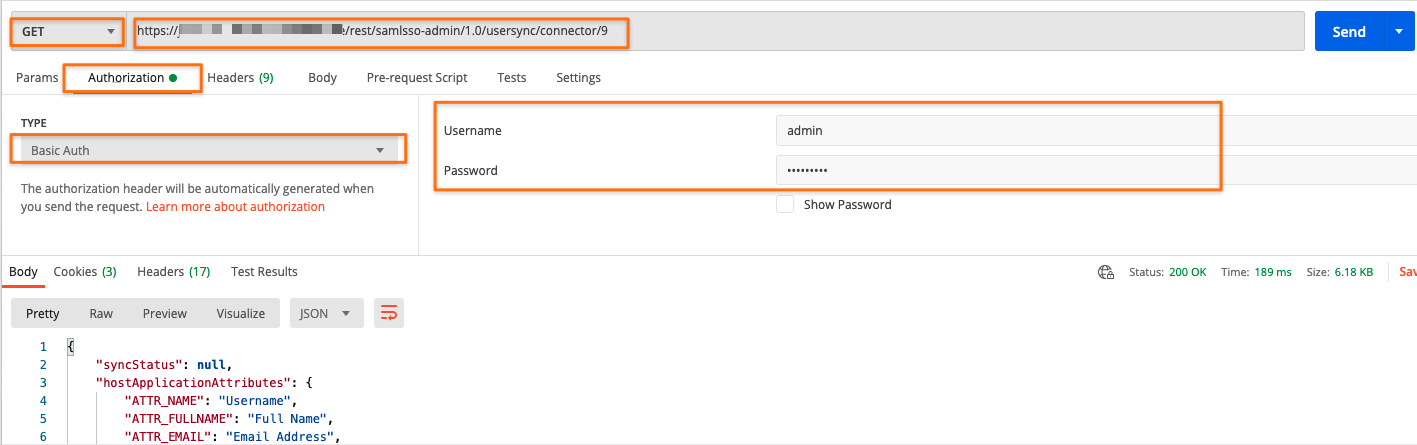
GET the connector configuration, i.e. with Postman. The URL to retrieve the config looks like this, with the connector ID at the end: https://<basurl>/rest/samlsso-admin/1.0/usersync/connector/4
Use a local user and password (or API Token) with admin permissions for the Basic Auth. REST doesn't work with SAML

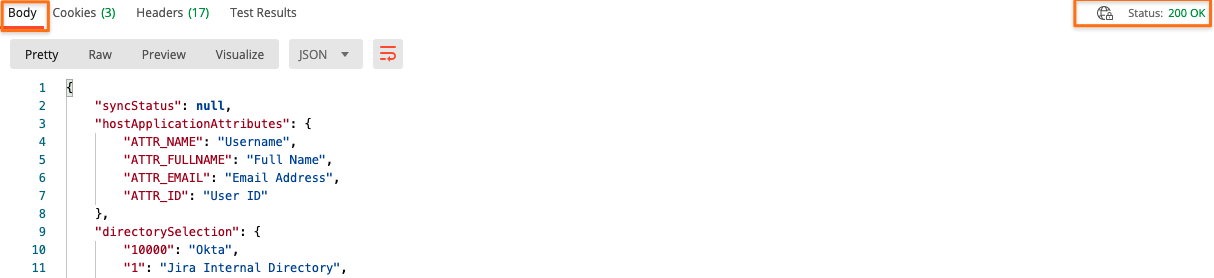
Extract the configuration from the response
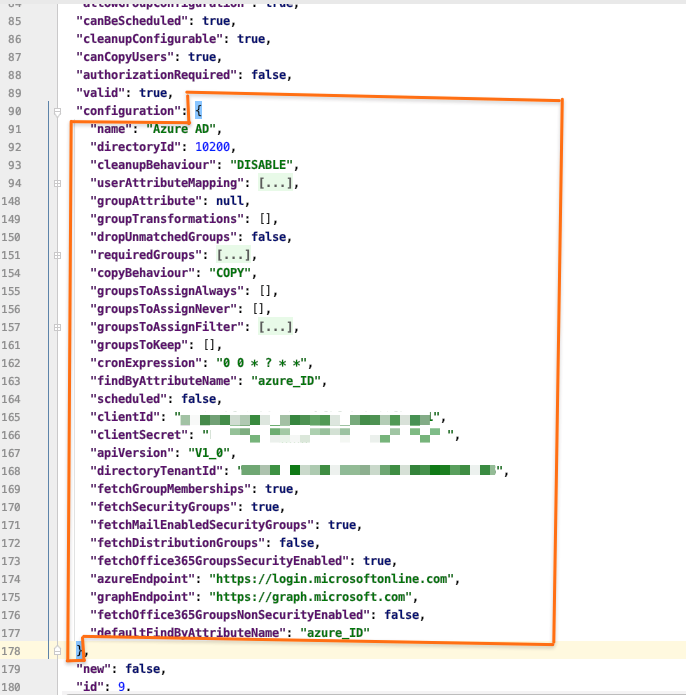
not everything in the response from the call above is the configuration, you only need to preserve the configuration node of the JSON response
We recommend pasting the response to a config.json file and open it in a text editor like Notepad++ or any other editor which highlights opening and closing brackets
the below example shows the part which needs to be extracted, the value of the configuration field, including the curly brackets
some child nodes have been collapsed for better readability
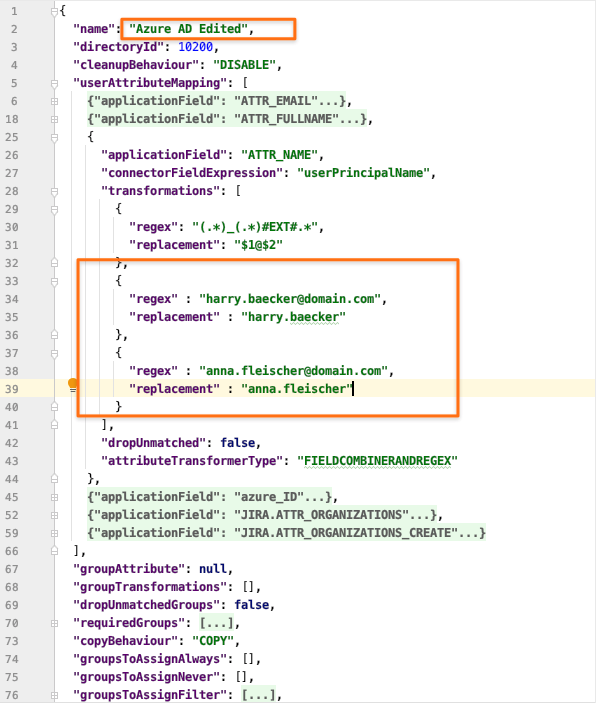
Copy that part, paste it to a new file and edit it as required
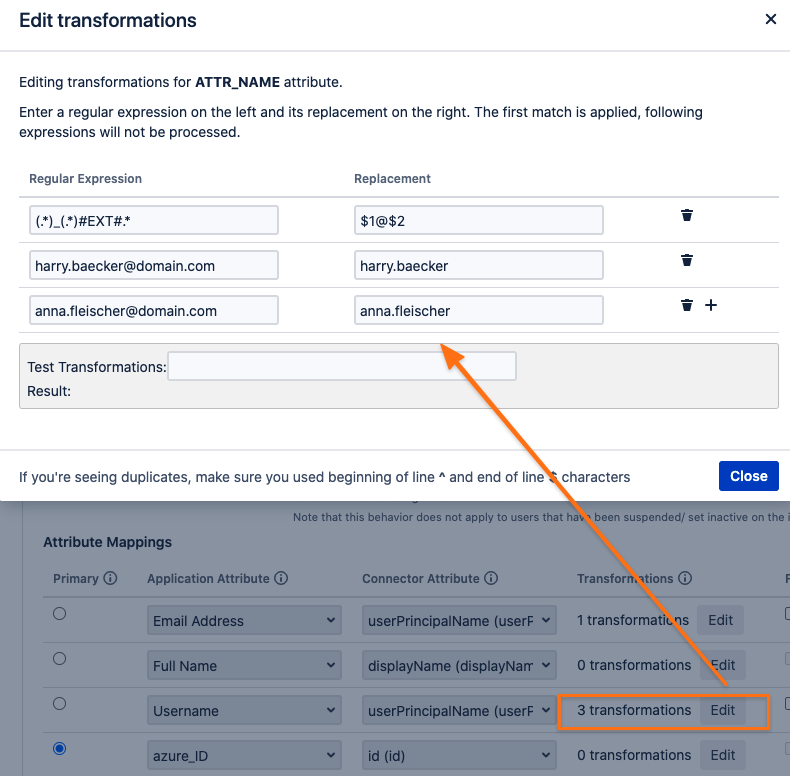
in the sample below, I've changed the connector name and added two additional transformations for the username mapping of the connector
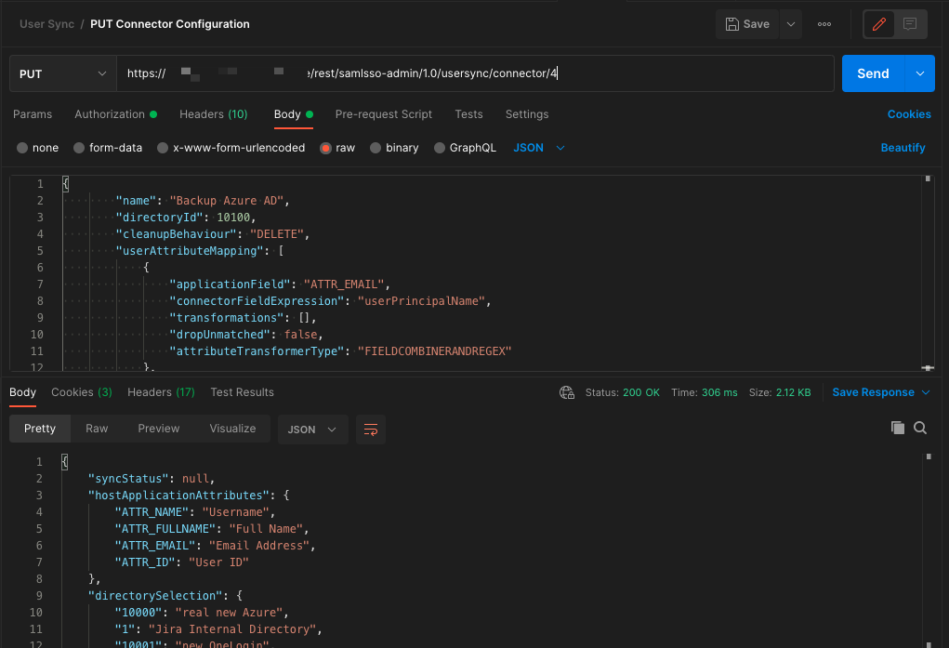
Copy the edited configuration and paste it back to Postman...
... into the Body tab with the radio button at "raw" and As JSON
change the request method to PUT and press send
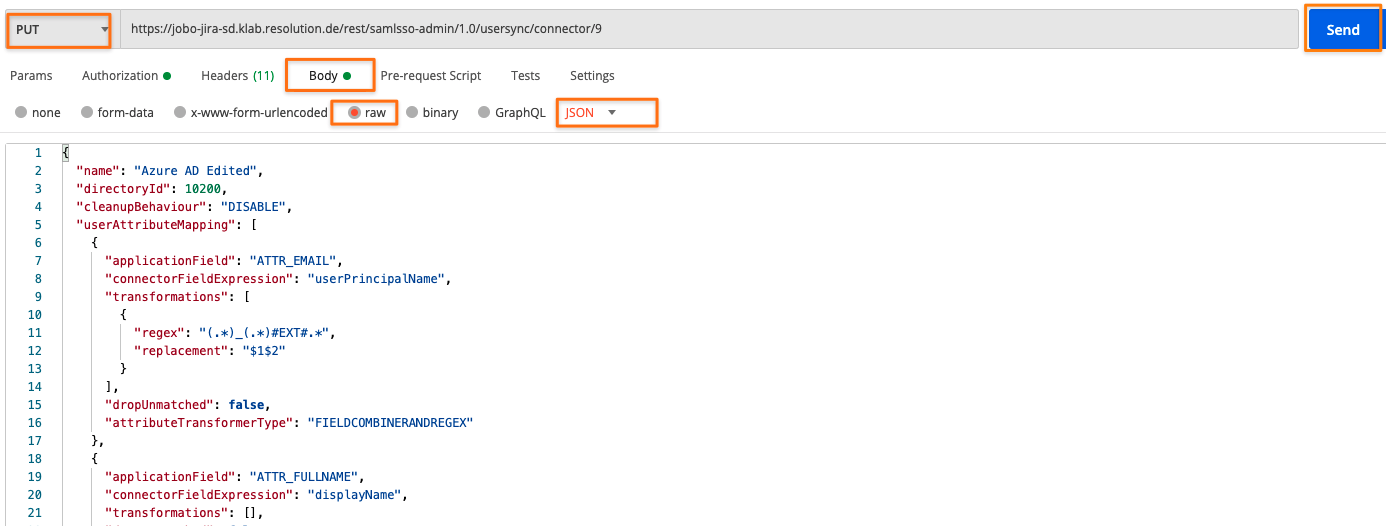
you should get a 200 OK Result and see the complete response again
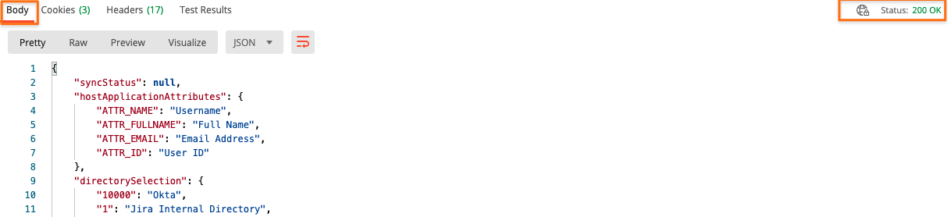
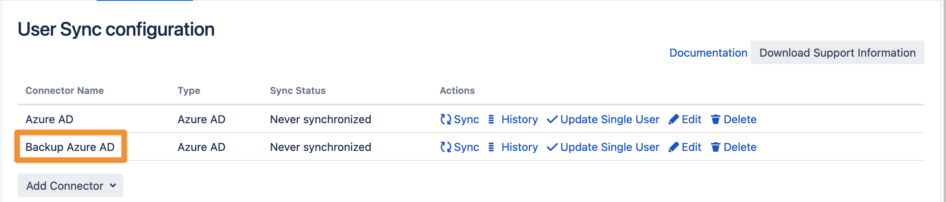
checking the User sync connector via the UI after refreshing the page should reflect the changes
Re-Use the Connector Configuration
Create a new Connector (you don't need to start any configuration)
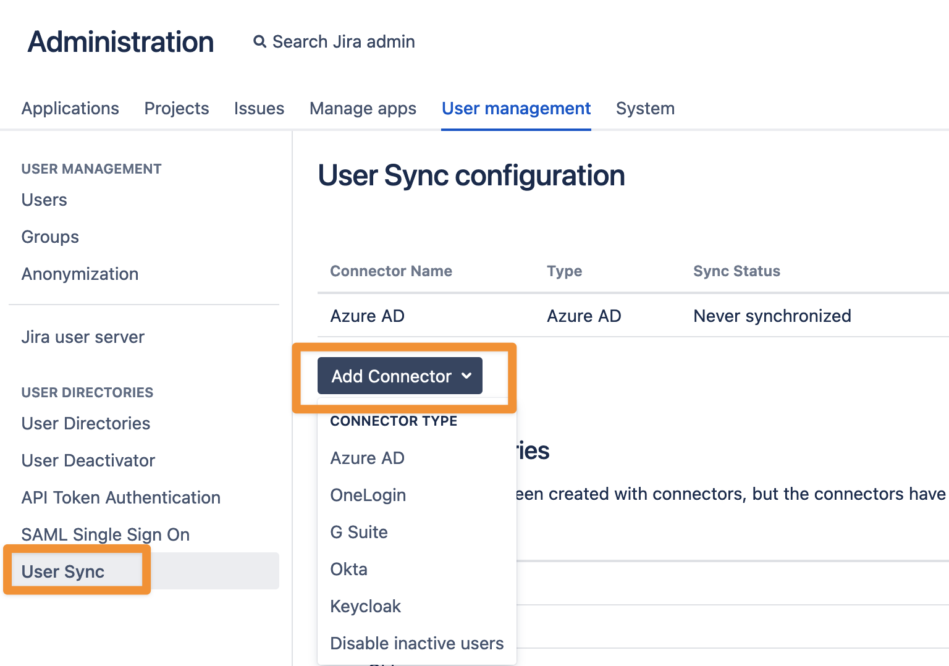 new_connector
Note the new Connector ID (remember address bar will reveal that ID)
 connector_id
Please choose Cancel (save would not be possible, because of missing parameters).
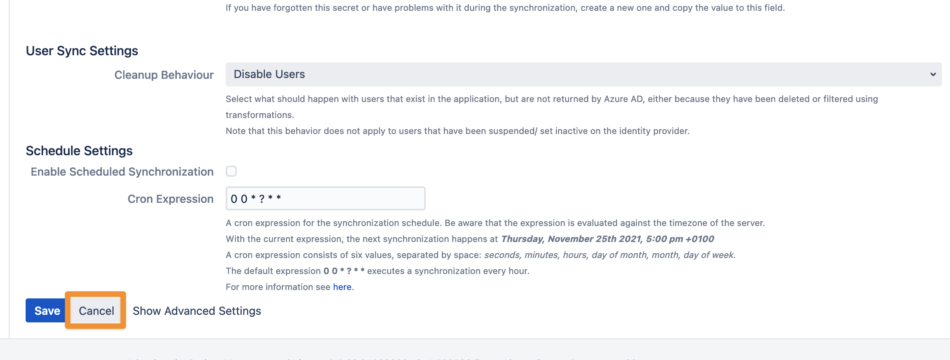 Cancel_Configuration_Connector
You will get a new Connector with an Invalid! NEW warning. You can ignore the message, we will import the configuration and everything will be fine.
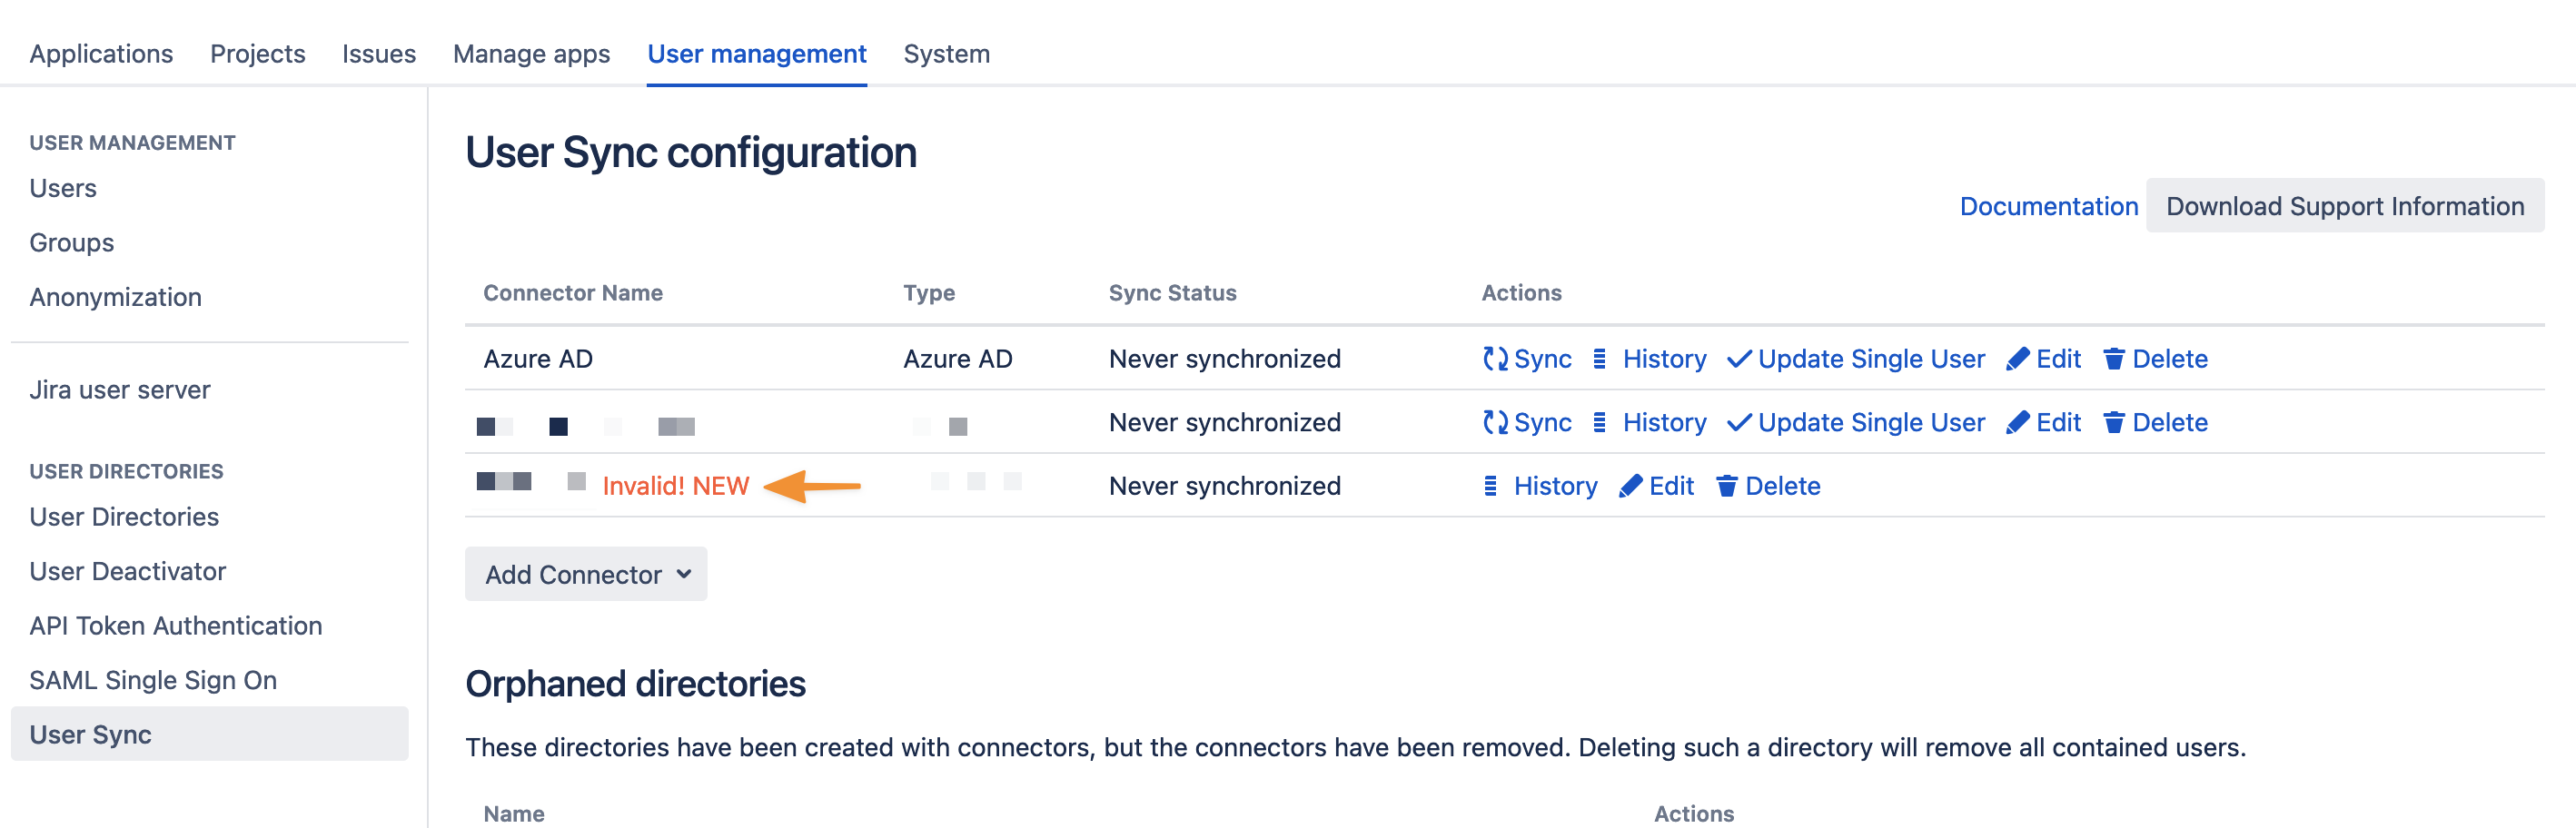 invalid_new
Import the (modified) configuration, change the Connector ID before (we will use the Connector ID from the new created one (in our case it is the ID 4)
 import_configuration
checking the User sync connector via the UI after refreshing the page should reflect the changes