Important Update Effective February 1, 2024!
Due to recent changes in Jira and Confluence, we've made the tough decision to discontinue the OpenID Connect (OIDC)/OAuth app and no longer provide new versions for the newest Jira/Confluence releases as of January 31, 2024.
This is due to some necessary components no longer shipping with Jira/Confluence, which would require some extensive rewrites of the OIDC App.
Important Update! This app will be discontinued soon!
Due to recent changes in Jira, which no longer ships with some components required for our Read Receipts app to run, we've made the tough decision to discontinue the app, as of Februar 5, 2025.
Important Update! This app will be discontinued soon!
We've made the tough business decision to discontinue the app, as of January 11, 2025.
Setup SAML SSO with AD FS (Confluence)
Video Guide
The video below is an installation guide for setting up SAML SSO for JIRA and Confluence with ADFS (see on YouTube).
Setup Guide
This setup guide describes how to complete the initial setup for Confluence SAML Single Sign On (SSO) Add-on with AD FS, applicable for Add-on version from 2.0.0. If you need any further support please feel free to contact us here.
Step1 Install the Add-on | Step2 Configure the Add-on (A-E) | Step3 Setup the ADFS (A-E) | Step4 Test | Step5 Enable login redirection |
|---|
Prerequisites
- ADFS 2.0/2.1/3.0/2016
- Confluence must be accessible via HTTPS. See https://confluence.atlassian.com/display/DOC/Running+Confluence+Over+SSL+or+HTTPS for instructions.
This is necessary because ADFS accepts only HTTPS-URLs for SAML endpoints.
Step 1: Install the Add-on
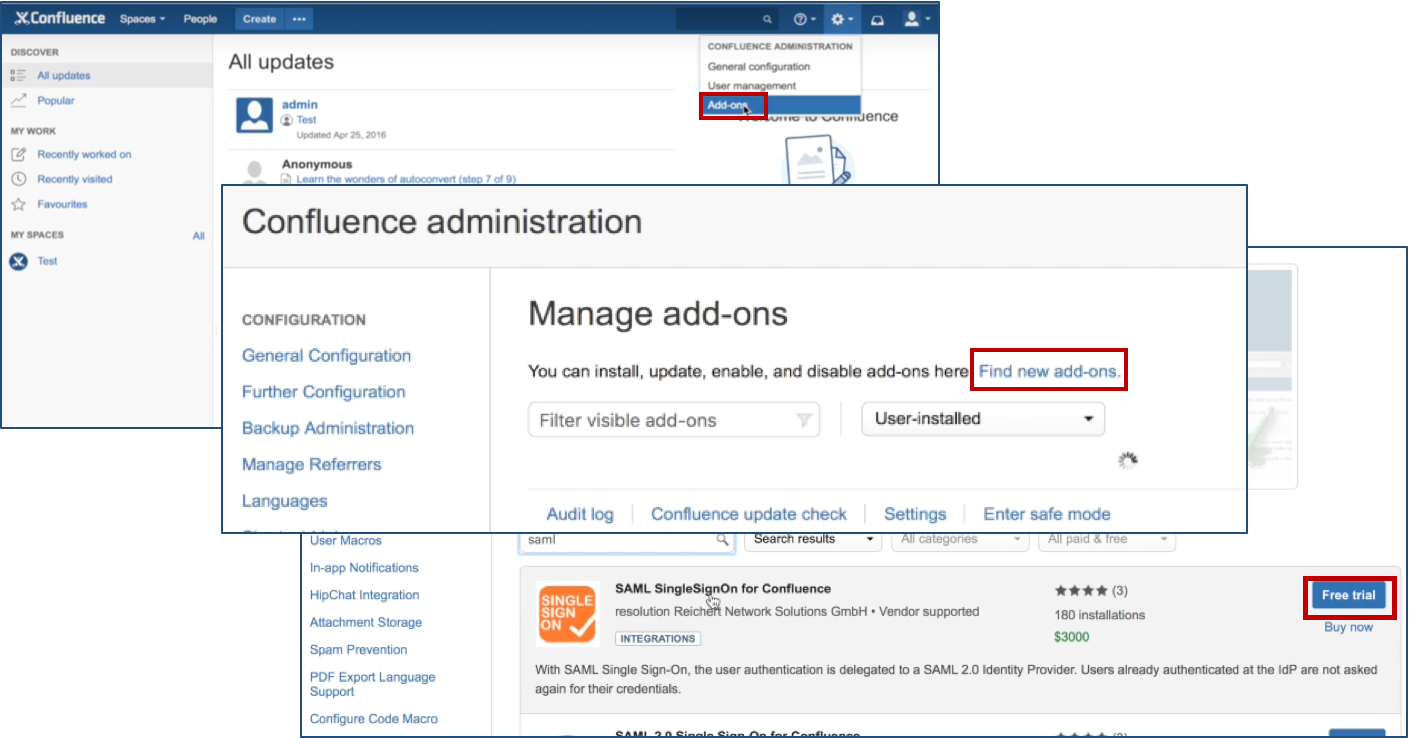
Click Add-ons under Confluence Administration on the top right corner of your Confluence interface. Then, choose Find new add-ons and you will be taken to Atlassian Marketplace. Search for SAML SSO and click on Free Trial to install.
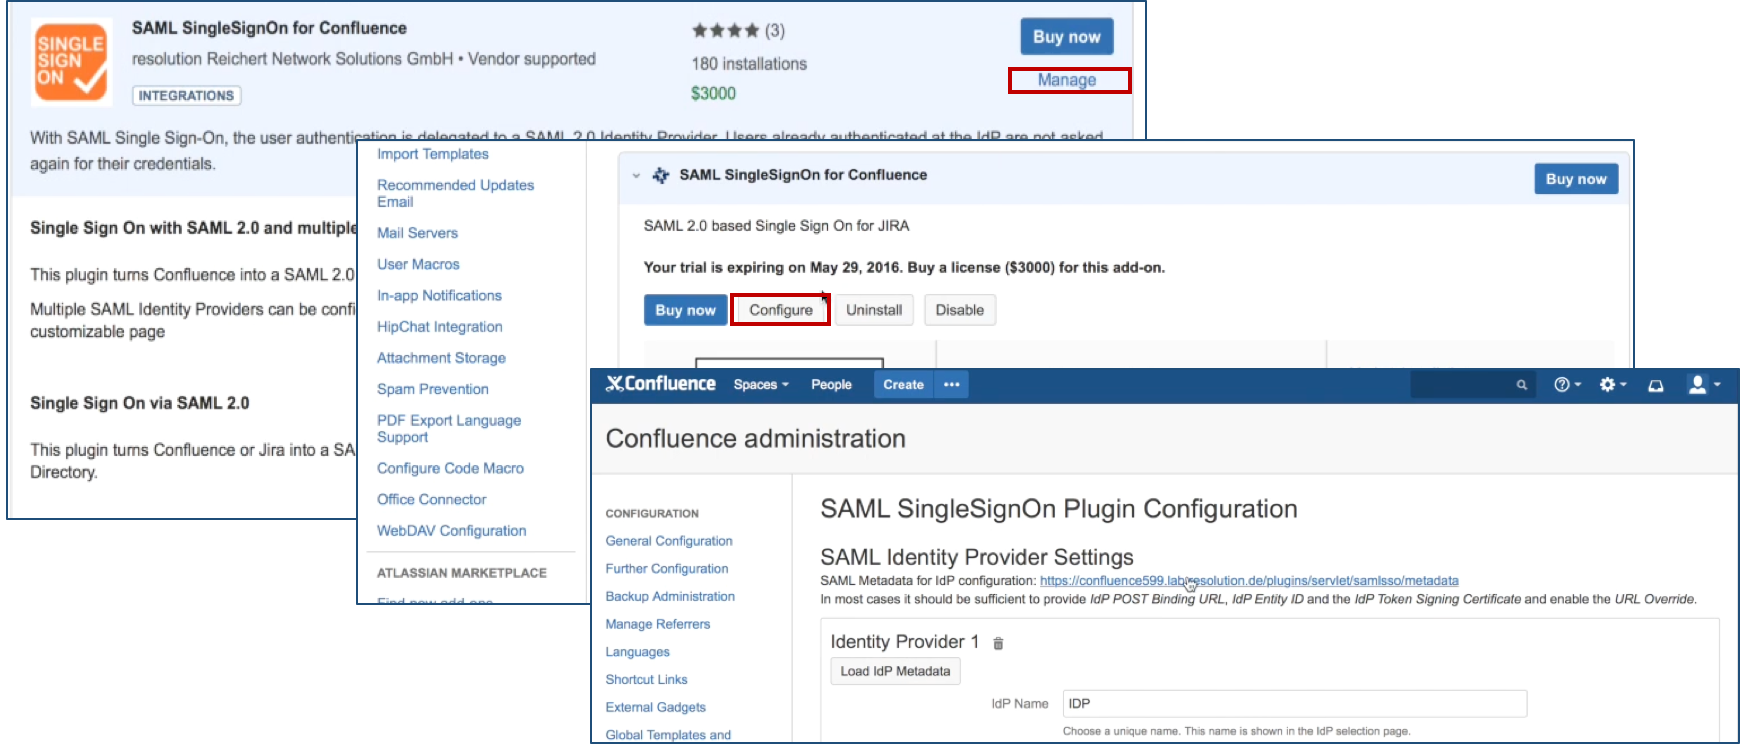
After installation succeeded, click on Manage, then choose Configure. Now, you are on the plugin configuration page.
Step 2: Configure the Add-on
Substep A: Add new IdP or import config
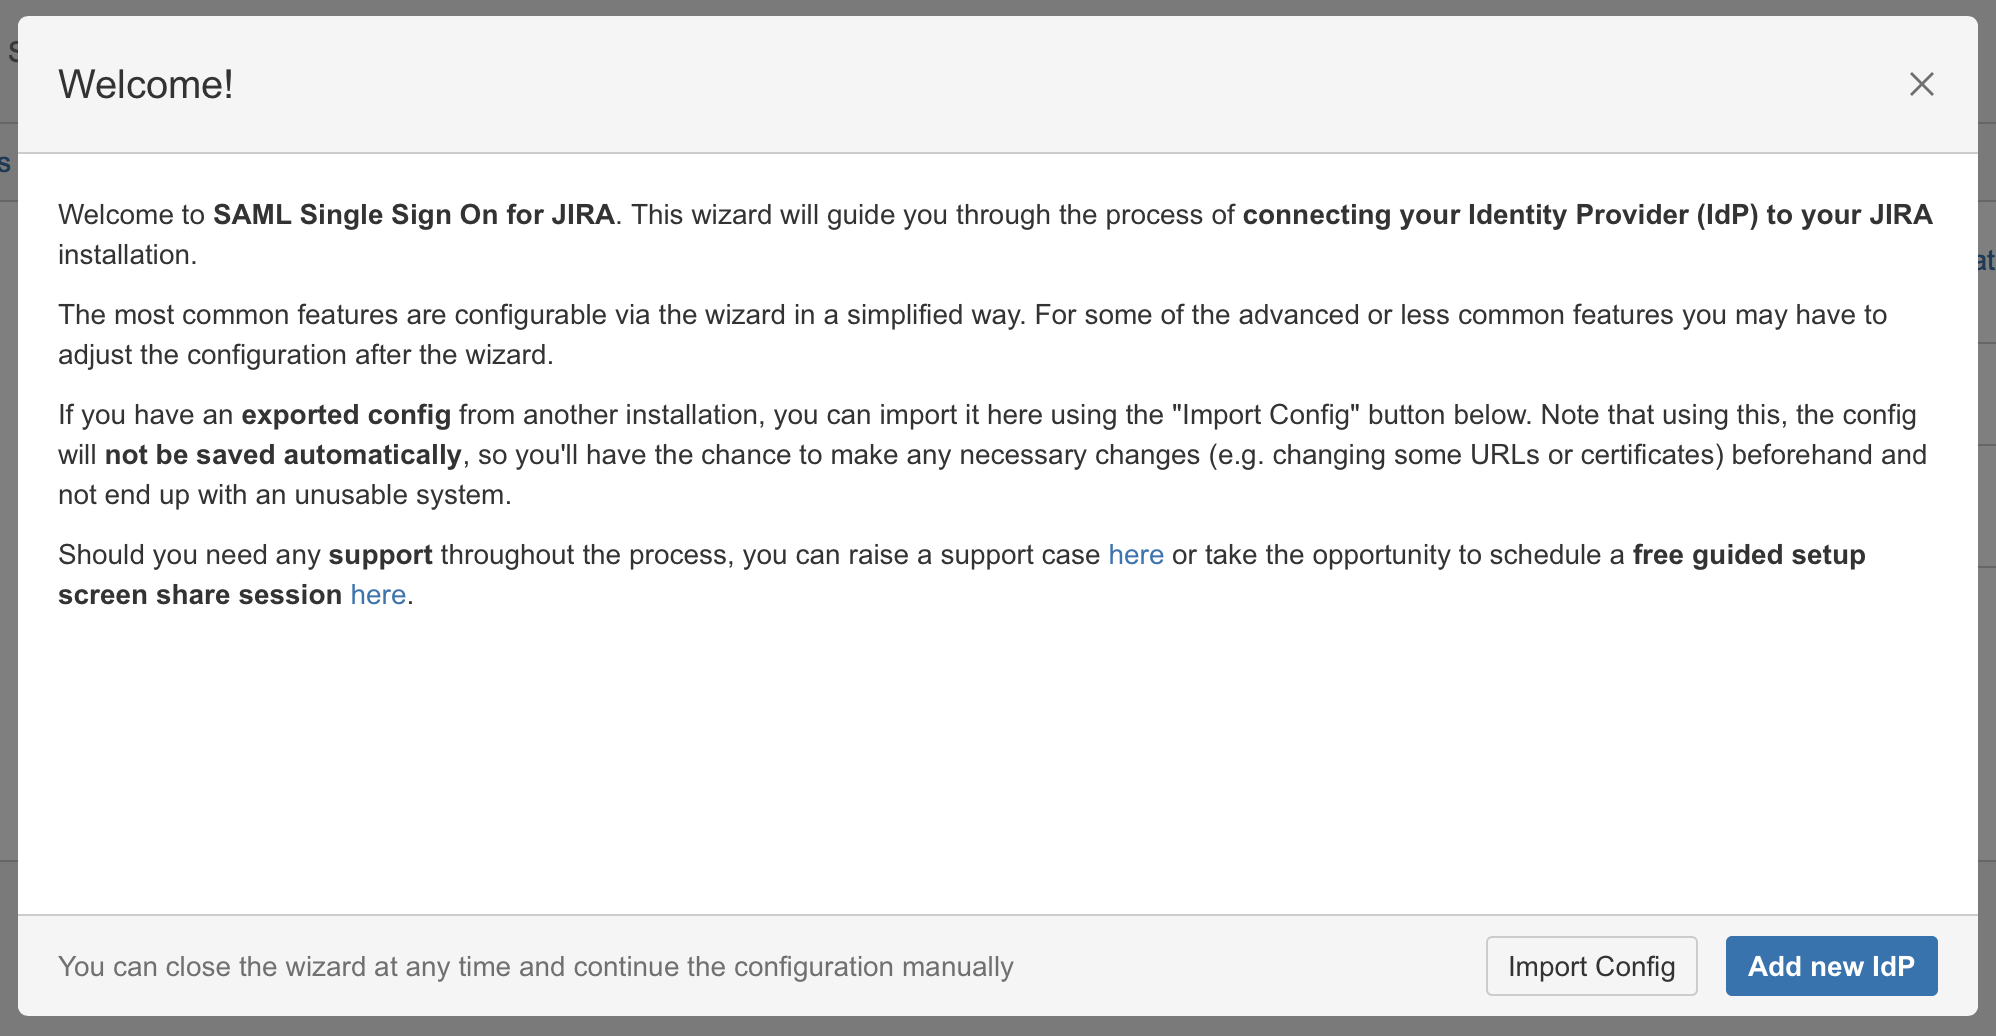
Since Version 2.0.0, our Add-on offers an intuitive configuration wizard that is presented on first start. In the first step it's possible to import an existing configuration or to start with a fresh configuration. Click on Add new IdP to start the wizard.
Substep B: Choose your SAML Identity Provider
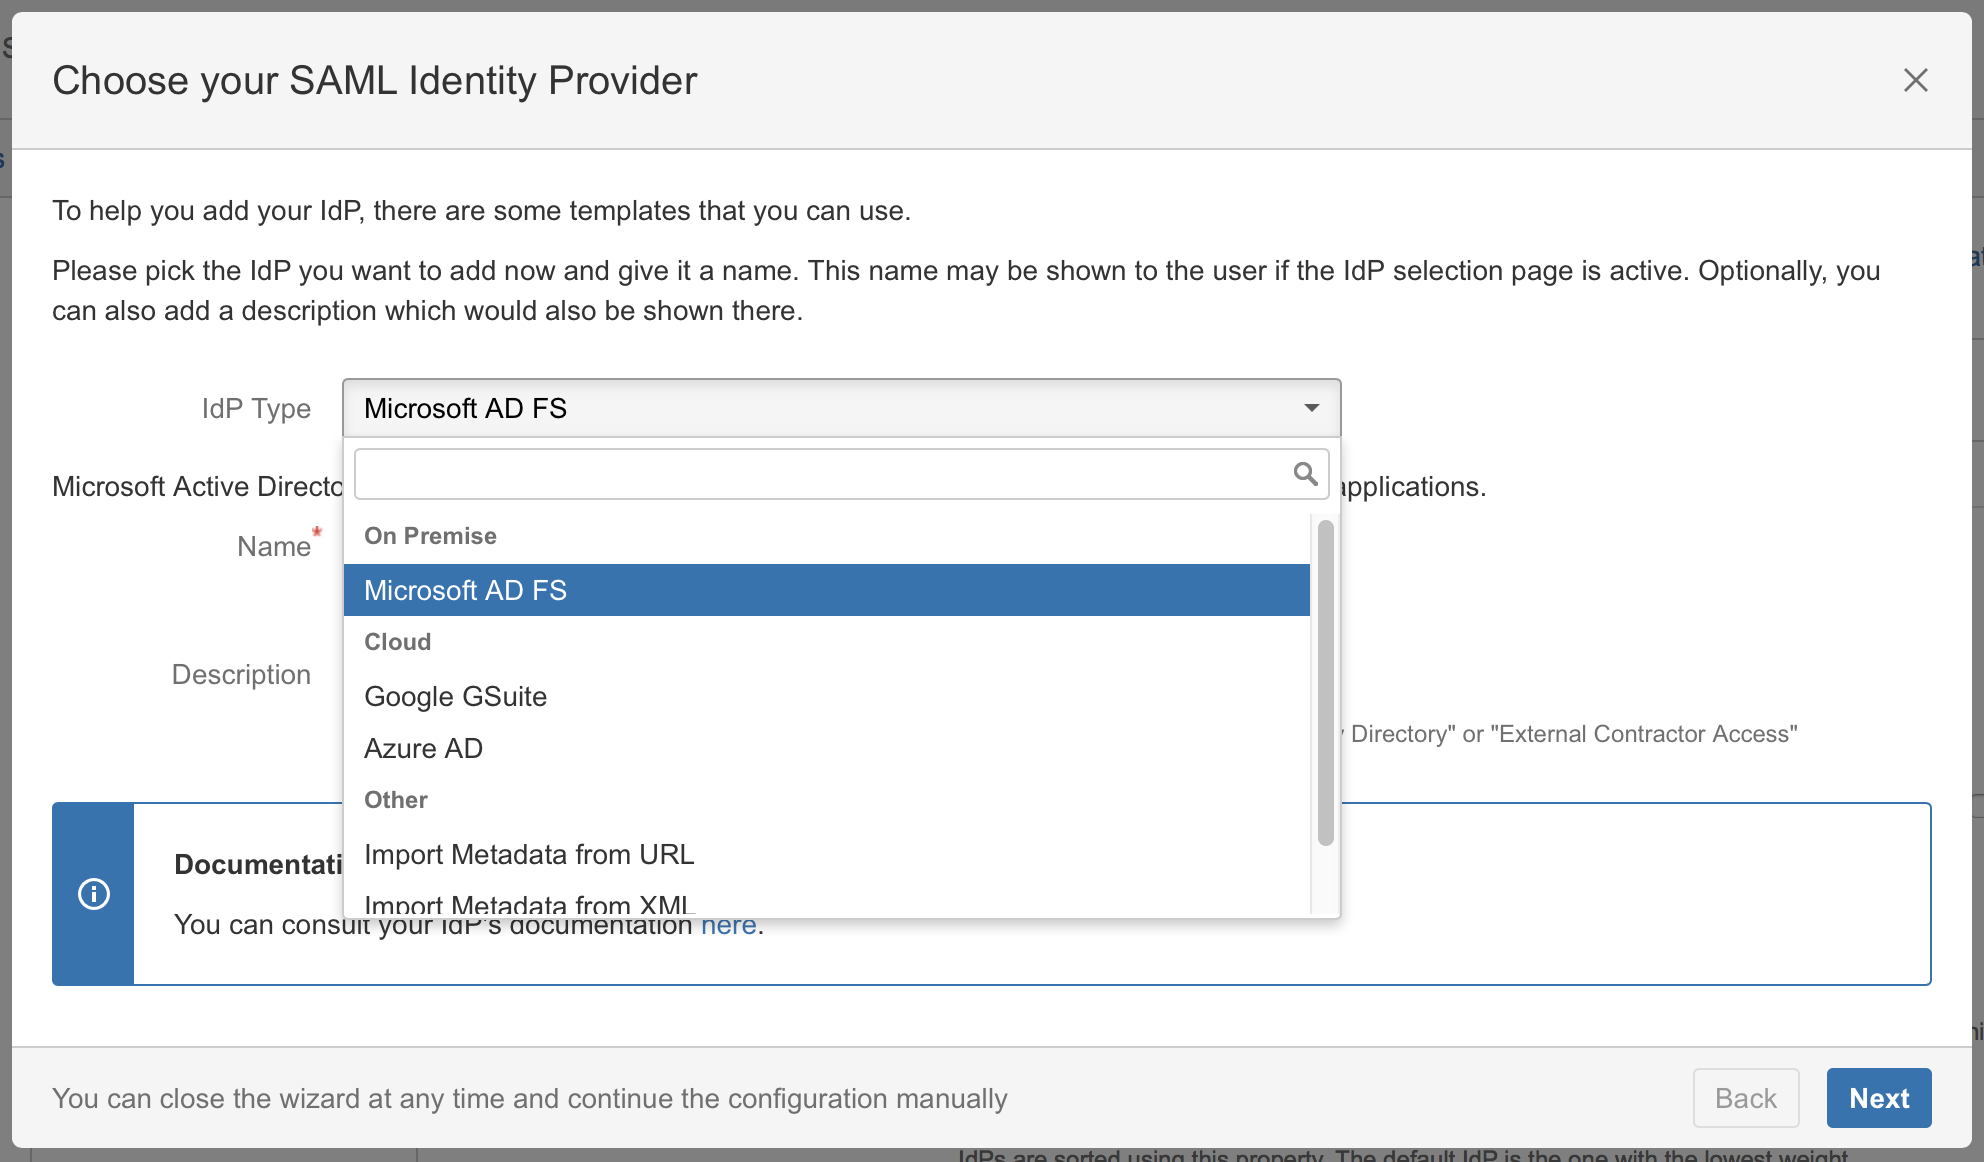
Select Microsoft AD FS as IdP Type and click on Next.
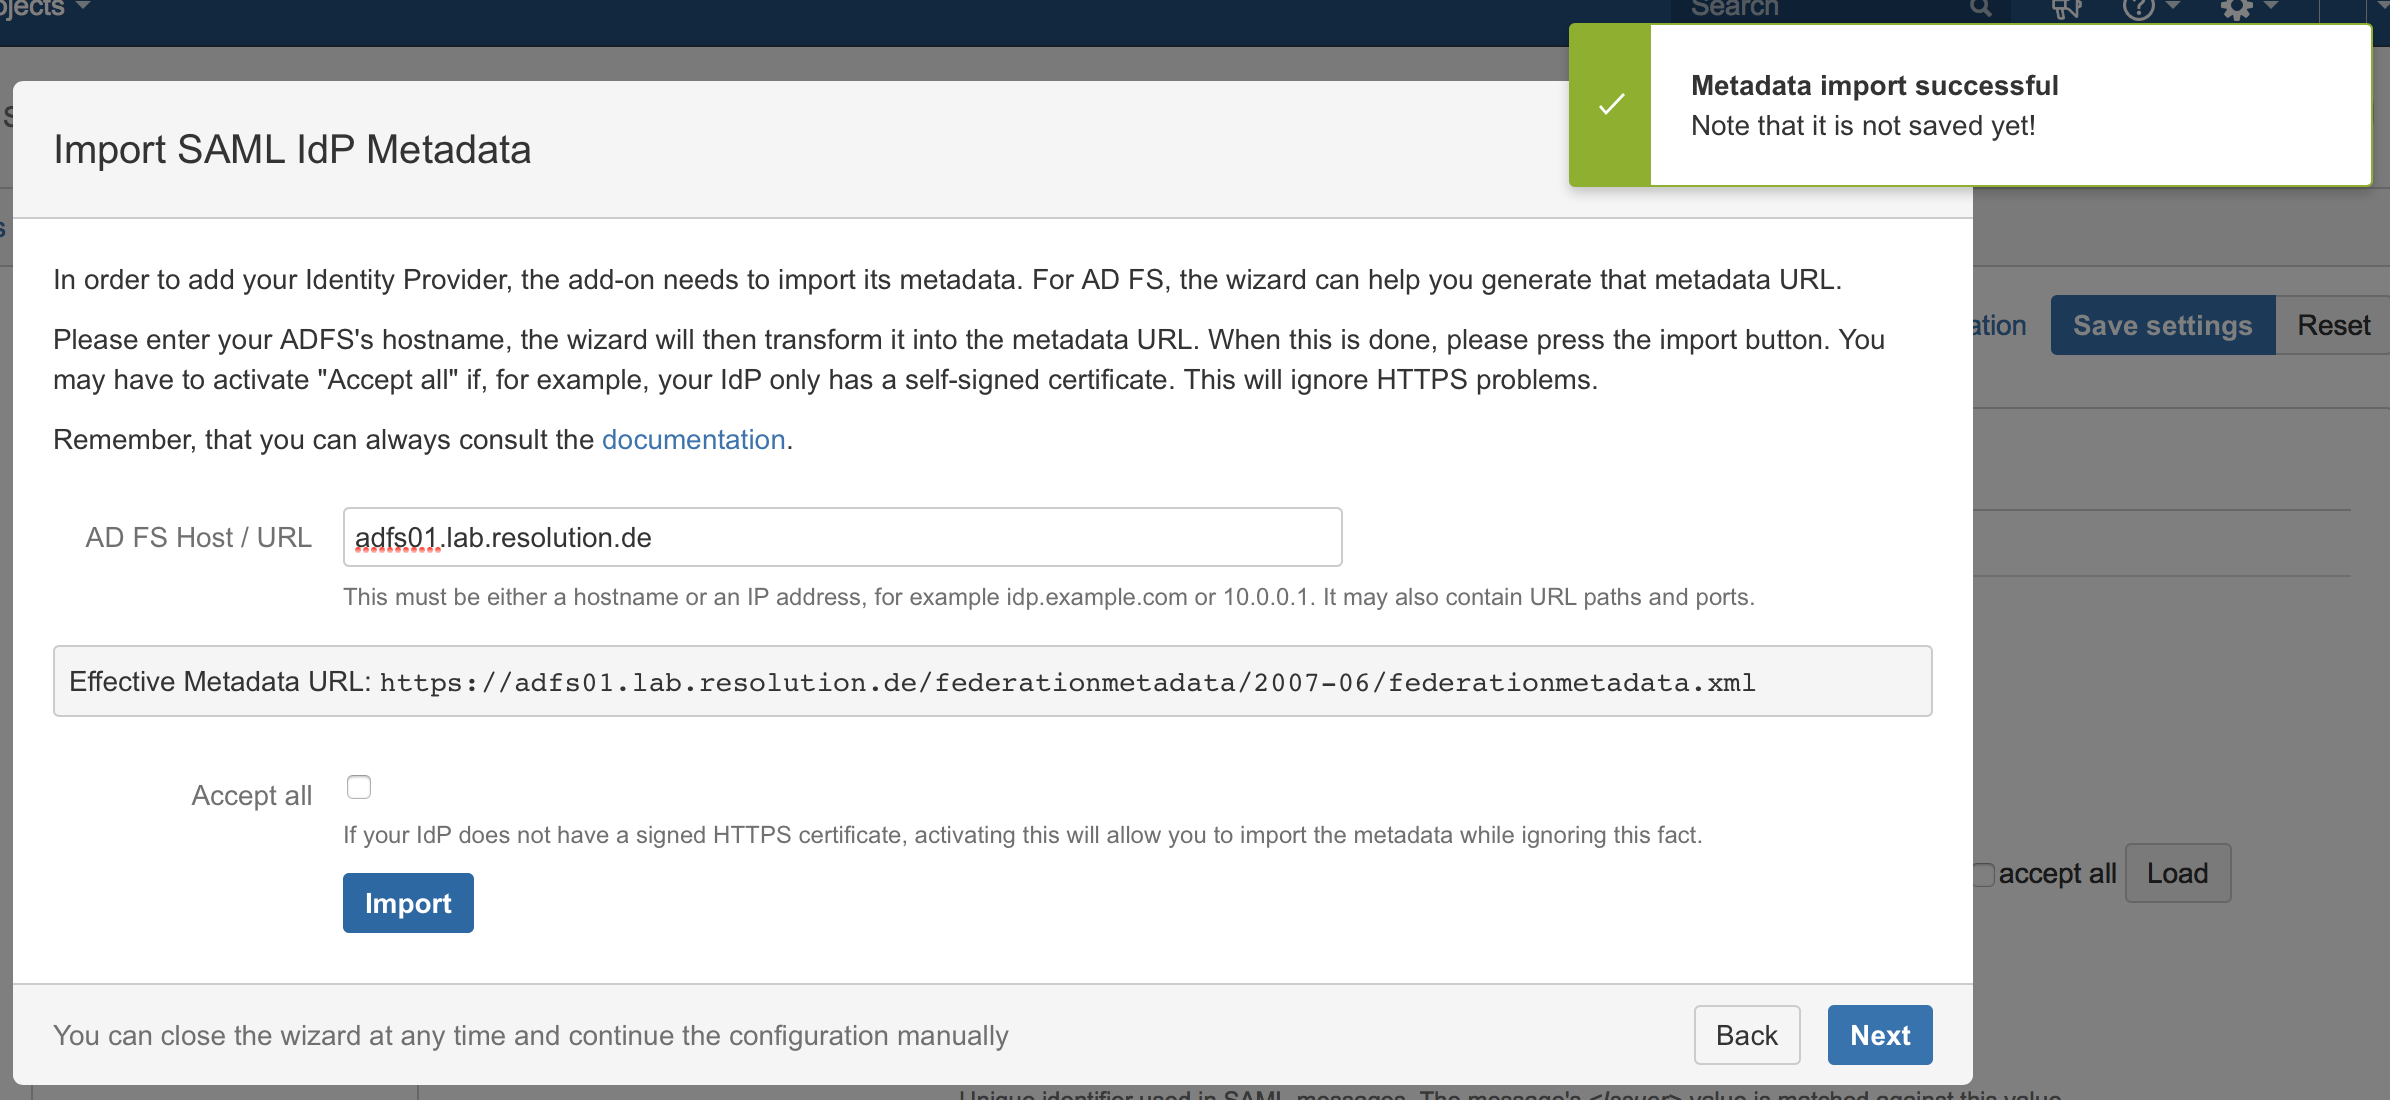
Substep C: Import SAML IdP Metadata
The recommended way to setup the ADFS is to import ADFS Metadata. The Metadata URL from ADFS is automatically detected from the hostname of the AD FS that has been entered.
- Check Accept all if your IdP's https-certificate is not in your JIRA instance's trust store.
- Click on Import.
If for some reason the AD FS Metadata is not accessible via this URL, you can always go back to substep 2B to import the metadata from an XML file or configure the IdP manually.
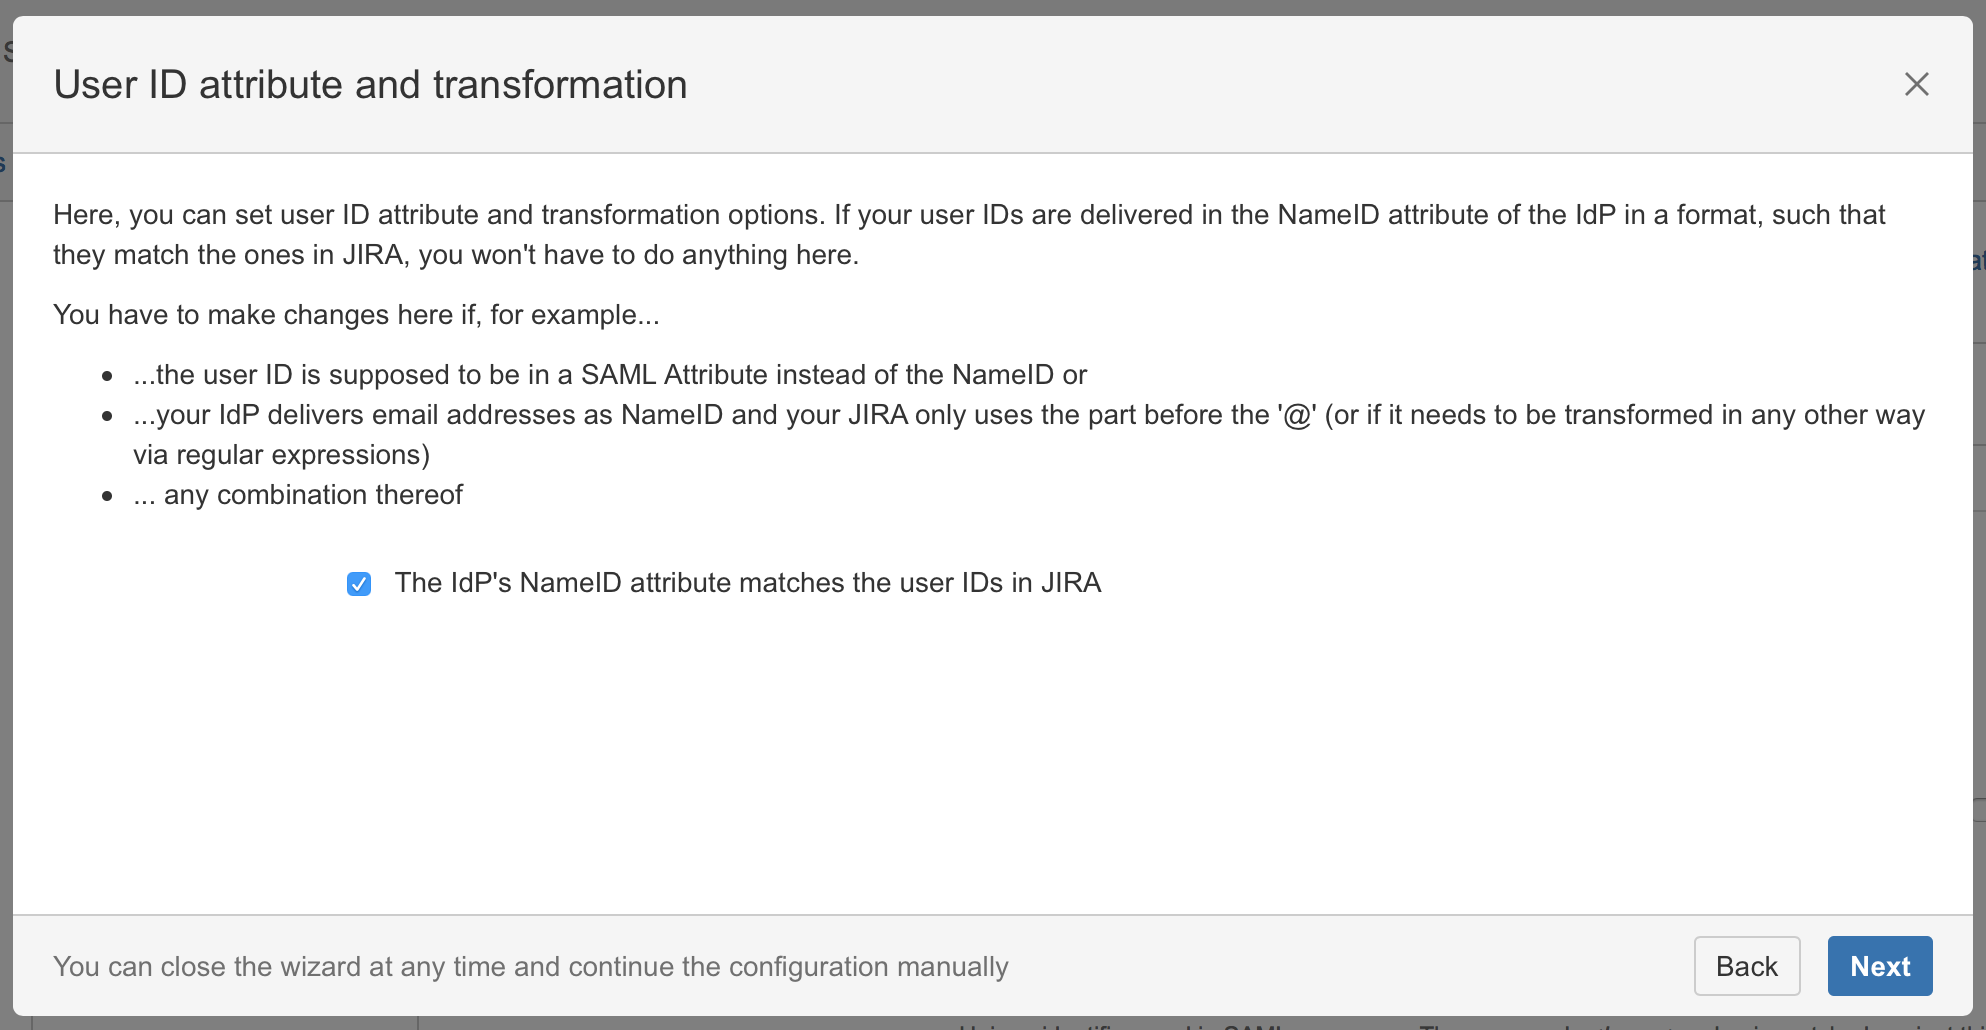
Substep D: User ID attribute and transformation
It's recommended to leave this option checked as we will later configure the AD FS to use the Name ID attribute. Simply click on Next.
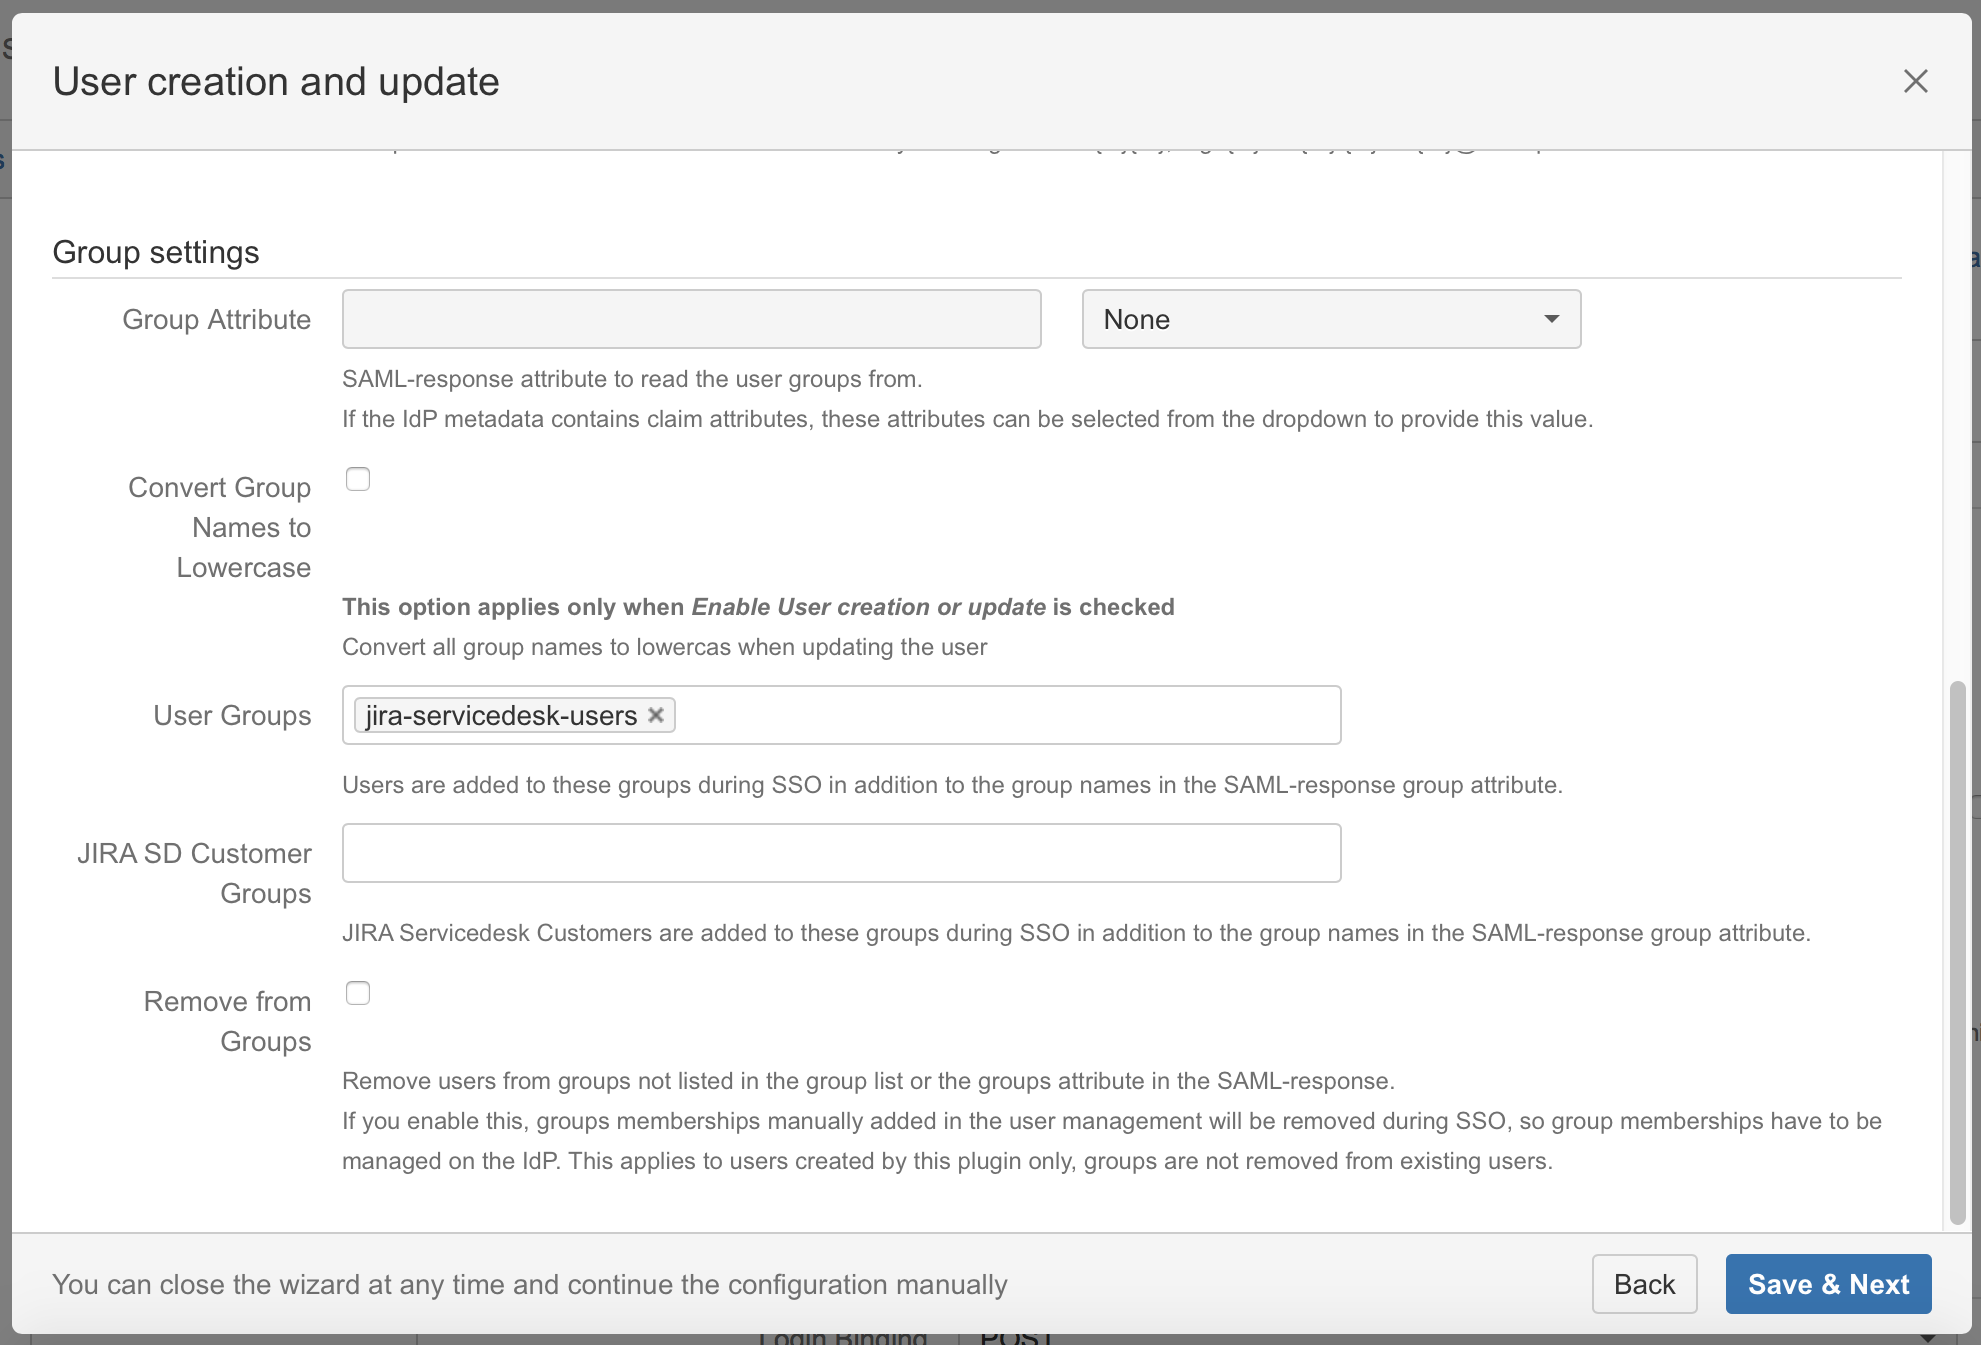
Substep E: Default group assignment
If you want to assign a default group check Enable user creation or update and define the default group in the User Group field. If a user logs in using SAML, he will be added to the groups specified in the User Groups section. This applies to all users. The user is assigned to these groups in addition to the groups in the SAML-response's attribute. The standard group in Confluence is called "confluence-users".
Click on Save & Next to continue with the configuration of your AD FS.
Step 3: Setup the ADFS
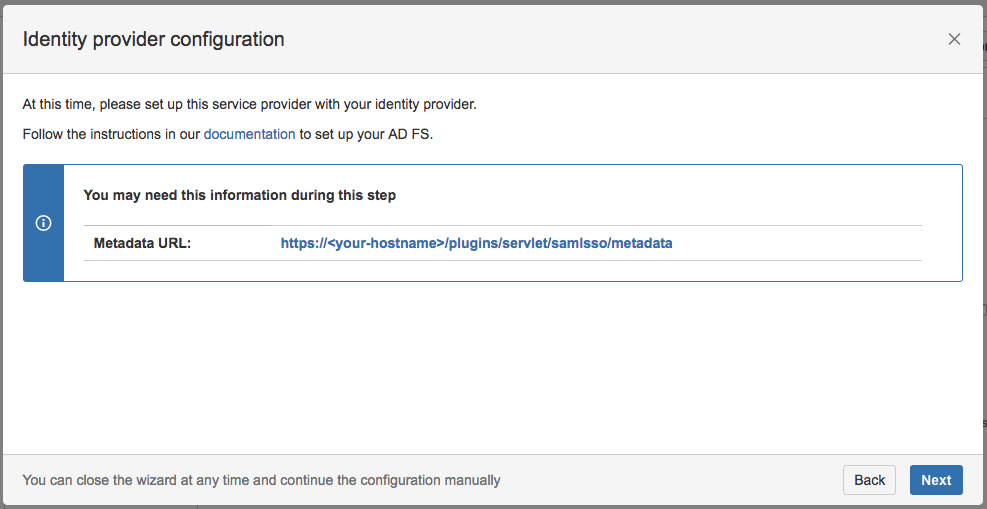
Substep A: Copy/Download the SAML Metadata URL
Substep A1:
Copy the SAML Metadata-URL from your SAML Single Sign On config page - or, if your AD FS has no connection to this instance do Substep A2.
Substep A2:
Save the linked metadata.xml of the SAML Metadata URL and move the saved metadata.xml to your ADFS to a location of your choice. The most common way is to open the SAML Metadata URL via browser and save the page/file as XML. This steps differentiate between all possible browsers. Try another browser if you have problems with that step.
Substep B: Start the Add Relying Party Trust Wizard
The rest of Step 2 will be completed in AD FS.
- Open the AD FS 2.0 Management Console and select Add Relying Party Trust to start the Add Relying Party Trust Wizard.

- Click the Start Button to start the wizard.

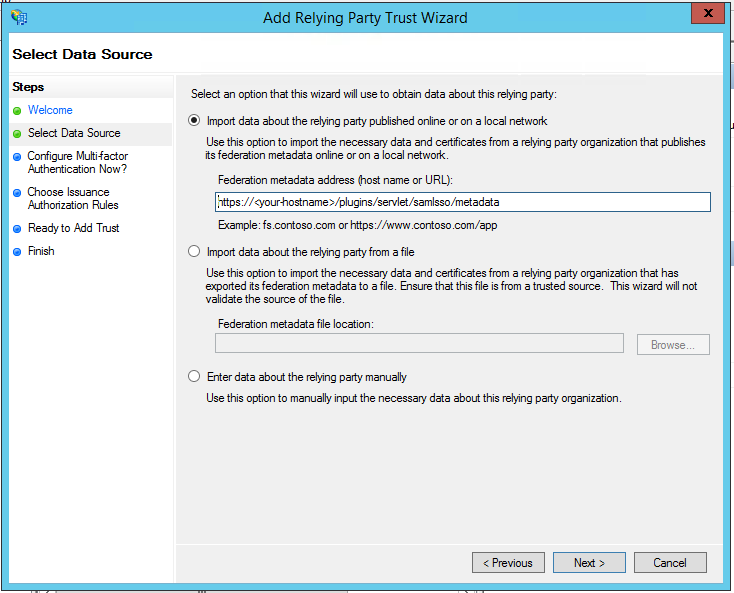
Substep C: Insert your SAML Metadata
Substep C1:
- Select Import data about the relying party published online or on a local network and paste in the SAML Meta-URL in the Federation metadata address (host name or URL) field.
- Click Next.
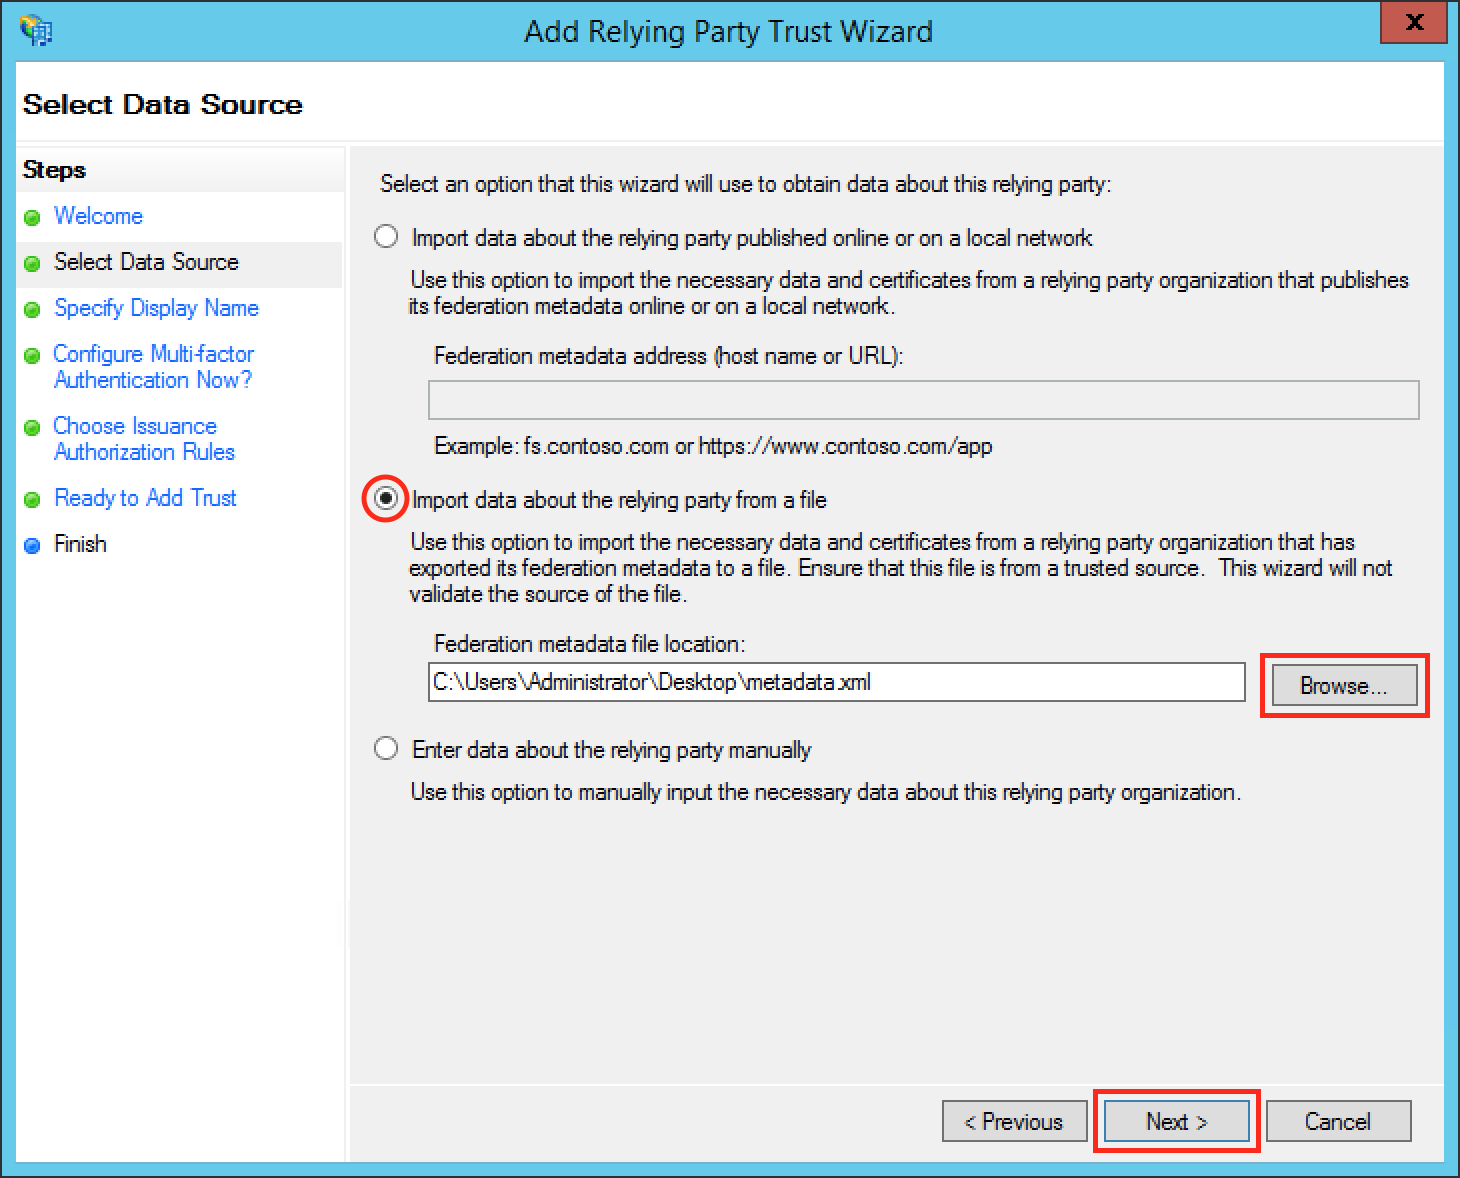
Substep C2:
- Select Import data about the relying party from file and browse to your metadata.xml location with the Browse... button or fill in your location directly.
- Click Next.
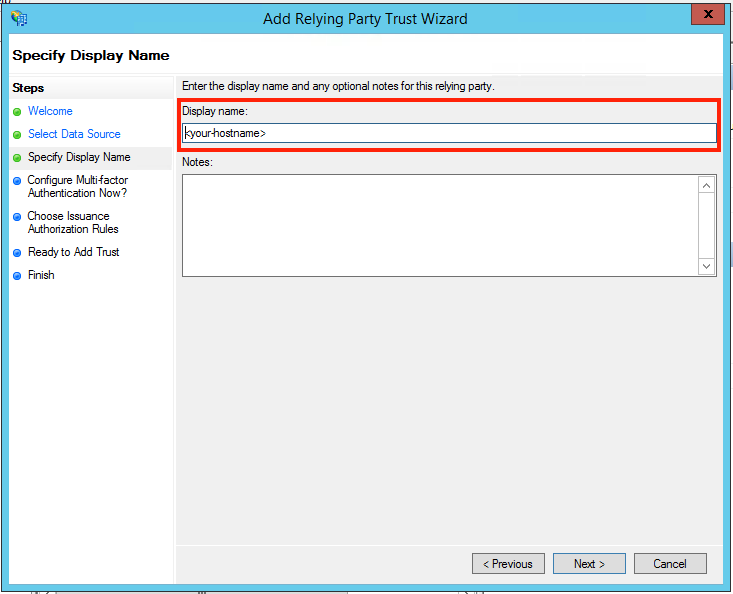
Substep D: Finish the Add Relying Party Trust Wizard
- Fill the field Display name with a name of your choice.
- Click Next.
- Select I do not want to configure multi-factor authentication settings for this relying party trust at this time.
- Click Next.

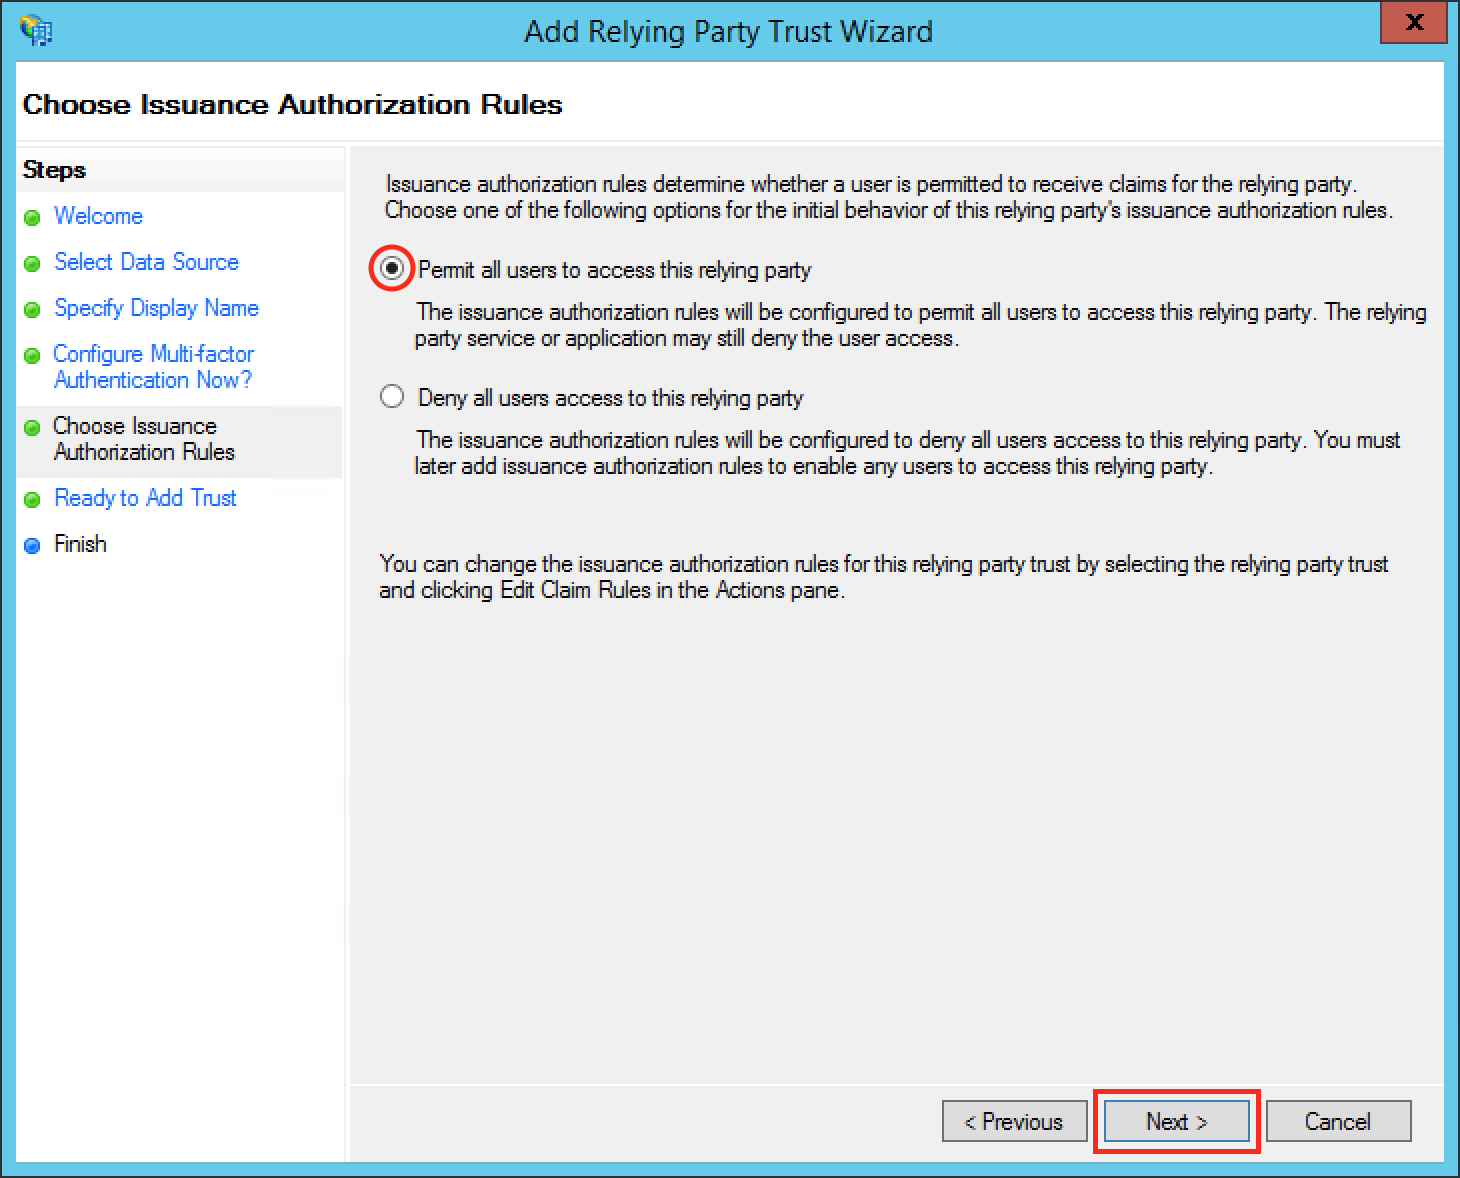
- Select Permit all users to access this relying party.
- Click Next.
- Click Next.
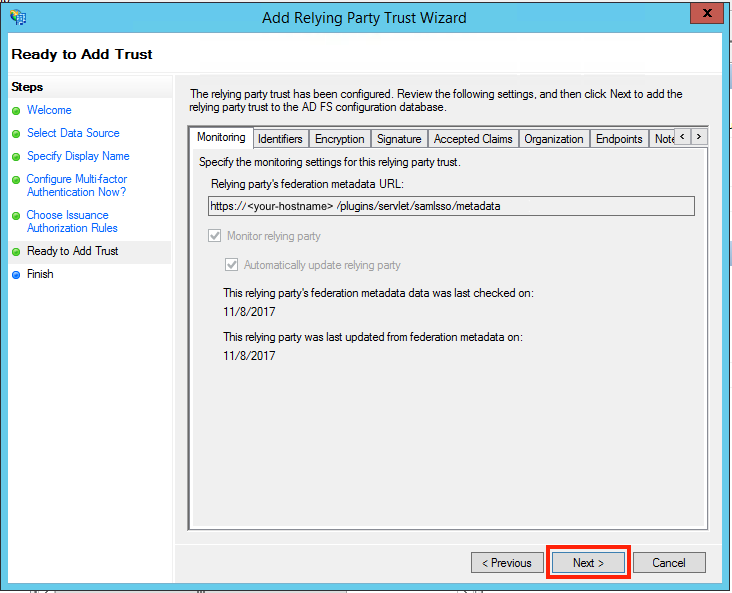
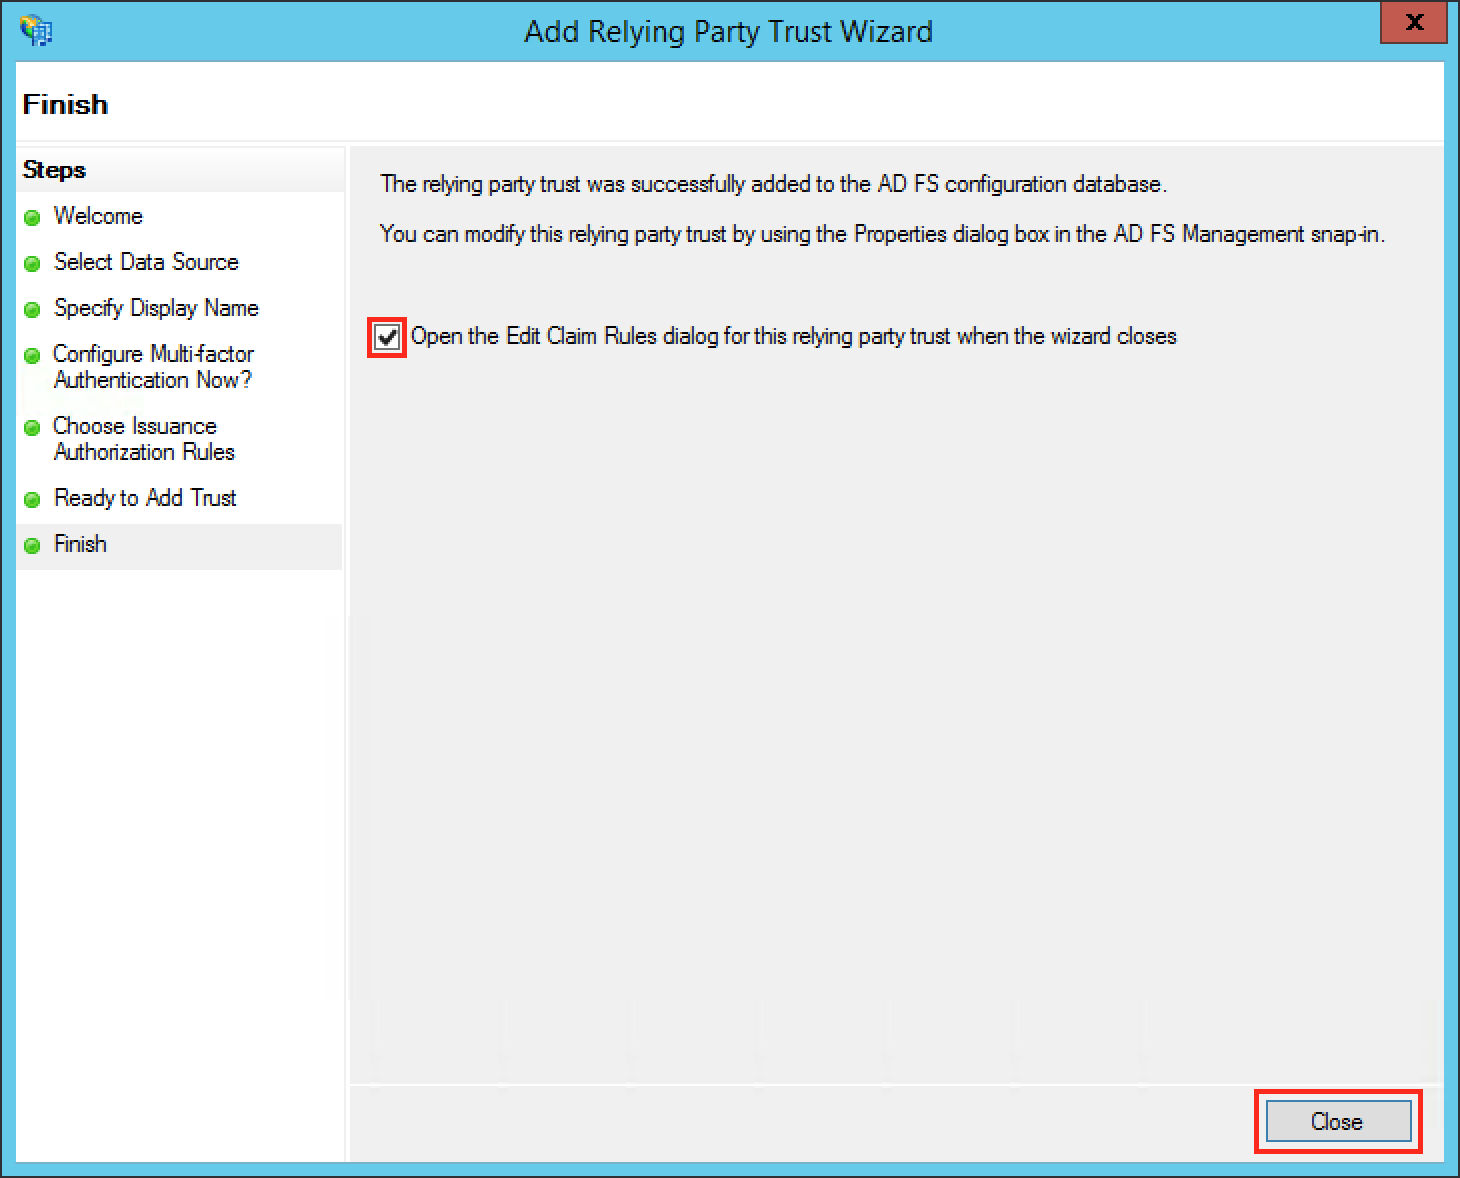
- Check the Open the Edit Claim Rules dialog for this relying party trust then the wizard closes checkbox to open the Edit Claim Rules dialog after closing the wizard.
- Click Close to finish the Add Relying Party Trust Wizard.
Substep E: Add Name ID as Claim Rule
The Name ID (on the normal case) from the SAML Response is required to authenticate users. So we need to add a claim rule on ADFS, which add the Name ID in every SAML Response from ADFS.
- Navigate to ADFS → Trust Relationships → Relying Party Trusts on the left Navigation panel.
- Select your Relying Party Trust.
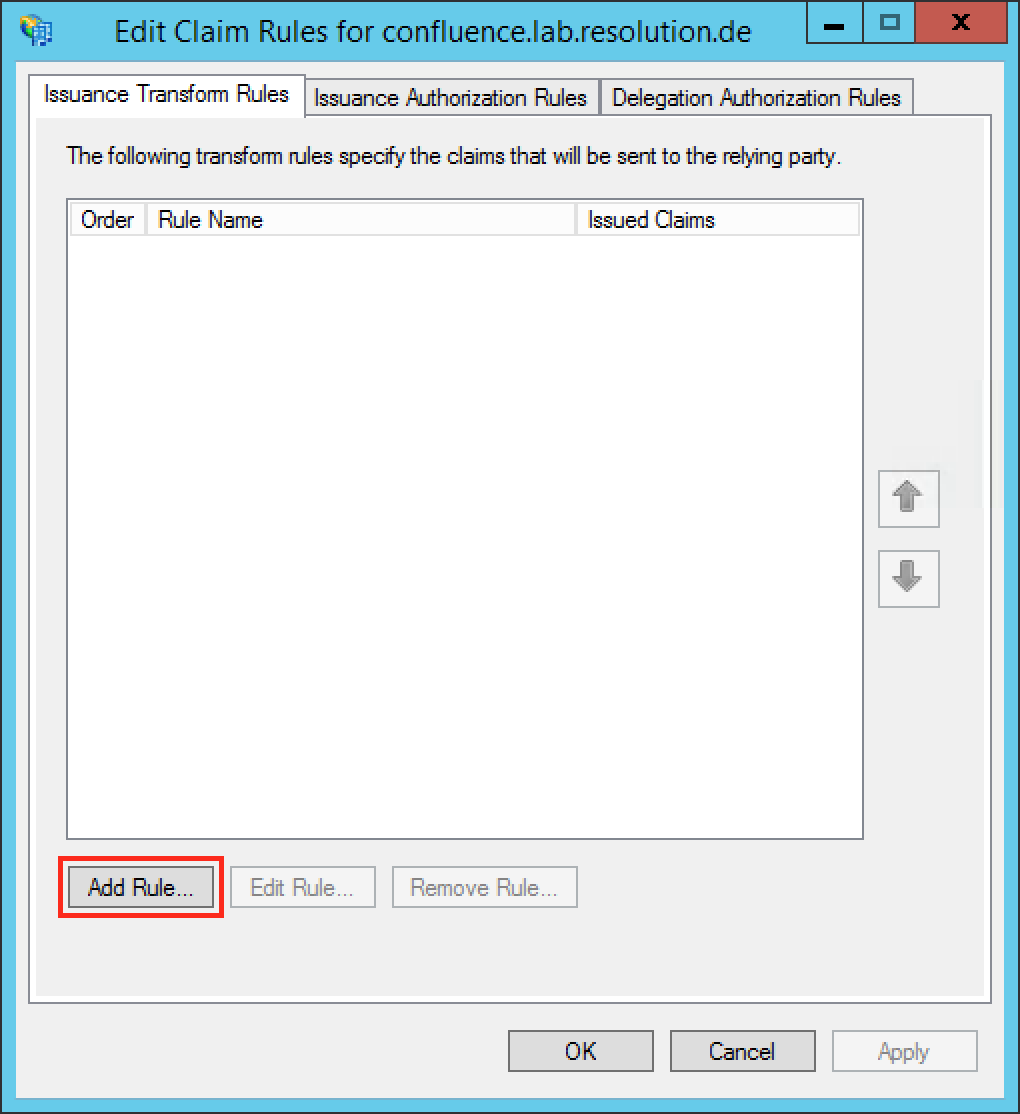
- Click on Edit Claim Rules... on the right Actions panel.

Otherwise, continue from here.
- Click the Add Rule... Button to open the Add Transform Claim Rule Wizard.
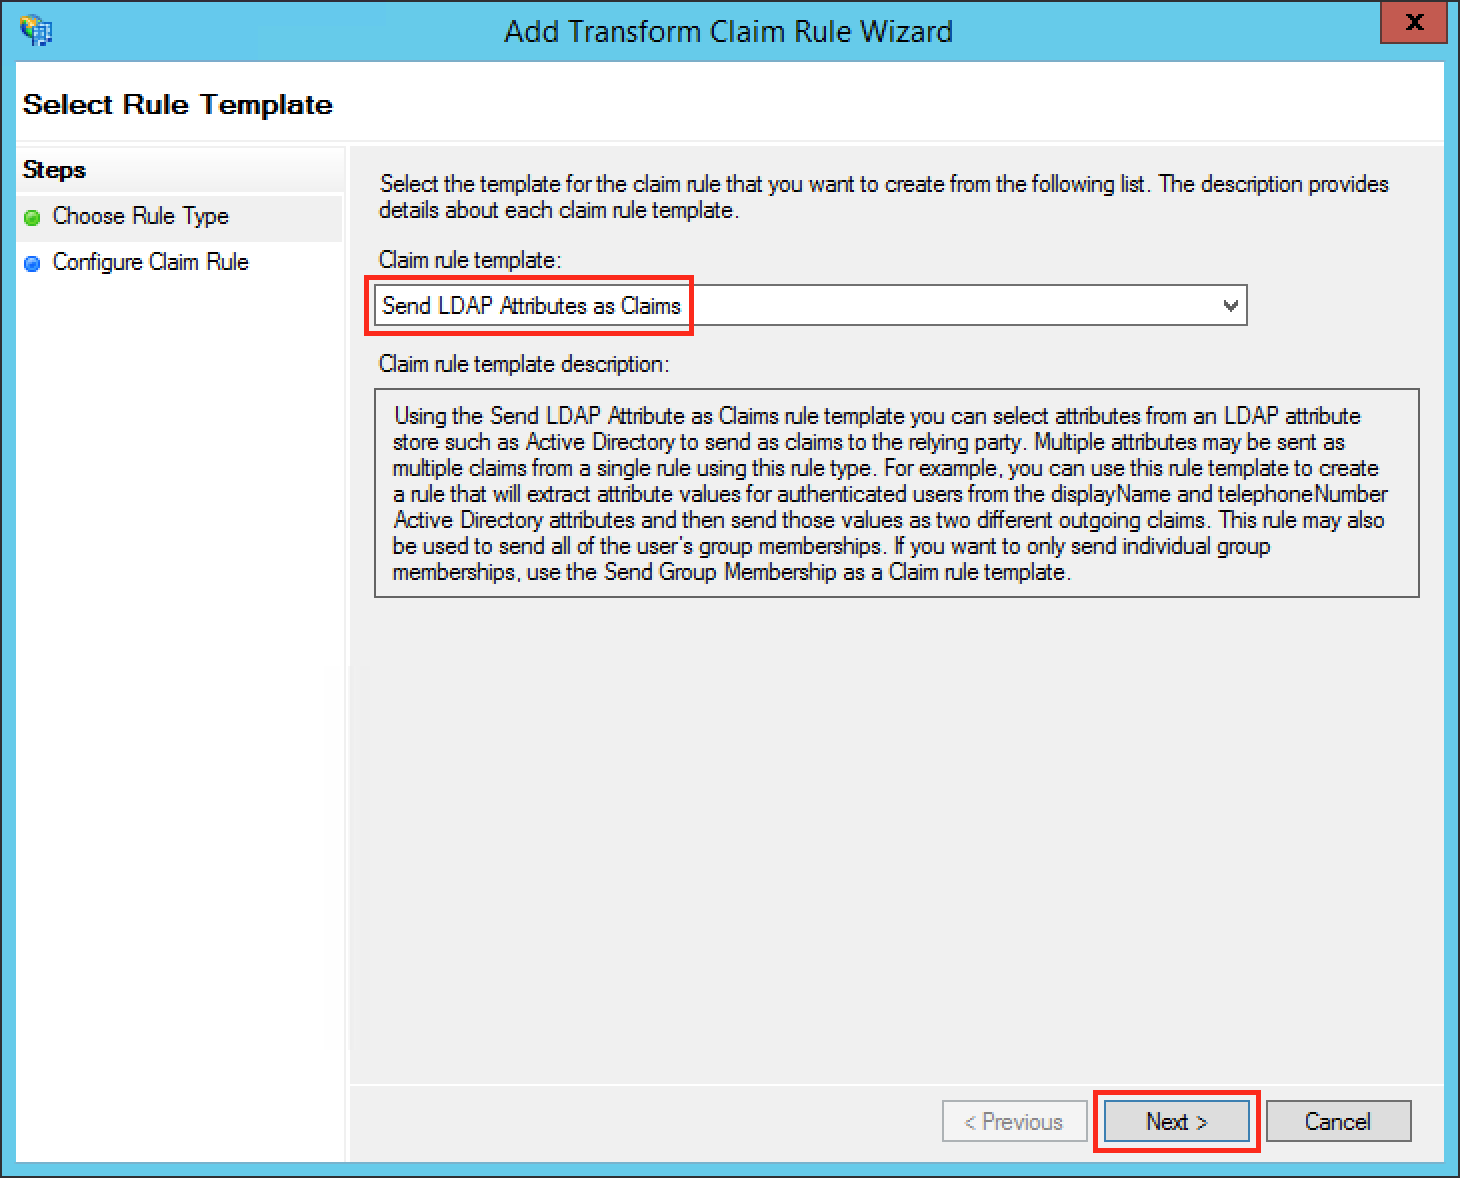
- Select Send LDAP Attributes as Claims in the Claim rule template drop-down list.
- Click Next.
- Fill the field Claim rule name with a name your choice.
- Select Active Directory in the Attribute store drop-down list.
- Select your appropriate LDAP Attribute in the first drop-down field from LDAP Attribute (Select or type to add more). In this example we are using the Windows login name attribute SAM-Account-Name as Name ID.
- Select Name ID in the first drop-down field from Outgoing Claim Type (Select or type to add more).
- Click Finish to complete the Add Transform Claim Rule Wizard.

- Check if your new rule has been added to the Edit Claim Rules dialog. Try again Step E if it has failed.
- Click Apply to save your settings.
- Click OK to finish.

Step 4: Test
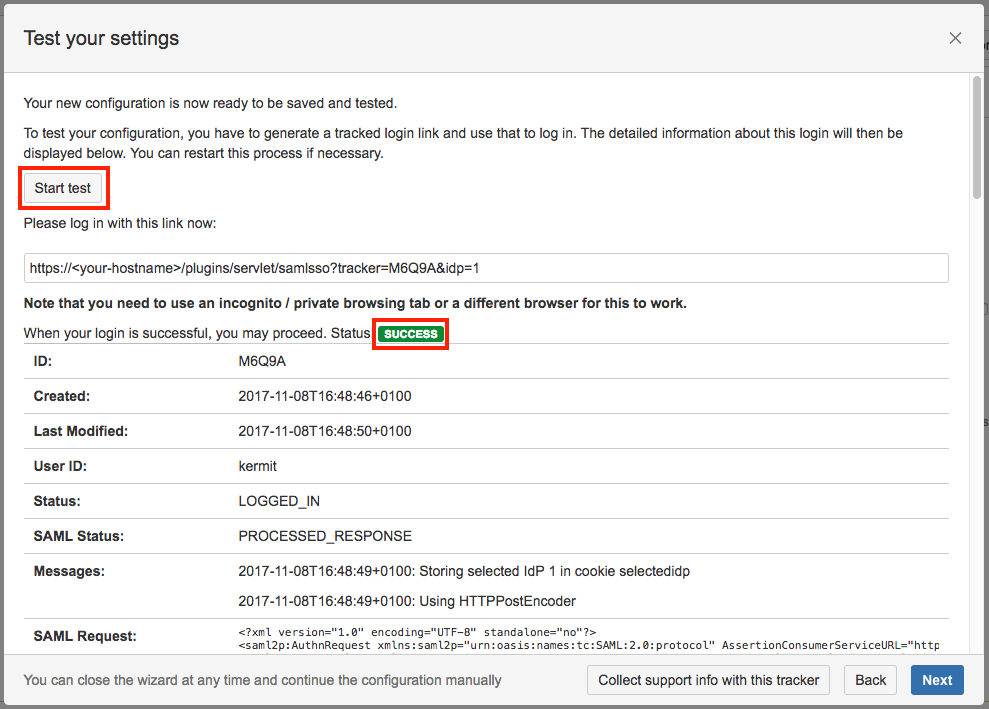
You are now able to perform a test with an authentication tracker, to see if your configuration is working as intended. To start the test, click on the Start test button, copy the displayed link, paste it into a new incognito / private browsing window, and execute a login with Identity Provider. The status of the authentication process is permanently update in the wizard.
Step 5: Enable login redirection
If the authentication test was successful, it is now safe to activate the redirection on login.
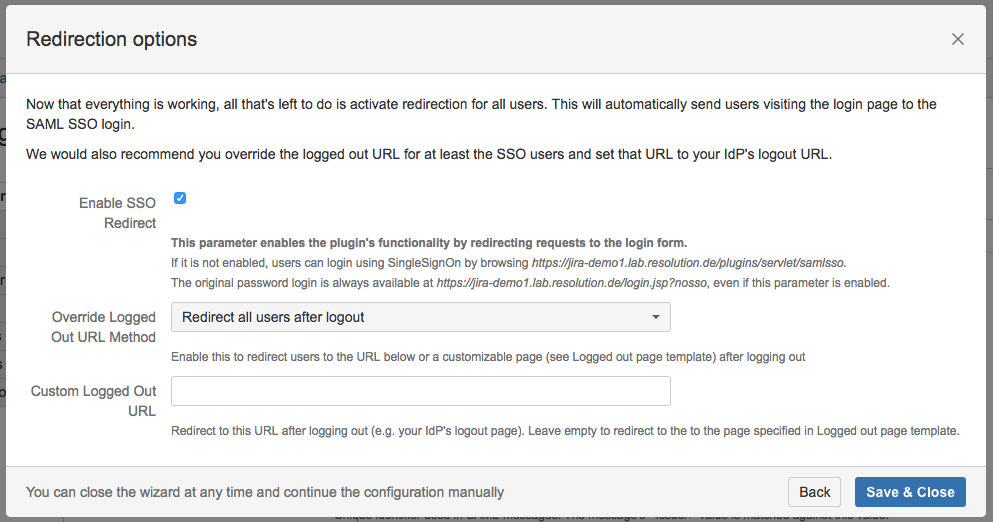
Click on Save & Close. The Add-on is now configured and ready to use.
If Enable SSO Redirect is enabled, you can login to Confluence manually by browsing https://<your-confluence>/login.action?nosso. Use this URL if you need to login a local user unknown to the ADFS or if there are any issues with Single Sign On.
You might also find following documentation helpful:
