
Setup SAML SSO with Azure AD (Bitbucket)
Our SAML Single Sign On for Bitbucket is now officially listed on Azure AD gallery.
Now customers who purchased our plugin can also use it with the Free Edition of Azure AD. Check out more detailed information here.
Check out our Plugin and Setup Guide in Azure AD Gallery:
Step-by-Step Setup Guides to setup our SAML plugin for Bitbucket with Azure AD
his guide describes how to complete the initial setup for Bitbucket Single Sign On Azure AD, applicable from Add-on version 2.0.4. If you need any further support please feel free to contact us here.
Step 1: Install the plugin | Step 2: Setup the Azure AD (Substep A-D) | Step 4: Test | Step 5: Enable login redirection |
|---|
Prerequisites
Azure Active Directory Premium
If you already have an Azure AD account, but are not sure if your premium account is enabledIf your Azure premium account is not yet enabled, find out how to enable Azure Active Directory Premium trial here.
Bitbucket must be accessible via HTTPS.
See https://confluence.atlassian.com/bitbucketserver/securing-bitbucket-server-with-tomcat-using-ssl-776640127.html for instructions. This is necessary because Azure AD accepts only HTTPS-URLs for SAML endpoints.
Step 1: Install the Add-on
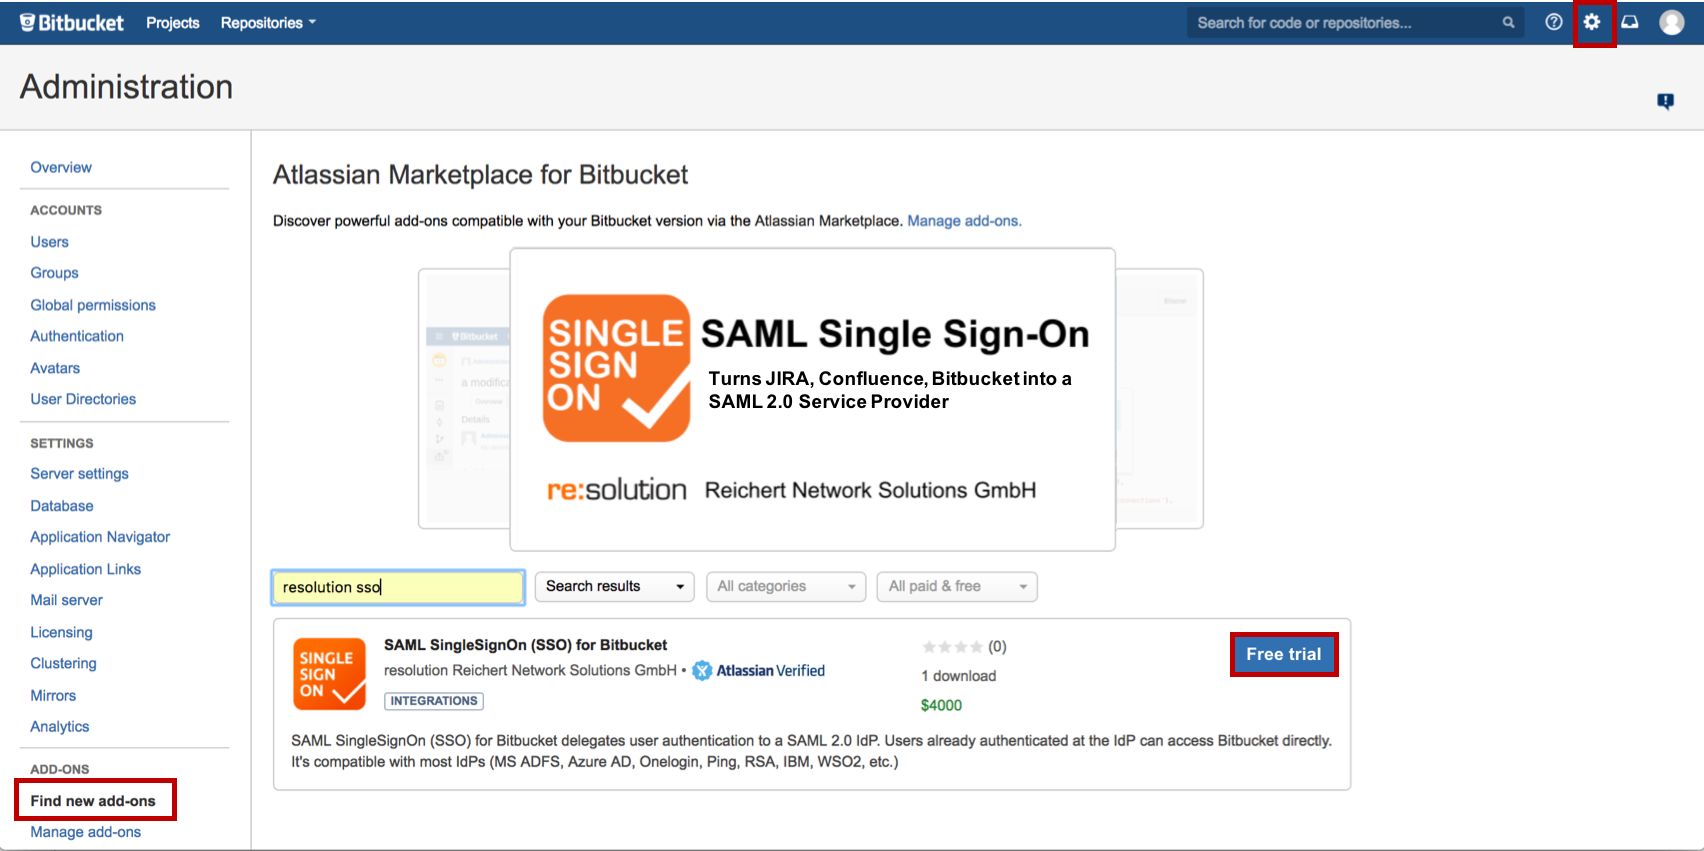
Open the Bitbucket Administration on the top right corner of your Bitbucket interface. Then, choose Find new add-ons and you will be taken to Atlassian Marketplace. Search for resolution sso and click on Free Trial to install.
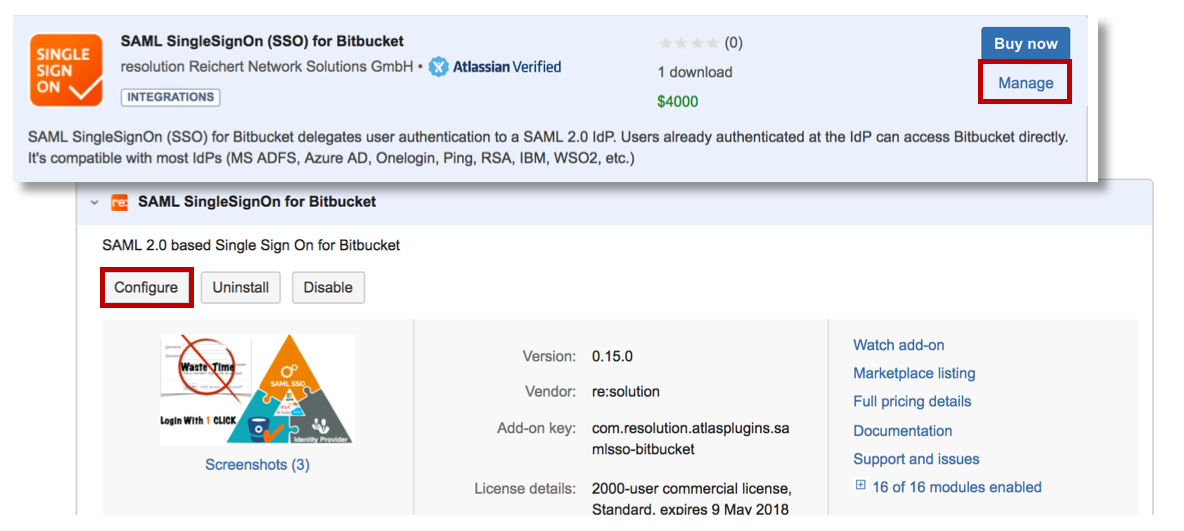
After installing free trial, click on Manage, then choose Configure. Now, you are on the plugin configuration page.
Step 2: Setup the Azure AD
Step 2 will be completed in Azure AD.
Substep A : Select your directory and start application dialog
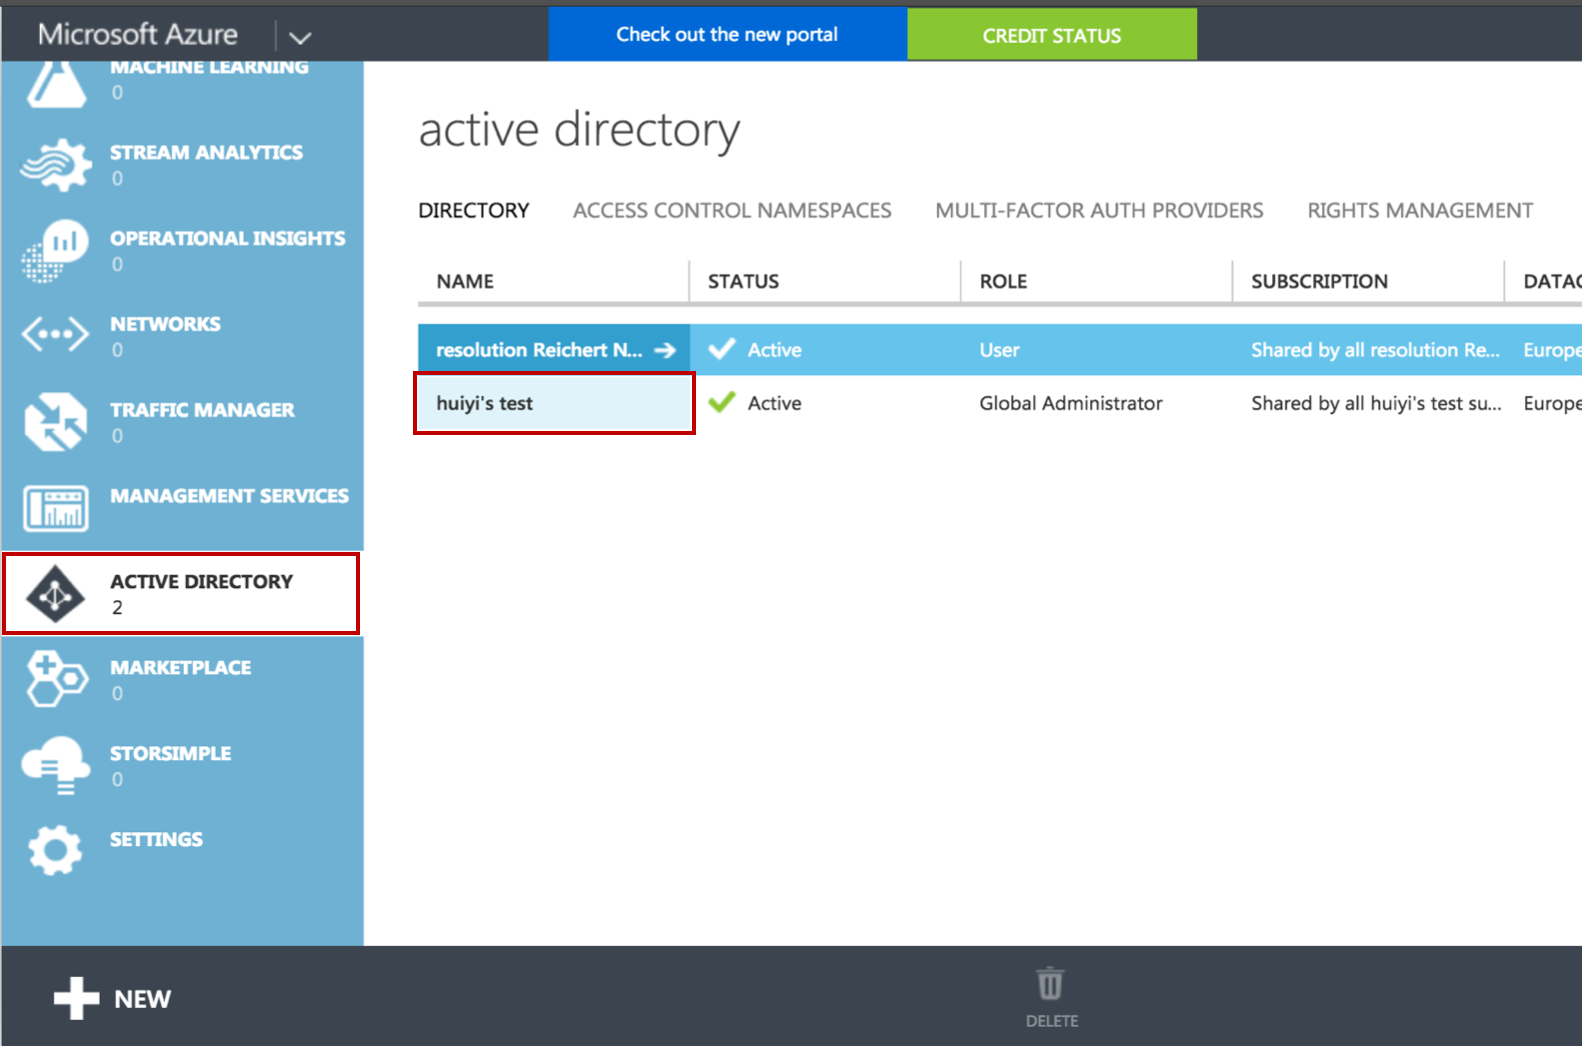
Go to https://manage.windowsazure.com and login with your credentials.
Select Active Directory on the left navigation panel, and select the directory that you want to use with SAML Single Sign On.
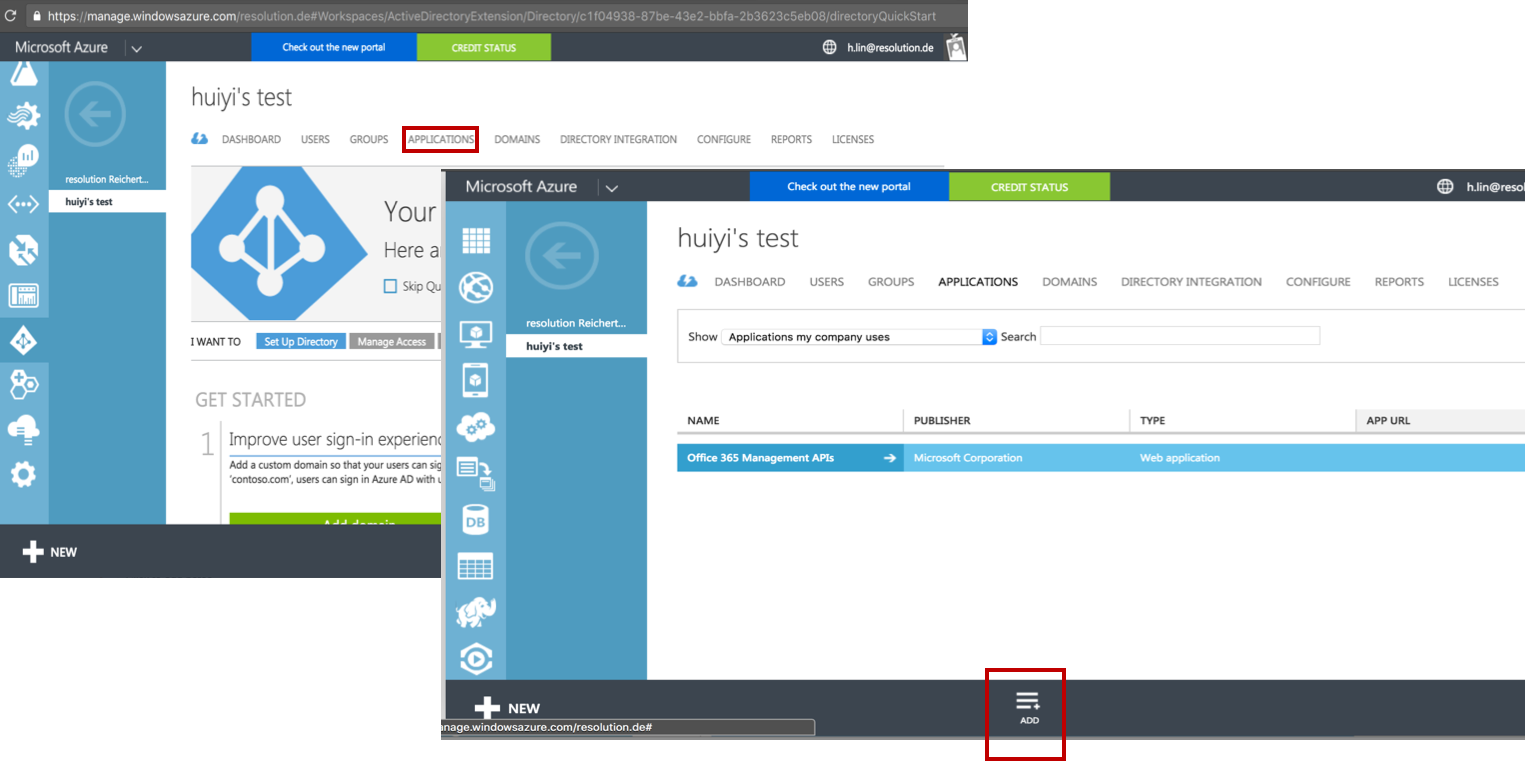
Click on APPLICATIONS, then click on ADD to start a new application dialogue
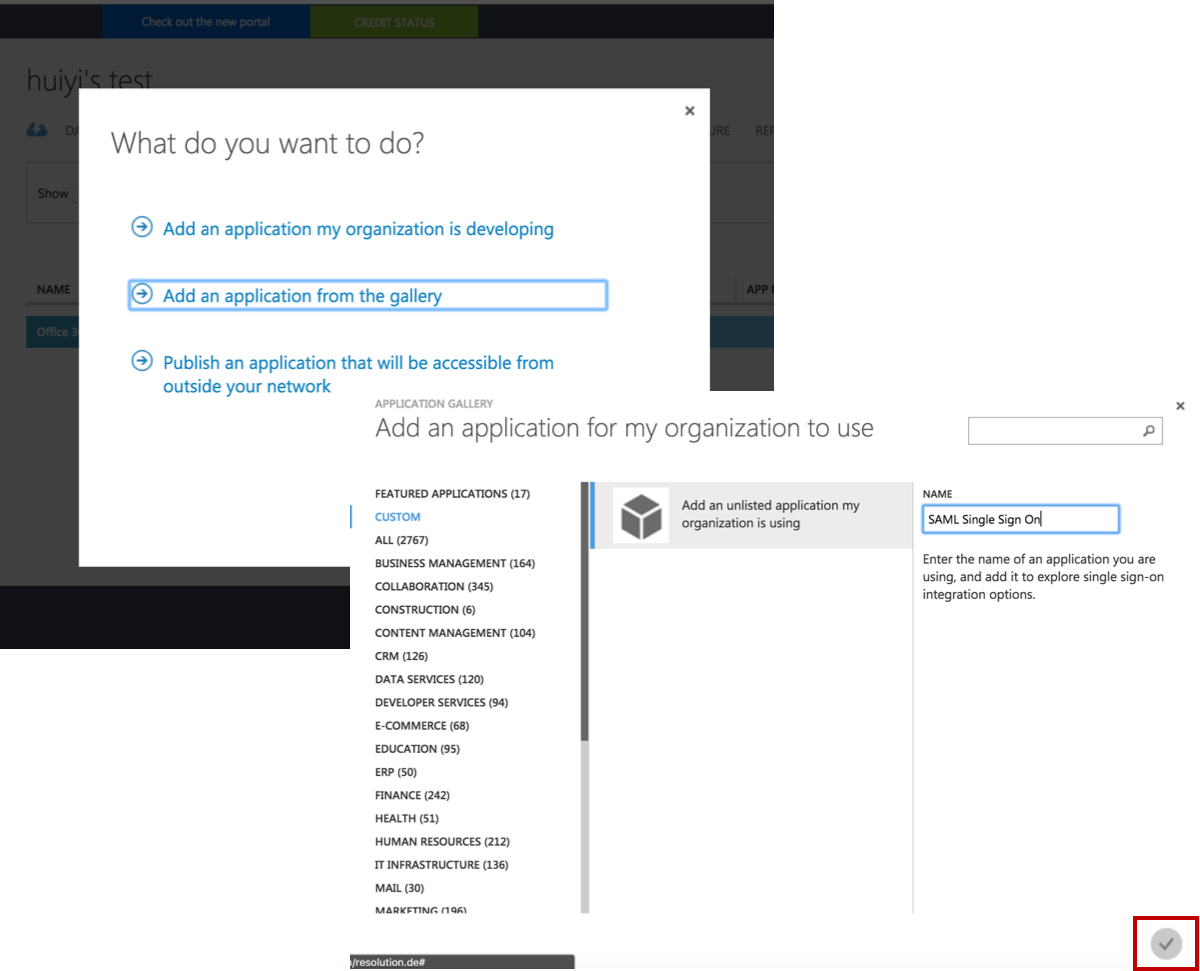
Substep B: Add a new application
Click on Add an application from the gallery.
Select Custom on the left navigation panel, and click Add an unlisted application my organization is using.
Then, fill in a name of your choice, e.g.. SAML Single Sign On in the NAME field.
Click on the Finish button at the bottom to add the application to your directory.
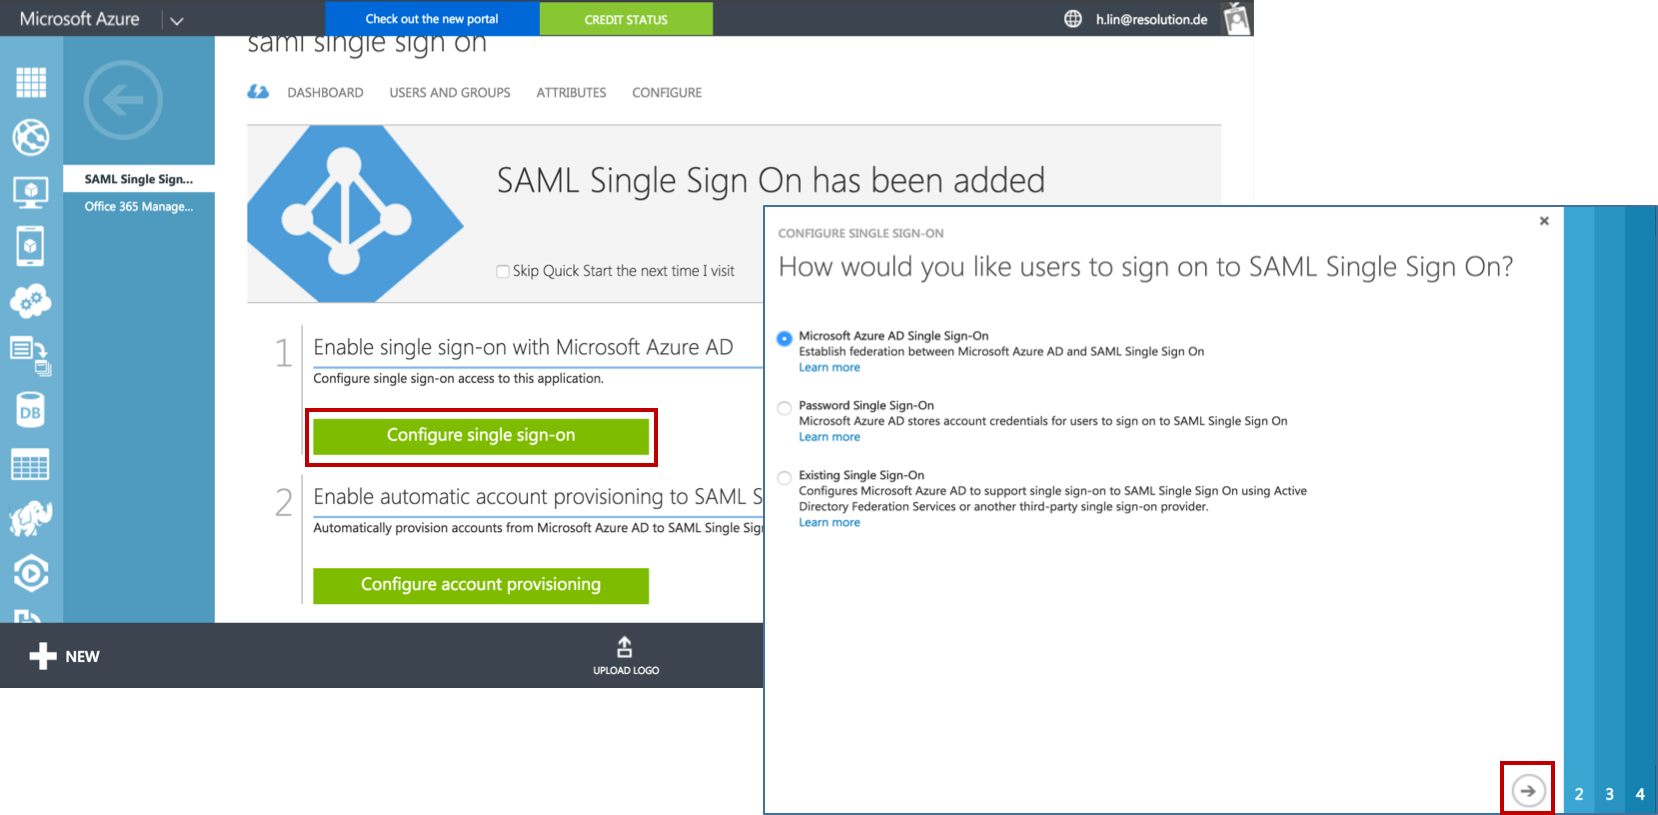
Substep C: Configure the new application
Click on Configure Single Sign On. In the Pop-up window choose select Microsoft Azure AD Single Sign-On, then click on Next.
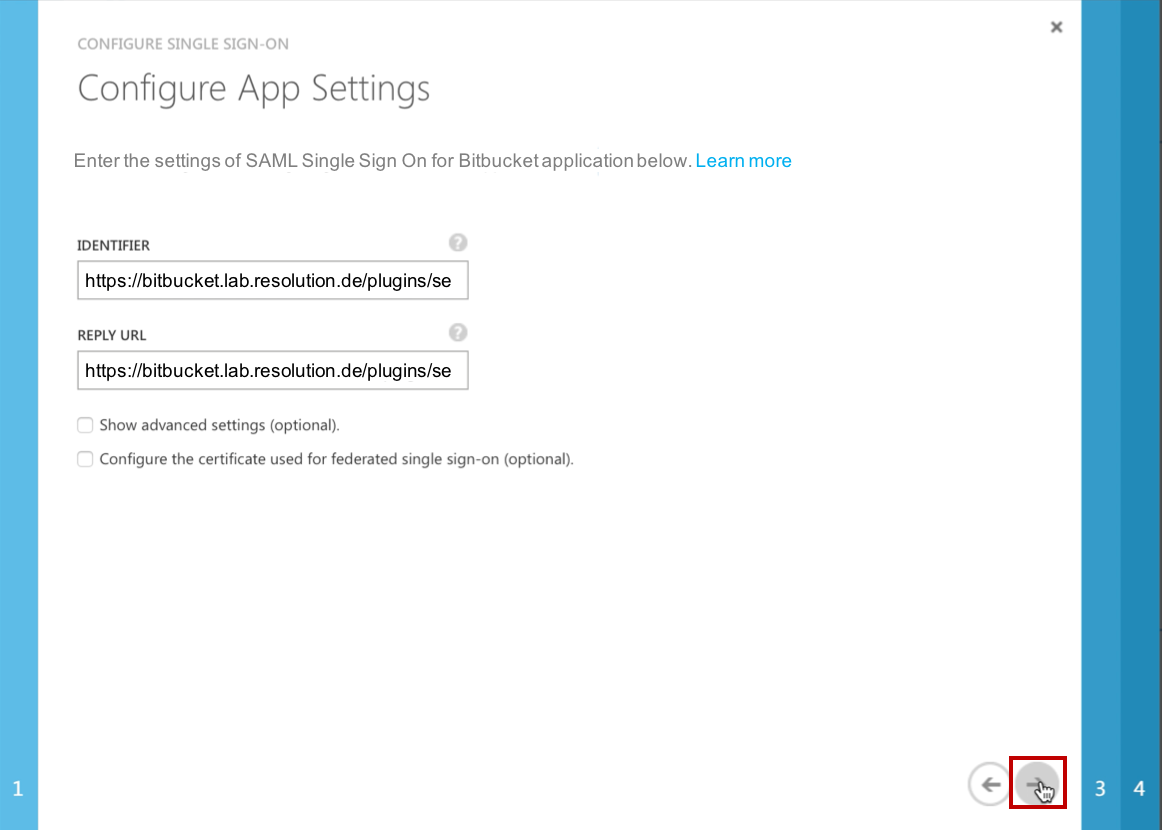
In the IDENTIFIER and REPLY URL fields please fill in your Bitbucket SAML Single Sign On URL :
https://<your-bitbucket>/plugins/servlet/samlsso. (e.g. https://bitbucket.lab.resolution.de/plugins/servlet/samlsso)Click Next.

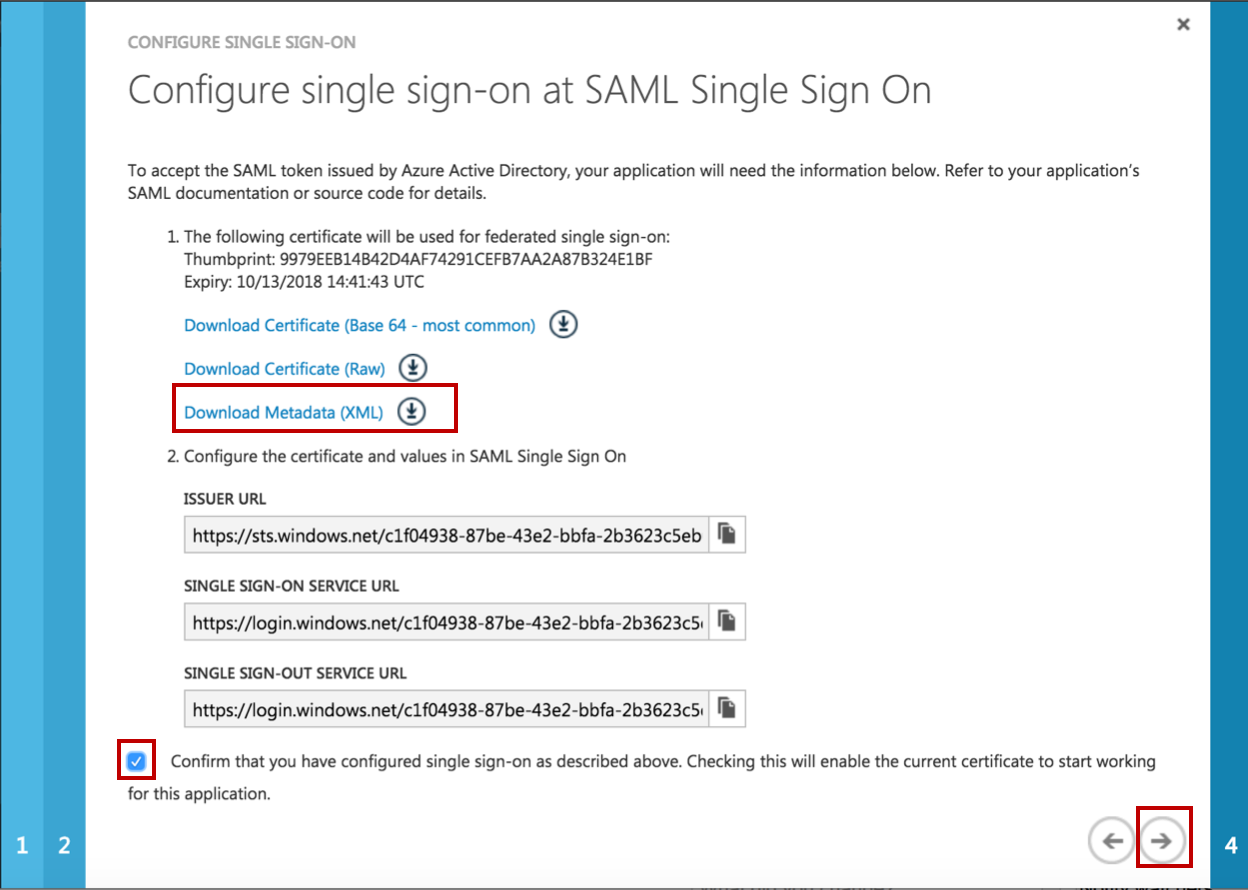
Click on Download Metadata (XML) to download the FederationMetadata.xml. We will configure the SAML Single Sign On with the Metadata from Azure AD in Step F.
Check the Checkbox Confirm that you have configured... .
Click on Next.
Fill in a NOTIFICATION E-MAIL for which you want to get notifications for this application.
Click Finish to complete the application configuration. Then you come back to the overview page of SAML Single Sign On and continue with Substep D to grant user access.
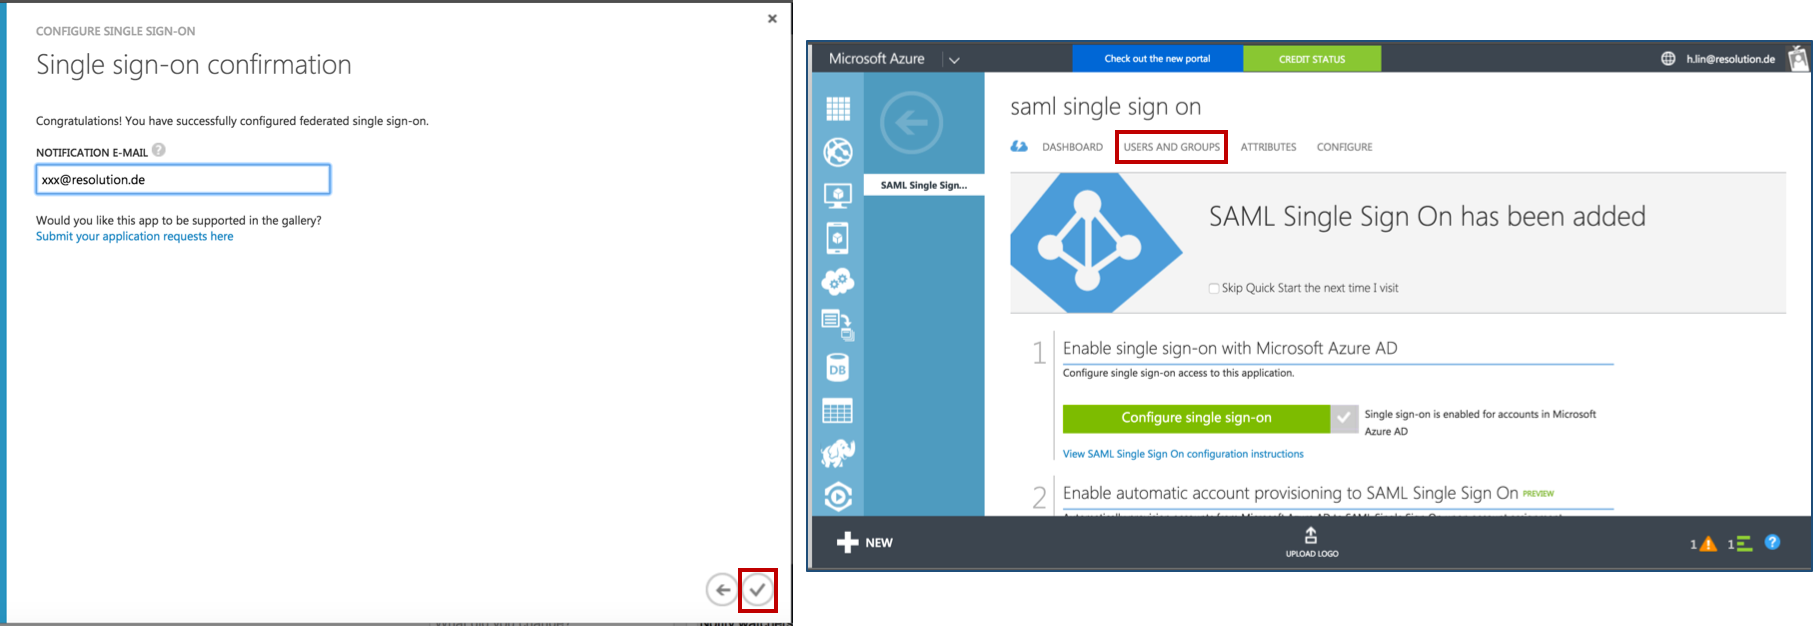
Substep D: Grant access to users
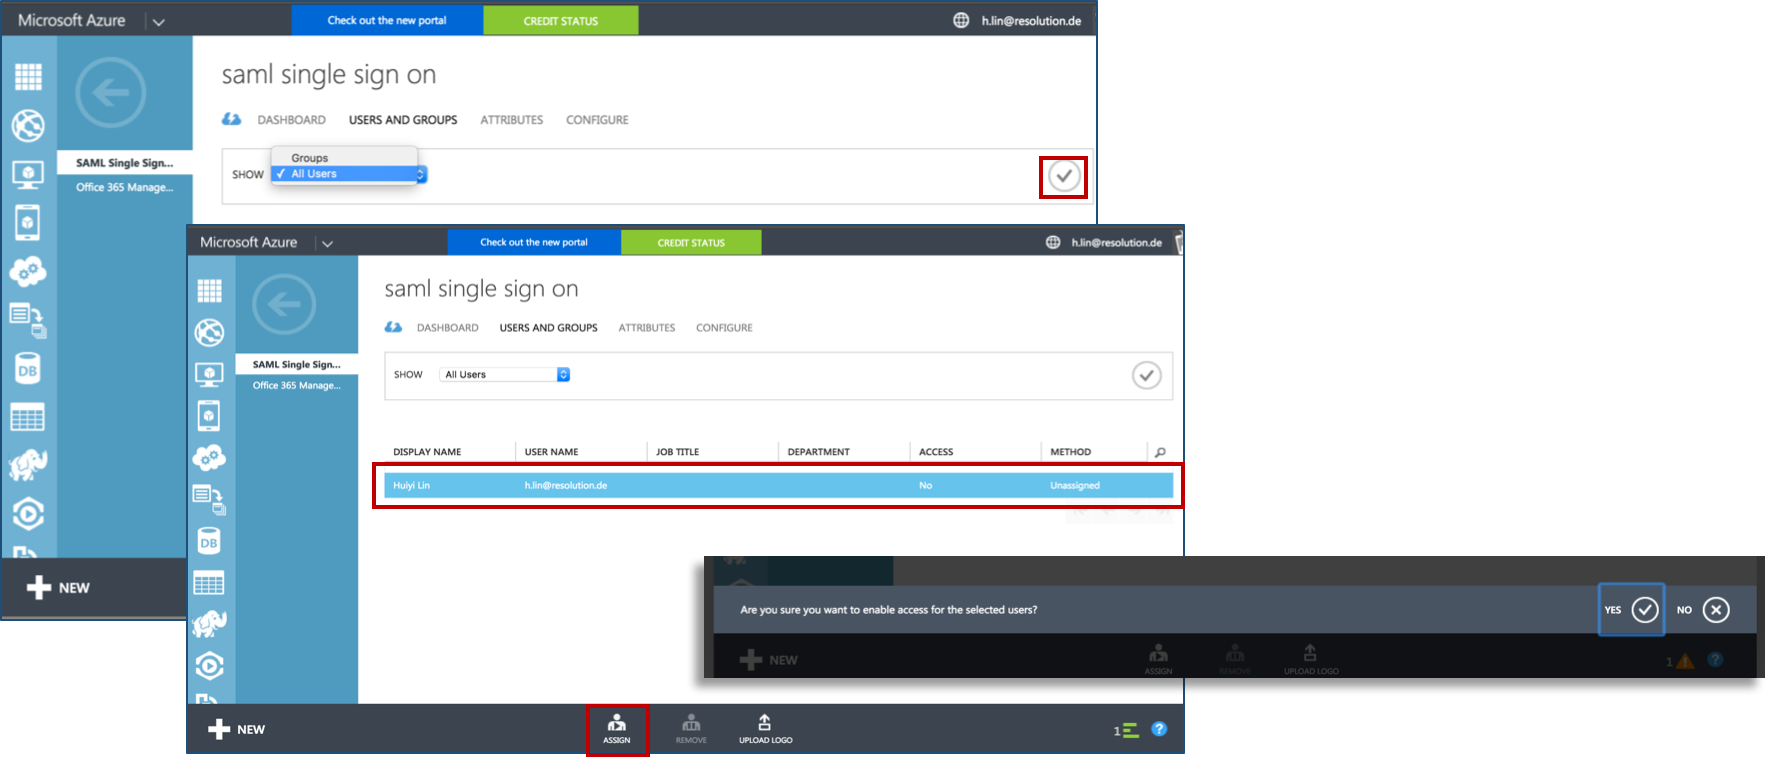
Click on USERS AND GROUPS and select All Users in the SHOW drop down field. Then click on the tick on the right side to show all users.
Select the user which you want to grant access for this application, and click on ASSIGN at the bottom.
Then, click on YES at the bottom of the black pop-up window to confirm to enable access for selected users.
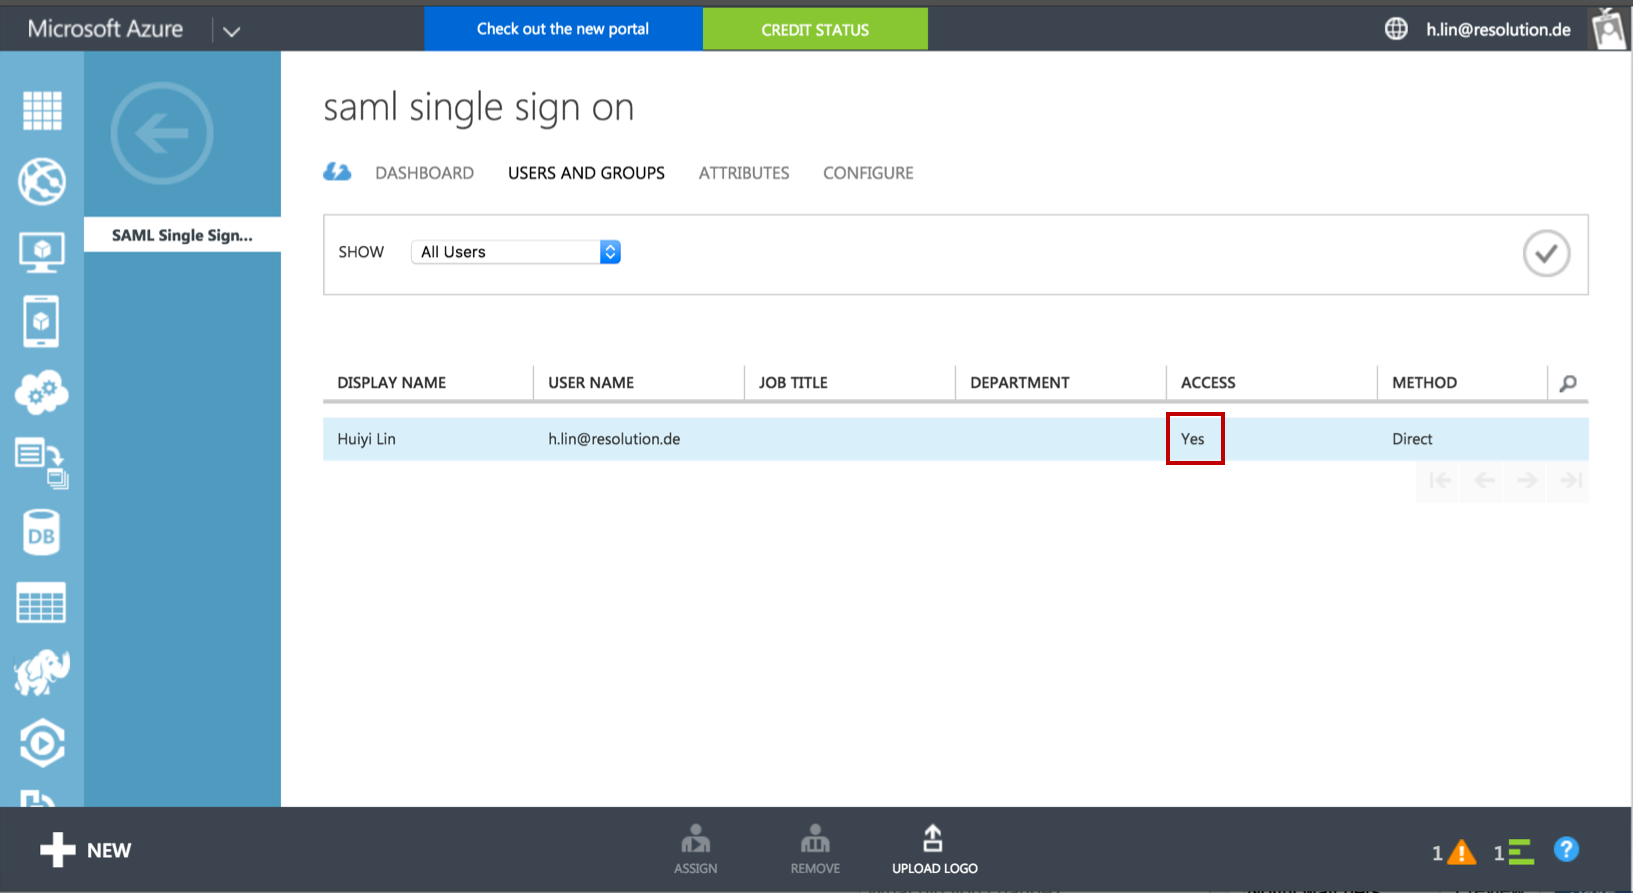
Finally, review “Access” status to see if the user has been successfully granted access to application now.
Step 3: Configure the Add-on
To continue Step 3, please go back to the plugin configuration page opened in Step 1.
Substep A: Add new IdP or import config
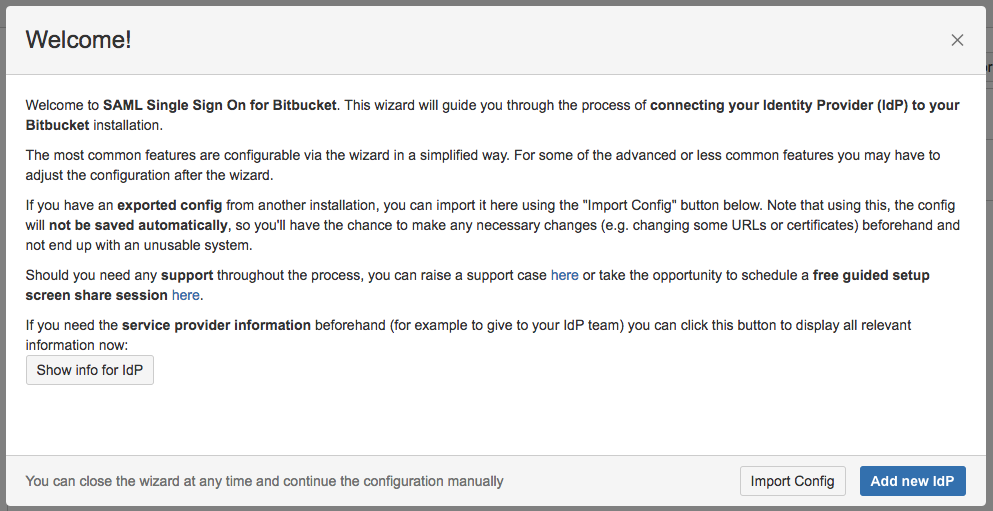
Since Version 2.0.4, our Add-on offers an intuitive configuration wizard that is presented on first start. In the first step it's possible to import an existing configuration or to start with a fresh configuration. Click on Add new IdP to start the wizard.
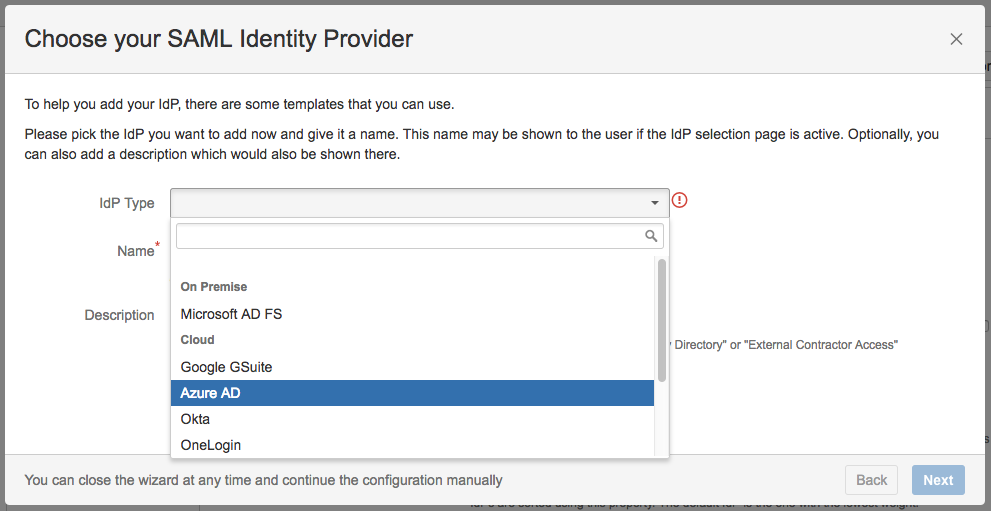
Substep B: Choose your SAML Identity Provider
Select Azure AD as IdP Type and click on Next.
Substep C: Identity Provider Configuration
Since you have done the configuration of Azure AD in Step 2 of this tutorial you can skip this step by clicking on Next.
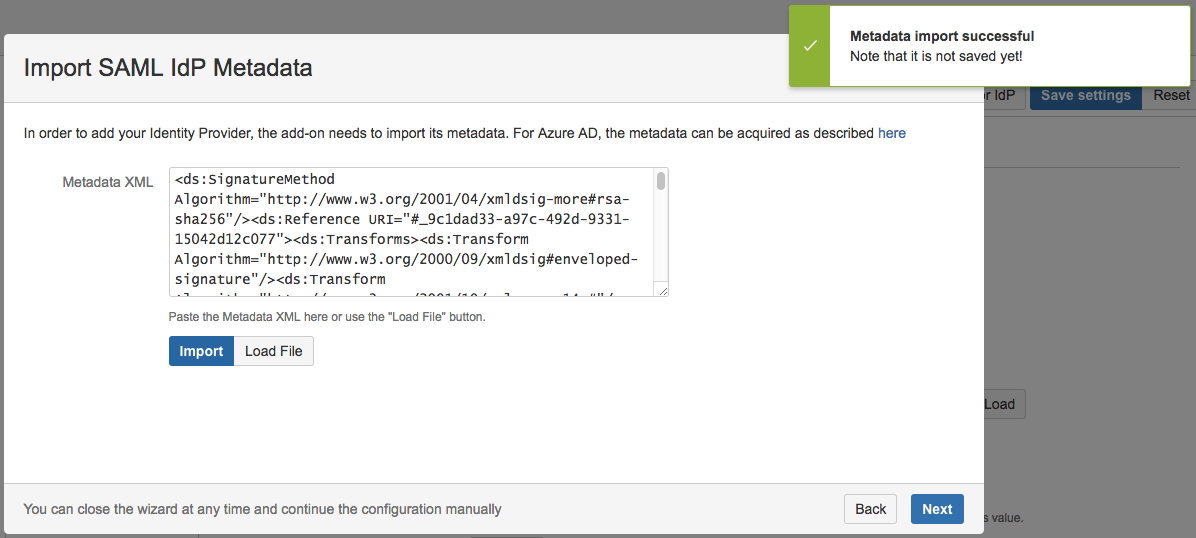
Substep D: Import SAML IdP Metadata
Paste the XML metadata from Azure AD to the input field or load the XML metadata from a file on your computer.
Click on Import.
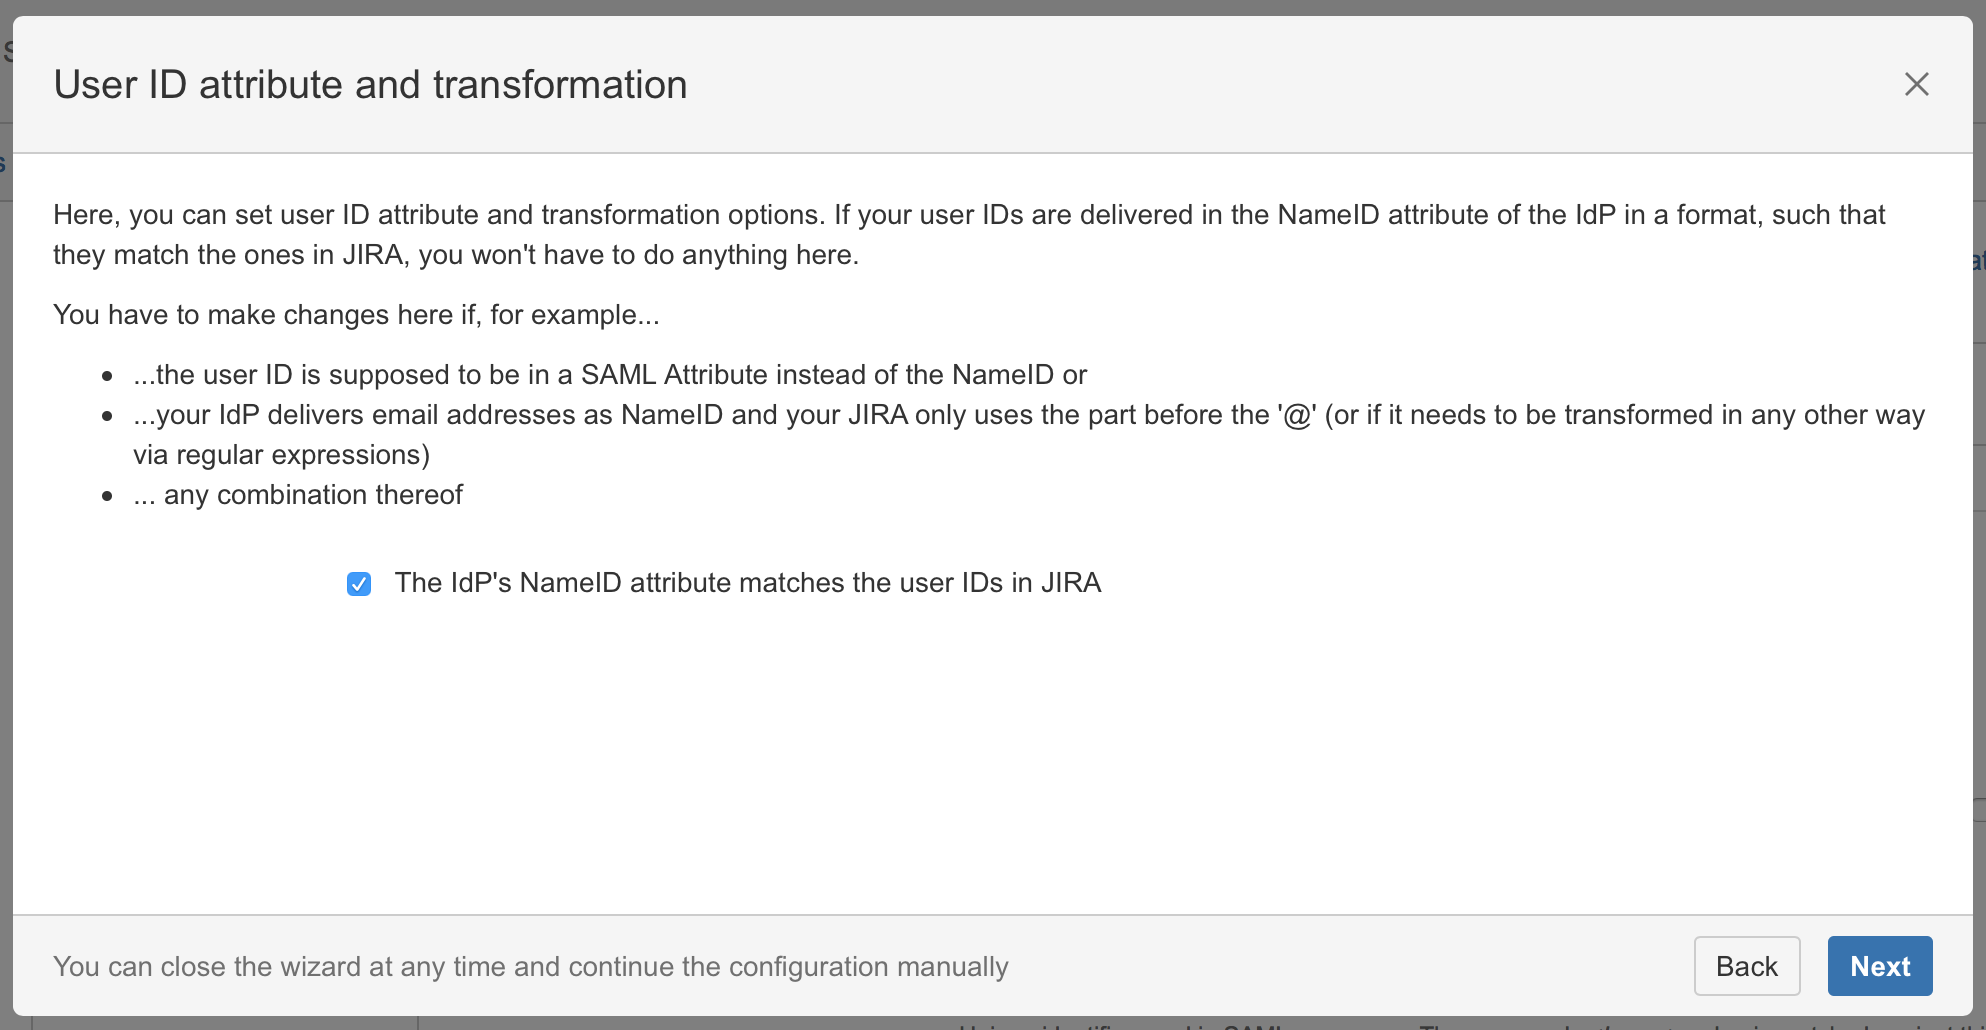
Substep E: User ID attribute and transformation
It's recommended to leave this option checked as we will later configure the AD FS to use the Name ID attribute. Simply click on Next.
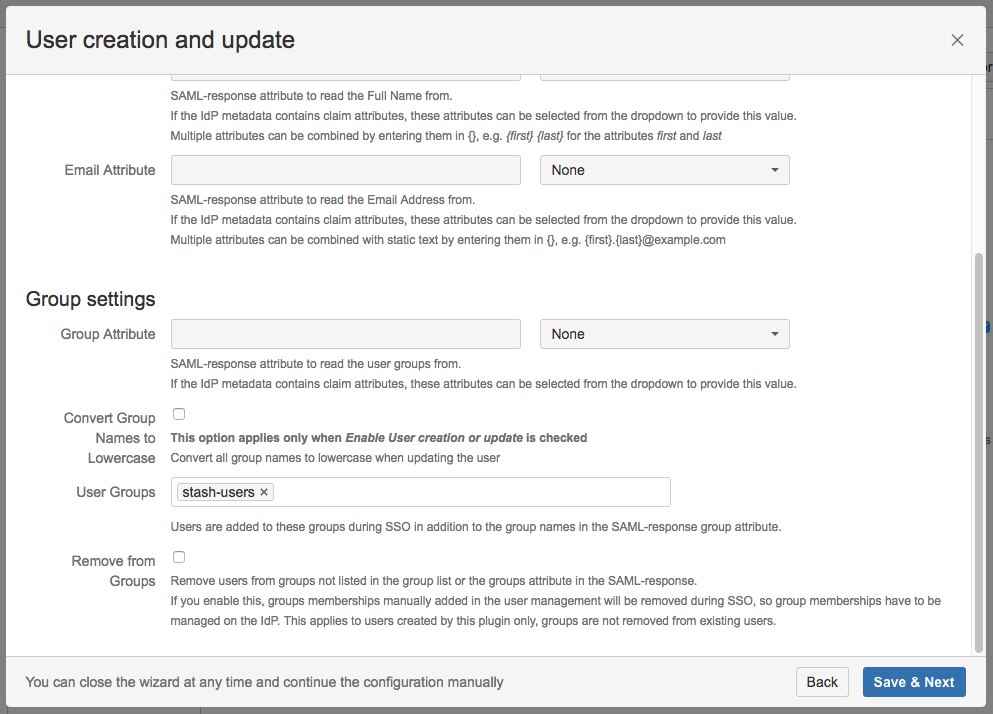
Substep F: Default group assignment
If you want to assign a default group check Enable user creation or update and define the default group in the User Group field. If a user logs in using SAML, he will be added to the groups specified in the User Groups section. This applies to all users. The user is assigned to these groups in addition to the groups in the SAML-response's attribute. The standard group in Bitbucket is called "stash-users”.
Click on Save & Next to continue with the configuration of your AD FS.
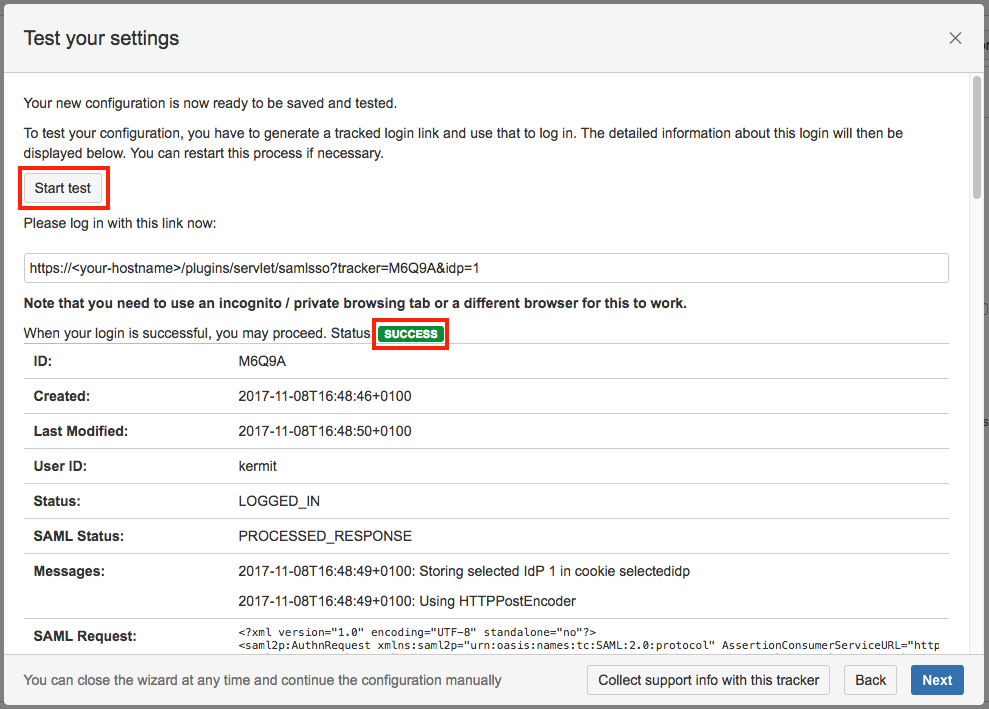
Step 4: Test
You are now able to perform a test with an authentication tracker, to see if your configuration is working as intended. To start the test, click on the Start test button, copy the displayed link, paste it into a new incognito / private browsing window, and execute a login with Identity Provider. The status of the authentication process is permanently update in the wizard.
Step 5: Enable login redirection
If the authentication test was successful, it is now safe to activate the redirection on login.
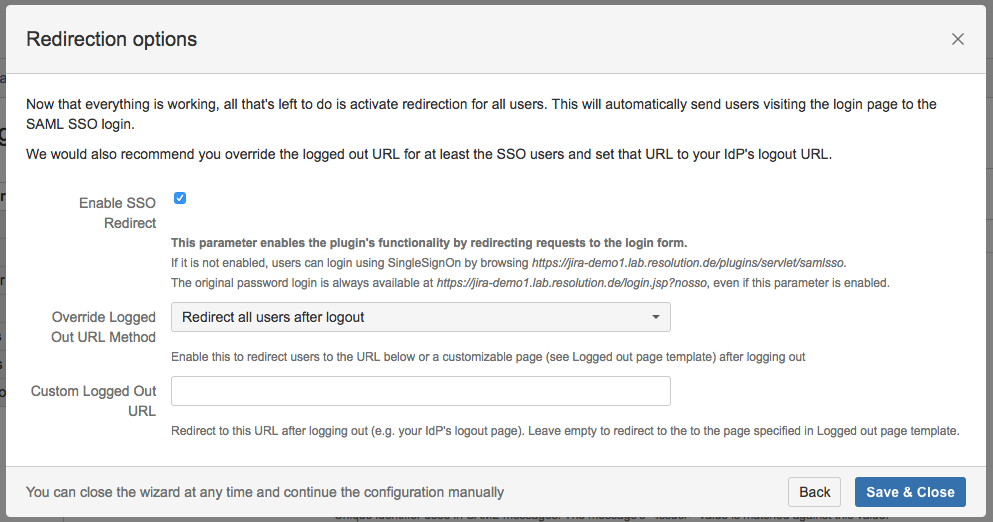
Click on Save & Close. The Add-on is now configured and ready to use.
If Enable SSO Redirect is enabled, you can login to Bitbucket manually by browsing https://<your-bitbucket>/login?nosso. Use this URL if you need to login a local user unknown to the Azure AD or if there are any issues with Single Sign On.
You might also find following documentation helpful: