
Keycloak with User Sync
- Goal
- Prerequisites
- Step-by-Step Setup Guide
Goal
Configure SAML Single Sign-On to work with Keycloak, using Just-in-Time provisioning to automatically create and update users during Single Sign On.
Prerequisites
Identity Provider Keycloak
Your Atlassian application must be accessible via HTTPS. (read more about it in the Atlassian documentation, i.e. for Jira or Confluence)
Step-by-Step Setup Guide
This setup guide describes how to complete the initial setup for SAML Single Sign On (SSO) Add-on with Keycloak,
applicable for Add-on version starting 3.1.0. If you need any further support, please feel free to contact us here.
Install the SAML SSO app
In your Atlassian product, open the in-product marketplace as described in the Atlassian documentation.
Search for "resolution saml" and click "Install" for SAML Single Sign On (SSO) by resolution Reichert Network Solutions GmbH.
After the installation is complete, click on Manage, then choose Configure.
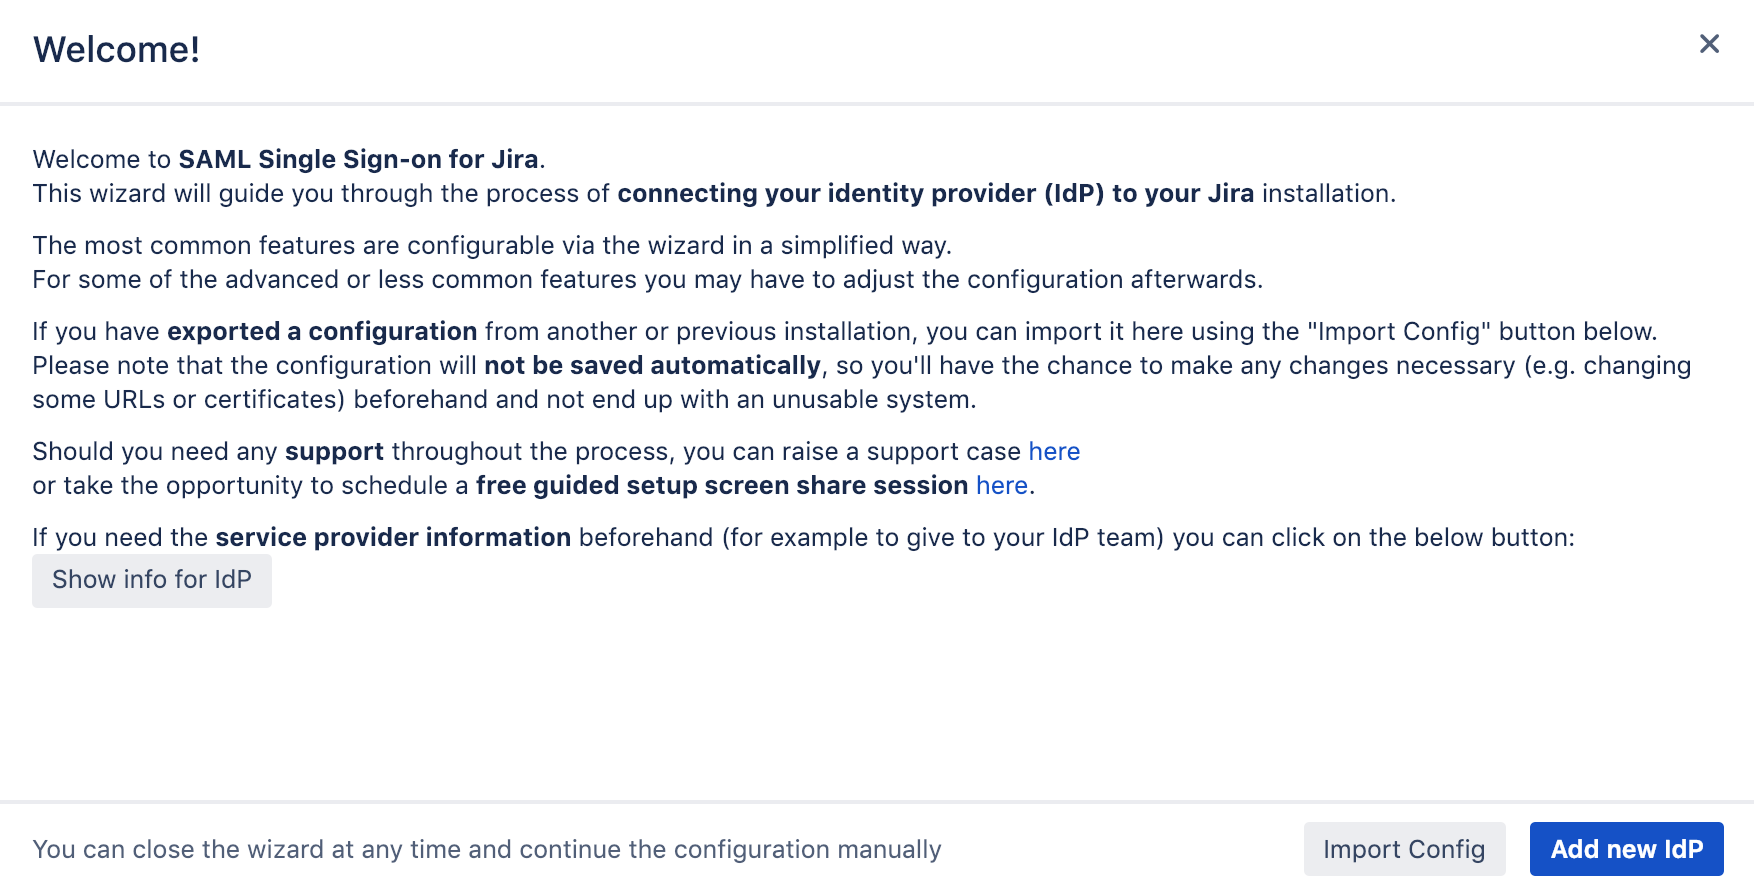
Now, you are on the Add-on / app configuration page and the first step of the setup wizard will appear.

Configure SAML SSO app
Add new Identity Provider (IdP)
Click on Add new IdP to start the wizard.
Adding a new IdP can also be done outside the wizard in the app configuration section Identity Providers

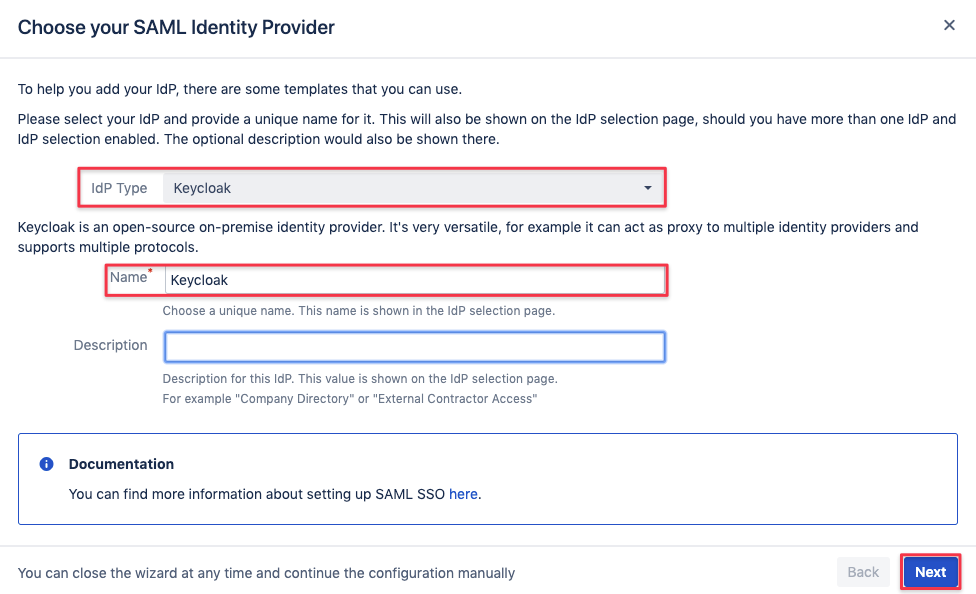
Select Keycloak as IdP Type.
You may also change the name and add a description. The name needs to be unique.
Click on Next.
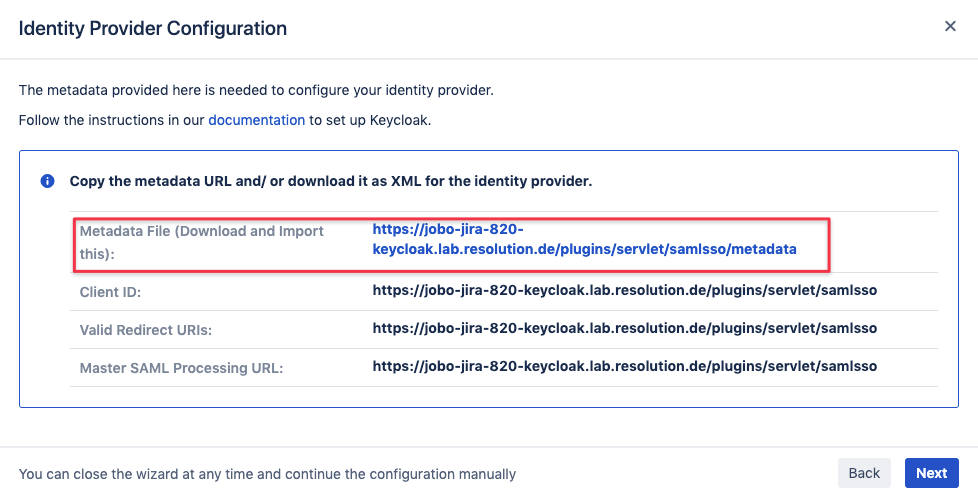
Retrieve SAML Metadata for Keycloak Client
The next step enables you to retrieve the information Keycloak needs to work with our SAML SSO app.
Right click on the link highlighted below and save the linked content, a file in xml format.
Click on Next and pause the SAML SSO app configuration for a moment.
Configure Keycloak
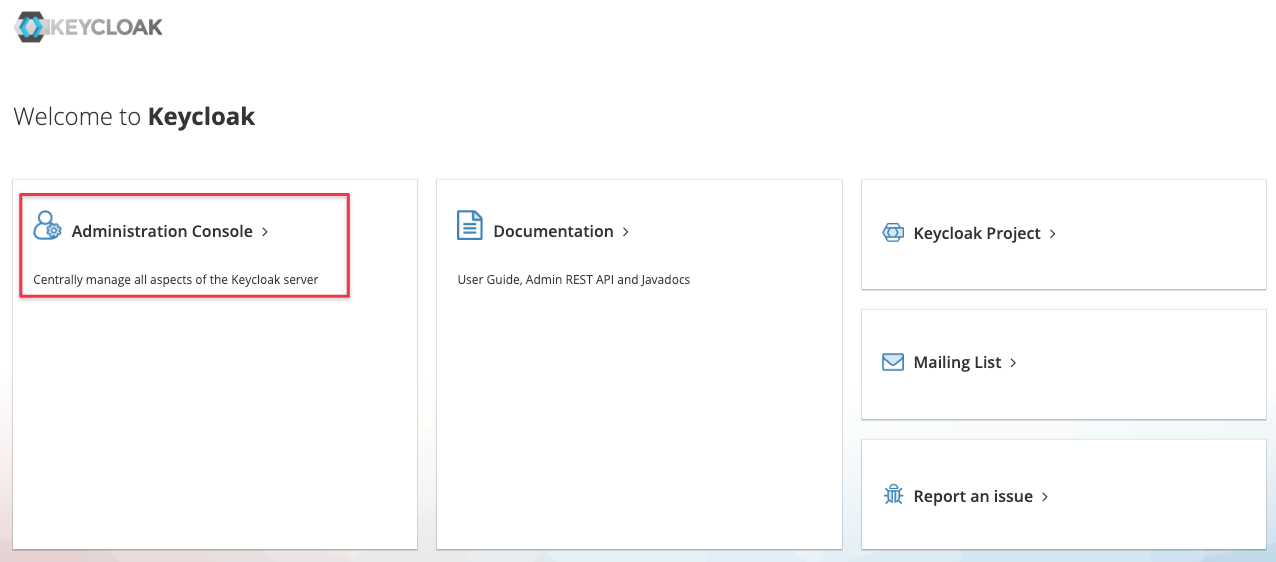
Head over to your Keycloak administration console
Select the realm, if you've more than one configured (this example is using the realm called jobo)

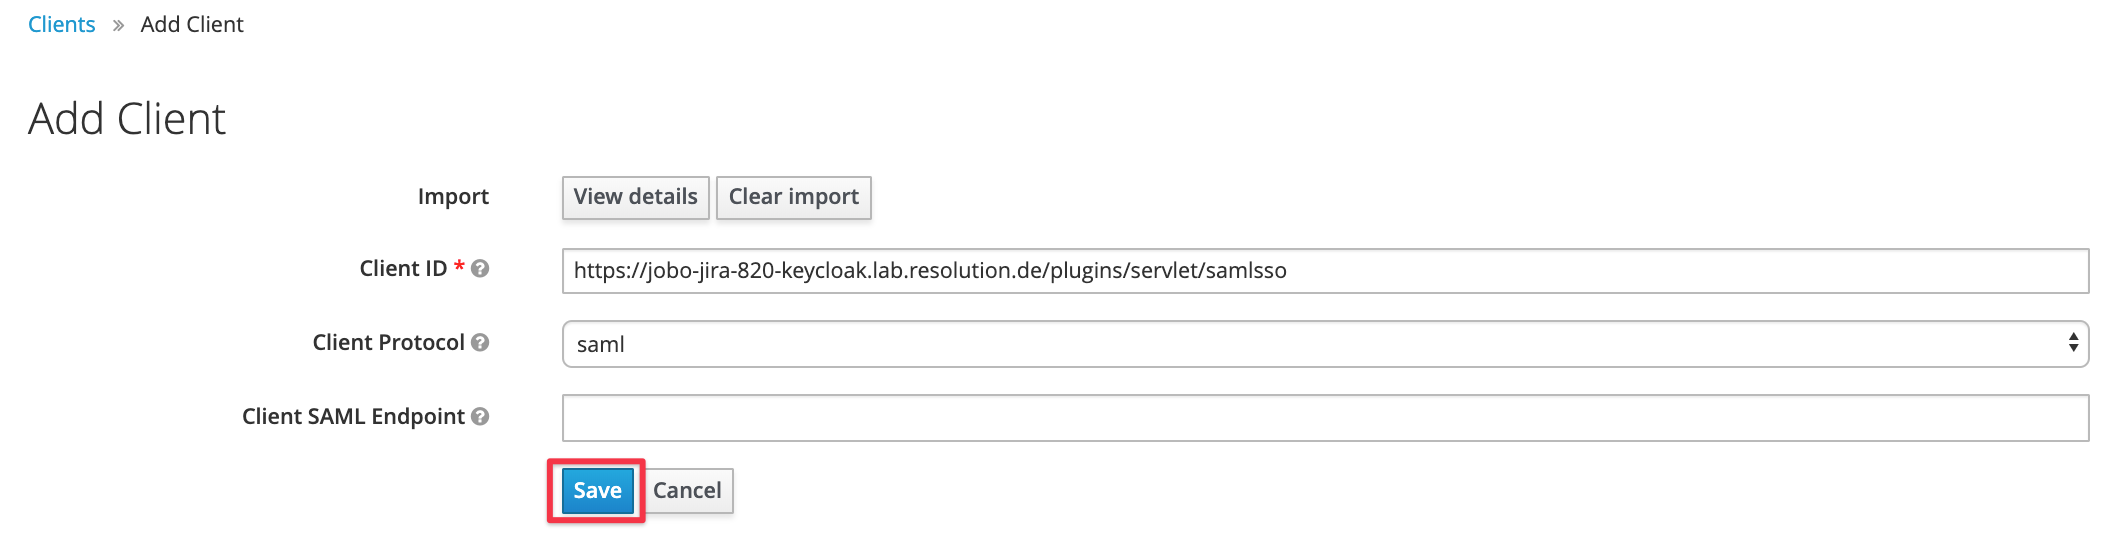
Select Clients and Add Client and use Select file to open the xml file you've saved earlier
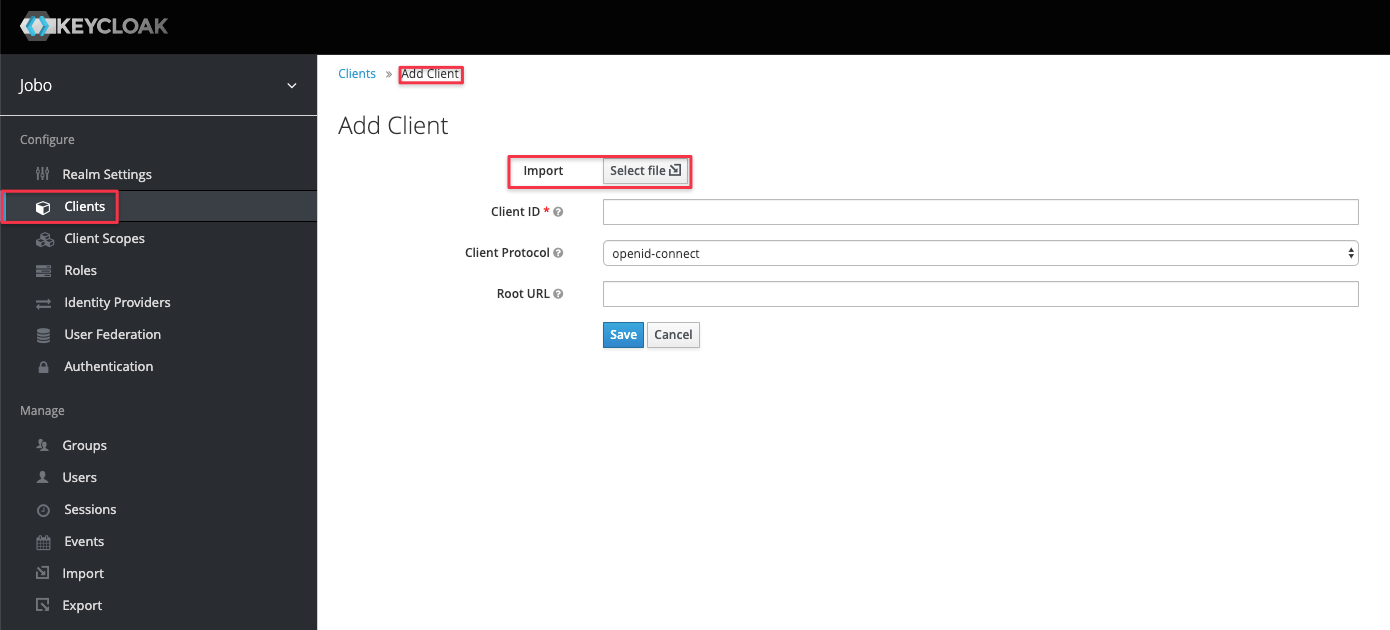
Once imported, save your settings.
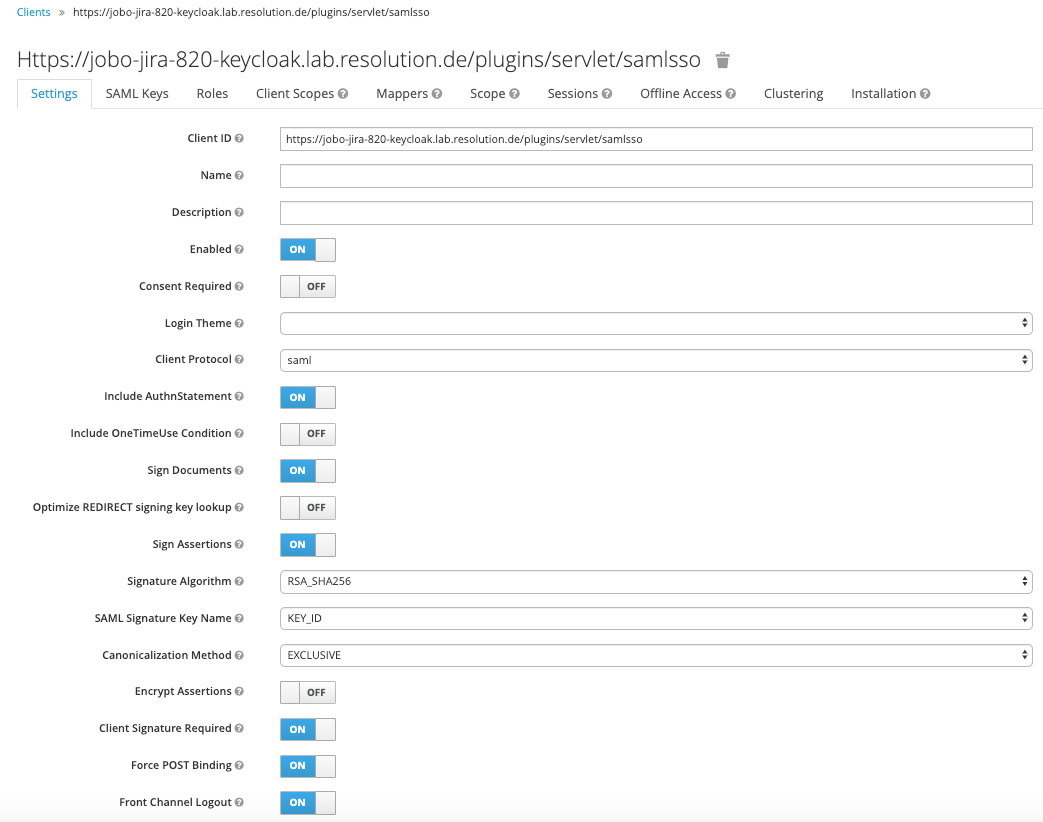
You'll see the following screen, leave its settings untouched unless you know what to configure beyond standard configuration.
Keycloak attributes for creating and updating users with Just In-Time provisioning
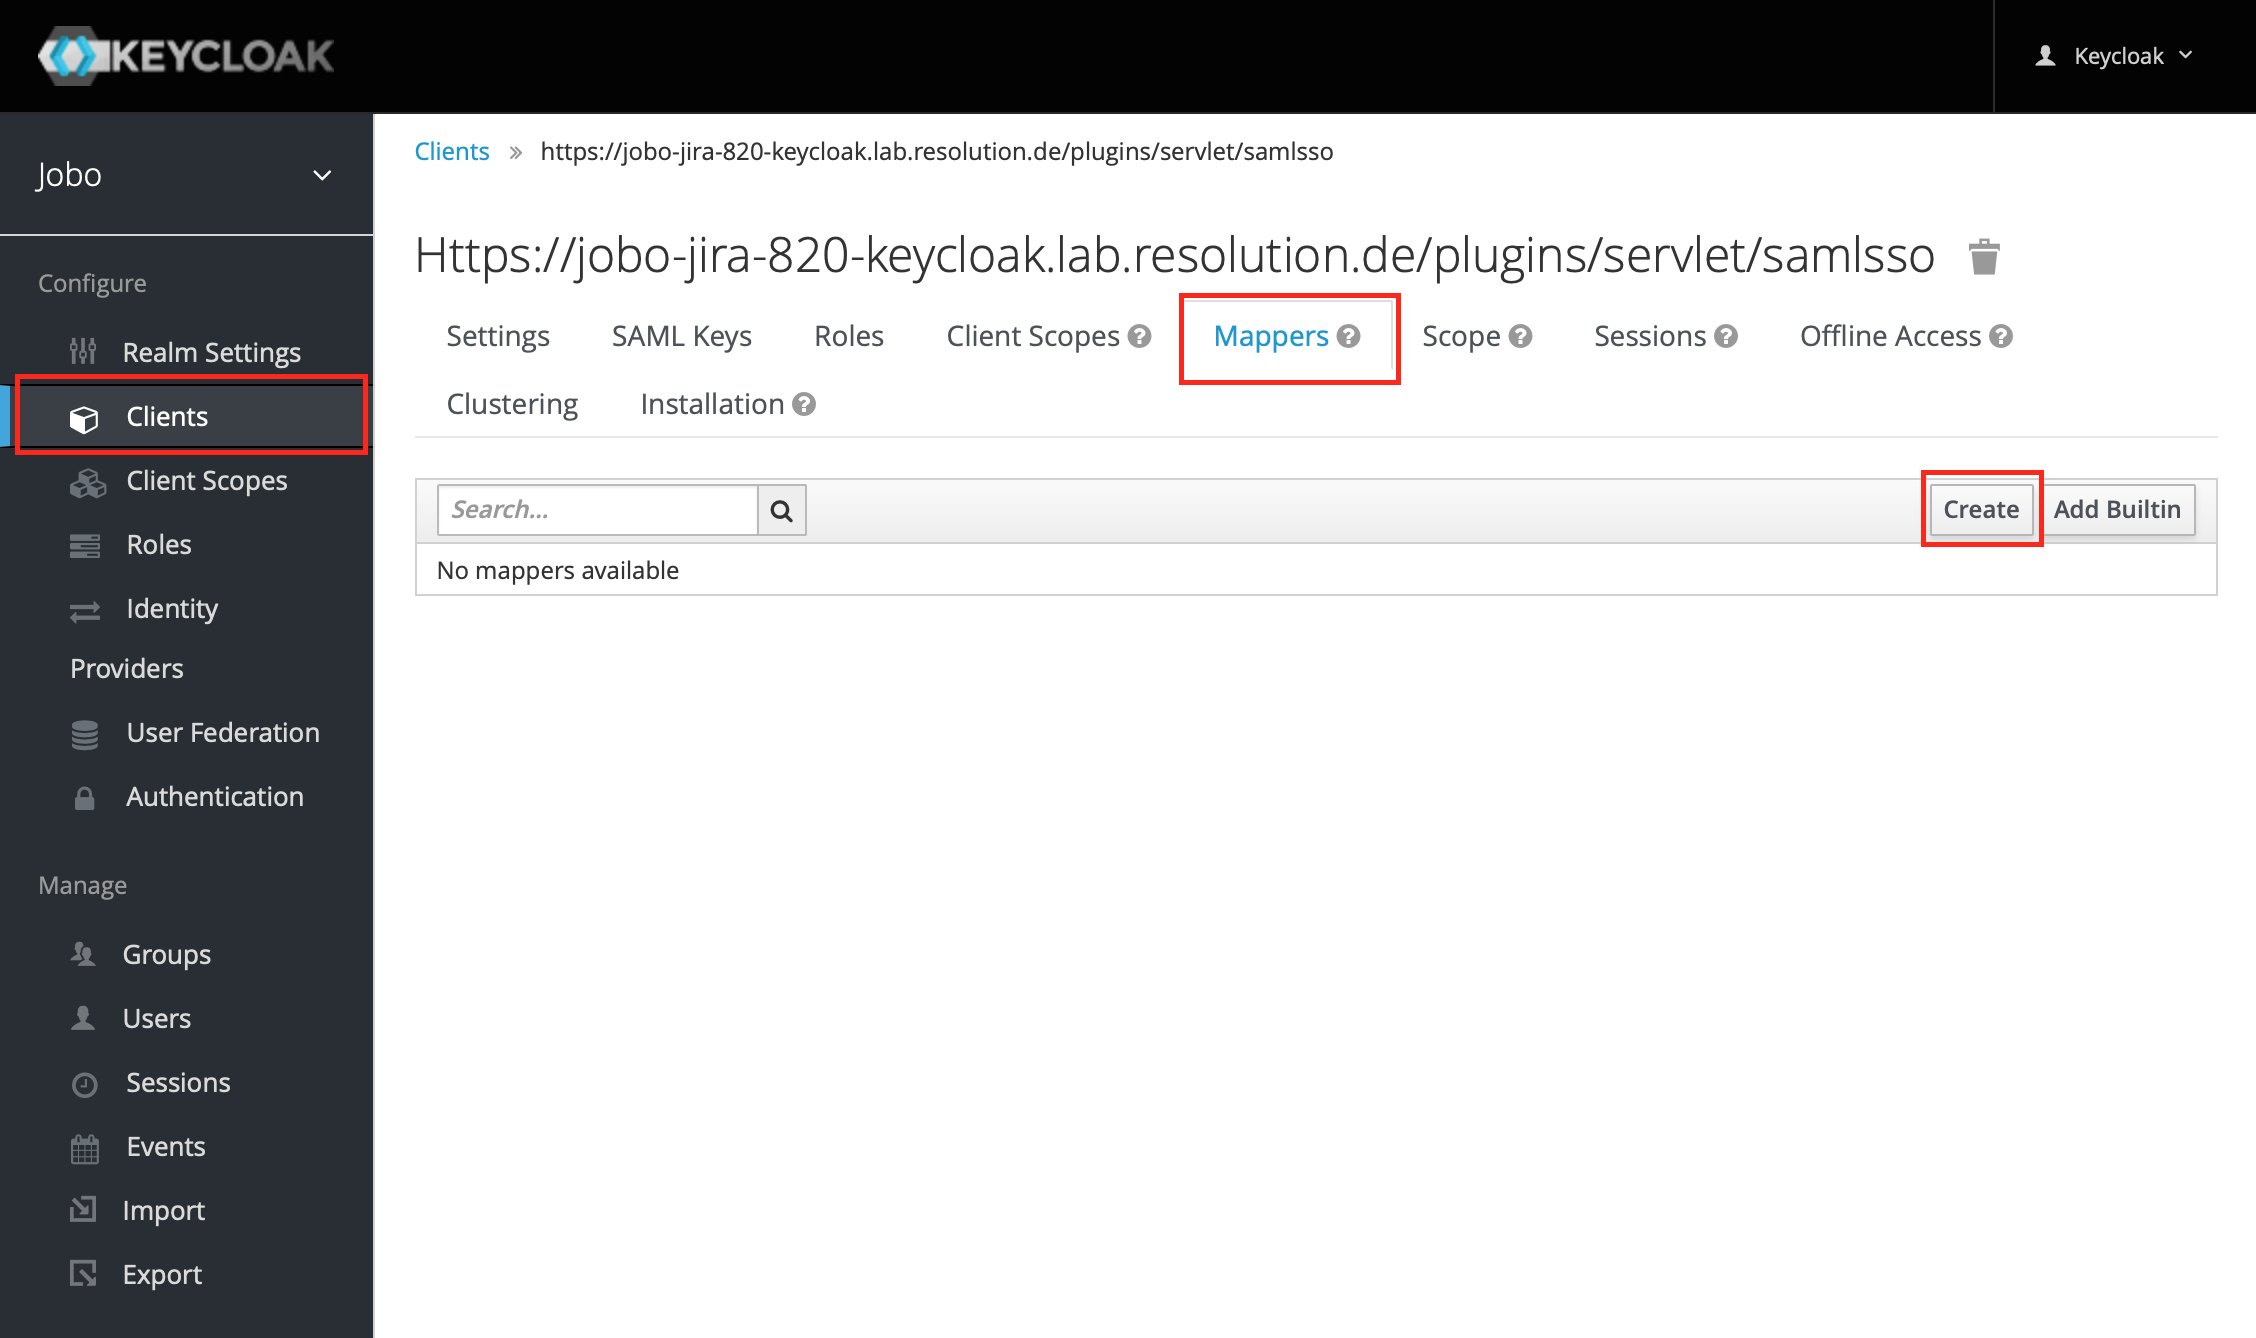
In order to create and/ or update users and assign groups to them during Single Sign On, you need to configure mappers in Keycloak.
Click on "Clients" from the left hand side options, and go to the "Mappers" section and click on "Create".
For the Mapper type, choose "User Property" from the drop down list, fill in the fields with the proper details related to the first name,
firstName, and then click on "Save".
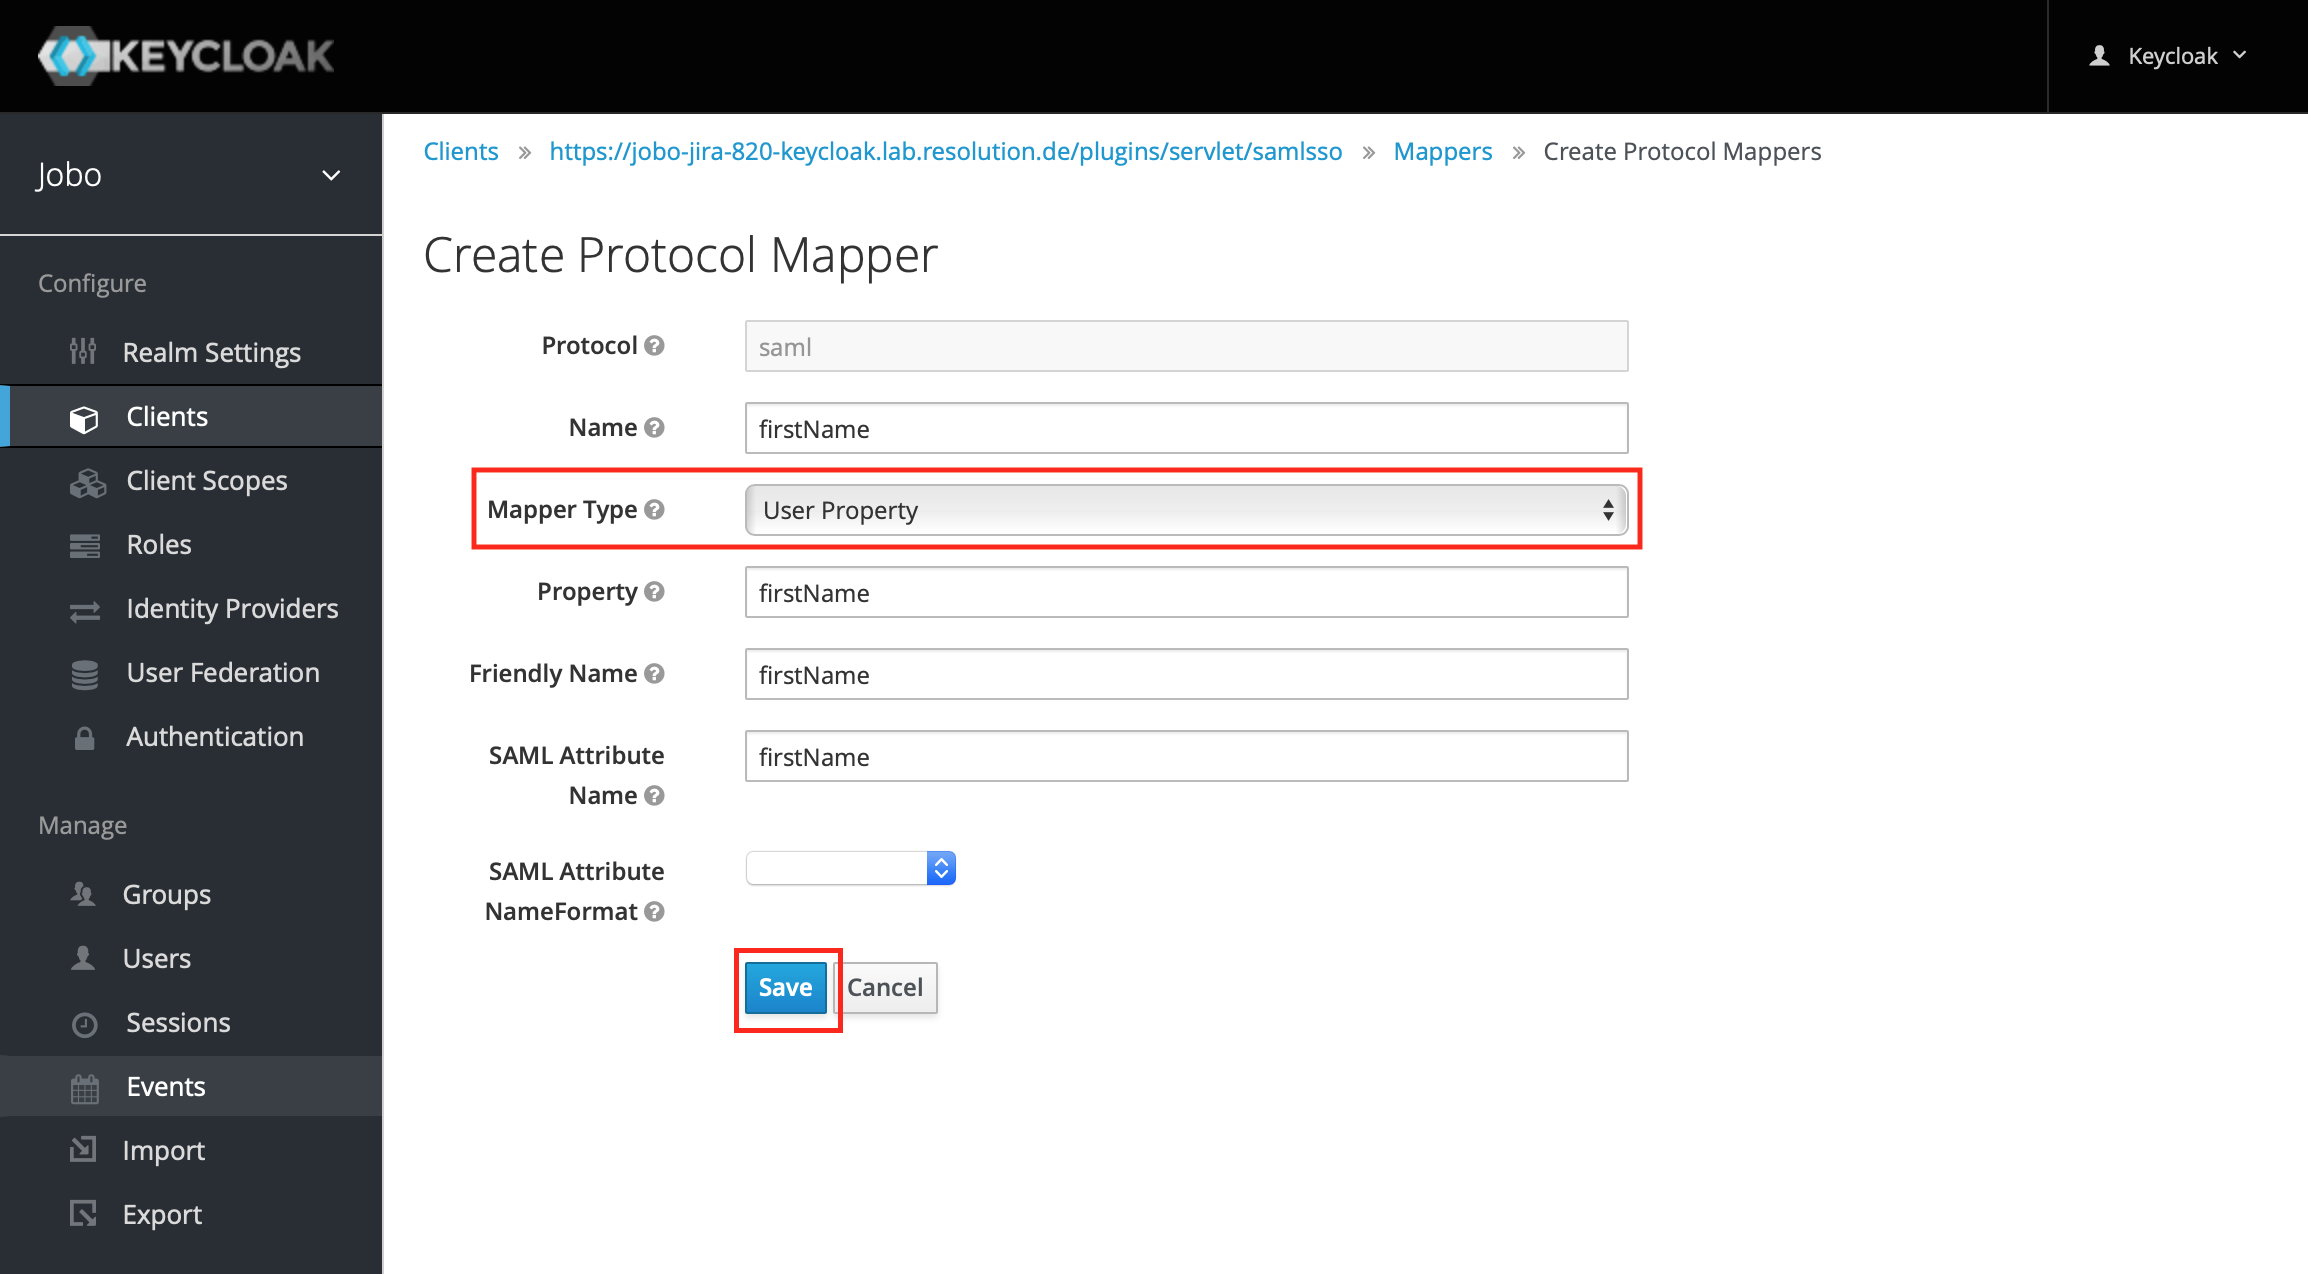
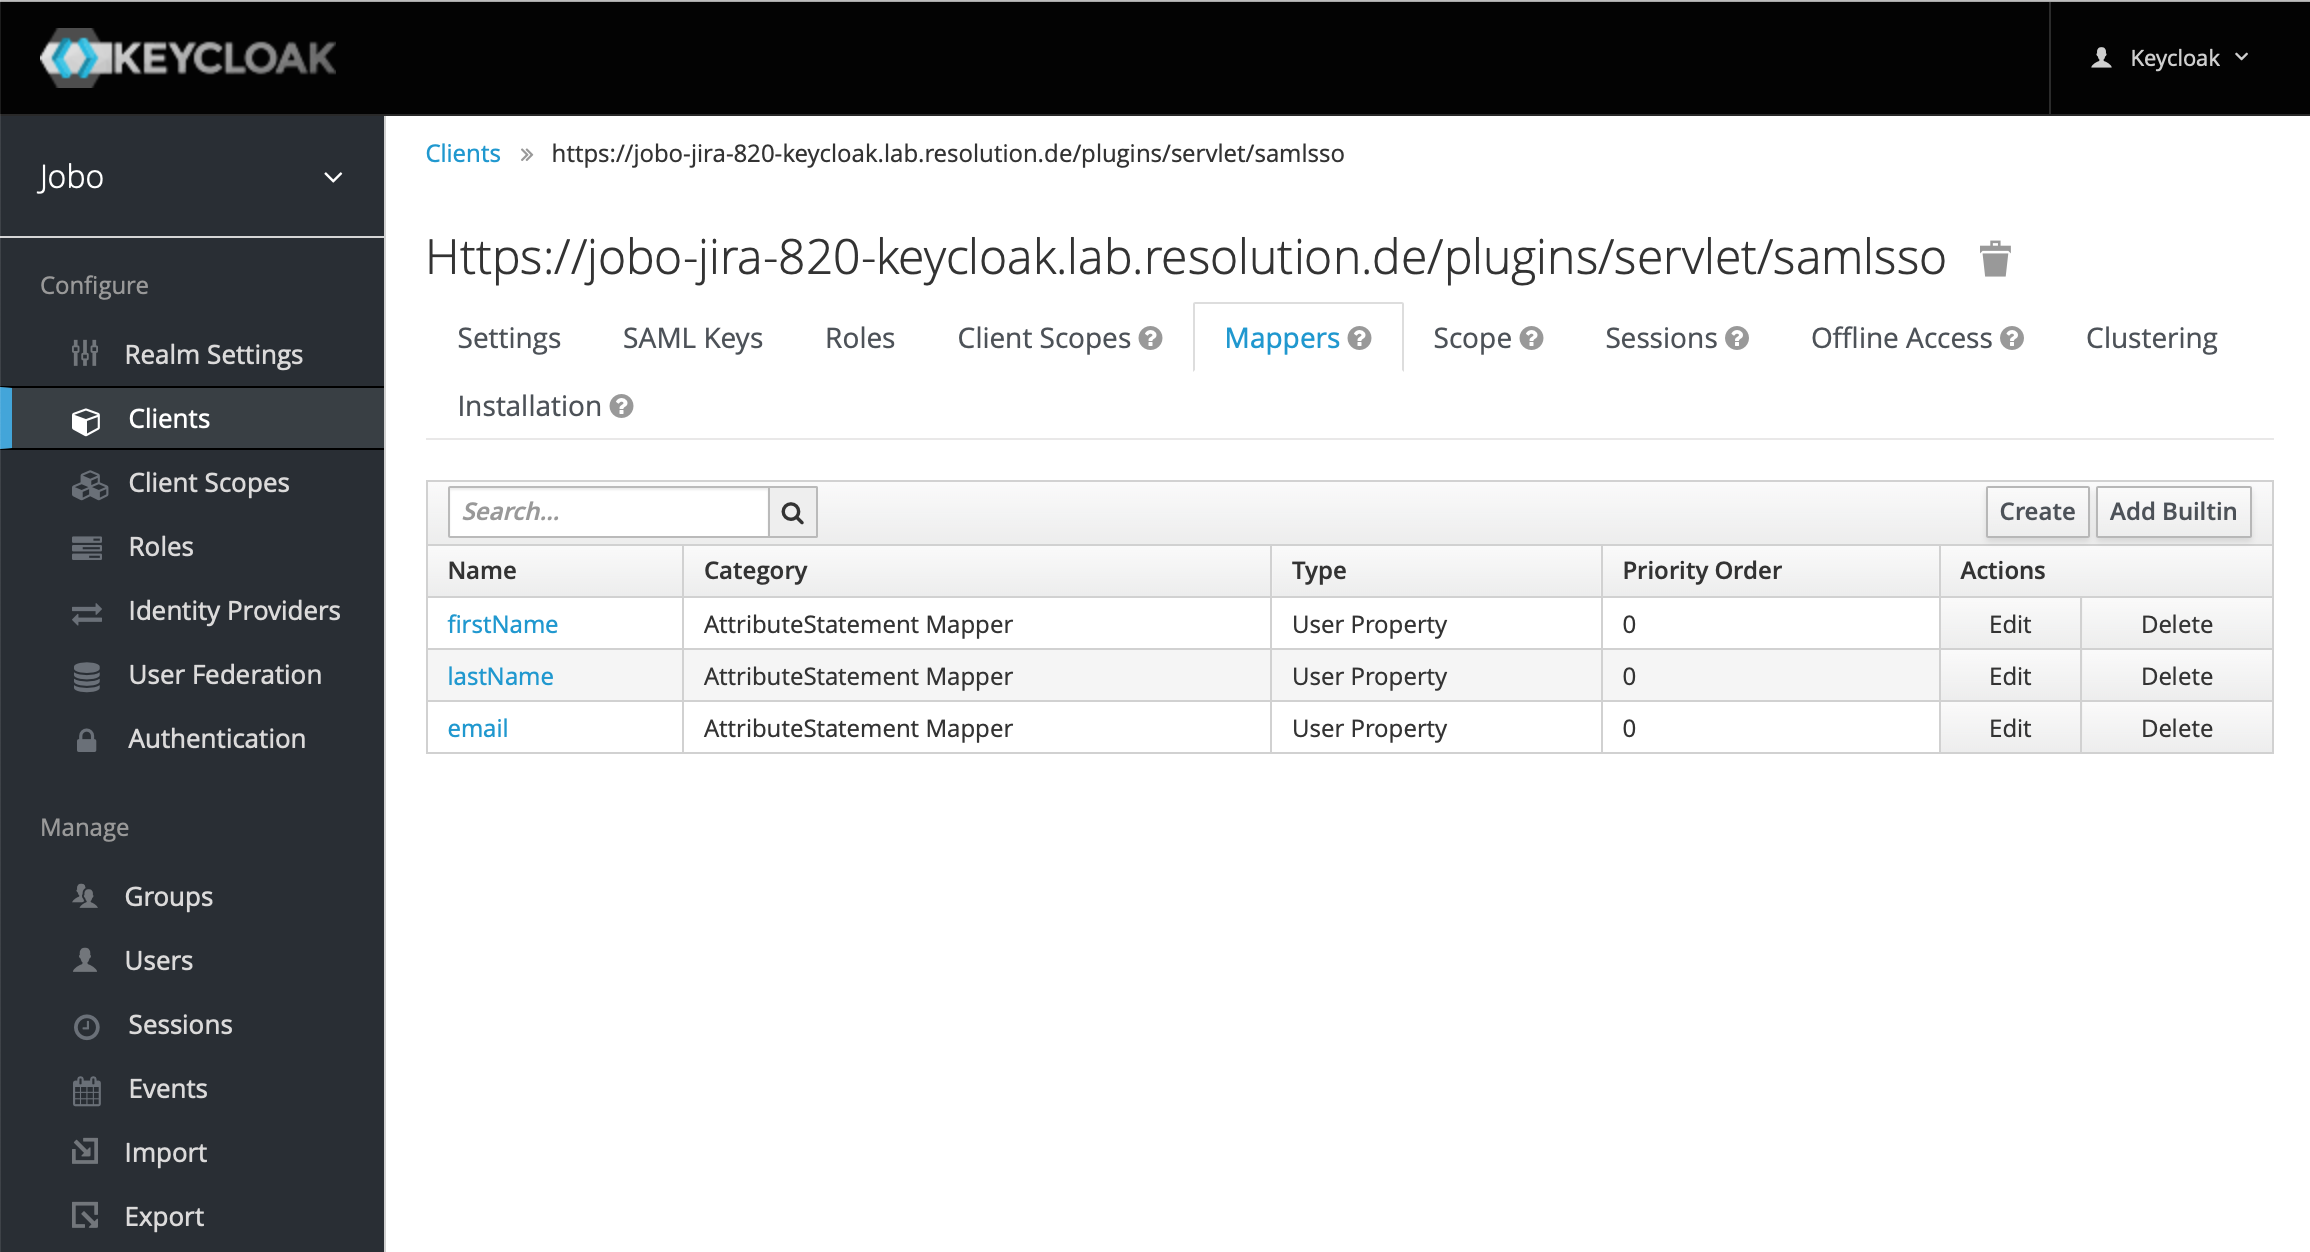
Accordingly, repeat this step to create new mappers for lastName and email.
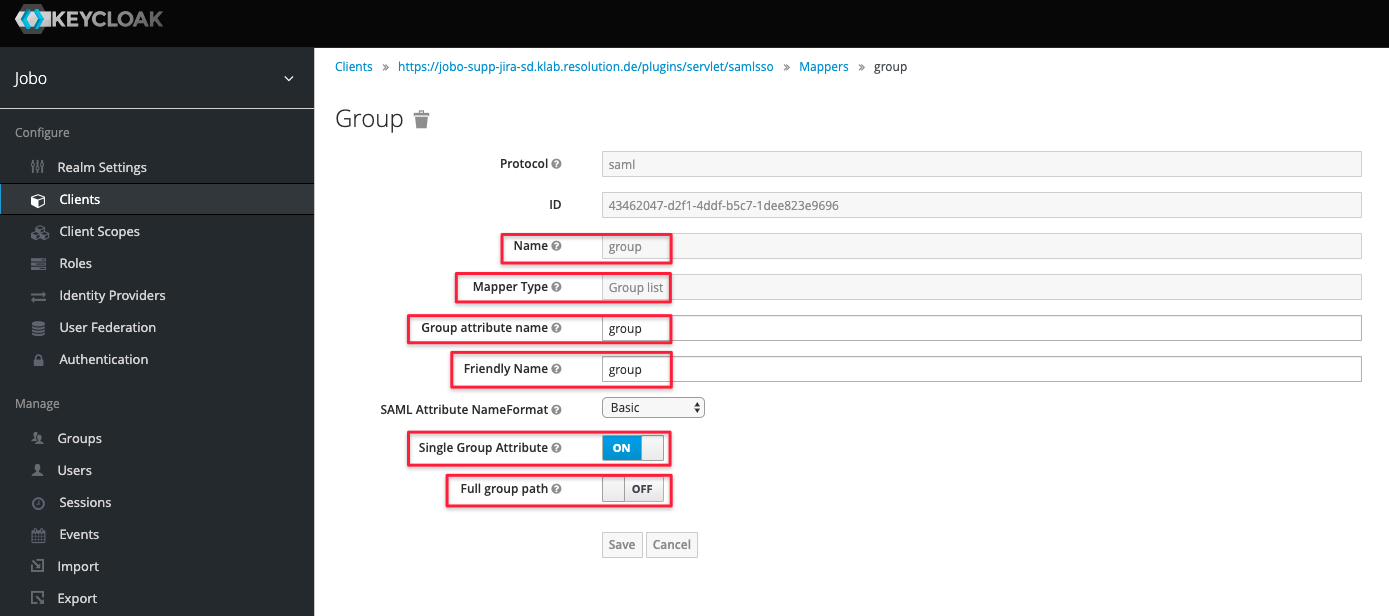
Keycloak attributes for managing groups with Just In-Time provisioning
Create a mapper for the group by choosing "Group list" from the drop down list of "Mapper Type", and add group
as value in all the name fields. Also, make sure you switch Full group path off and that Single Group Attribute is on:
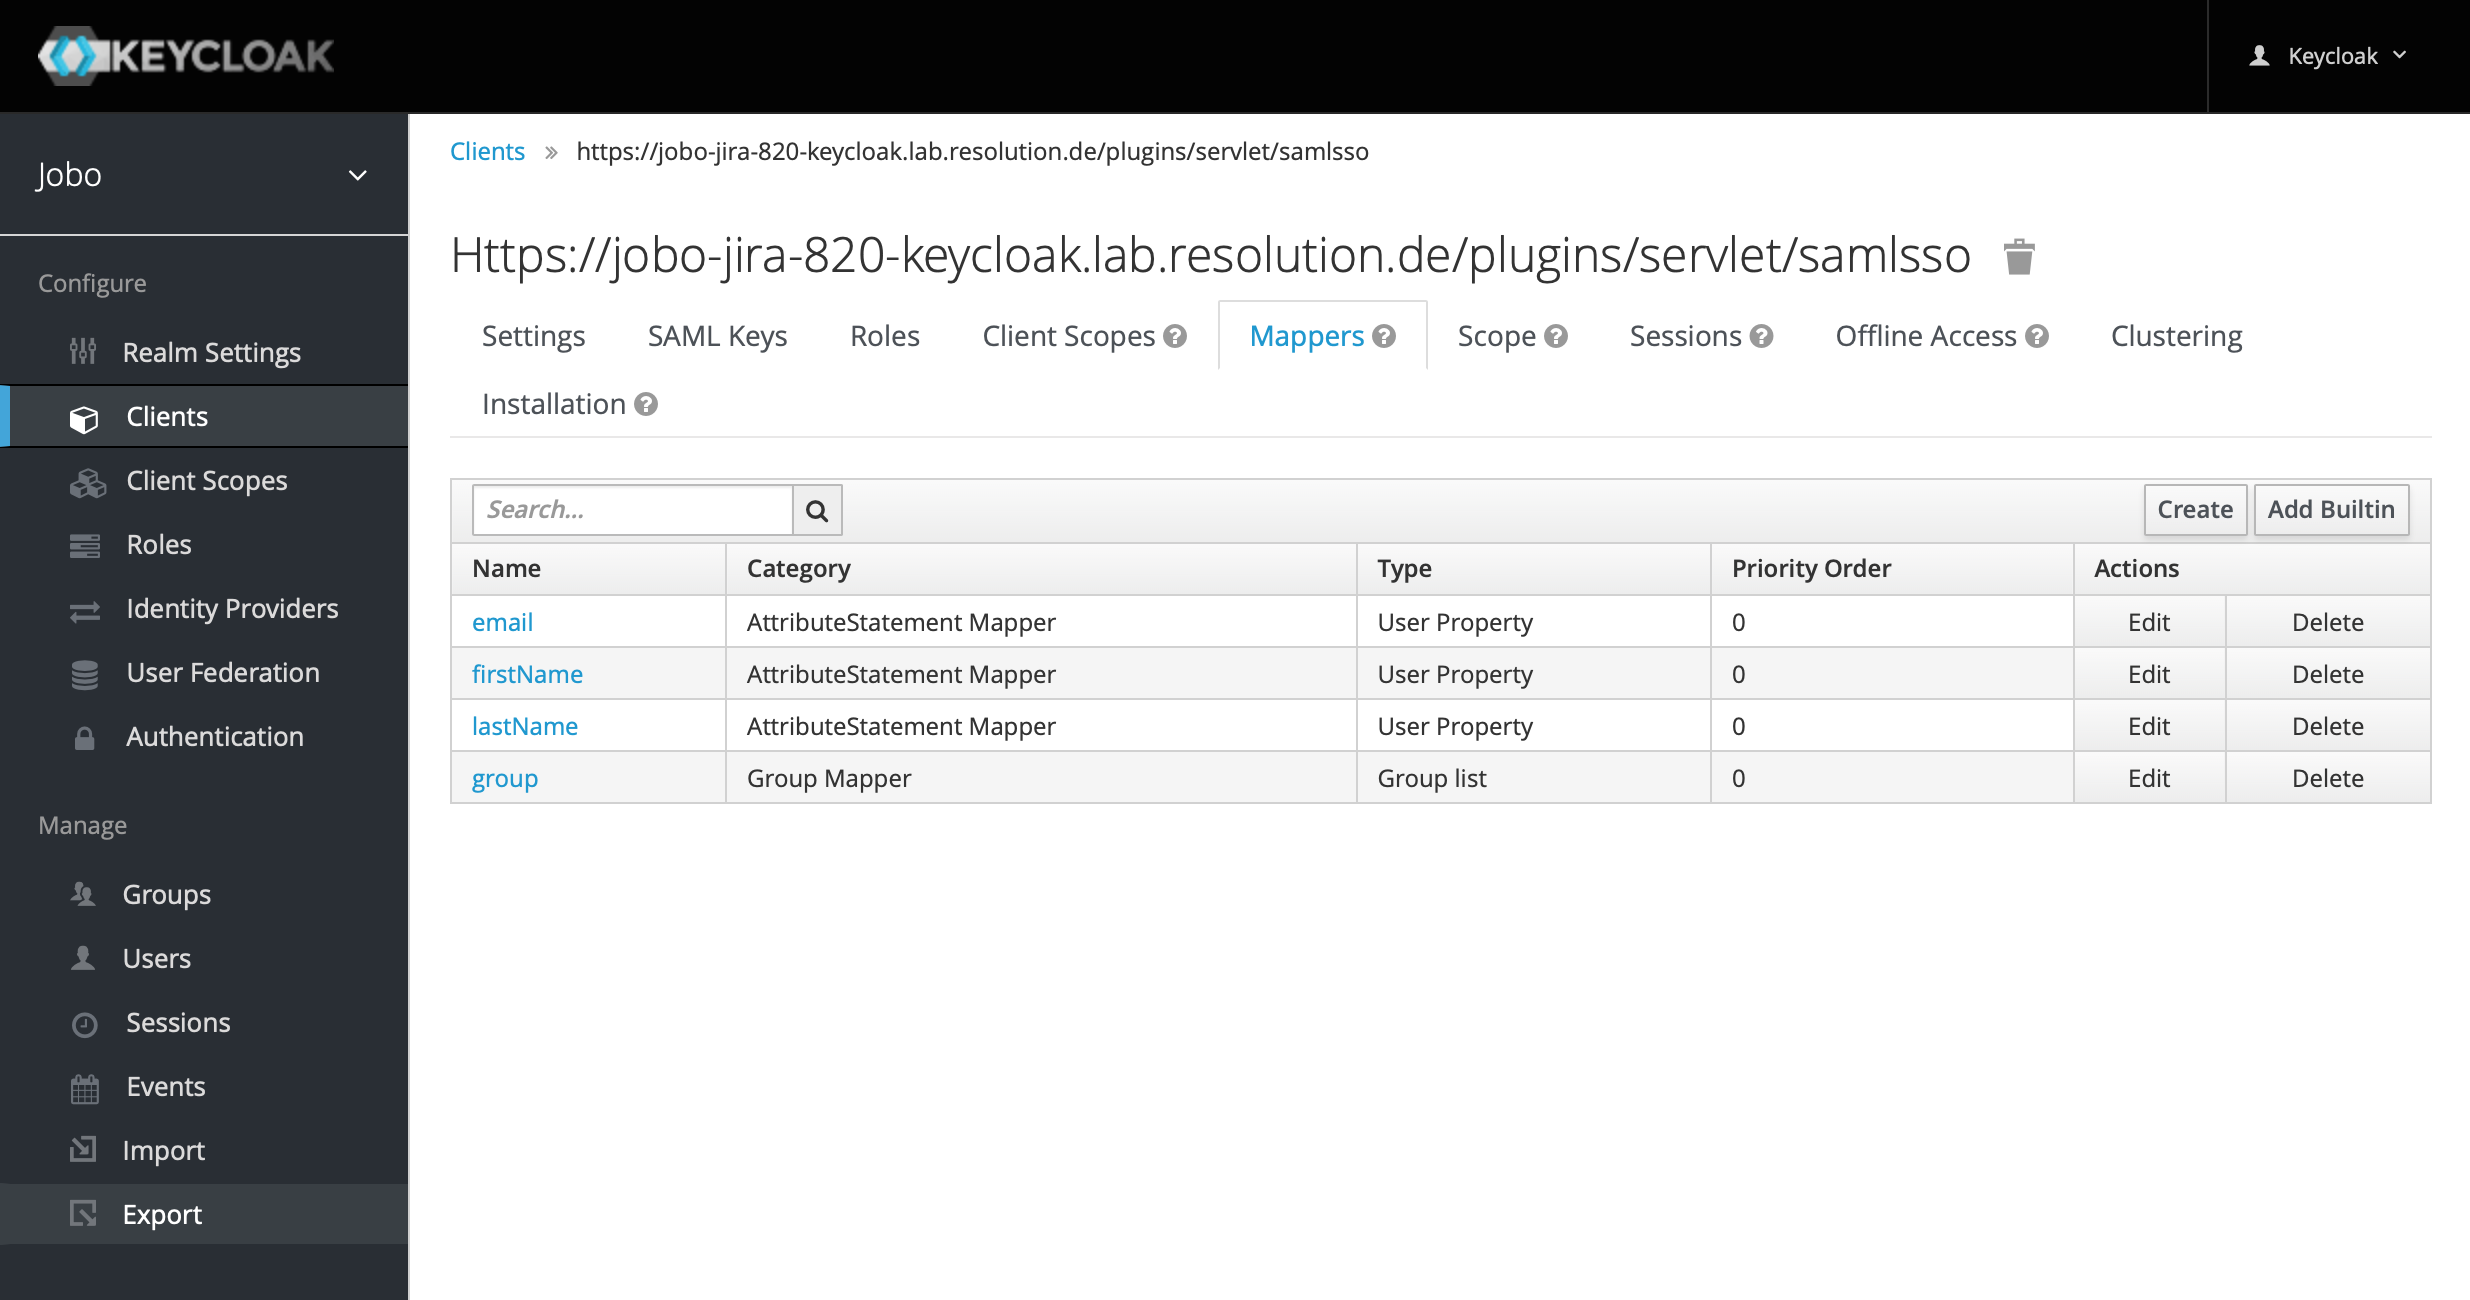
The complete list of mappers should look like this:
You may now continue with the SAML SSO app configuration, but leave your Keycloak admin page open,
as you'll need to copy something from it.
Import Keycloak IdP Metadata into SAML SSO app
You can choose from the following options in the Metadata Upload dropdown
Help me generate a metadata URL
I have a metadata URL
I have a metadata XML file
I want to past my metadata XML
I don't have any metadata and want to enter the data manually
The preferred option is 2, using the metadata URL from Keycloak which will allow automatic updates of the metadata later.
For Keycloak starting versions 6, the Metadata URL can be found in the Realm Settings/ General tab:
Just copy the link for SAML 2.0 Identity Provider Metadata under Endpoints

Keycloak < 6
In Keycloak versions lower than 6, you might not see this link, but you can easily construct it yourself:
https://<your-keycloak-instance-name/auth/realms/<your-realm-in-lowercase>/protocol/saml/descriptor
Opening the URL should reveal an XML file with a first node called <EntitiesDescriptor xmlns="urn:oasis:names:tc:SAML:2.0:metadata" xmlns:dsig="http://www.w3.org/2000/09/xmldsig#" Name="urn:keycloak">
In the Import SAML IdP Metadata screen of the wizard, select the following options and paste the URL:
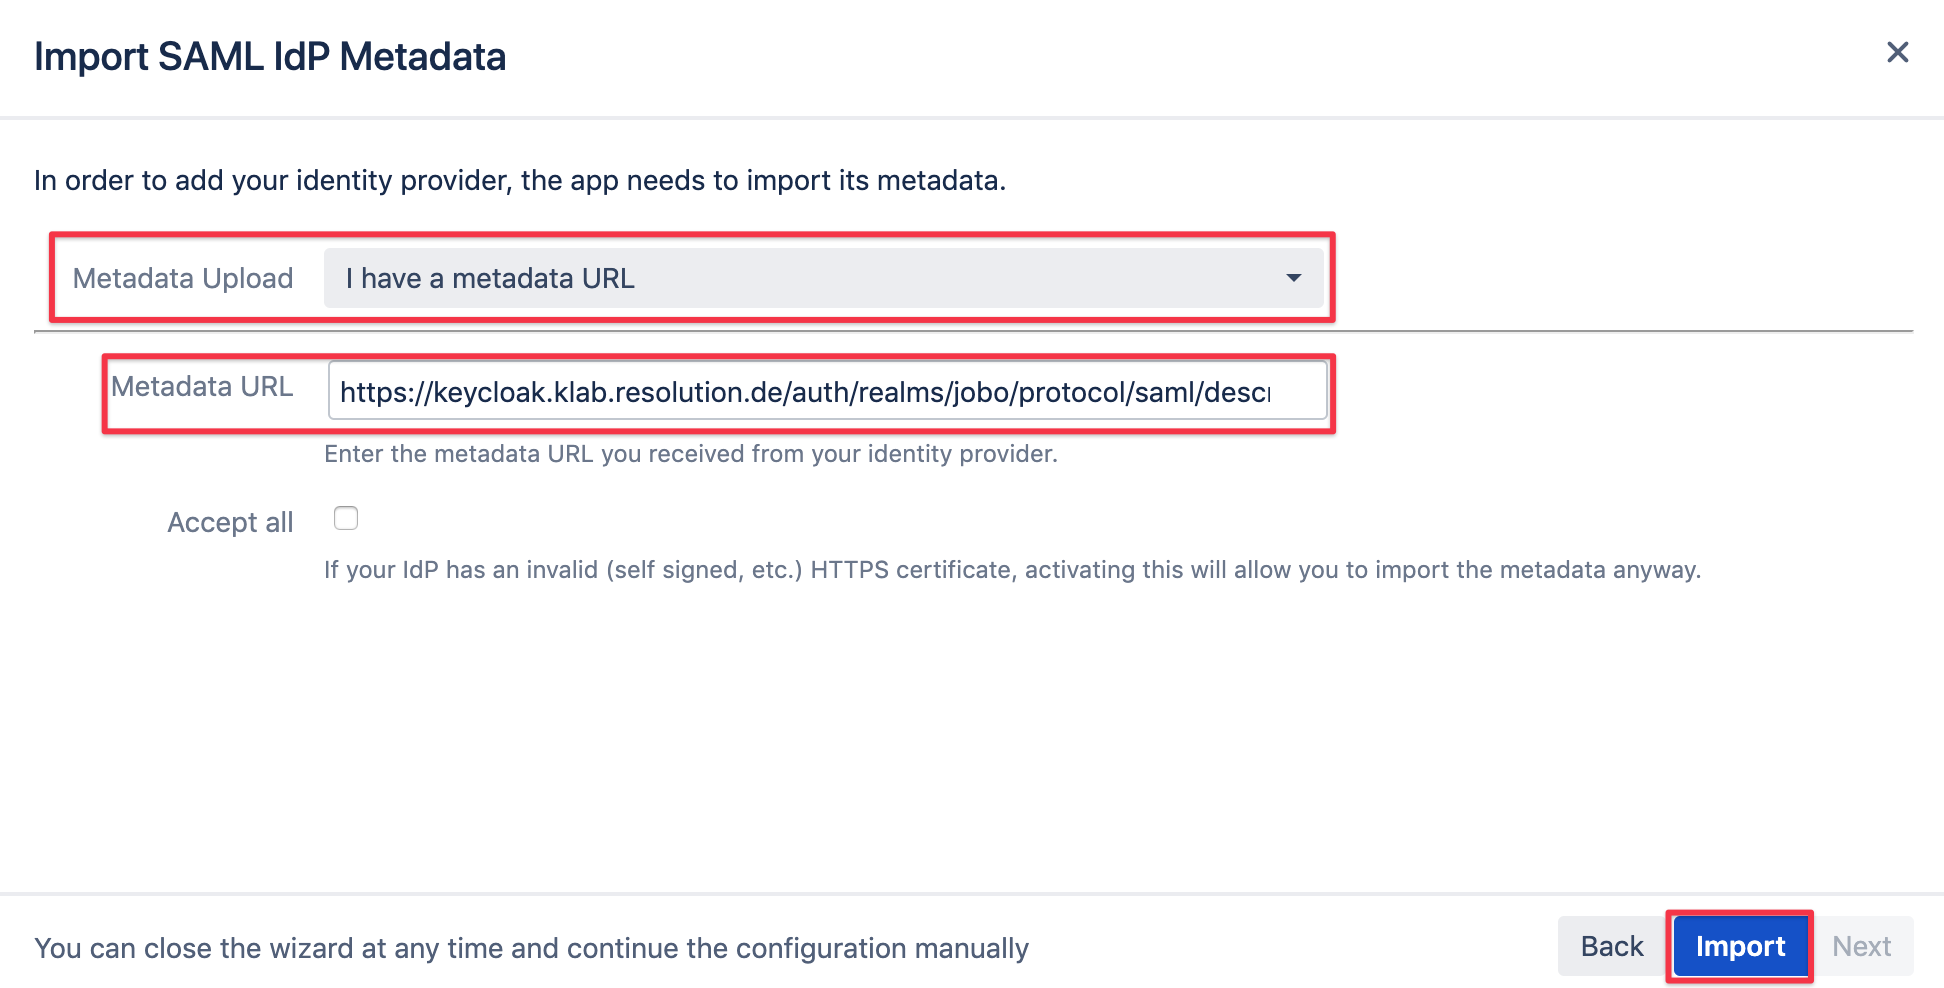
Proceed with the next steps described below.
Configure remaining SAML SSO app settings
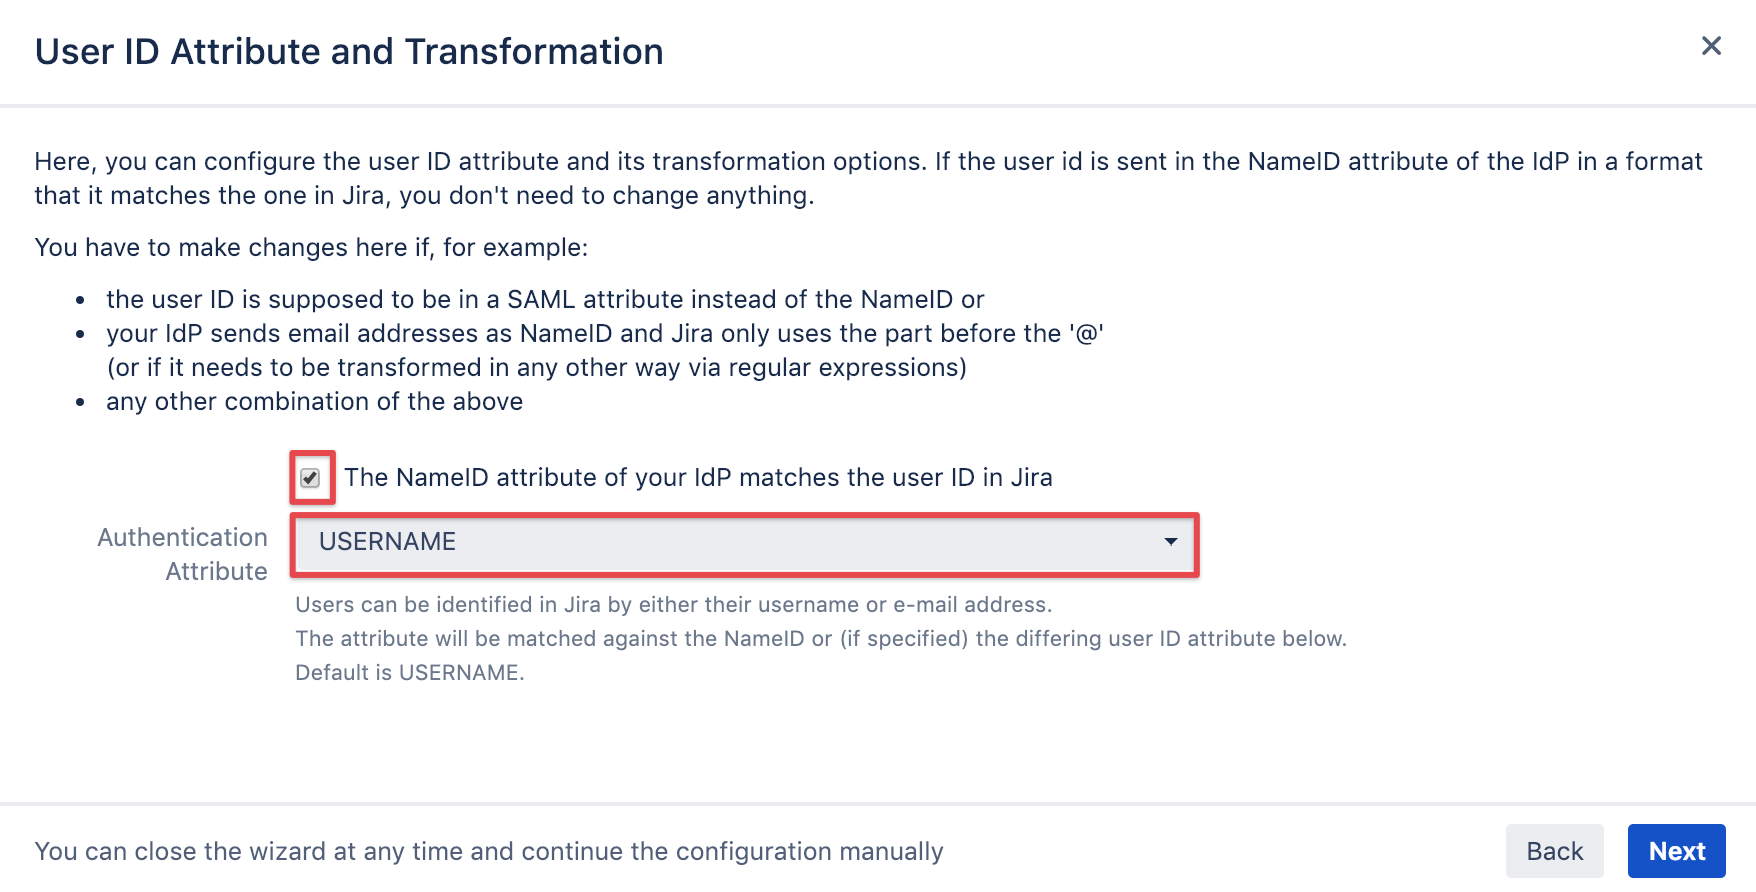
User ID attribute and transformation
It's recommended to leave this option checked.
Click on Next.
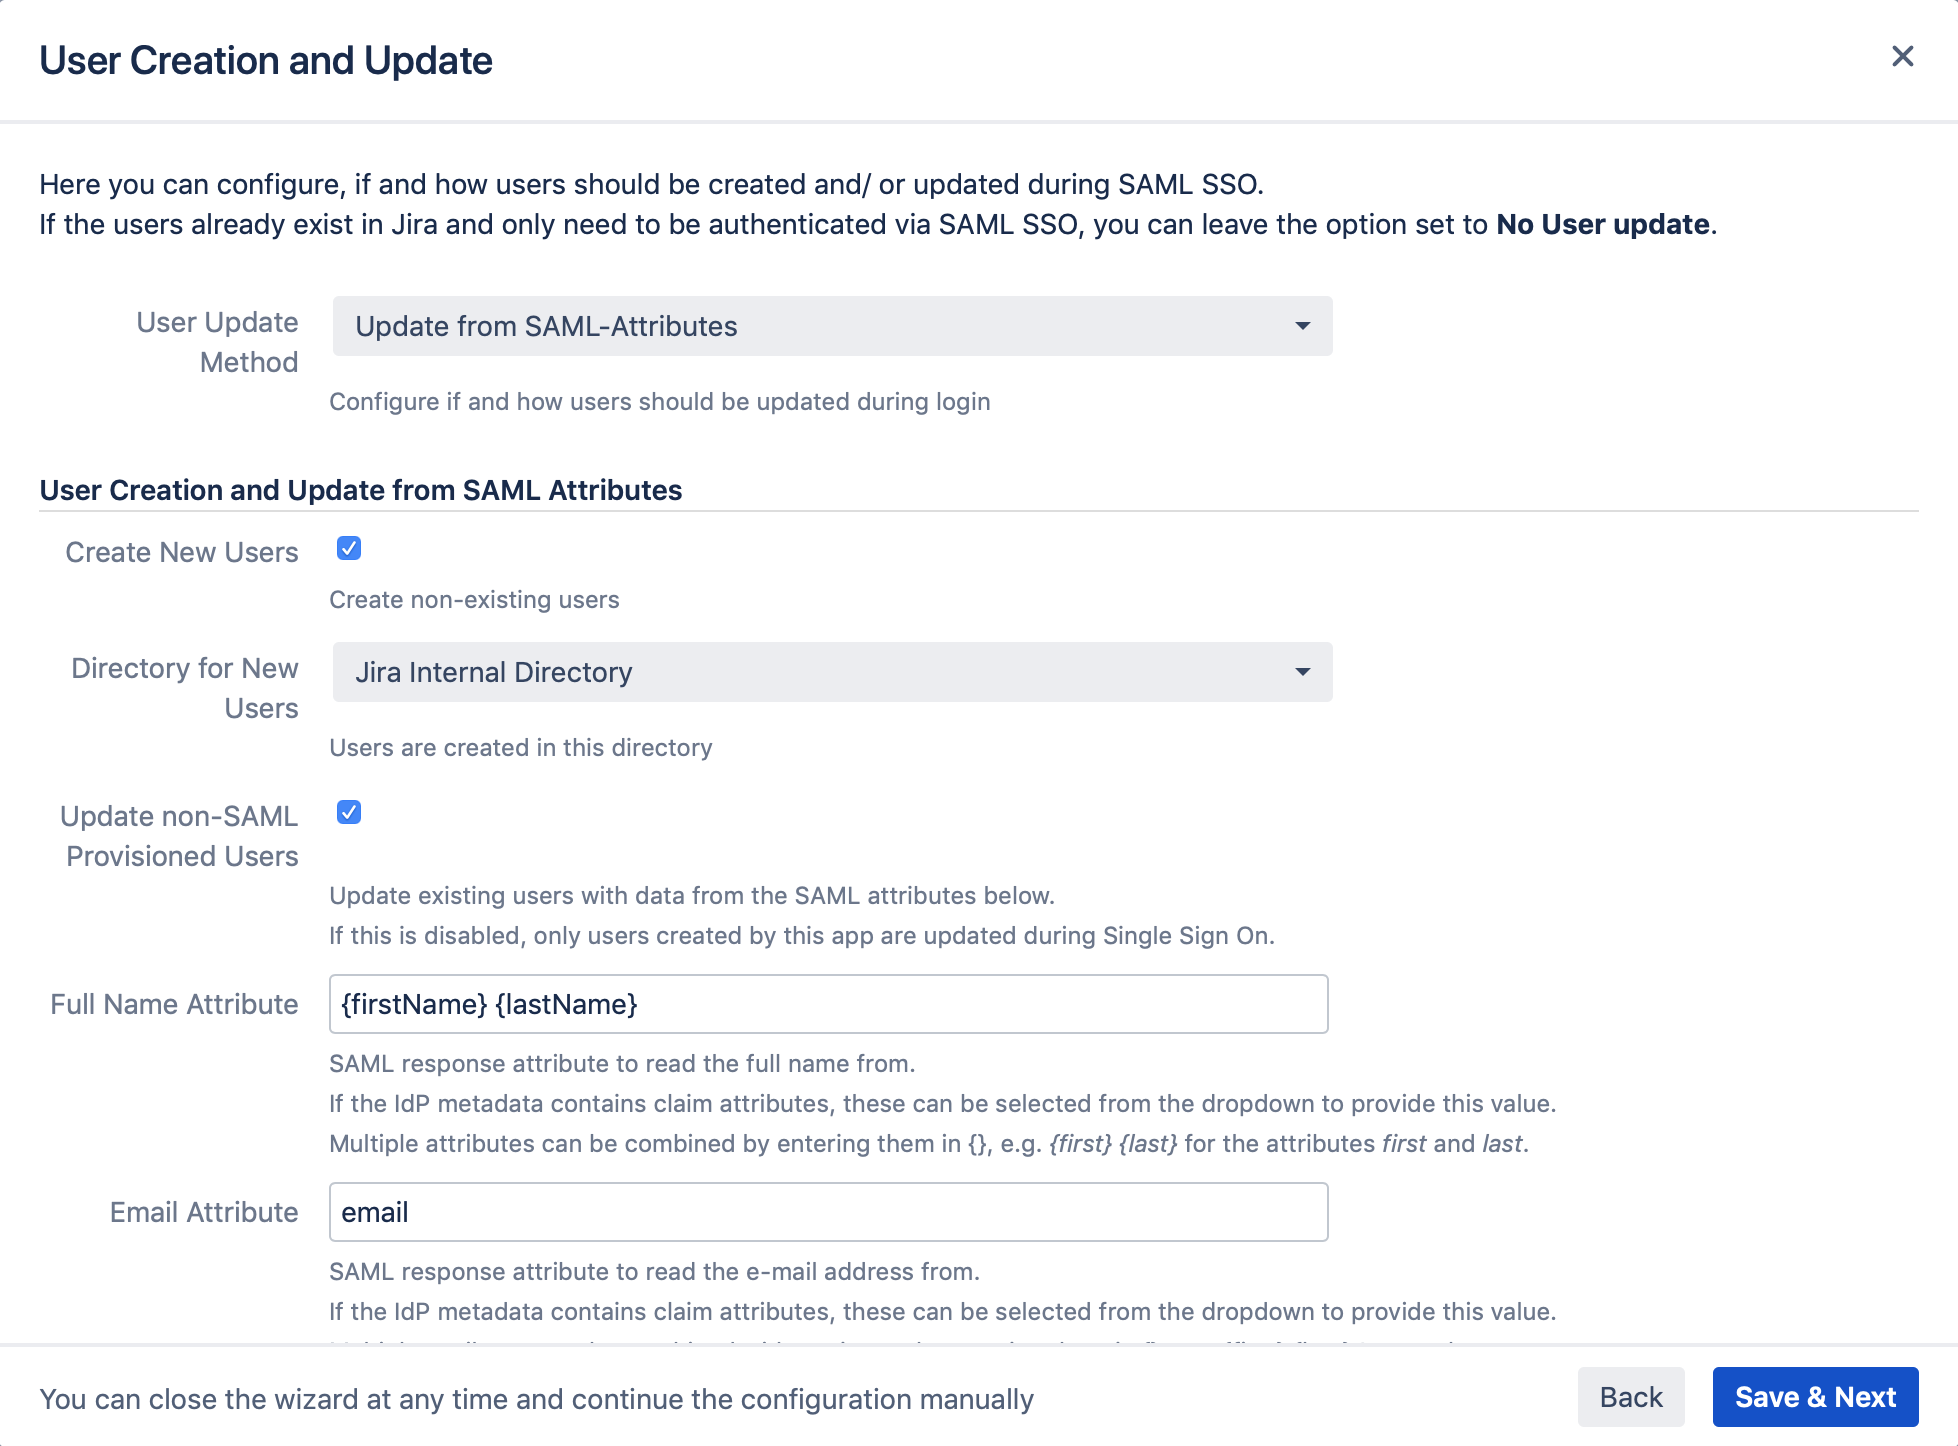
User creation and update
This part of the configuration defines how just in-time provisioning is working, creating users not manually in the Atlassian application,
but during Single Sign On with Keycloak
select Update from SAML-Attributes as User Update Method
check the Create New Users box
select a directory to create the new users in, usually the default user directory
if you want, you could also update users who were not created by the SAML SSO app by checking the corresponding box
enter {firstName} {lastName} as Full Name Attribute
enter email as Email Attribute
Click Save & Next to proceed.
Scroll down to the Group Settings.
Add group as the attribute to read the groups from, as configured earlier in Keycloak.
Depending on your Atlassian product, it is a good idea to set default user groups for new users,
such as jira-software-users for Jira or confluence-users for Confluence. You only need to do this, if these
groups are not already assigned to the users in Keycloak.
Without assigning new users to the Atlassian product specific group, they are not able to use it.
Also, feel free to activate any option which suits your needs.

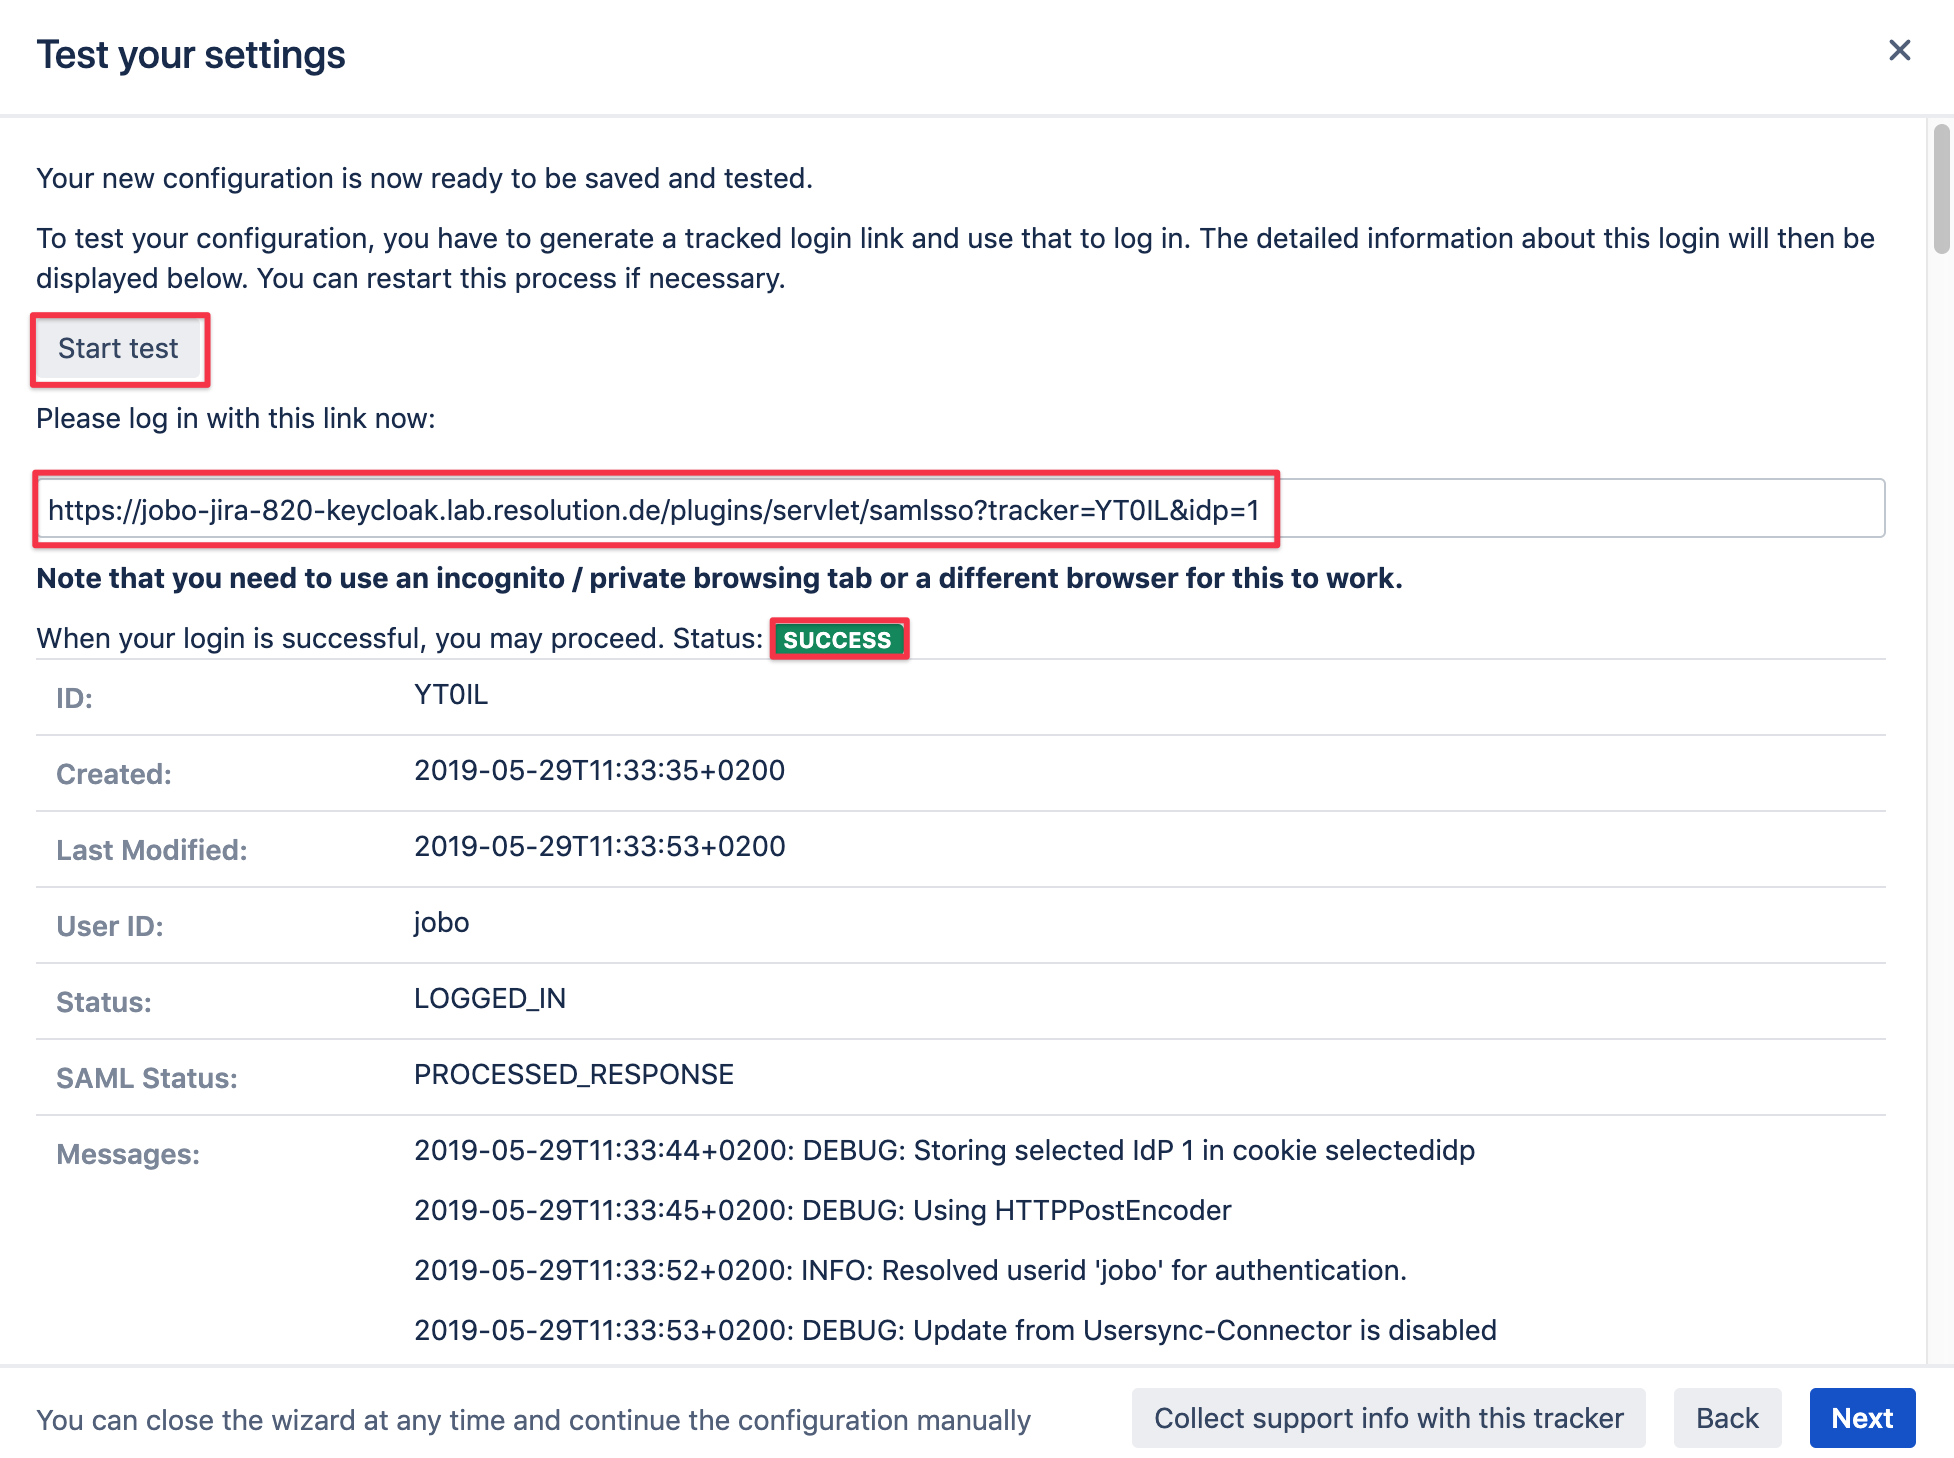
Test configuration of SAML SSO app
As a last step you can test your settings which can be executed by clicking on the corresponding Start test button.
Copy the link displayed and paste it into a new incognito/ private browsing window, and execute a login against Keycloak,
using a user and password which is a member of your realm in Keycloak.
The status of the authentication process is permanently updated in the window.
If there is any error at this point you need help with, please refer to the troubleshooting guide, which will also help us, should you open a support ticket with us.
Of course the test window above will display a lot of information about the errors already, but requires some deeper knowledge of the SAML protocol.
Enable login redirection
The last step is to configure redirect options, which you should only do if the test before succeeded.
Selecting Enable SSO Redirect will ensure that users are getting redirected to be logged in via SAML,
instead via the login form as before the SSO setup.
The Override Logged Out URL Method can be left at the default option.
It will redirect users after log out to a default page where they can login again via username and password or SSO again.
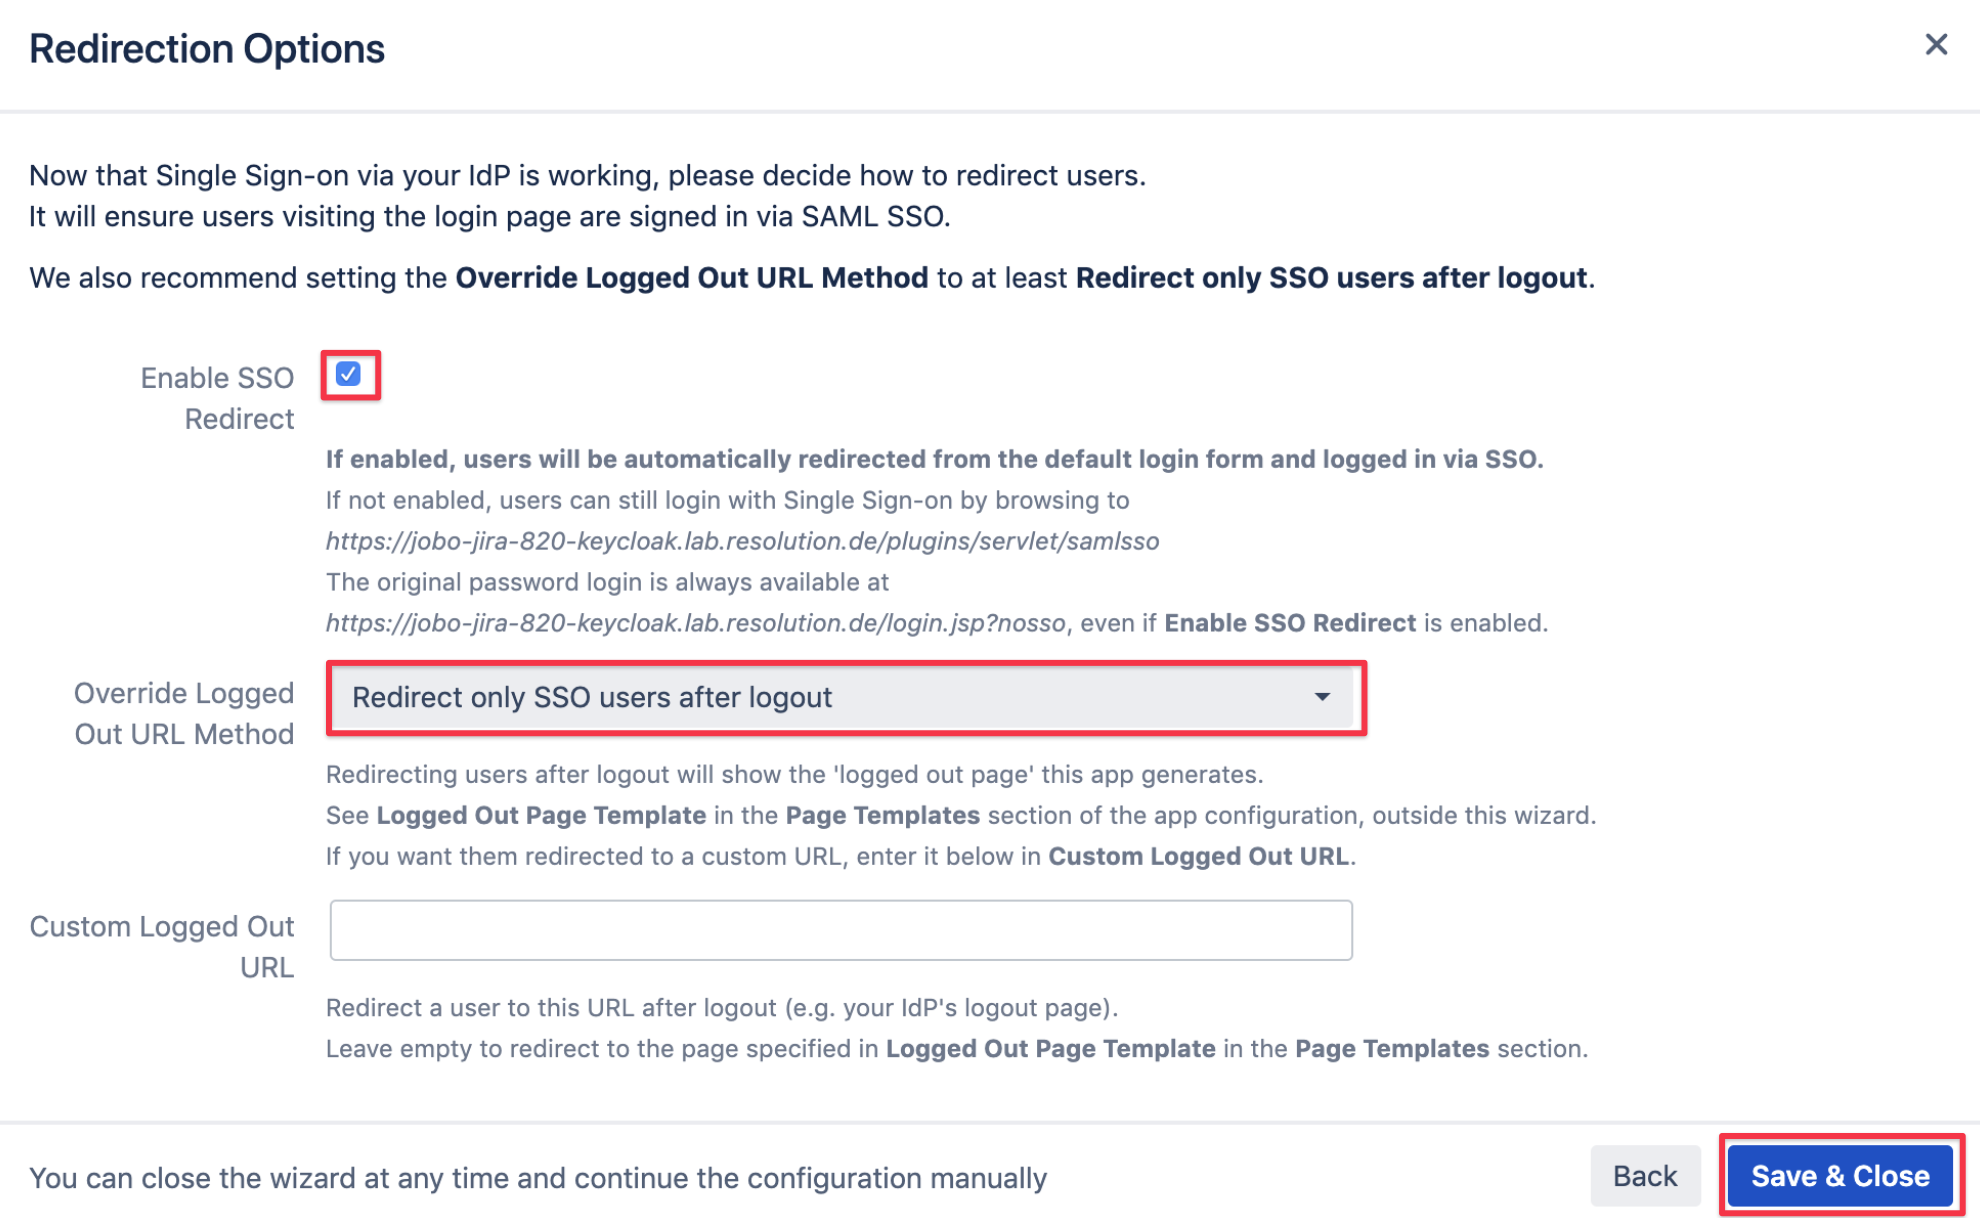
Save & Close to complete the setup and close the wizard. You are now ready to use Keycloak with SAML SSO in your Atlassian application.
If Enable SSO Redirect is enabled, you can login to your Atlassian application manually by browsing to the URL that fits your Atlassian application as listed below.
Use this URL, if you need to login a local user unknown to the ADFS or if there are any issues with Single Sign On.
Jira: https://<baseurl>/login.jsp?nosso
Confluence: https://<baseurl>/login.action?nosso
Bitbucket: https://<baseurl>/login?nosso
Bamboo 5: https://<baseurl>/userlogin!default.action?nosso
Bamboo 6: https://<baseurl>/userlogin!doDefault.action?nosso