RSA SecurID Access
Goal
The following tutorial is currently only intended to provide at least minimum information on how to setup SAML SSO with a RSA SecurID Access Idp.
Prerequisites
RSA SecurID Access
Jira, Confluence, Bitbucket, Bamboo with SAML SSO and a fully qualified domain name for the instance (i.e. jira-dev.company.local or jira.company.com)
Step-by-Step Setup Guide
Install the SAML SSO app
In your Atlassian product, open the in-product marketplace as described in the Atlassian documentation.
Search for "resolution saml" and click "Install" for SAML Single Sign On (SSO) by resolution Reichert Network Solutions GmbH.
After the installation is complete, click on Manage, then choose Configure.
Now, you are on the Add-on / app configuration page and the first step of the setup wizard will appear.

Configure SAML SSO app, Part 1
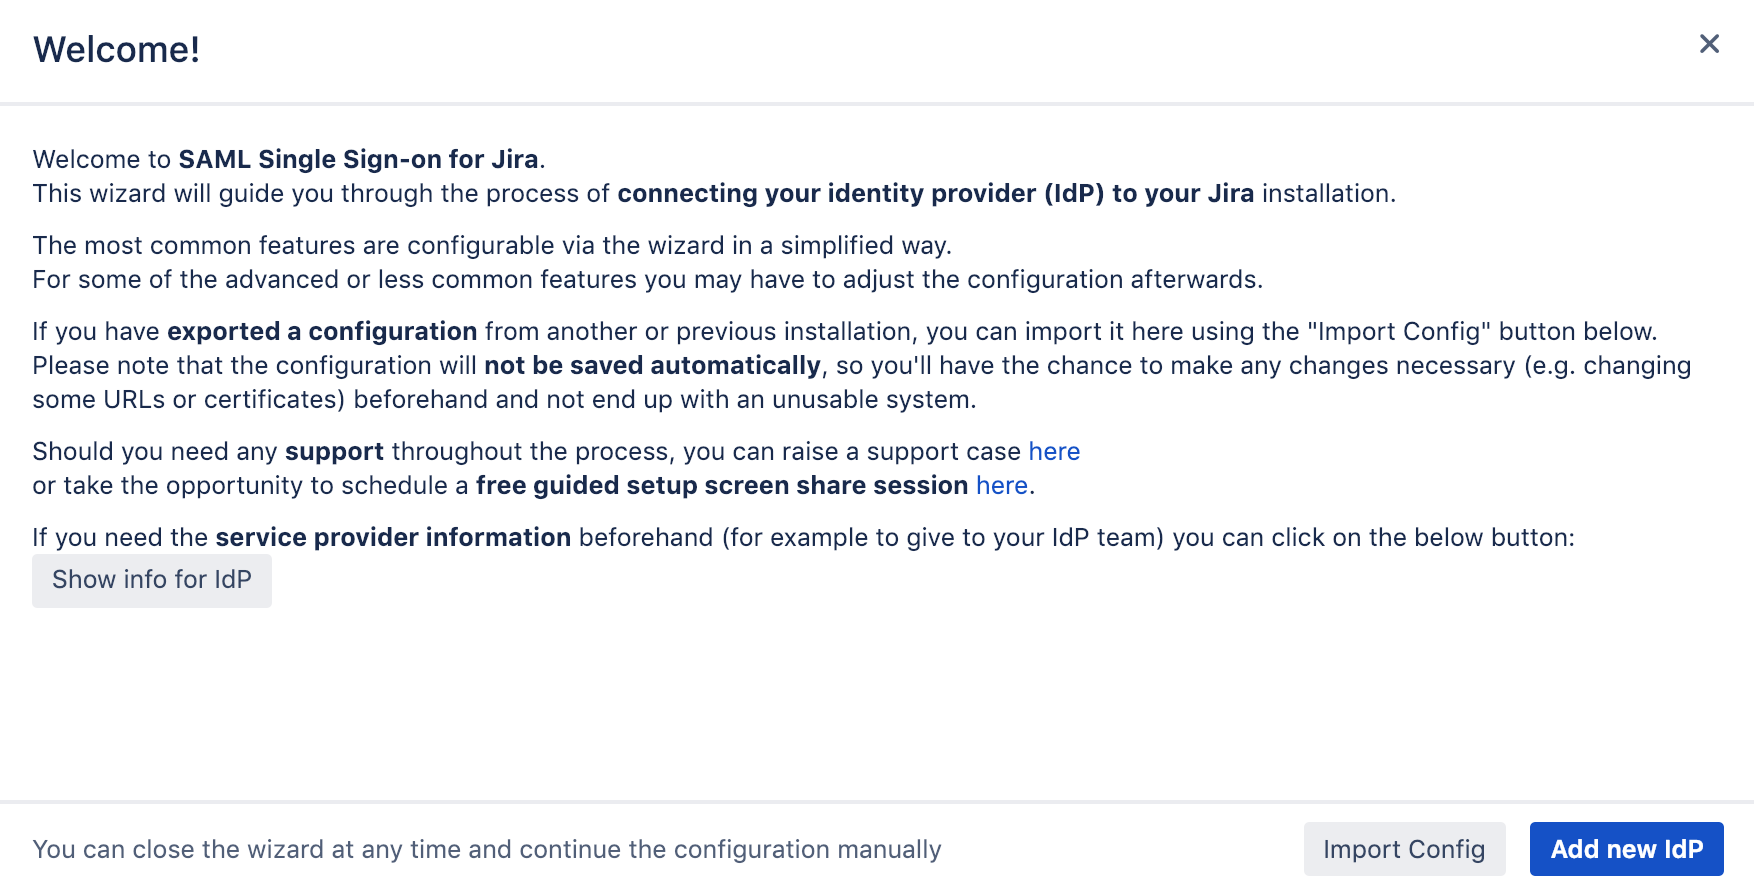
Add new Identity Provider (IdP)
Click on Add new IdP to start the wizard.
Adding a new IdP can also be done outside the wizard in the app configuration section Identity Providers

Select Other SAML Identity Provider as IdP Type.
You may also change the name and add a description. The name needs to be unique.
Click on Next.

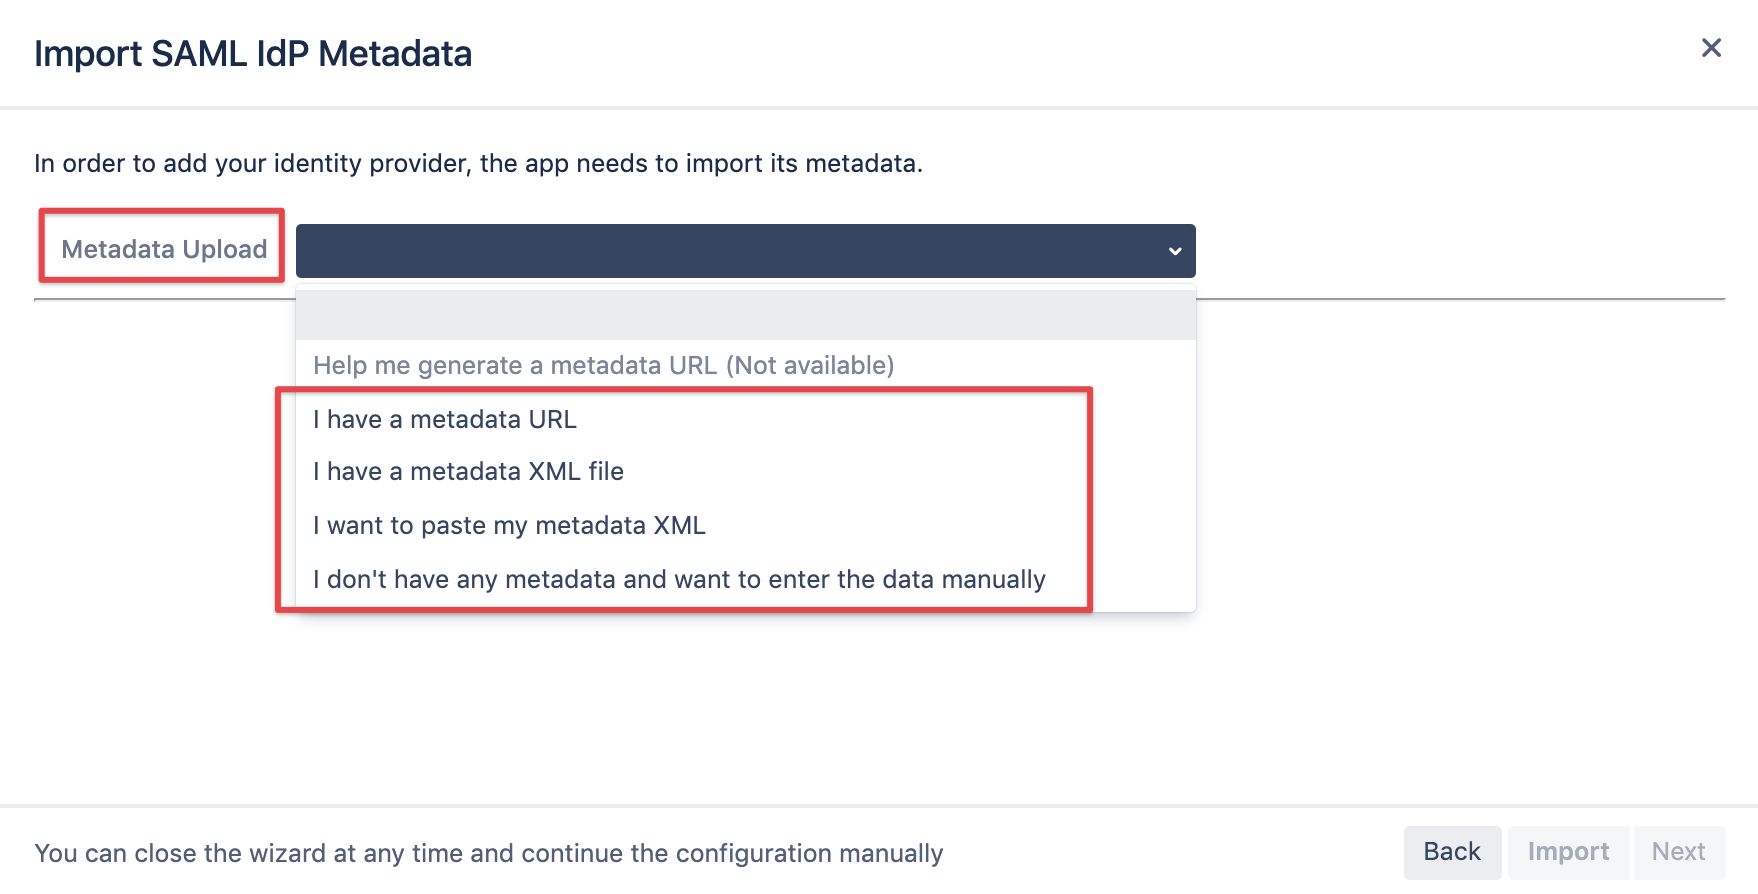
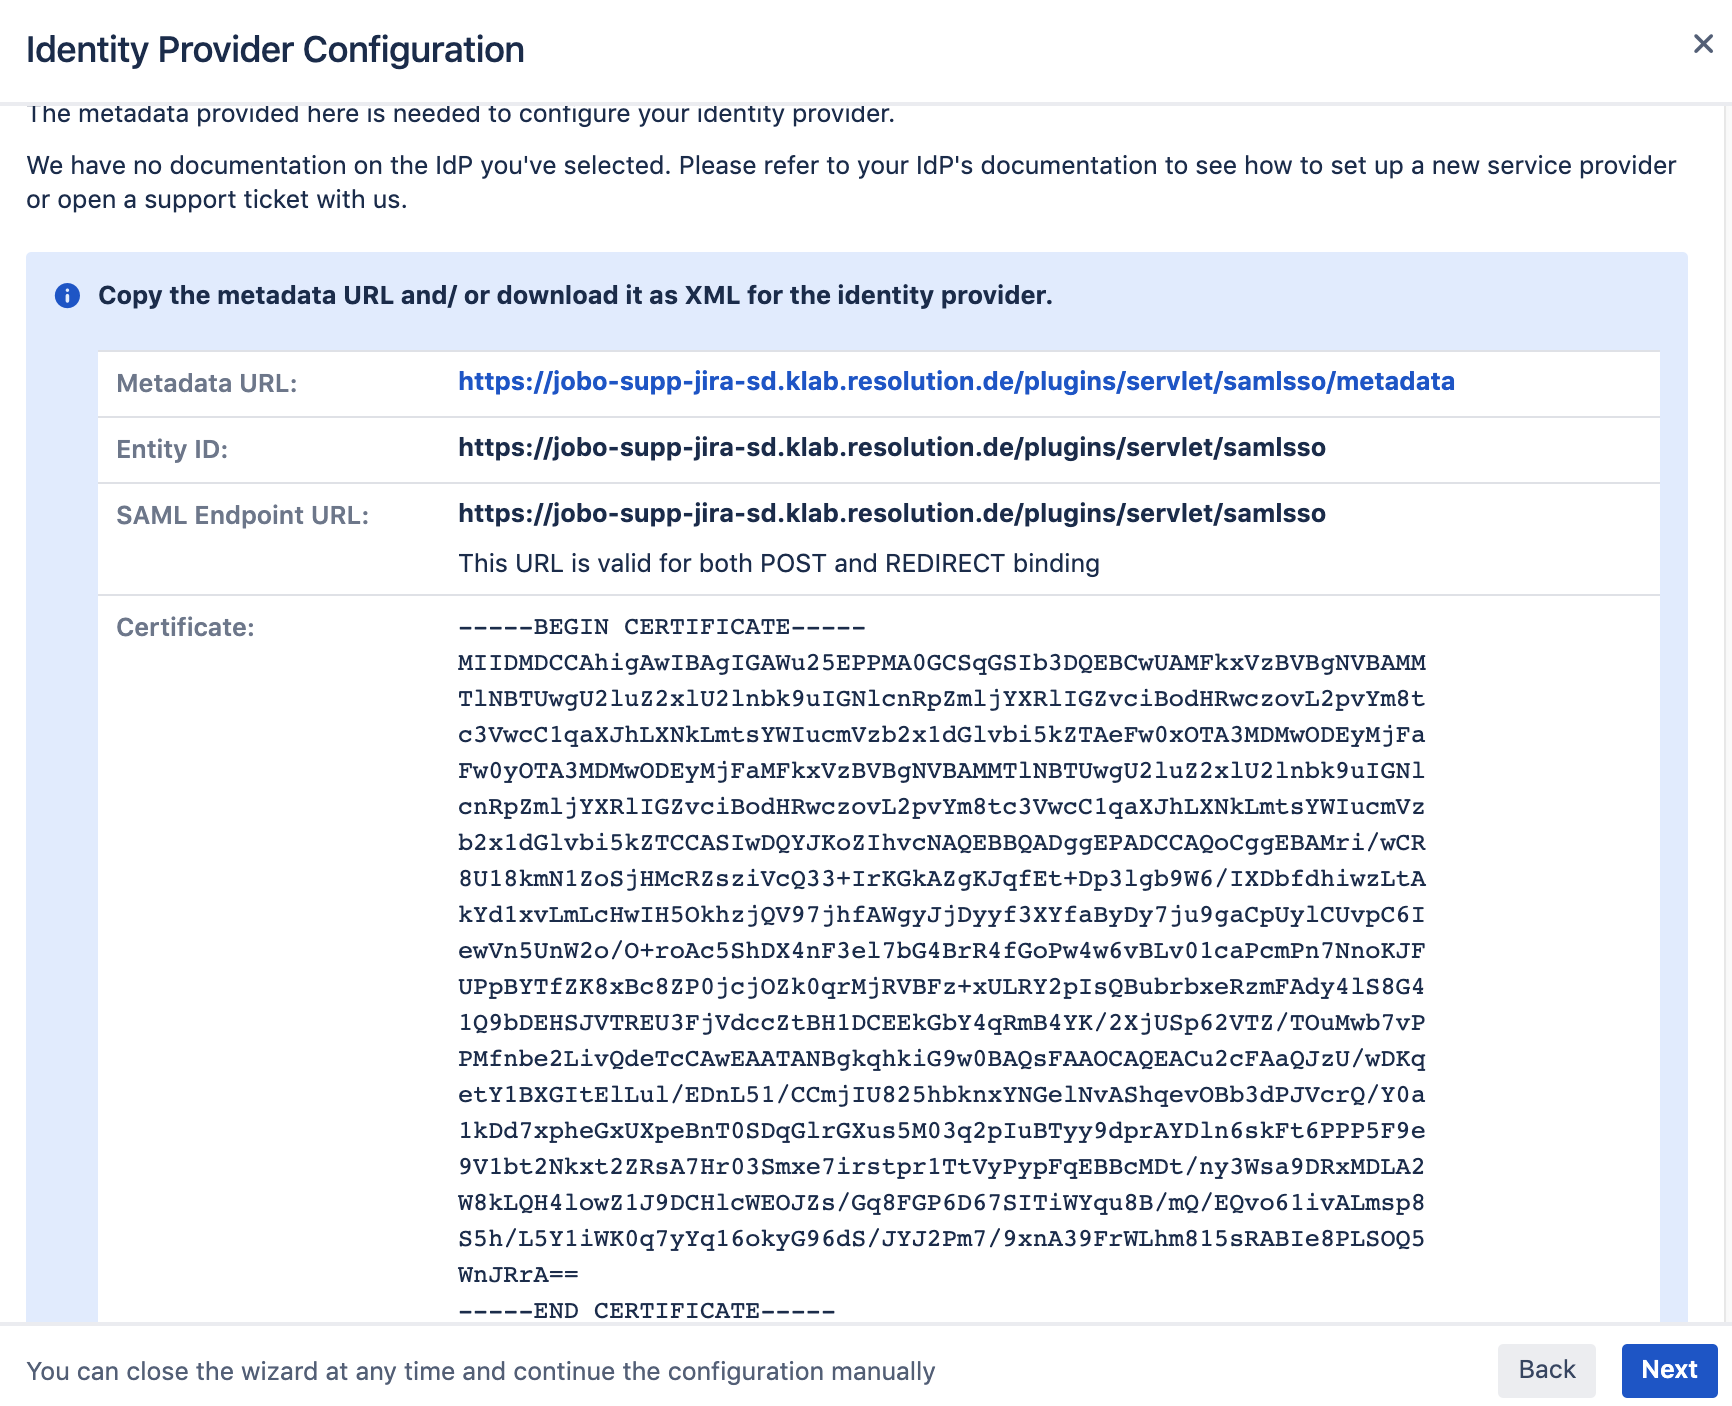
Copy the Metadata URL and Entity ID from the next screen, as you'll need when setting up the RSA IdP configuration
Configure RSA SecurID
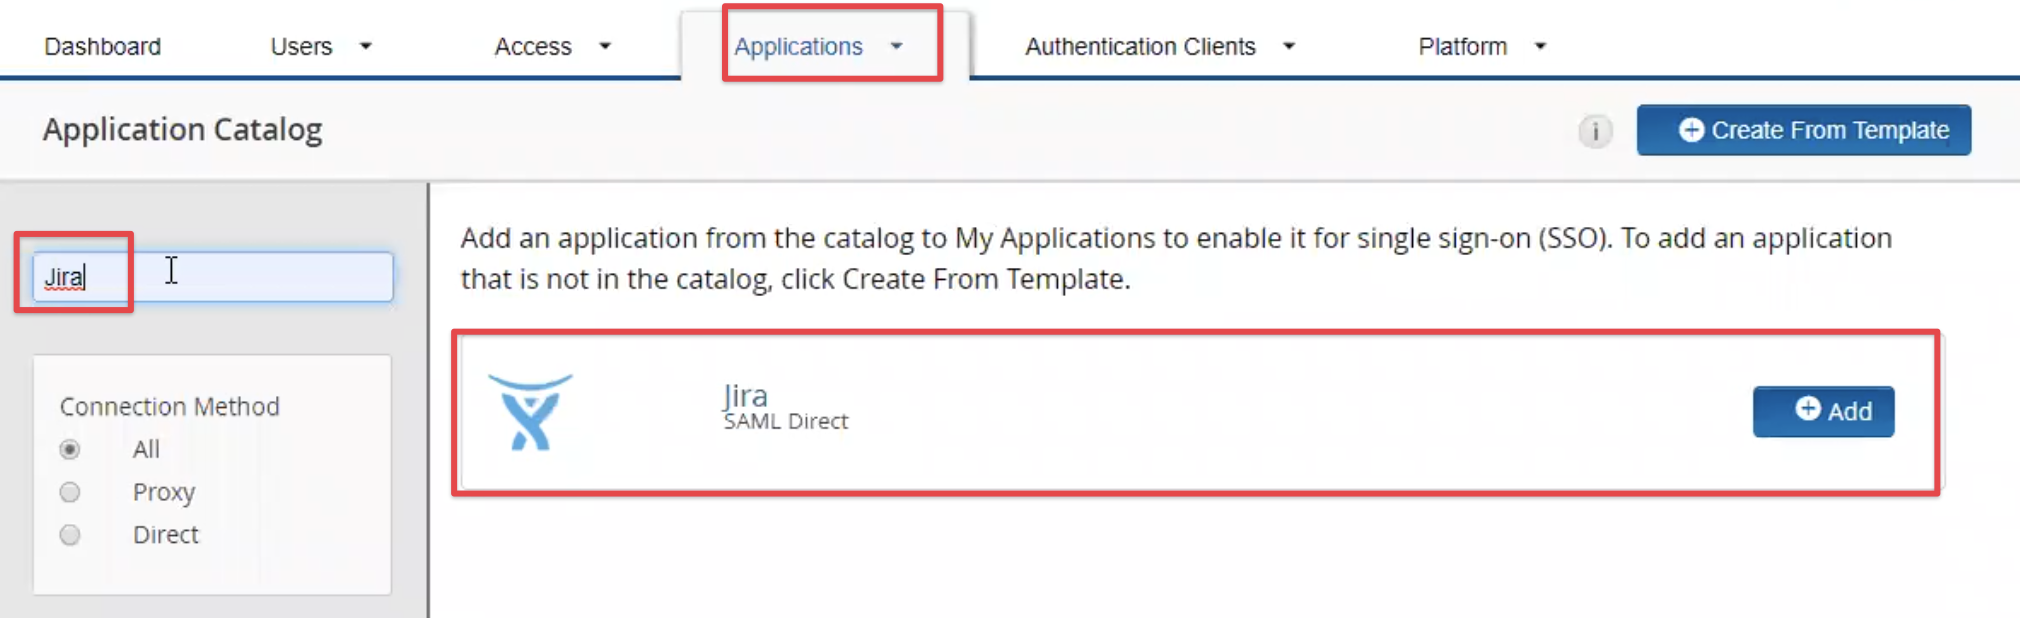
Navigate to your RSA SecurId admin portal and add a new application from the Application Catalog

Search for Jira or Confluence and click on the Add button once the result has been retrieved.
You can also use the Jira template for Bitbucket, Bambooo and Fisheye/ Crucible.
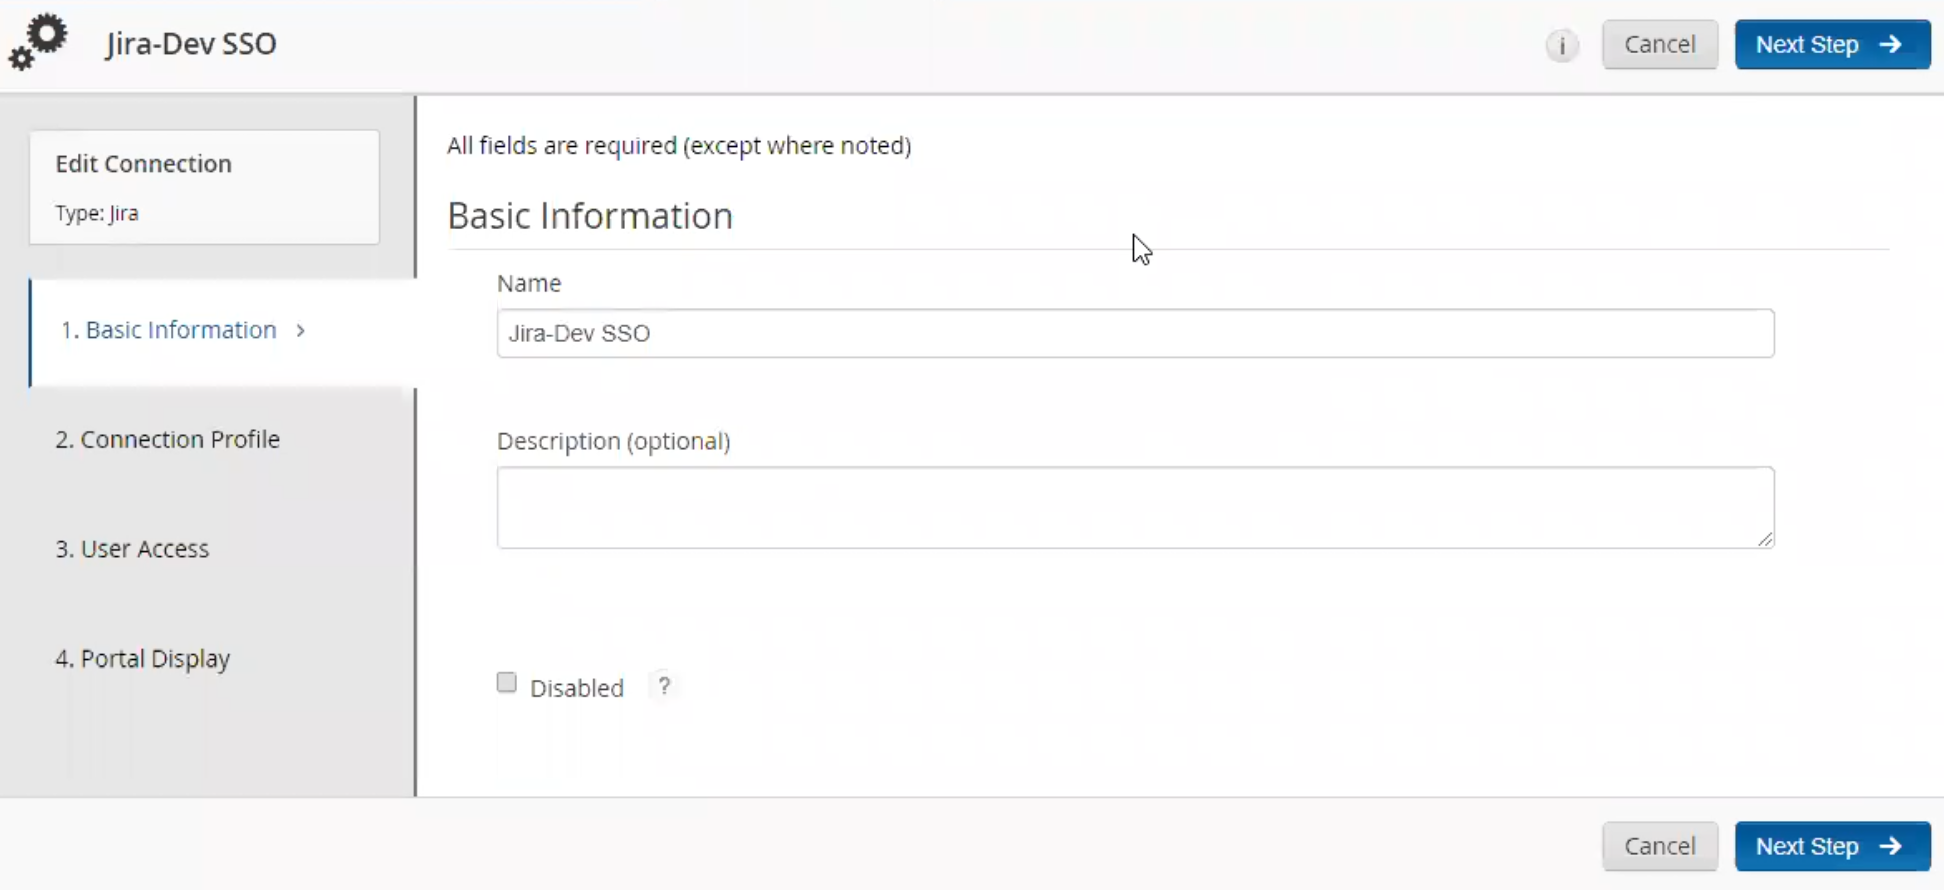
Provide some basic information for it
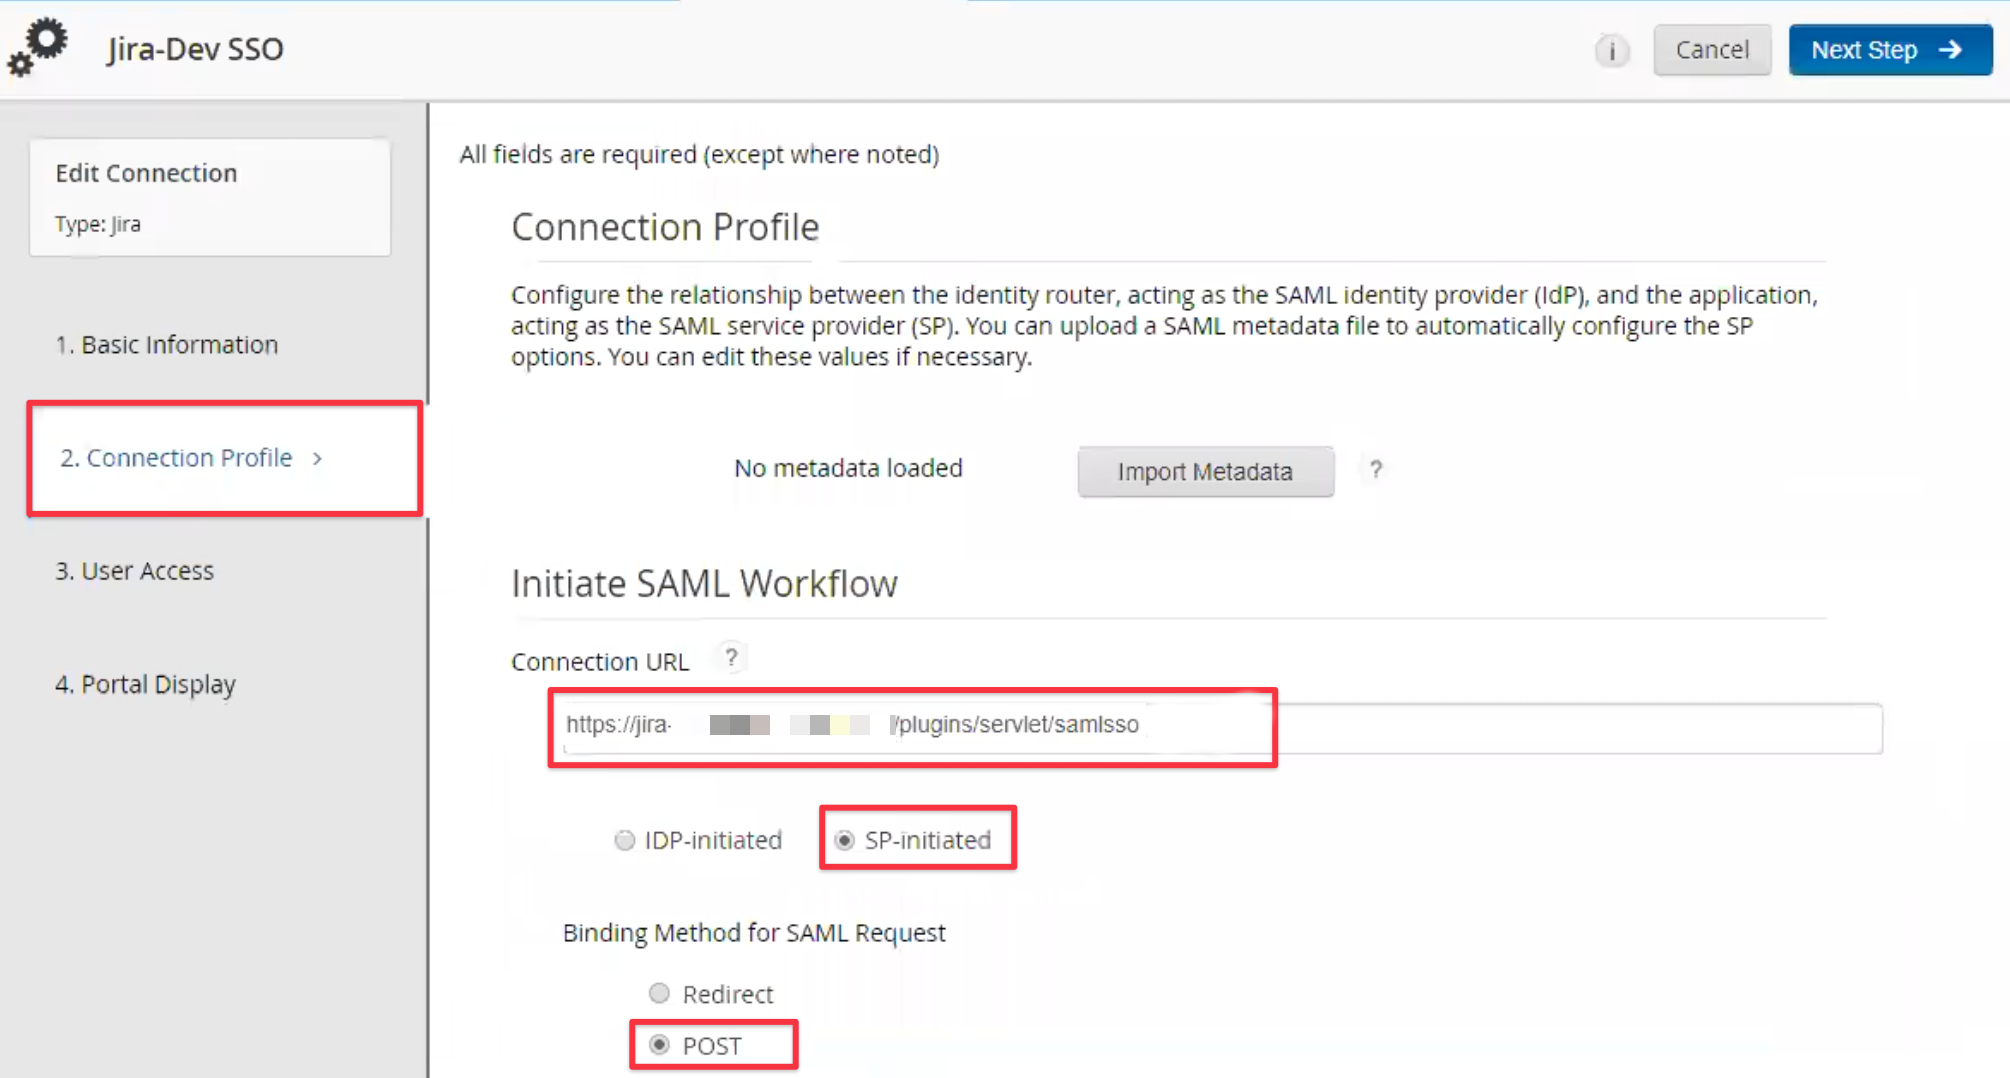
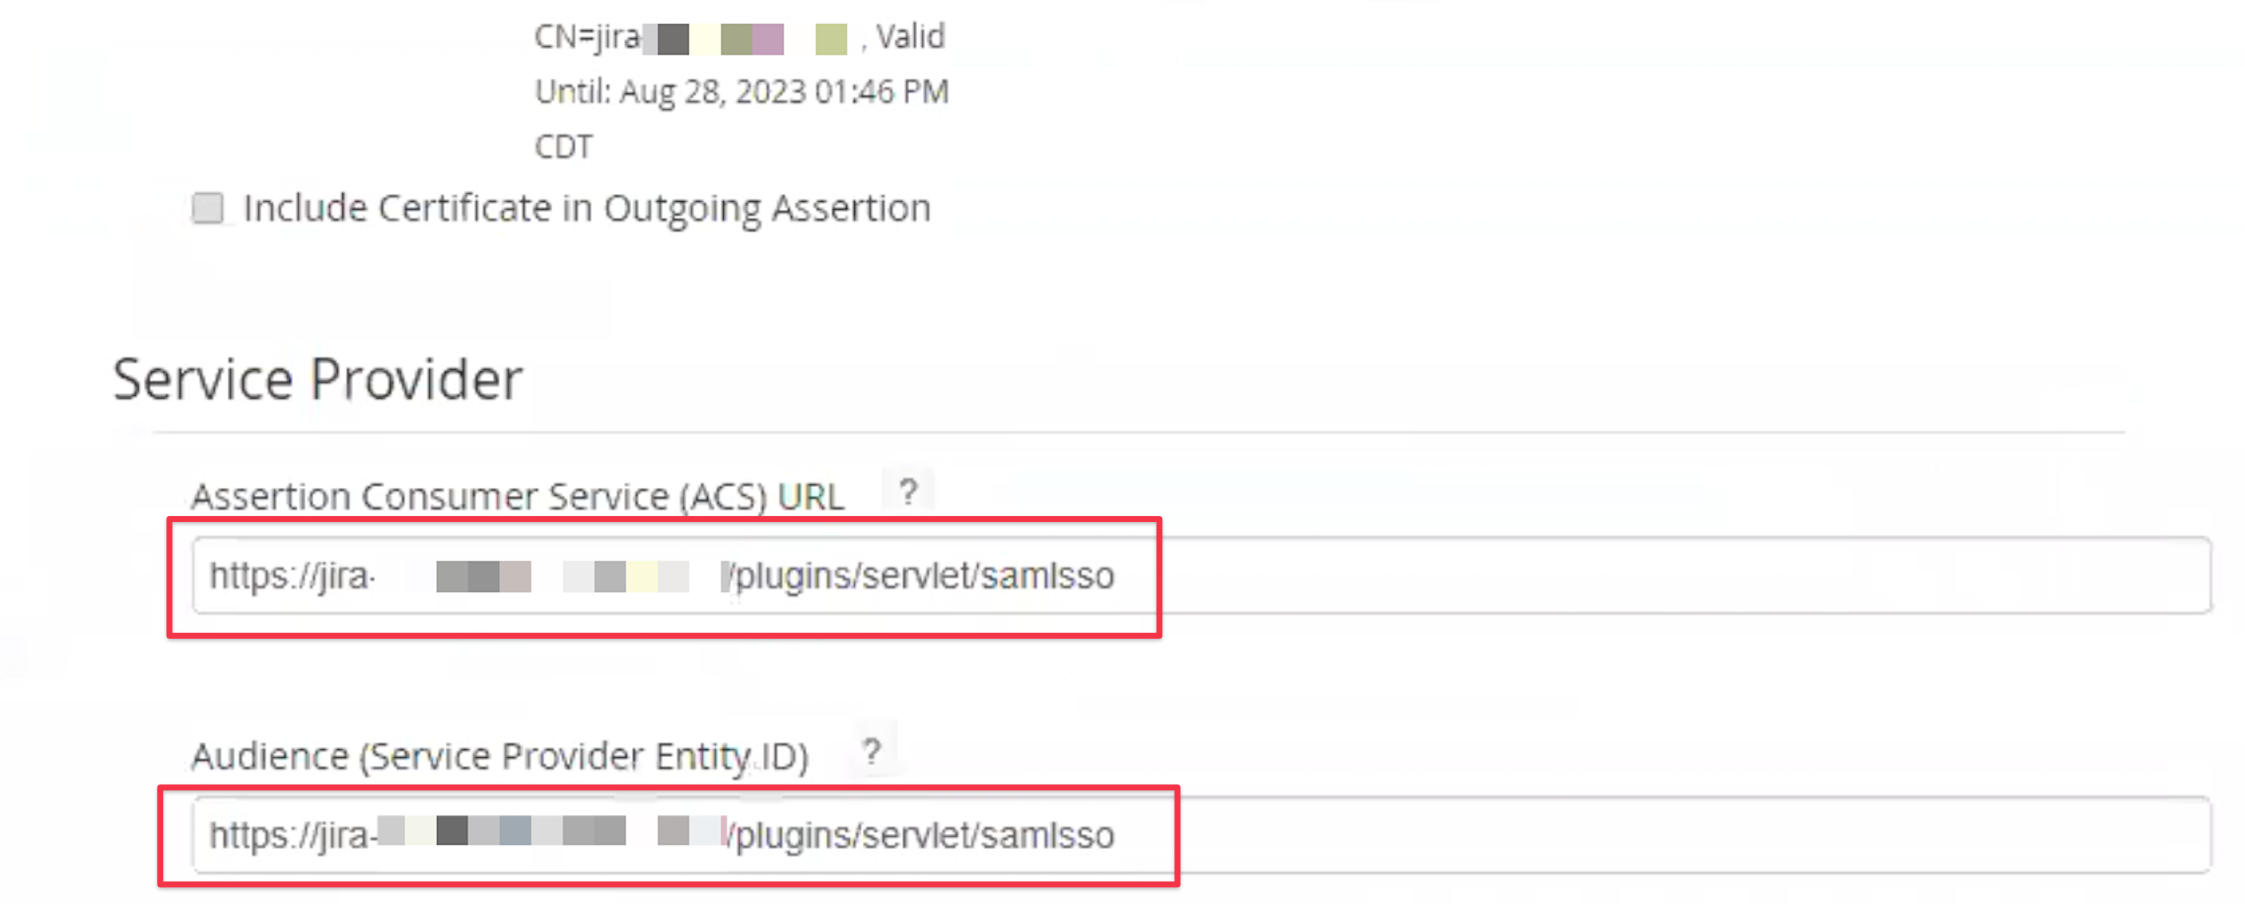
as connection URL, enter the Entity ID copied earlier, it will always be the base URL of your Atlassian instance and /plugins/servlet/samlsso at the end
set the initiation method to SP-initiated
set the binding method to POST
From further down the screen, copy the identity provider URL and save it somewhere, as you'll need it to complete the SAML setup


Configure SAML SSO app, Part 2
Complete Identity Provider (IdP) setup