Azure AD with User Sync
Goal
After completing this setup guide, you will have setup Azure AD and your Atlassian product for the SAML SSO app and also User Sync. Additionally, you will enable the SSO redirection and test SSO.
Prerequisites
To use the SAML SSO app with Azure AD, you need the following:
An Azure AD subscription
A (trial) subscription for the SAML SSO app
Admin access to your Atlassian product
Video Guide
Step-by-Step Setup Guide
Install the SAML SSO App
In your Atlassian product, open the in-product marketplace as described in the Atlassian documentation.
Search for "resolution saml" and click "Install" for SAML Single Sign On (SSO) by resolution Reichert Network Solutions GmbH.
After the installation is complete, click Manage Apps/Addons.

Configure UserSync
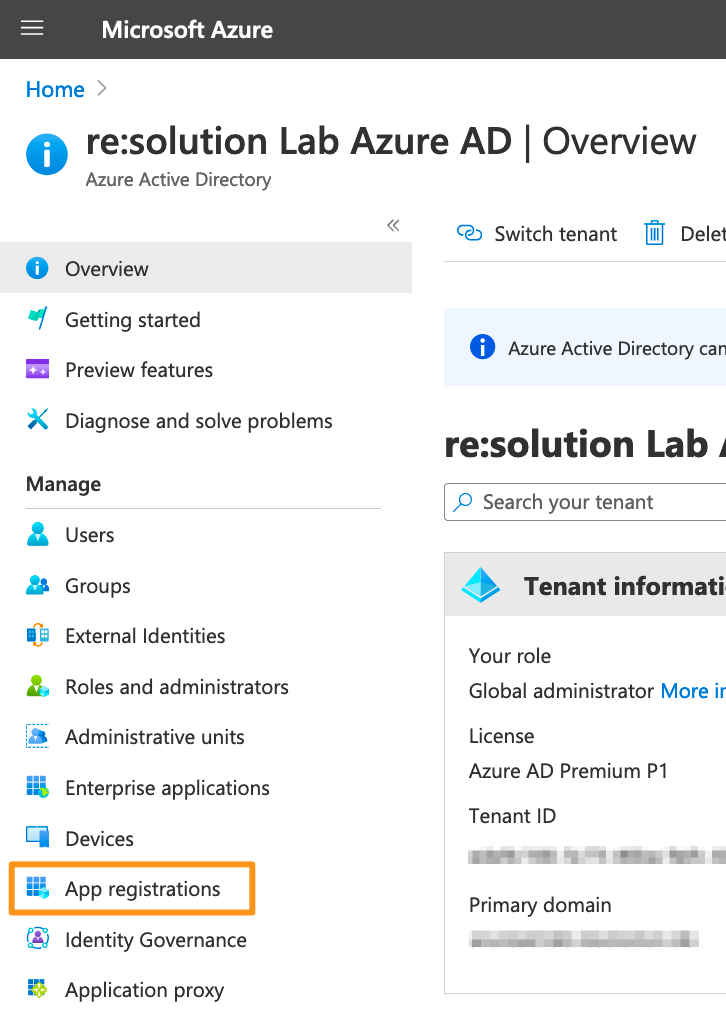
Go to http://portal.azure.com and click Azure Active directory.

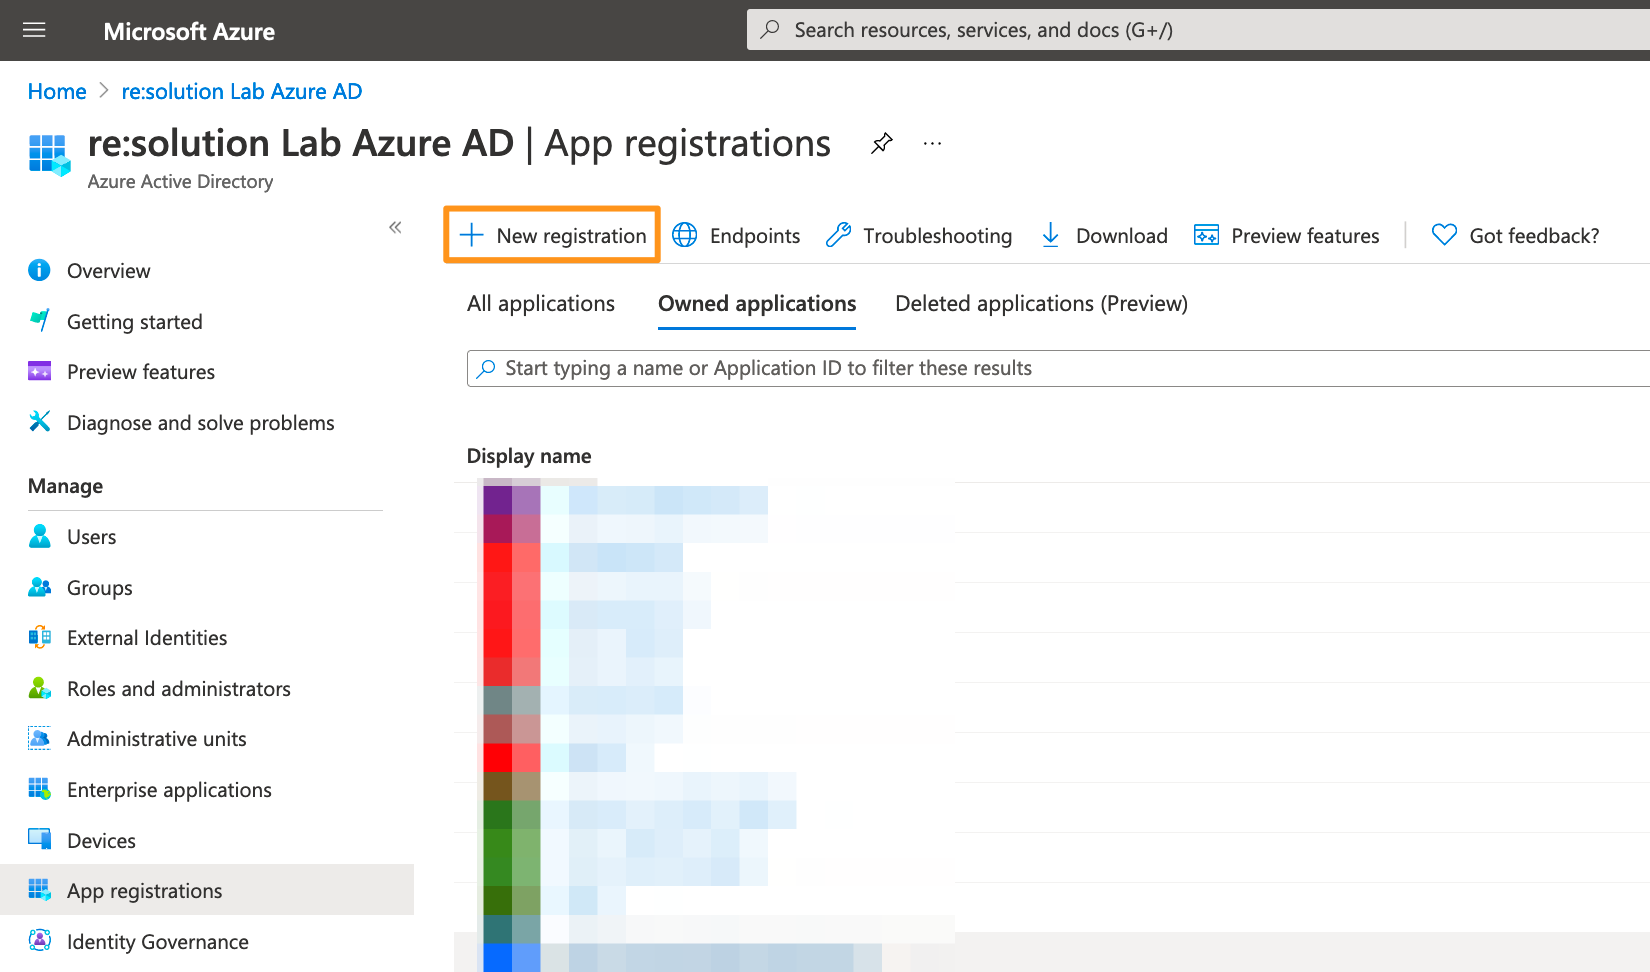
In the Azure Active directory, click App registrations.
Click New registration to create a new app.
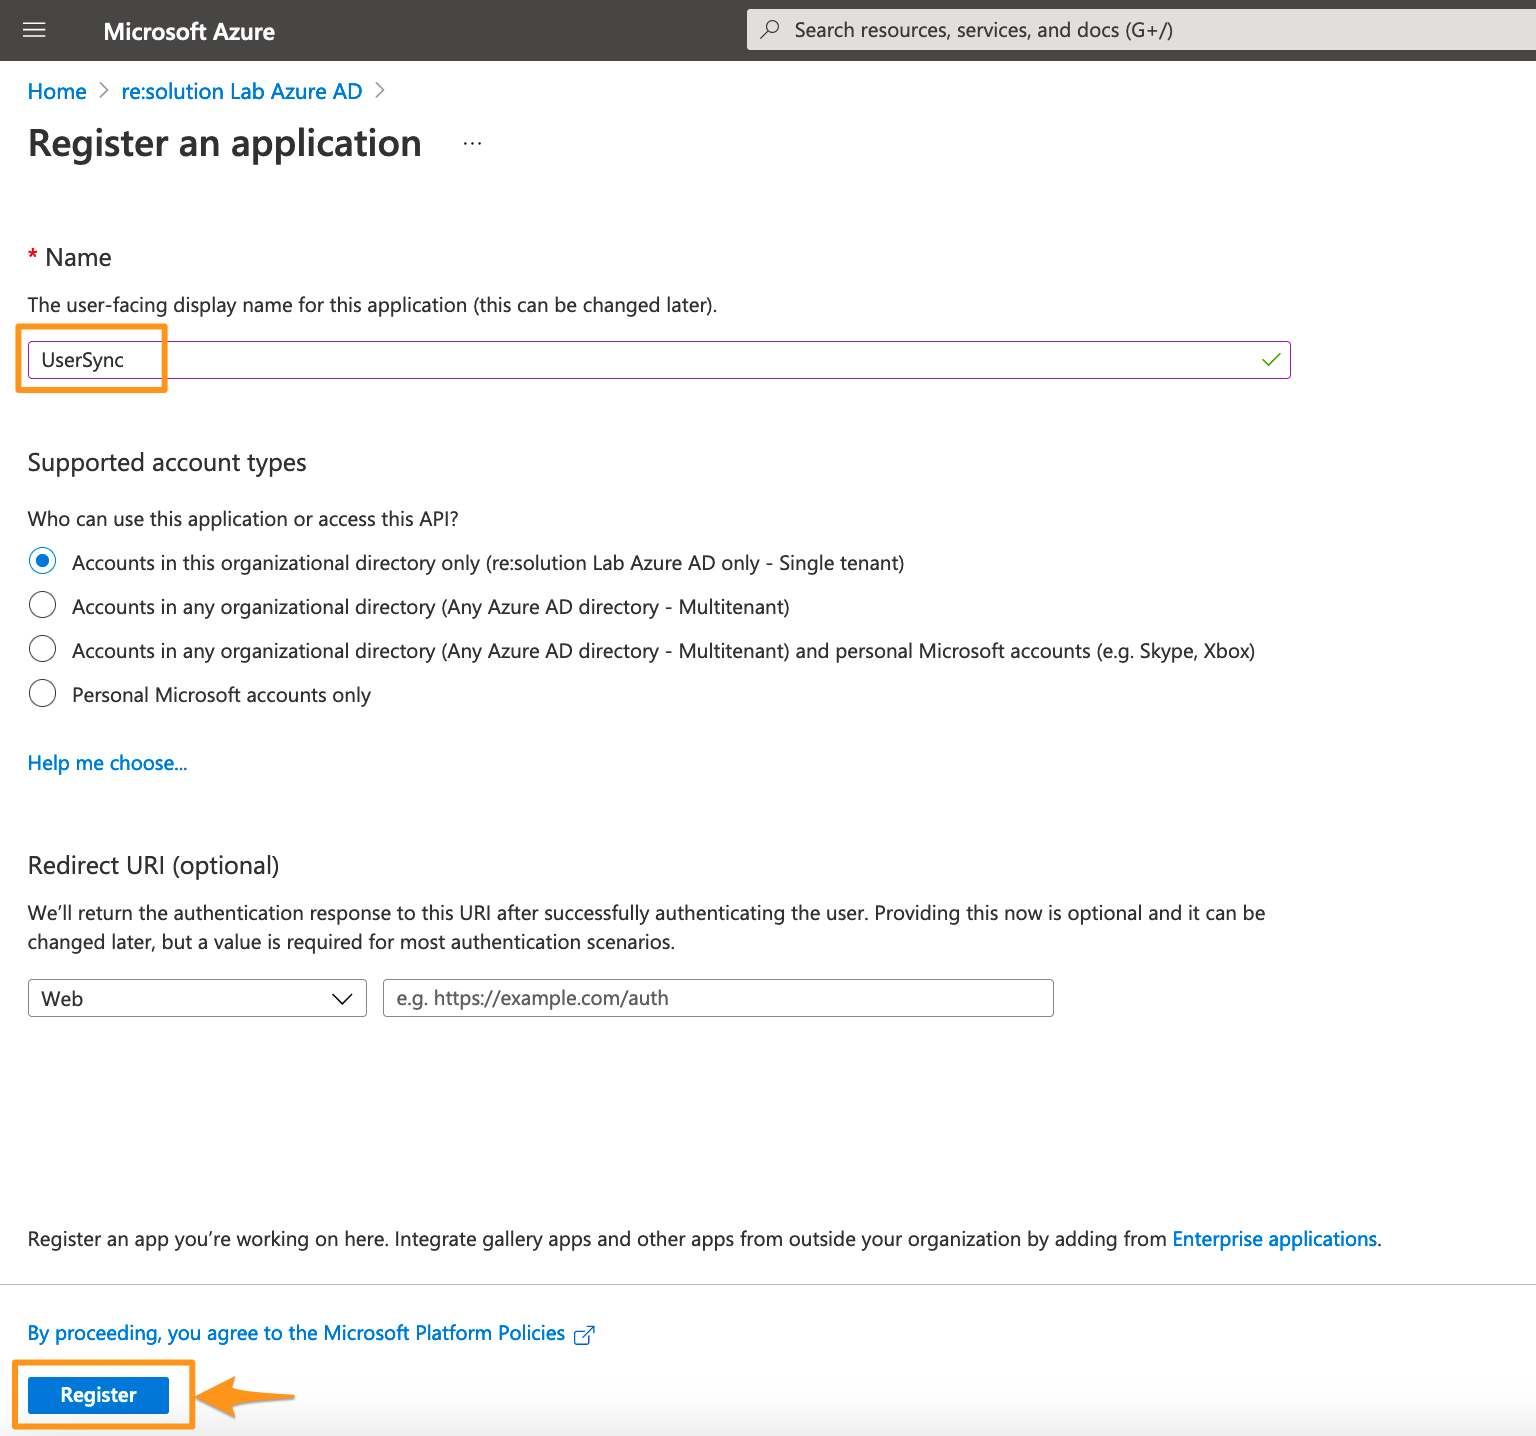
Enter a name for your application and click on Register to proceed.
Click API permissions in the left panel.
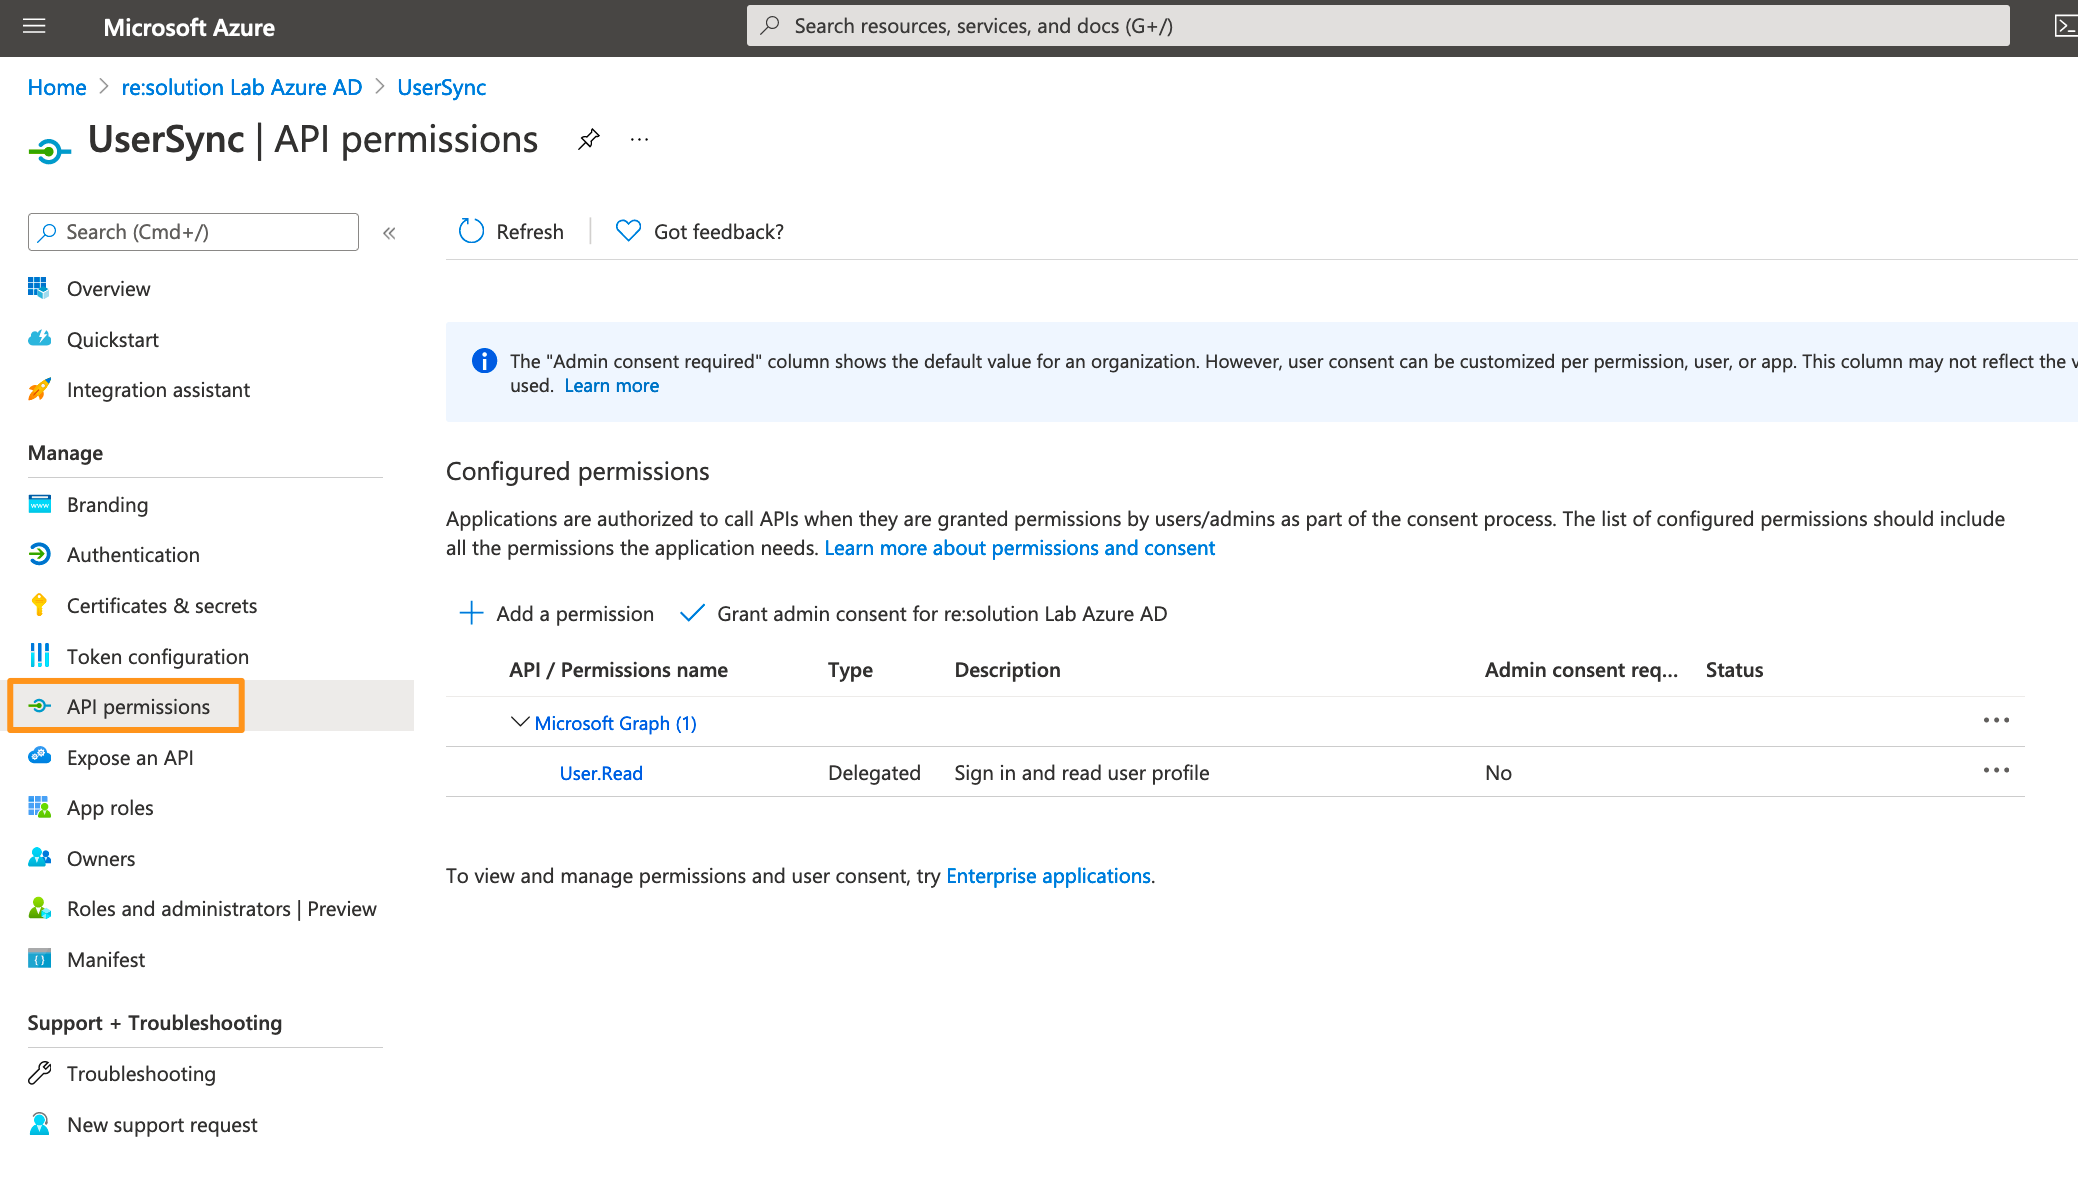
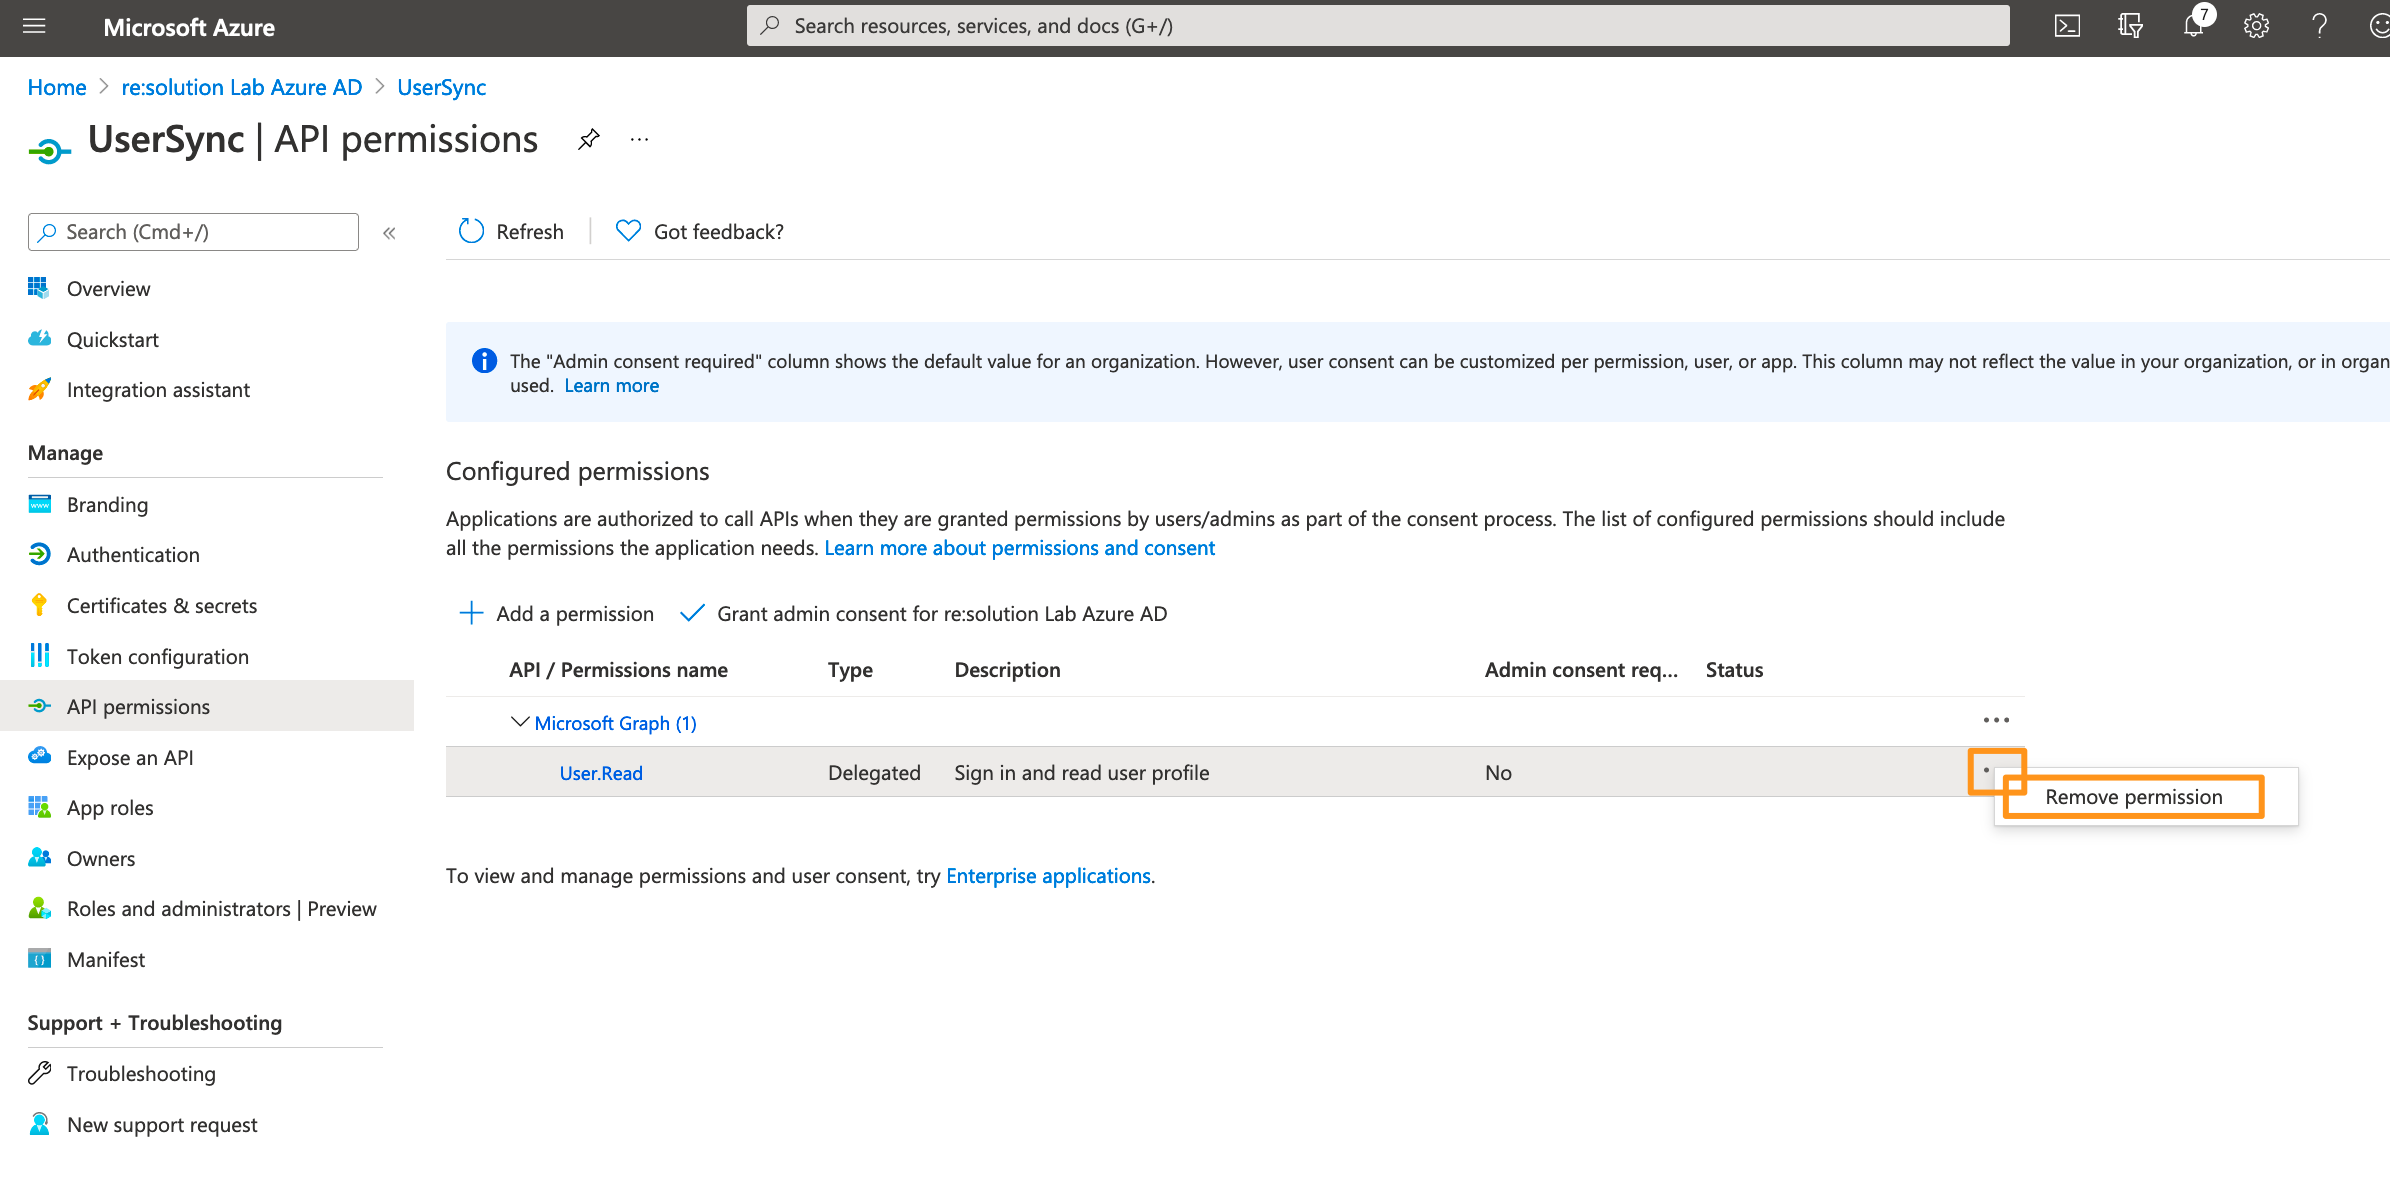
Delete the default created permission since it's not needed.
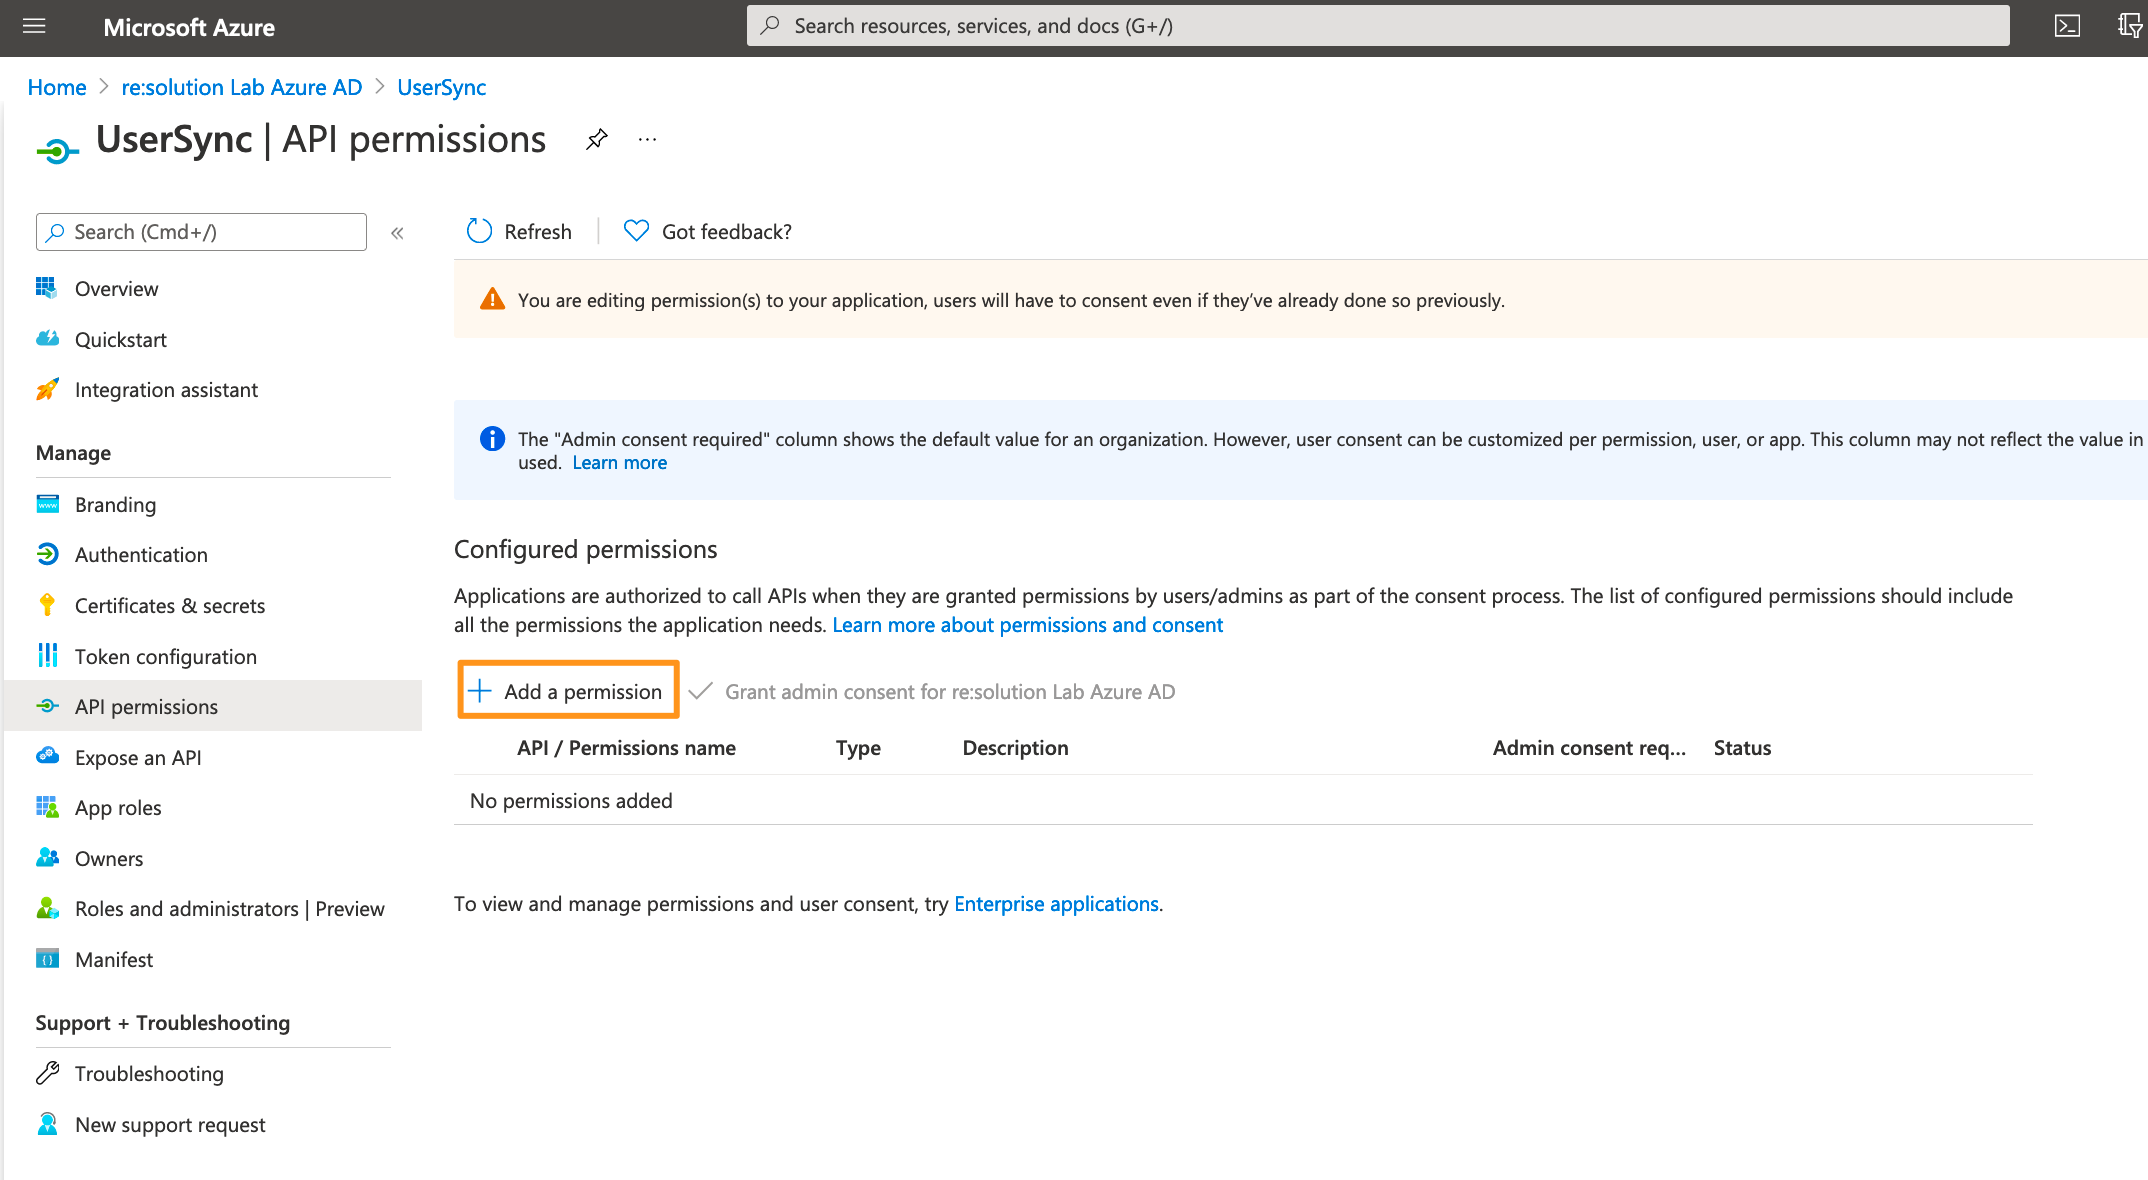
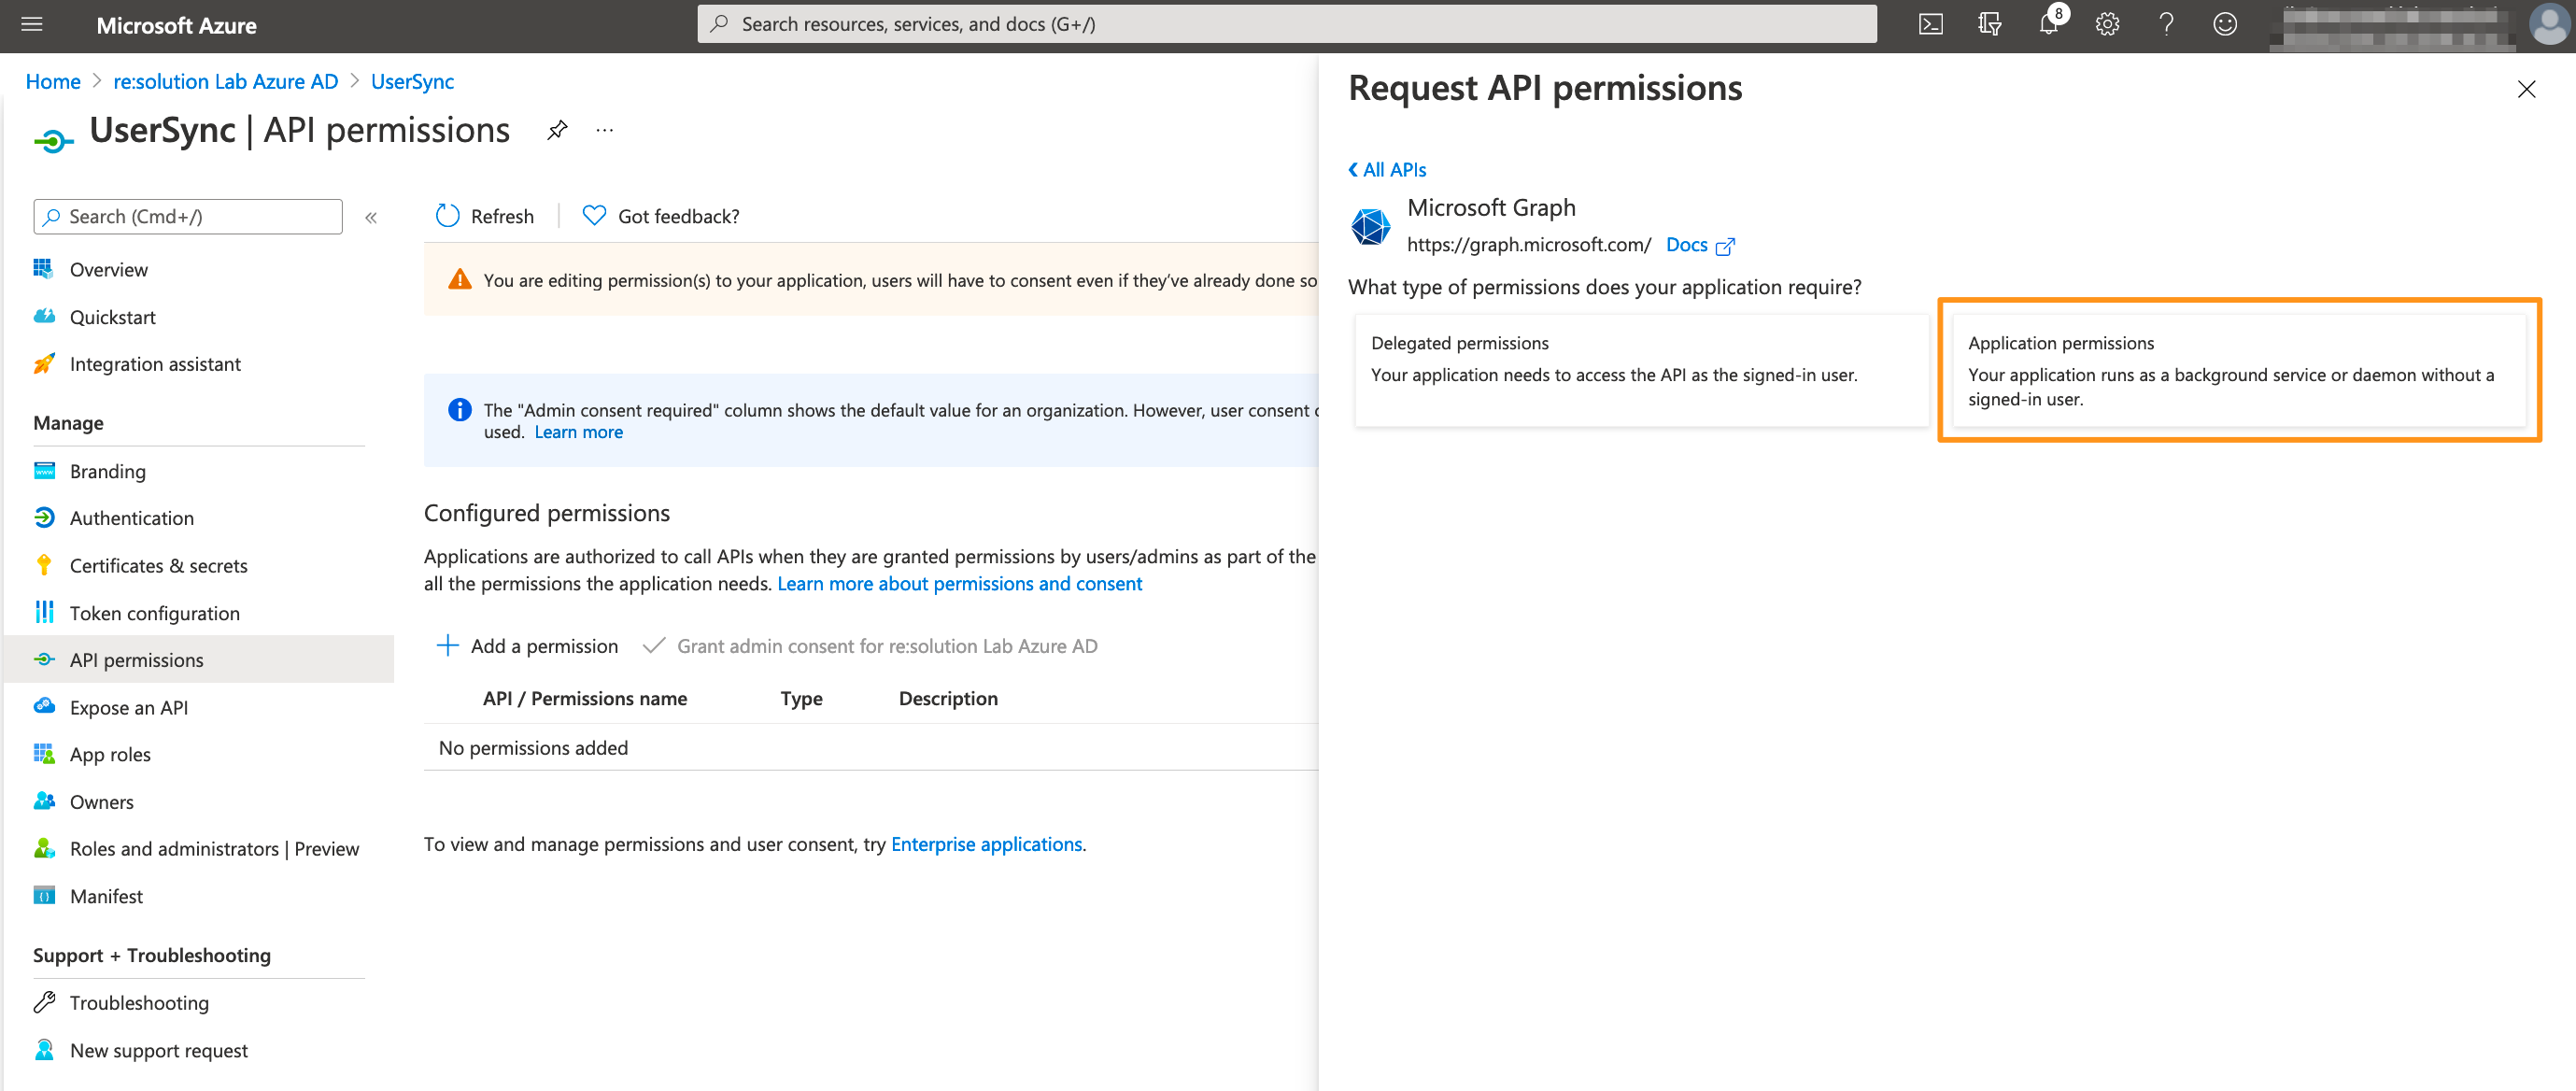
Click on Add a permission.
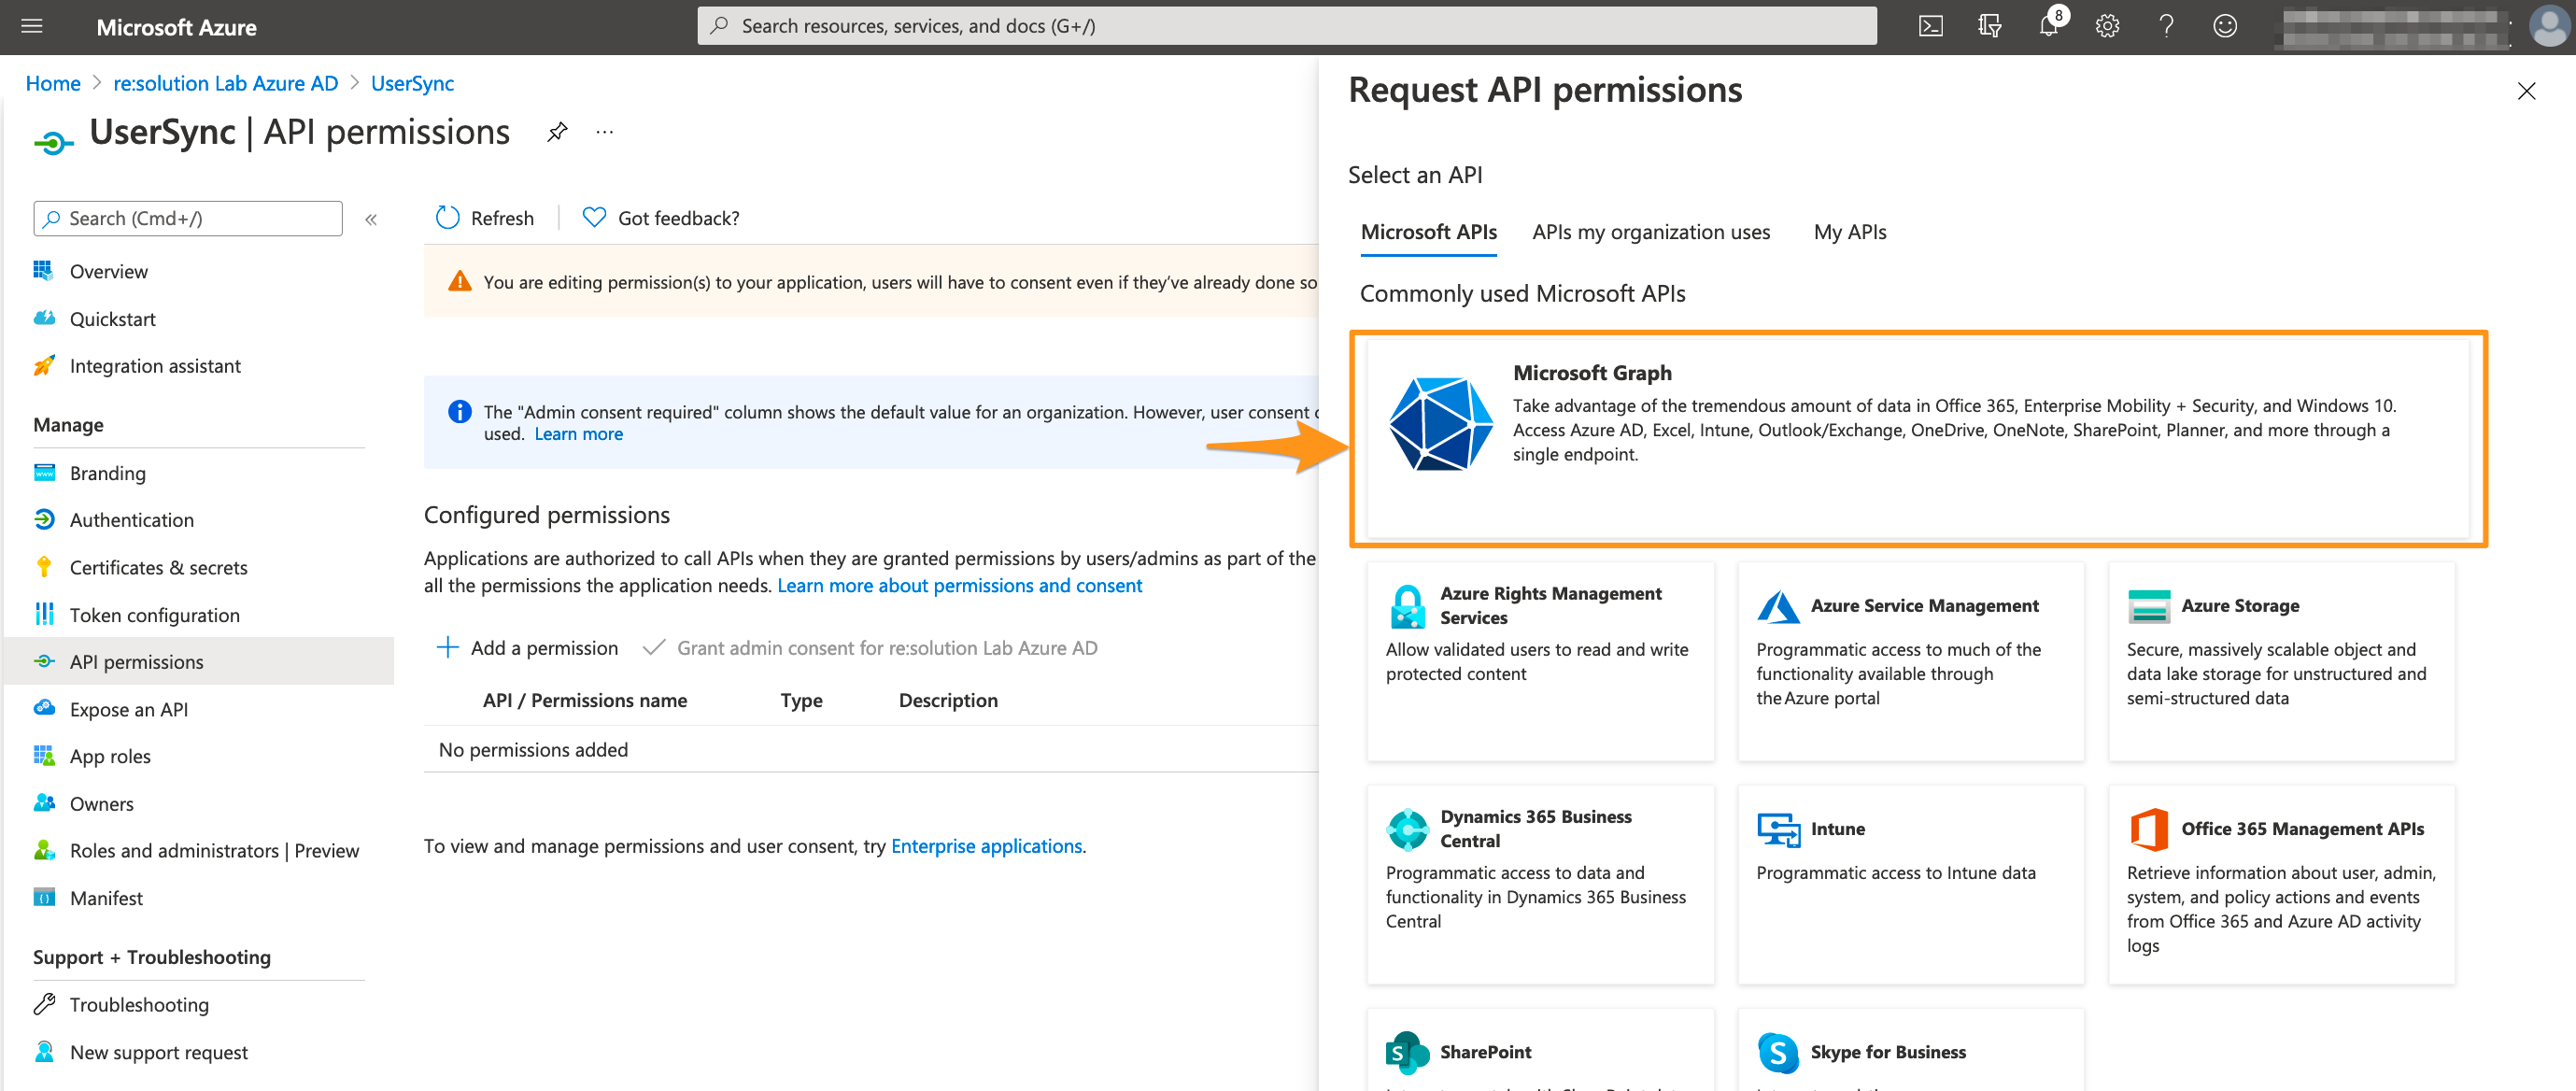
Select Microsoft Graph.
Choose Application permissions.
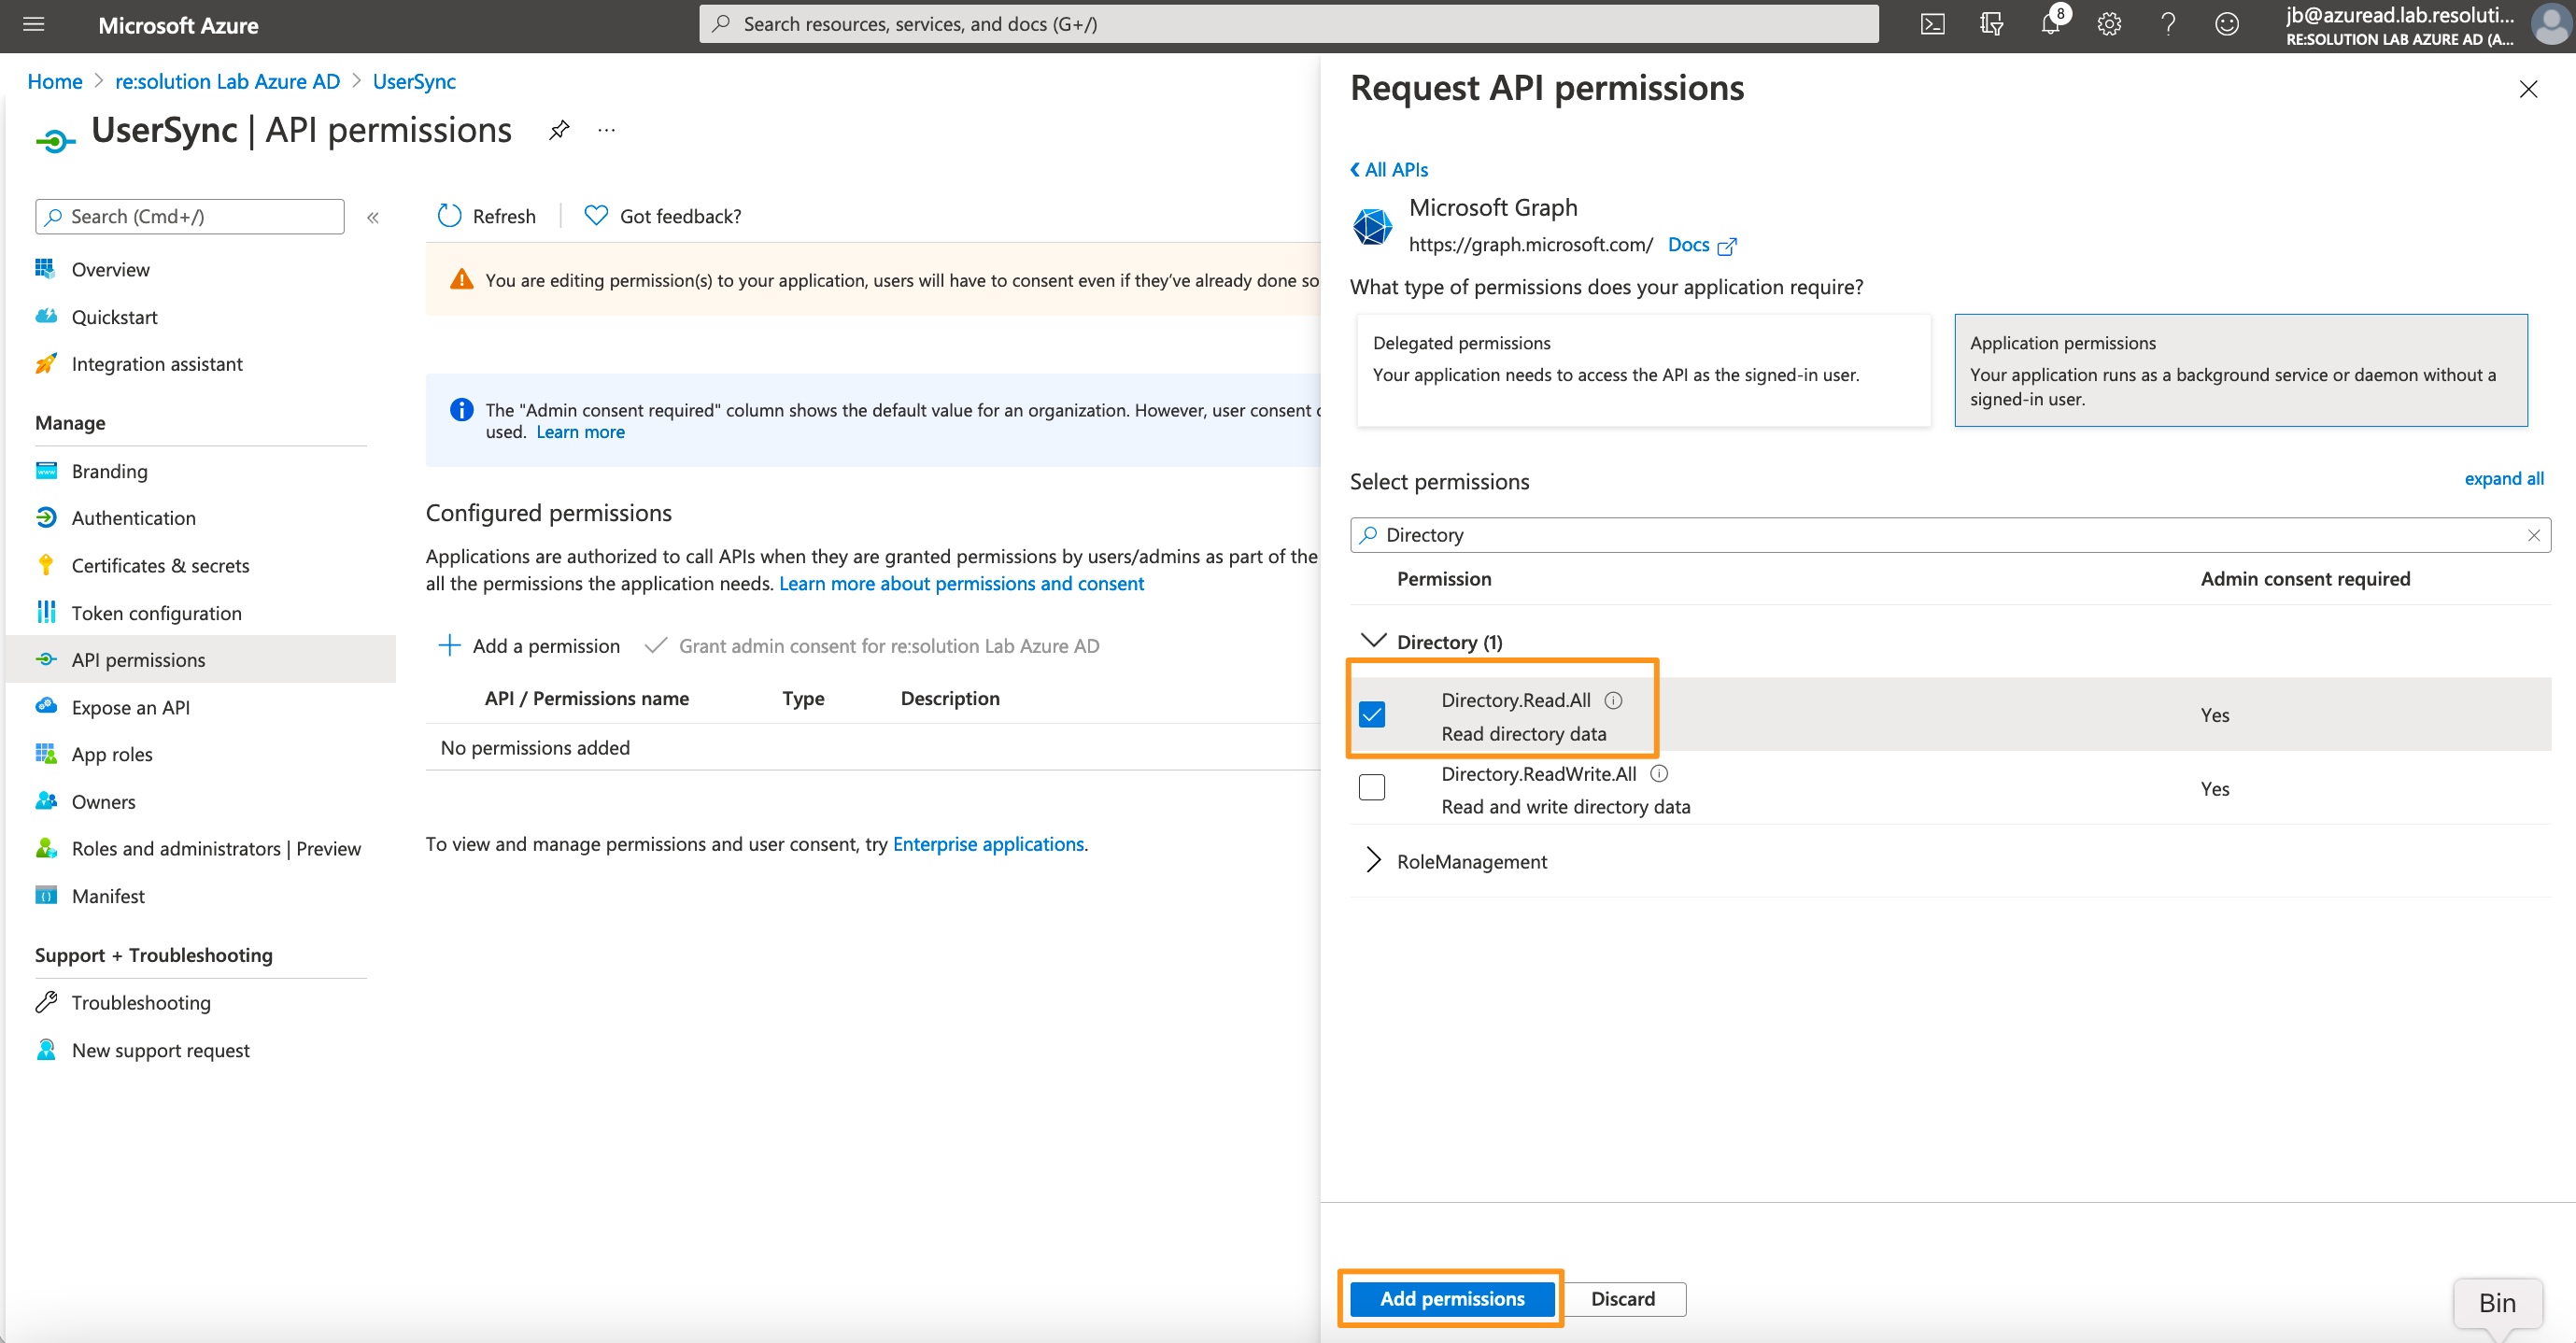
Expand Directory and tick Directory.Read.All
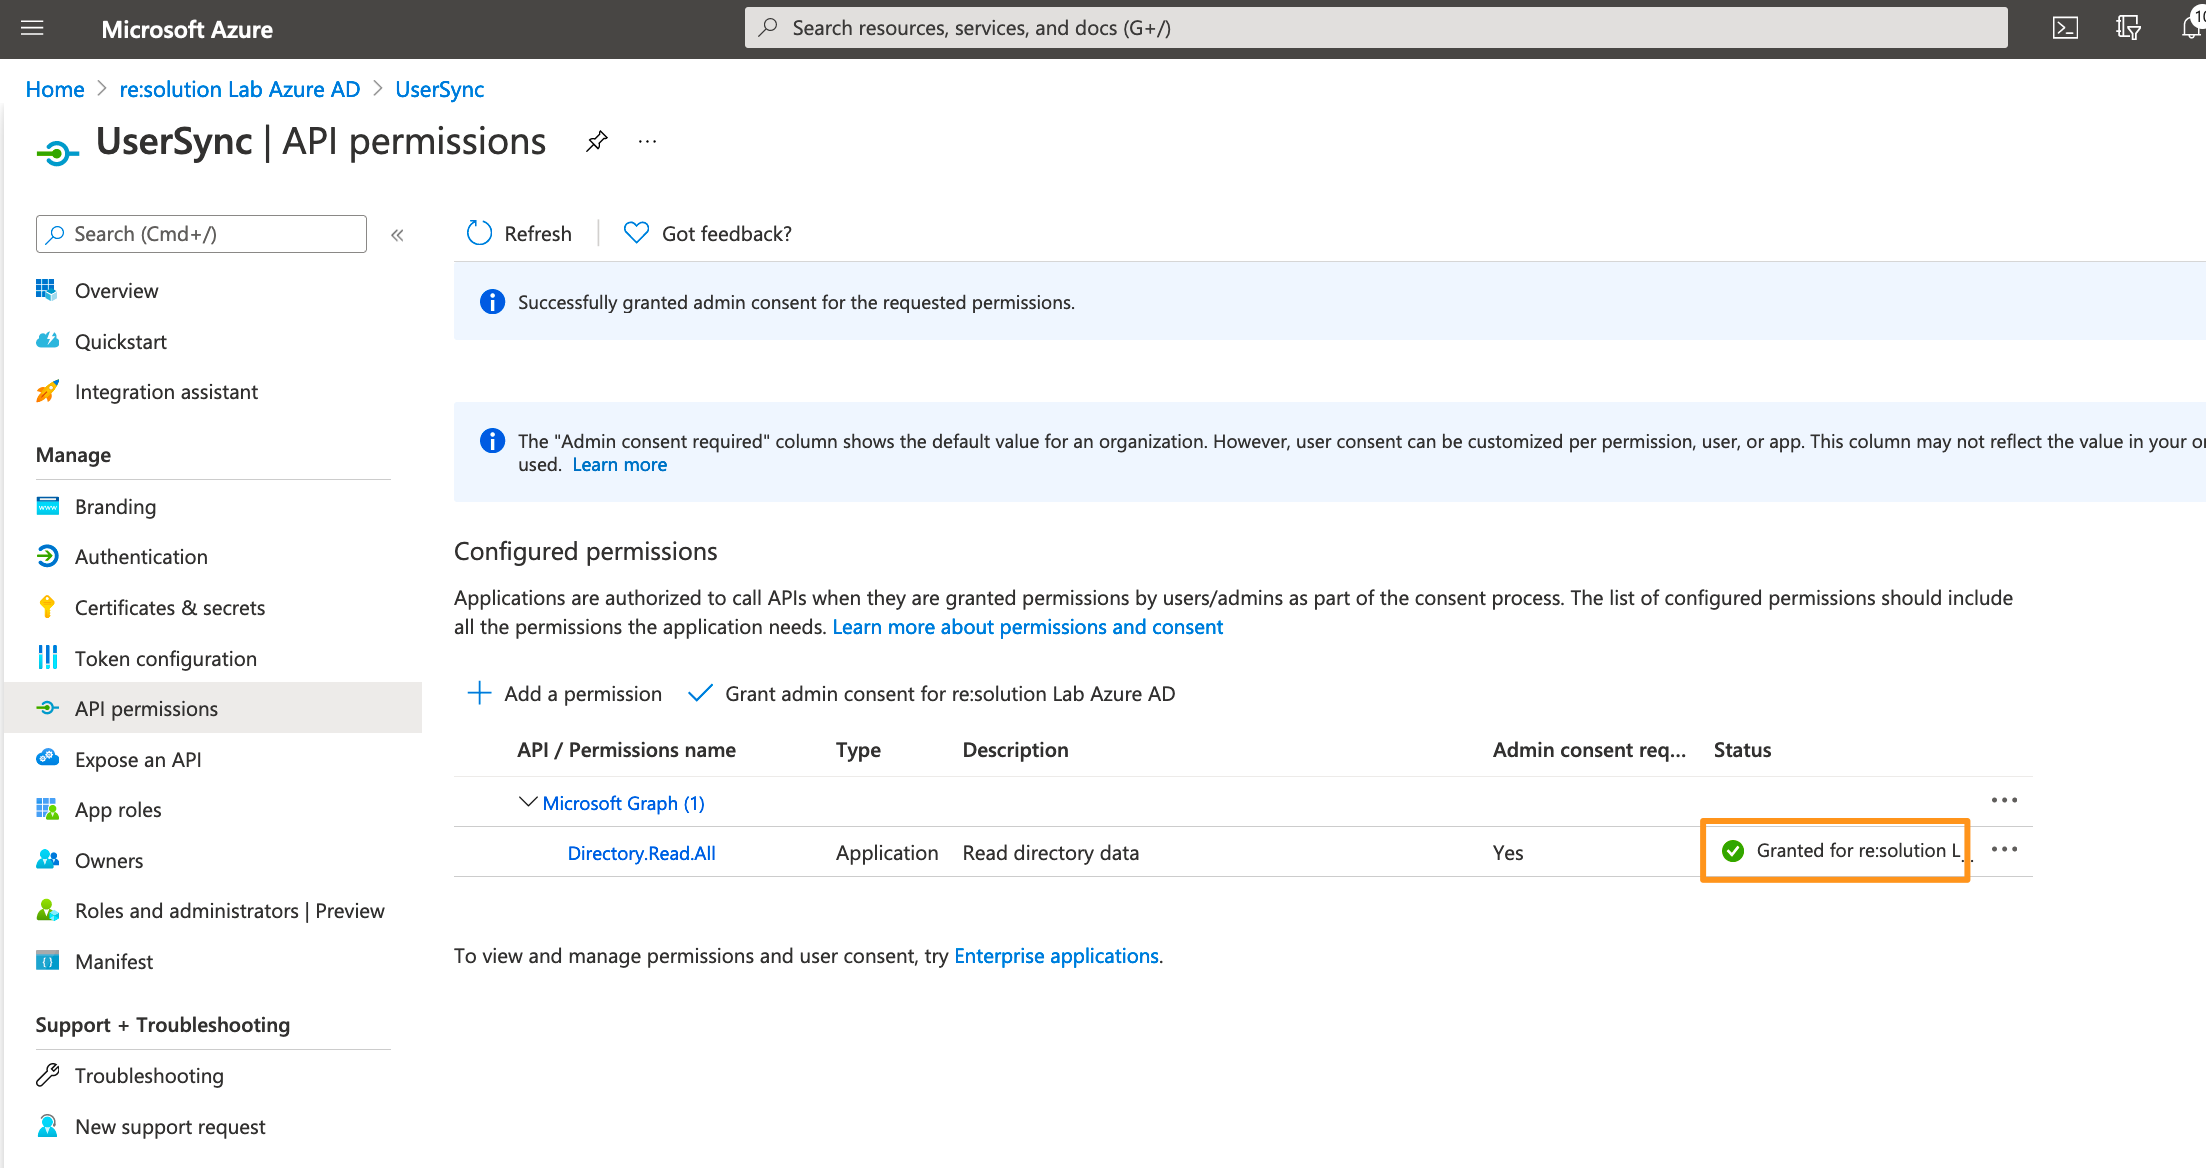
Click on "Grant admin consent for ...".
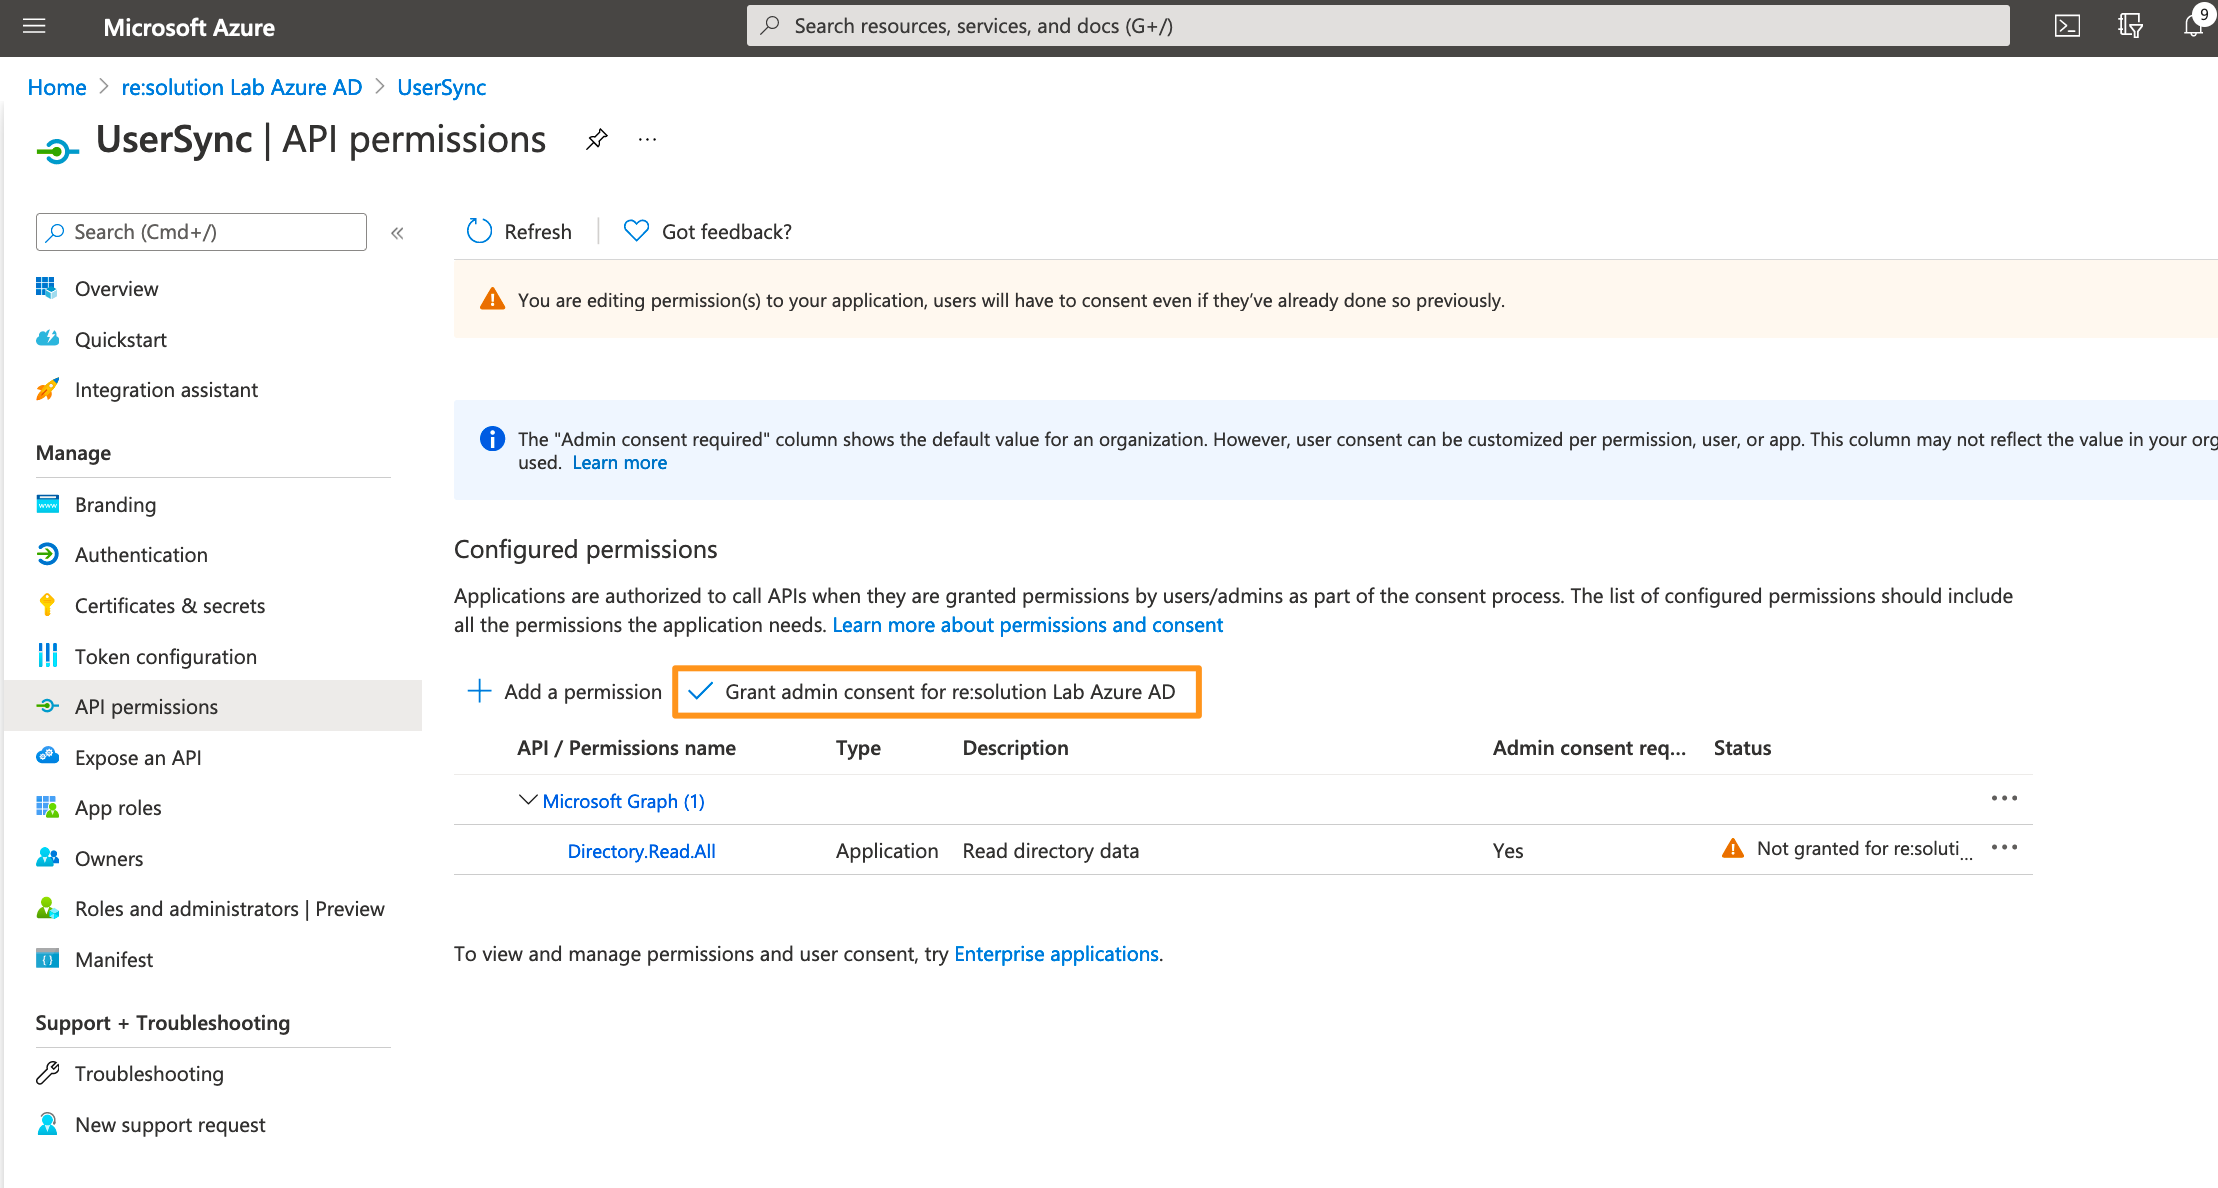
It should look like this after granting admin consent:
For the next step, click on Certificates & secrets in the left panel, and then click on New client secret.
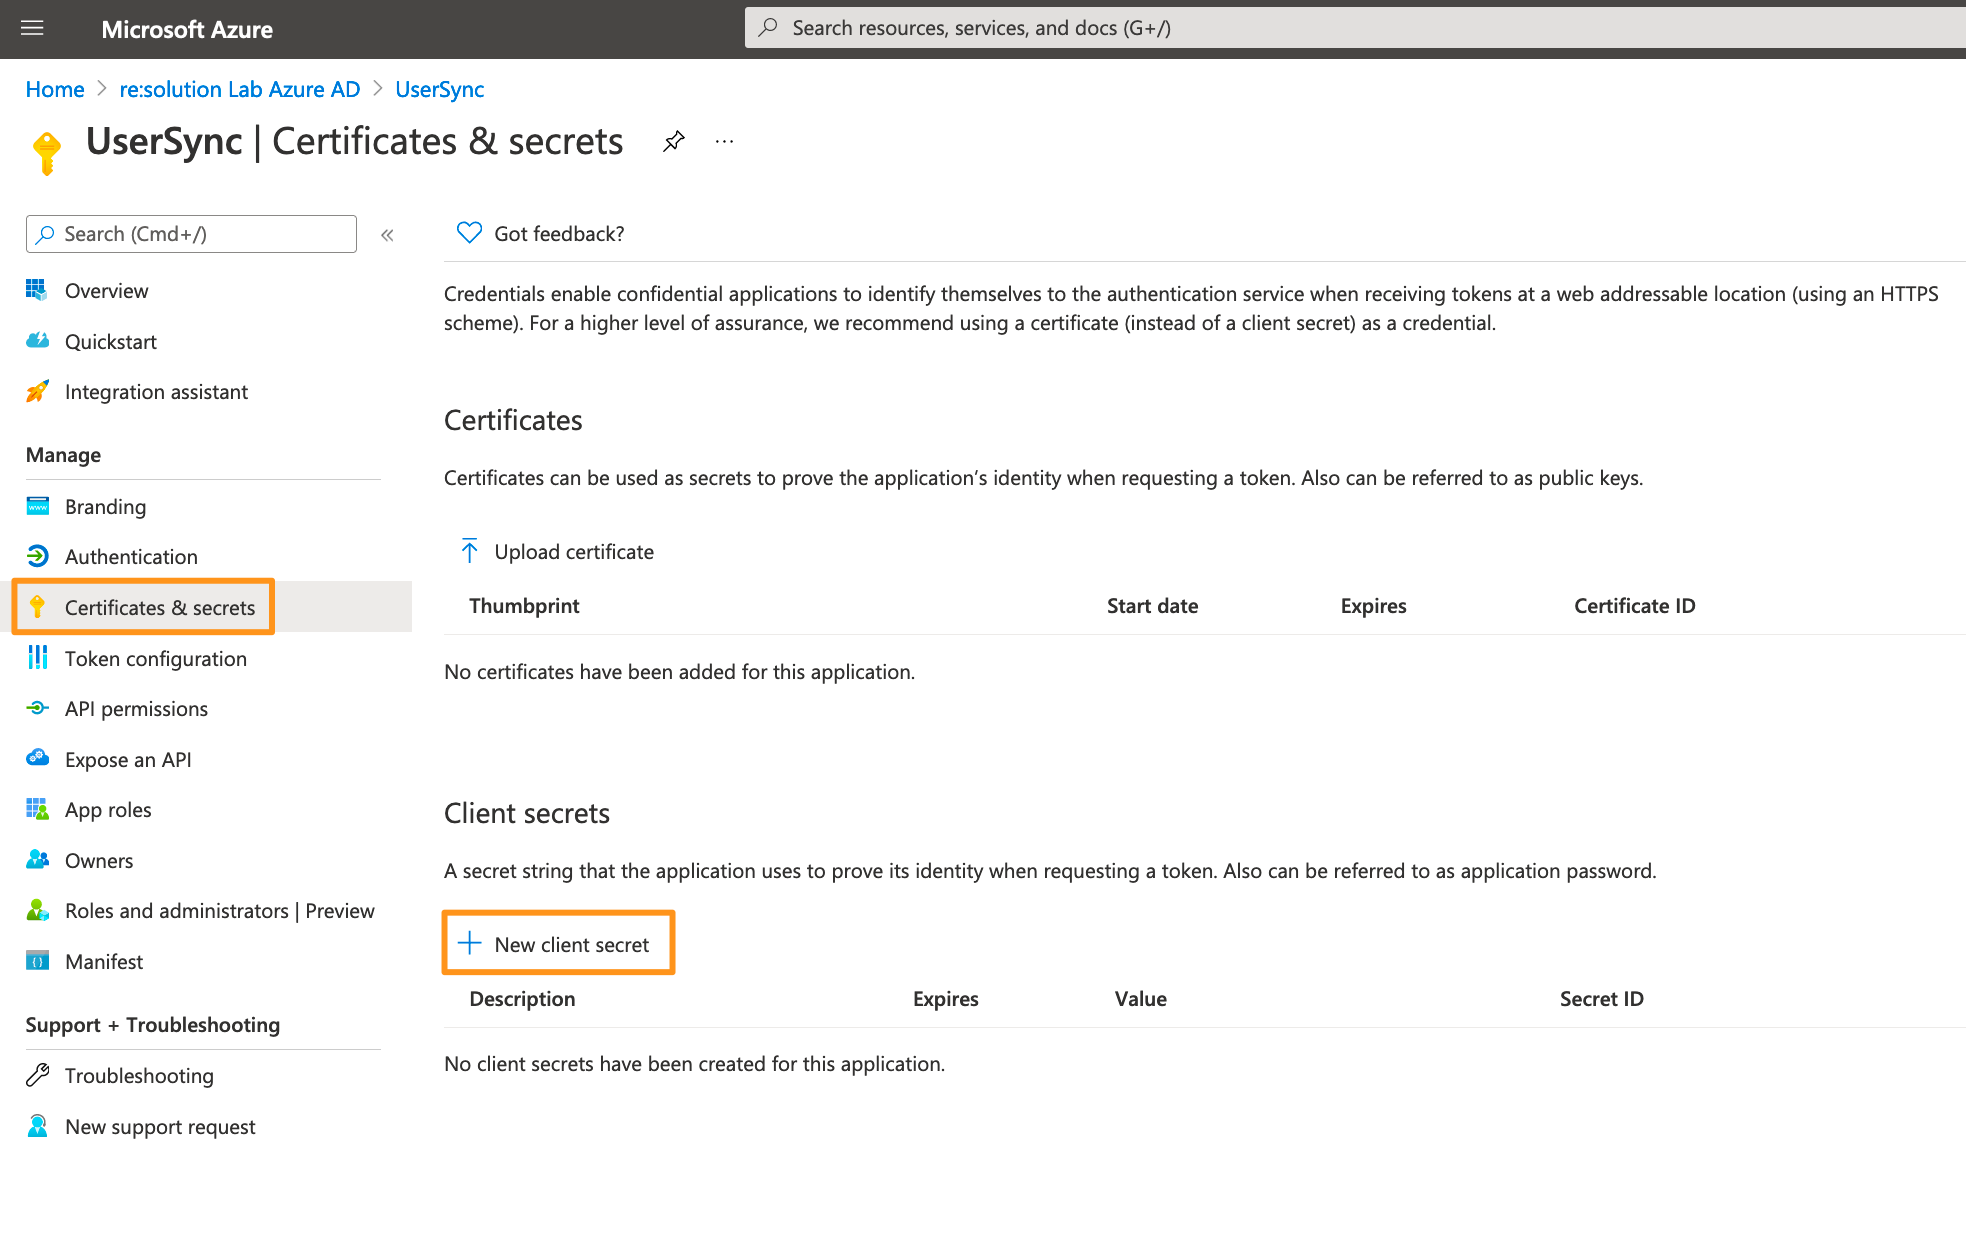
Enter a description for the secret and also set an expiry date. Click on Add to confirm.
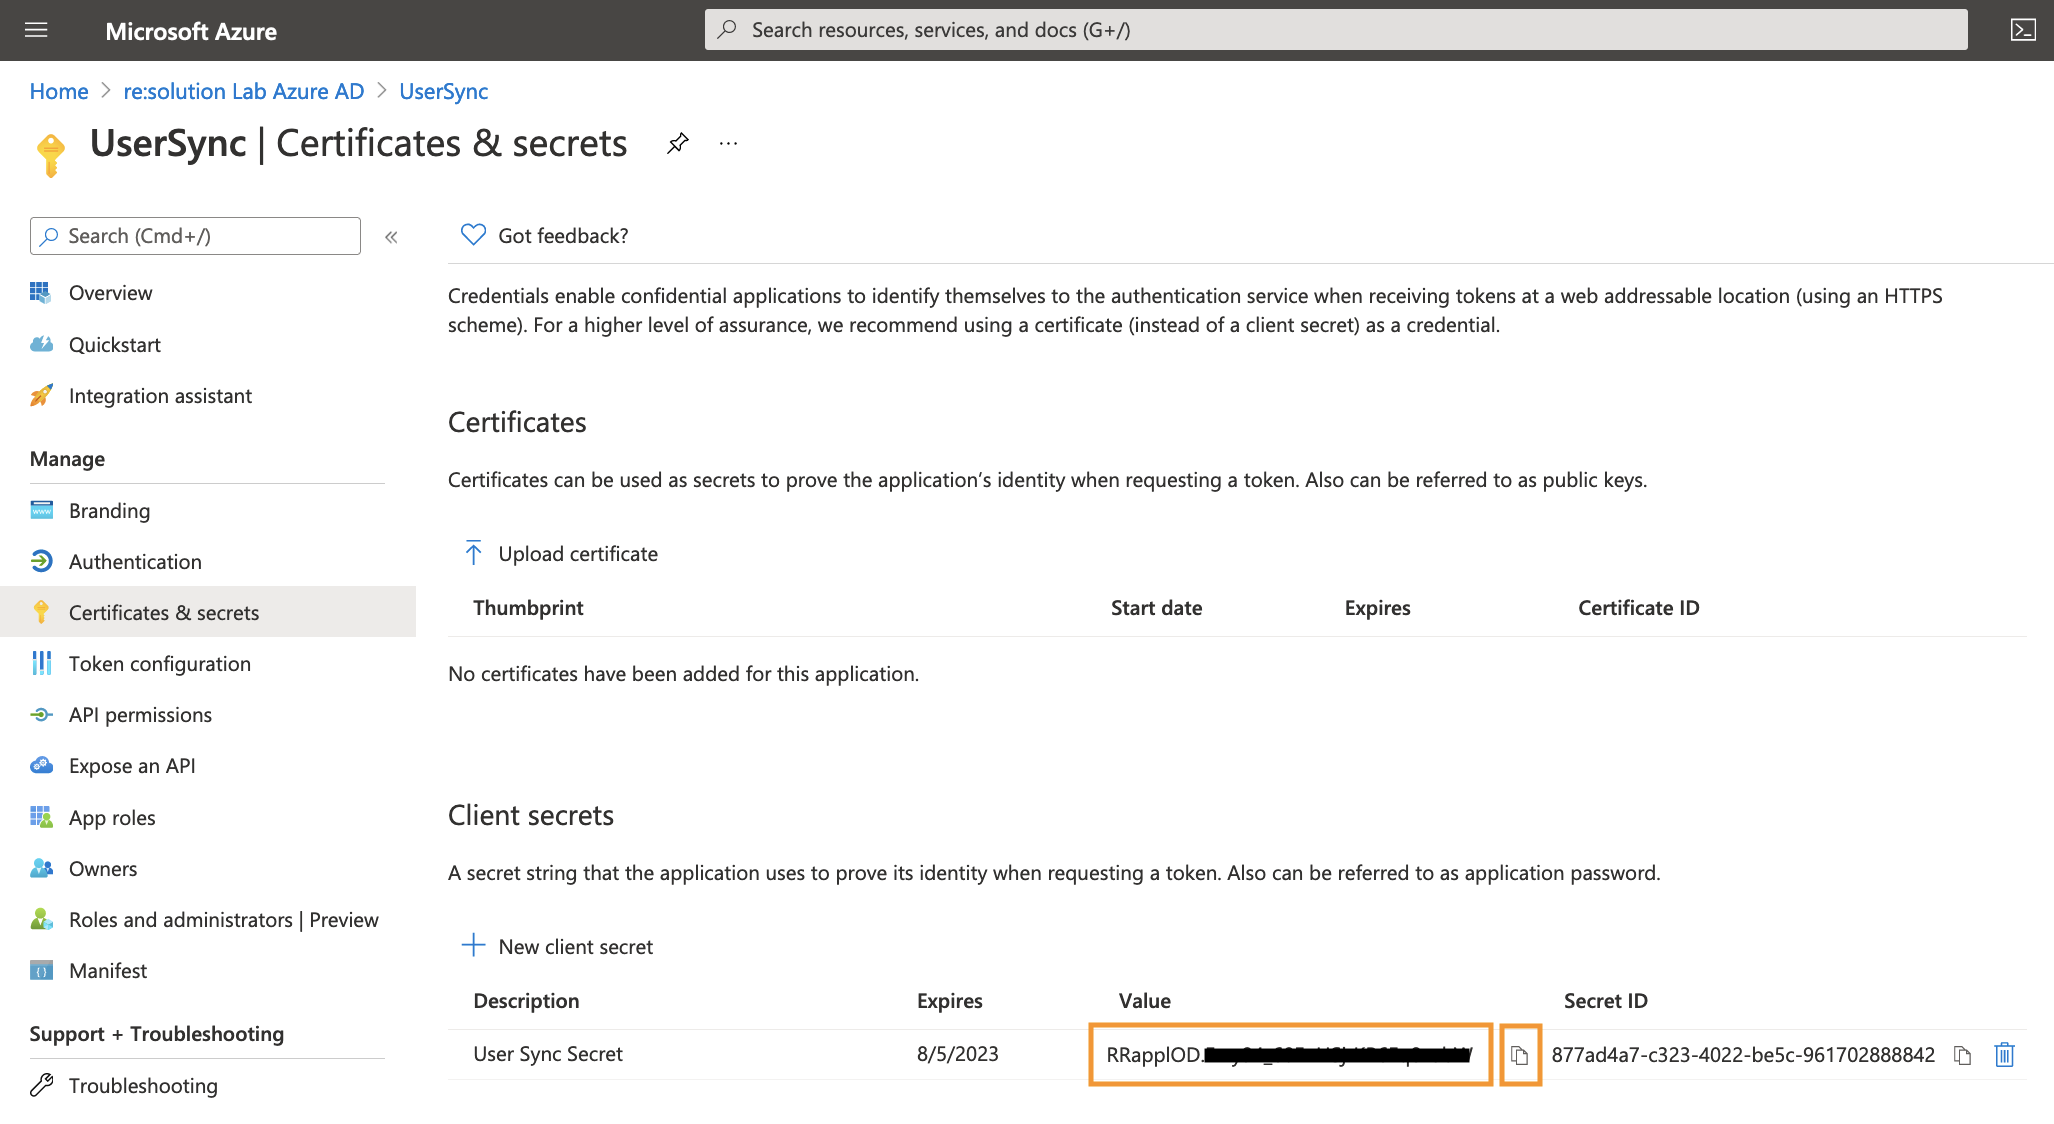
Please note that your secret will expire after 24 months. If syncs start failing in 24 months, you must create a new secret and update the secret in the connector.

Your Client secret will displayed only once, thus copy the secret. Of course it is possible to create a new secret, if you lost your secret.
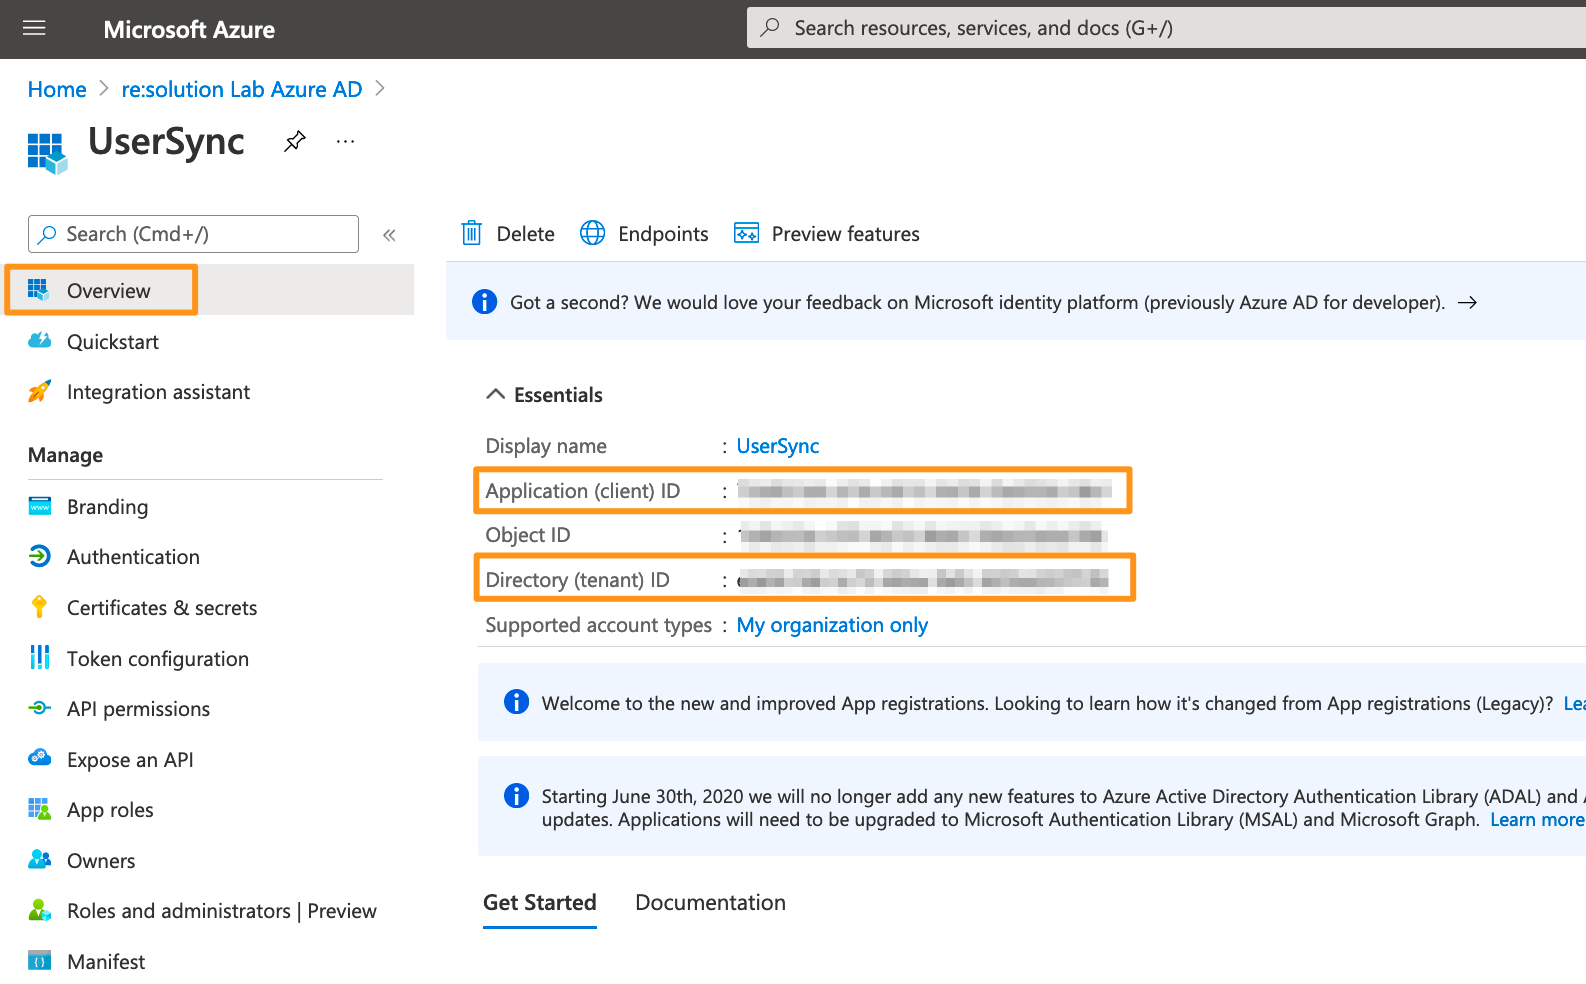
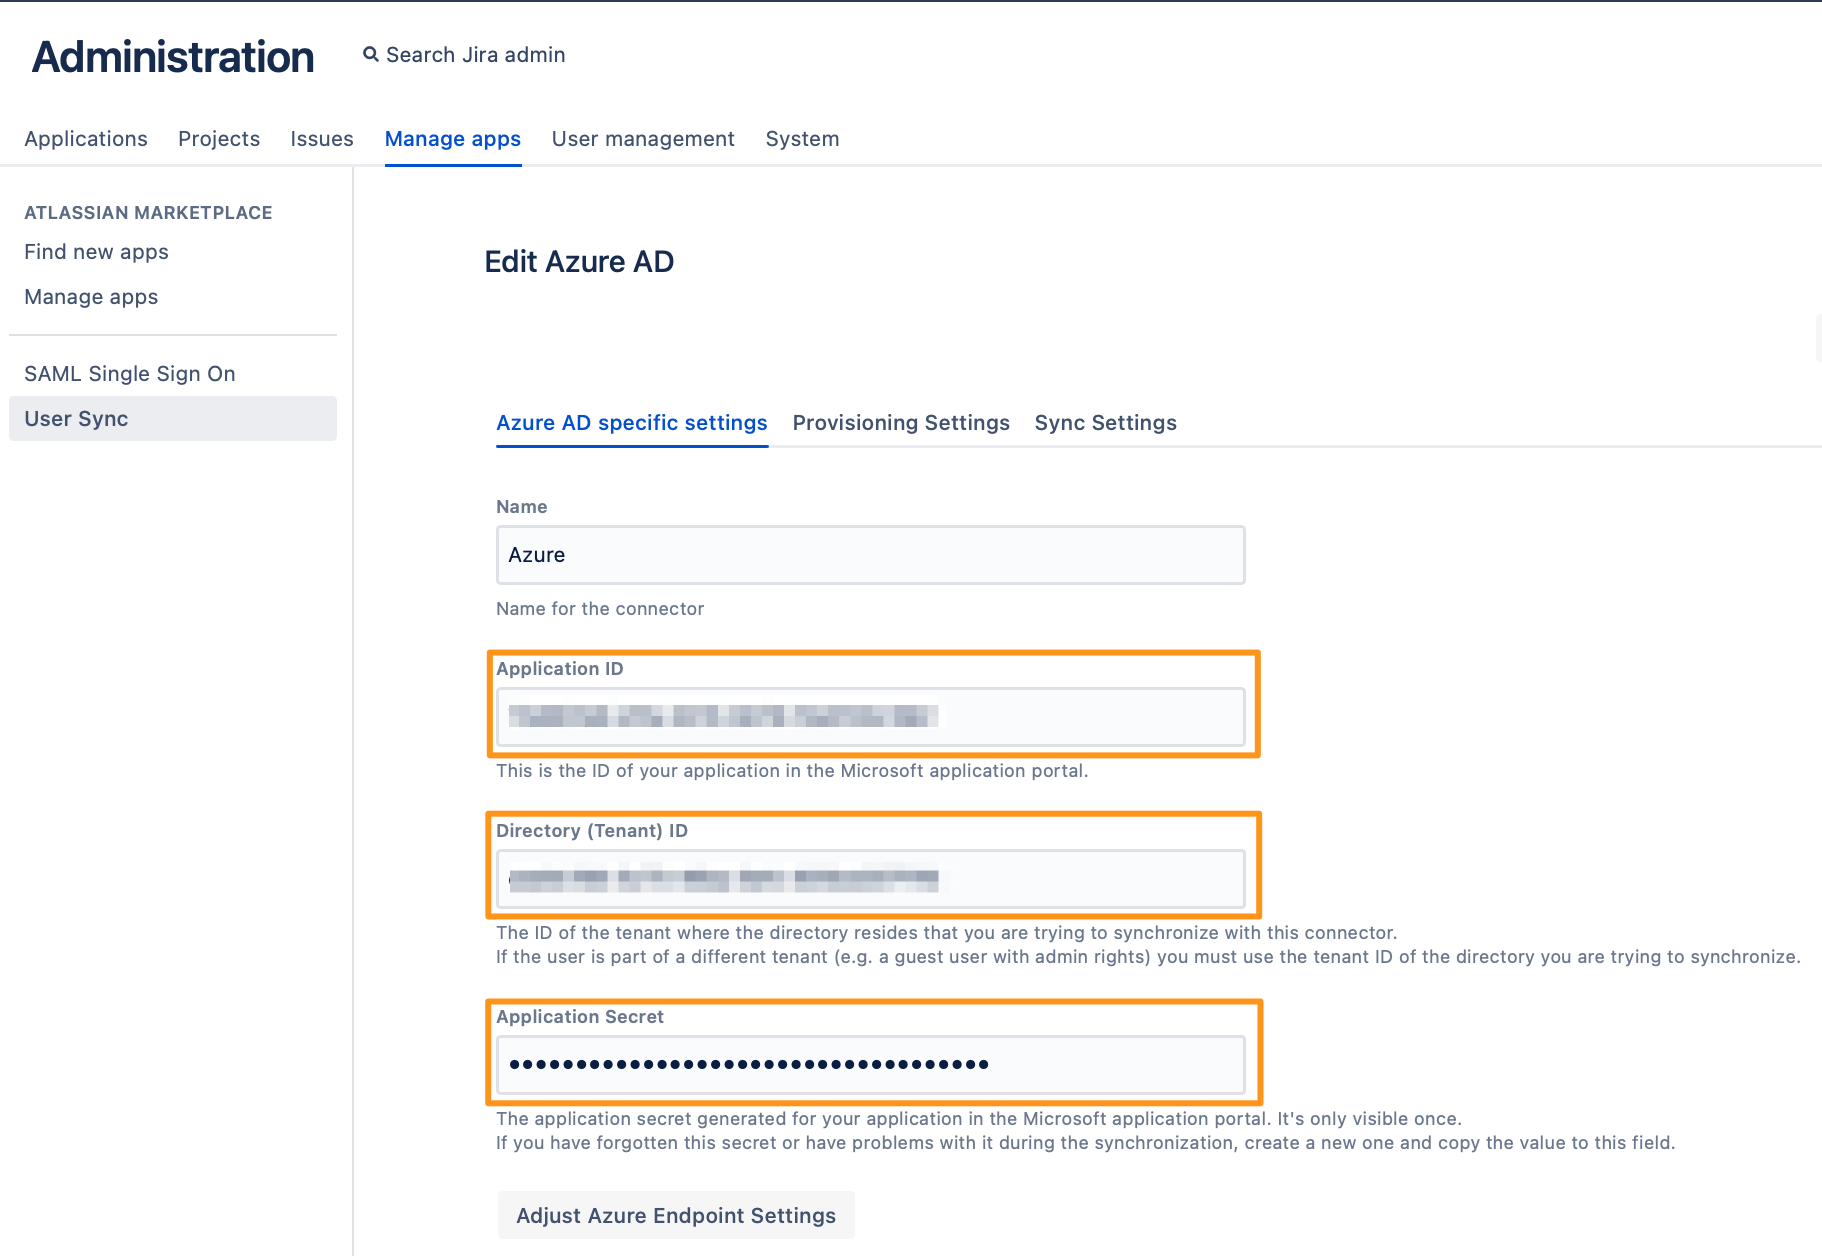
Go overview page of the Azure AD app. Copy the Application ID and the Directory (tenant ID). Now, it is time to head over to your Atlassian application.
In your Atlassian application, go to User Sync, click Create Connector and choose Azure.
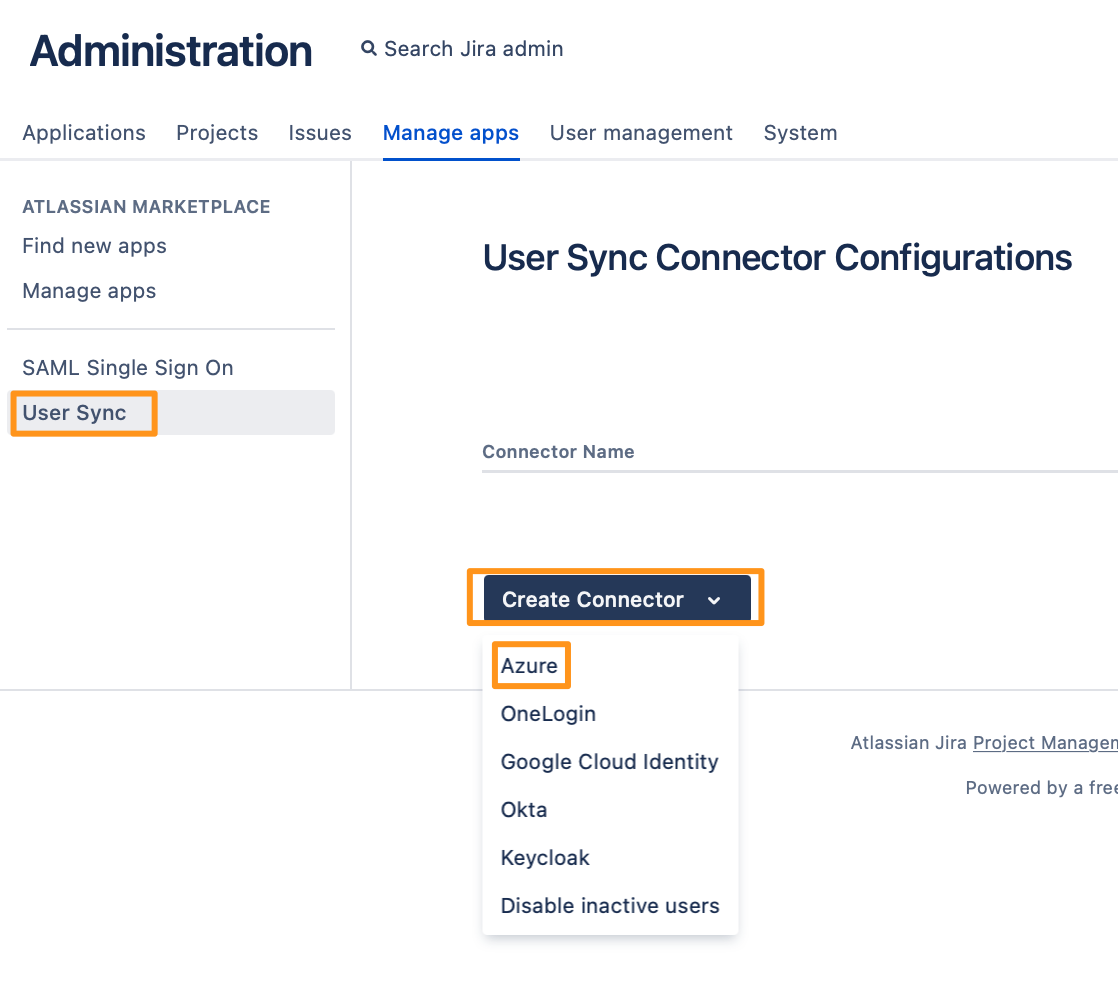
Insert the Application ID, Directory ID and the Application secret into the User Sync connector.
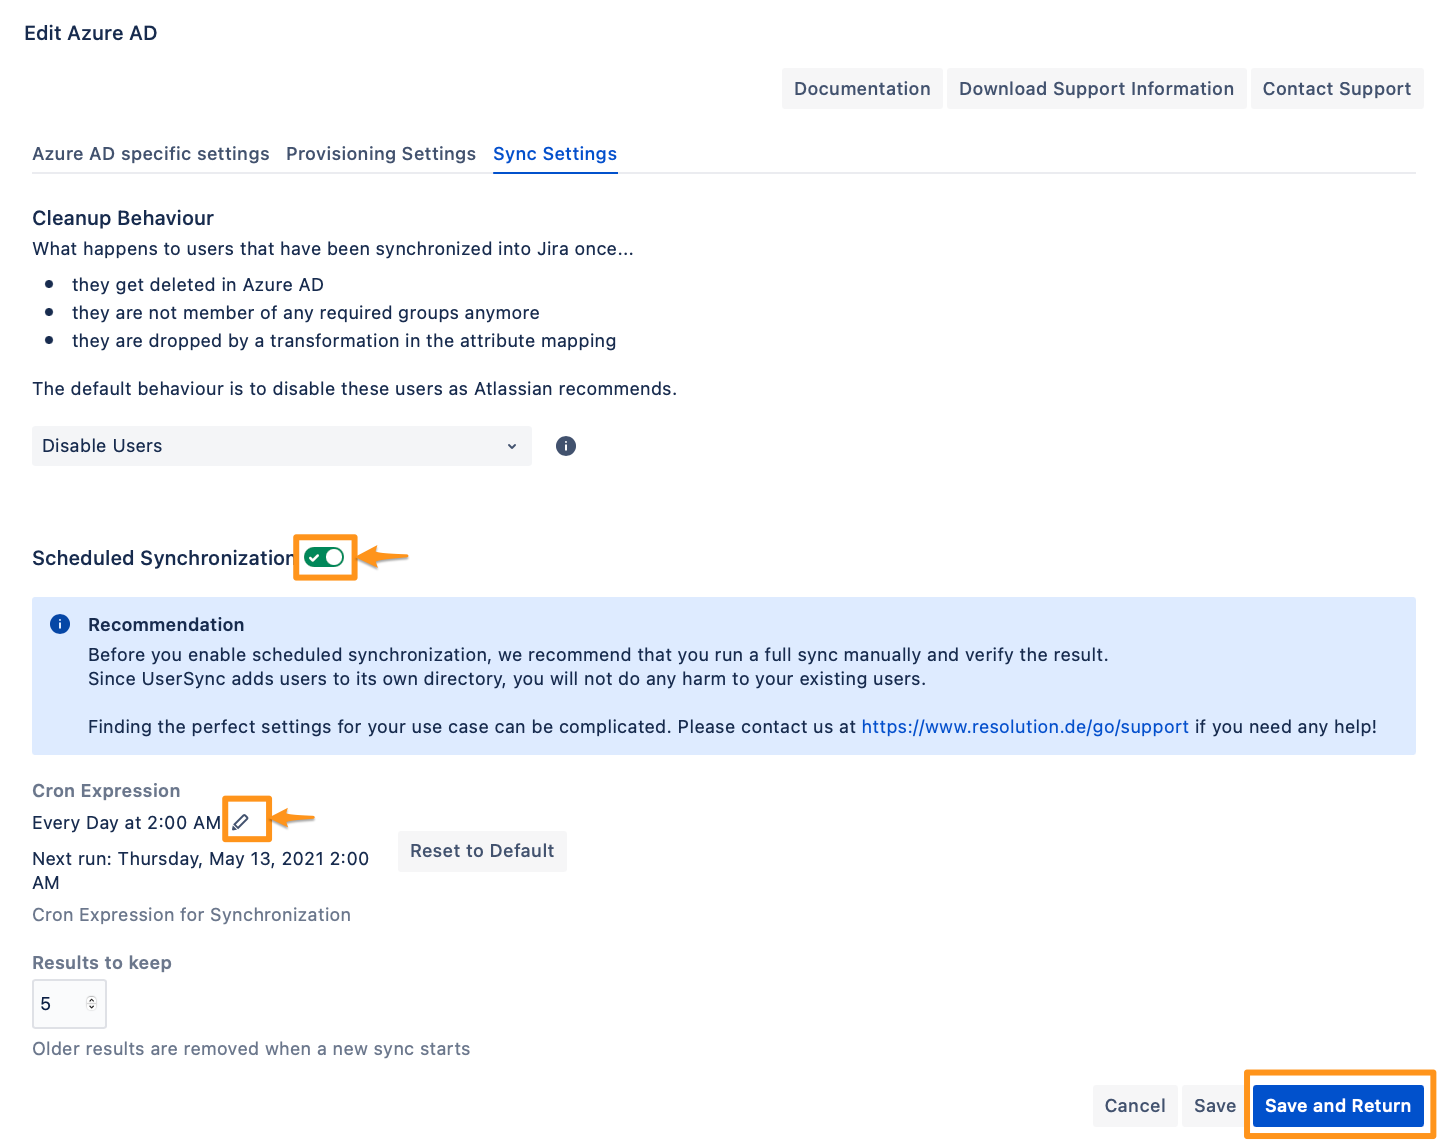
To take the full advantages of User Sync, go to the Sync Settings tab and enable "Scheduled Synchronization". You can control the sync interval via a Cron Expression.
Do not forget to save your configuration by clicking on "Save and Return".
Configure SAML SSO
For the next steps, please go to Manage apps (or addons), choose SAML SSO and click Configure.
First Steps - Wizard
After you clicked "Configure", the Wizard will be triggered. If not, or if you want to add another Identity Prover (IdP) to your existing configuration, click on "+ Add IdP". This guide assumes, that there is no IdP configured.
The Wizard greets you with information, click on "Add new IdP" to proceed.

For the IdP Type, choose "Azure AD". You can also choose a name. Click on "Next" to continue.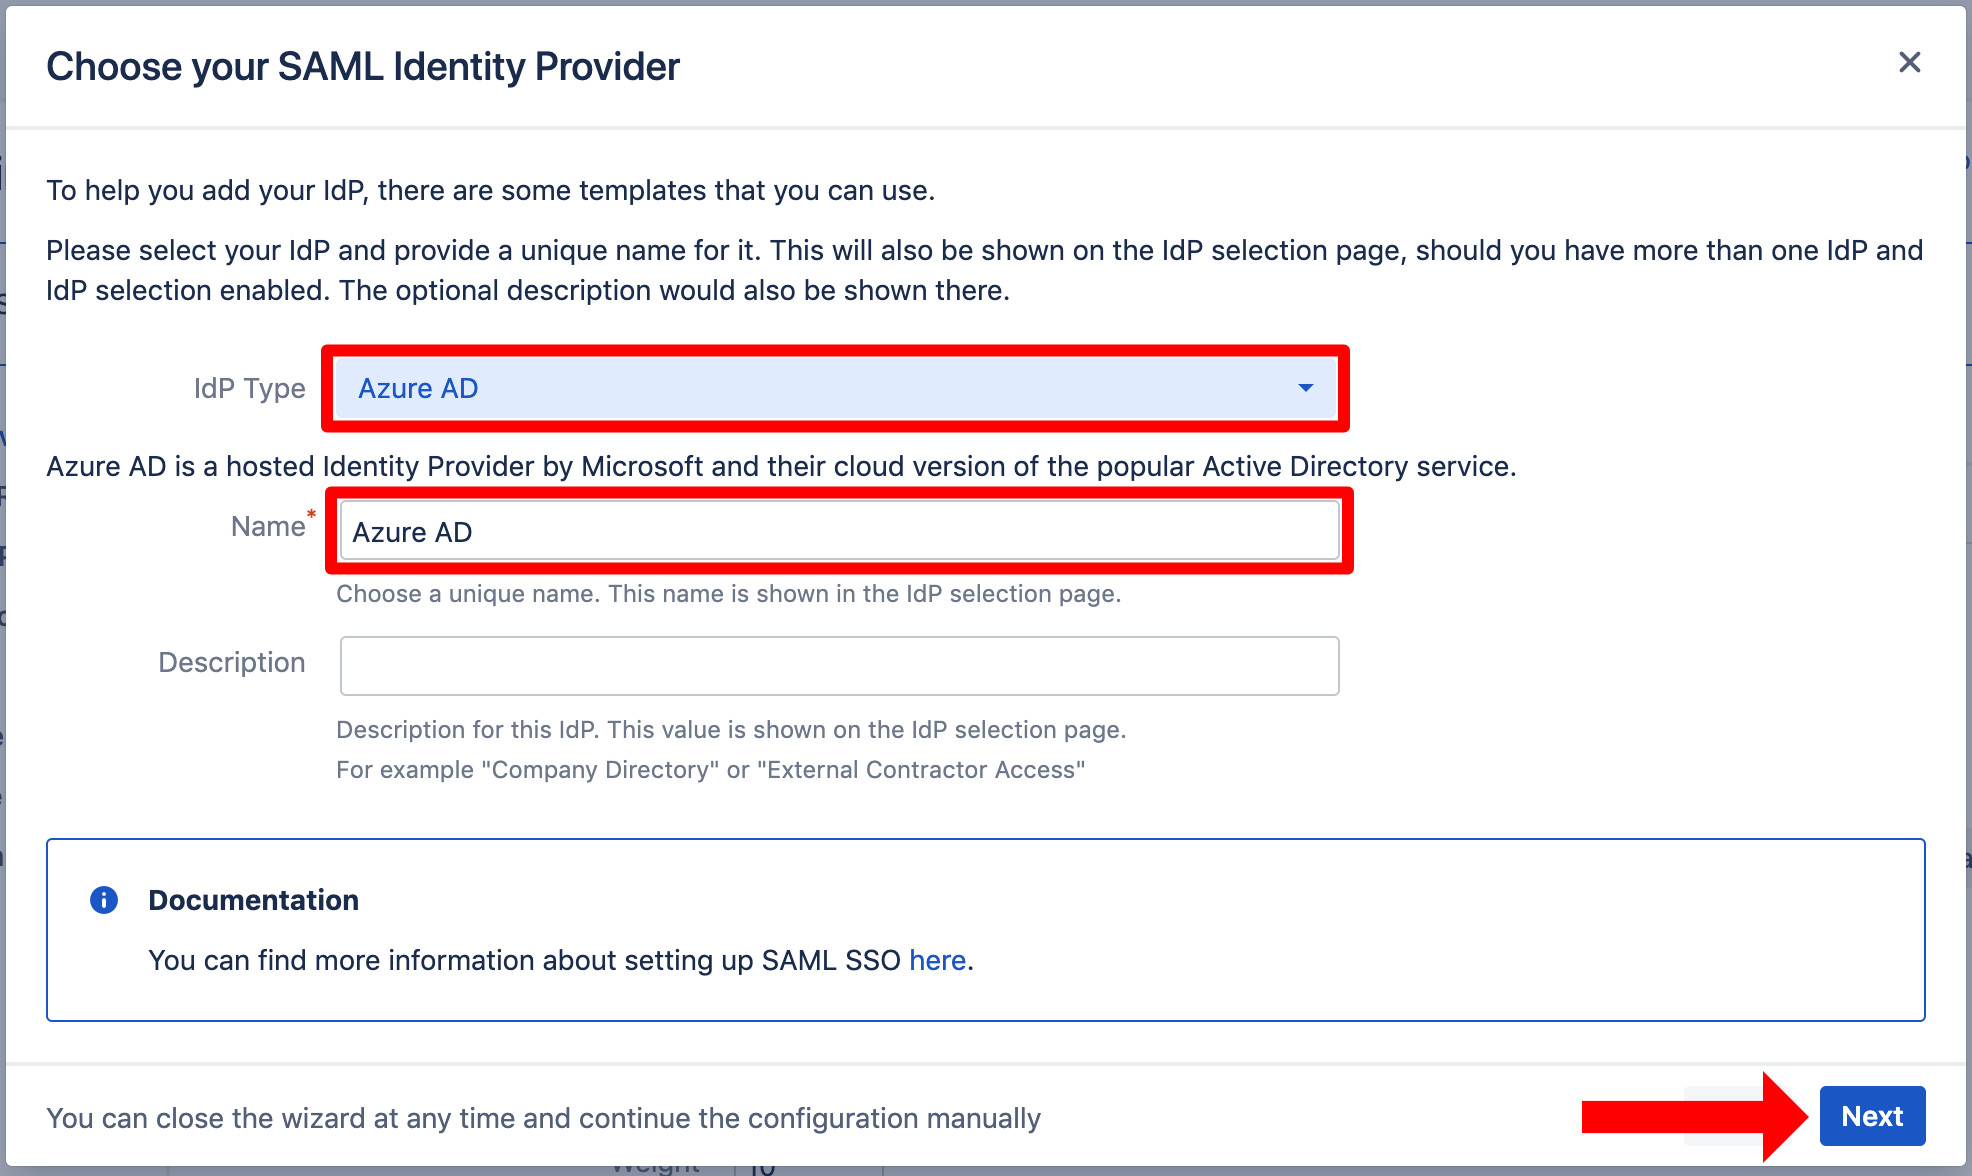
In the next step, you will configure Azure AD. Please keep this tab open or copy the information.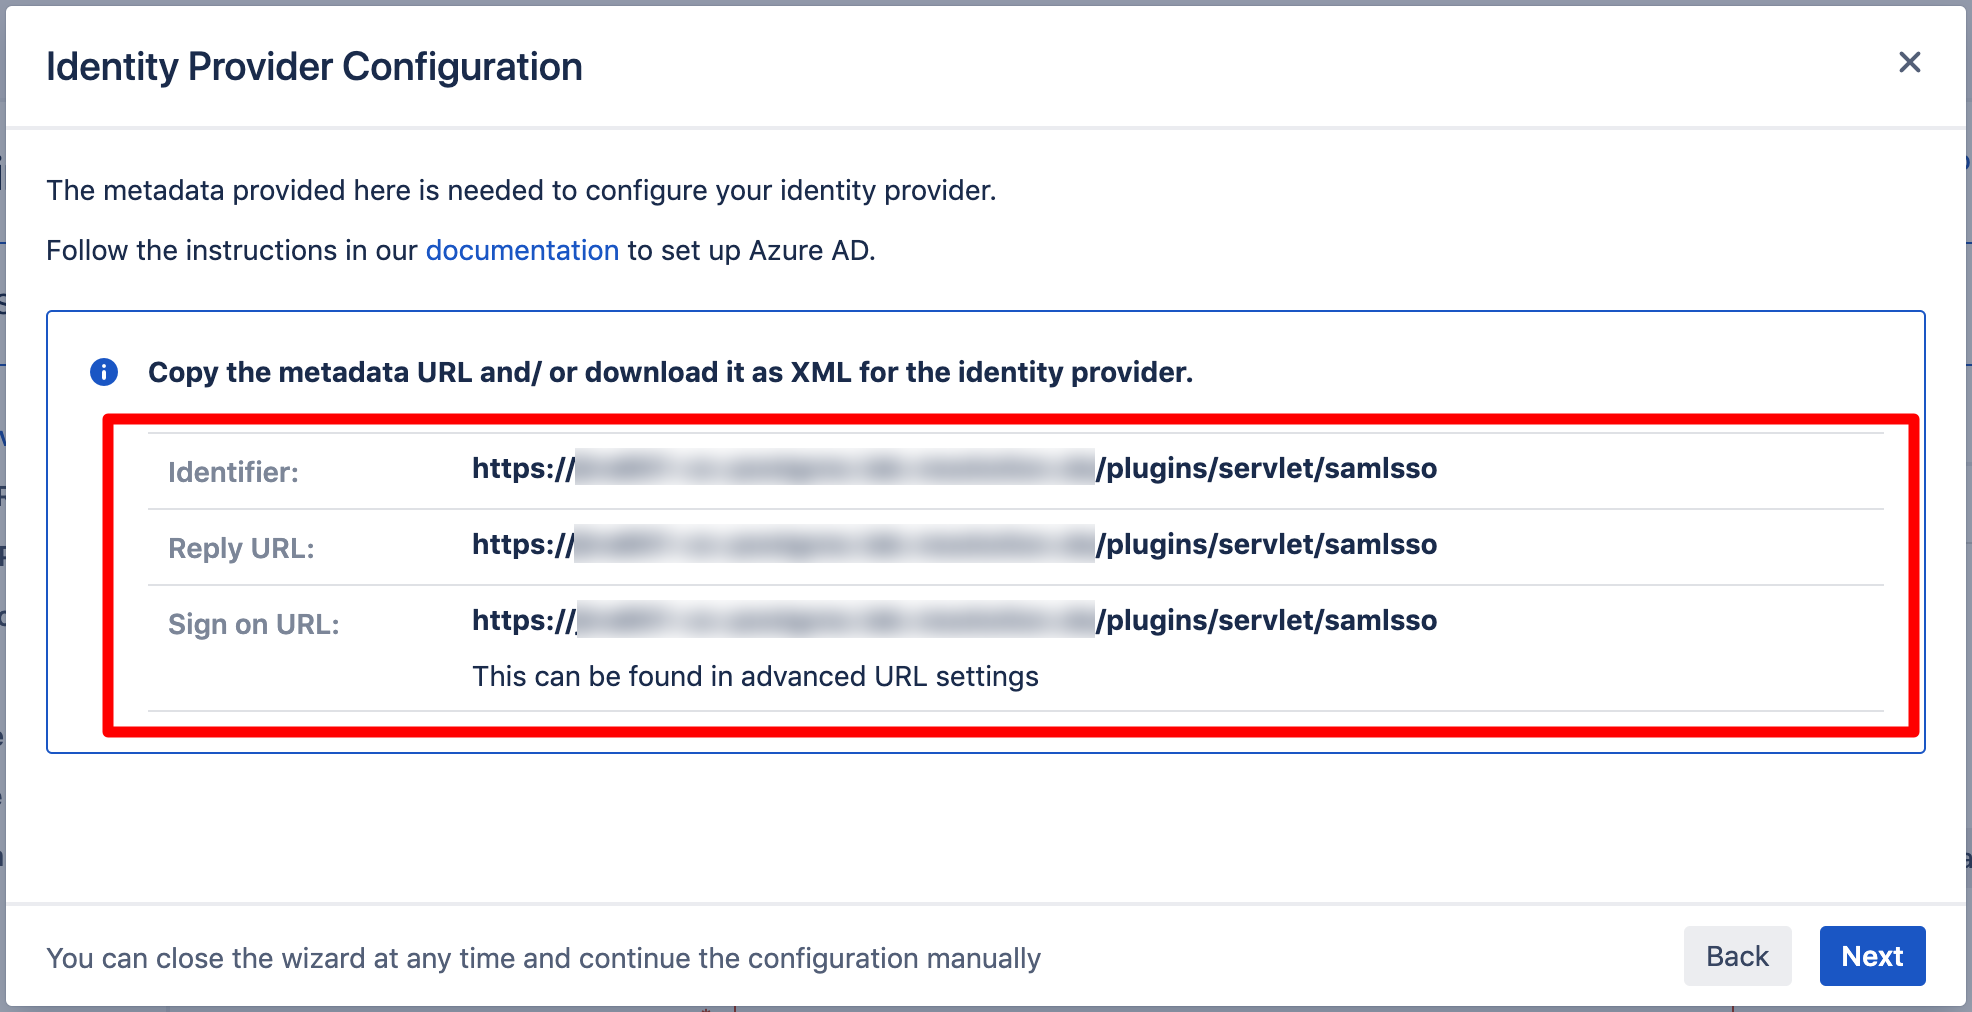
Create and Configure an Azure Enterprise App for SAML SSO
Adding an Enterprise Application for the SAML SSO App
Navigate to the Azure Portal. In the left panel, click Azure Active Directory.

Again, in the left panel under Manage click Enterprise Applications.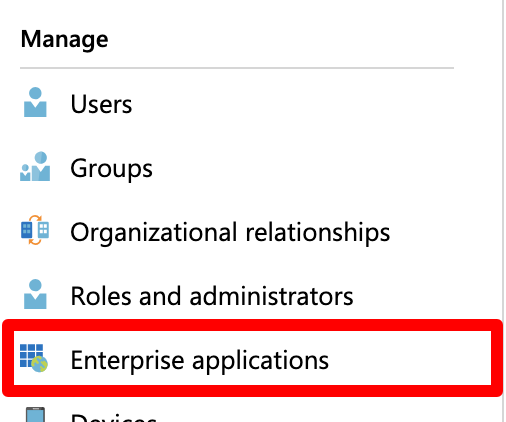
Now, click New Application to add a new Enterprise Application.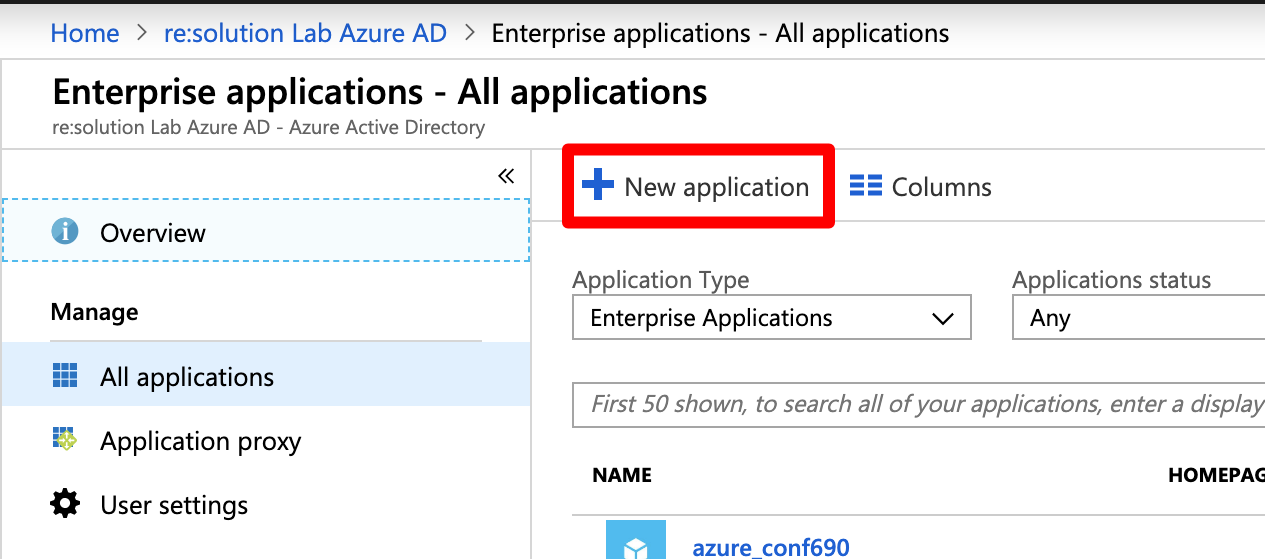
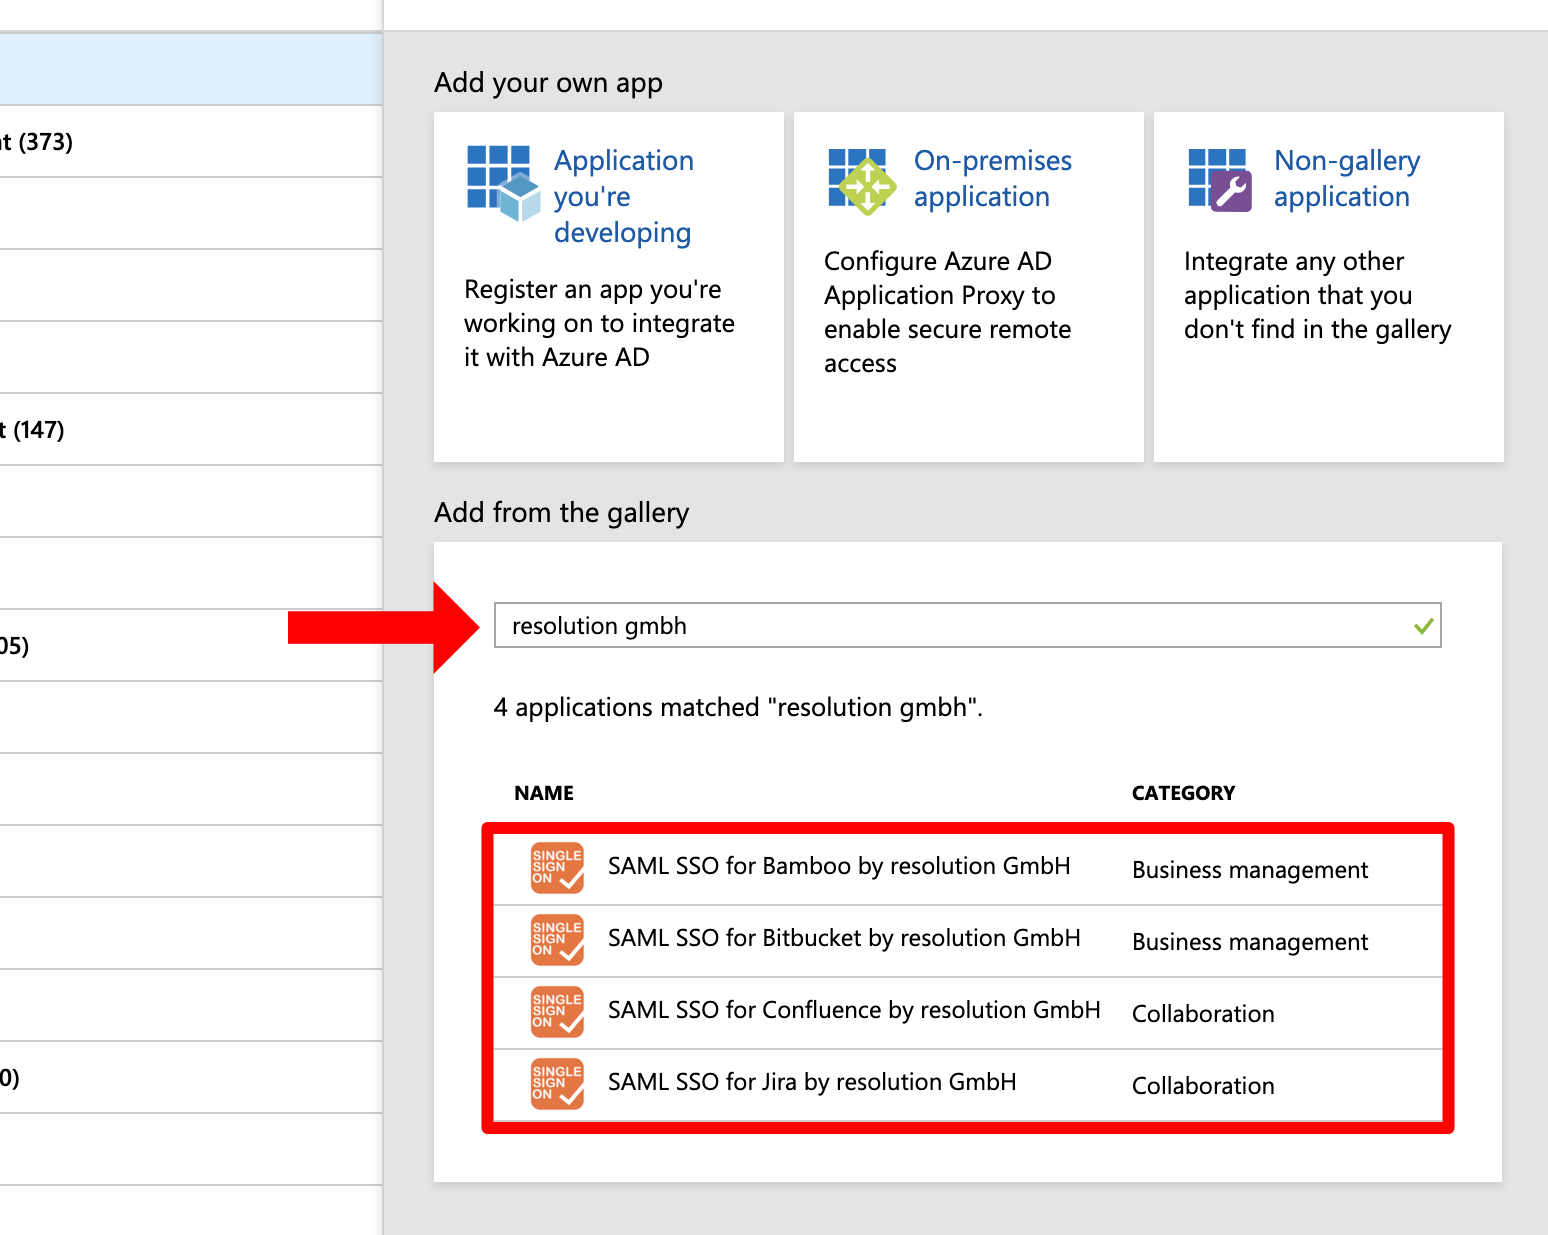
We created presets in the gallery for the SAML SSO app. Search for "resolution gmbh" and choose the version which matches your Atlassian product, e.g. "SAML SSO for Jira by resolution GmbH" for Jira.
For the rest of this tutorial, the screenshots will show the Jira version of the marketplace app, but the configuration is identical for the other gallery apps.
In the next step, click Add to add a new enterprise application. You can also choose new name for it.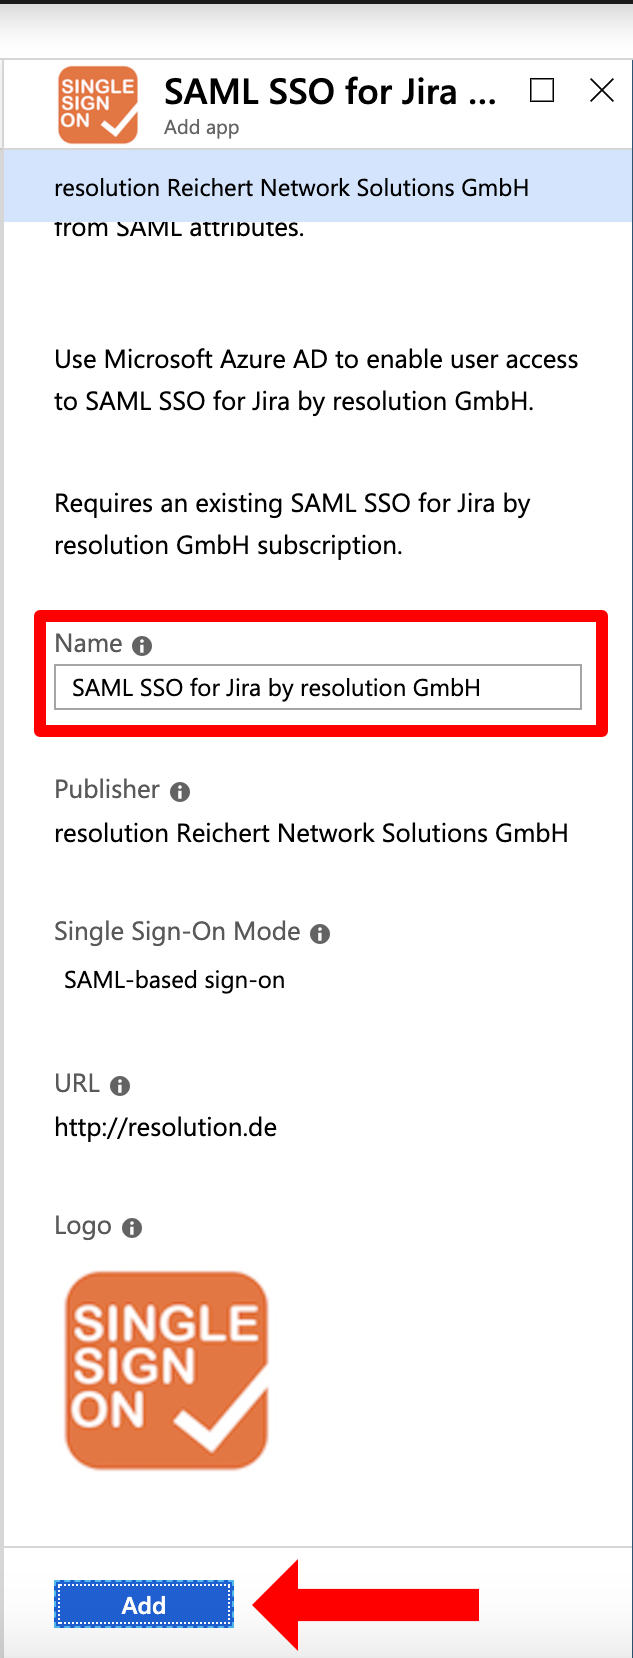
Please wait until the Azure portal redirects you to the enterprise application you just created. This can take a couple of seconds. For the next steps, you will configure the enterprise application.
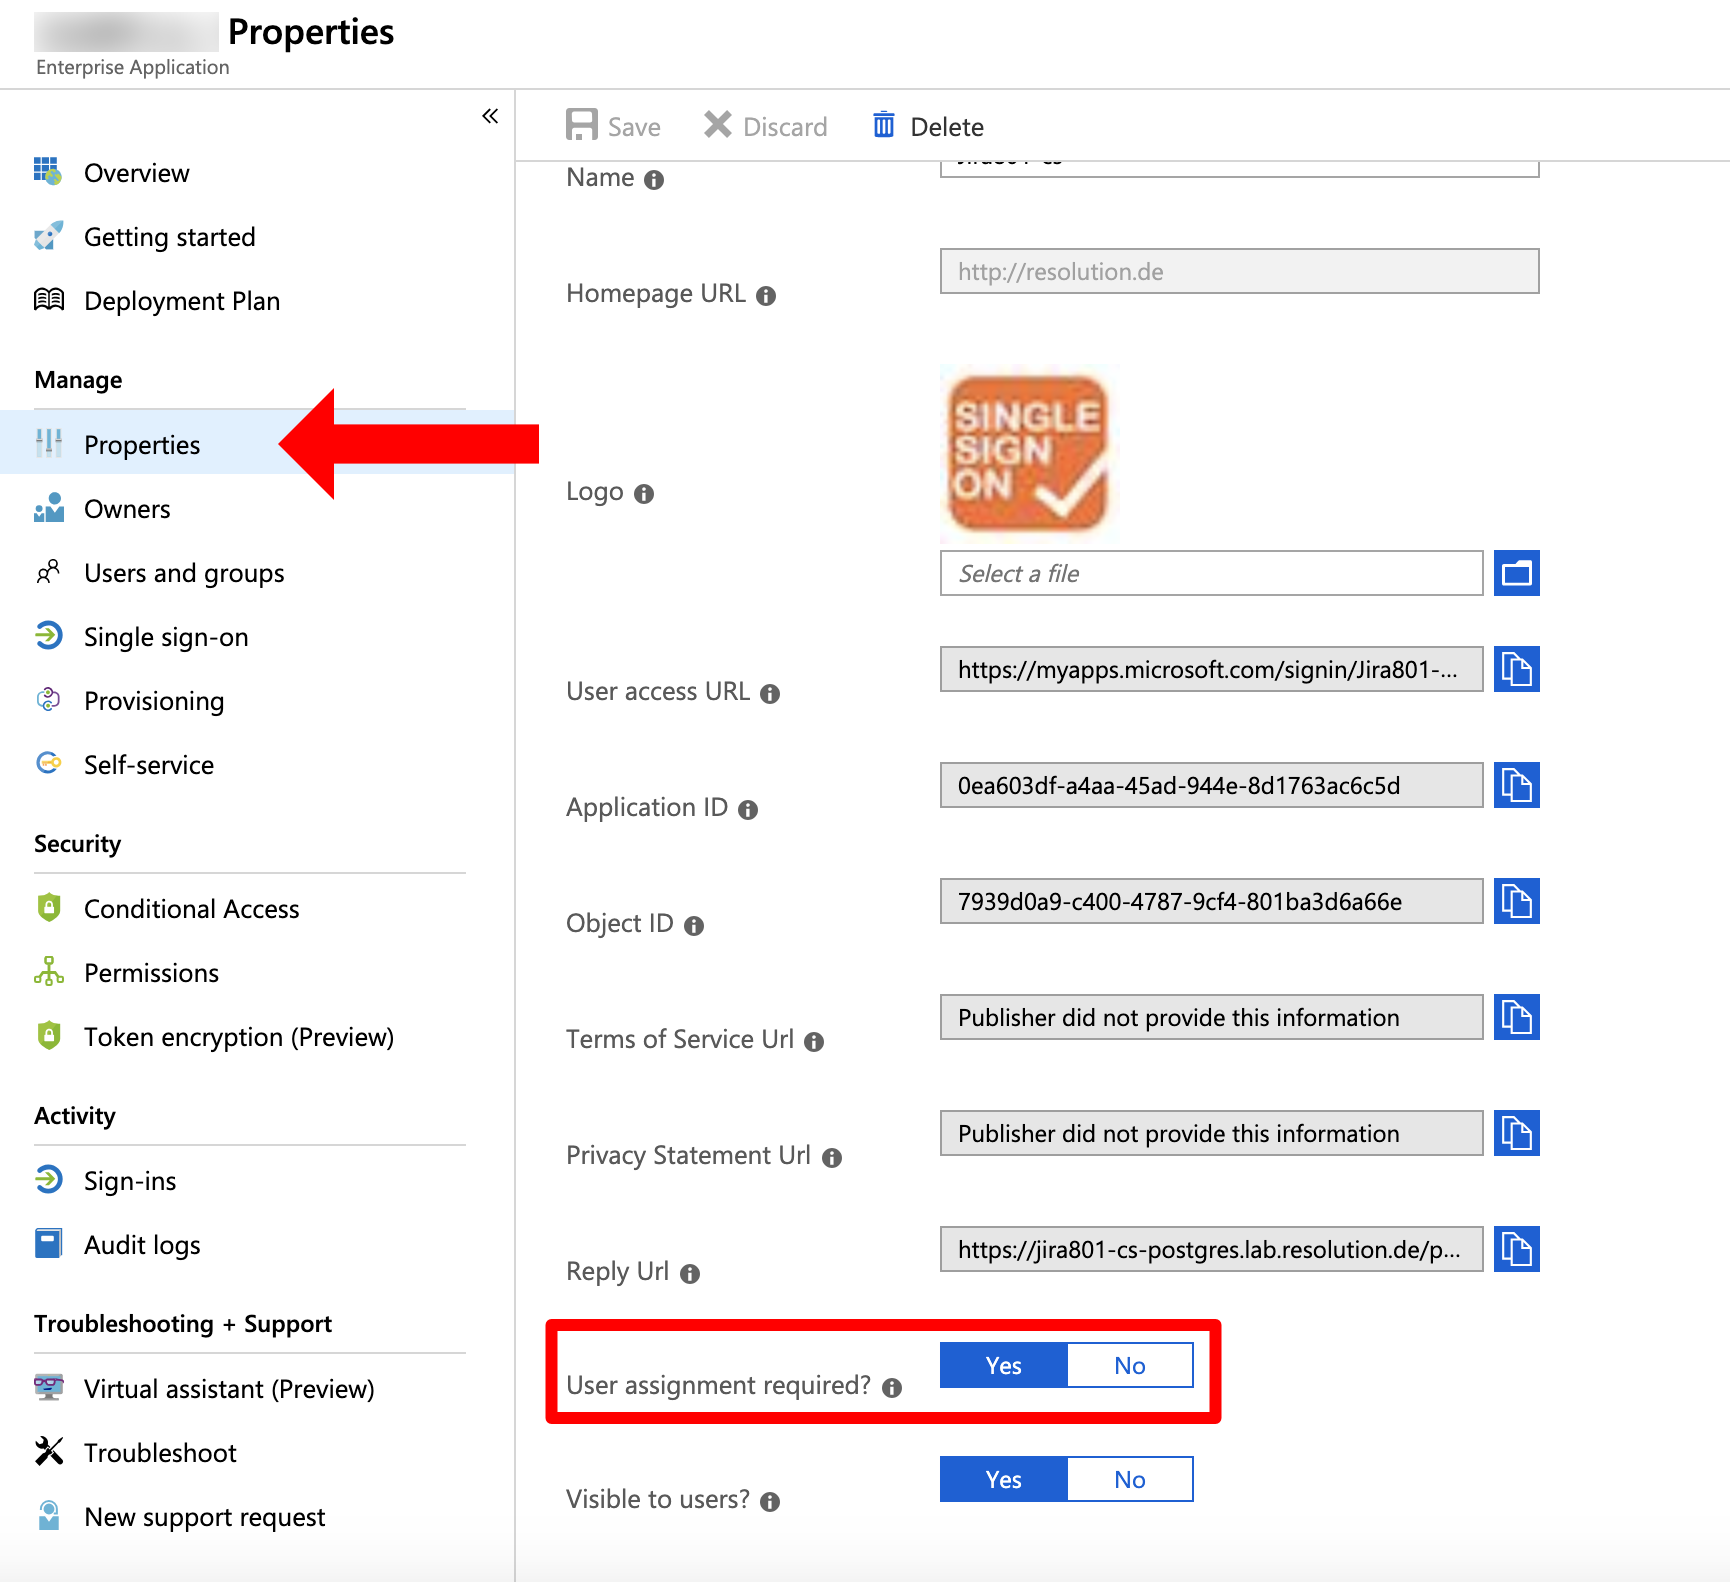
Deactivate User Assignment Required
In the left panel, click Properties. In the new window, scroll down to User assignment required? and set the option to NO. Afterwards Save your configuration.
When set to "YES", users and groups must be first added to the Enterprise application before users are able to use SSO.
Configure the SSO
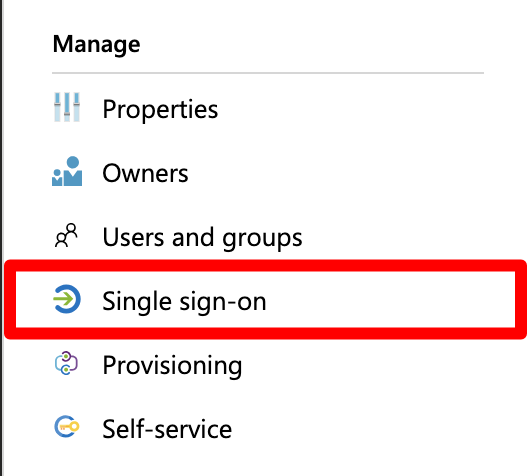
In the left panel under Manage, choose "Single sign-on".
Click SAML for the Single Sign On method.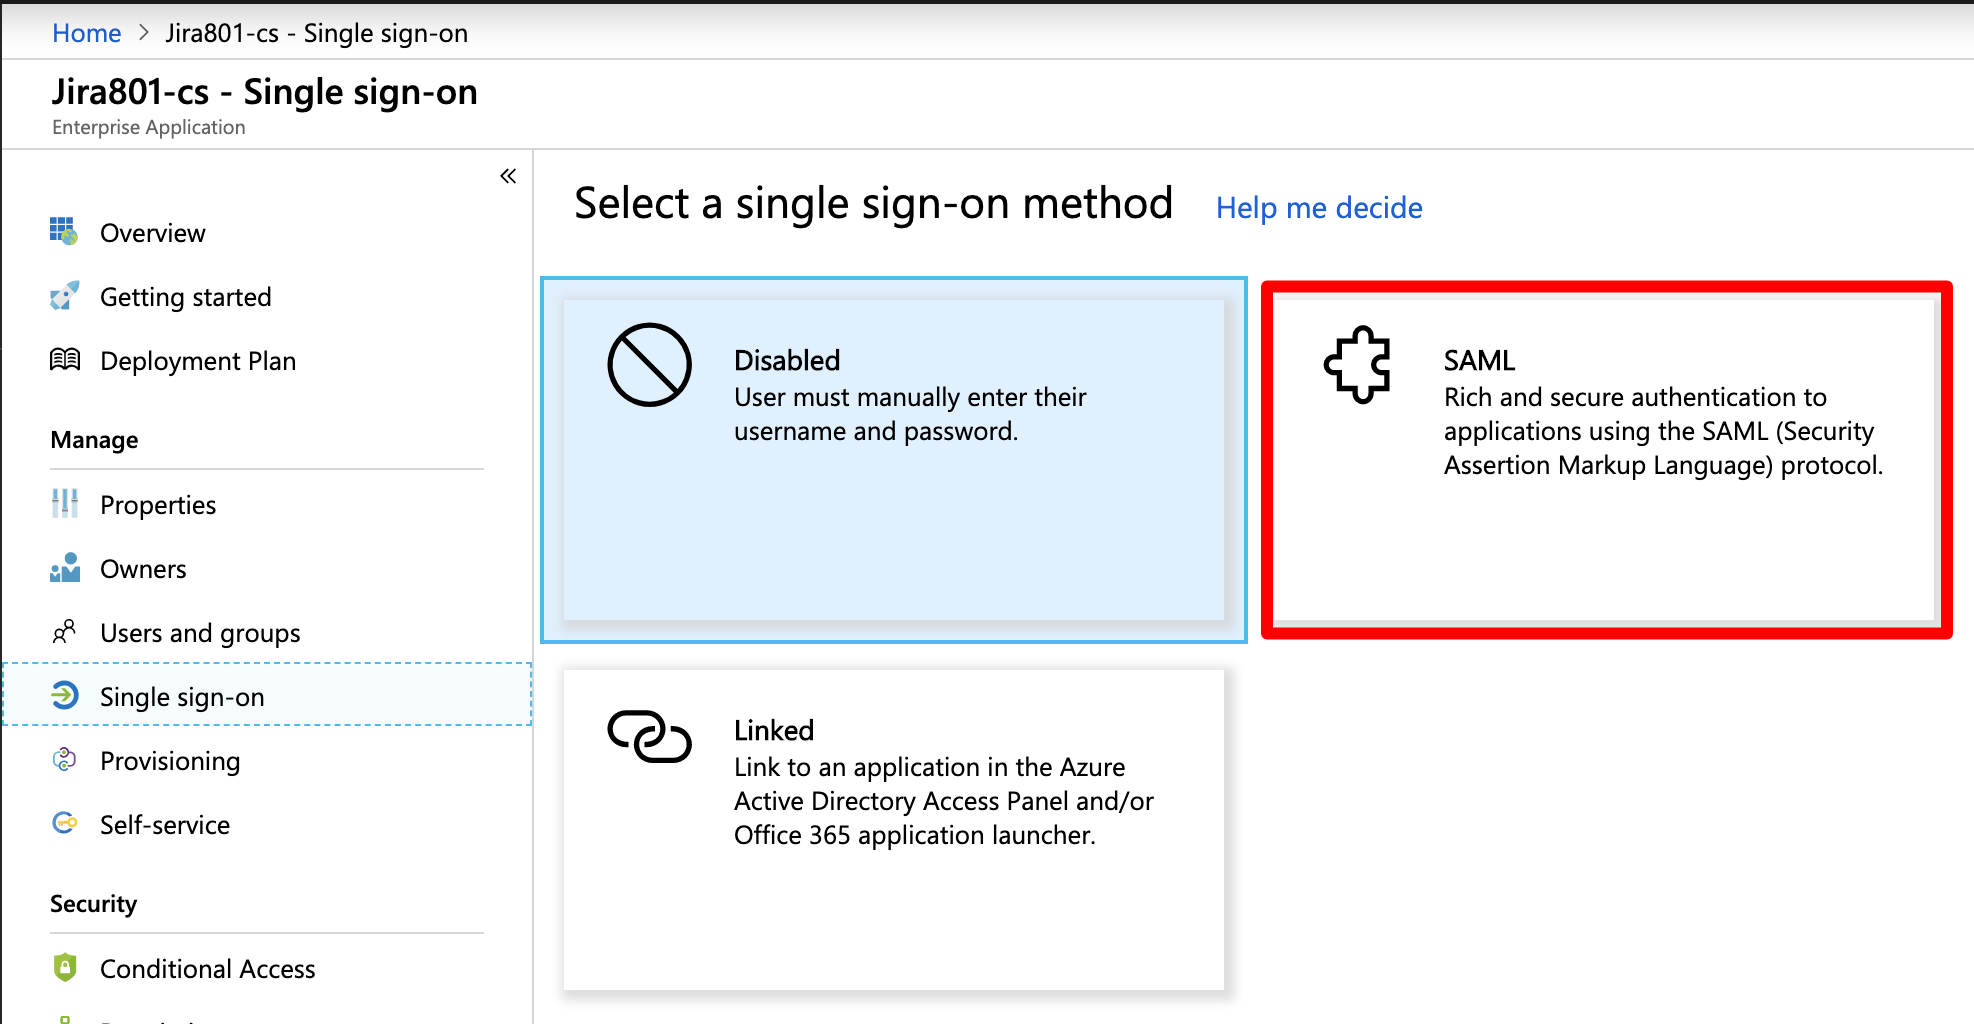
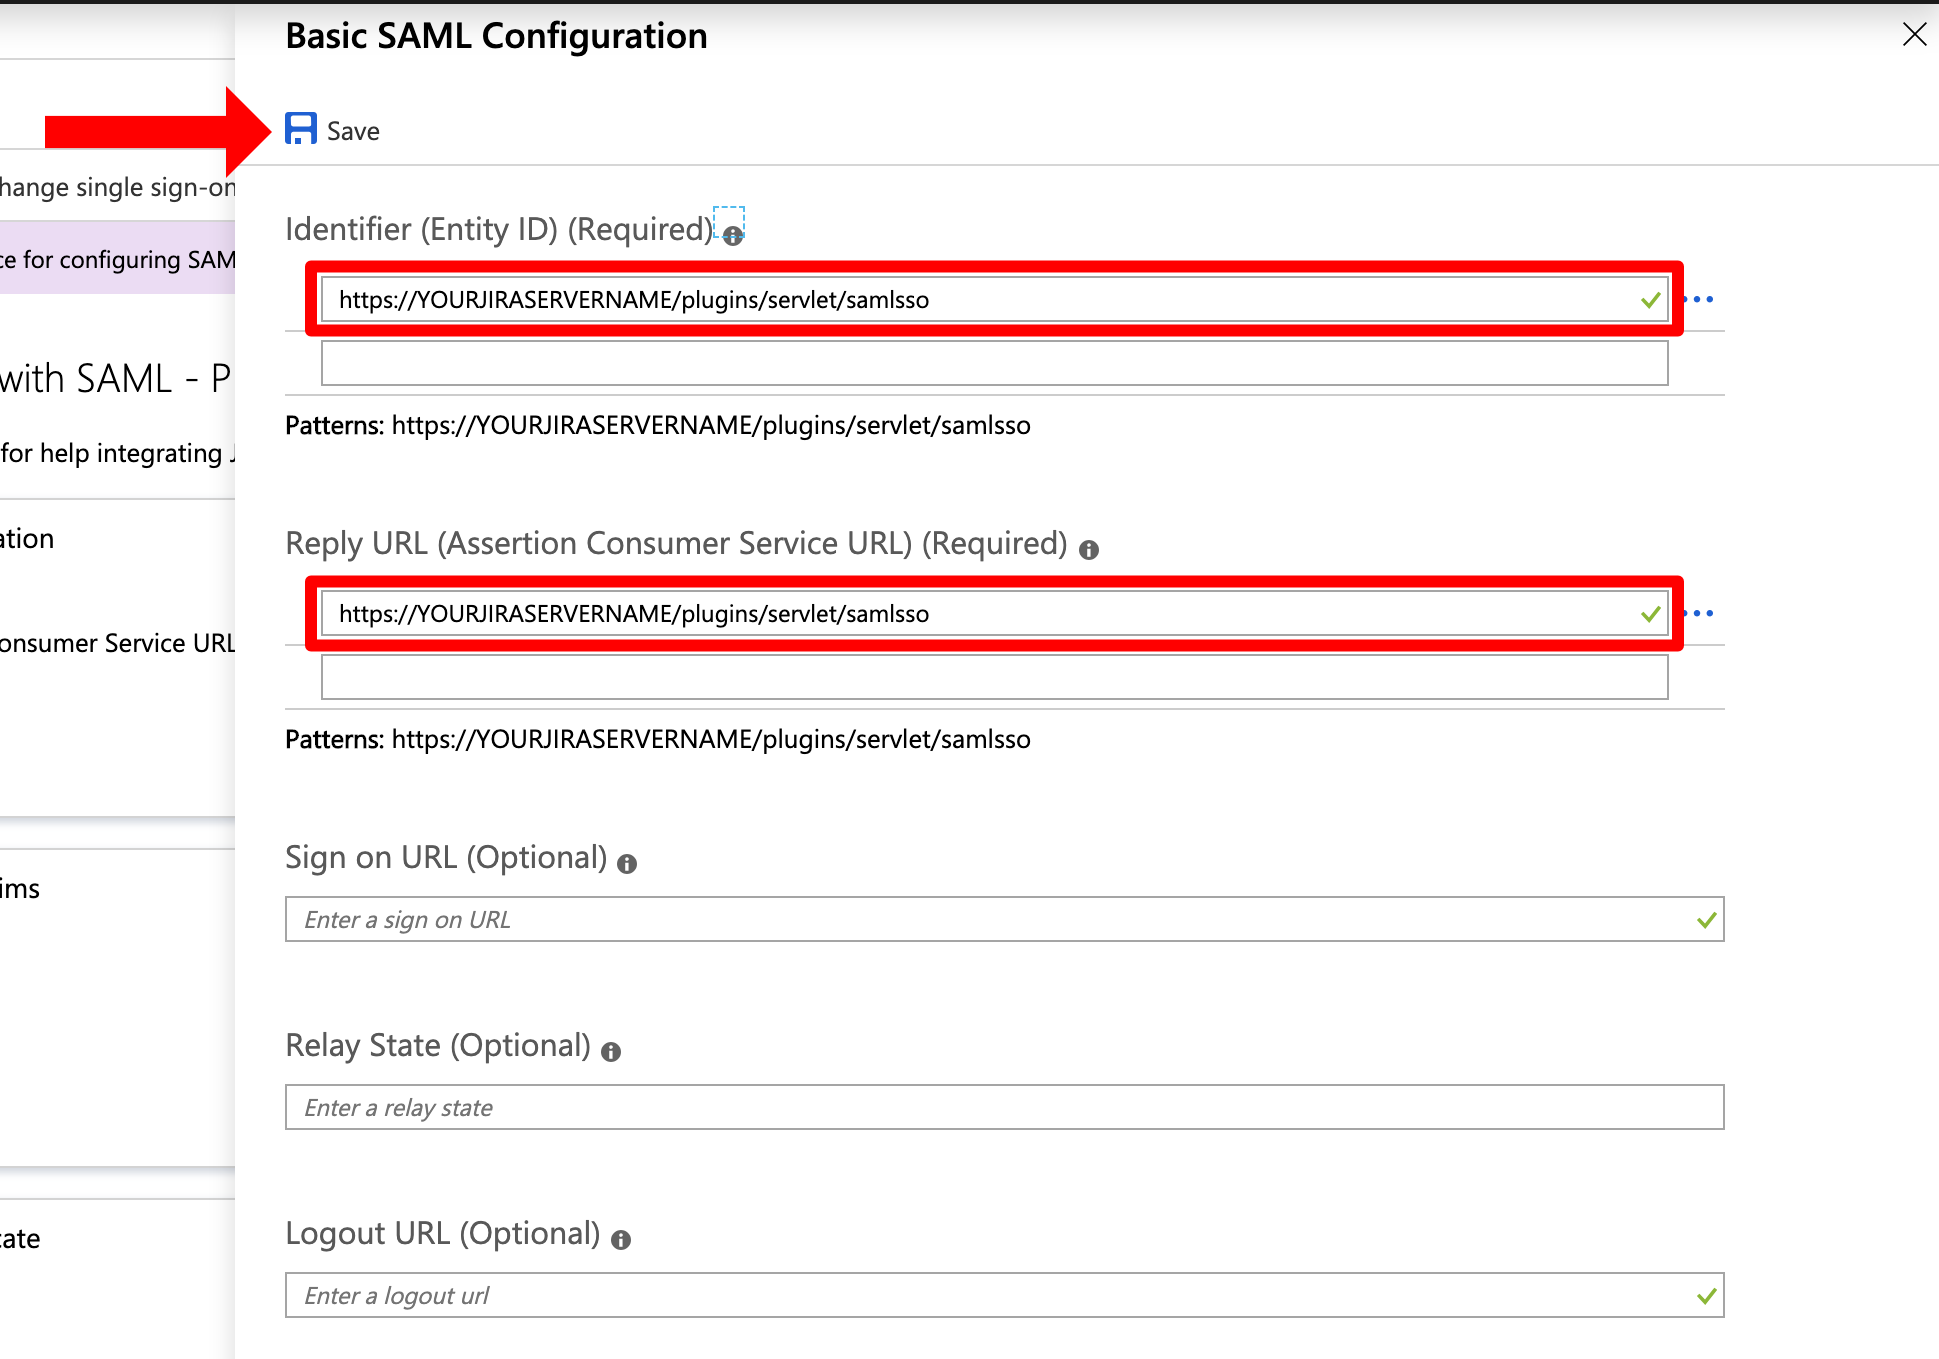
Next, click the pen symbol in Basic SAML Configuration.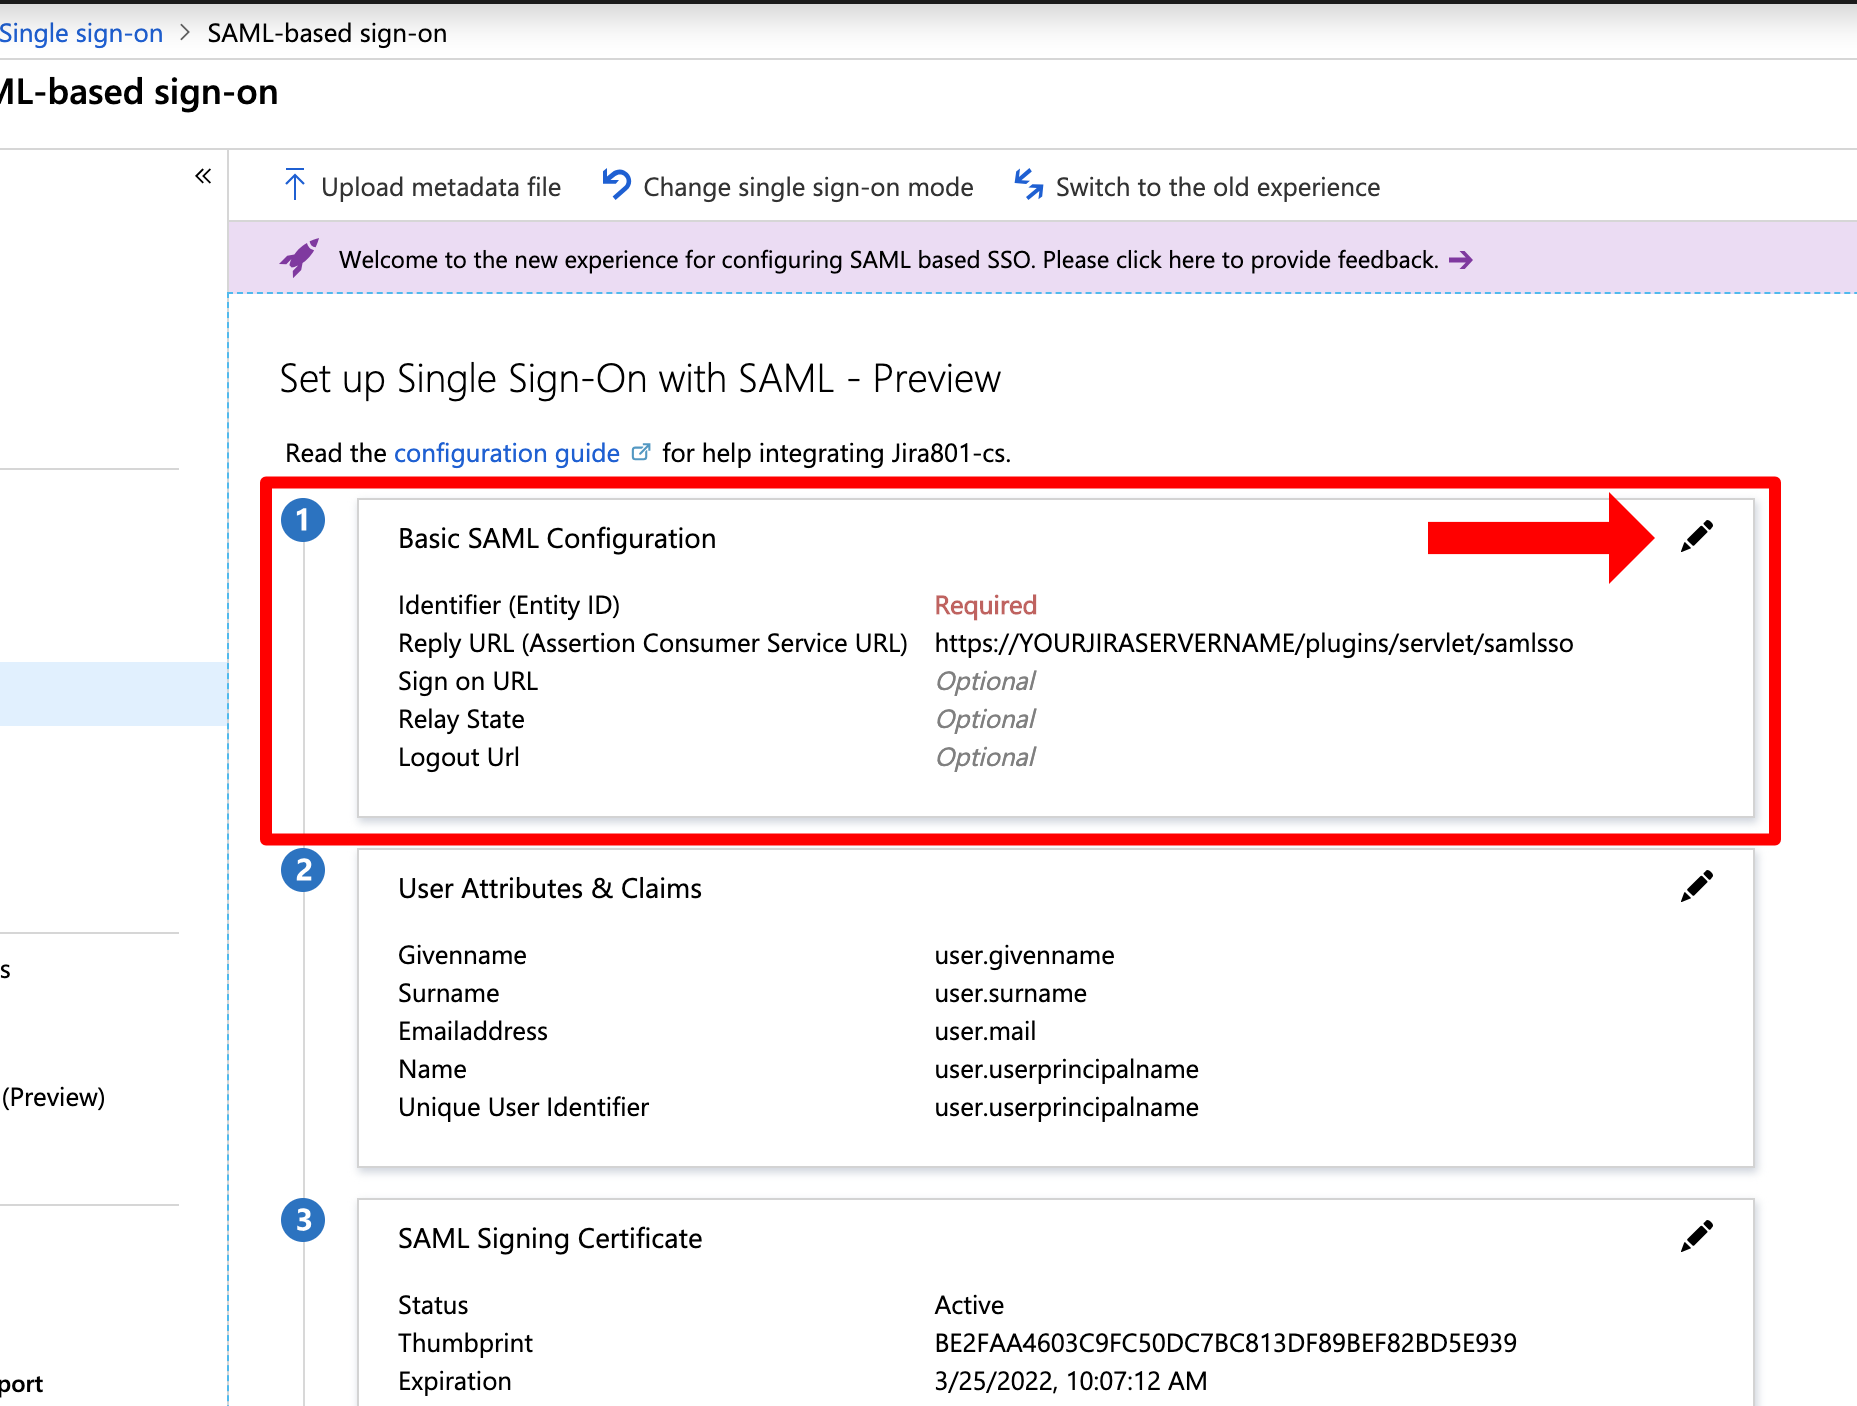
Next, set the Identifier (Entity ID) and the Reply URL (Assertion Consumer Service URL). You can find both in the last window of the wizard.
In general, the needed URL for both is: https://<base-url>/plugins/servlet/samlsso
You need to substitute <base-url> with the base url of your Atlassian product instance. The gallery application already provides the needed URLs. You only have to substitute YOURJIRASERVERNAME with the URL of your Atlassian product instance and then click Save.
"YOURJIRASERVERNAME" will be called differently depending on the gallery application, e.g. "YOURCONFLUENCESERVERNAME" for the Confluence version of the gallery application.
Afterwards, scroll down to SAML Signing Certificate and copy the App Federation Metadata Url. The link will be used to configure the SAML SSO app.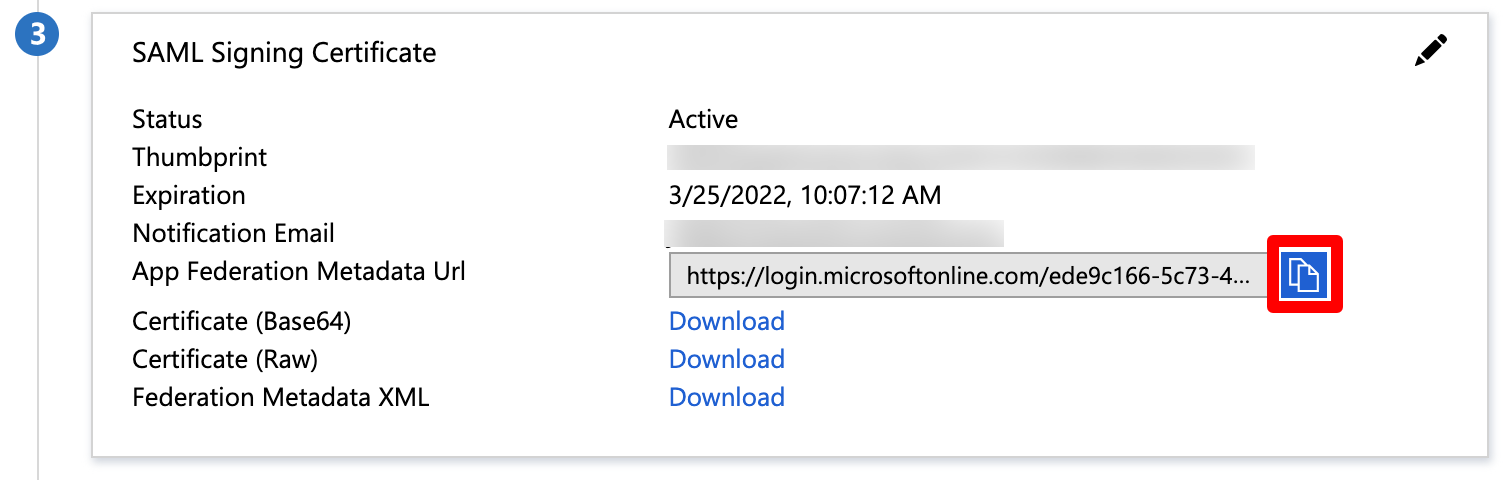
The configuration in Azure AD is now finished. In the next step, we will finish the configuration in the SAML SSO wizard.
Finishing the Configuration - Wizard
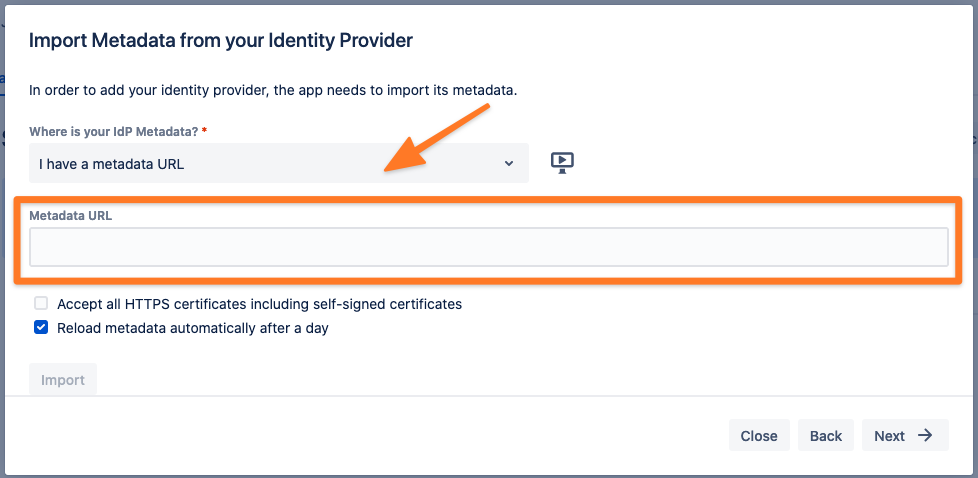
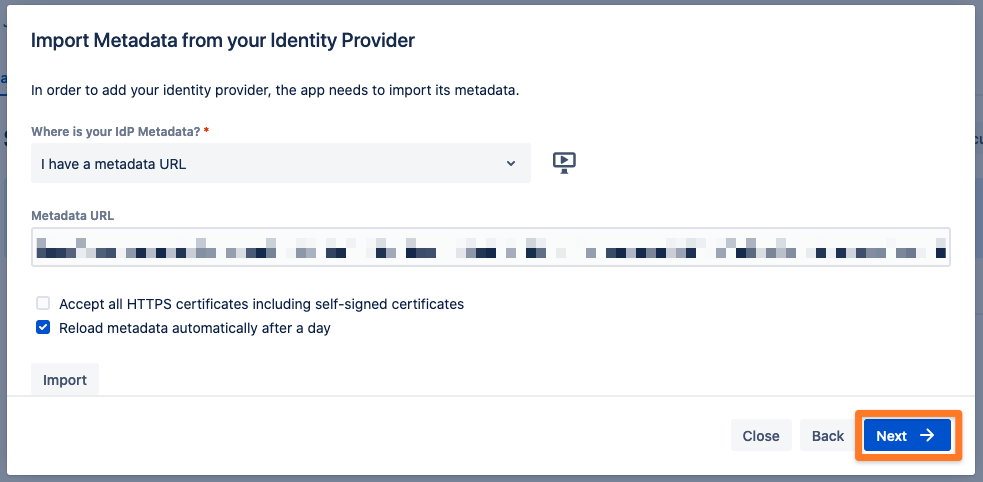
Now, you will paste the App Federation Metadata URL you have obtained before. Paste the App Federation Metadata URL in the "Metadata URL" text field.
You can also configure the plugin without the metadata XML URL. Please choose another option from the dropdown menu and proceed as the wizard guides you.
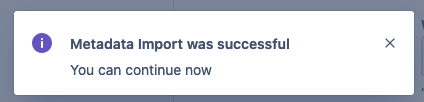
Afterwards, click on "Import".
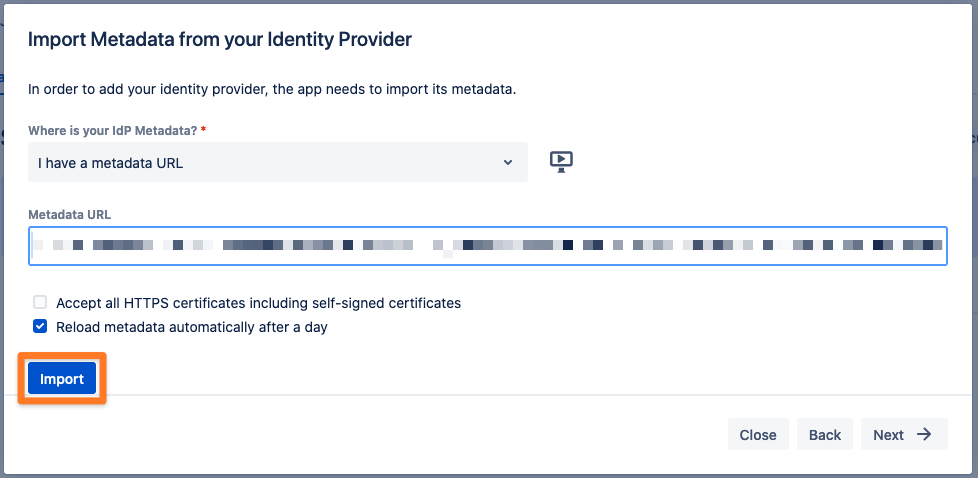
Click on "Next" to continue.
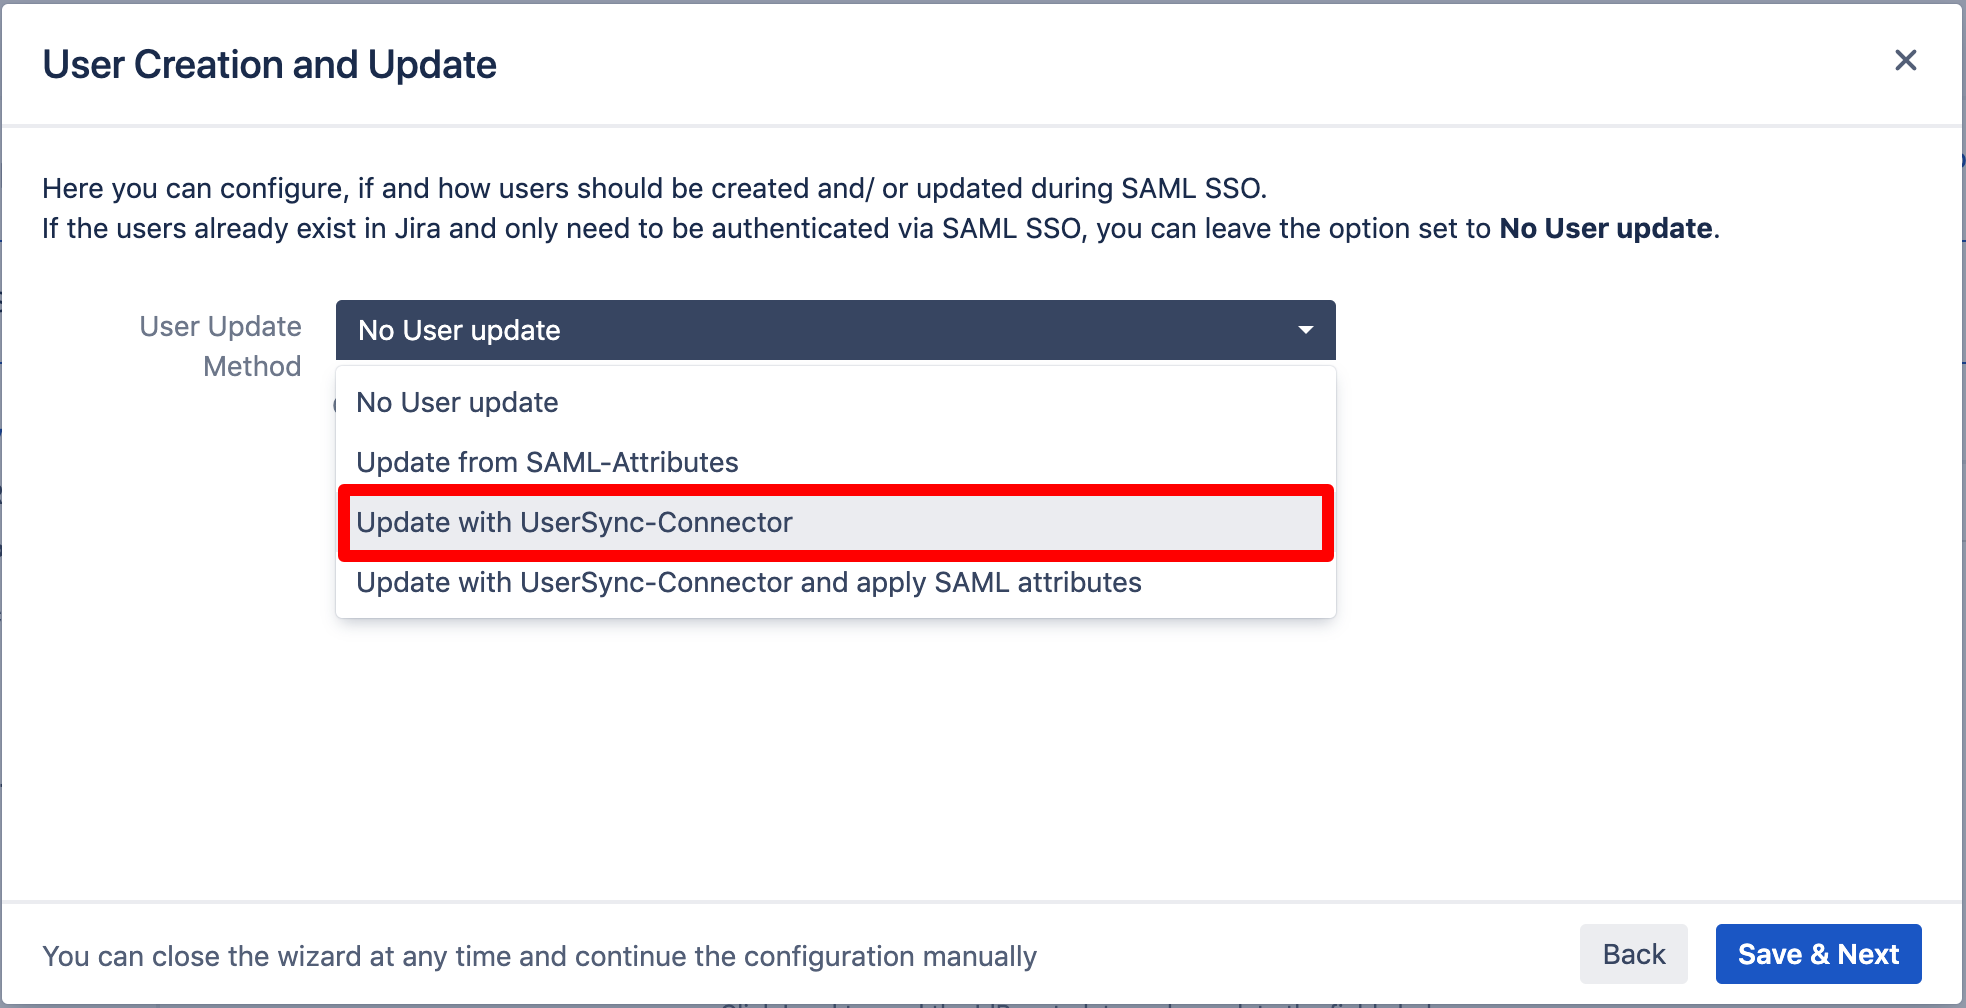
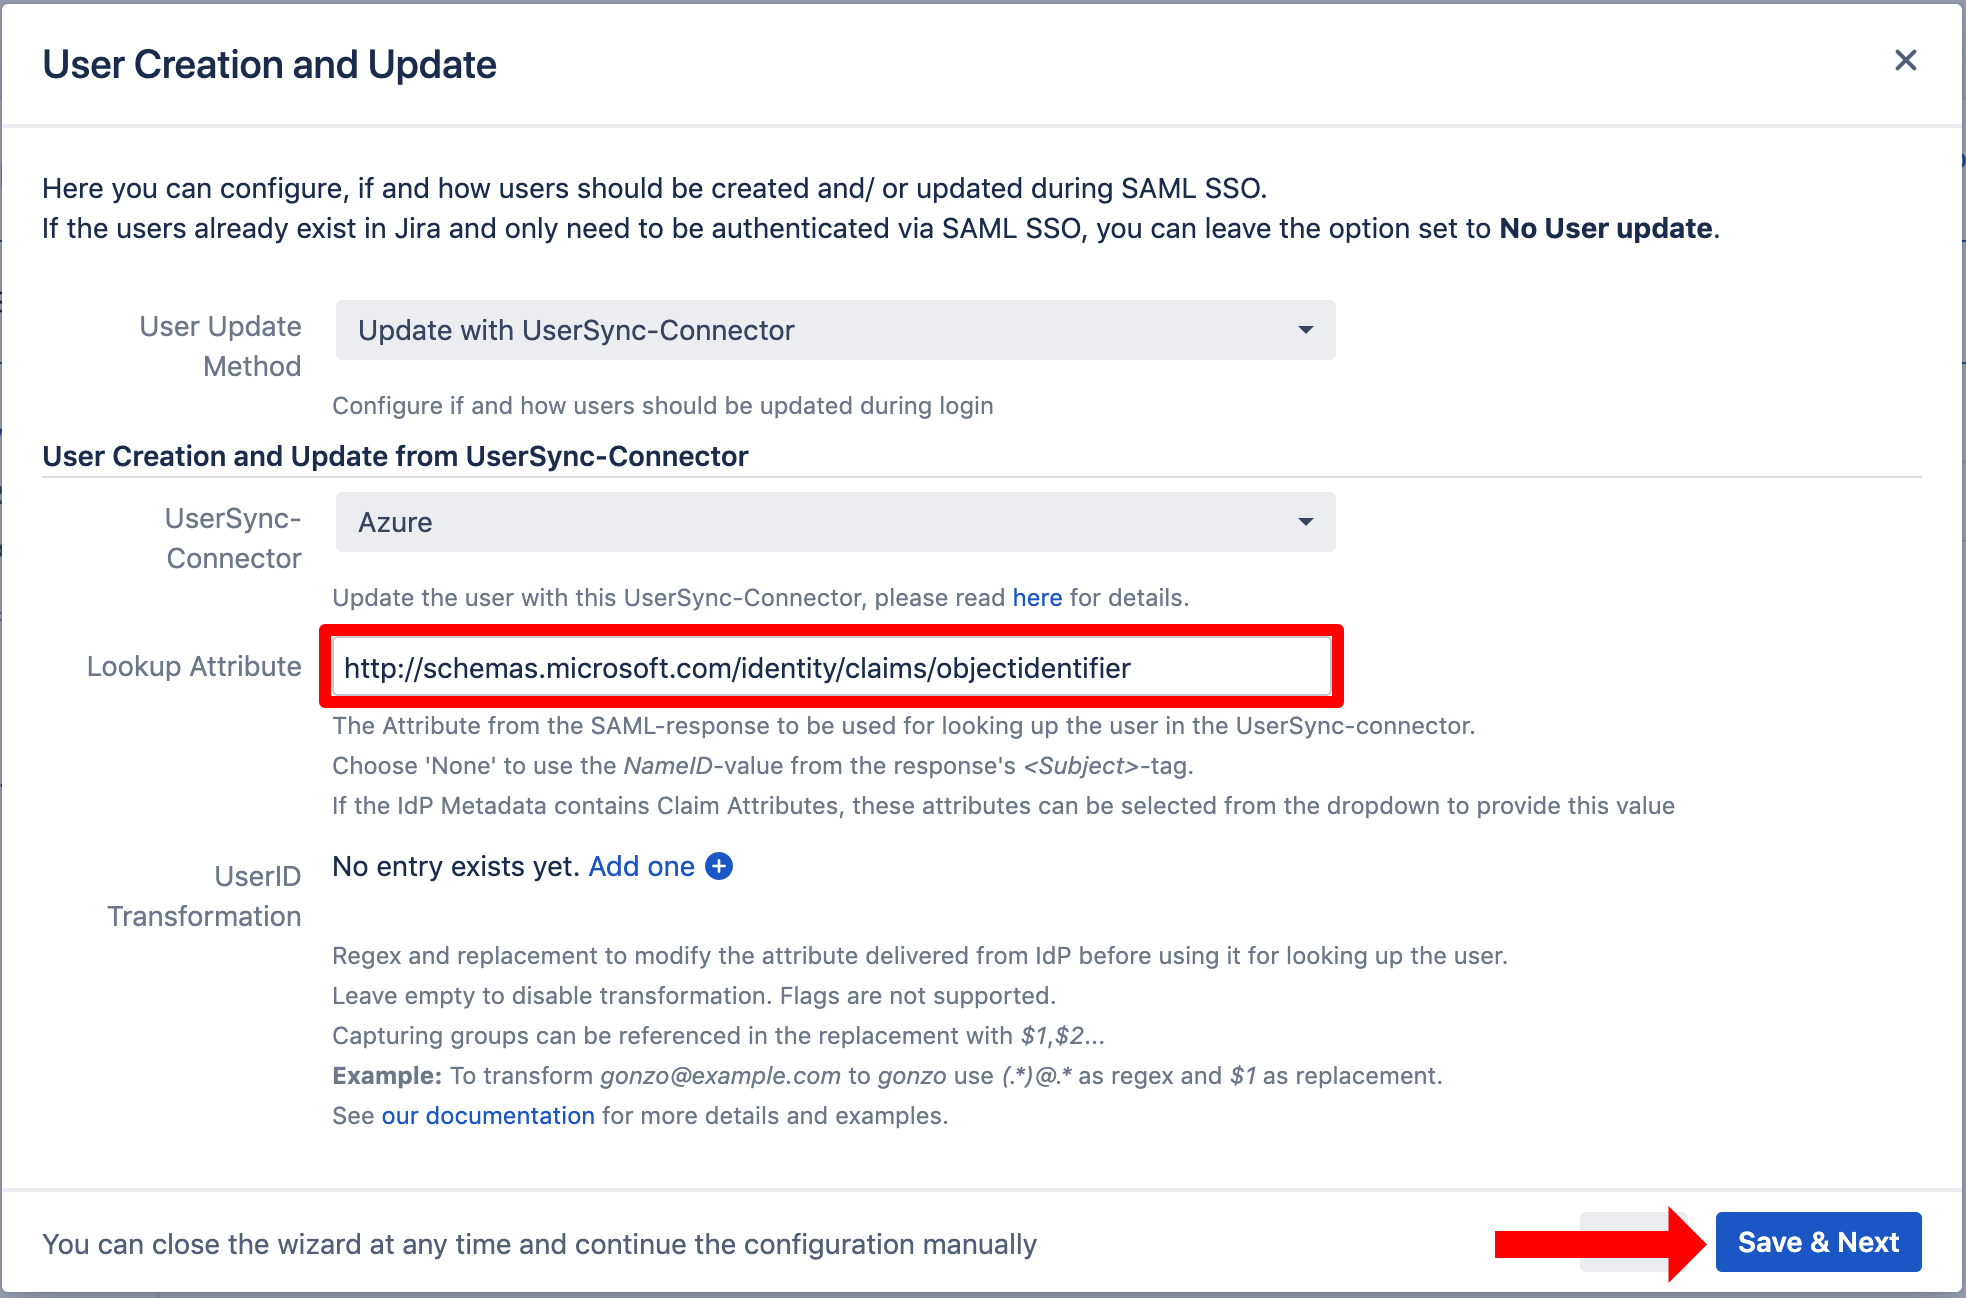
For the User Update Method choose Update with UserSync-Connector. If you additionally want to use the SAML attributes as sent by your identity provider, choose the corresponding option.
For UserSync-Connector, choose the one you have created before.
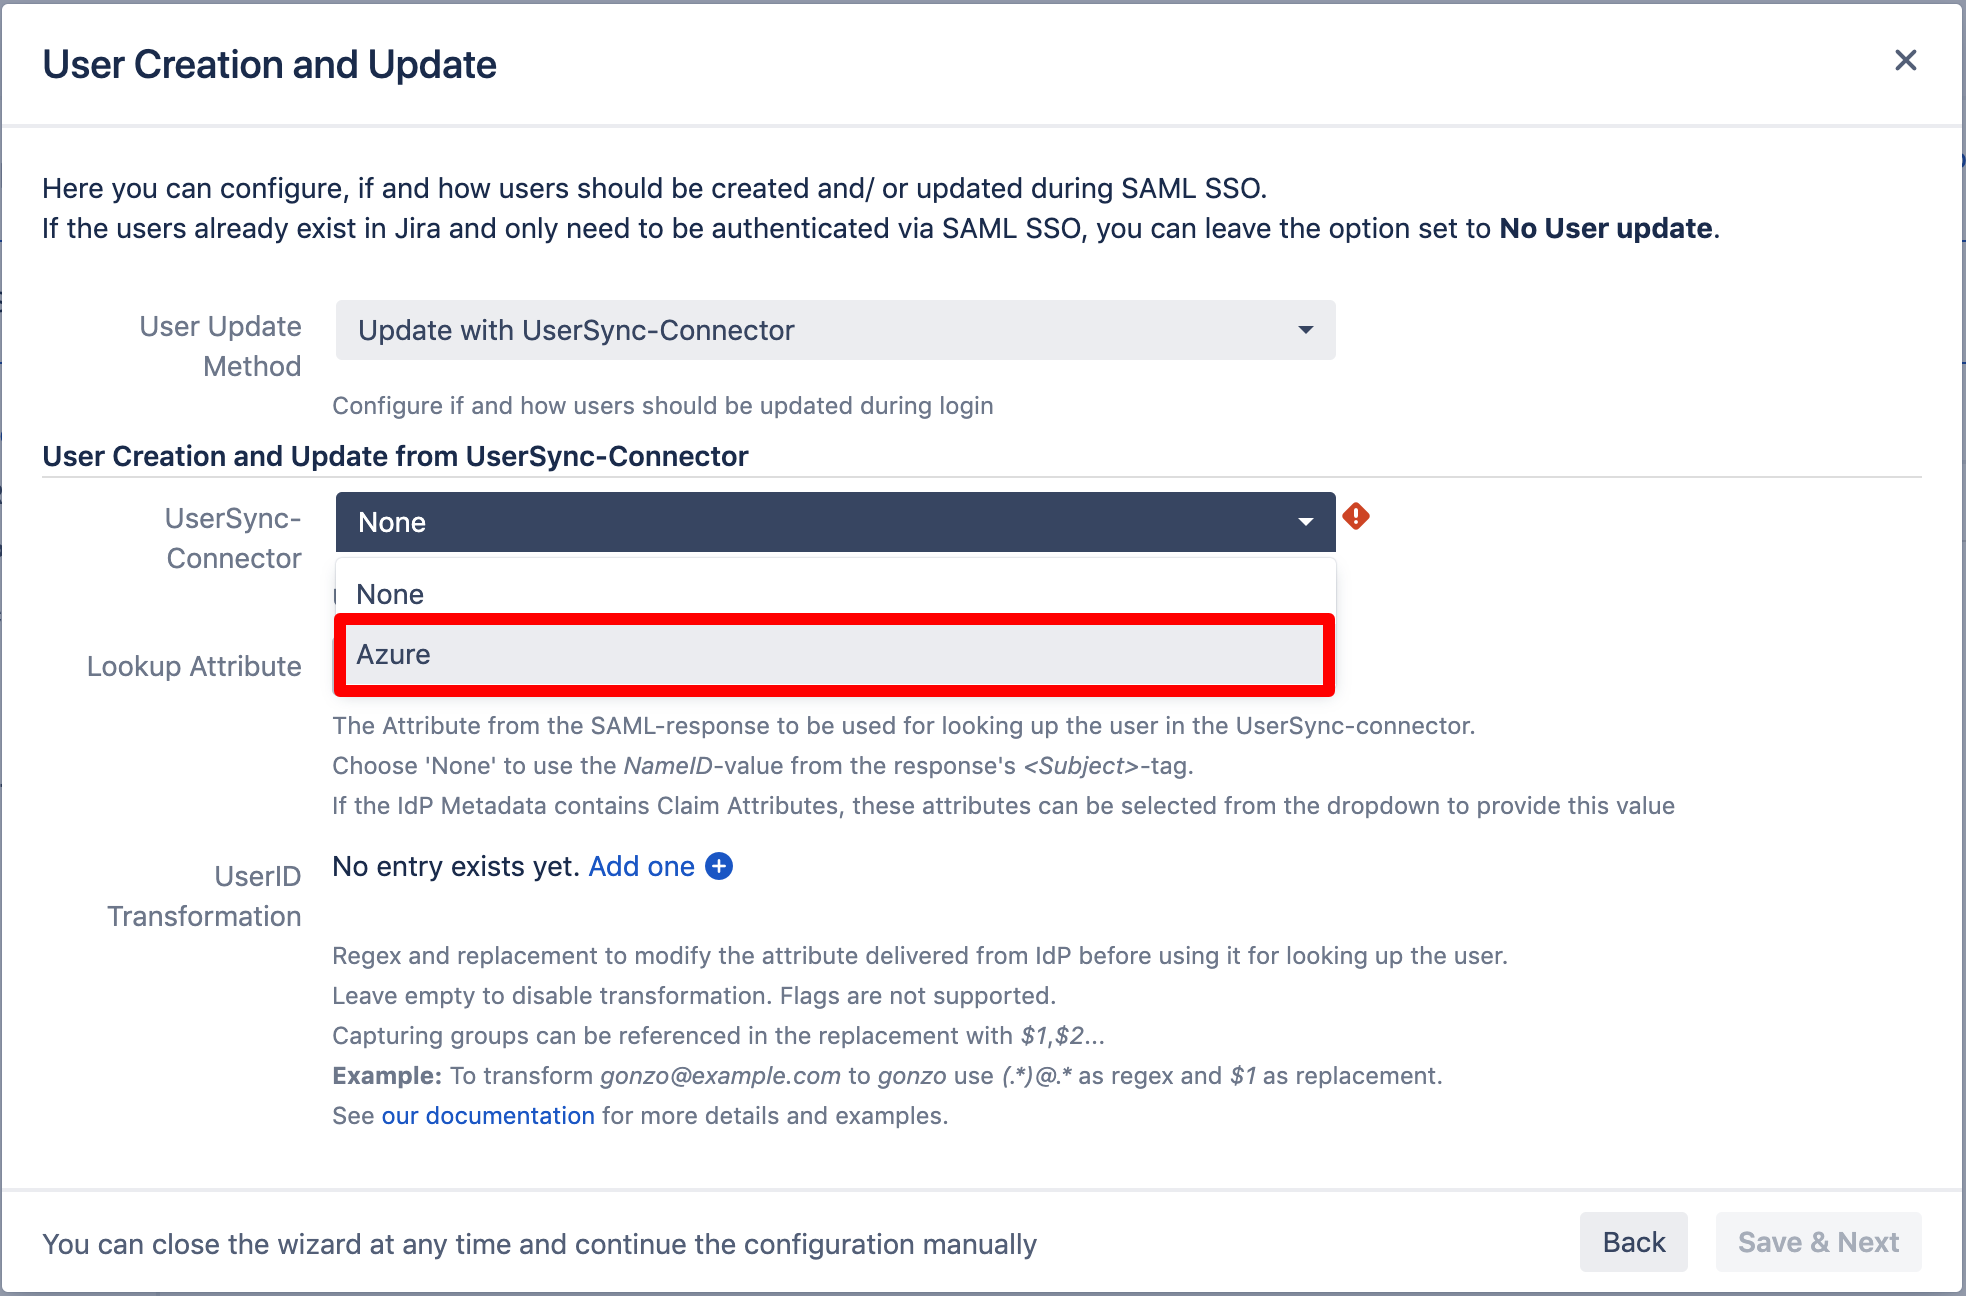
For the "Lookup Attribute", insert
http://schemas.microsoft.com/identity/claims/objectidentifier
into the textfield. This allows the app the add create new users which have not already been synced by User Sync in the first place.
Click "Save & Next" to continue.
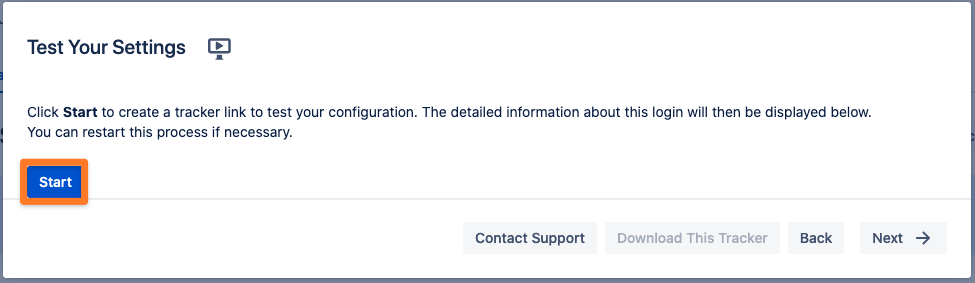
Testing SSO
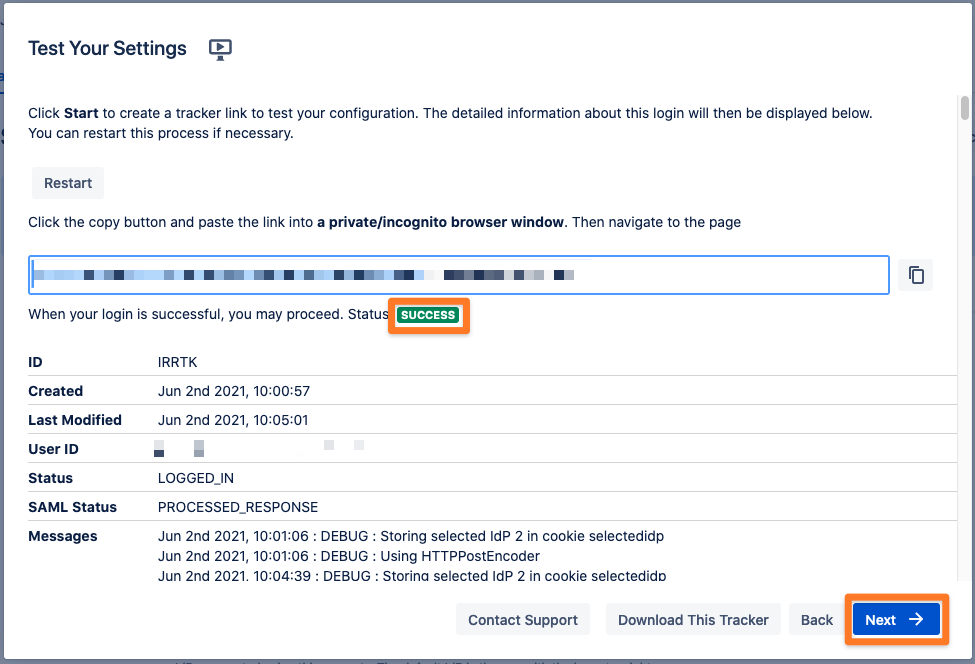
The wizard also allows to test the Single Sign On. Just follow the steps to test if the login works as expected.
Click on "Start test" to proceed.
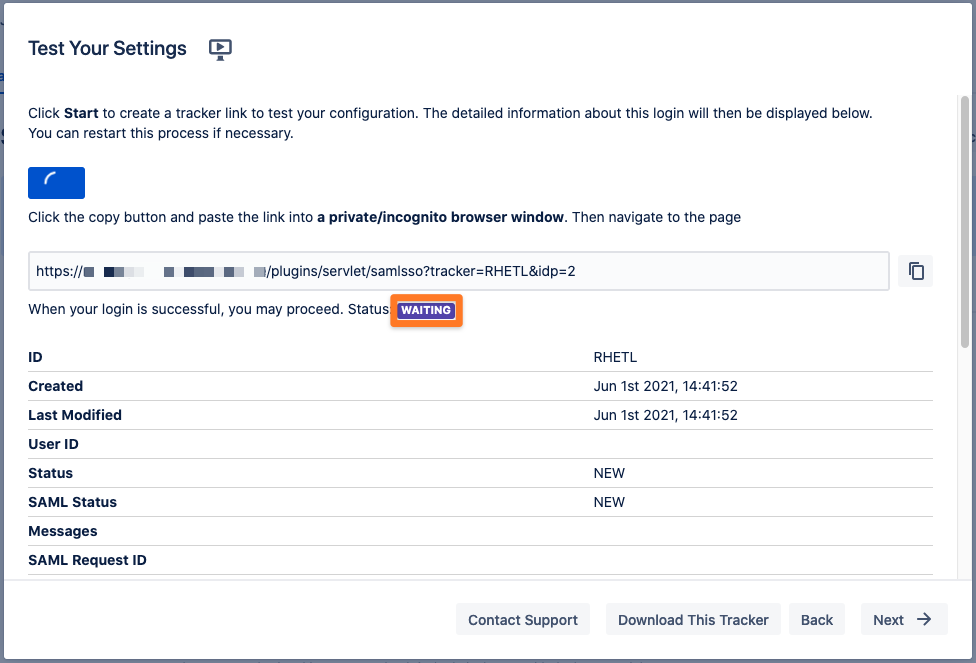
Copy the orange marked link and open a new incognito/private tab or a different web browser. Then, paste the link and navigate to it.
You will be now redirected to Azure AD's login page. Please log-in with you username and password. 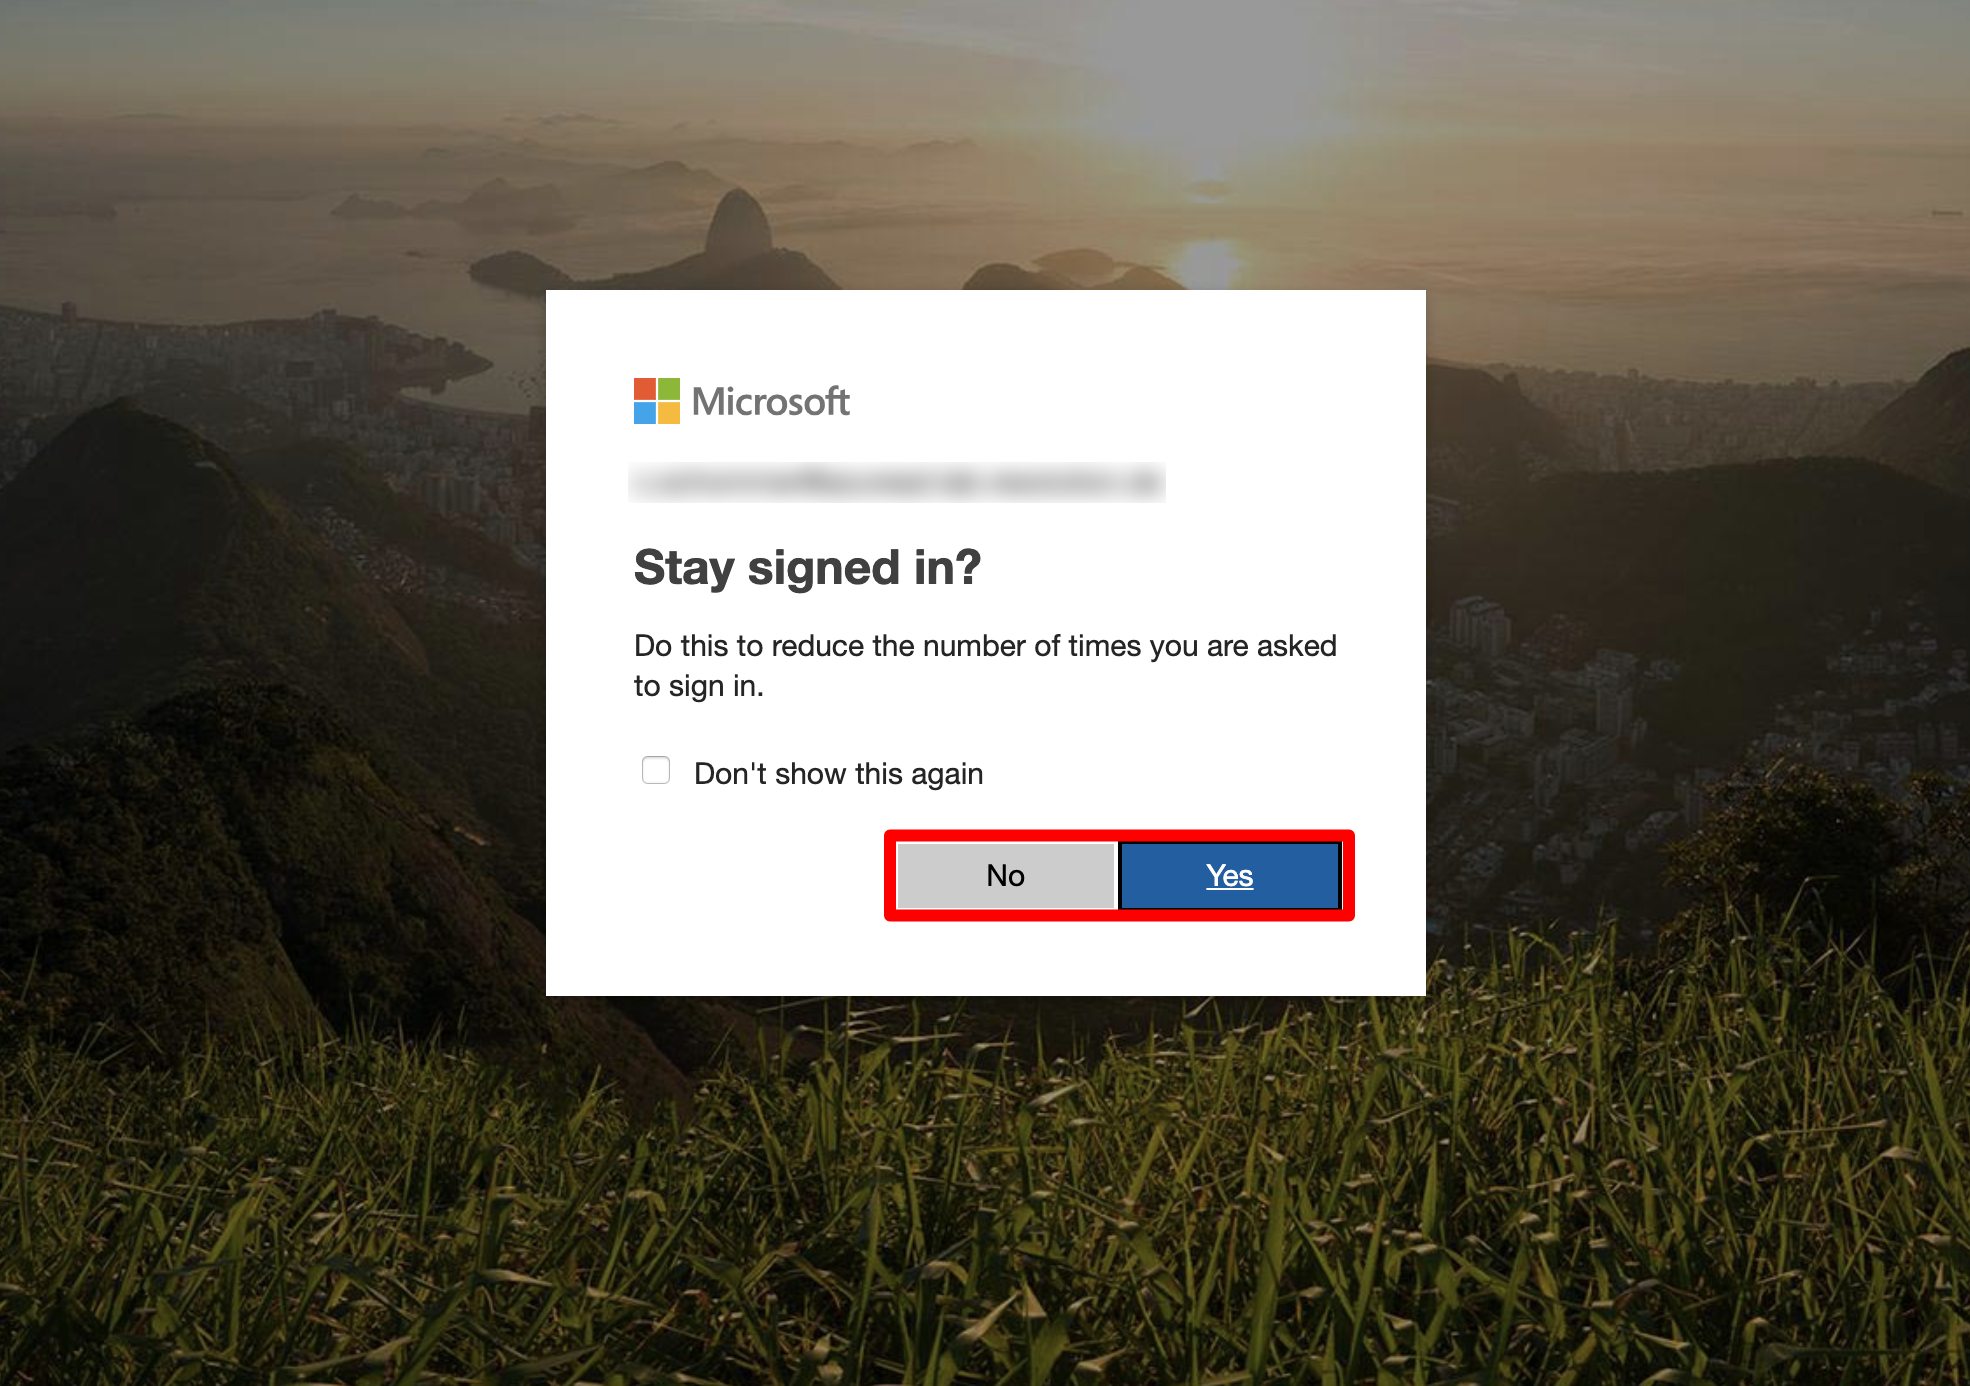
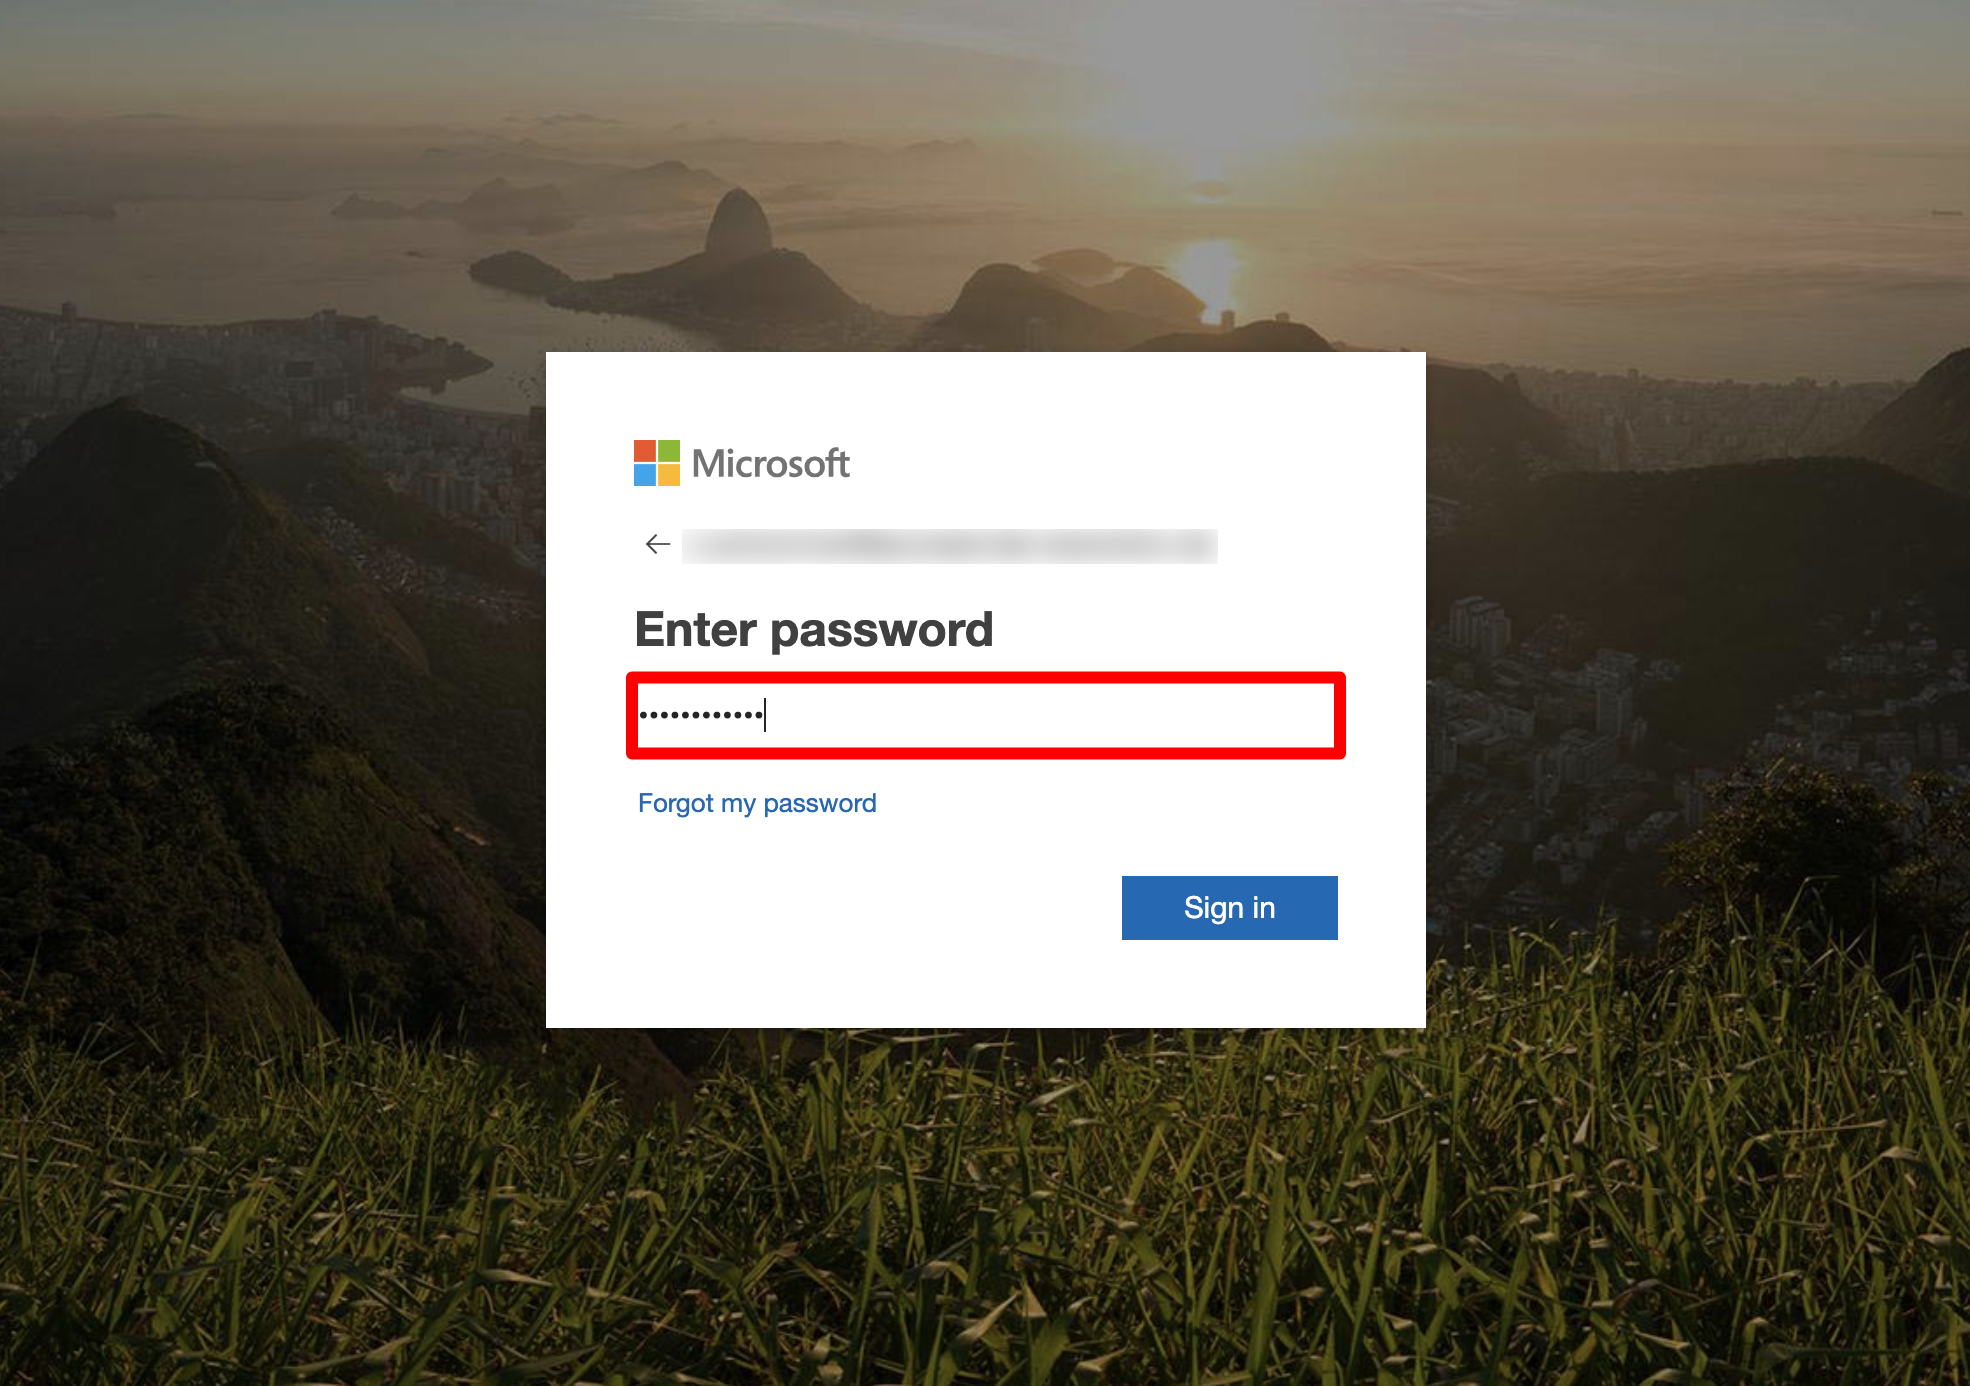
If everything worked fine, you will log in into your Atlassian product. In the other tab/browser in which you were configuring the SAML SSO plugin, you can see also the "SUCCESS" status, if everything worked as expected. Click Next to proceed.
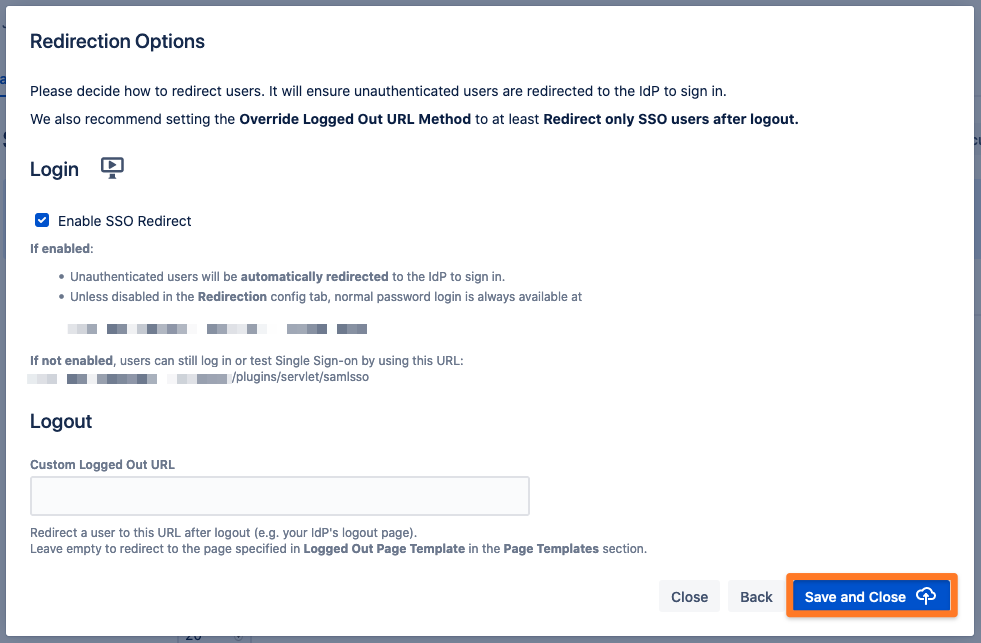
SSO Redirection
As a last step, you can set the Enable SSO Redirect option. If set, all users will be redirected to Single Sign On, thus they will be logged in via the IdP. Click on Save & Close to finish the configuration.