PingOne with Manual Provisioning
Log In as Administrator (you should be in your Home environment now)
Switch to your Administrators Environment
First we want to add a SAML App, we need to choose 'Connections' and '+ add Application'
Select an Application type → Web App → SAML Configure
Goal
After completing this setup guide, you will have setup PingOne with Manual Provisioning and your Atlassian Server or Data Center product for the SAML SSO app. Additionally, you will test SSO and enable the SSO redirection.
Prerequisites
To use the SAML SSO app with PingOne, you need the following:
An PingOne subscription
A (trial) subscription for the SAML SSO app for Server or Data Center
Admin access to your Atlassian product
Users are already available in Jira and PingOne.
Step-by-Step Setup Guide
Install the SAML SSO App for Server or Data Center
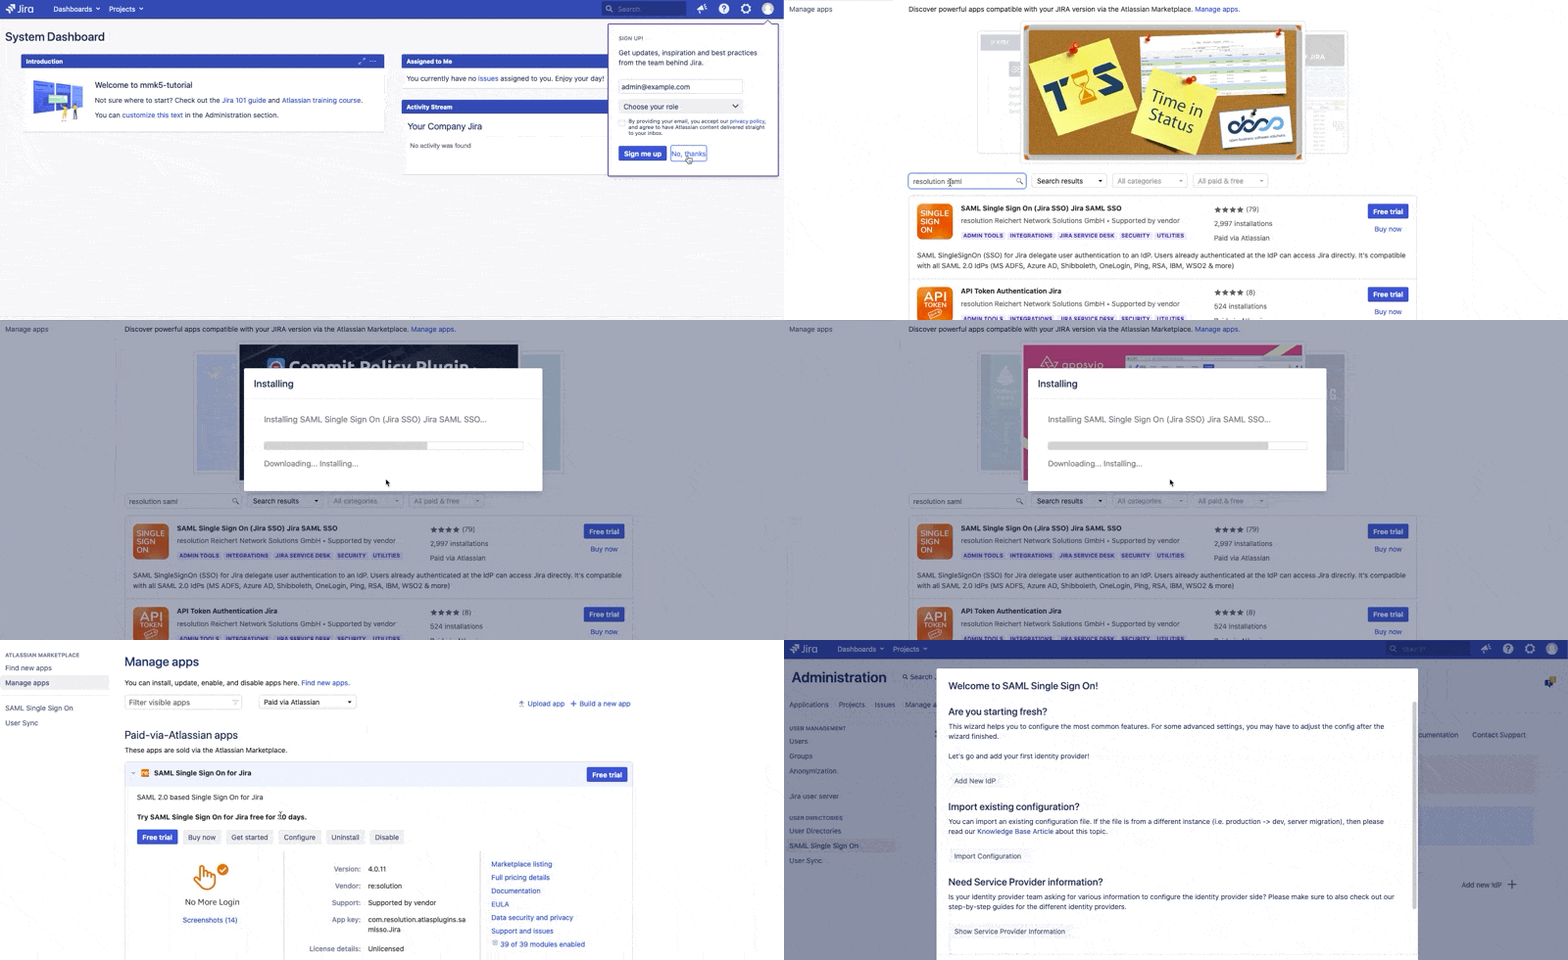
In your Atlassian product, open the in-product marketplace as described in the Atlassian documentation.
Search for "resolution saml" and click "Install" for SAML Single Sign On (SSO) by resolution Reichert Network Solutions GmbH.
After the installation is complete, click on Manage, then choose Configure.
Now, you are on the Add-on / app configuration page and the first step of the setup wizard will appear.

First Steps - Wizard
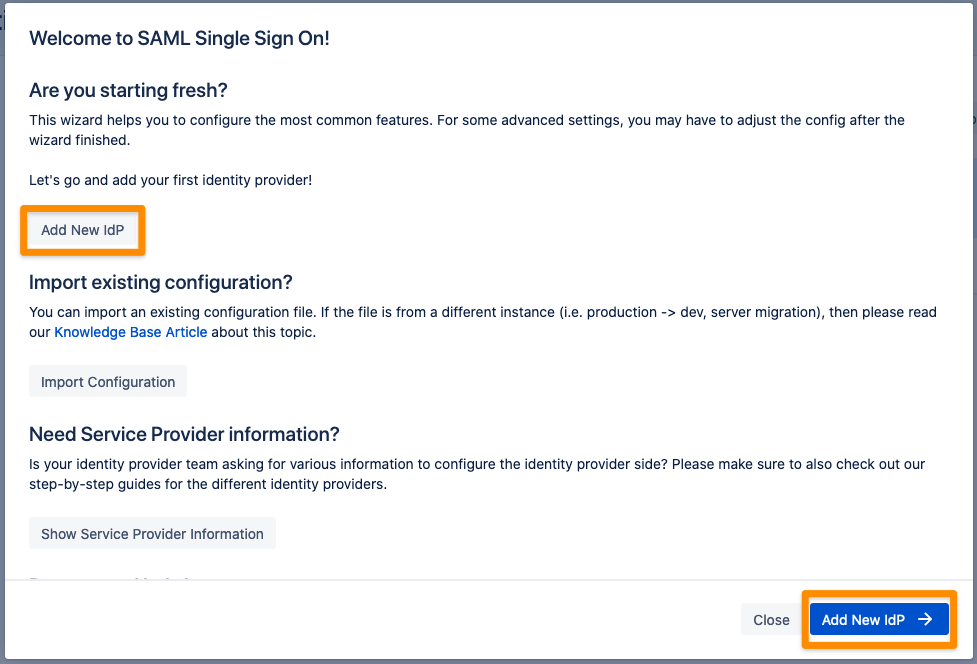
After you clicked "Configure", the Wizard will be triggered. If not, or if you want to add another Identity Prover (IdP) to your existing configuration, click on "+ Add IdP". This guide assumes, that there is no IdP configured.
The Wizard greets you with information, click on "Add new IdP" to proceed.

