Sign in with Apple with Manual Provisioning
Goal
After completing this setup guide, you will have set up Sign in with Apple with manual provisioning and your Atlassian product for the SAML SSO for Atlassian Server or Data Center app. Additionally, you will enable the SSO redirection and test SSO.
If you need help, please reach out to us at https://www.resolution.de/go/support. You can also book a free meeting via https://www.resolution.de/go/calendly.
Prerequisites
To use the SAML SSO app for Atlassian Server or Data Center with Azure AD, you need the following:
A paid Apple Developer Account
A (trial) subscription for the SAML SSO app
Admin access to your Atlassian product
Step-by-Step Setup Guide
Install the SAML SSO App
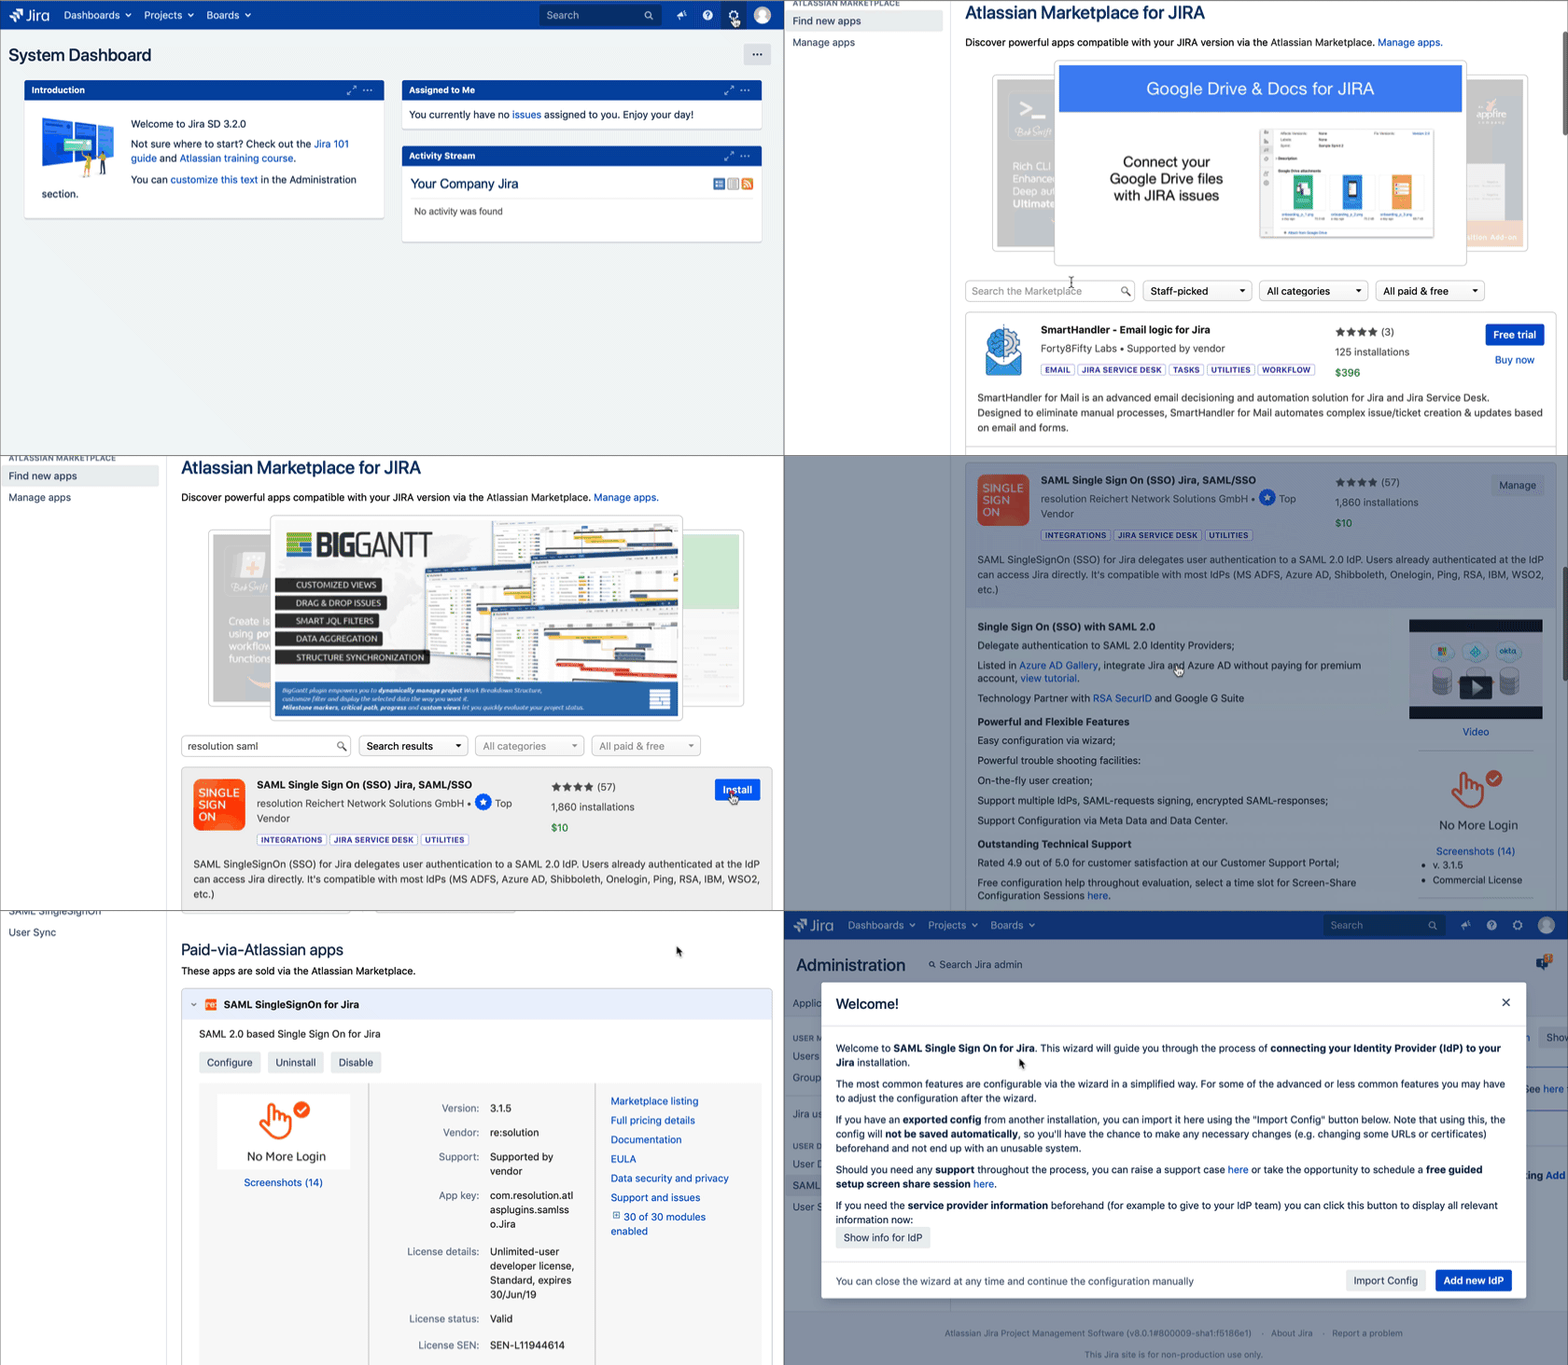
In your Atlassian product, open the in-product marketplace as described in the Atlassian documentation.
Search for "resolution saml" and click "Install" for SAML Single Sign On (SSO) by resolution Reichert Network Solutions GmbH.
After the installation is complete, click Manage Apps/Addons.
Configure SAML SSO
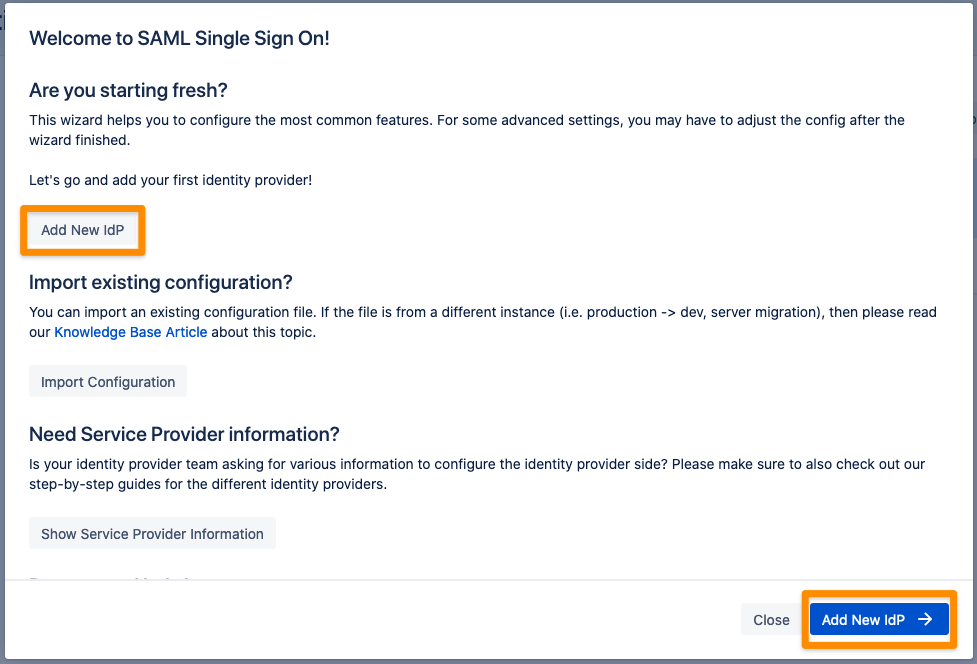
After you clicked "Configure", the Wizard will be triggered. If not, or if you want to add another Identity Prover (IdP) to your existing configuration, click on "+ Add IdP". This guide assumes, that there is no IdP configured.
The Wizard greets you with information, click on "Add new IdP" to proceed.
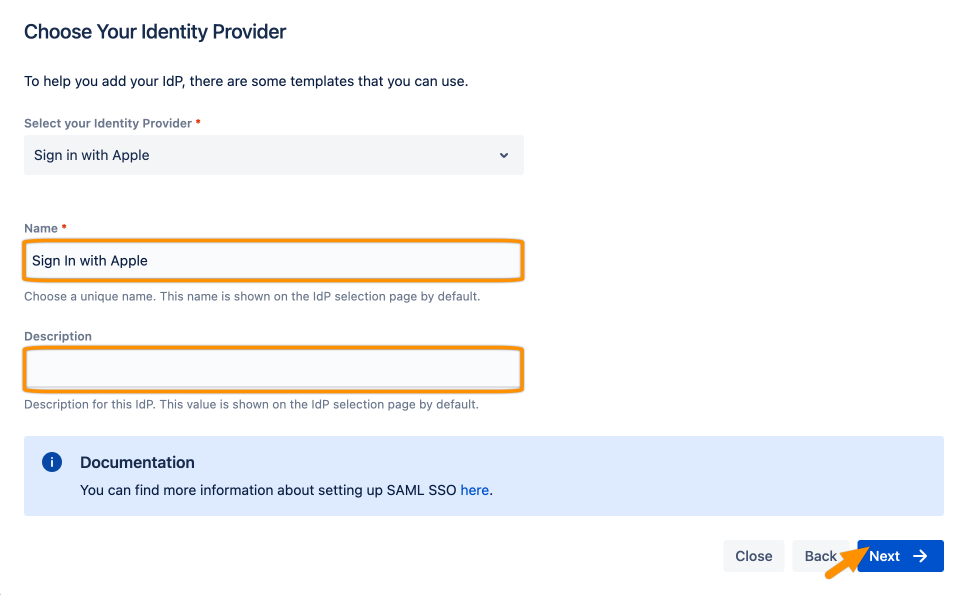
Choose Sign in with Apple for your Identity Provider and click Next.
Copy the Callback URL and keep it ready for the next step. Click Next.

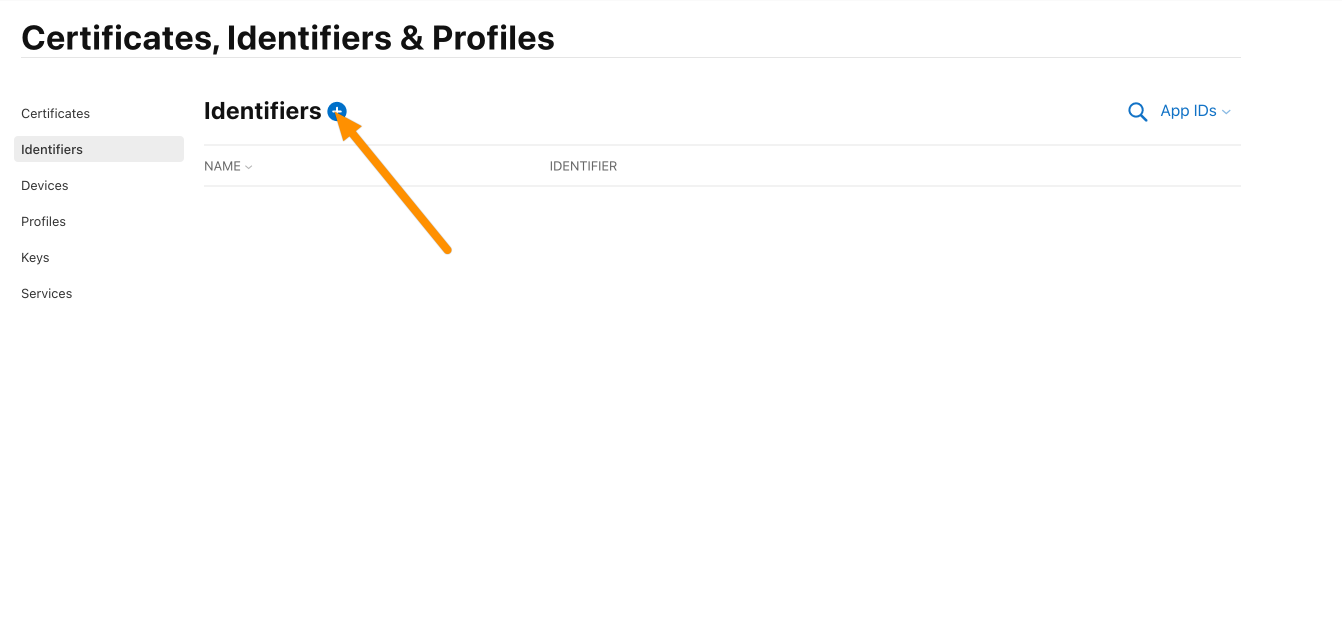
Go to https://developer.apple.com/account/resources/identifiers/list and login in with your Apple Developer Account.
Click the plus icon next to Identifiers.
Choose App IDs and click Continue.
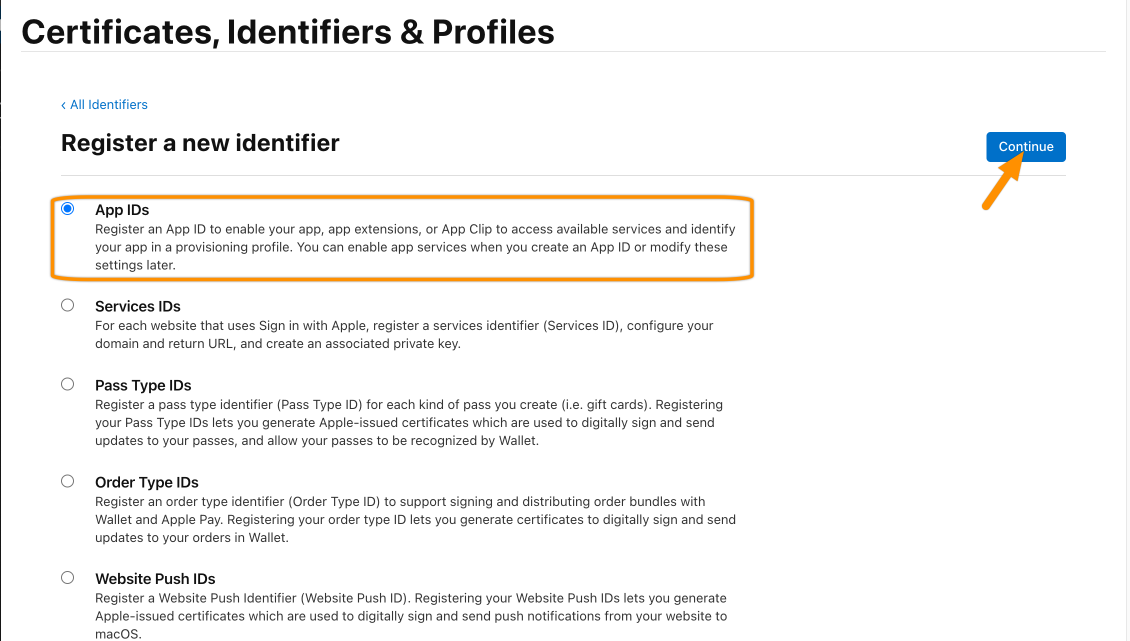
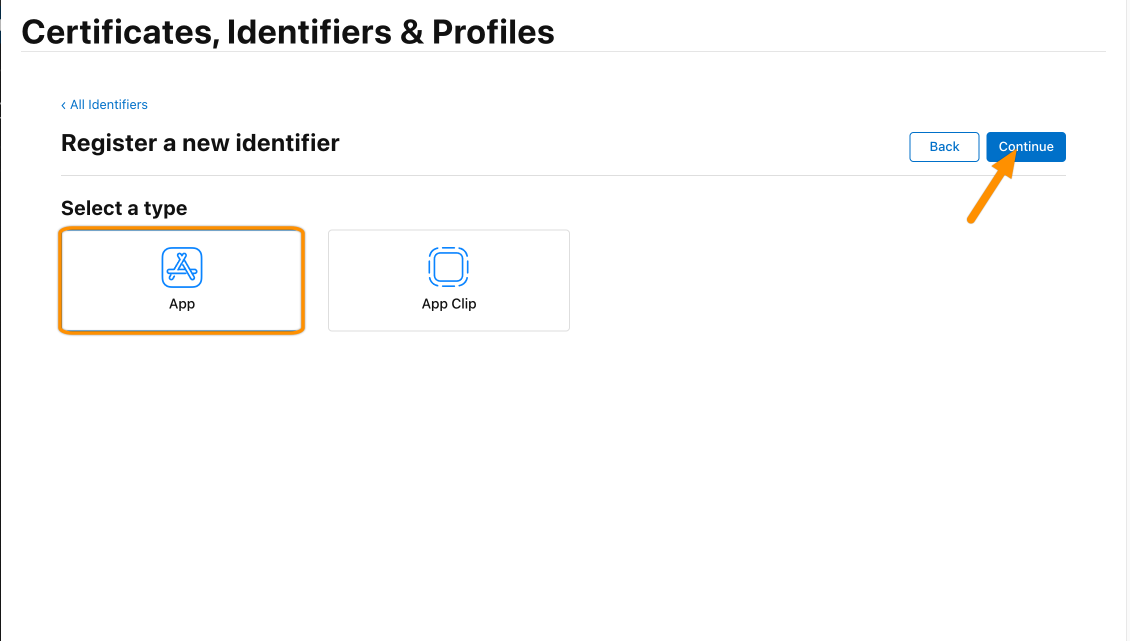
Choose App and click Continue.
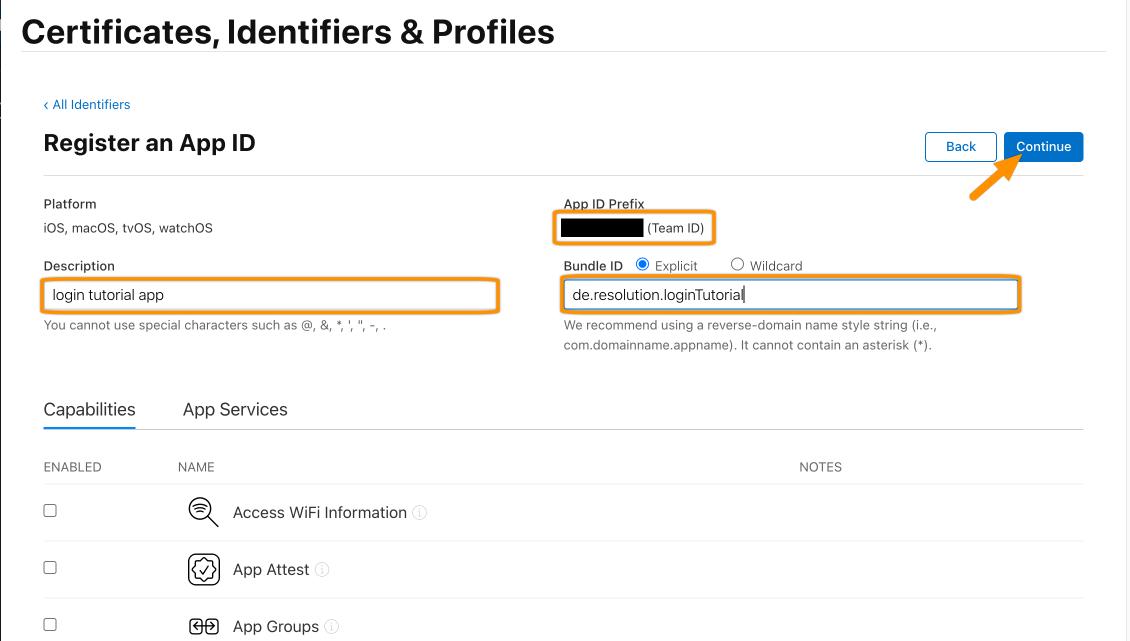
Enter a Description, and give a Bundle ID. For a later step, please copy the Team ID to a your favorite text editor (the identifier in front of "(Team ID)").
Then click Continue.
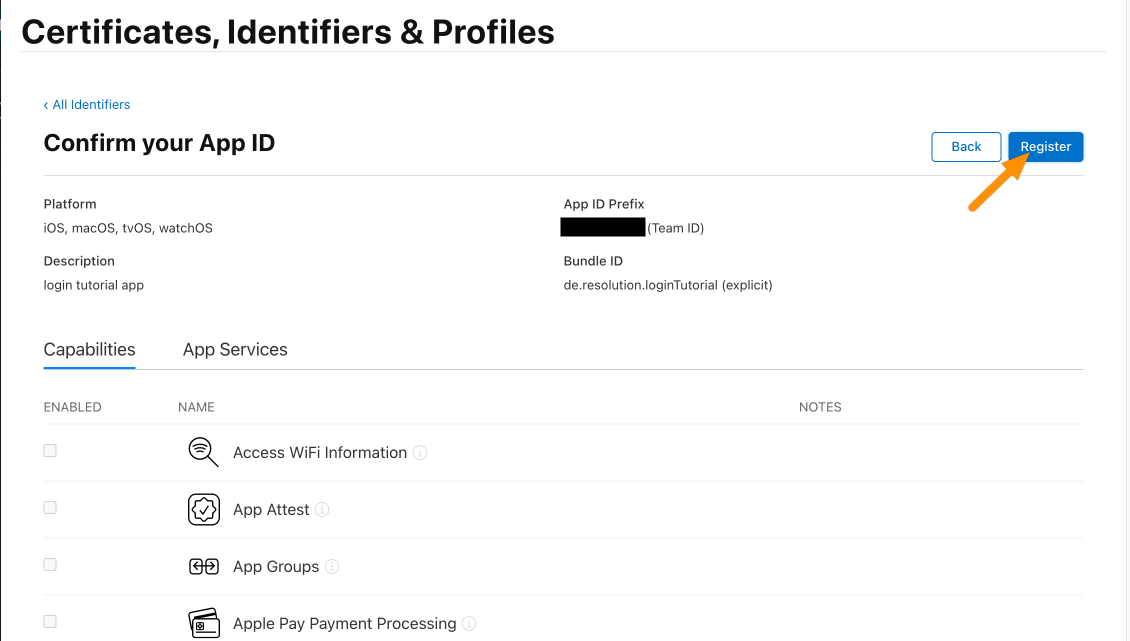
Finally, click Register. For the next step, we will create a Service ID.
You will be redirected to the Identifiers table. Click App IDs and click Services IDs.
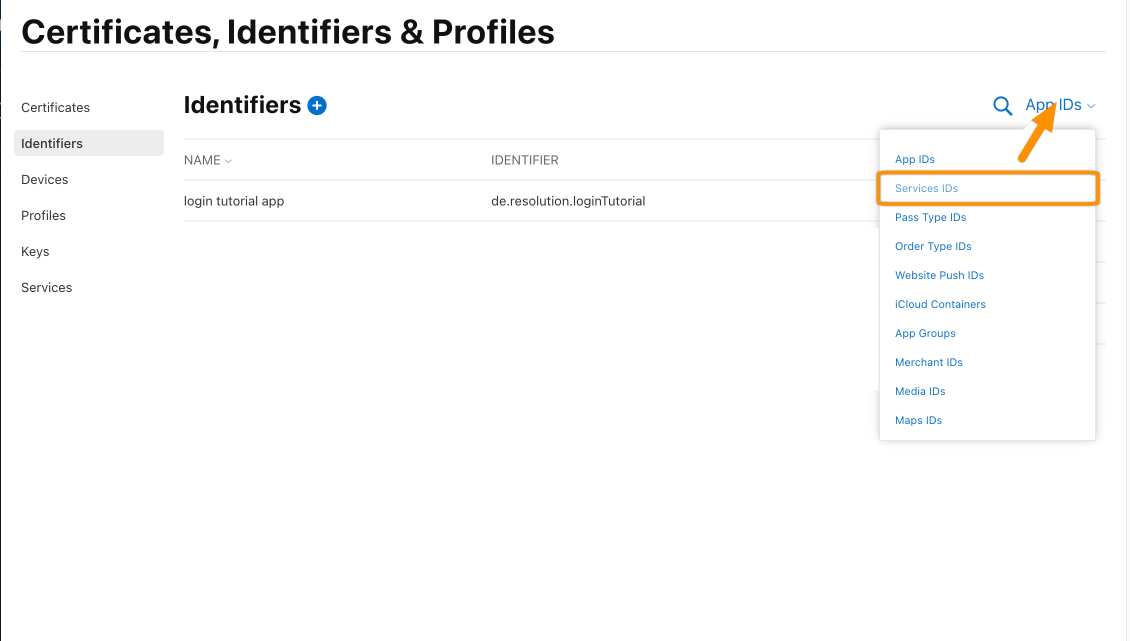
Click the plus icon again.
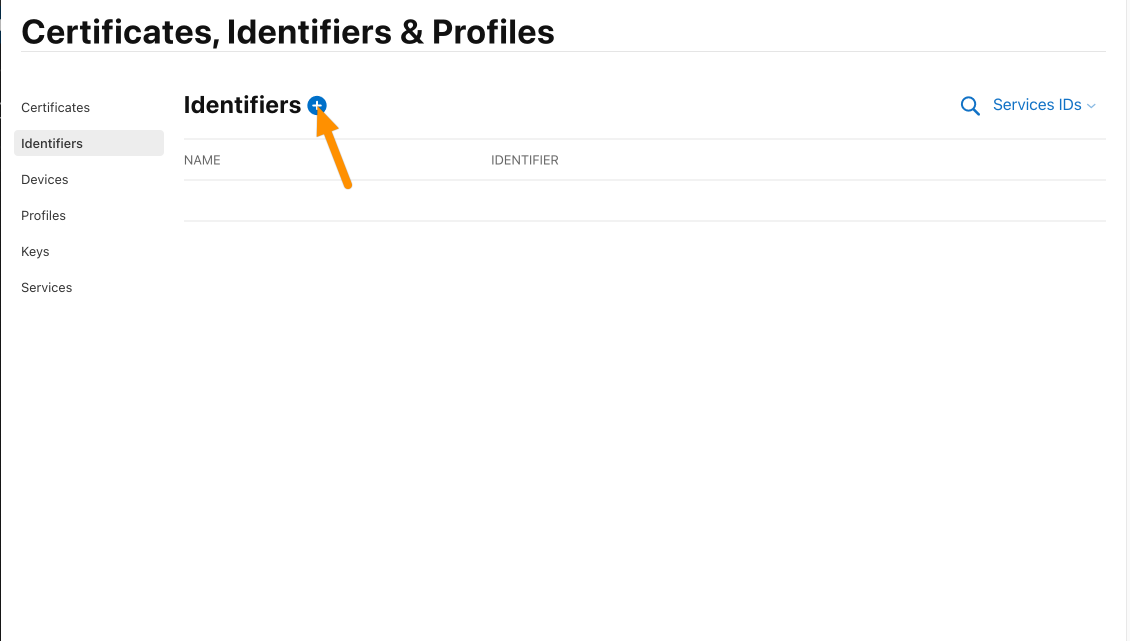
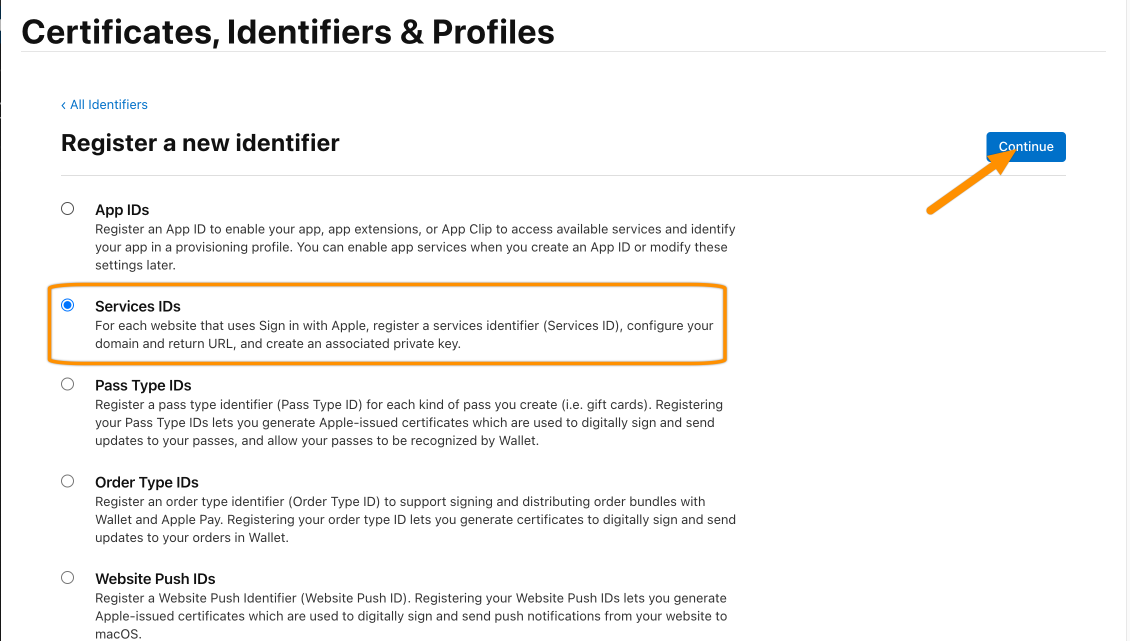
Make sure that Services IDs is selected and hit Continue.
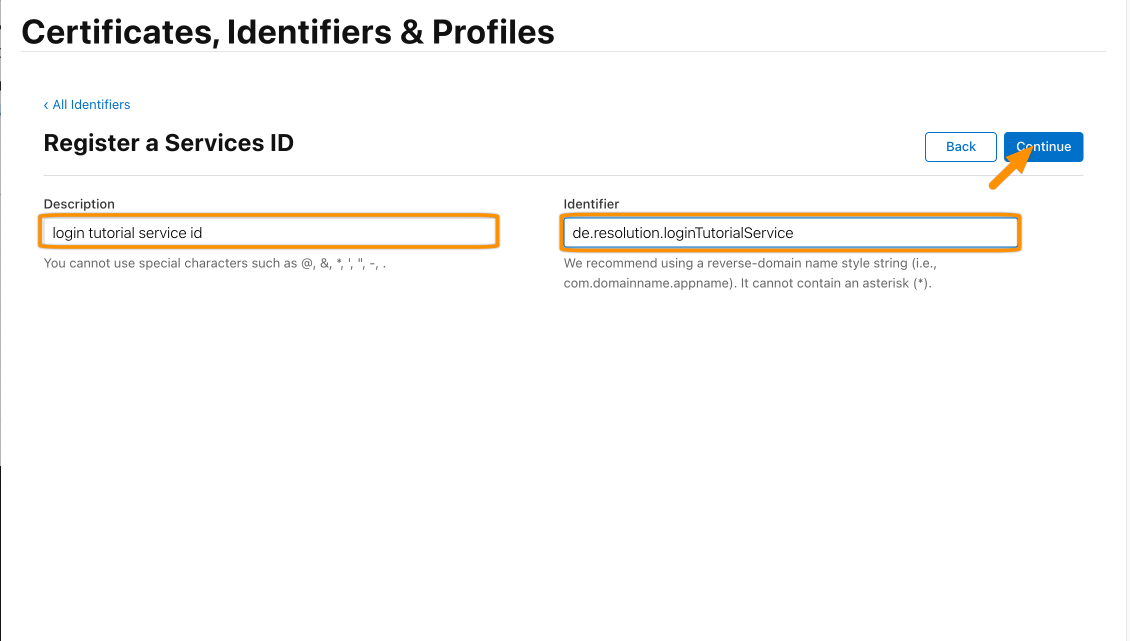
Give a description and provide a unique identifier (it will complain otherwise). Copy the identifier to your text editor for later, this will be the ClientId.
Click Continue.
Click Register to continue.

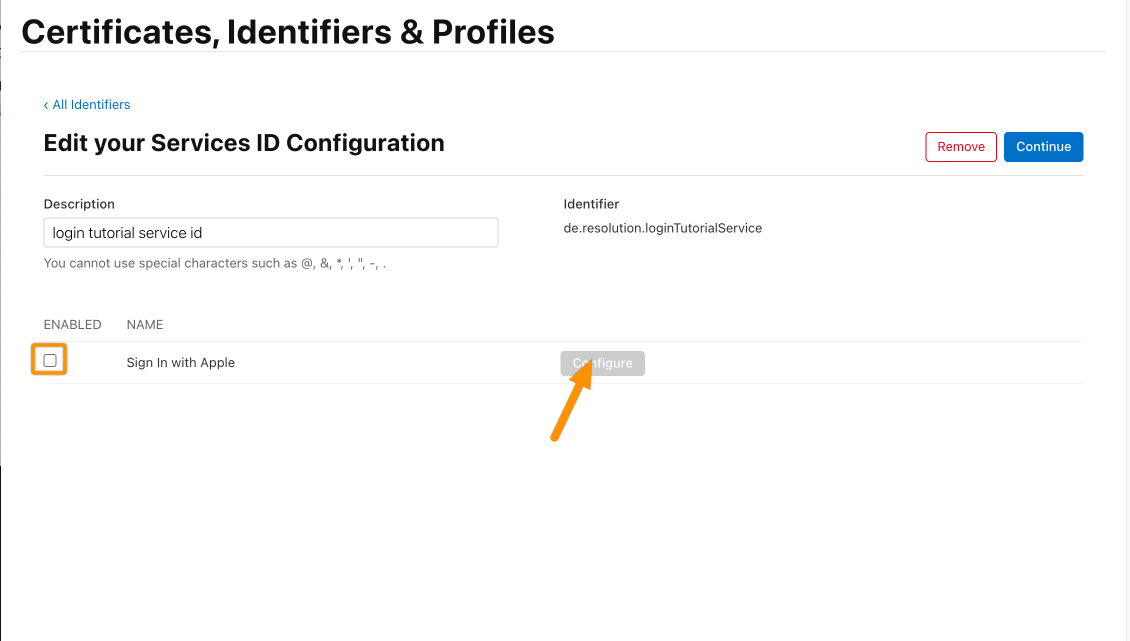
For the next step, click the checkbox next to Sign In with Apple and afterward, click Configure.
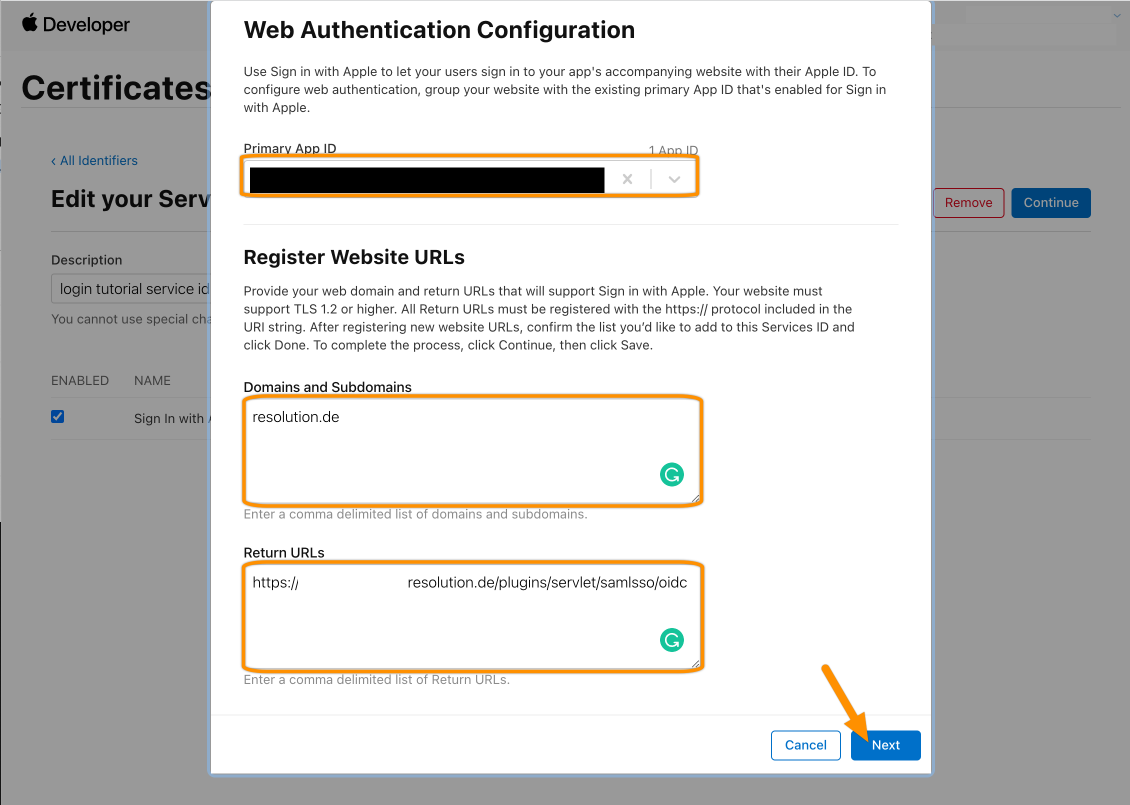
Choose the Primary App ID and enter the domain of your Atlassian product. For the Return URLs, enter the Callback URL fro the wizard.
Then click Next.
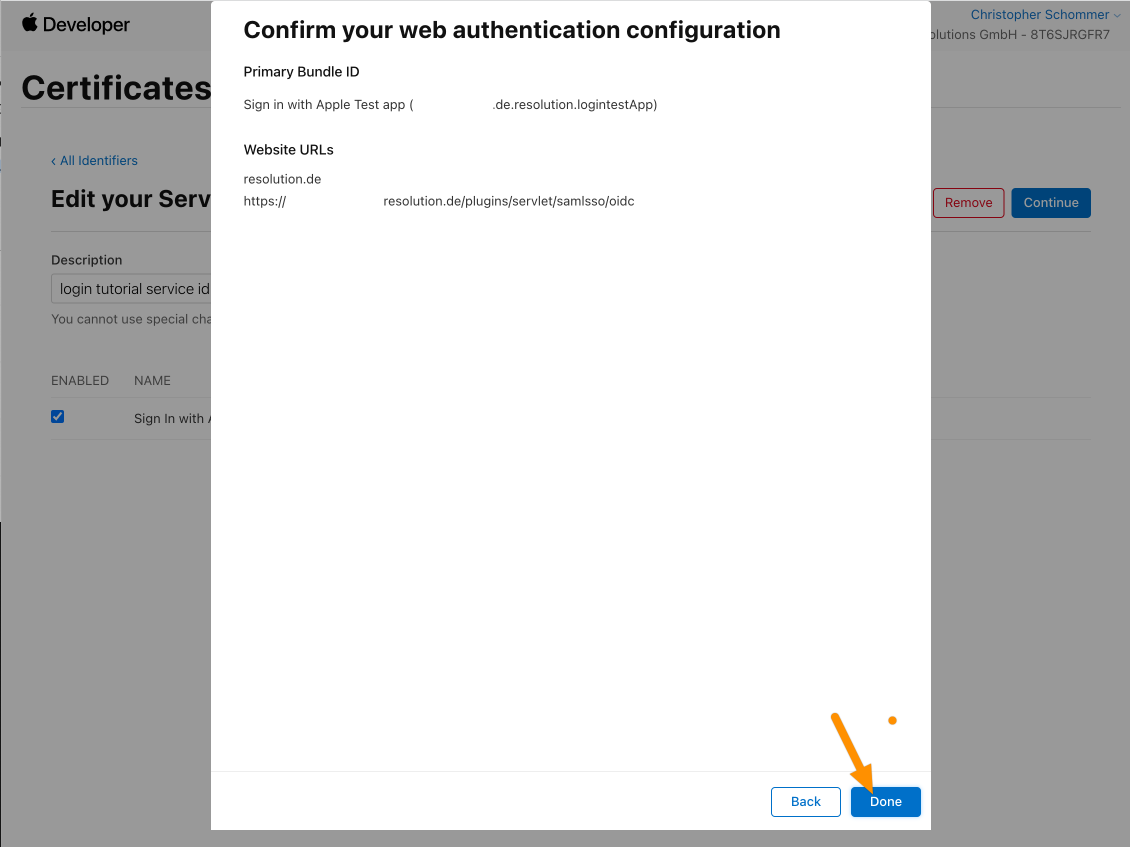
Click Done.
Click Register to

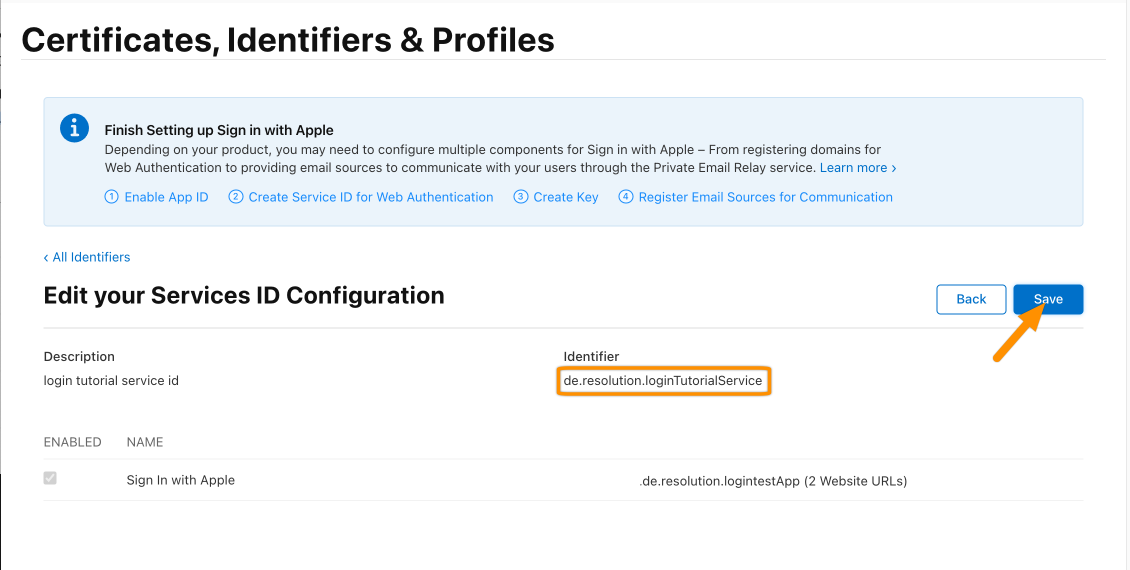
Click Save. (Don't forget to save the Identifier somewhere for later).
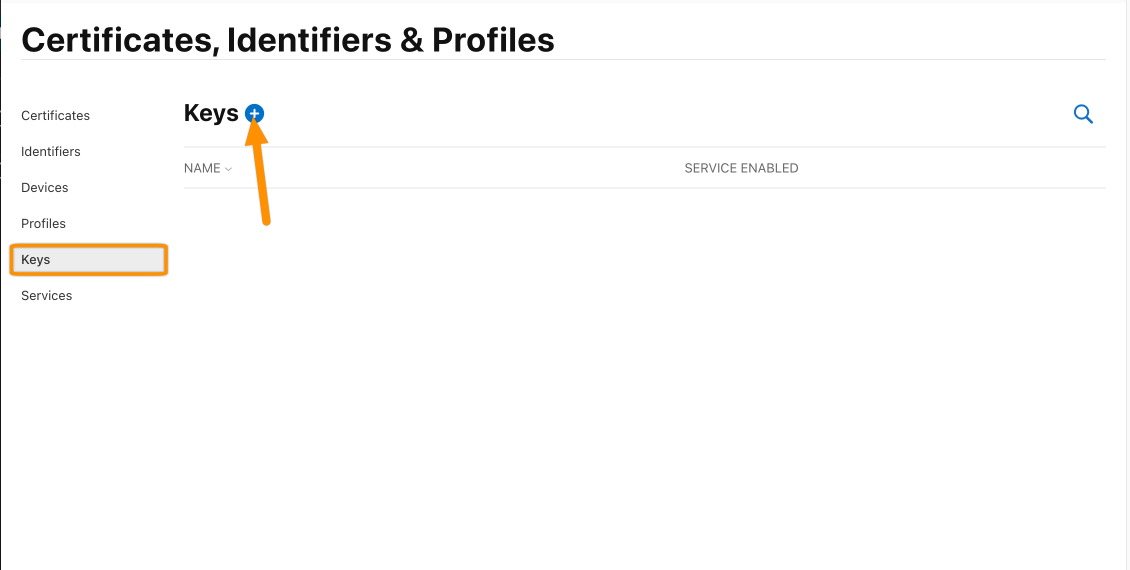
To create the Client Secret, we need to create a Key first. Click Keys from the left panel and hit the plus icon.
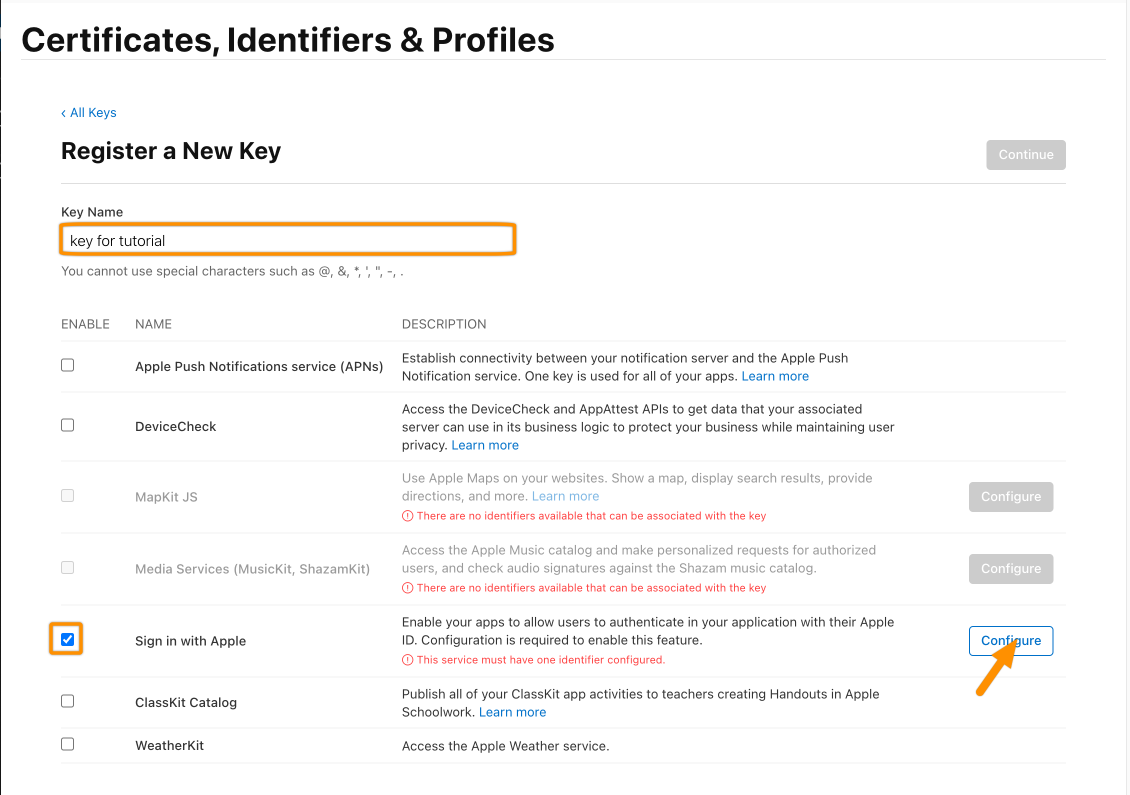
Enter a Key Name, select Sign in with Apple , and hit Configure.
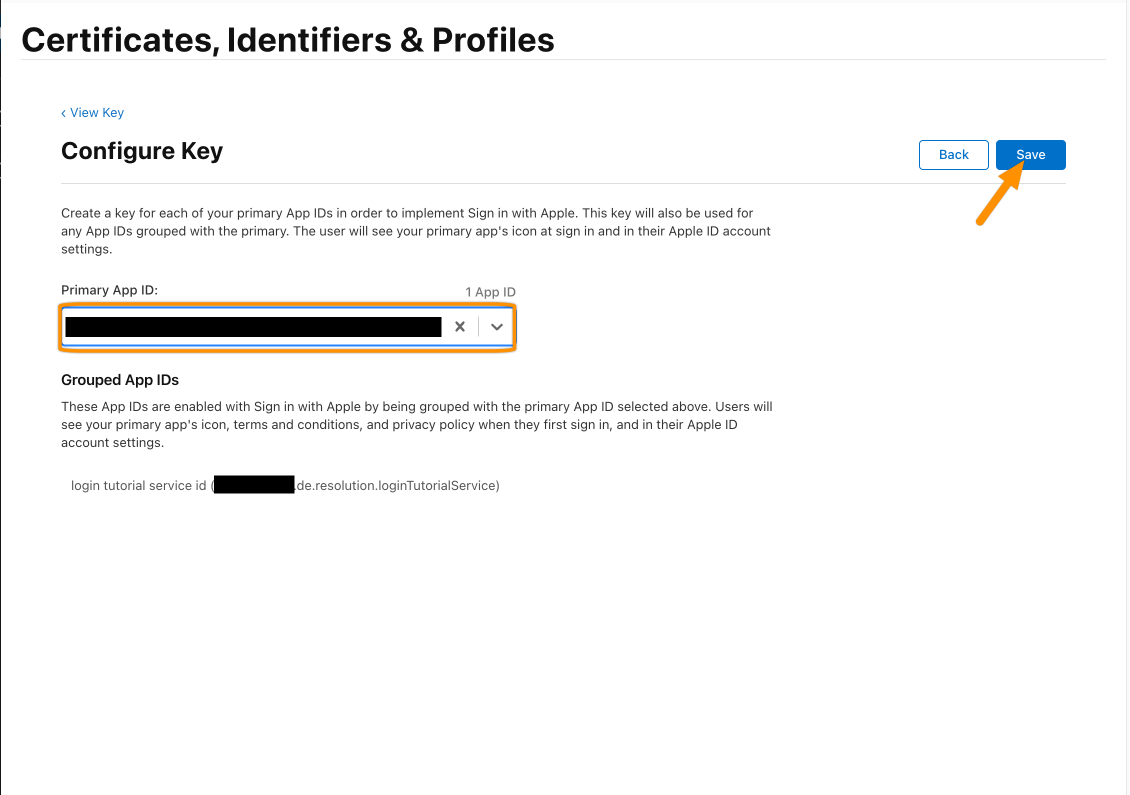
Choose the Primary App ID again and click Save.
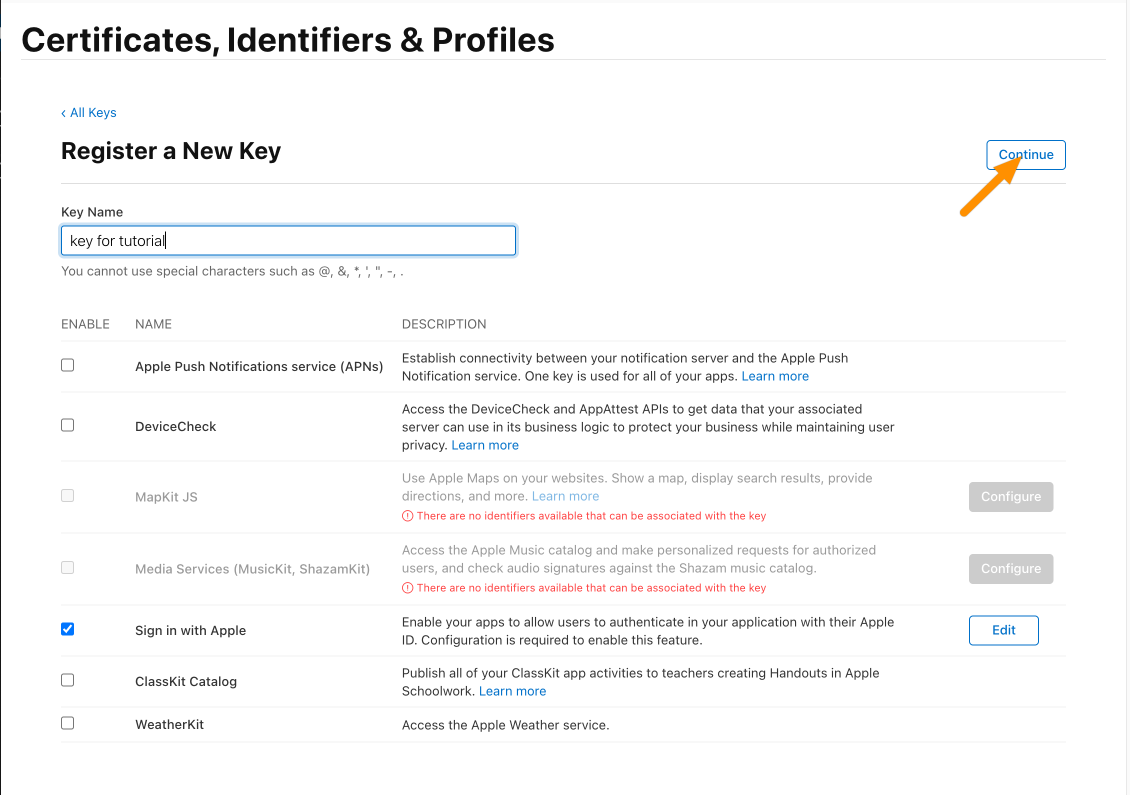
Click Continue.
Click Register.
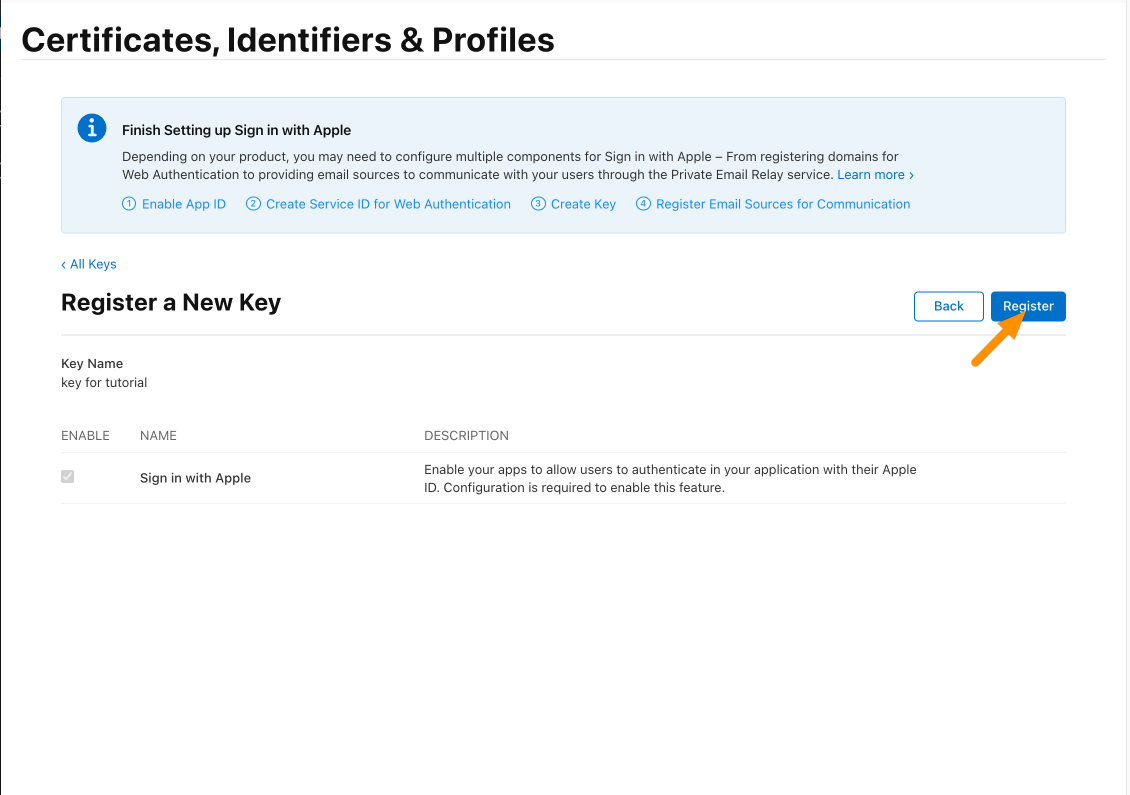
Copy the Key ID into your favorite text editor. Next, click Download and save the private key to a safe environment. This key will be used to create the client secret. Click Done afterwards.
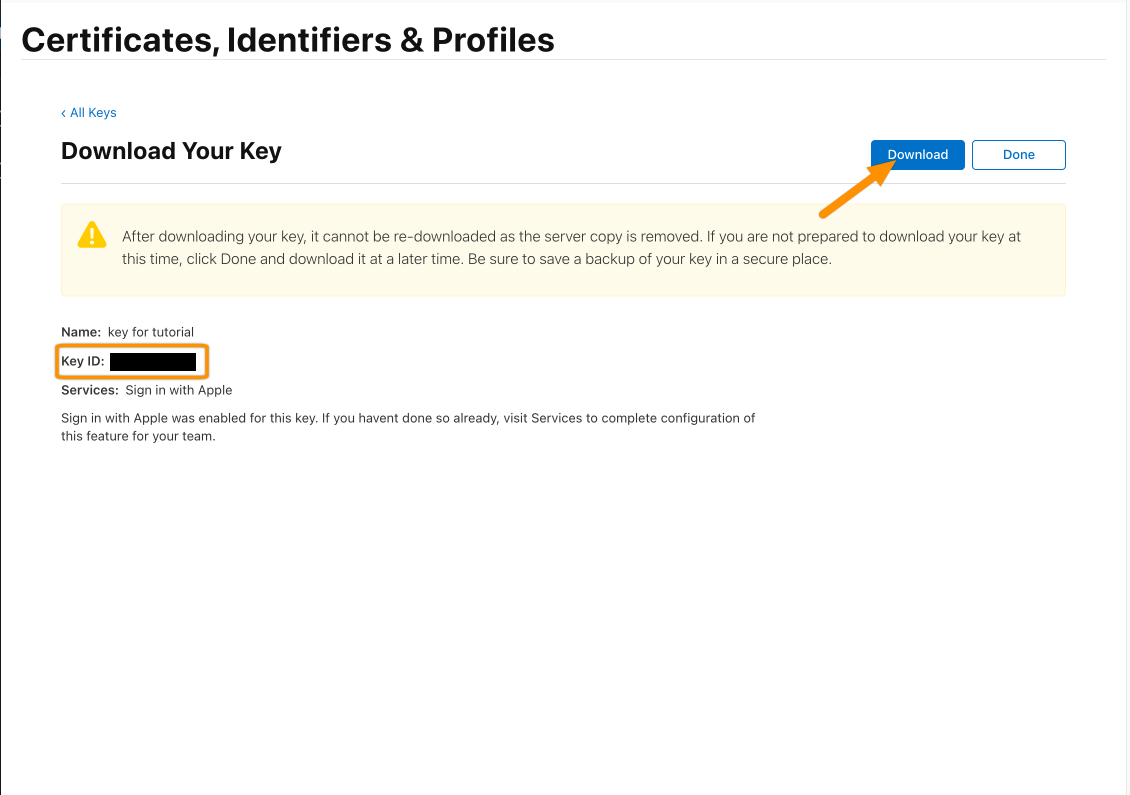
After these steps, you should have the Key ID, Team ID and ClientID.
Next, we must create a client secret. This works by creating a JWT token and signing it with the issued private key from Apple during the setup.
We provide a python script to do this. This script needs the following:
python3
cryptography
pyjwt
When installed python3, you can install the needed packages via pip3:
- pip3 install pyjwt cryptography
- import time
- import jwt
- privateKey = """-----BEGIN PRIVATE KEY-----
- your private key
- -----END PRIVATE KEY-----"""
- maxValidiyInDays = 180 # in days - 180 seems to be the max
- clientId = "your client id"
- teamId = "your team id"
- kid = "your key id"
- now = int(time.time())
- exp = now + 86400 * maxValidiyInDays
- result = jwt.encode( {
- "iss": teamId,
- "iat": now,
- "exp": exp,
- "aud": "https://appleid.apple.com",
- "sub": clientId
- },
- privateKey, algorithm="ES256",
- headers={"kid": kid},)
- print("Copy the following and add it to the SAML SSO configuration as the Client Secret:\n" + result)
- print("\n\nYour secret will expire at: " + time.strftime('%Y-%m-%d %H:%M:%S', time.localtime(exp)))
- print("Make sure to regenerate the secret before expiry and update the configuration!")
The generated client secret is valid for 180 days. Please make sure that you regenerate the secret before the time that is given by the script
Download the script and save it to your Computer. Next, open the .p8 file downloaded from Apple. You can use a text editor for this. Copy the key:

Now, open the python script and enter the needed data:
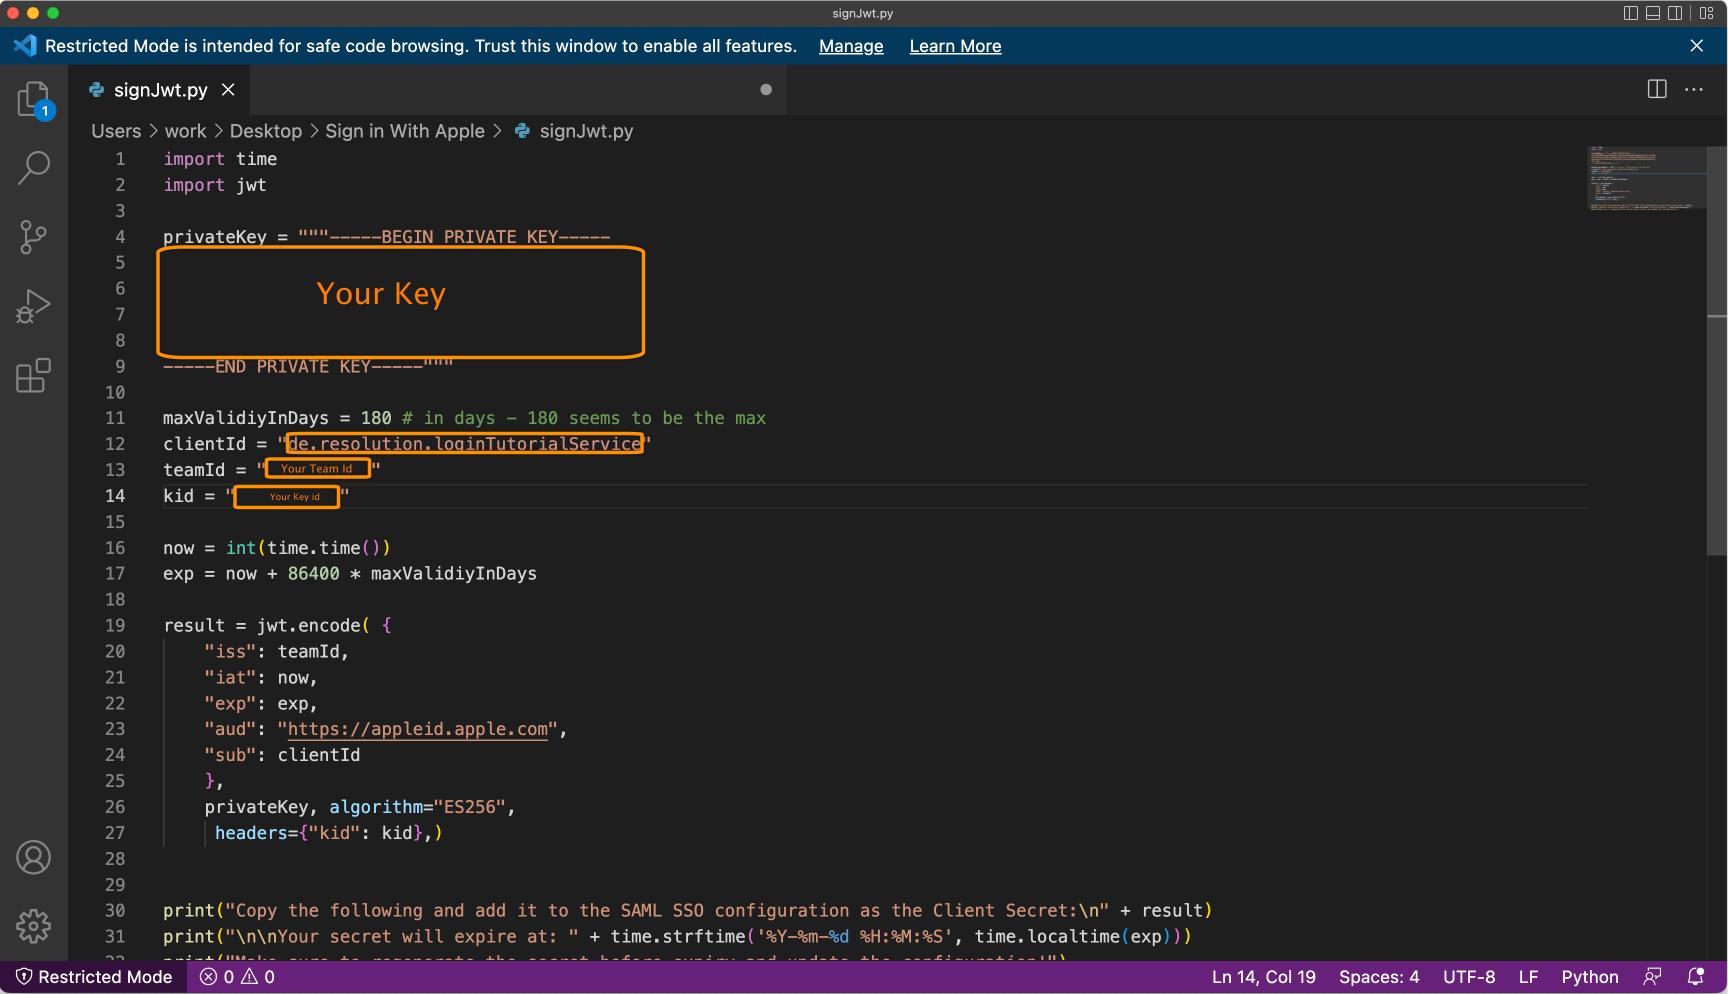
Enter the private key, the clientId (identifier from steps before), the teamId, and the keyId (kid).
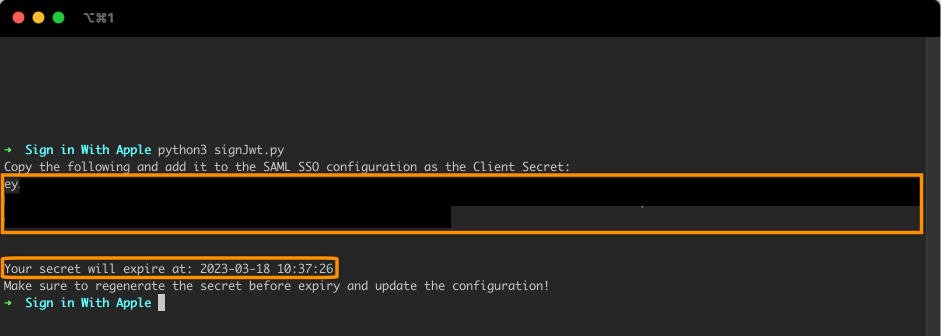
Save the script as "signJwt.py", and run it via
- python3 signJwt.py
Copy the calculated client secret (it will start with "ey"). Please also note the expiry date below. Make sure to rerun the script before this time and replace the old secret in the Saml SSO configuration.
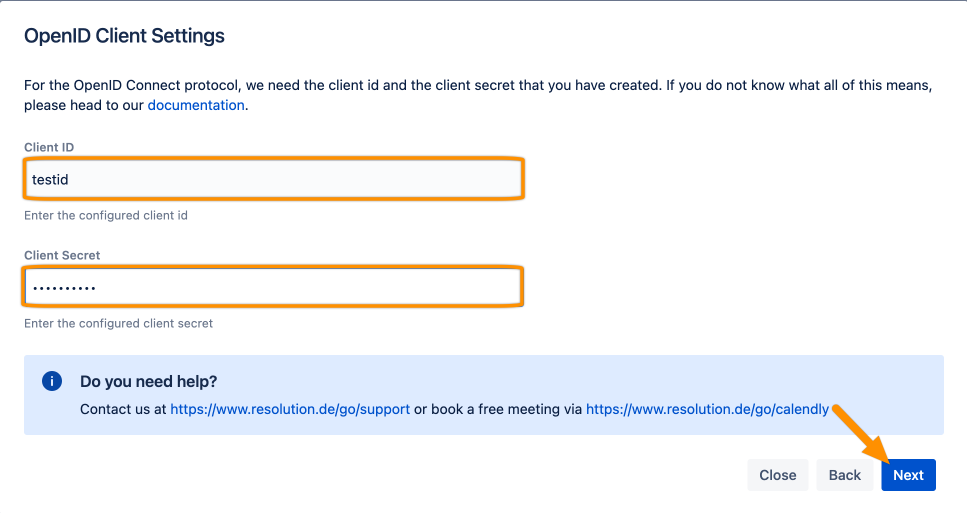
Enter the Client ID and the calculated Client Secret, and click Next.
Hit Import Metadata.

Click Save and Close.

That's it!
