
Quick Setup
Get your service portal up and running in under a minute — no deep config required.
This guide walks you through the default setup using our predefined workspace template. If you need more advanced options later, check the Administrator Guide.
Open the Service Desk Settings View
When opening the Service Desk app view on a board for the first time, a dialog will prompt you to authorize the app.
The dialog shows a summary of the required permissions, such as reading and modifying board data, creating webhooks, and posting updates on your behalf.
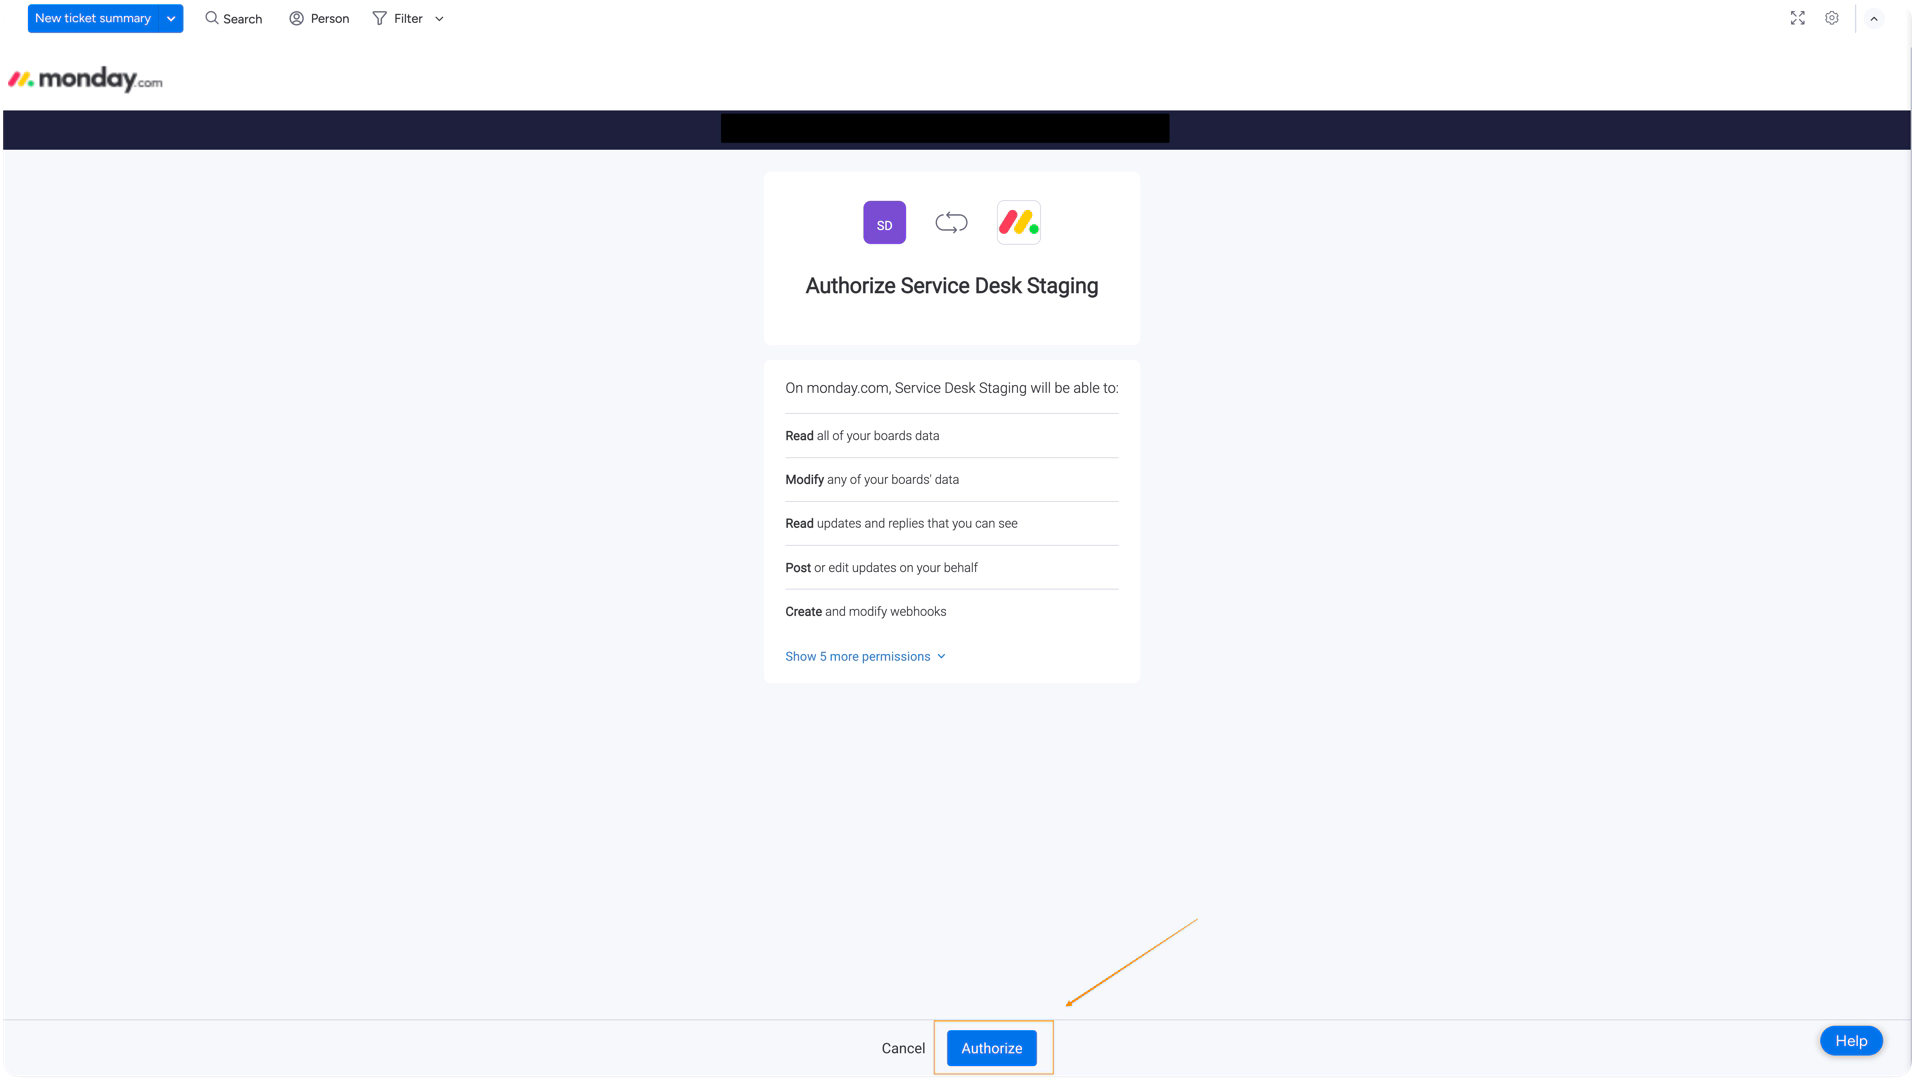
Carefully review the requested permissions, then click Authorize to proceed.
Once authorized, you’ll be taken to the Service Project Summary tab. This initial view acts as your central dashboard for enabling the service portal, managing licenses, and viewing key configuration details.
*screenshot of that initial tab
The user who first installs the app and accesses the settings is automatically assigned as the Service Project Admin. This role allows full access to configure the app, manage licensing, and assign other users.
Details about licensing and available roles can be found in the Administrator Guide.
Set the Service User
To continue, go to the Service Project tab. You can either click the link in the tooltip on the Service Project Summary view or open the tab directly in the navigation bar.
The Service User is a monday.com account that performs actions on behalf of your customers — for example, when a ticket is created or updated via the portal. These actions are technically executed by the Service User, but agents will still see the customer’s name and message in the Ticket View.
We recommend that the admin who installed the app sets themselves as the Service User for now. This makes the setup process faster and easier.
*screenshot of the “set service user” section
You can update the Service User later as needed. Details on how to do this are explained in the Administrator Guide.
Complete the Portal Configuration
After assigning the Service User, the remaining configuration options appear in the Service Project tab. Most fields are prefilled when using the template. Only a subdomain must be entered manually to activate the portal.
Required Settings
Subdomain
You must enter a unique subdomain to make the portal accessible to customers.
This will generate your portal link in the format:https://<subdomain>.serviceportalhub.com
The subdomain you choose also defines the default sender address for customer email notifications.
Emails will be sent from:noreply@<subdomain>.serviceportalhub.com
Recommended Settings
These settings are not mandatory, but we strongly recommend setting them before going live to avoid email delivery issues and improve the customer experience.
Portal name and logo
A default logo is provided. You can replace it and optionally define a portal name.
Some email providers may block or filter messages that lack branding. Setting at least one of these helps ensure your emails reach the inbox.
Before you can enable the portal, make sure to save changes in both the Service Project tab and the Field Mappings tab.
Even if the fields are already prefilled, you still need to click Save once in both places.
Once that’s done, you can head back to the Service Project Summary tab and switch the portal on.
You’re ready to go live and if needed, you can always return later to configure additional options.
Optional and Customizable Settings
These settings are prefilled or optional and can be updated now or later, depending on your preferences:
Customer name collection
By default, the service portal collects the customer's full name in a single field during account creation. This name is stored in the main item column of the customer board. You can switch to separate first and last name fields or choose not to collect names at all. Column mapping can be adjusted in the settings.
Resource links
You can add homepage, documentation, privacy policy, or terms of service links. These are displayed in the portal footer to help guide customers.
Ticket numbering
The ticket reference prefix defaults to SD, and the start number is 1. You can change both values to align with your internal tracking formats.
Email Notification Settings (Optional)
The Customer Notification Settings tab allows you to review how customers are notified when tickets are created or updated.
By default:
A system-generated email address based on your subdomain is used to send notifications
Predefined email templates are already in place for all key ticket events
No additional configuration is required to start using the portal.
If needed, you can:
Connect your own SMTP server to use a custom sender address
Adjust the content of the email templates for different ticket statuses
For advanced customization, see the Administrator Guide.
Don’t forget to save your configuration. Once saved, return to the Service Project Summary tab to switch on the portal. You’ll also find the link to your customer-facing portal there.