
Important Update Effective February 1, 2024!
Due to recent changes in Jira and Confluence, we've made the tough decision to discontinue the OpenID Connect (OIDC)/OAuth app and no longer provide new versions for the newest Jira/Confluence releases as of January 31, 2024.
This is due to some necessary components no longer shipping with Jira/Confluence, which would require some extensive rewrites of the OIDC App.
![]() Important Update! This app will be discontinued soon!
Important Update! This app will be discontinued soon!
Due to recent changes in Jira, which no longer ships with some components required for our Read Receipts app to run, we've made the tough decision to discontinue the app, as of Februar 5, 2025.
![]() Important Update! This app will be discontinued soon!
Important Update! This app will be discontinued soon!
We've made the tough business decision to discontinue the app, as of January 11, 2025.
GSuite configuration
For the following setup, it's recommended to perform it in a browser where you're just logged into the Google account you are using for configuring GSuite.
Other Google sessions might make it hard for you to walk through the setup successfully, especially when authorizing the Gsuite app from inside the connector configuration.
This page contains information for how to setup User & Group Sync and G Suite. Note, it is recommend to follow the video or the detailed User guide. If you are familiar with setting up G Suite projects, feel free to follow the Quick start guide.
Quick start guide
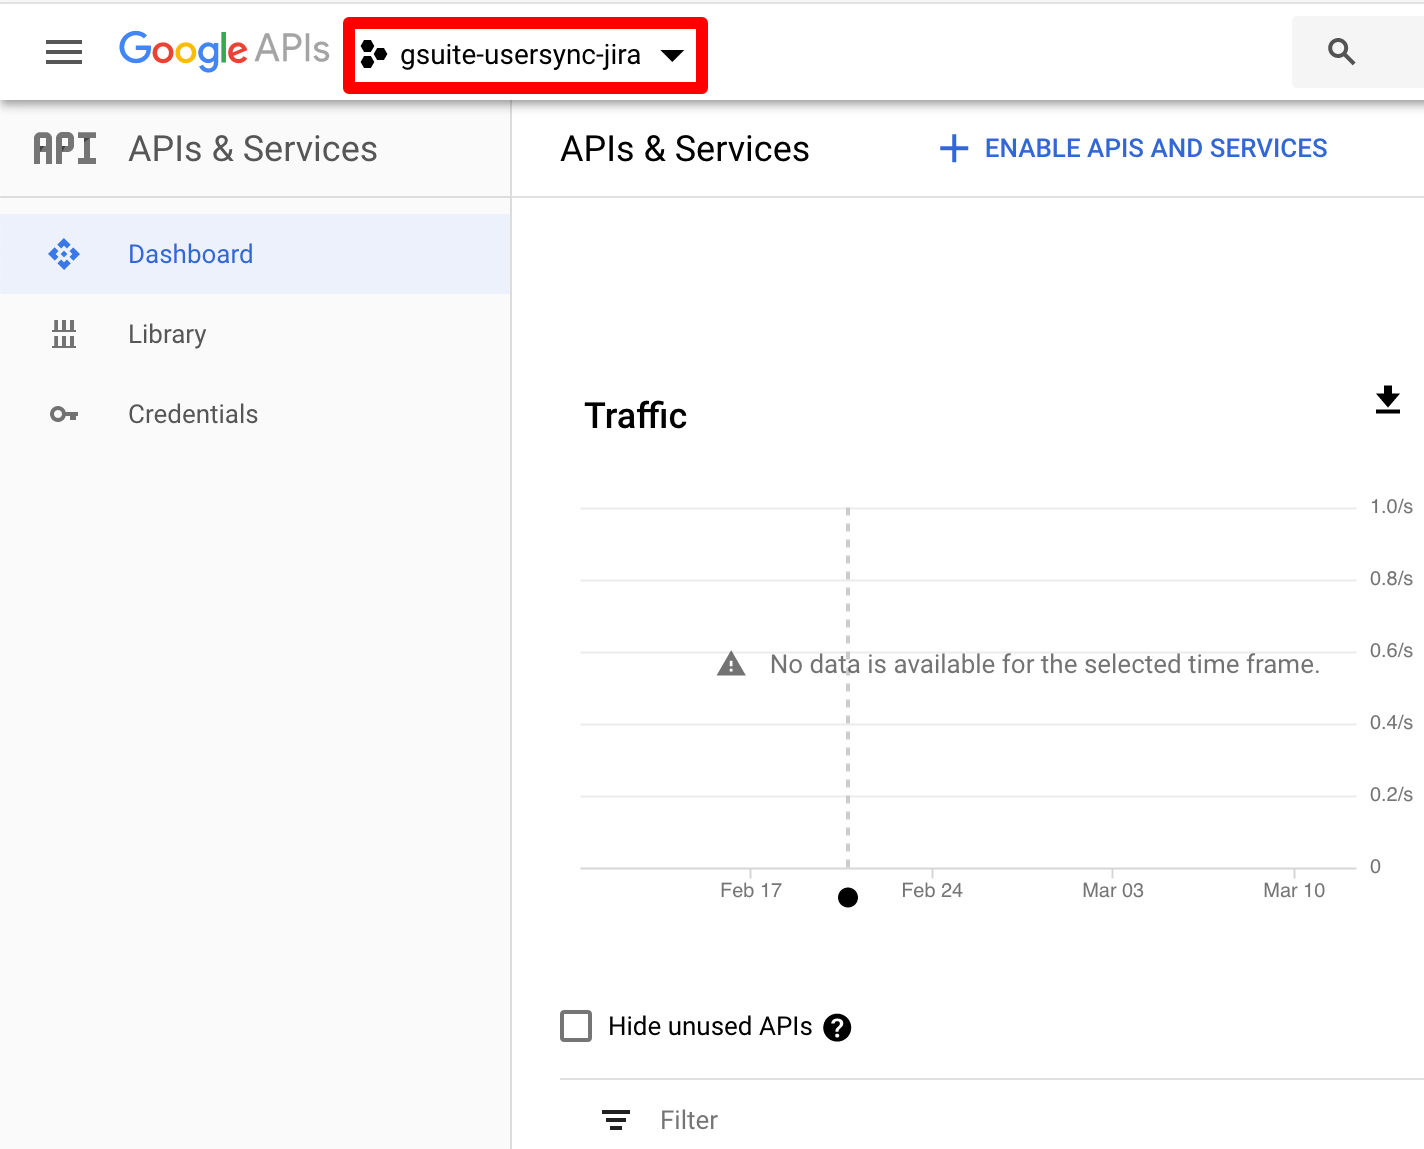
- Login to the Google API Console. Click on the current active project.
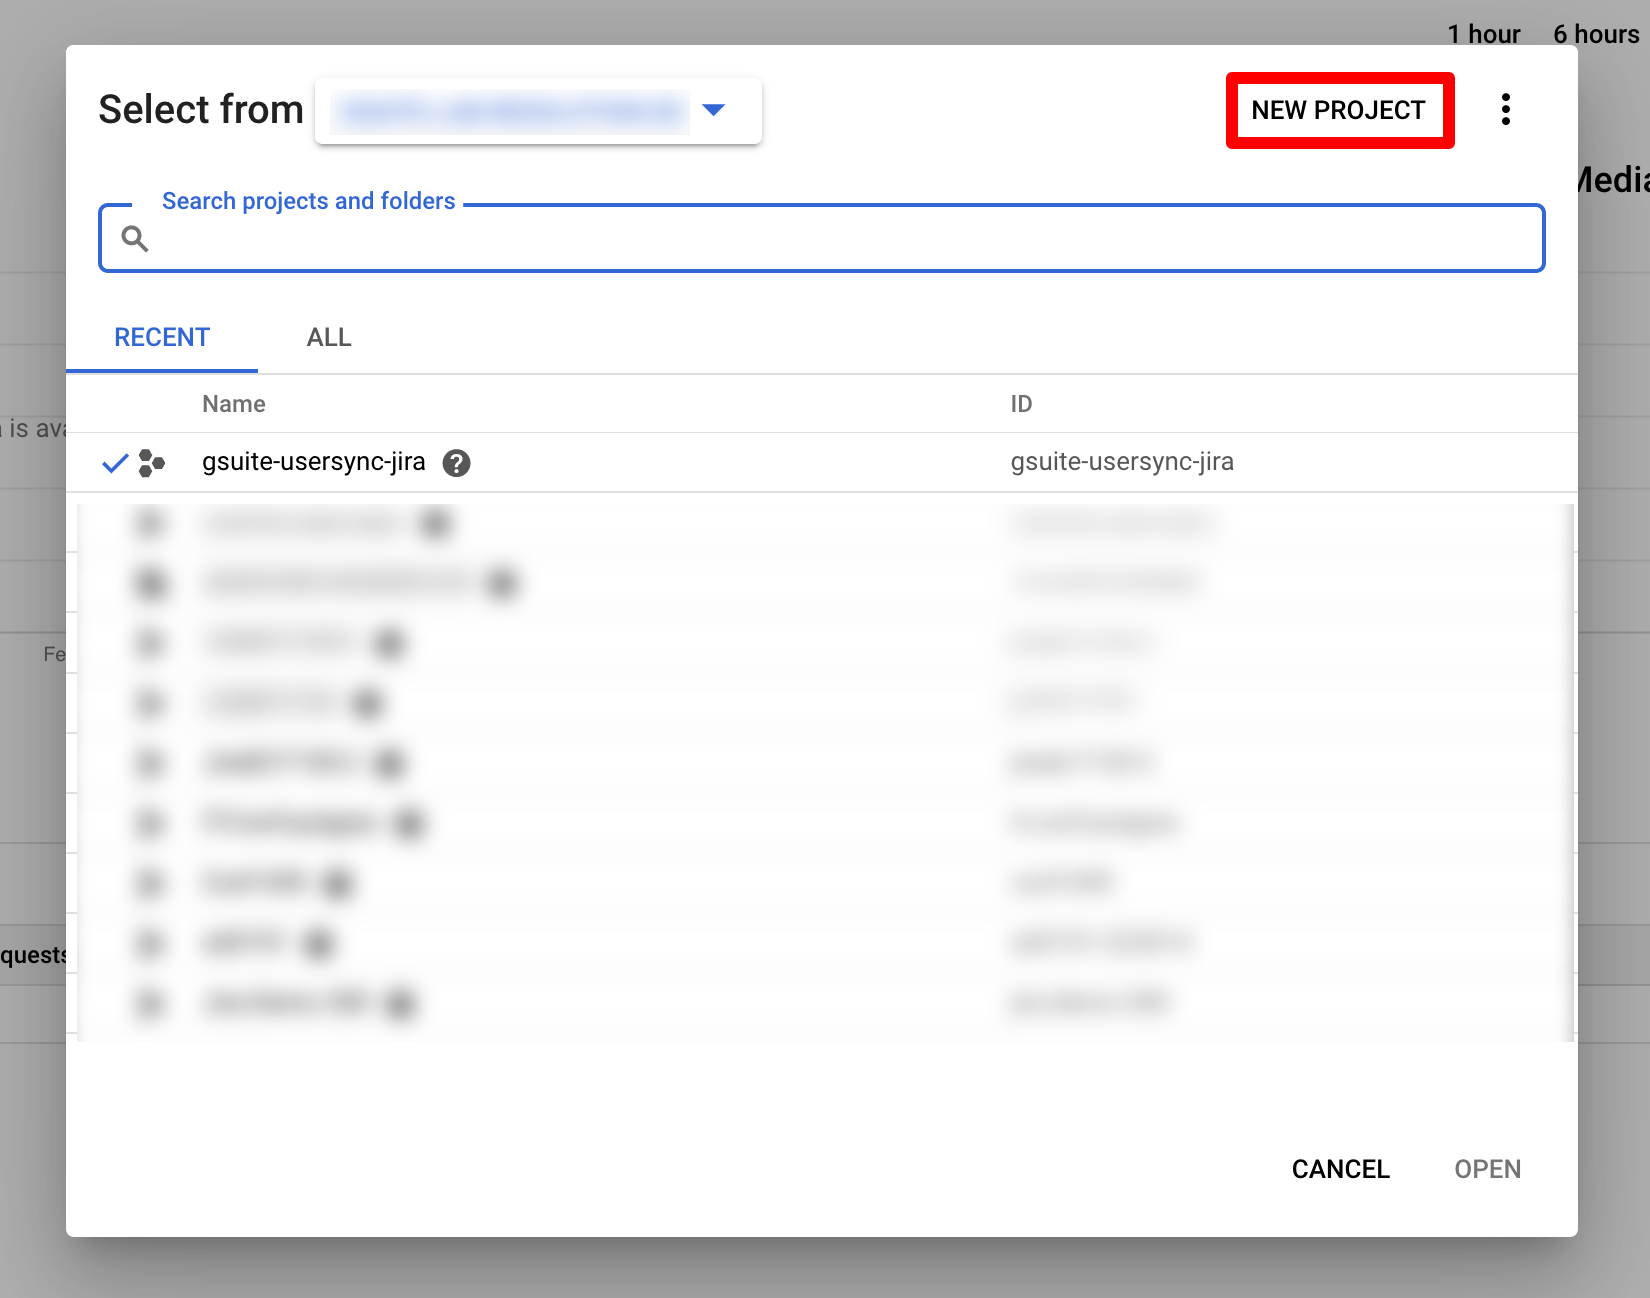
- Click on "NEW PROJECT".
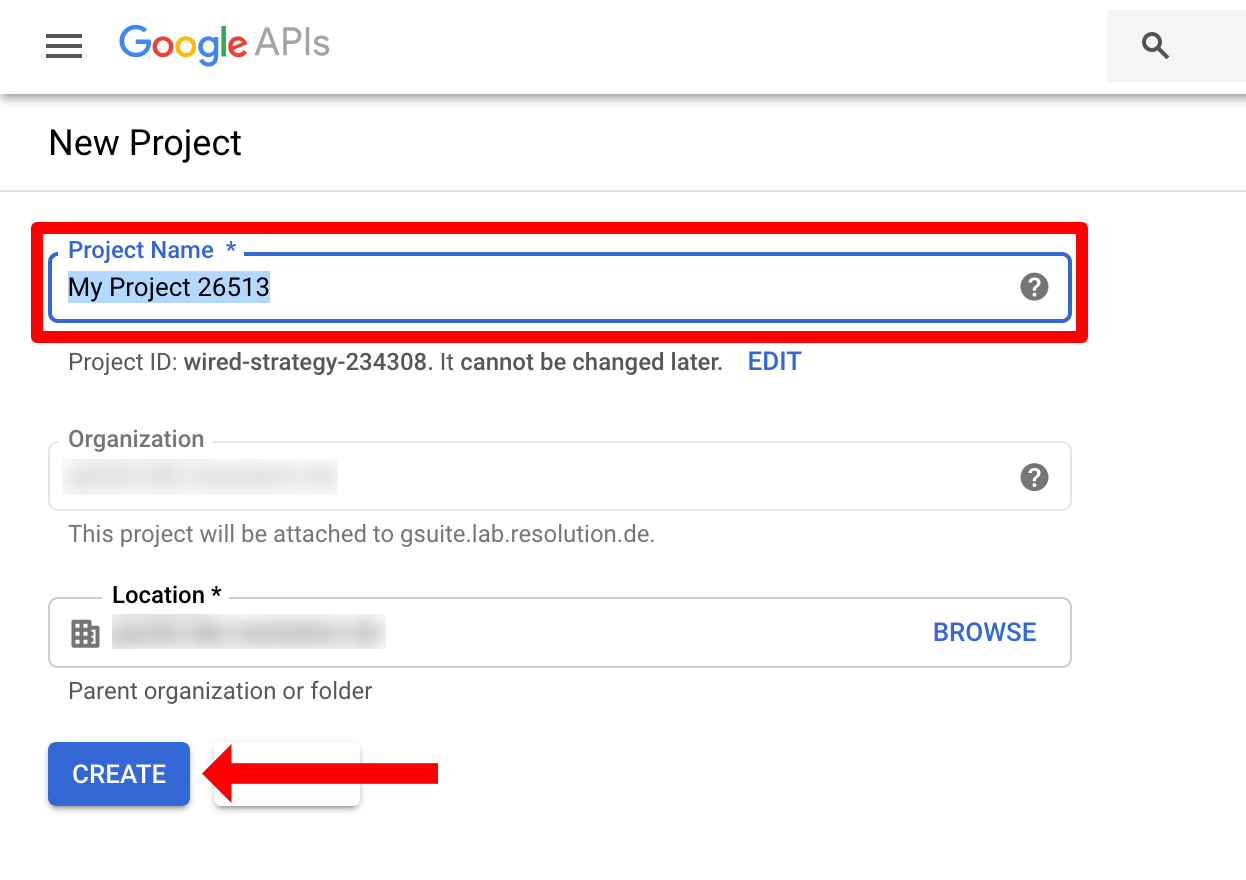
- Enter a "Project Name" and click on "CREATE". For this tutorial, it is calls "Test Project". This can take a second.
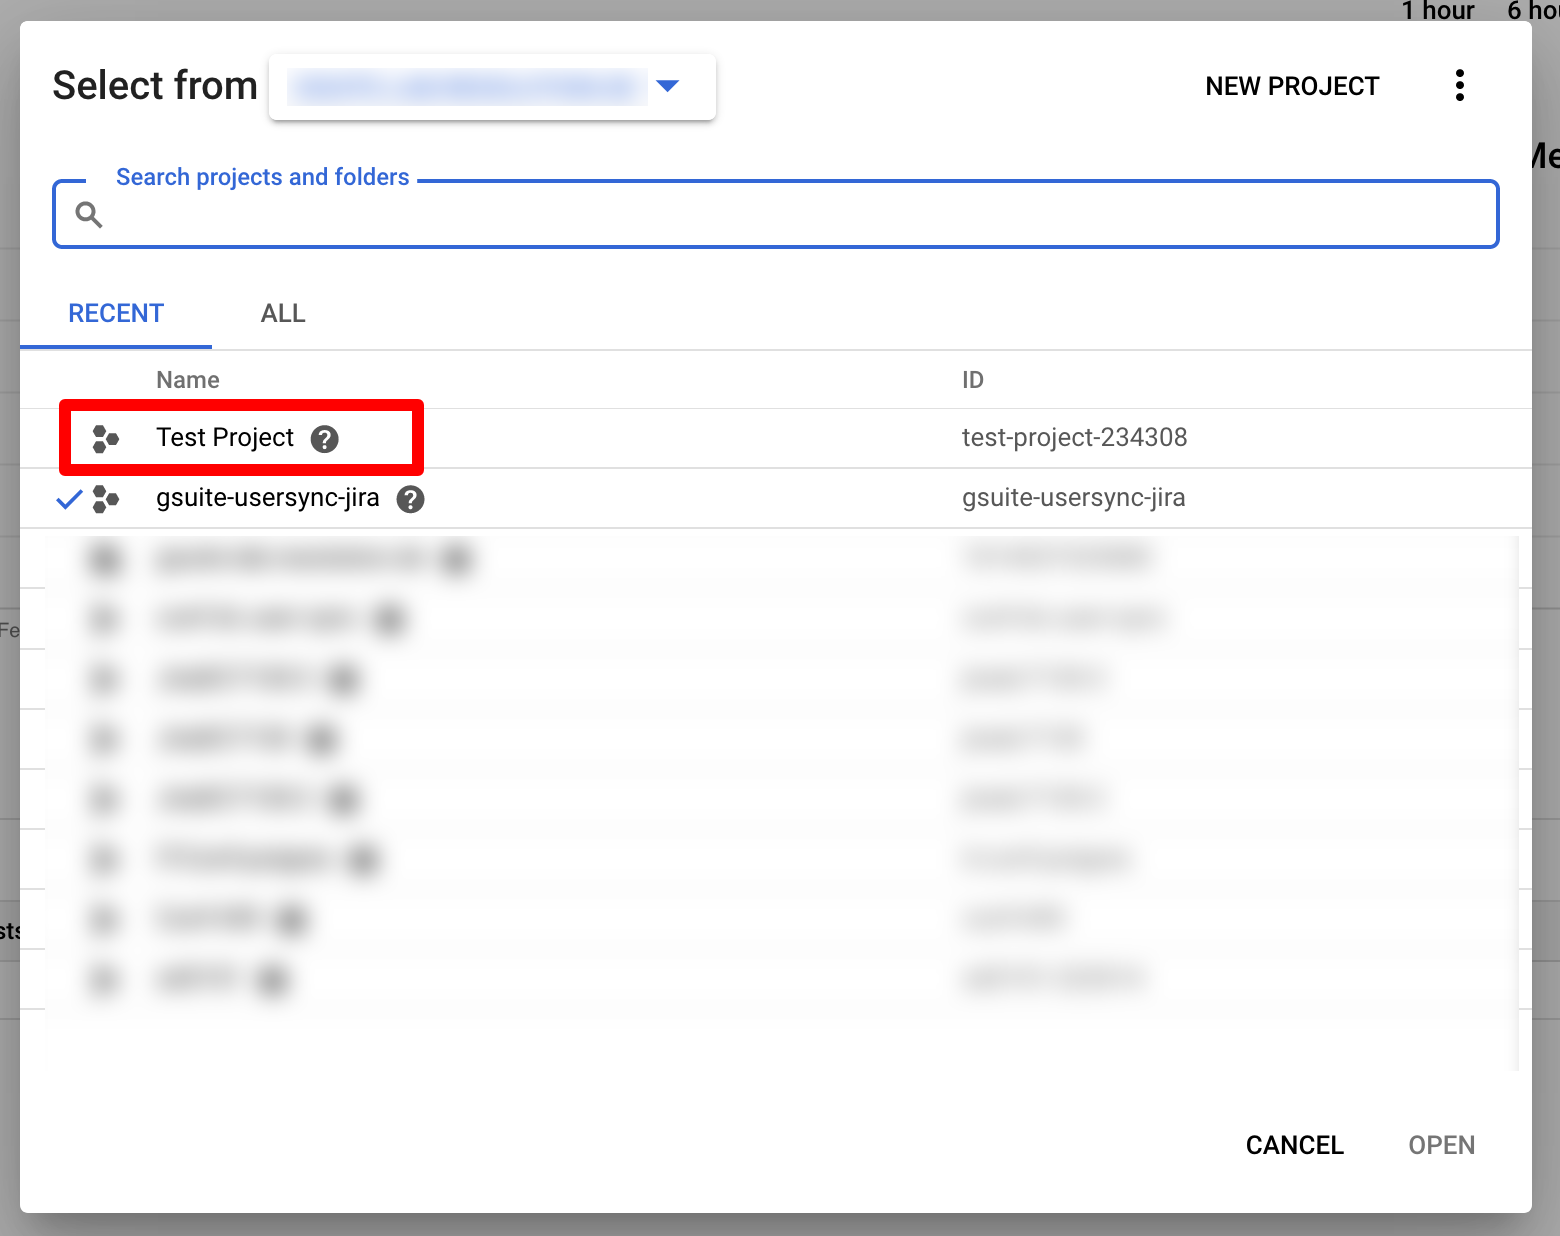
- In the next window, click on your just created new project.
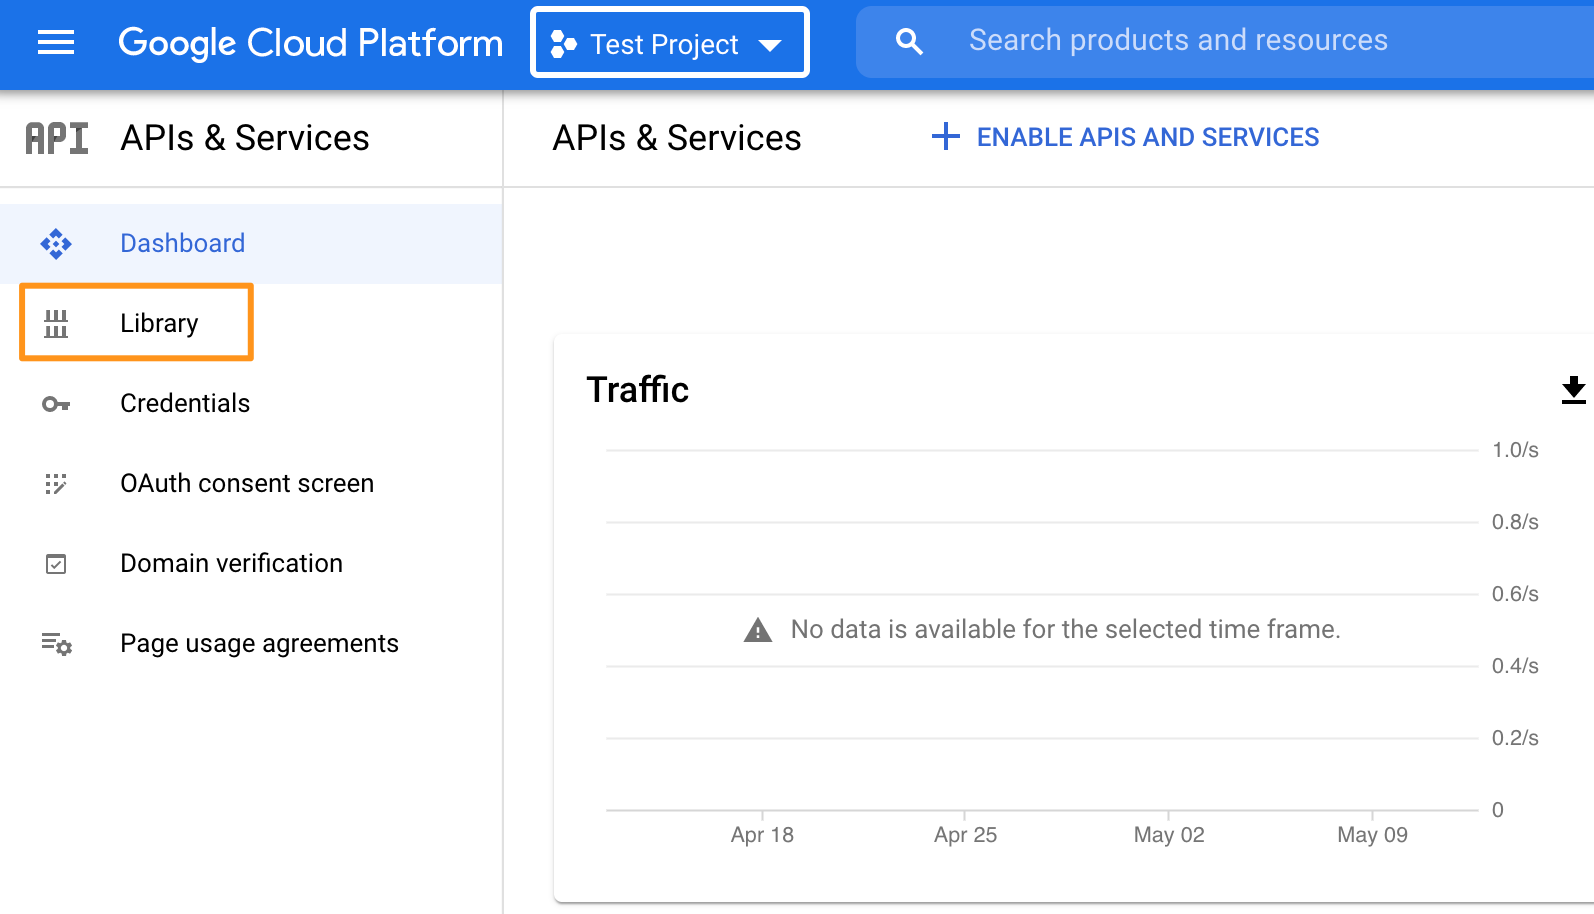
- After opening your project, click on "Library".
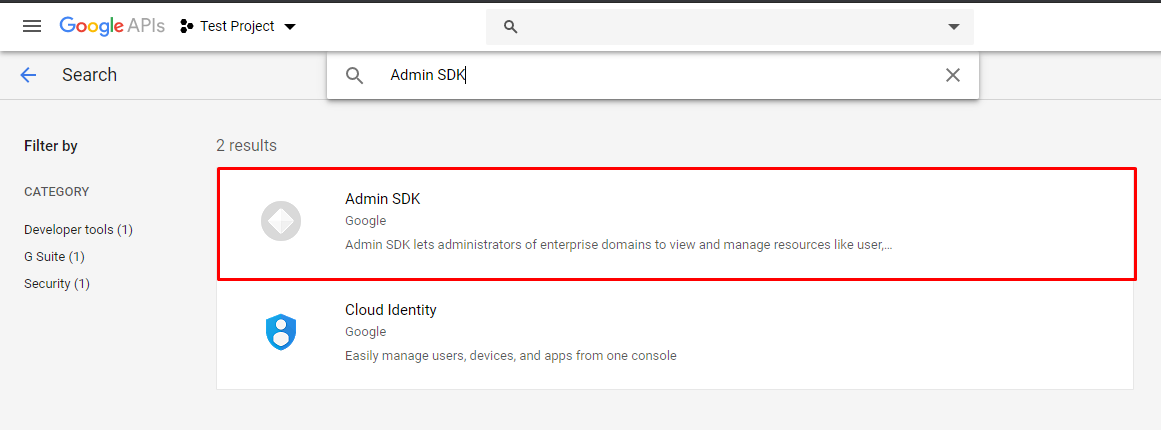
- In the search bar, type "Admin SDK" and click on the "Admin SDK".
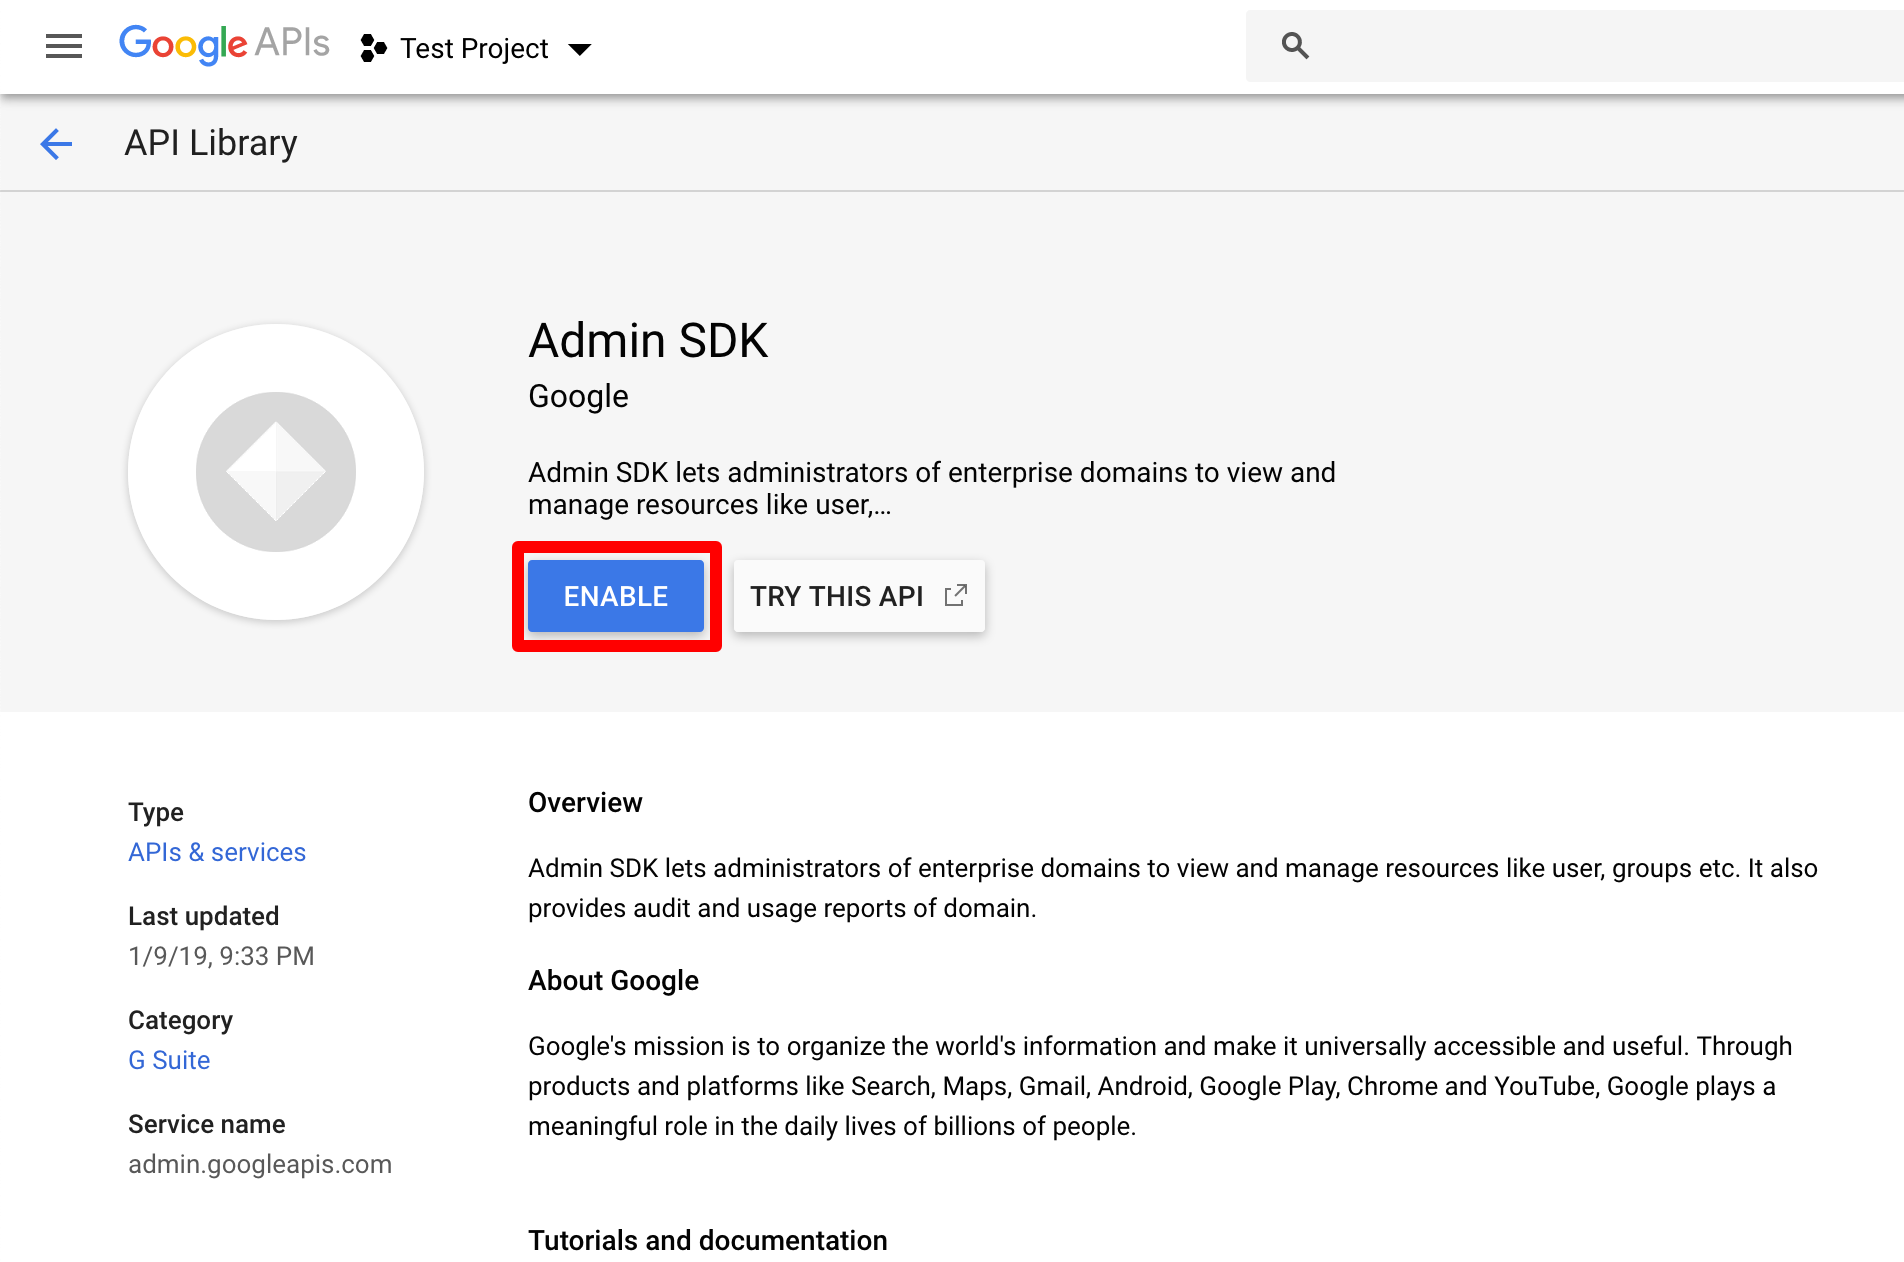
- On the next page click on "ENABLE".
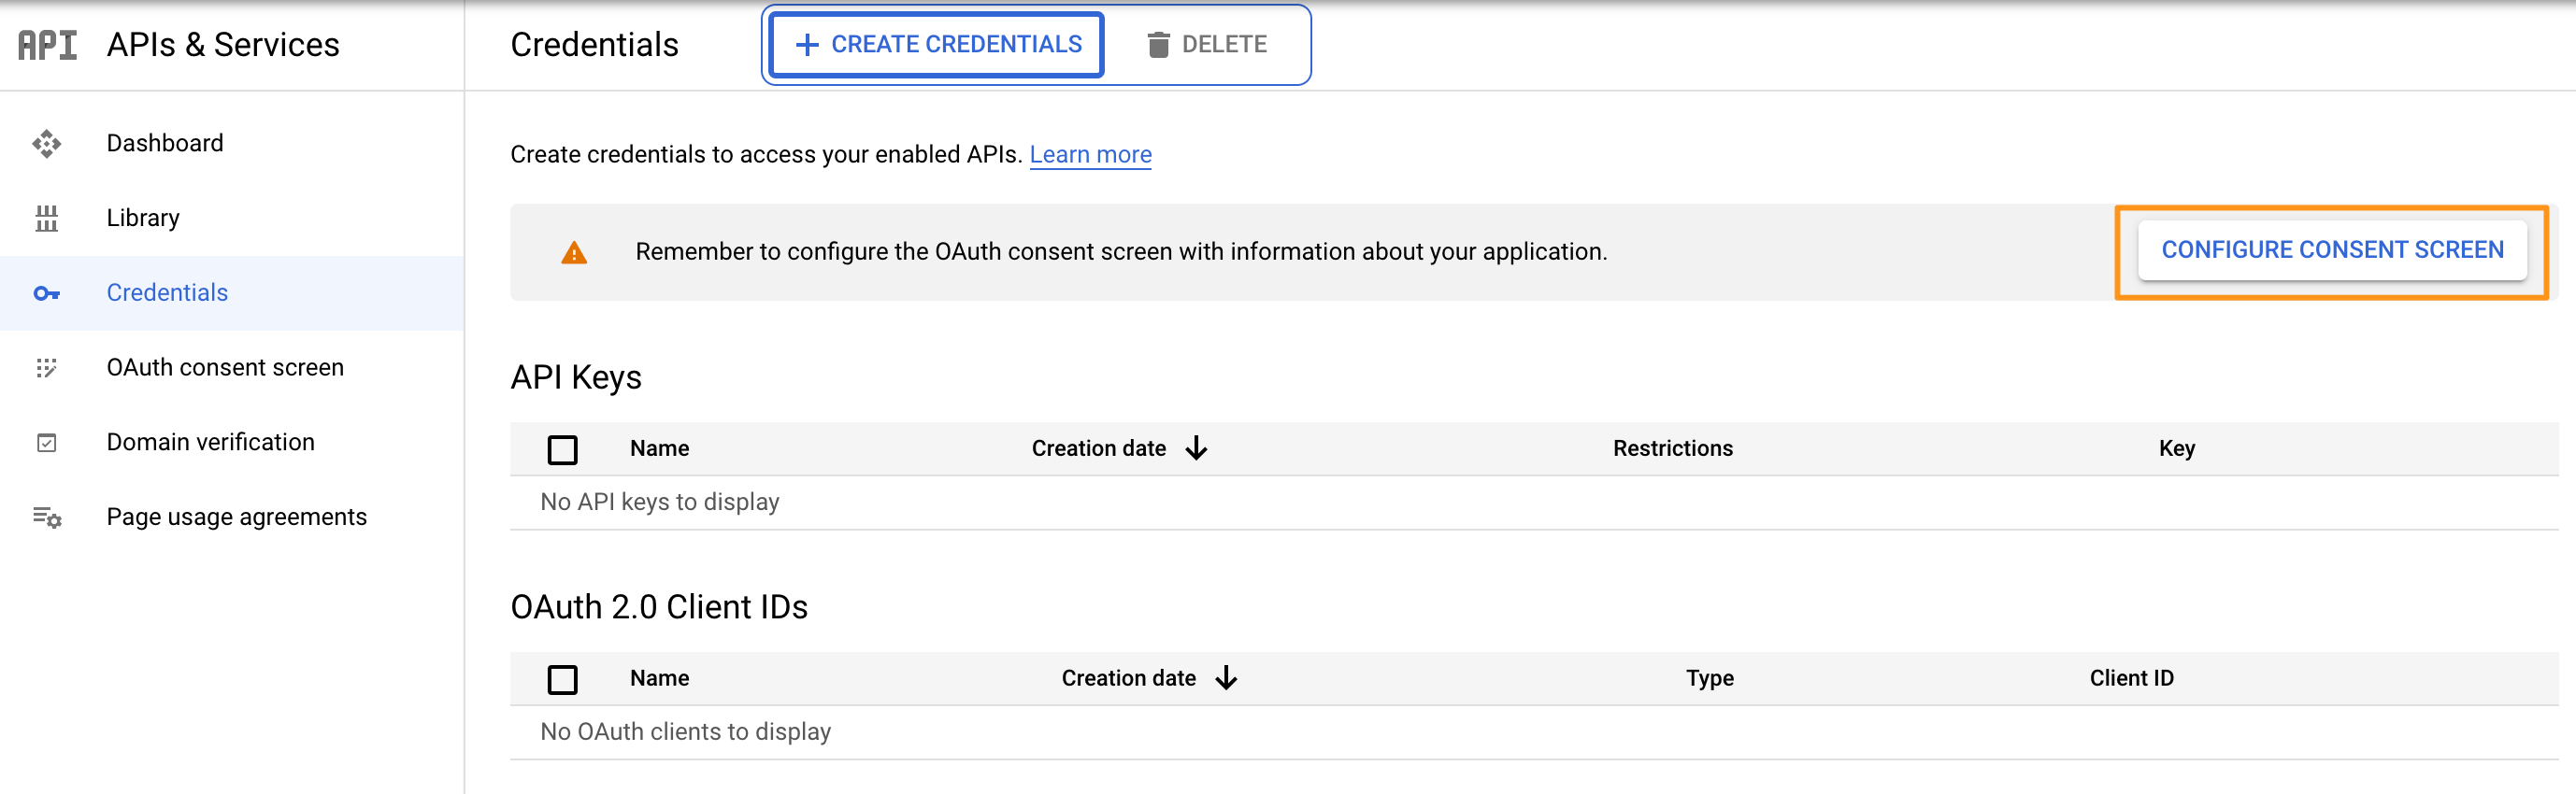
- Now, click on "Credentials" in the left panel.
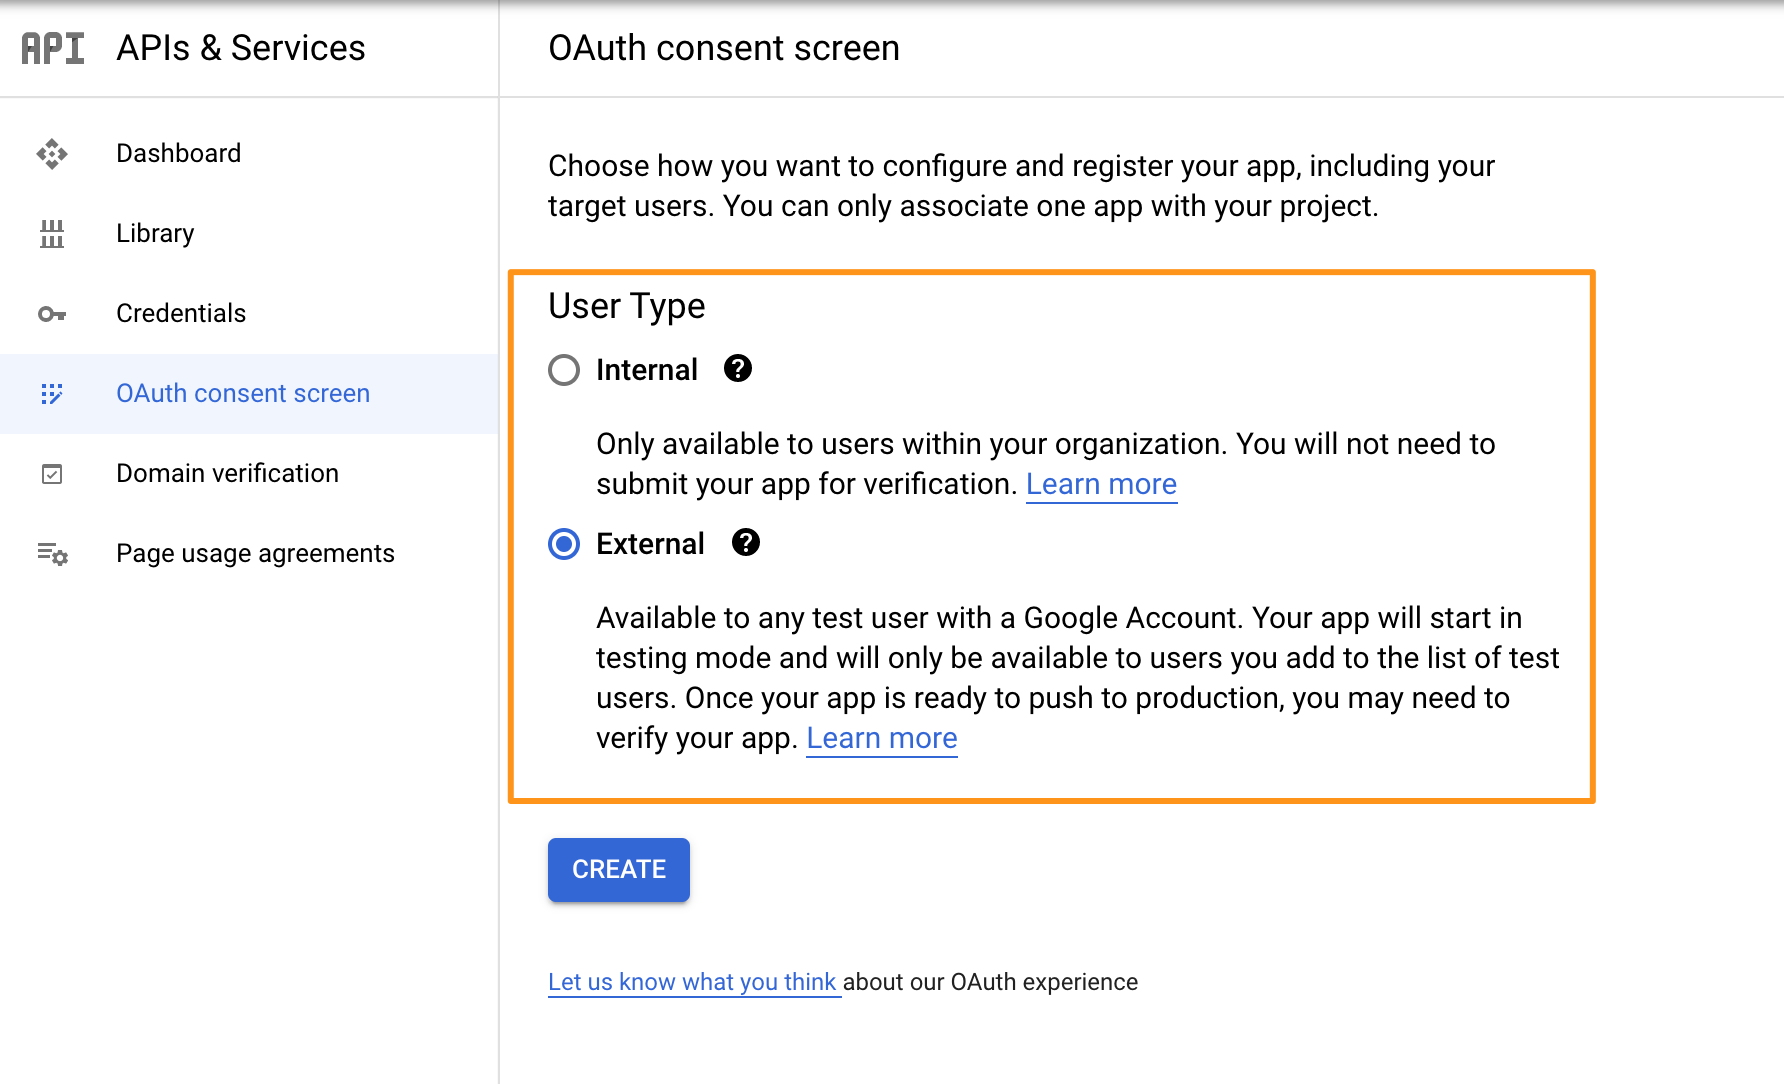
- Click on the "Configure consent screen" button.
- Choose an "User Type" (see https://developers.google.com/identity/protocols/googlescopes?hl=en_US) and click on "CREATE".
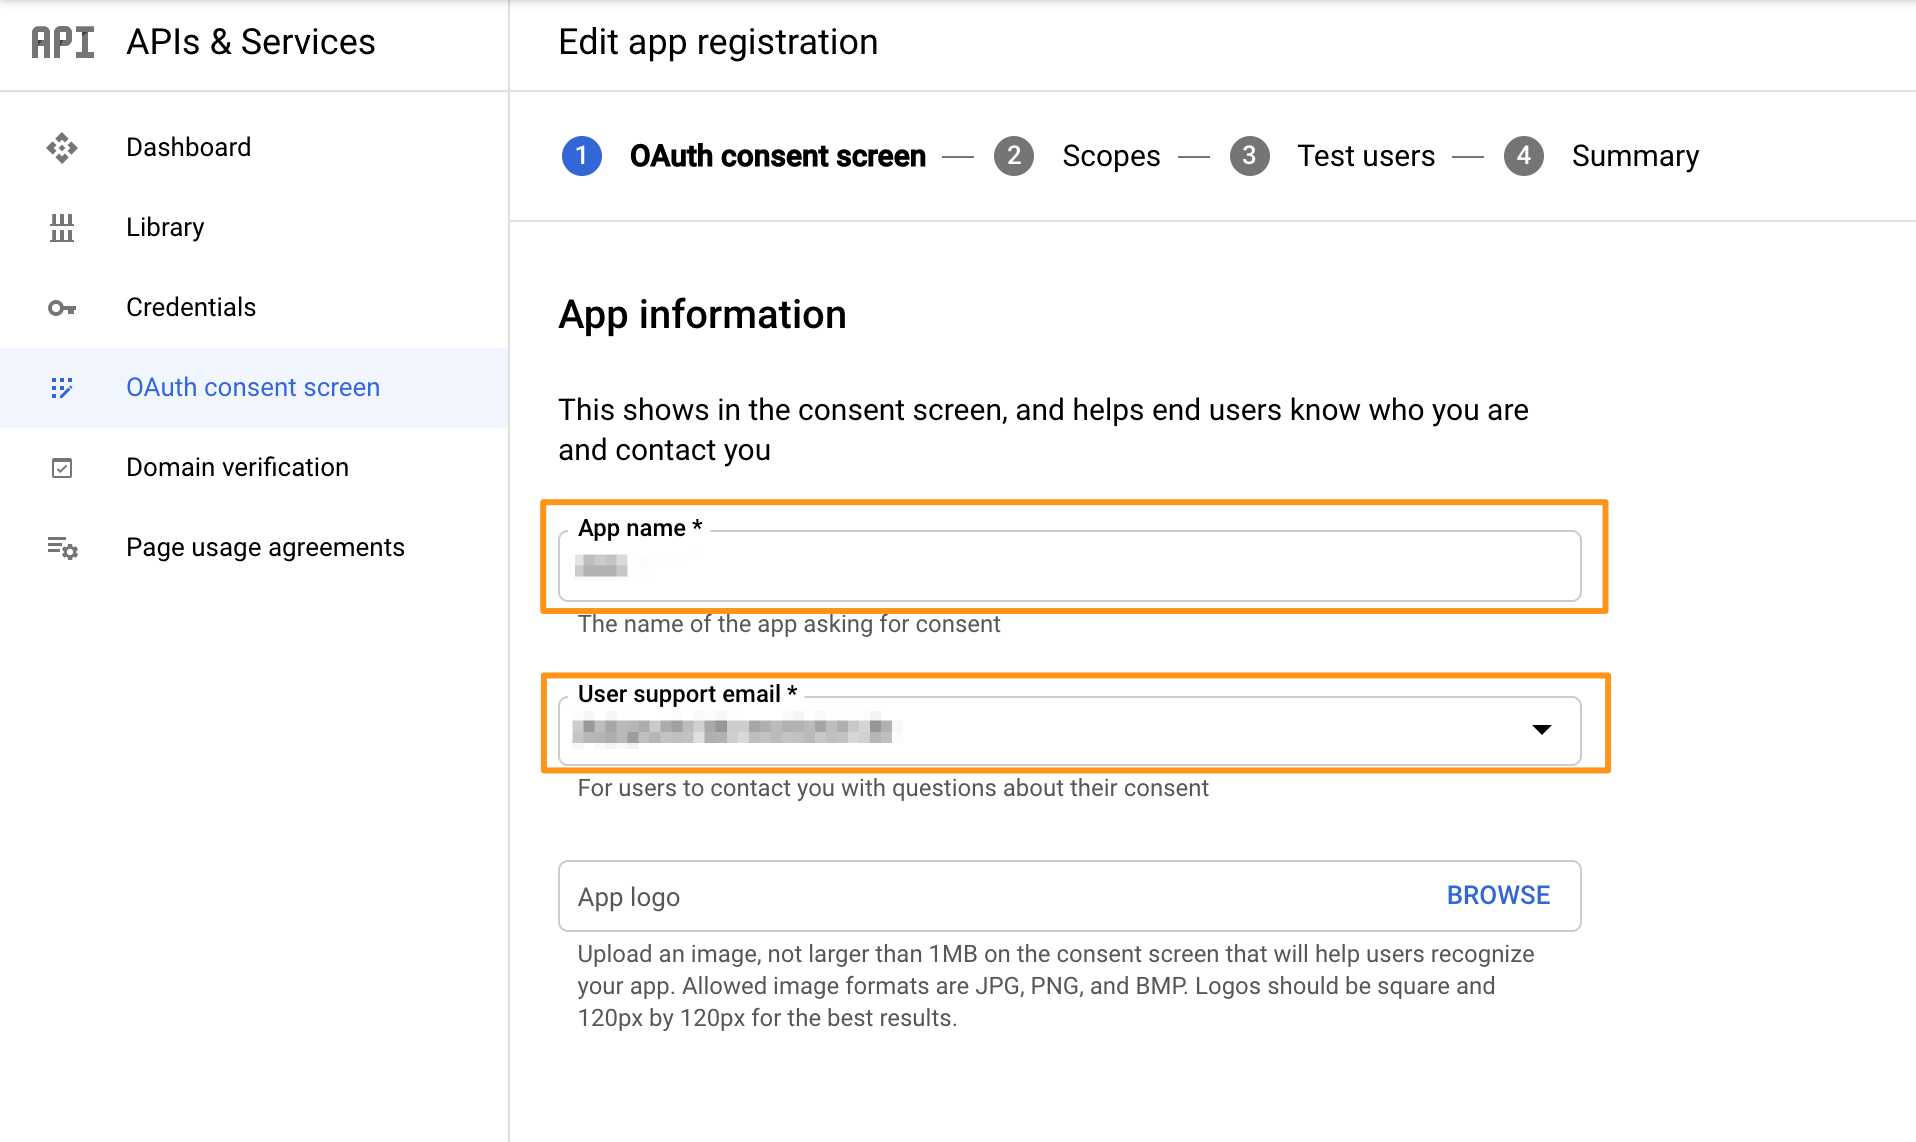
- On the next screen, enter "App name" and "User support email".
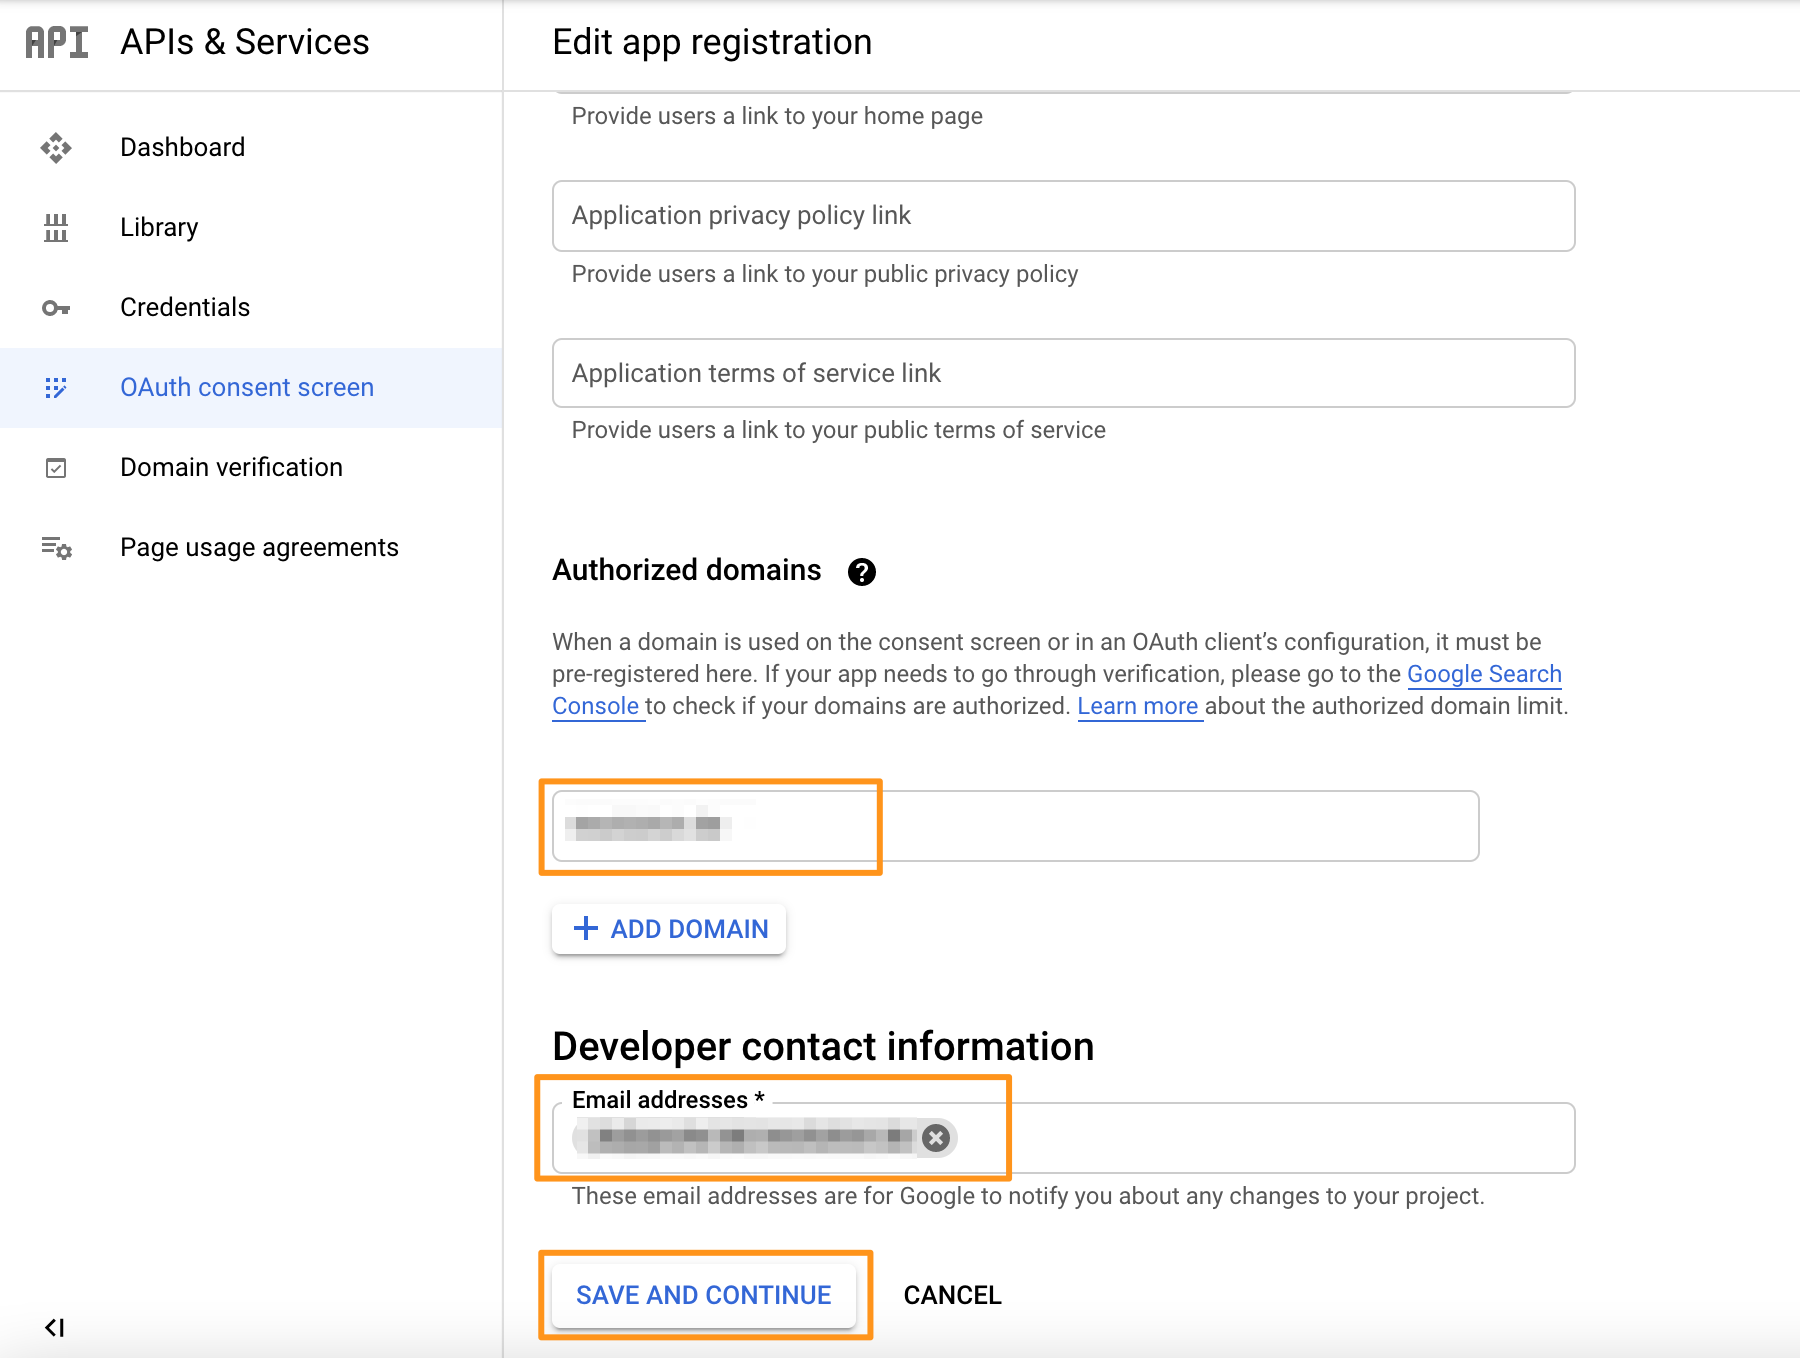
- Scroll down to "Authorized domains" and enter your personal domain, e.g. "mycompany.com". Press the ENTER key to add the domain.
- Enter an email address in the "Developer contact information" section.
- Click on "SAVE AND CONTINUE".
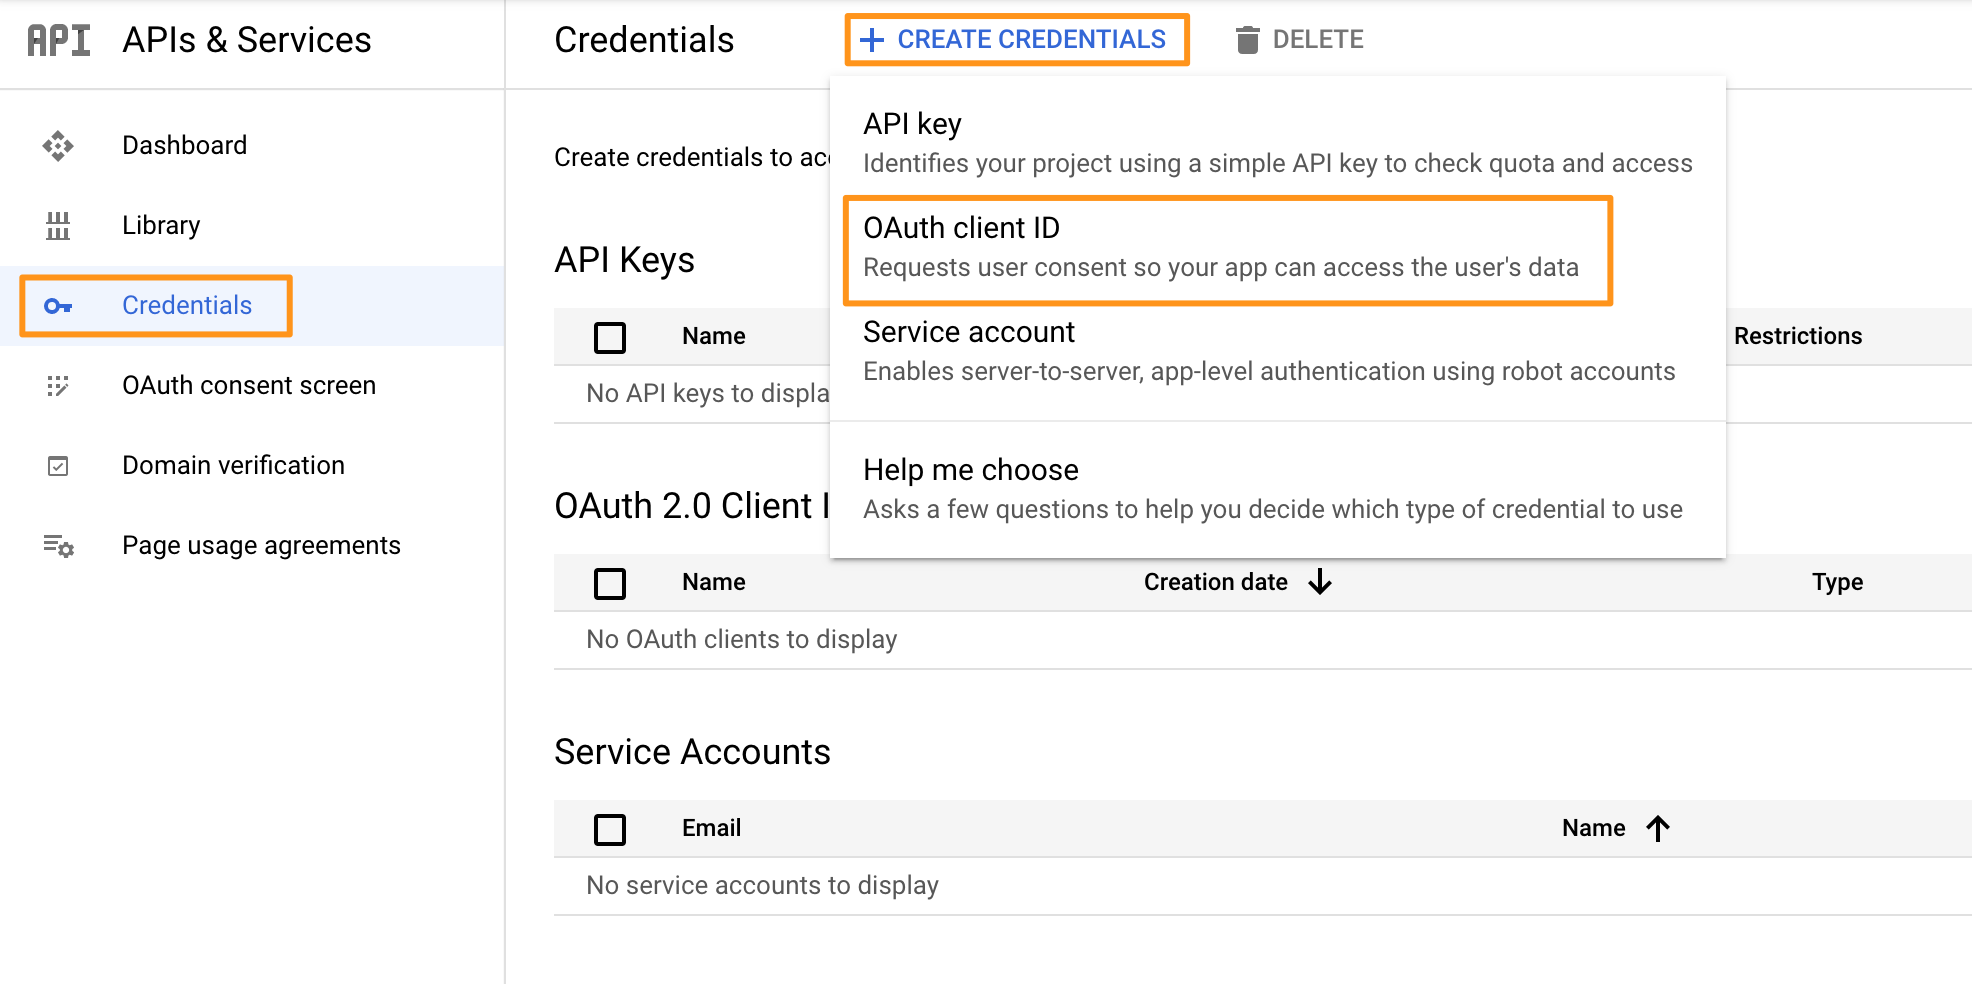
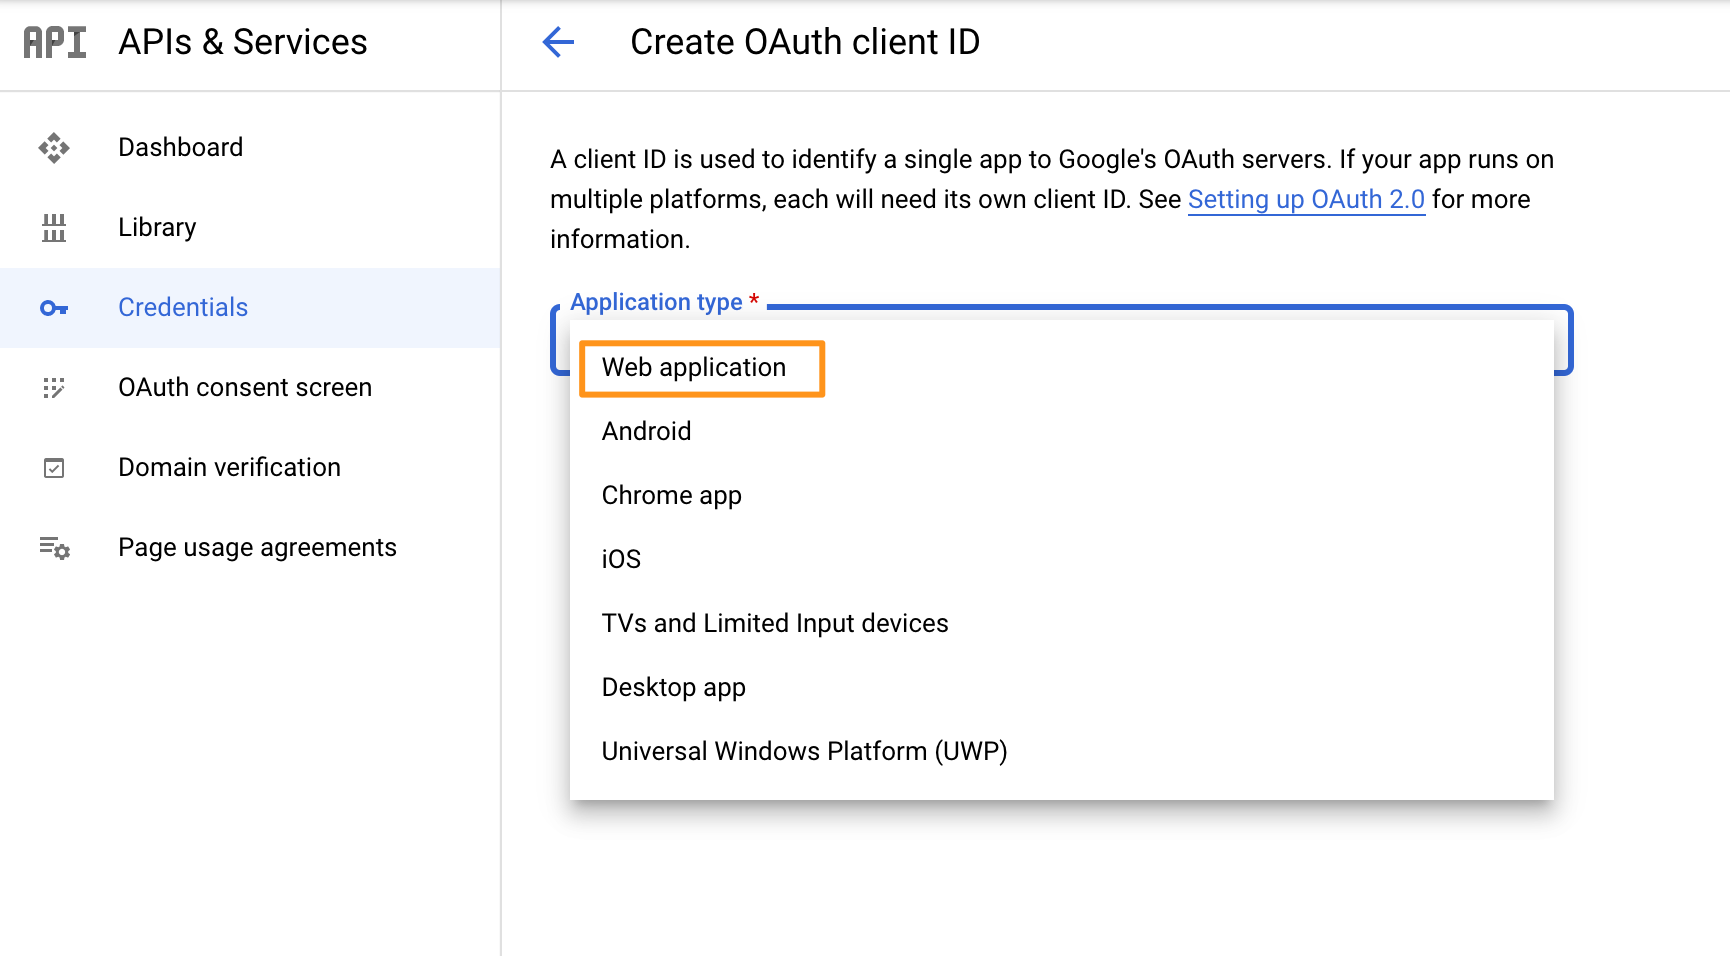
- Go back to the Credentials tab on the left menu. On the next page, click at Create Credentials and click at OAuth client ID.
- In next window, choose "Web application".
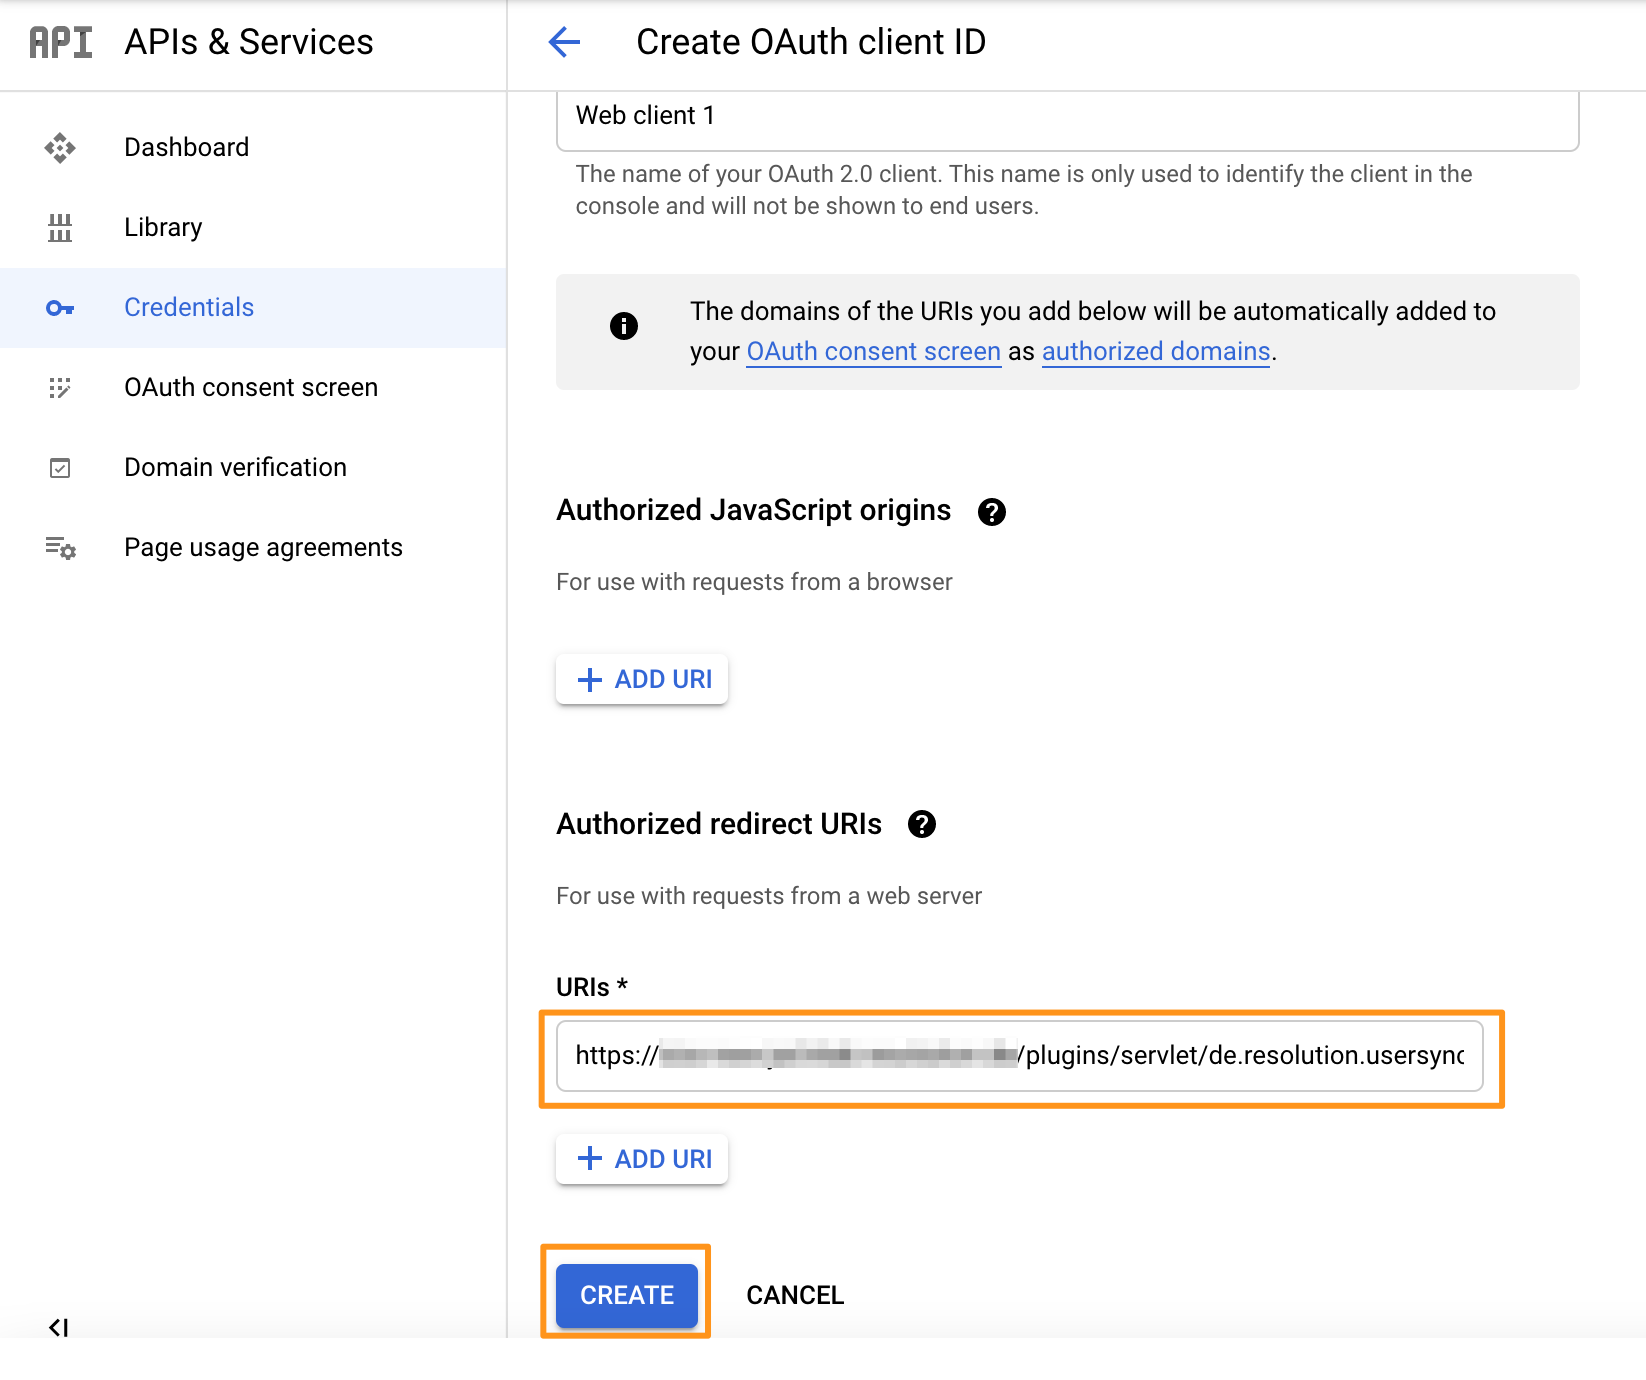
- Enter an "Authorized redirect URIs" https://<your-atlassian-product-base-url>/plugins/servlet/de.resolution.usersync/oauth2/authorize then click "CREATE".
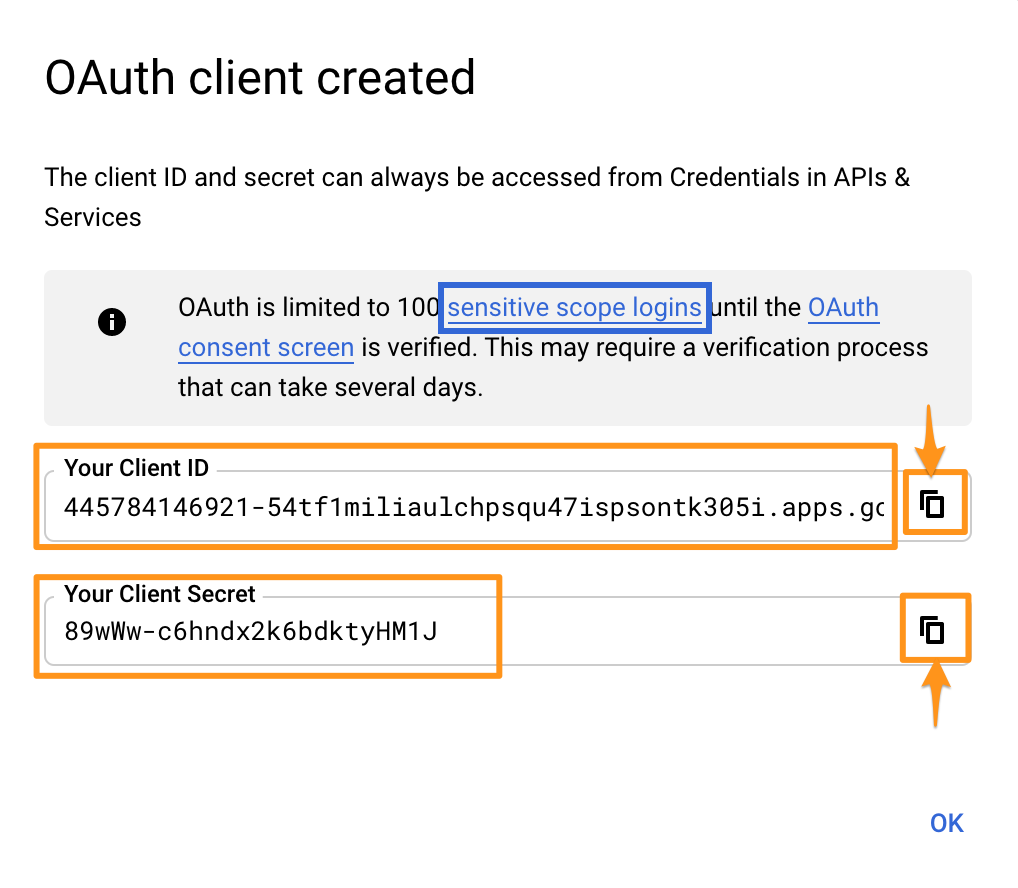
- In the next window you can see your "client ID" and your "client secret". You will need both for setting up User & Group Sync, thus save them somewhere where you can find them for the next step.
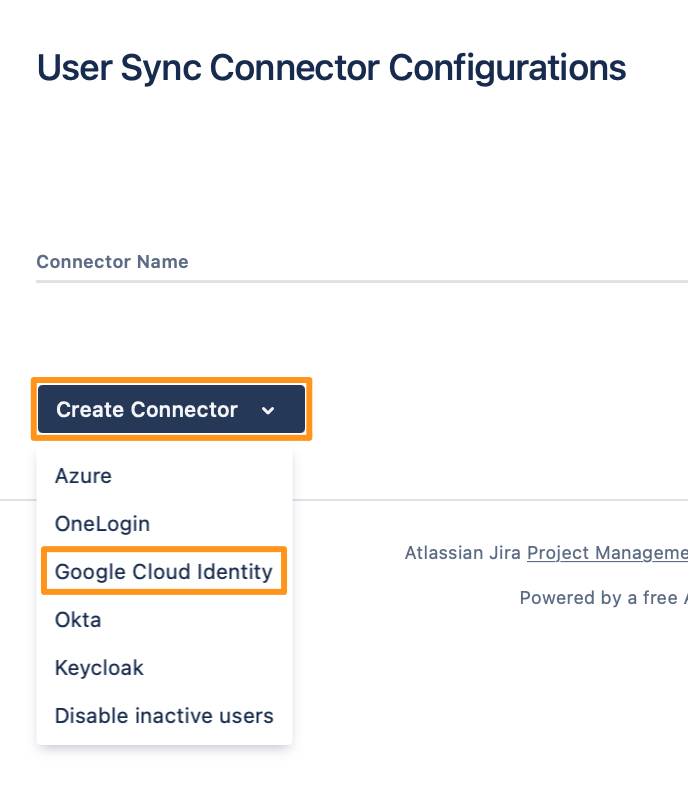
- Now User & Group Sync will be setup in your Atlassian application. Press "Create Connector" and choose "Google Cloud Identity".
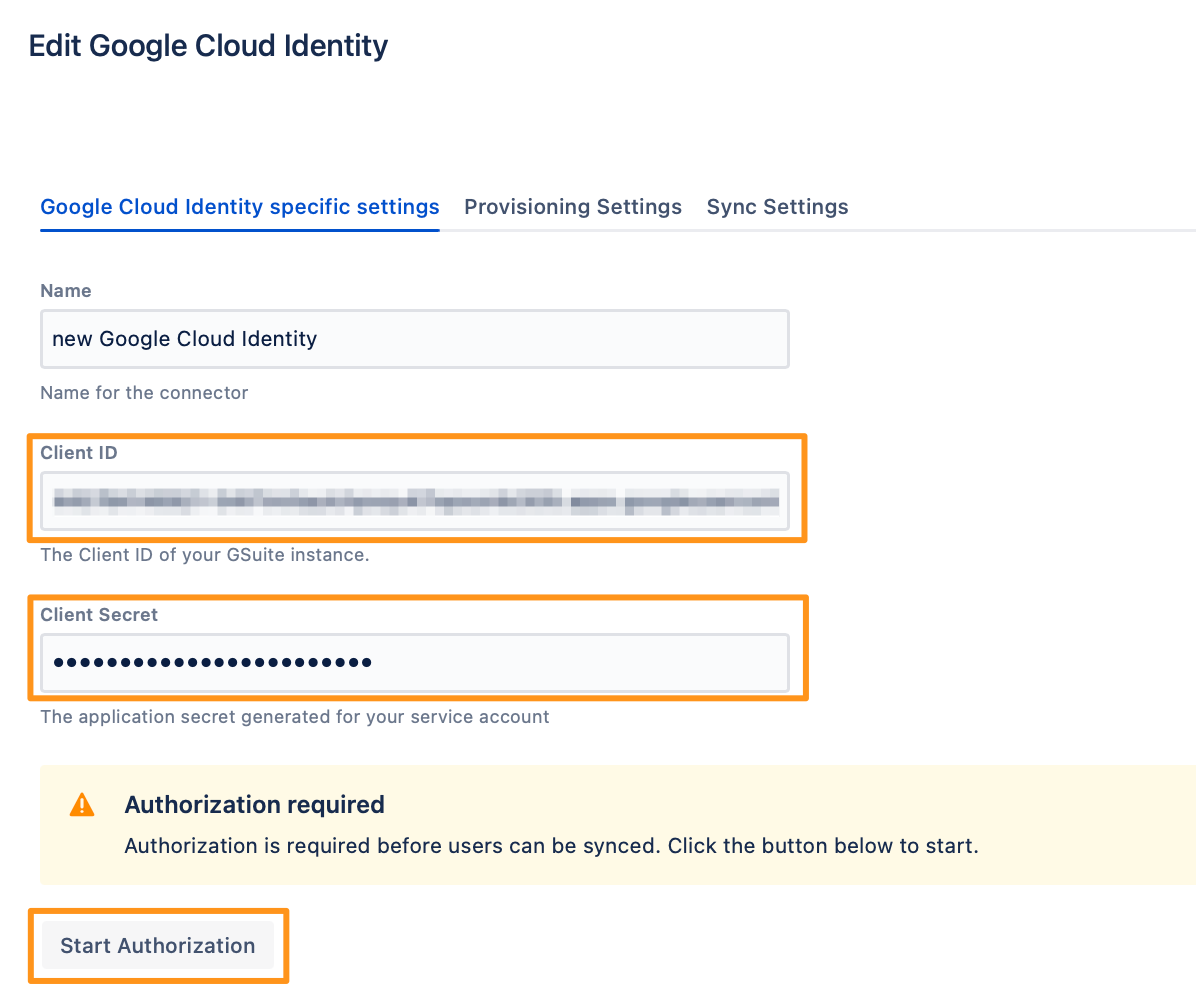
- Enter your "Client ID" and "Client Secret" that you have copied earlier (step 18). Click on "Start Authorization".
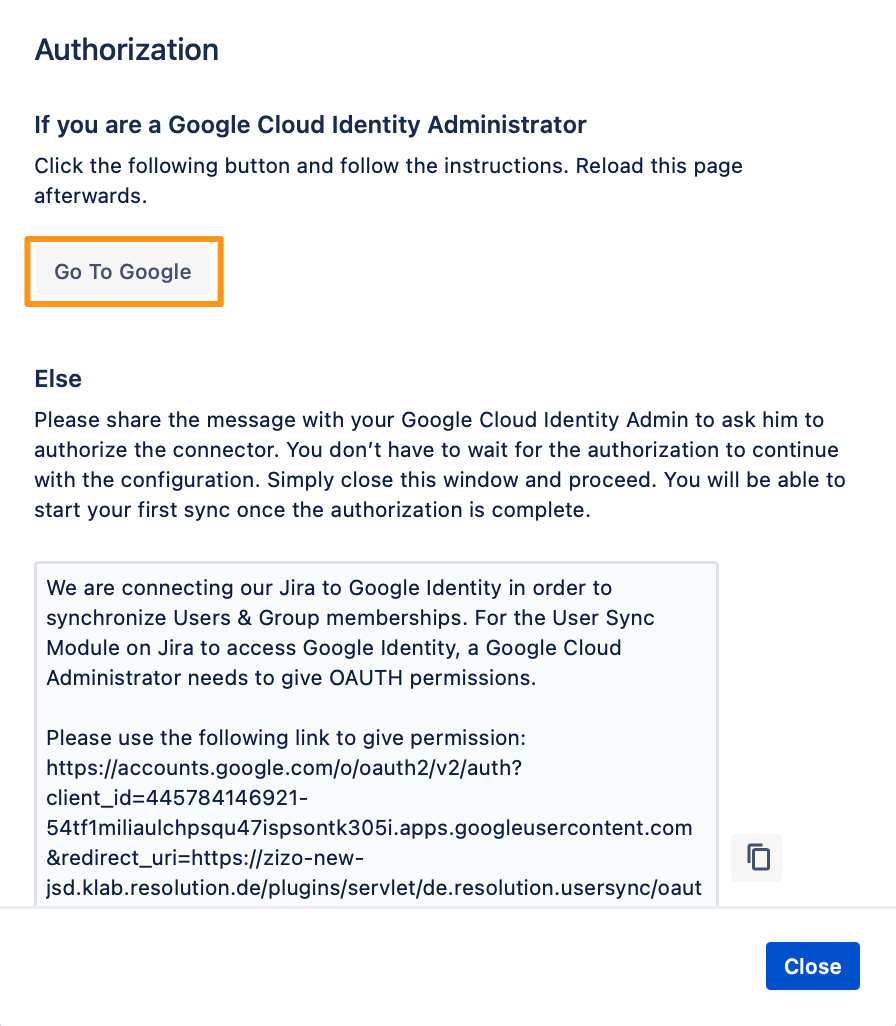
- If you are a Google Cloud Identity Administrator, click on "Go to Google". Otherwise, copy the generated messaged and provide it to your administrator, and you can continue the configuration meanwhile by closing that window.
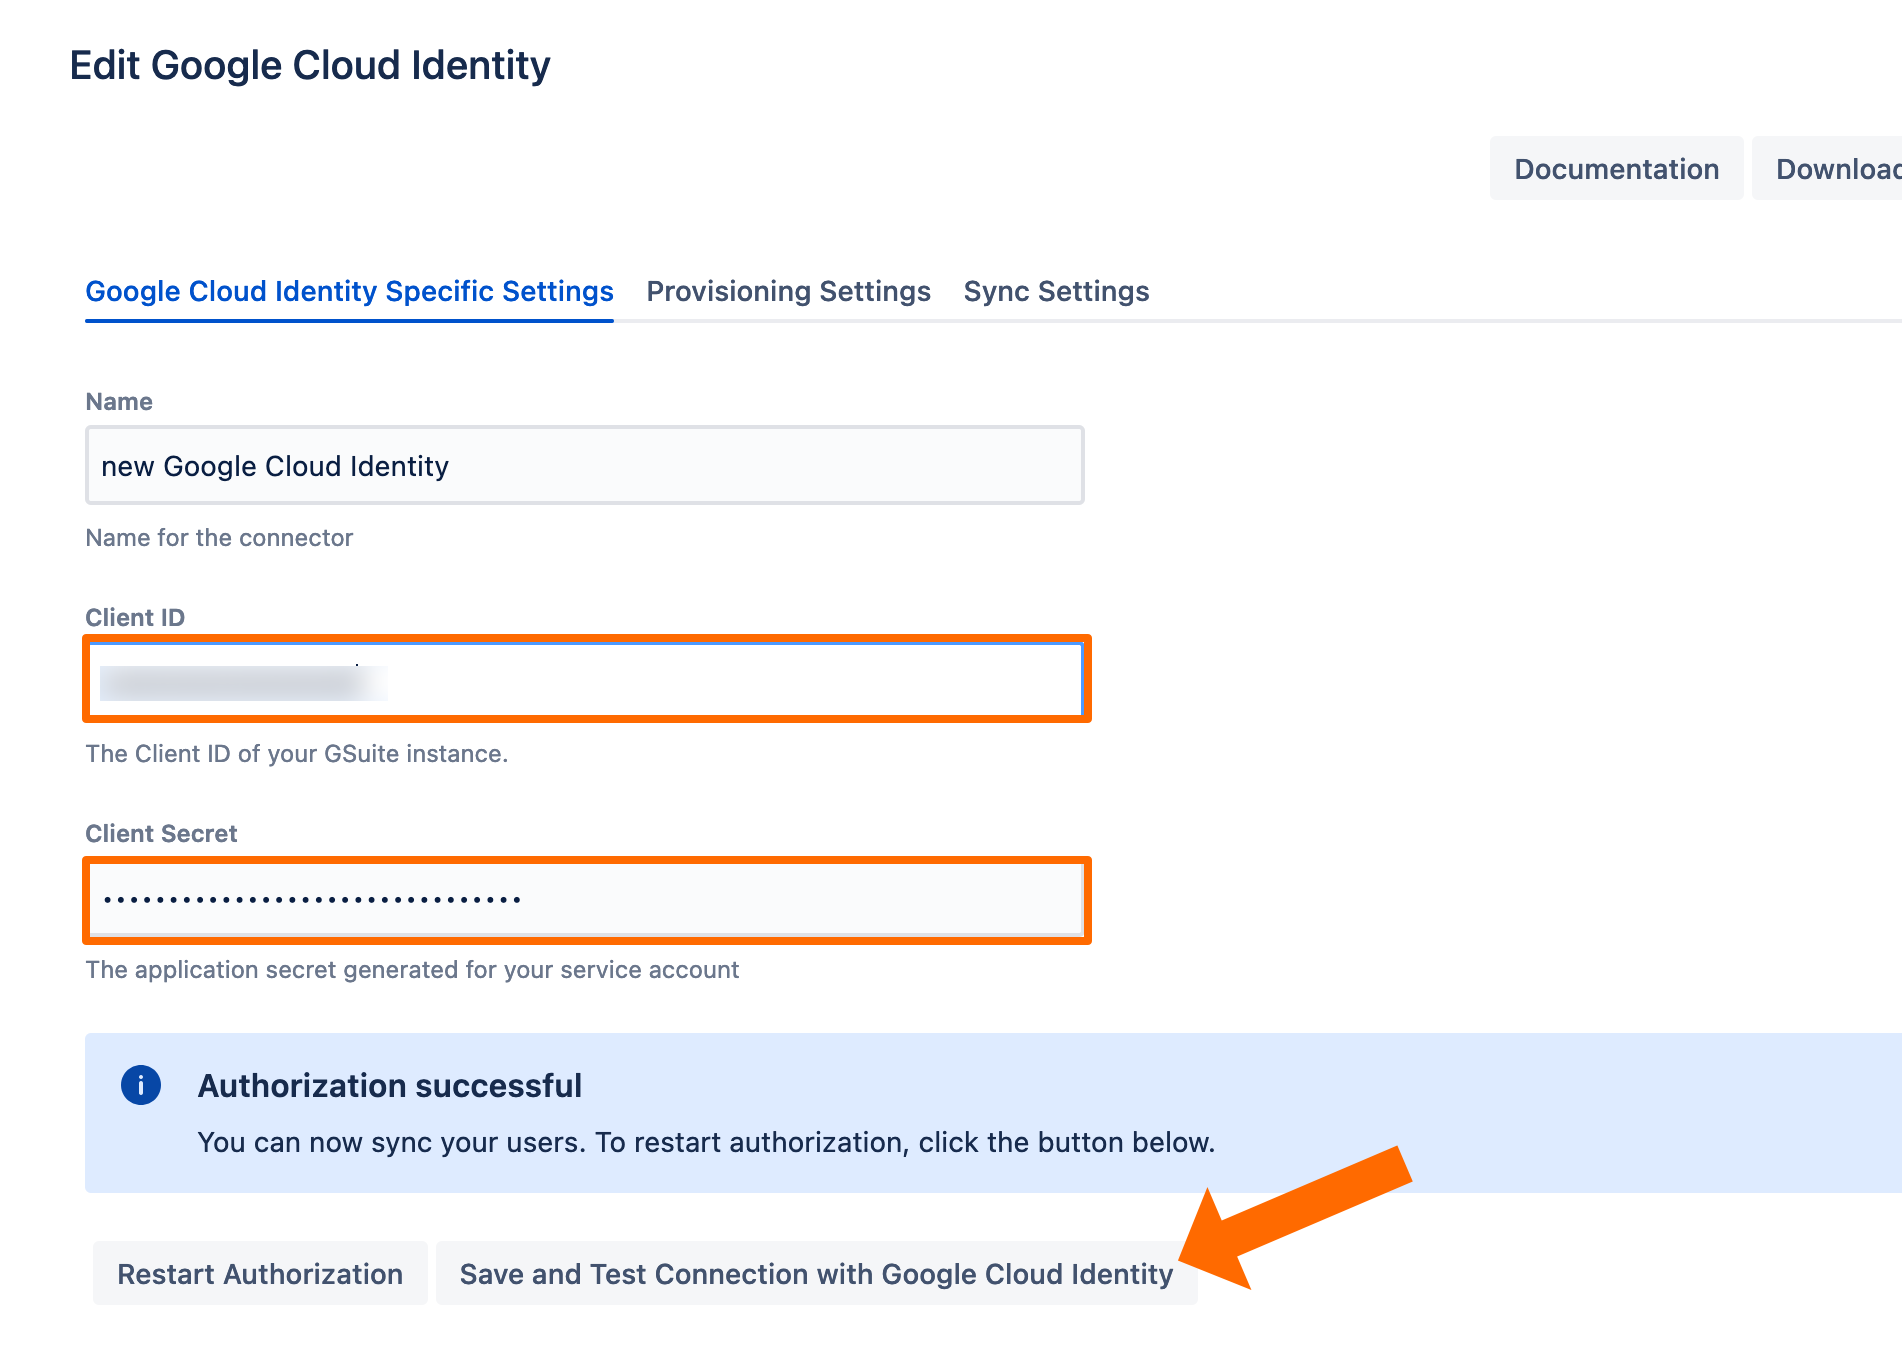
- The plugin will show you if the authorization was successful.
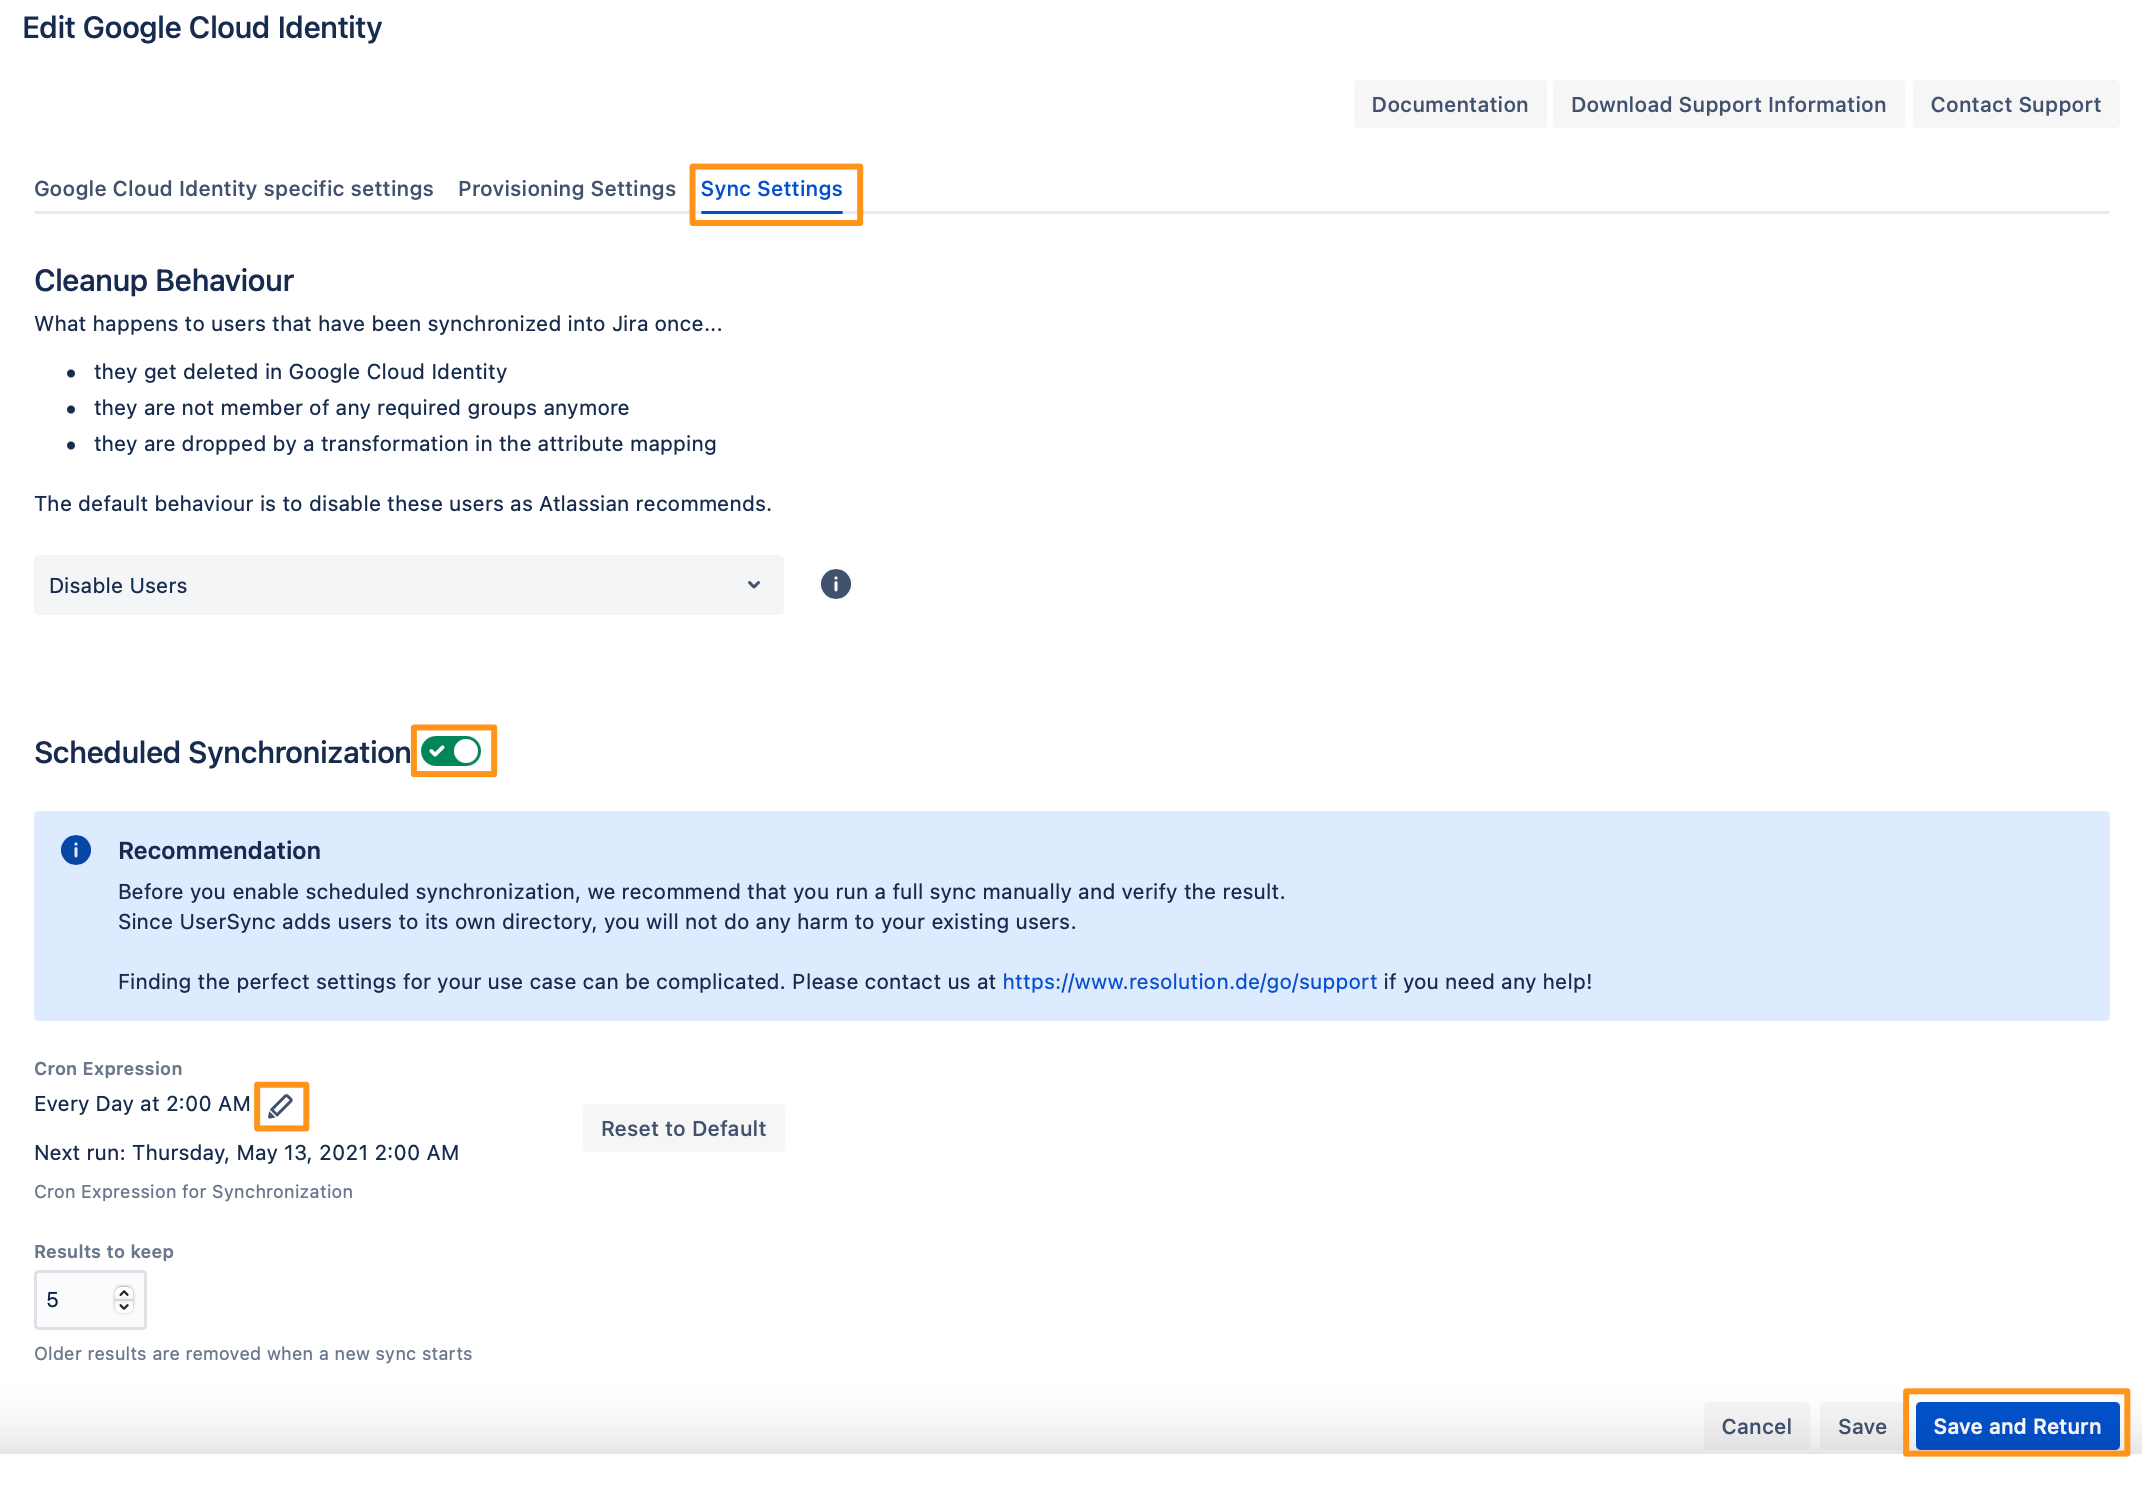
- Your configuration is now done, click on "Save and Return".
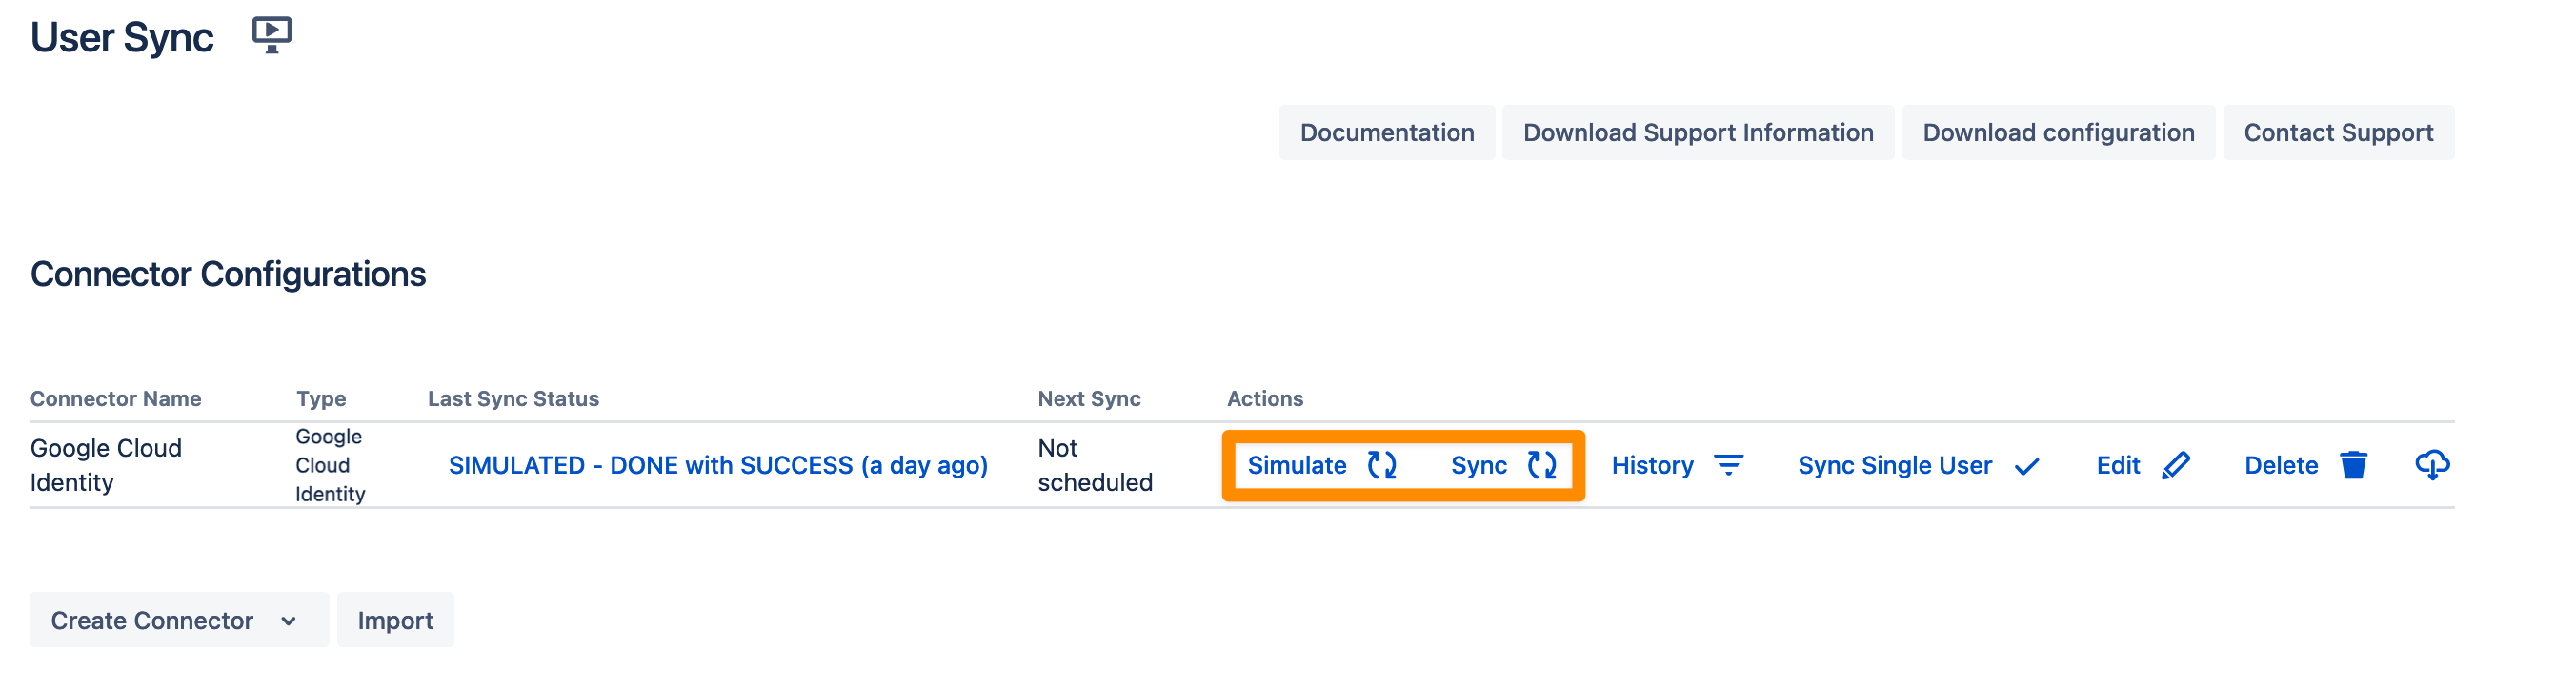
- You are now ready for your first sync. Click on "Sync" in the Connector overview.
User guide
Login to the Google API Console. Click on the current active project.
Click on "NEW PROJECT".
Enter a "Project Name" and click on "CREATE". For this tutorial, it is calls "Test Project". This can take a second.
Open your project list again and click on your just created new project.
After opening your project, click on "Library".
In the search bar, type "Admin SDK" and click on the "Admin SDK".
On the next page click on "ENABLE".
Now, click on "Credentials" in the left panel, and click on "Configure consent screen"
Choose an "User Type" (see https://developers.google.com/identity/protocols/googlescopes?hl=en_US) and click on "CREATE".
On the next screen, enter "App name" and "User support email".
Scroll down to "Authorized domains" and enter your personal domain, e.g. "mycompany.com".
Enter an email address in the "Developer contact information" section.
Click on "SAVE AND CONTINUE".
Go back to the Credentials tab on the left menu. On the next page, click at Create Credentials and click at OAuth client ID.
In next window, choose "Web application".
Enter an "Authorized redirect URIs" https://<your-atlassian-product-base-url>/plugins/servlet/de.resolution.usersync/oauth2/authorize then click "CREATE".

In the next window you can see your "client ID" and your "client secret". You will need both for setting up User & Group Sync, thus save them somewhere where you can find them for the next step.
Now User & Group Sync will be setup in your Atlassian application. Press "Create Connector" and choose "Google Cloud Identity".
Enter your "Client ID" and "Client Secret" that you have copied earlier. Click on "Start Authorization".
If you are a Google Cloud Identity Administrator, click on "Go to Google". Otherwise, copy the generated messaged and provide it to your administrator, and you can continue the configuration meanwhile by closing that window.
If the authorization was successful, you will see the following. Click Save and Test Connection to check whether User Sync can get access to all needed Google Cloud Identity API endpoints.
To take the full advantage of User & Group Sync, go to the Sync Settings tab and enable "Scheduled Synchronization". You can control the sync interval via a Cron Expression.
Do not forget to save your configuration by clicking on "Save and Return".
You are now ready to commence either a simulated or a full sync. By simulating the sync first you will be able to verify your configuration and see what changes User Sync would apply like what users will be added, modified, or not modified. With the full sync, User Sync will apply those changes. Both sync actions will run a full sync and will have the same sync duration. For more information on the sync simulation please refer to Using the Simulated Sync Feature.
Please read here, if you already have users in your system which you want to migrate, without losing their history. Don't hesitate to reach out to https://www.resolution.de/go/support, if you need any help with achieving this.