User Guide
User Token Management for Server and Data Center
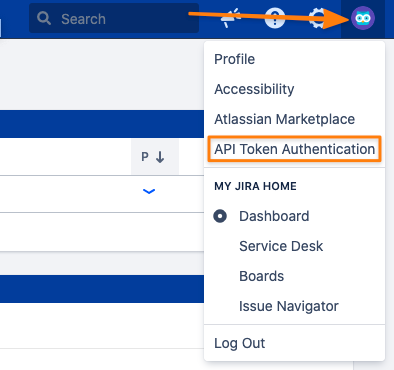
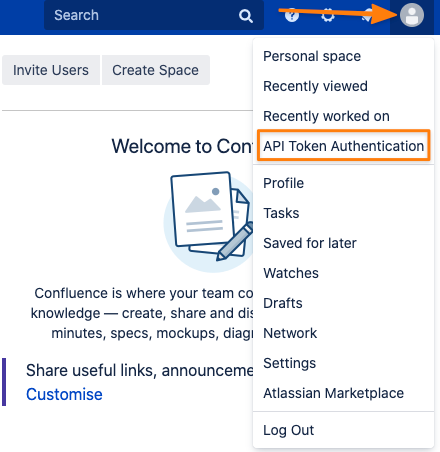
Users can manage their tokens by clicking on the profile icon and selecting the API Token Authentication Link
Jira Server or Data Center
Confluence Server or Data Center
Creating a new token
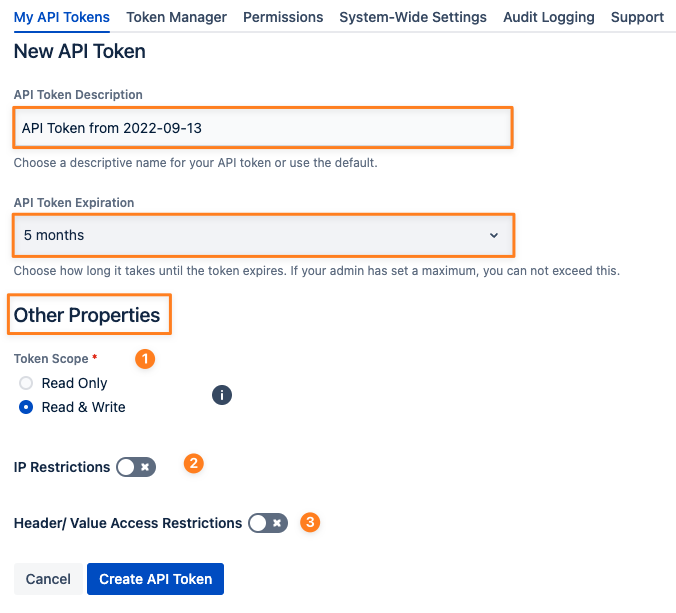
Provided that you have permission to create your own tokens, you can do this in the "My API Tokens" tab:
Enter a meaningful description for the token
Select the expiration of the token within the boundaries defined by your administrator
Assign other properties/ restrictions to the token, each of the below is explained in more detail in the subsequent paragraphs
(1) Choose whether the token should have Read Only or Read & Write scope
(2) Add one or more IP restrictions
(3) Add one or more HTTP request header/ value access restrictions
Click on the Create API Token button to retrieve your token along with a summary of its properties. You can copy the token using the button on the right side and click OK to get back to the list of tokens. Alternatively, you can choose to go back and create another token with the same or slightly changed properties. This might be handy when you need to create multiple tokens with similar properties.
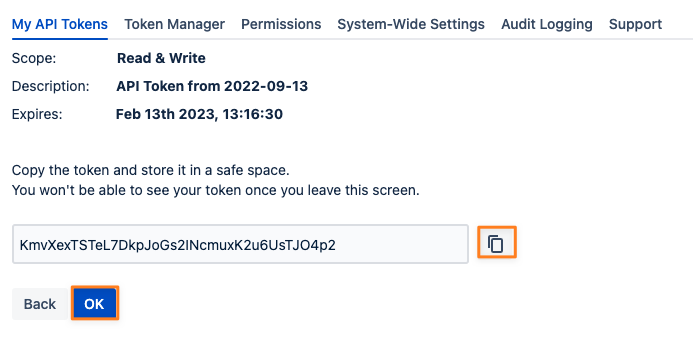
You may now authenticate on the REST API with Basic Authorization, using your username and the token, instead of your user password (if you have any). You may also use the token with Bearer Authentication. Please be aware of possible token scope restrictions as defined by your administrator (see the next paragraph for details).
Token Scope
There are currently two token scopes available.
Read Only
Only the GET, HEAD and OPTIONS HTTP request types are allowed, using a token on endpoints requiring any other type will result in a 403 Forbidden error.
There are two exceptions/ endpoints not affected by that:
the Jira Session endpoint to which you can POST your username and token to retrieve a session cookie
the API Token Authentication endpoint to which a user can POST details to create a token if permitted to
Read & Write
All HTTP request types are allowed to be used.
Every type other than GET, HEAD and OPTIONS suggests that it is a write operation somehow, manipulating existing data in some form.
If your administrator has not enabled the Users may only create "Read Only tokens" setting, you will see additional info stating that the token will only have a read-only scope: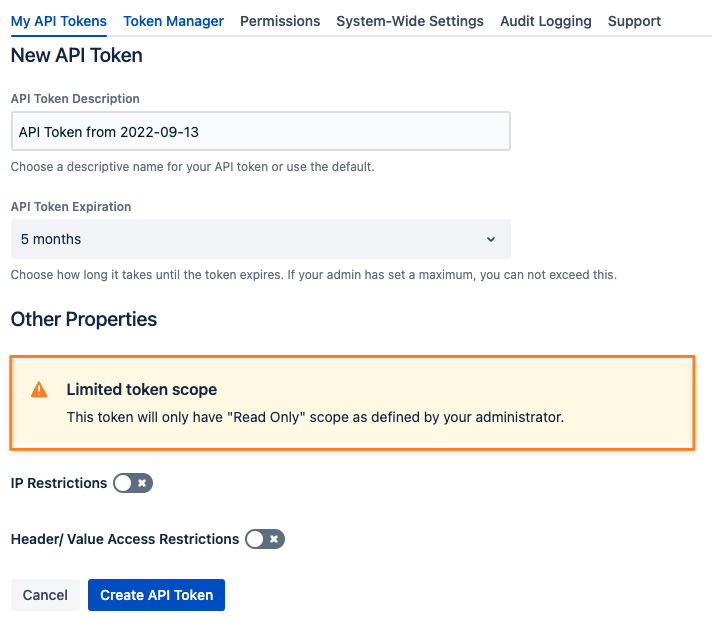
Trying to perform write operations with a read-only token will result in a 403 Forbidden error and a message Authentication failed. Please contact your administrator for more details. This is to not leak any sensitive data.
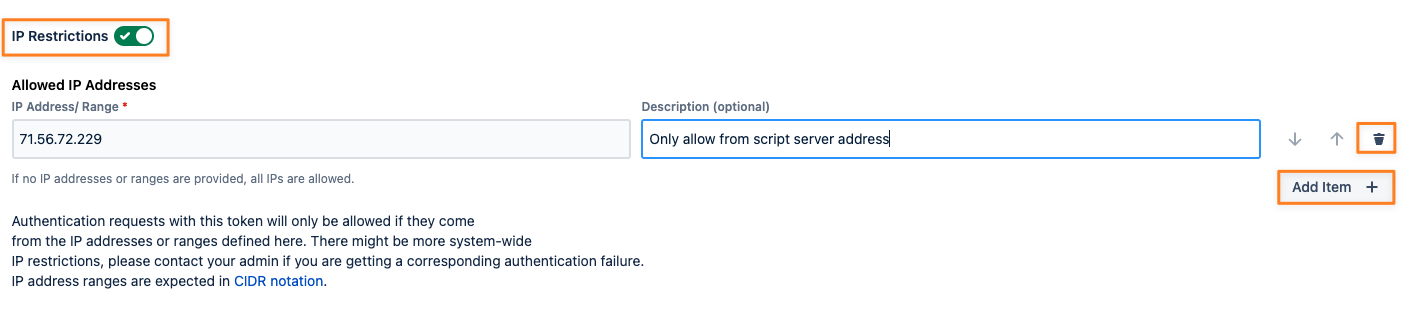
IP Restrictions
The IP Restrictions toggle allows you to add one or more IP addresses/ ranges. Only if the request originates from these addresses our app will authenticate it. You might need to talk to your administrator in case our app is not fully configured to work with reverse proxies. If that would be the case, your request would be rejected even though it comes from the right address. If no addresses were provided, requests from every IP address will be allowed.
To not leak any sensitive details, authentication failures due to IP restrictions will result in 401 - Unauthorized and a message Authentication failed. Please contact your administrator for more details. The administrator can look up more details in the log files in case you can't solve the problem yourself.
Header/ Value Access Restrictions
The Header/ Value Access Restrictions toggle allows you to add one or more rules that allow and/ or deny an authentication request based on the presence of a specific HTTP header and optionally its value. This feature is described in more detail in our documentation. Please read here to continue.
If no rules were provided, every request with that token will be allowed.

To not leak any sensitive details, authentication failures due to header/ value restrictions will result in 401 - Unauthorized and a message Authentication failed. Please contact your administrator for more details. The administrator can look up more details in the log files in case you can't solve the problem yourself. If you get a 500 error instead, the server was not able to validate the restriction in the time allowed (2 seconds for matching regular expressions of your rules).
Rate Limiting
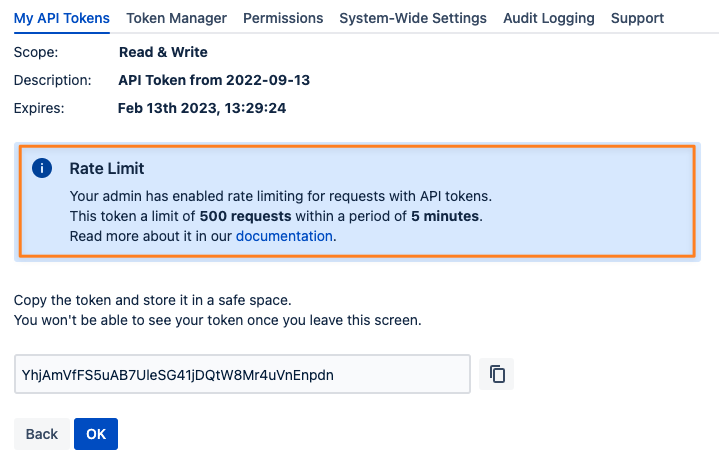
If your administrator has enabled rate-limiting for requests that were authenticated with an API token it will be automatically applied to your token. The same details are also contained in the token list.
For the new token you create, you'll see
for how long the rate limit is valid until it gets reset again
how many requests you can make within that period
Example:
at some point, you make your first request with the token
from that moment on you are allowed to make 5 requests for the next 5 minutes
details about the current rate limit status for your token are contained in the response headers:

if you exceed the amount in ATA-RL-REMAINING, you'll receive error 429 (Too many requests) and some more information as JSON in the response itself
- {
- "remainingMillisecondsUntilRateLimitReset": 283893,
- "requestBucketSize": 5,
- "currentRequestBucketSize": 0,
- "rateLimitMessage": "You've exceeded the rate limit for your token"
- }
the field remainingMillisecondsUntilRateLimitReset provides the amount of time in milliseconds until the request bucket is filled again and you can execute more requests
A rate limit is permanently assigned to an individual API token and can't be changed once that has been created.
Should your administrator have raised the limit in the meantime, you need to create a new token or request one from a person who creates it for you (in case you don't have permission to do that yourself).
Reviewing Token Details
The Details button in your token list opens a window that contains information about who created the token, the IP restrictions and the Header/ Value access rules assigned to it.

Revoking tokens
To revoke any token, simply use the Delete button in the Actions column of your token list. This is only possible if you have permission to create your own tokens.
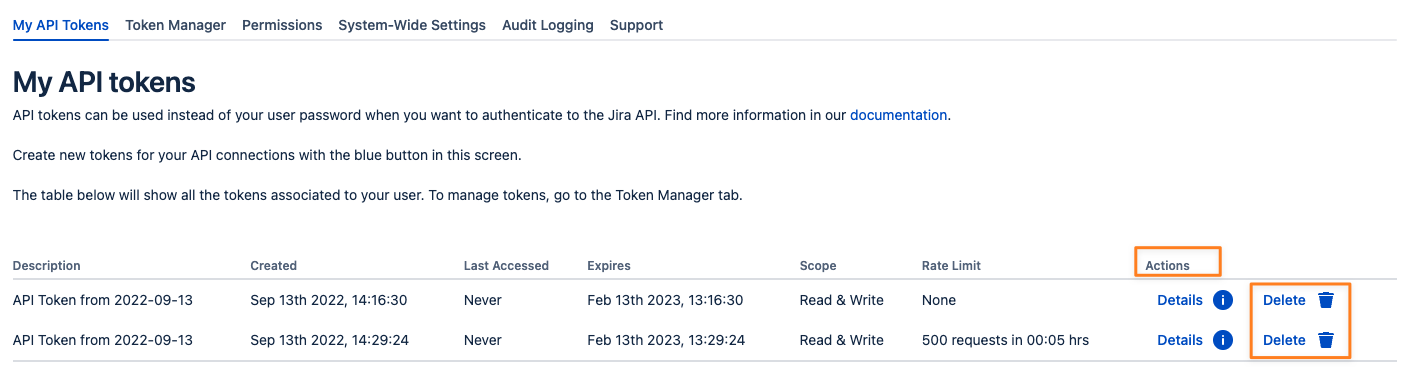
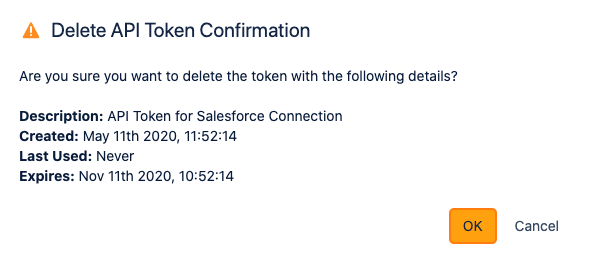
You'll be asked for confirmation again, displaying all the token details for your convenience.
Token Manager
Creating a token for other users
If your administrator has assigned you permission to create tokens for other users, you'll see a tab called "Token Manager". It also allows you to filter the tokens of all users and create and revoke tokens for any of them.
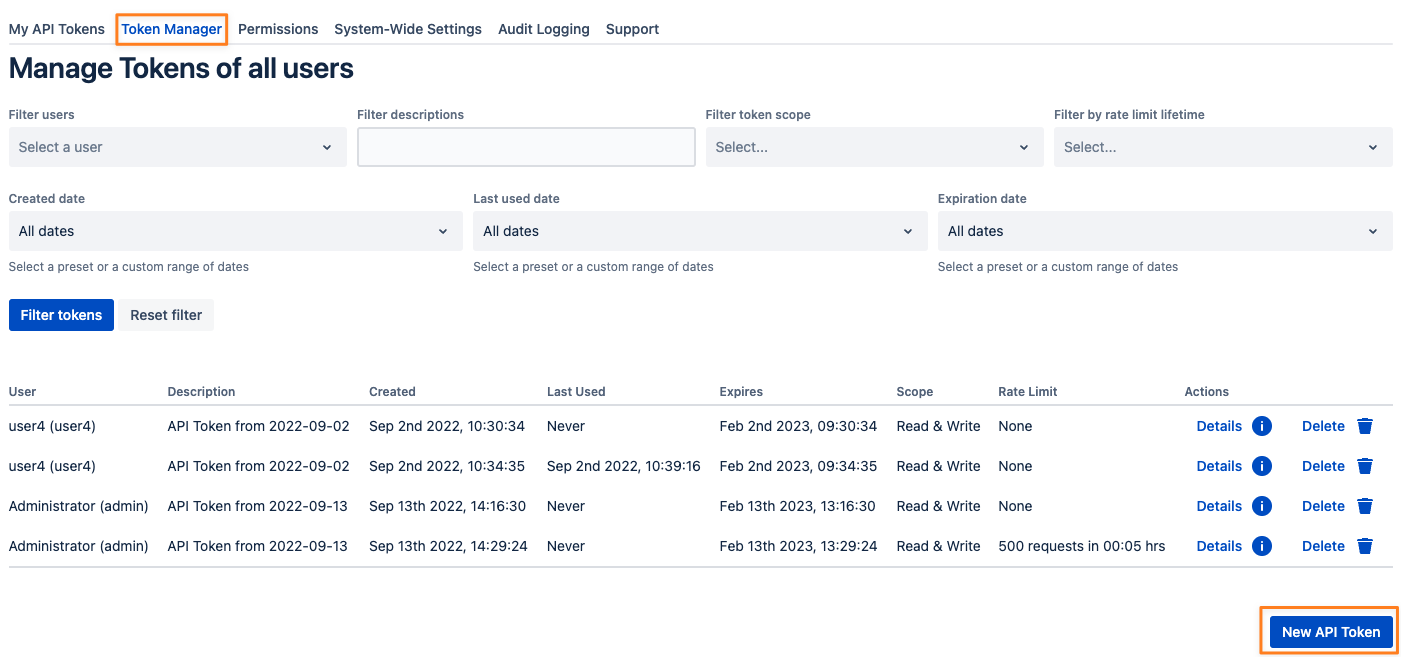
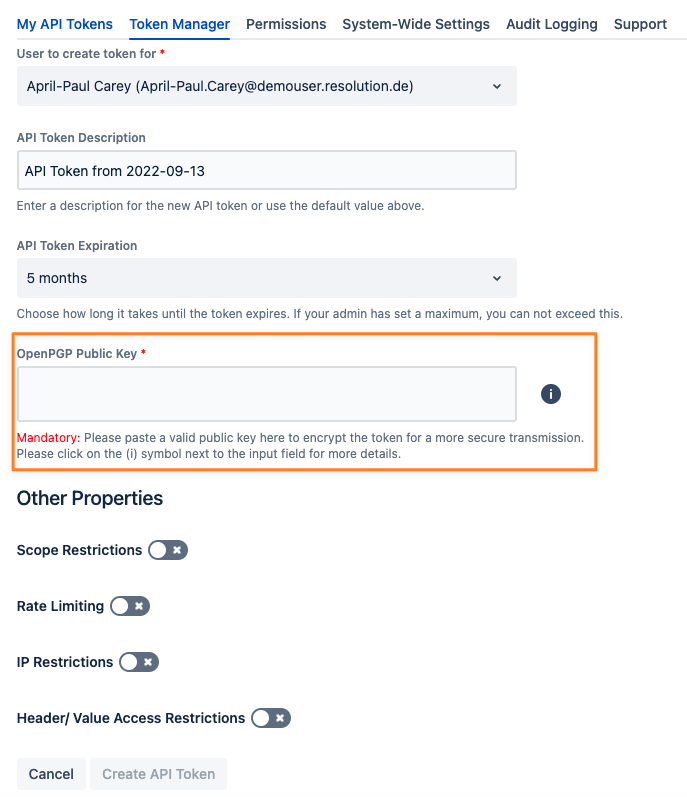
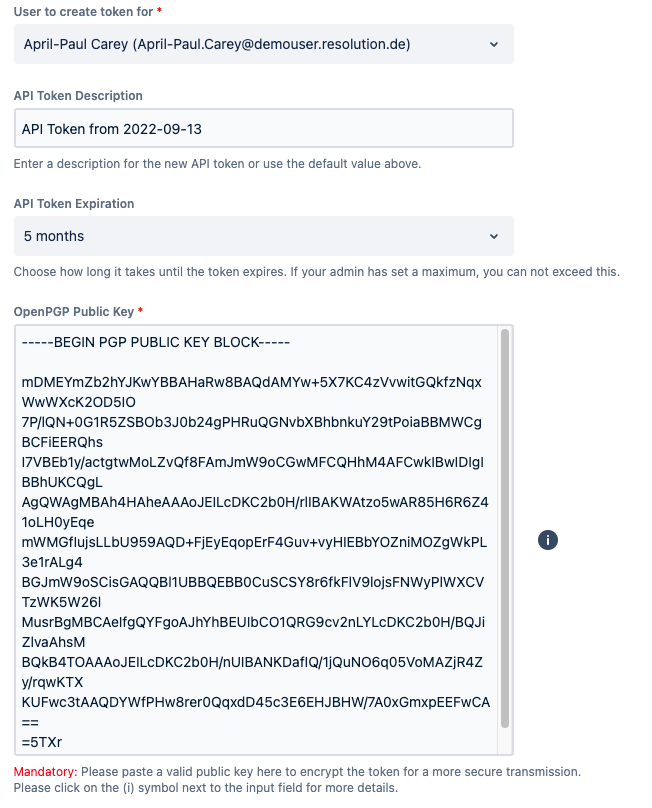
To create a token for somebody else, press the New API Token button again and select the user for whom you want to create the token.
Provide a description and select an expiration time. The minimum value here is what your administrator has defined. You might choose a lower value, but you can't select anything above, if applicable at all.
You may also assign other properties to the token:
Scope (Read Only or Read & Write) as described earlier
not selecting any scope will create a token with Read & Write scope
Rate Limiting
only visible if Rate Limiting has been enabled globally by your admin
if you don't change anything, the rate limit defined globally will be applied automatically
if you decide to change the rate limit properties for the specific token, you may only select smaller values than the ones globally defined
IP Restrictions
HTTP request header/ value access restrictions

OpenPGP Encryption
Encrypting tokens for other users with a PGP public key (available since version 2.1) might be mandatory. The last field at the bottom of the screen will show an additional "Mandatory" flag in that case, preventing the token from being created without providing a valid public OpenPGP key.
You can share this knowledge-base article with the users who should receive an encrypted token. It contains all the information they need to set up OpenPGP, create a public key for you to receive and decrypt the PGP message with the token later.
Rate Limiting
If the administrator has enabled rate-limiting for requests with API tokens it will also be applied to tokens created for another user. You can not select or enter values greater than these but you could use smaller values.
For the example in the picture below it could be any lifetime smaller than 4 hours and a smaller amount of requests in the bucket.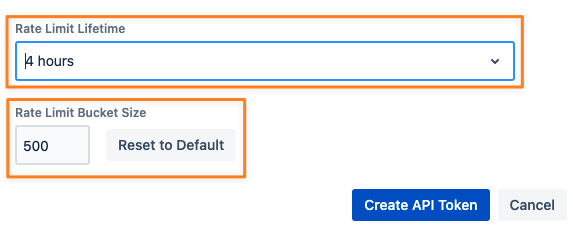
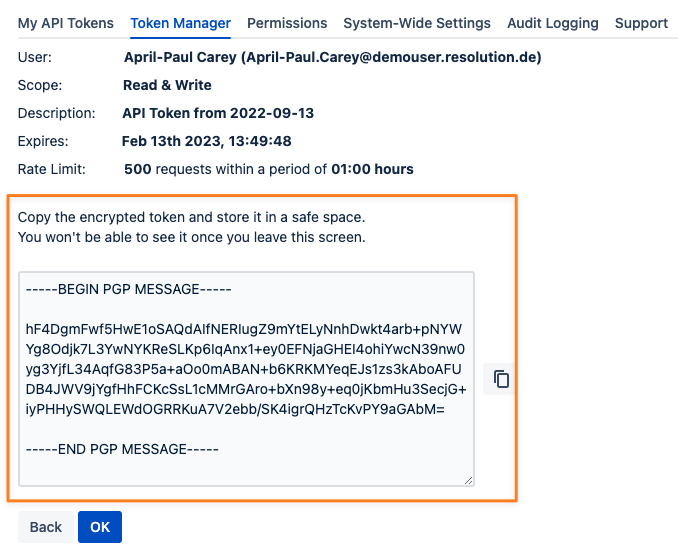
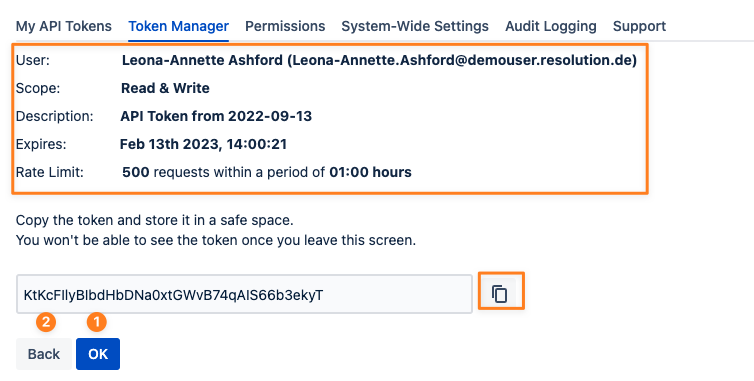
Once you've provided all values you can click the Create API Token button to see the token and its details.
You can copy the token using the button on its right side and click OK (1) to get back to the list of tokens. Alternatively, you can choose to go back (2) and create another token with the same or slightly changed properties. This might be handy when you need to create multiple tokens with similar properties.
Revoking tokens of other users
If you have permission to access the Token Manager tab, you can revoke/ delete tokens in the same way you would your own tokens.
Just use the delete icon/ link in the Action column.
Filter Tokens
The token manager tab also provides filter capabilities for almost all token properties.
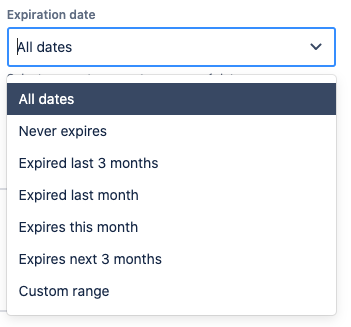
Select one or more users for whom you want to see their tokens, and enter a string from the token description to search for (search is case insensitive) or filter for created, last used or expiration date.
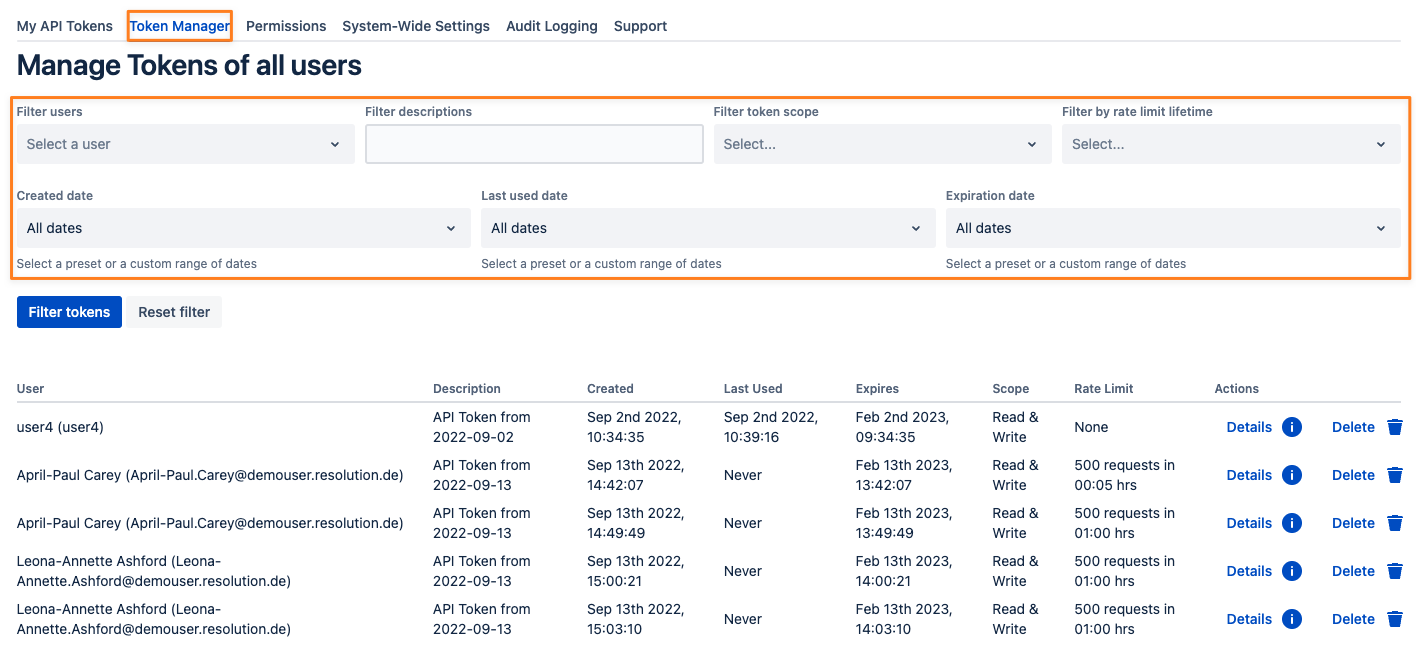
The date filters provide presets to choose from but you can also define a custom range for each