
Azure and ALB Setup
Goal
After completing this guide, you will have set up Azure and your ALB for the AWS ALB & Amazon Cognito Authentication app.
Prerequisites
This guide assumes the following:
A (trial) subscription for the AWS ALB Auth app
Admin access to your Atlassian product and AWS
Guide
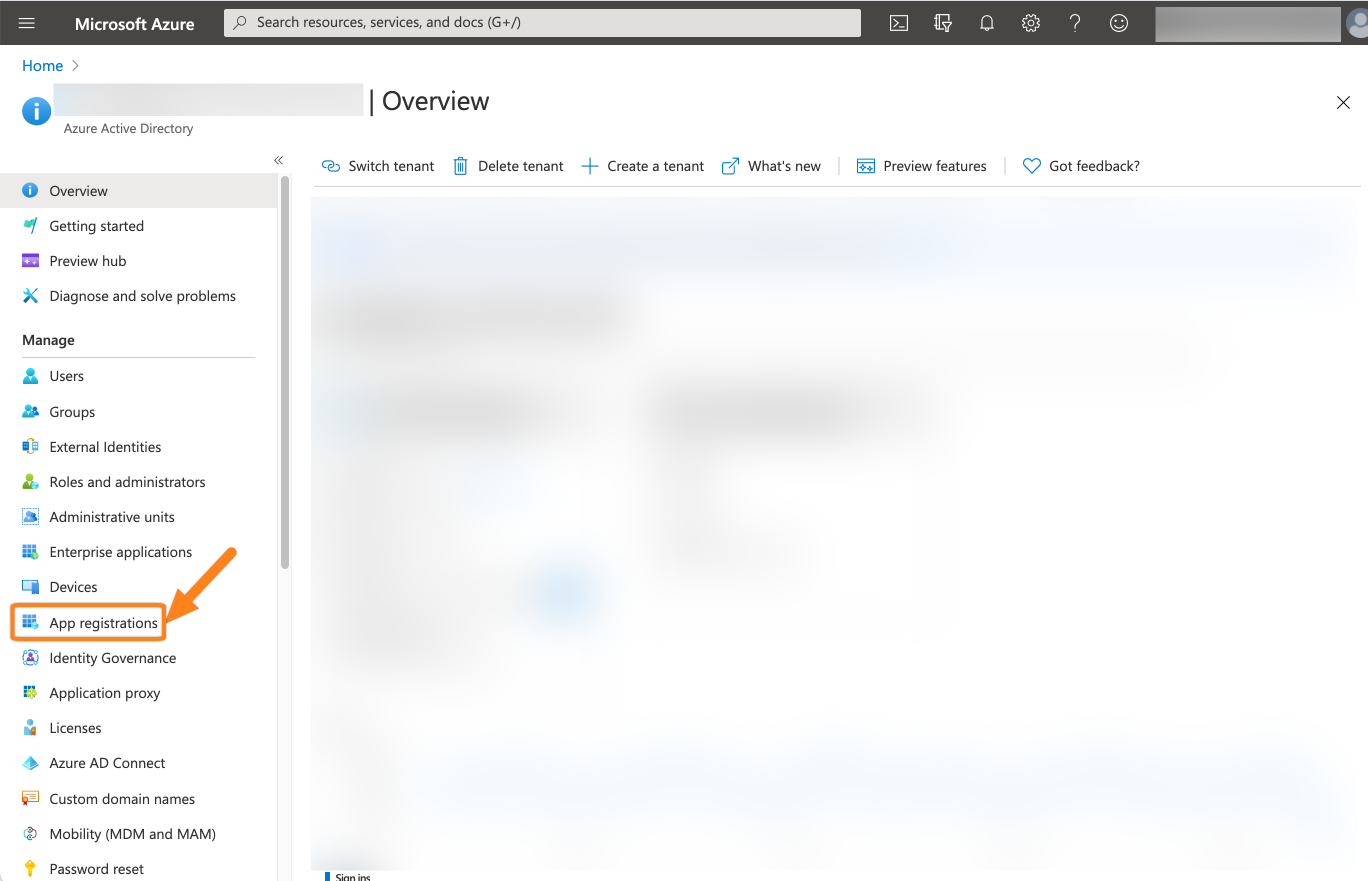
Go to https://portal.azure.com, then to Azure Active Directory and choose App registrations.

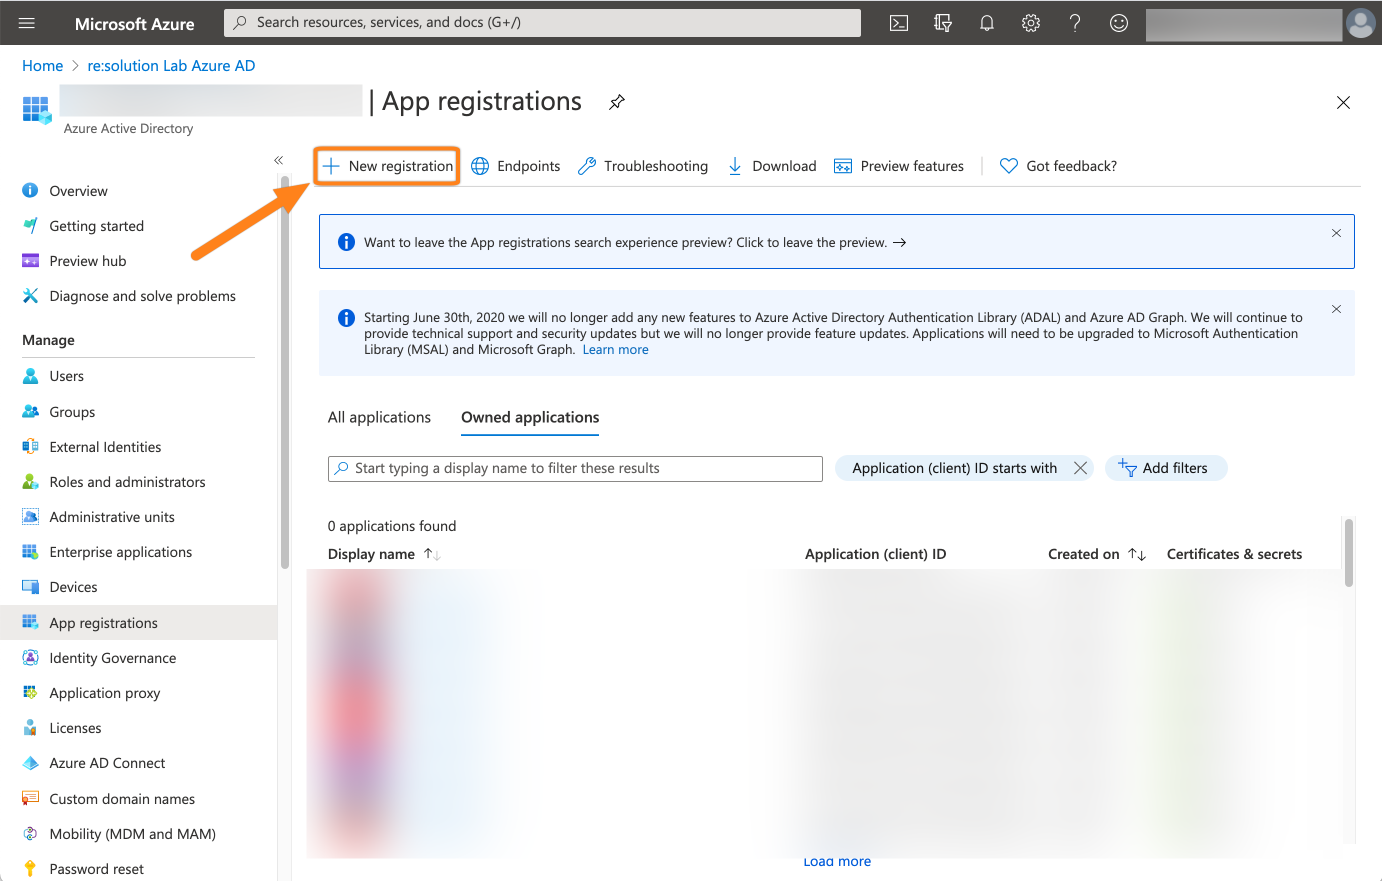
Then click New Registration

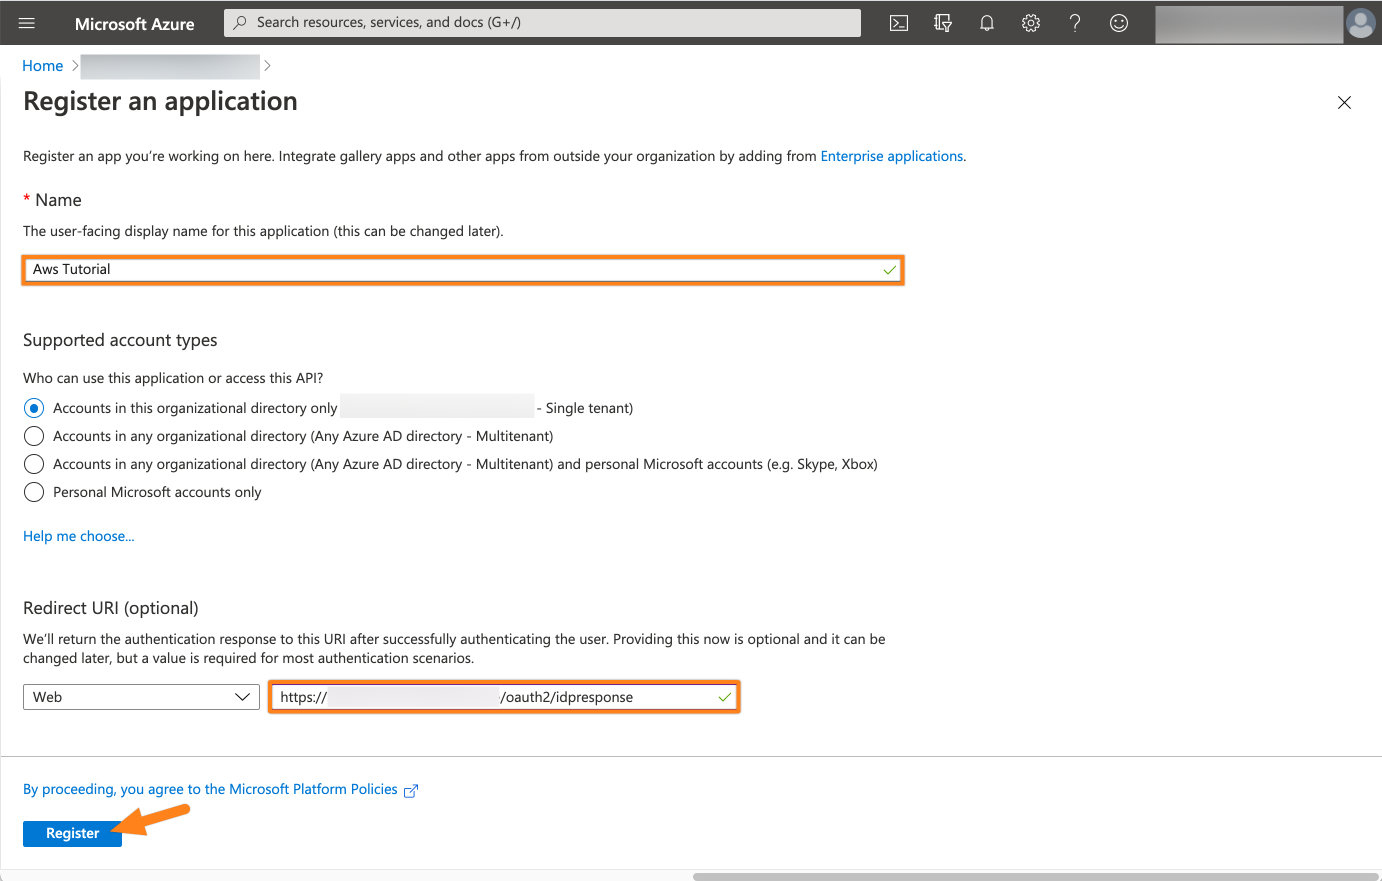
Enter a name for the app. Now, add the Redirect URI https://<baseUrl>/oauth2/idpresponse and substitute <baseUrl> with the baseUrl of your instance.

Copy the Directory (tenant) ID, as well as the Application (client) ID into your favorite text editor. We will need it later.

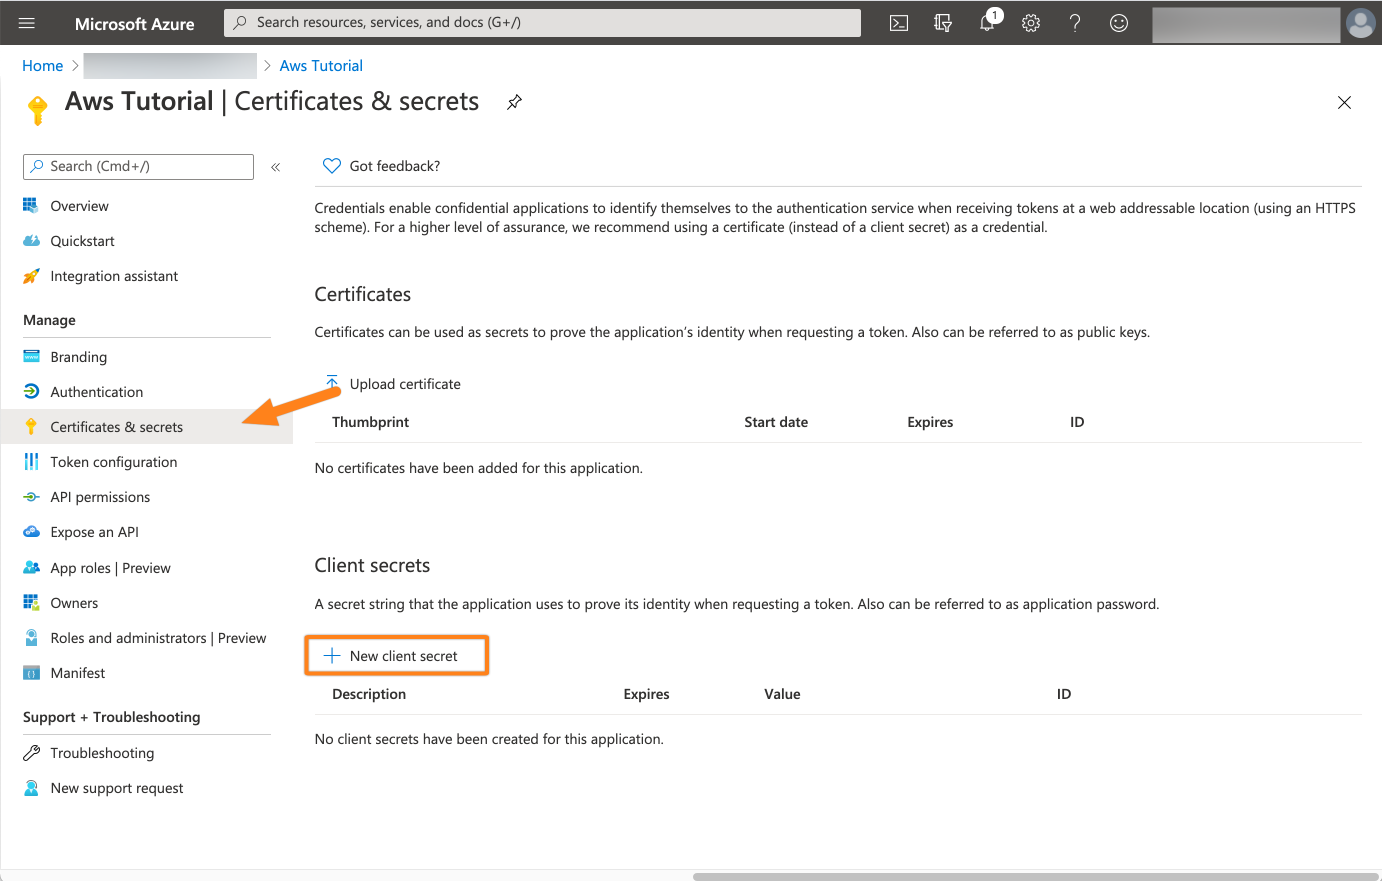
Now go to Certificates & secrets and click New client secret.

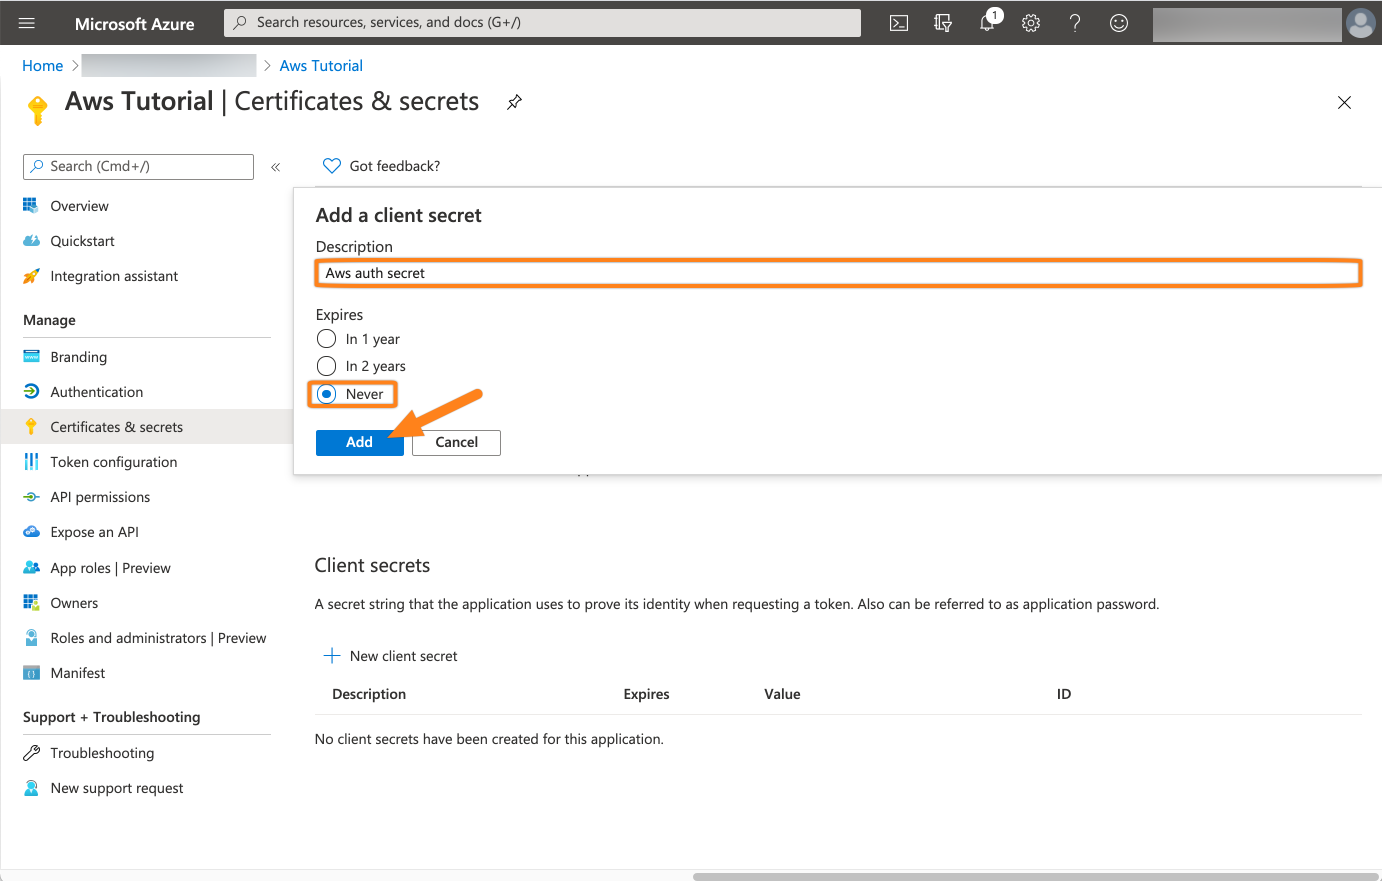
Add a Description for the secret and an Expiry. If you do not want to interrupt your service, choose Never and click Add.

Now, the secret will be displayed once. Thus, click the copy button near the Value column and add this to your text editor as well.

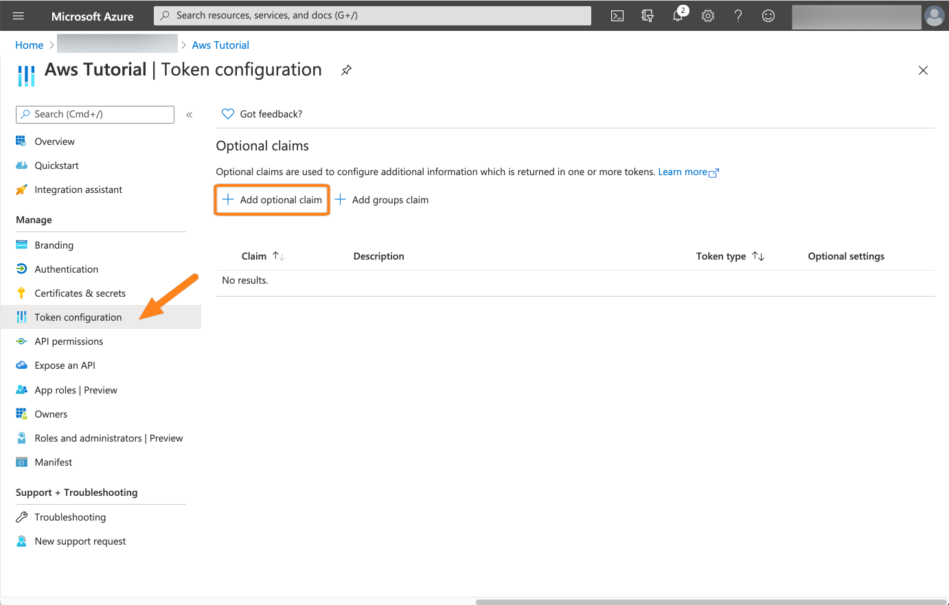
Next, click Token configuration and then Add optional claim.
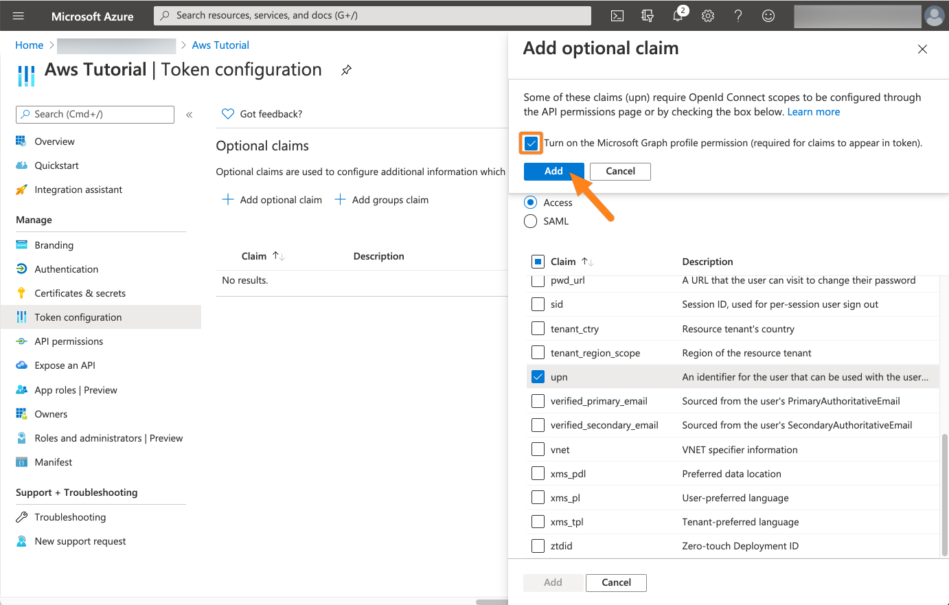
For the type choose Access - for some reason, the ALB will ignore ID tokens. For this tutorial series, we assume that you use the user principal name for the username in your Atlassian application. Thus, click upn from the list and confirm by clicking Add.

Azure will now ask you to add permissions to retrieve the claims from before. Select Turn on the Microsoft Graph ... option and click Add.
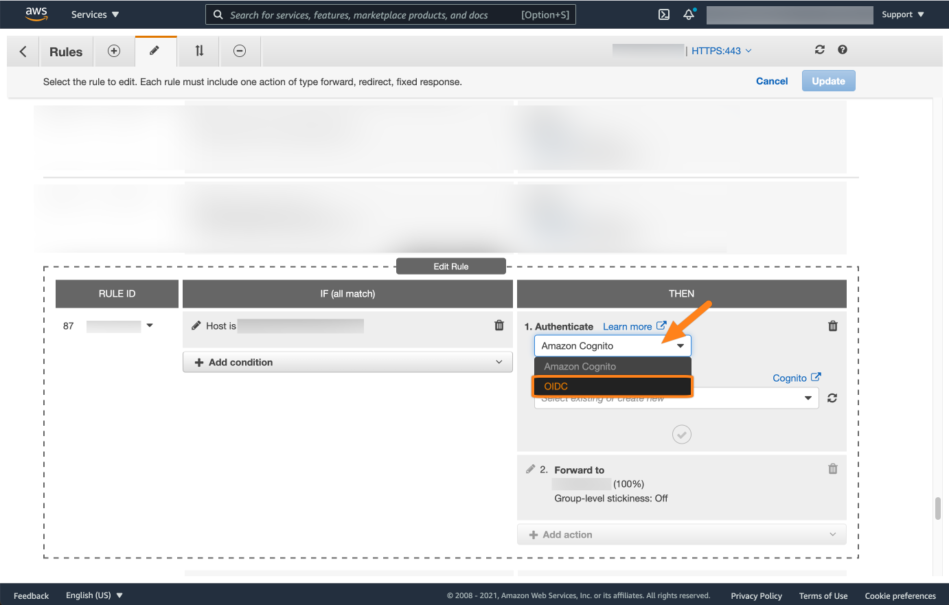
For the next steps, go to the AWS management console at https://console.aws.amazon.com/ and go to the Load balancers options.
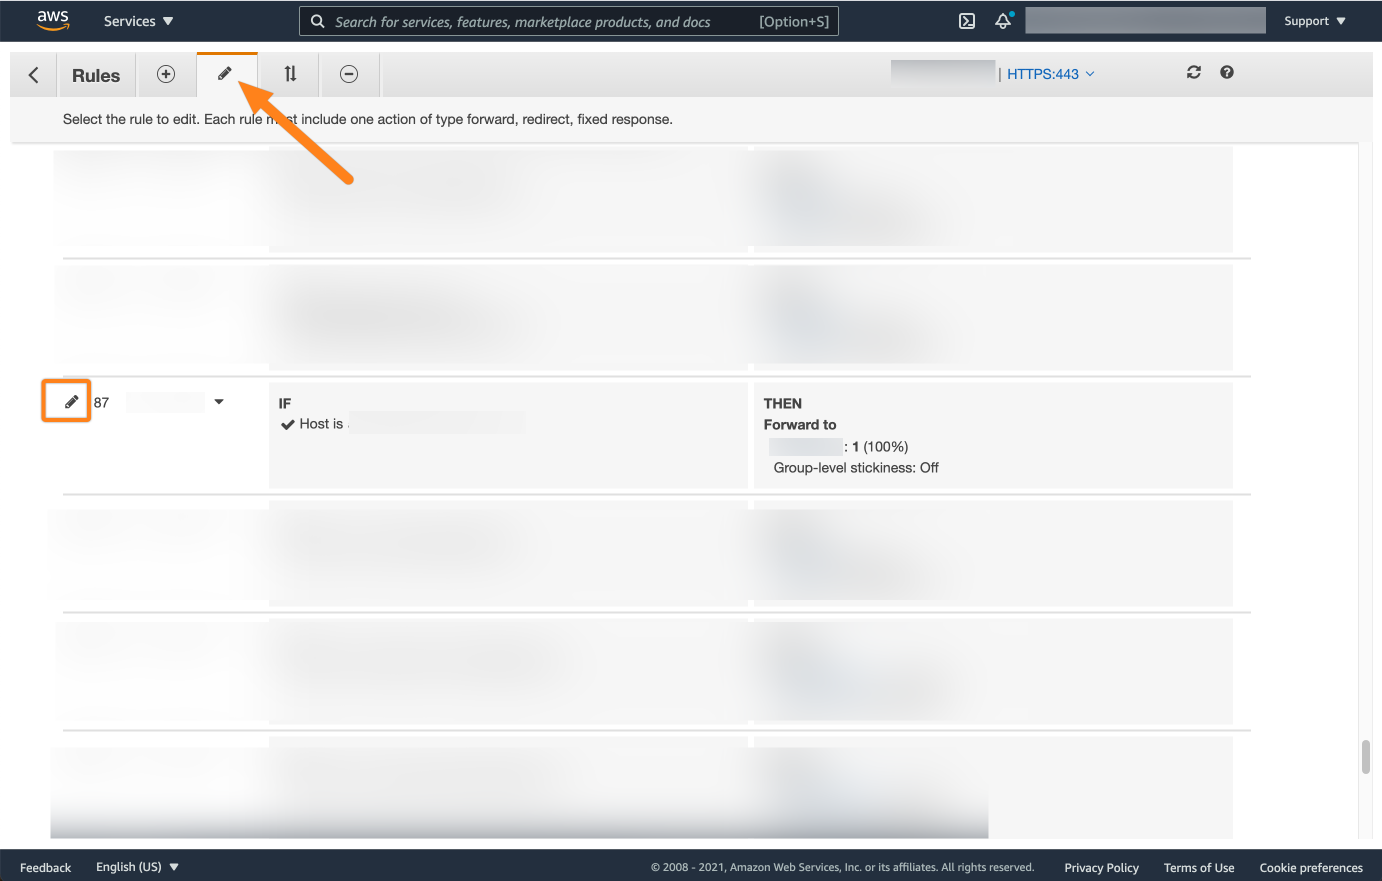
Select the load balancer which manages your Atlassian product, go to Listeners and click View/edit rules for the listener.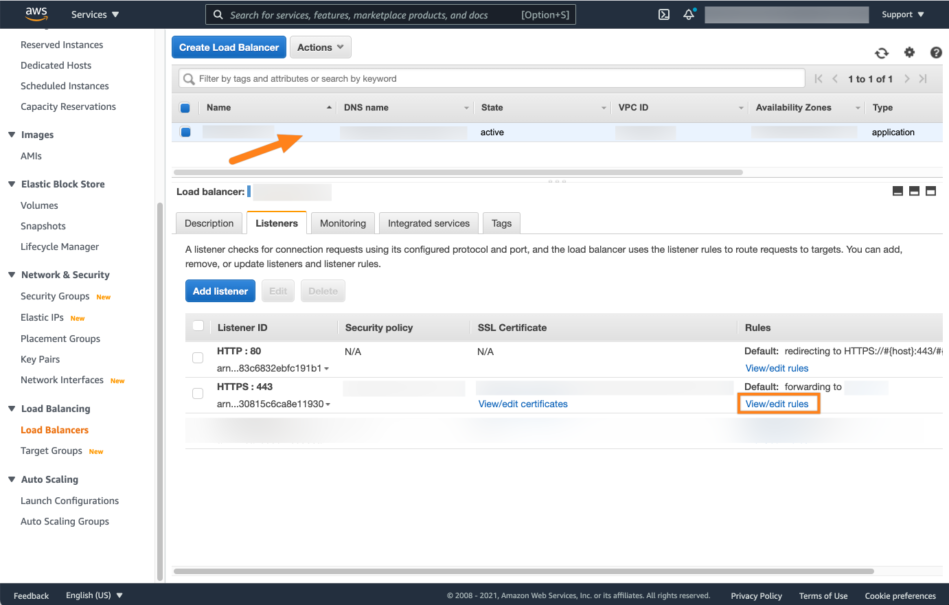
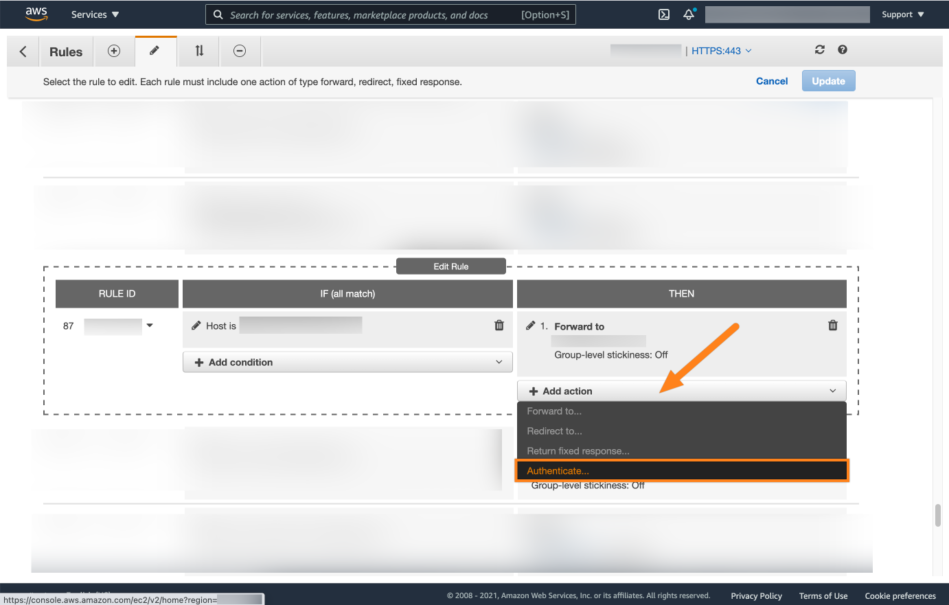
On the rules page, click the edit tab. Next, search for the rule of your Atlassian product and select the edit icon.

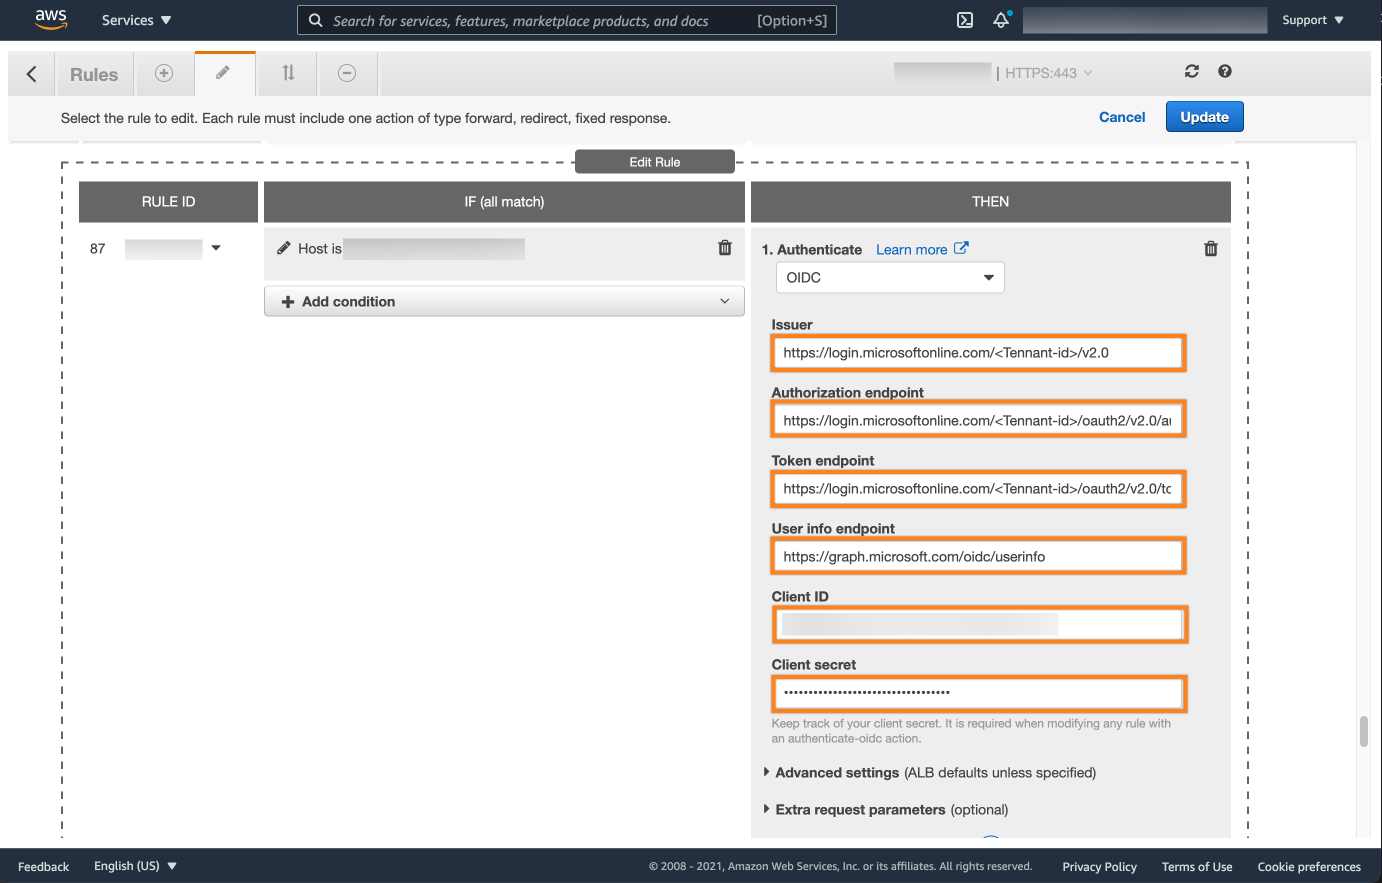
Select Add action and choose Authenticate.
Next, choose OIDC for the type of the authentication.
Now we need to add the urls. You need the Directory Tenant ID, and Application Client ID, as well as the secret.

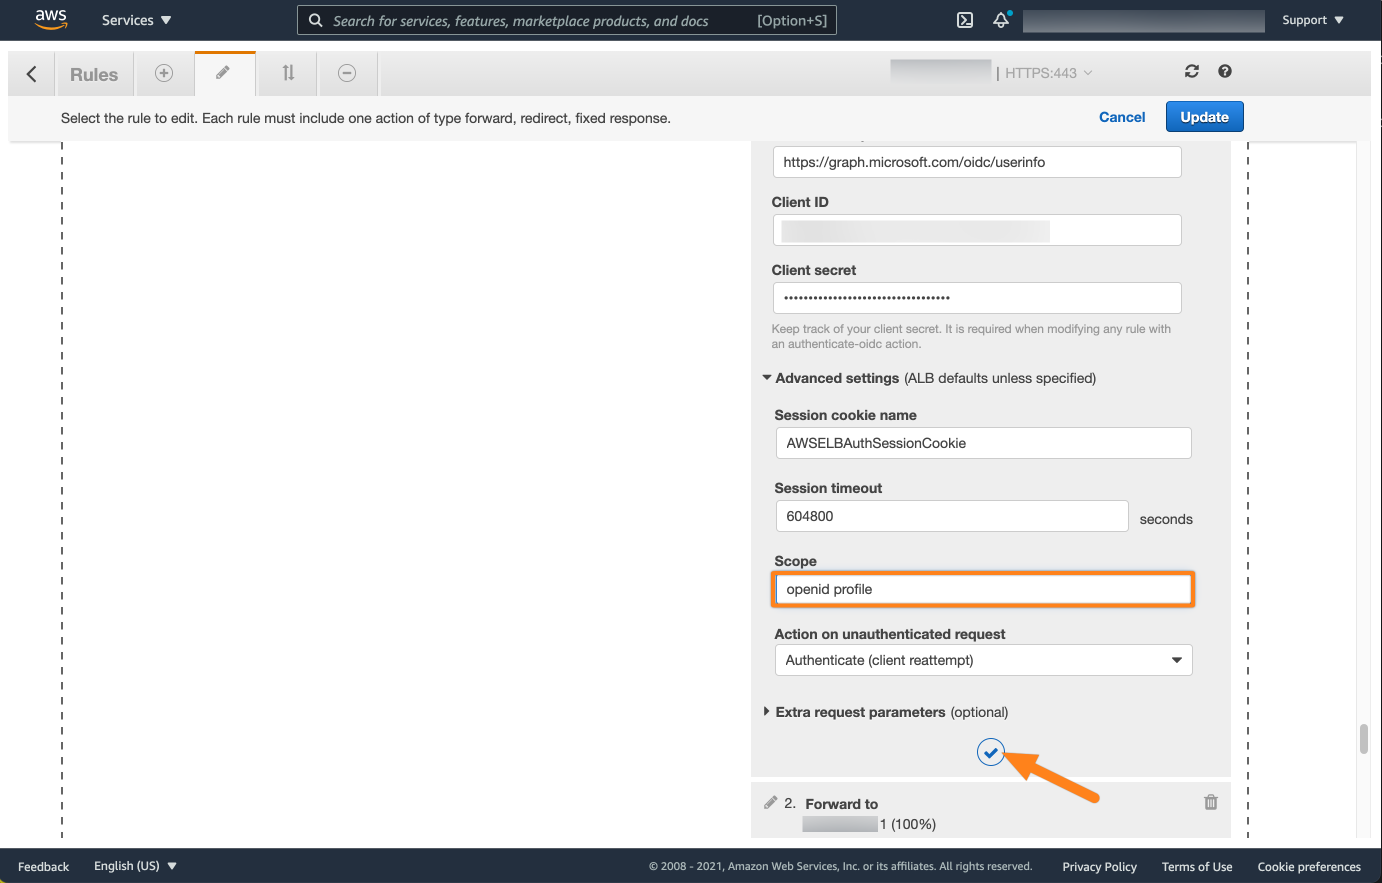
Next, expand Advanced settings and set the scope to "openid profile". (Without quotes. The space between the two words is important!!). Click the checkmark button.
Don't forget to select the load balancer below under Forward to
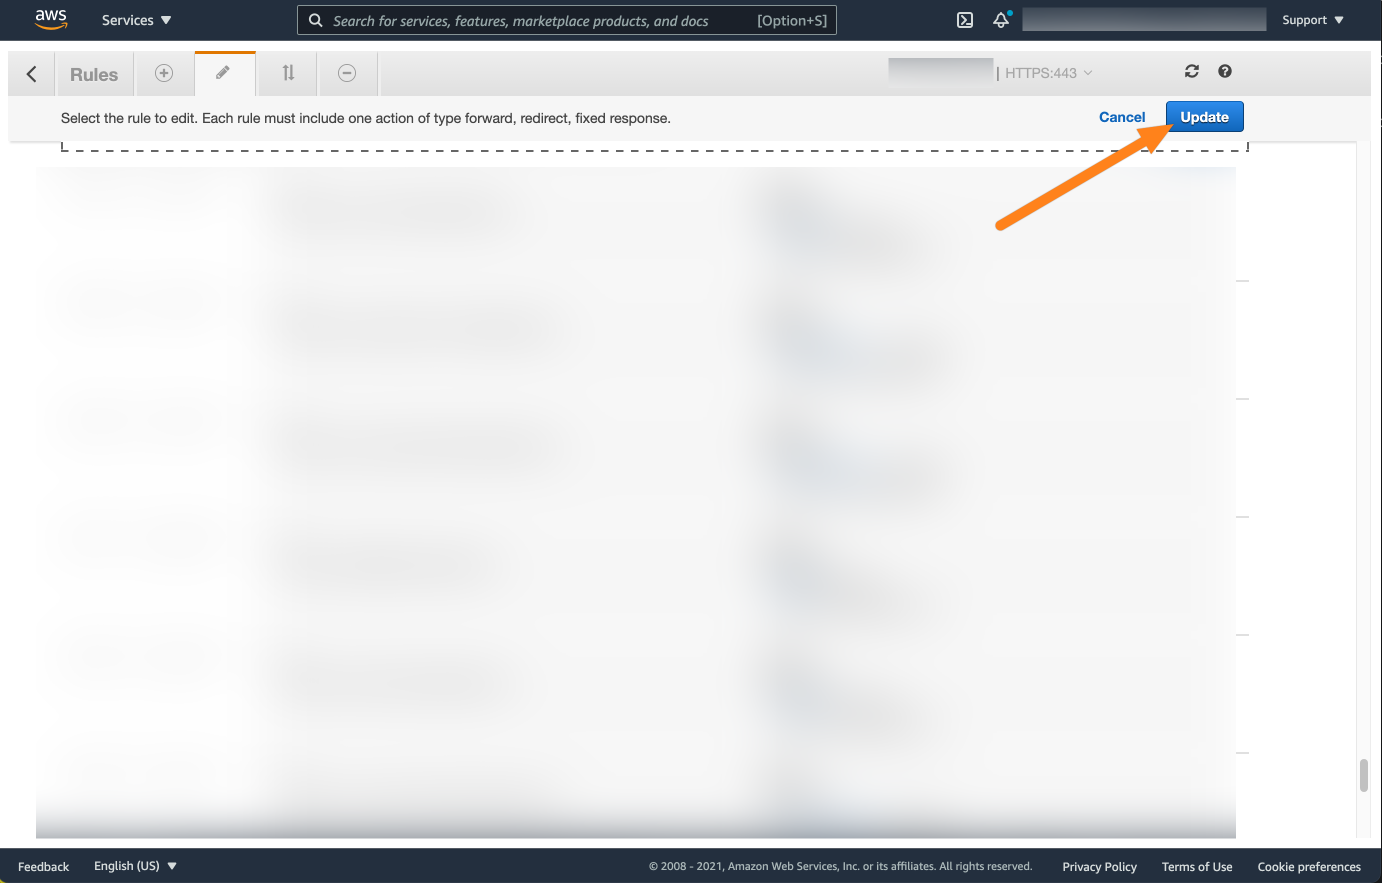
For the last step, click Update to save your settings. Please note that it will take some seconds until this will be enforced.


Further configuration
Please see (3.3.x) User Provisioning to learn about user provisioning, e.g. by claims or with an identity provider