
Activating Task Egg Timer in your Jira project
Project Settings
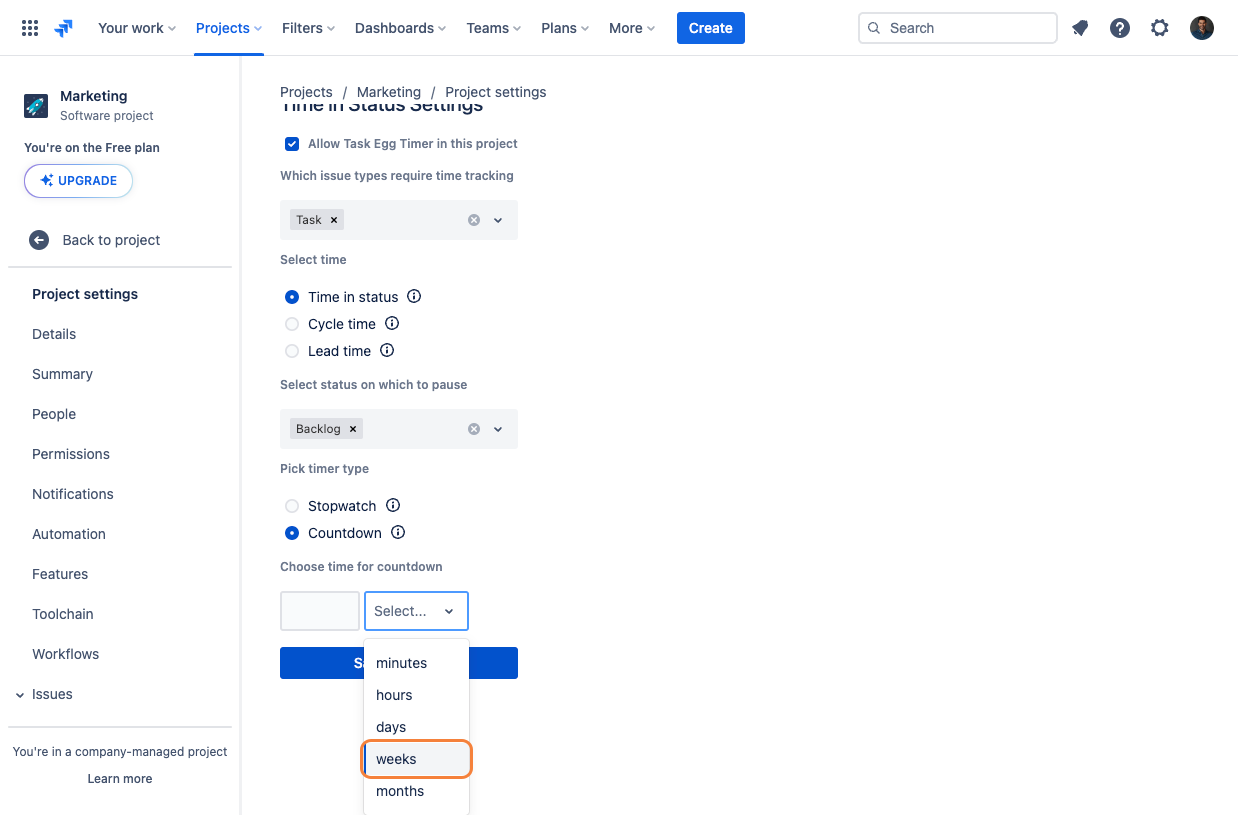
The first step to activate Task Egg Timer within your project is to click on the "Allow Task Egg Timer in this project" checkbox.
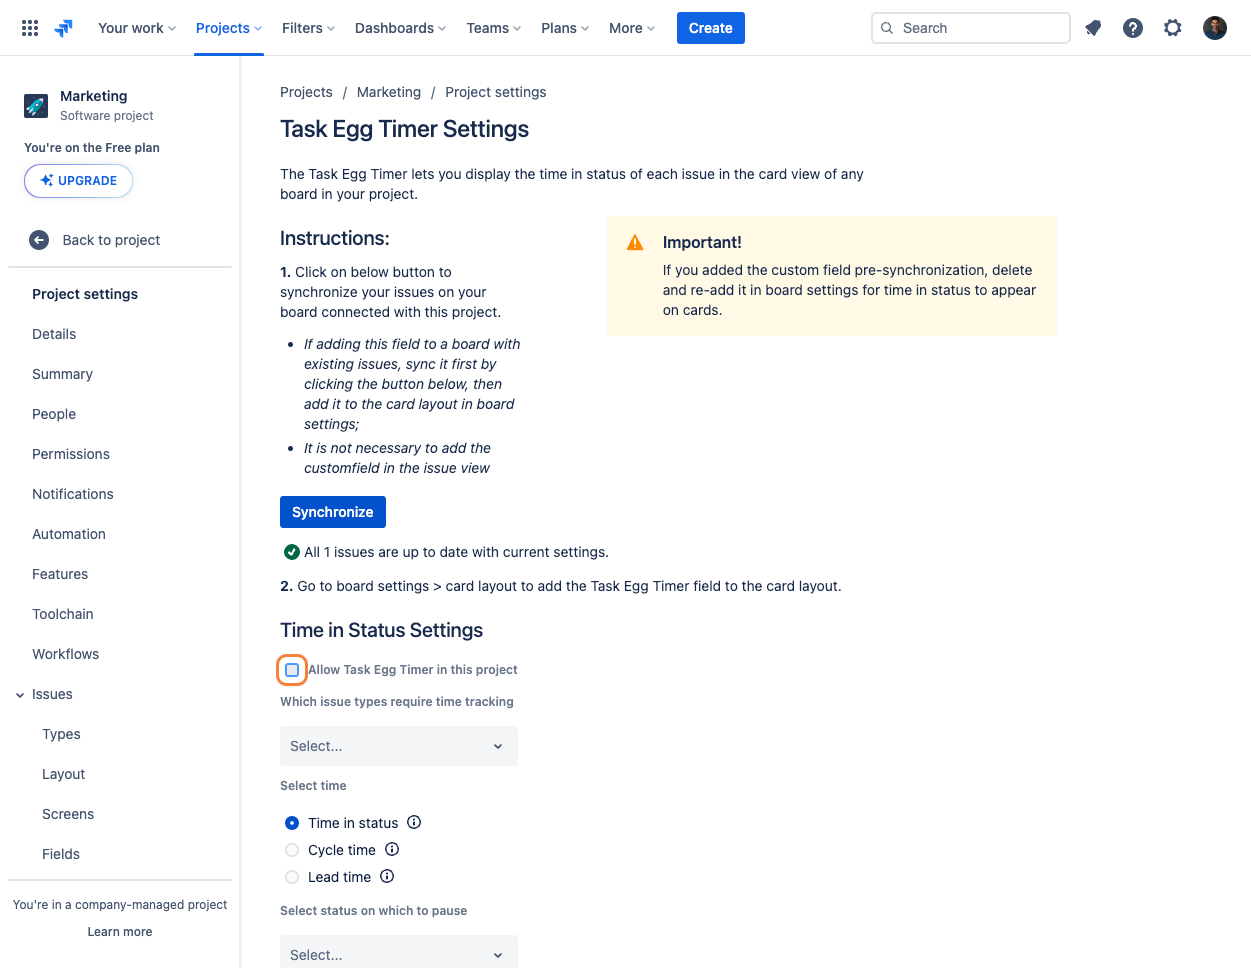
Select which Jira issue types to track (please note that multiple types can be selected)

Select the relevant Jira project format based on your project (“Time in Status”, “Cycle Time“, or “Lead Time“)
Time in Status: Measures how long an issue stays in a particular status or stage within its workflow.
Cycle Time: Measures the amount of time an issue spends in the active working process—from when work actually begins on the issue to when the issue is resolved.
Lead Time: Measures the total time from when a request is initially made (or a task is created) to when it is fully completed.
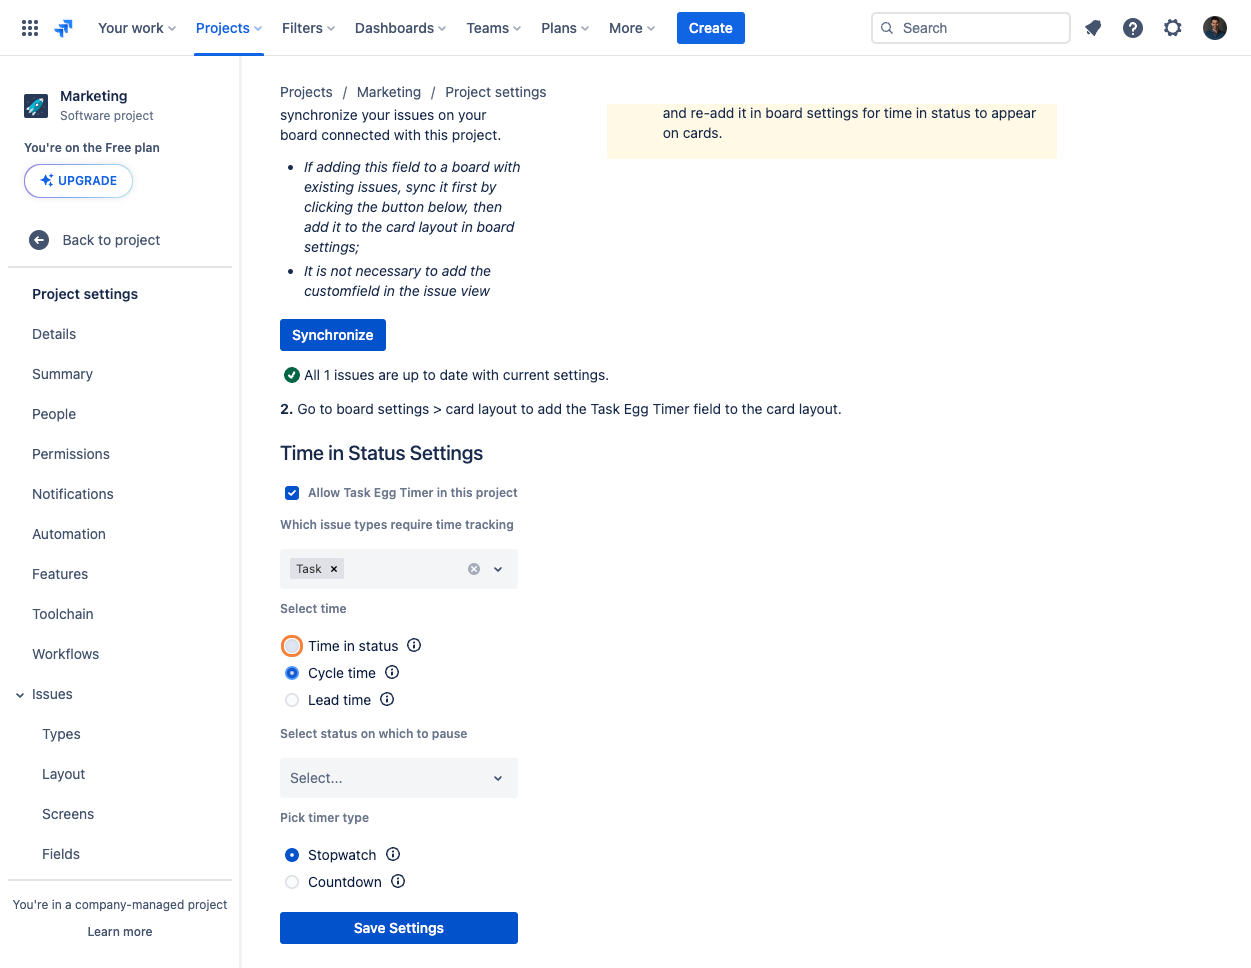
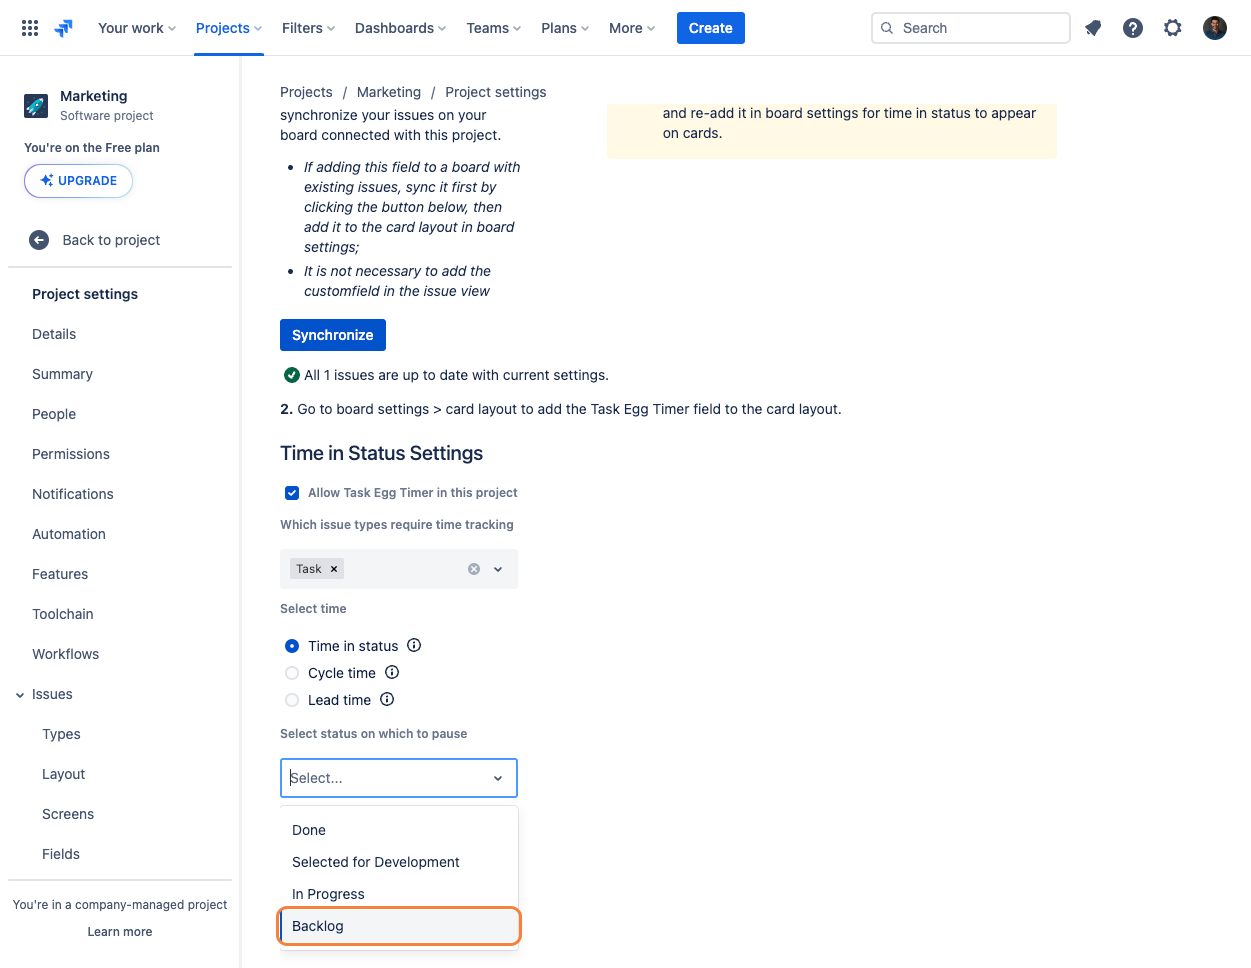
Should a pause be needed, select which status should pause the timer.
Based on your project type and/or objective, you can decide if the timer displayed on the cards should be based on a stopwatch or a countdown.
Stopwatch: Measures the duration of the event or the amount of time that has elapsed from a starting point.
Countdown: Counts down from a set amount of time to zero, used to signal the end of a period.
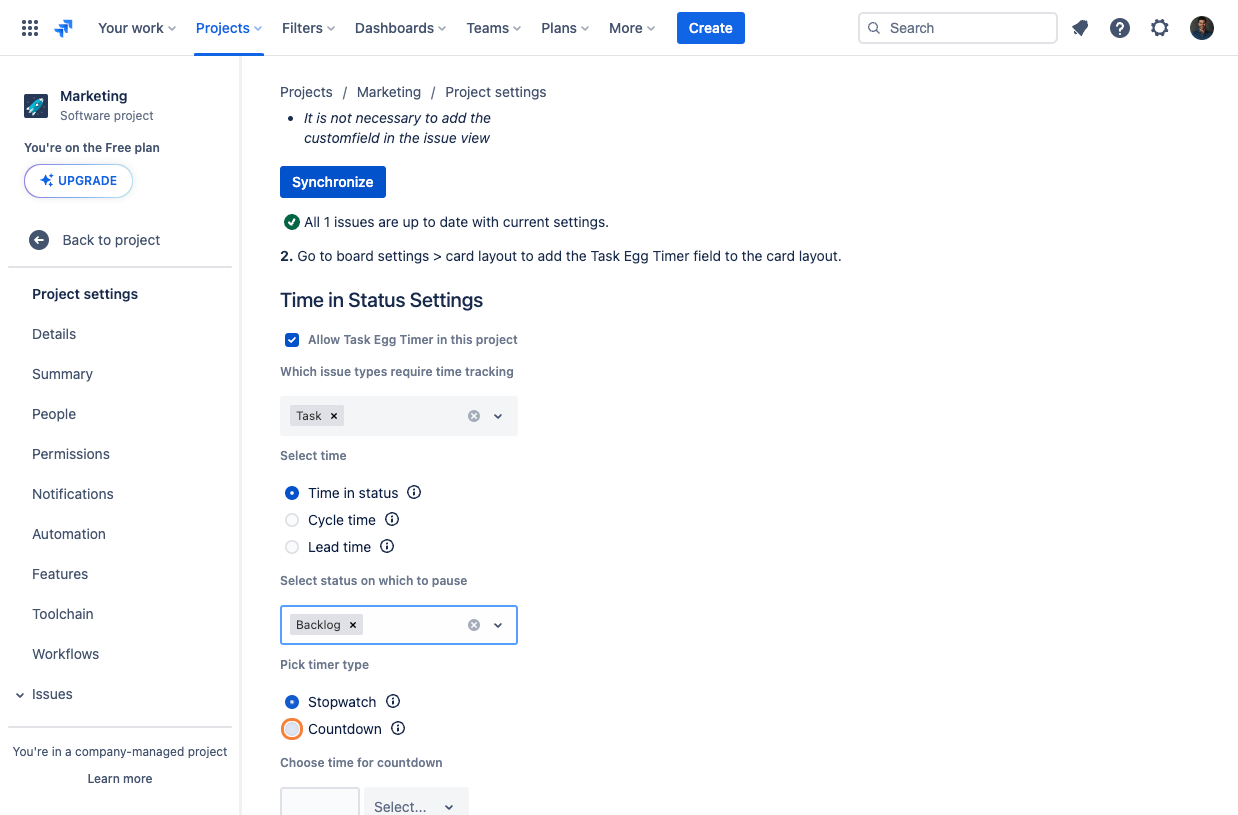
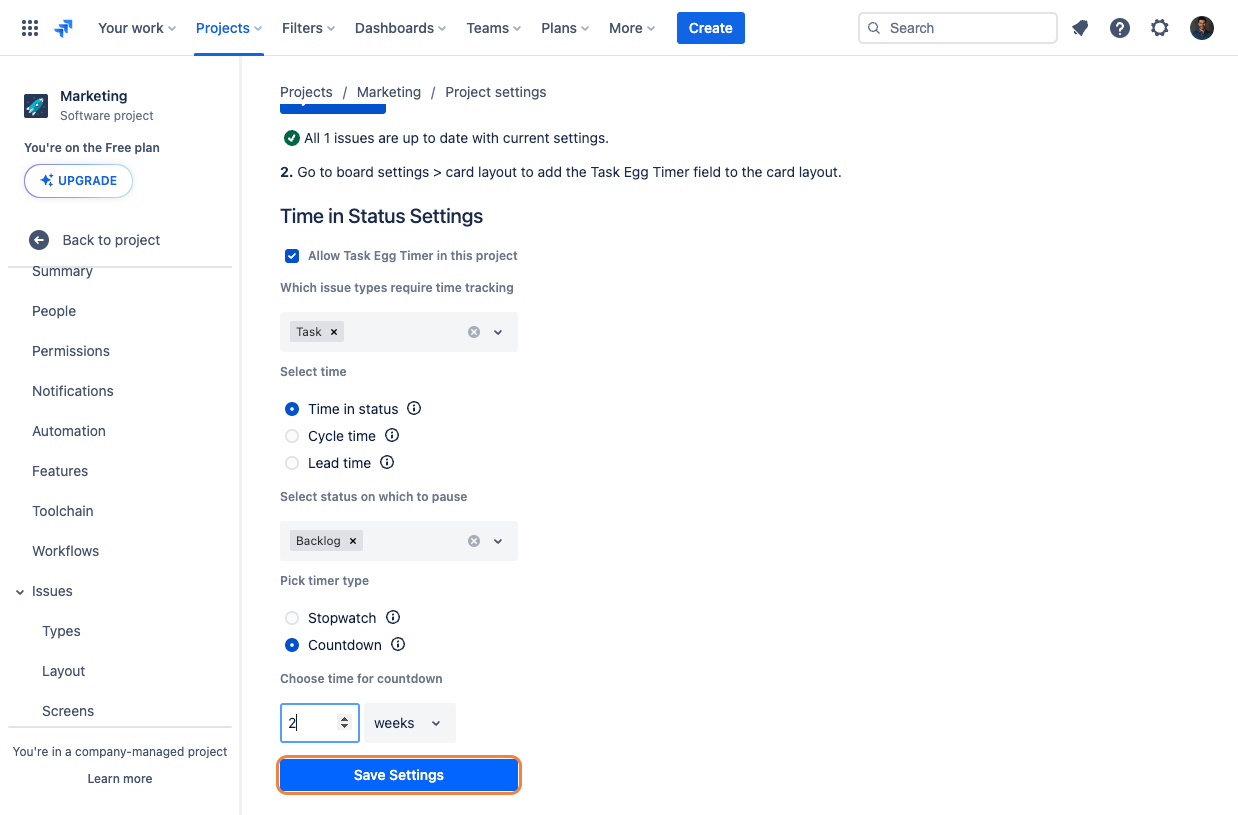
When selecting the "Countdown" timer, be sure to configure the countdown based on "Minutes", "Hours", "Days", "Weeks", or "Months".
Once the desired intervals have been selected, go ahead and enter the desired amount of time to match your intervals.

Click on “Save Settings“ to activate “Task Egg Timer“ within your project.
Board Settings
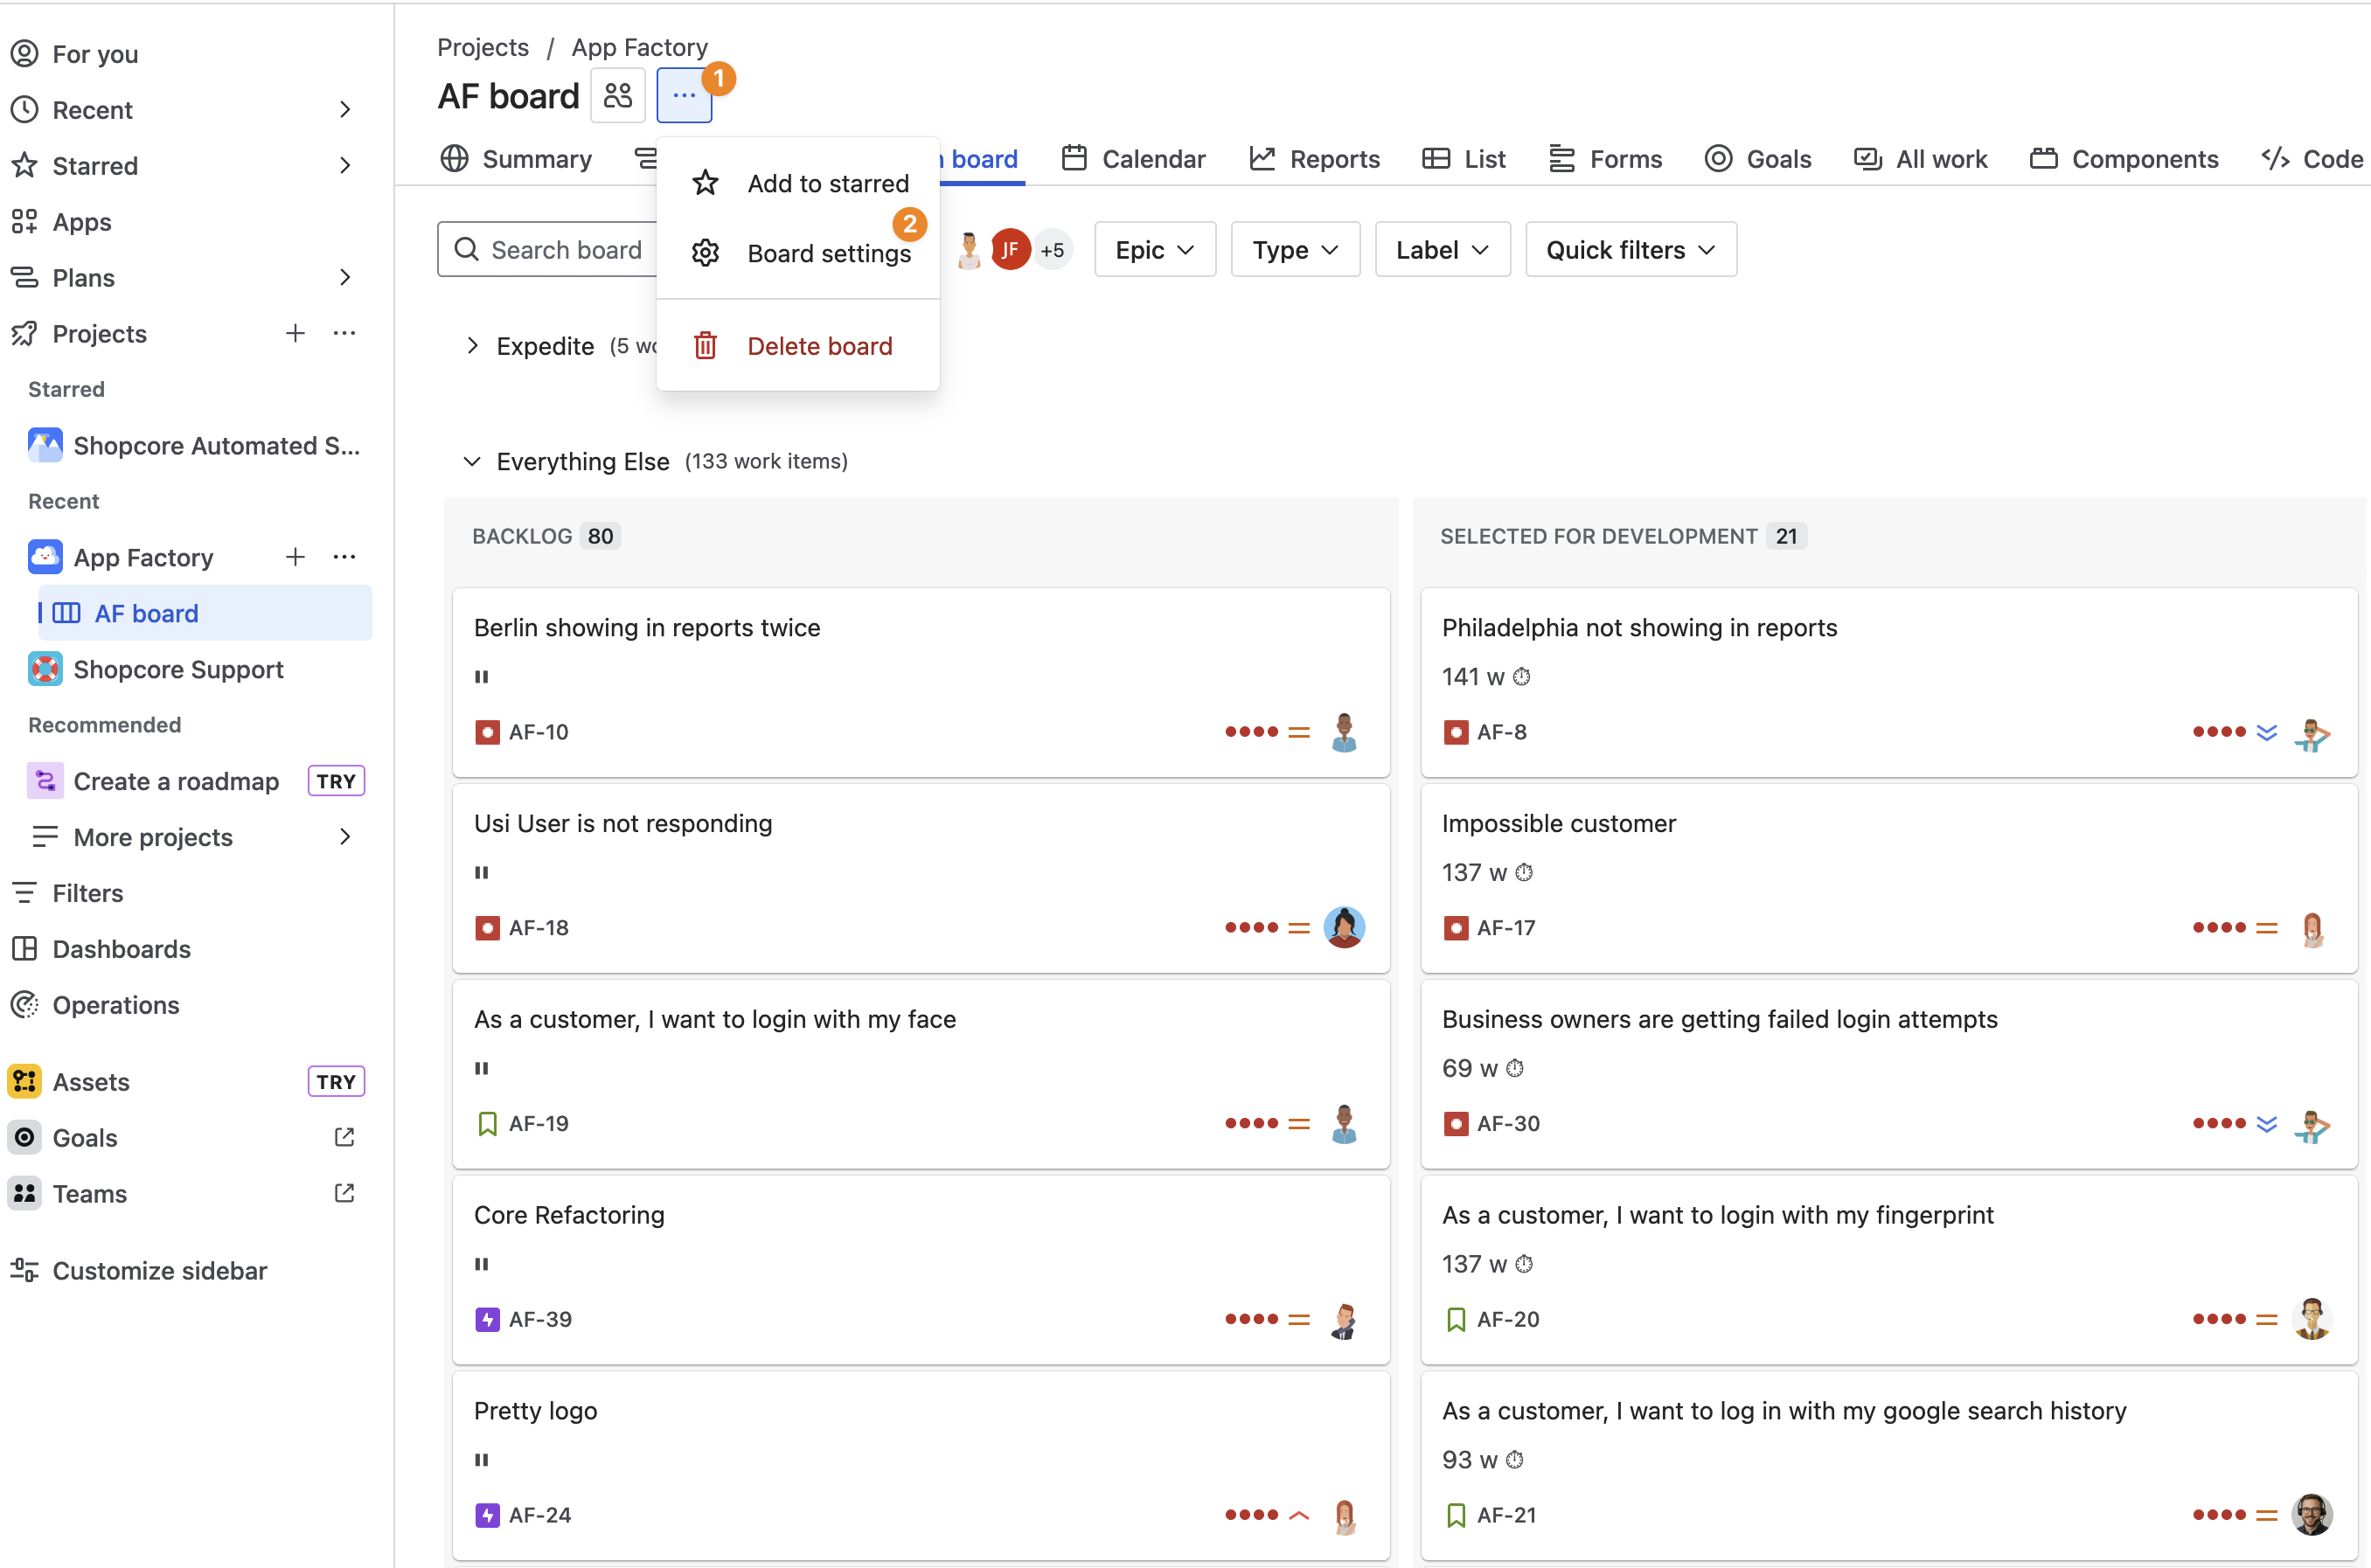
To make the measured values visible in the card view of your Jira board, you need to add the Task Egg Timer field to it. Click on the three dots/ more options link beside your board name (1) and select Board settings (2):
Under Layout/ Card layout (1), you can then add the Task Egg Timer field (2):
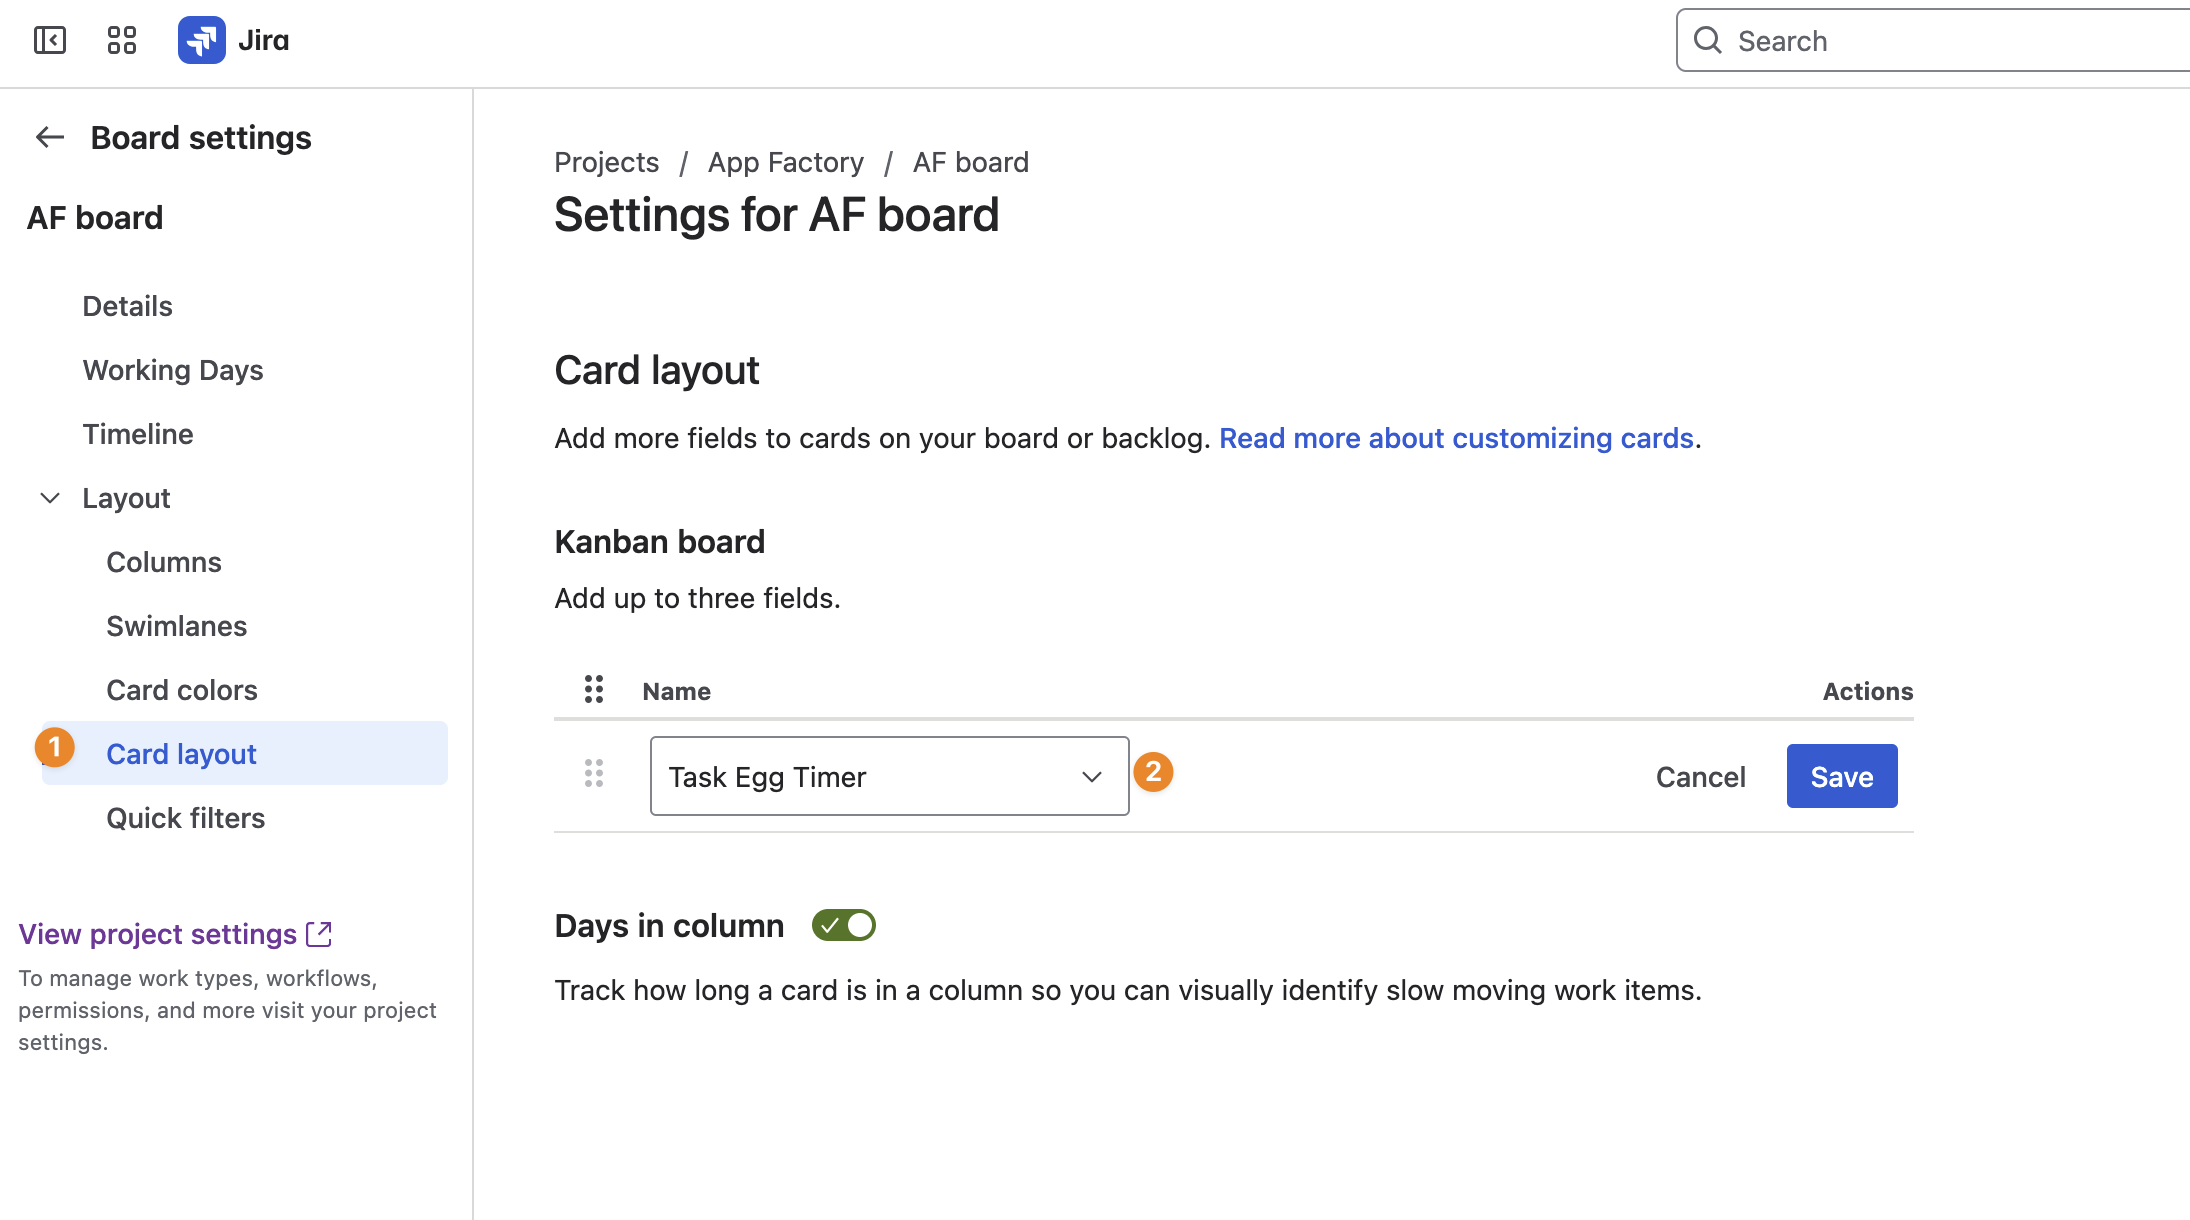
Save your changes, refresh your board, and you are set.
Once the Task Egg Timer has been activated within your project, it will be displayed as a custom field called “Task Egg Timer“. Please ensure to include this field in your views/ work item layouts, if you want the values to be visible outside the card view as well.