User Guide
After installing the app and granting it access to your workspace, you can create your first required field rule.
It is important to mention that you need to have admin rights or board ownership status to create a rule.
Creating required field rules and automations
1. Open the app by heading to the board where you want to implement the rule.
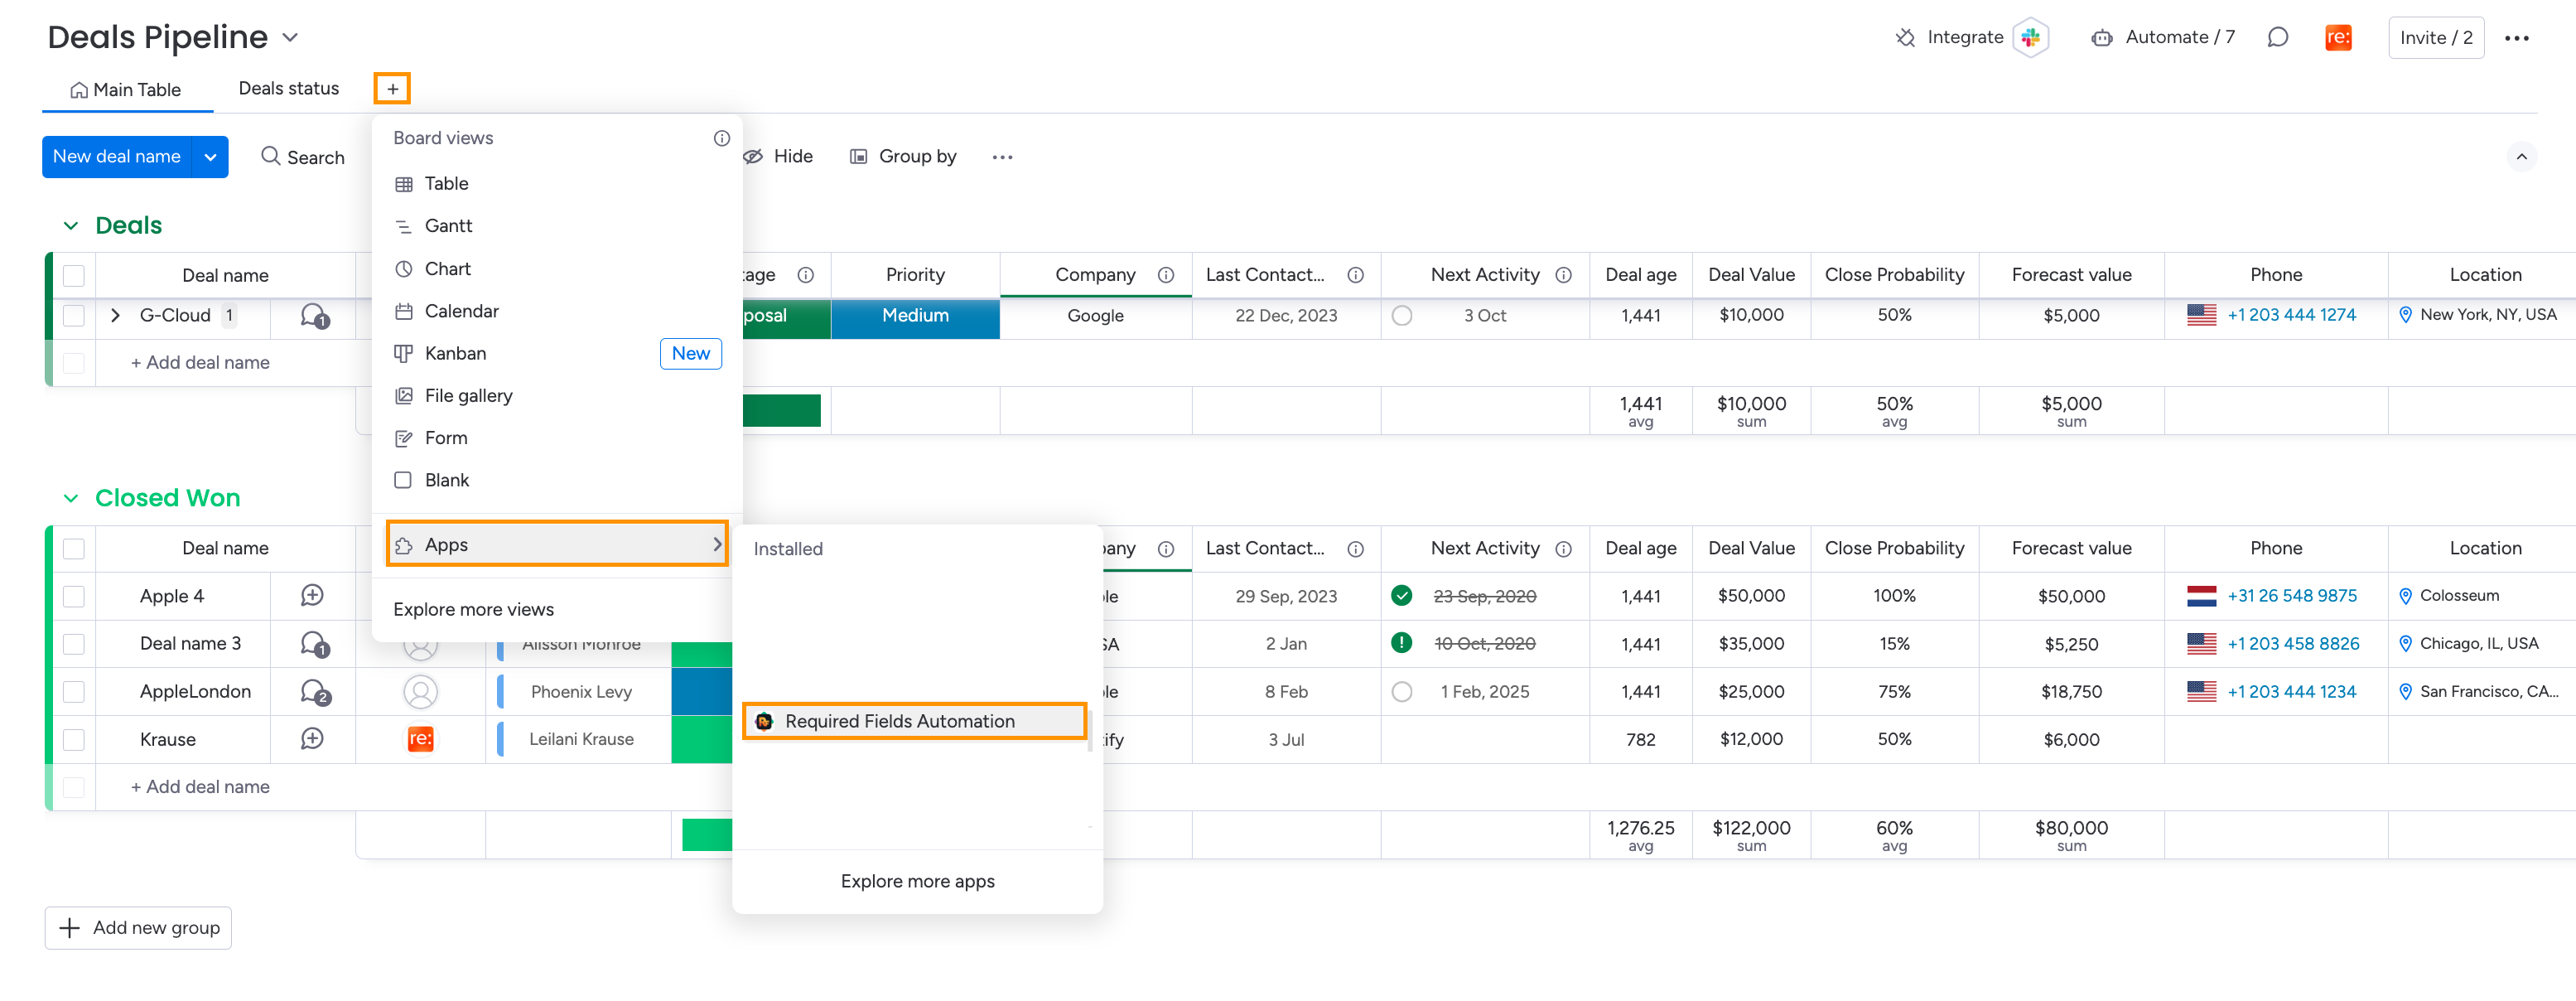
Add a view to the board by clicking on the "+" sign at the top, find the required fields app in the app submenu, and click on it.
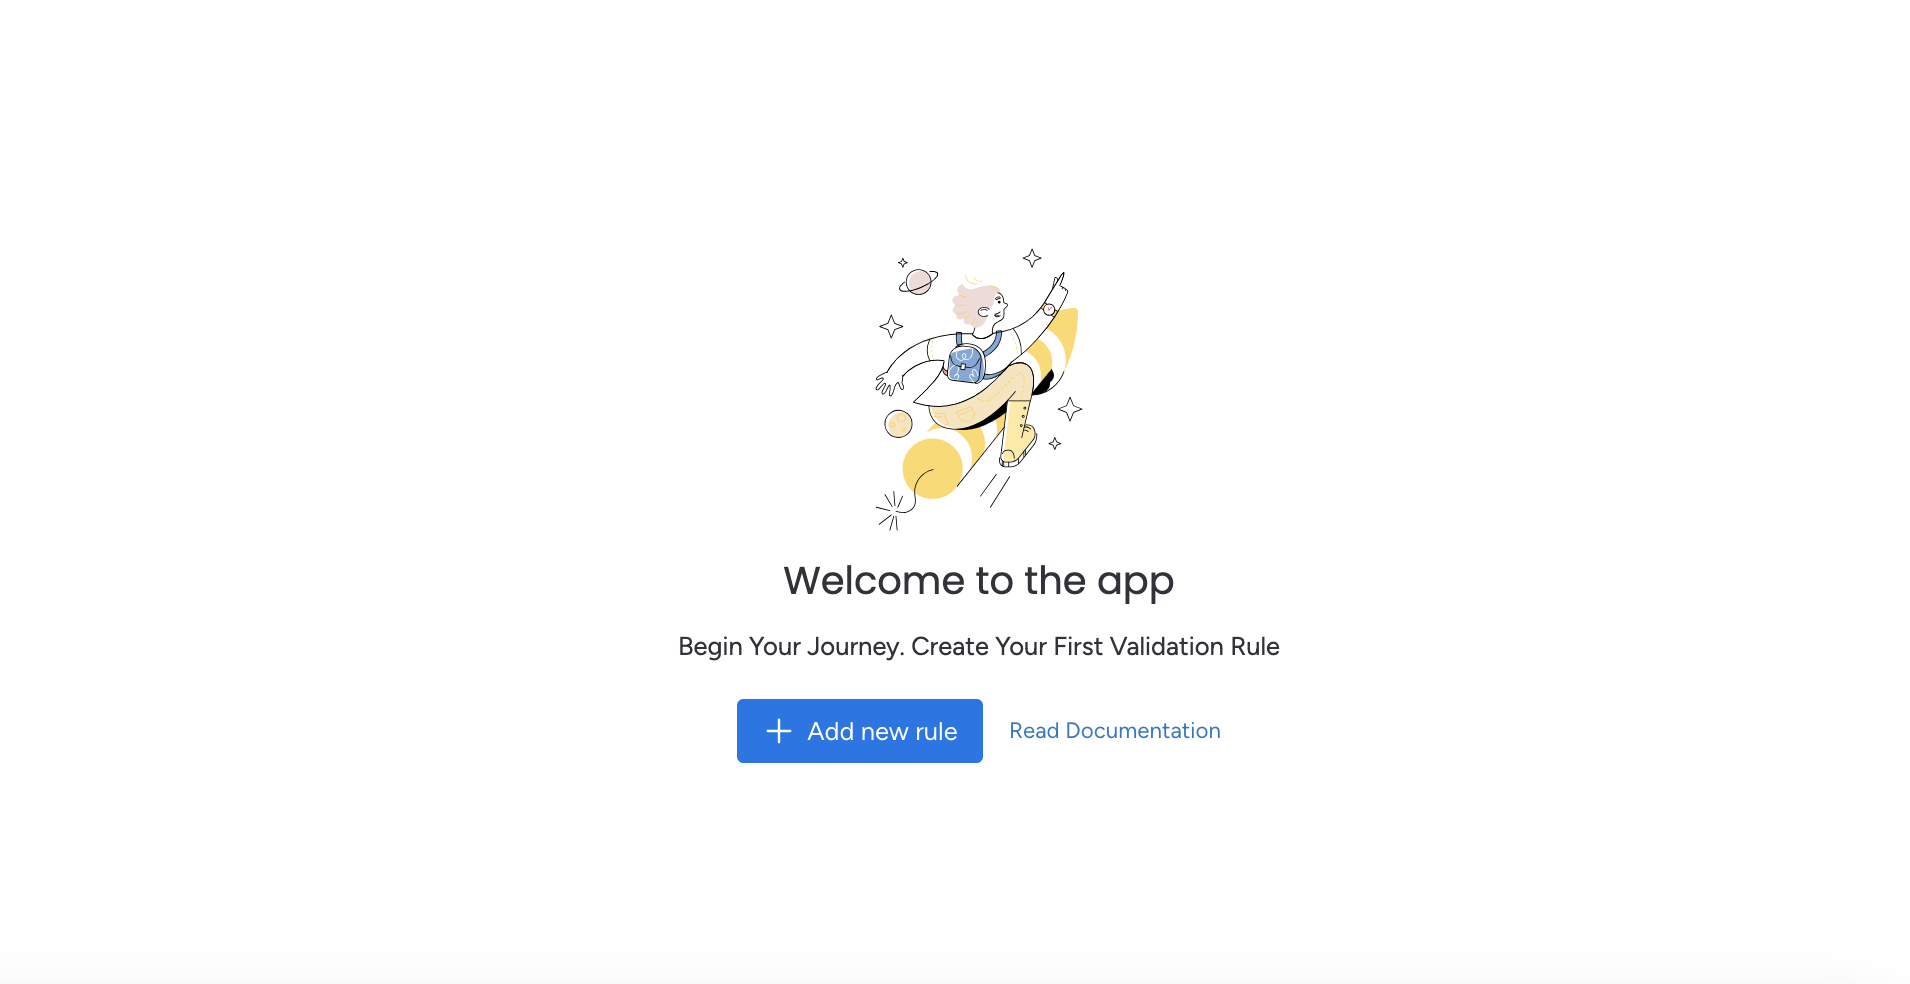
2. In the newly created view, click on the "Add new rule" button
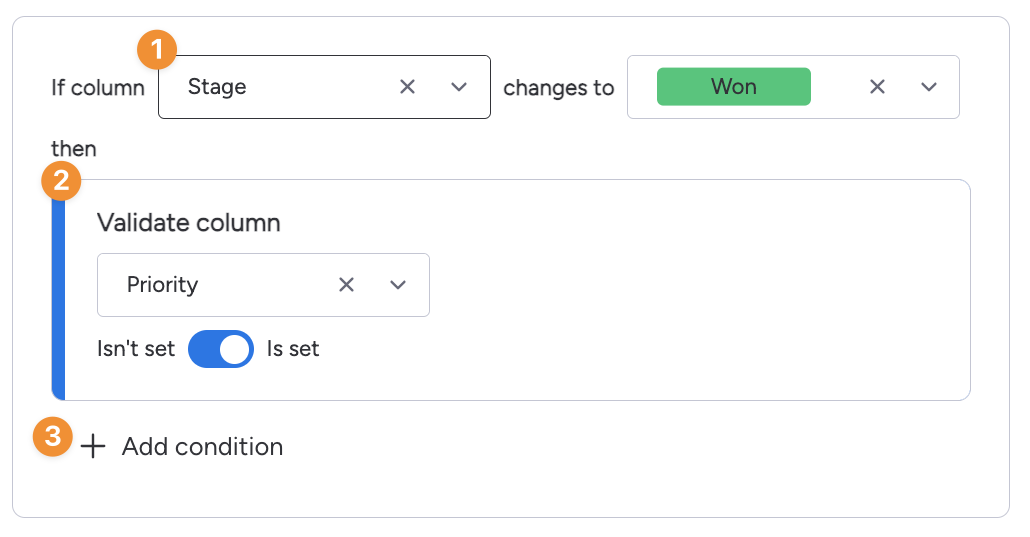
3. Select the column and status change that will trigger the rule. After this, select the column you want to validate when this status change happens and move the toggle to the desired option between "Isn't set" and Is set.
Tip
You can decide whether an item of the validated column is set or not, meaning that you can also create rules requiring empty columns.
If you want to validate more columns, add as many conditions as required. You can decide to validate any single column of your board.
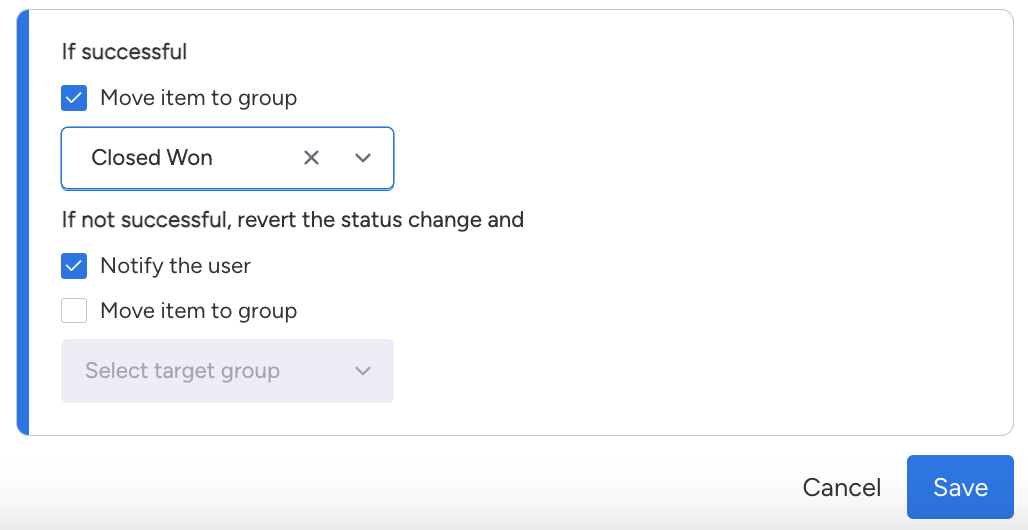
4. Define your rule's outcomes based on whether the requested conditions have been met, and save your rule.
When the rule conditions are met successfully, you can decide whether to move the item to another group or leave it in the same group. When the conditions are not met, you can choose whether to notify the user who modified the item and whether to move the item to another group.
Deleting, editing, or adding more rules
You can always edit or delete existing rules or add new rules on top of the previously created ones.
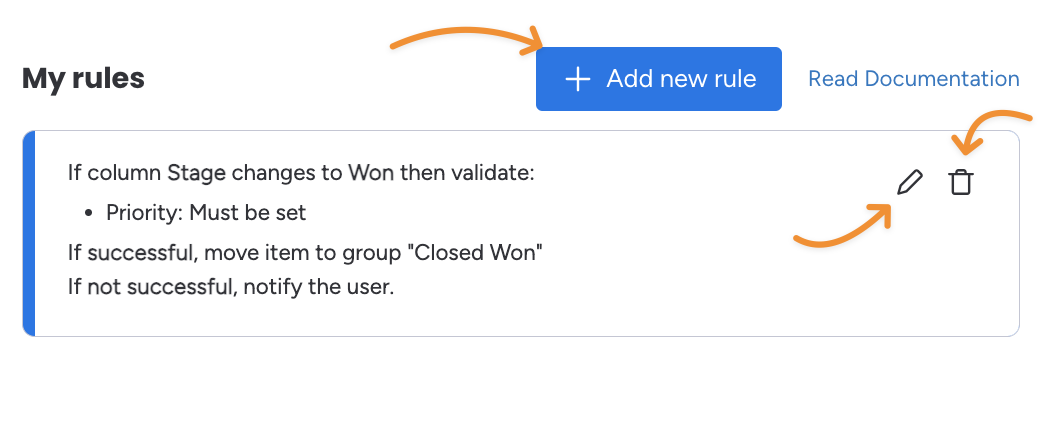
1. In the required fields view, you can see a dashboard with all the rules on that board.
2. Add new rules by clicking on the "Add new rule" button. It will open the rule console, and you can define the conditions and outcomes of your rule as usual.
3. To edit a rule, click on the pencil icon. This will open the rule console, where you can make any changes to the selected rule.
4. To delete a rule, click on the trash bin icon and confirm your decision by clicking the "Delete it" button in the pop-up.
Triggering rules in boards
After a rule has been set, any user on the board who wants to modify the status of an item (the status column that was used as a rule trigger) can only do so if all the conditions of the rules are met. This means that the rule will verify whether all the columns selected as mandatory are filled.
When rule conditions are met
| When rule conditions are not met
|
|---|---|
|
|
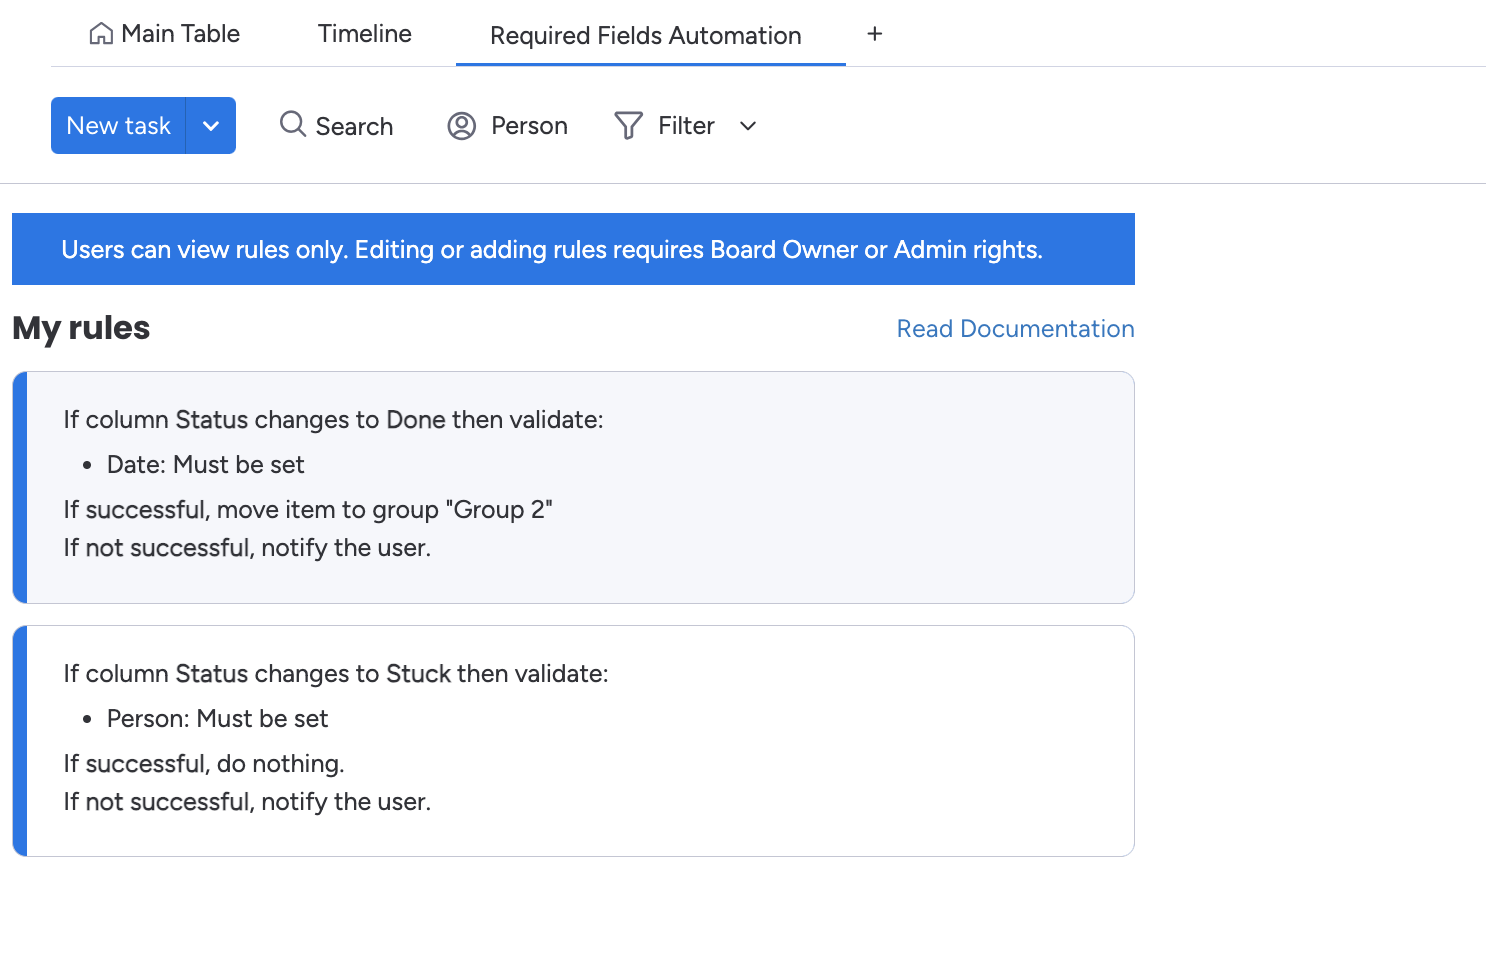
Users without board ownership or admin rights can see the rules that the owner has set in the board by opening the Required Fields Automation board view to better understand the automation and mandatory fields in place.
Note
When a rule is edited, its ownership is transferred to the editor. This allows teams to keep using and editing the rule even if the user who created the rule is removed from the board or project.


