Setup SAML SSO with OKTA (Jira)
Currently we do not yet provide a written setup suit for OKTA, however we published a recorded YouTube Tutorial (https://youtu.be/8VP-KF4m30M), showing the Setup of OKTA together with our plugin.
This tutorial is for plugin Version 2.0.3 later, when we added OKTA to our Wizard. See below for an older tutorial.
Alternatively simply book a free screen share session via https://resolution.de/go/calendly and we help you with the setup.
For plugin versions 2.0.0 - 2.0.2 we recommend you upgrade to the latest version - if you can't here is the tutorial link for these older versions: https://www.youtube.com/watch?v=MSJPunraQbQ
Alternatively simply book a free screen share session via https://resolution.de/go/calendly and we help you with the setup.
Before you start
A) How to install the Saml
B) How to add an IdP
C) Test IdP Setup
Before you start
For plugin versions 2.0.0 - 2.0.2 we recommend you upgrade to the latest version
Confluence must be accessible via HTTPS. See https://confluence.atlassian.com/display/DOC/Running+Confluence+Over+SSL+or+HTTPS for instructions.
A) How to install the SAML Plugin
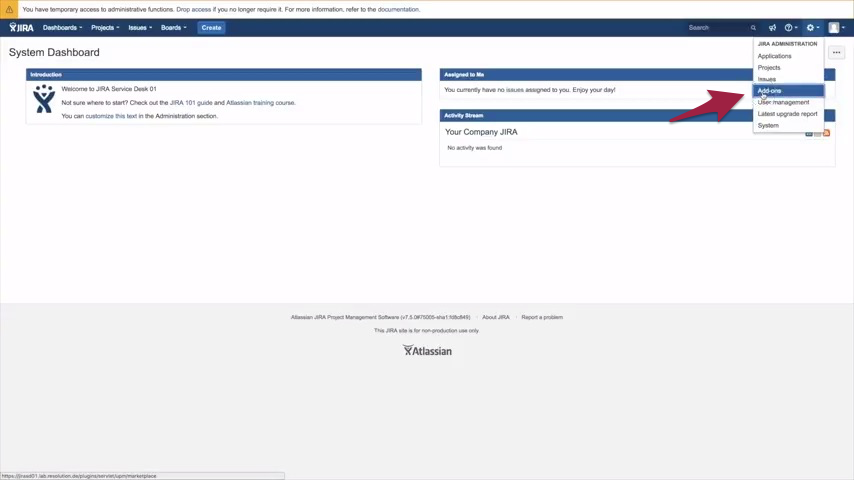
To install the SAML Plugin, click on the gear menu in the top right corner and select Add-ons from the dropdown menu.
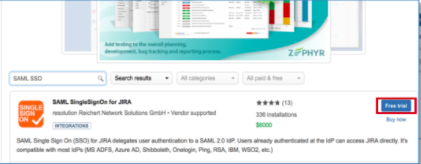
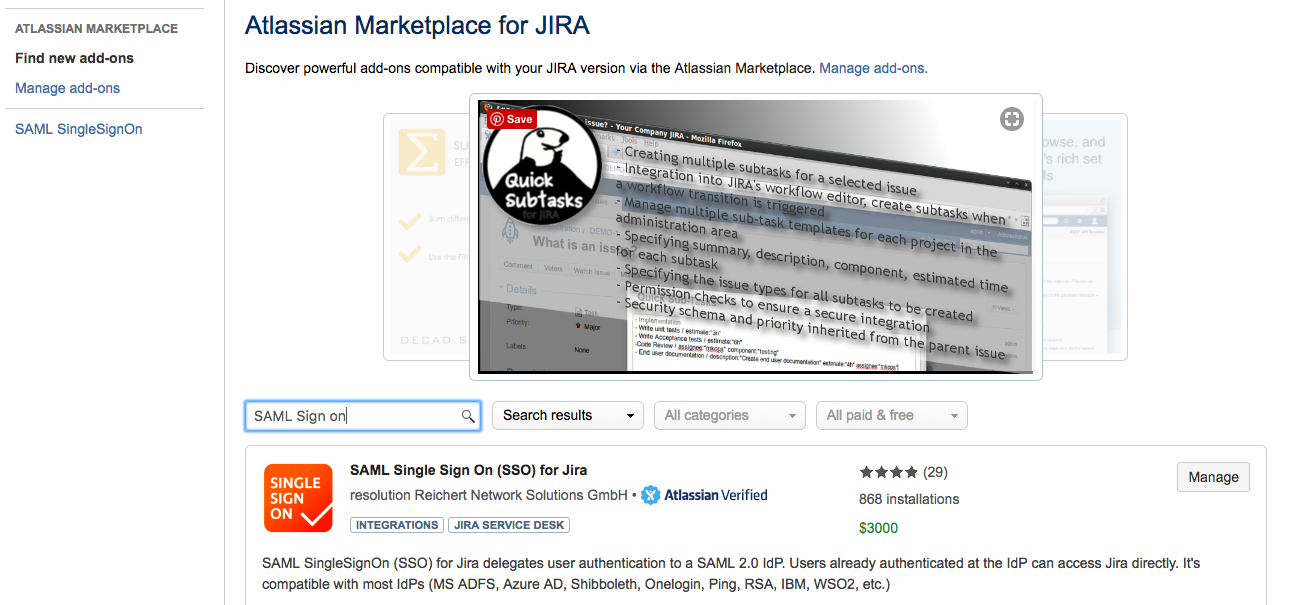
2. Choose Find new add-ons and you will be taken to the Atlassian Marketplace. Search for SAML SSO and click on Free Trial to install.
After successful installation -) click on Manage
Then choose Configure.
If you have already installed the plugin, this is what you will see as well, in this case simply select Add-ons and choose SAML Single Sign On
B) How to add an IdP
Make sure that the Plugin is already installed, if you haven't installed it yet, please check How to install the Saml SSO Plugin.
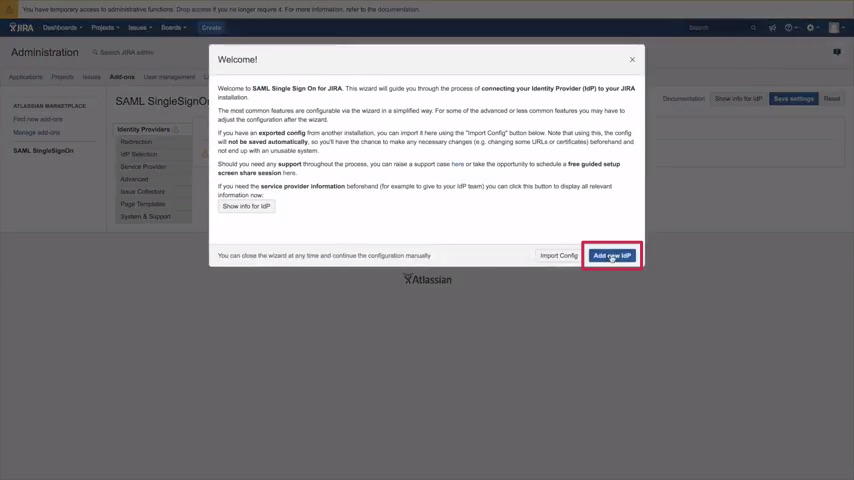
1) To add your IdP, please select Add-ons under Confluence Administration on the top right corner of your Confluence interface next to your user profile.
2) A new IDP dialogue opens, click on Add new IdP
B.1.) How to authenticate JIRA against Okta
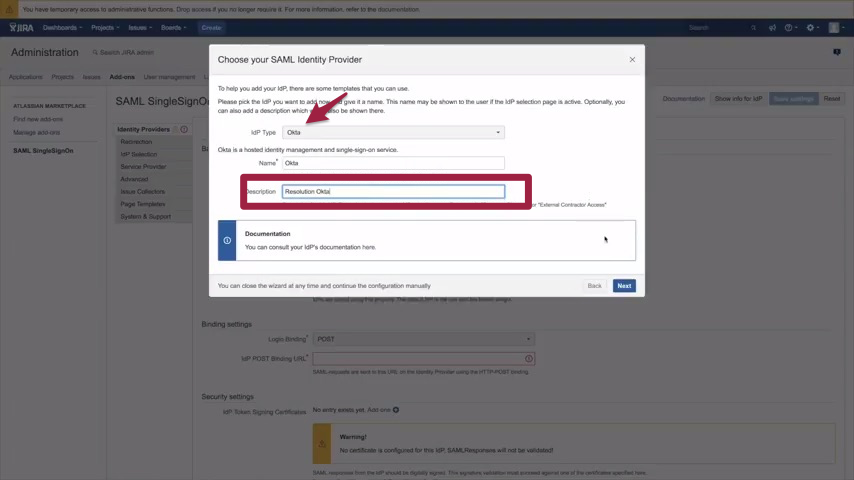
1) Select Okta as the new IdP. Please enter a description like "Okta Resolution" any other is fine as well. Now click Next.
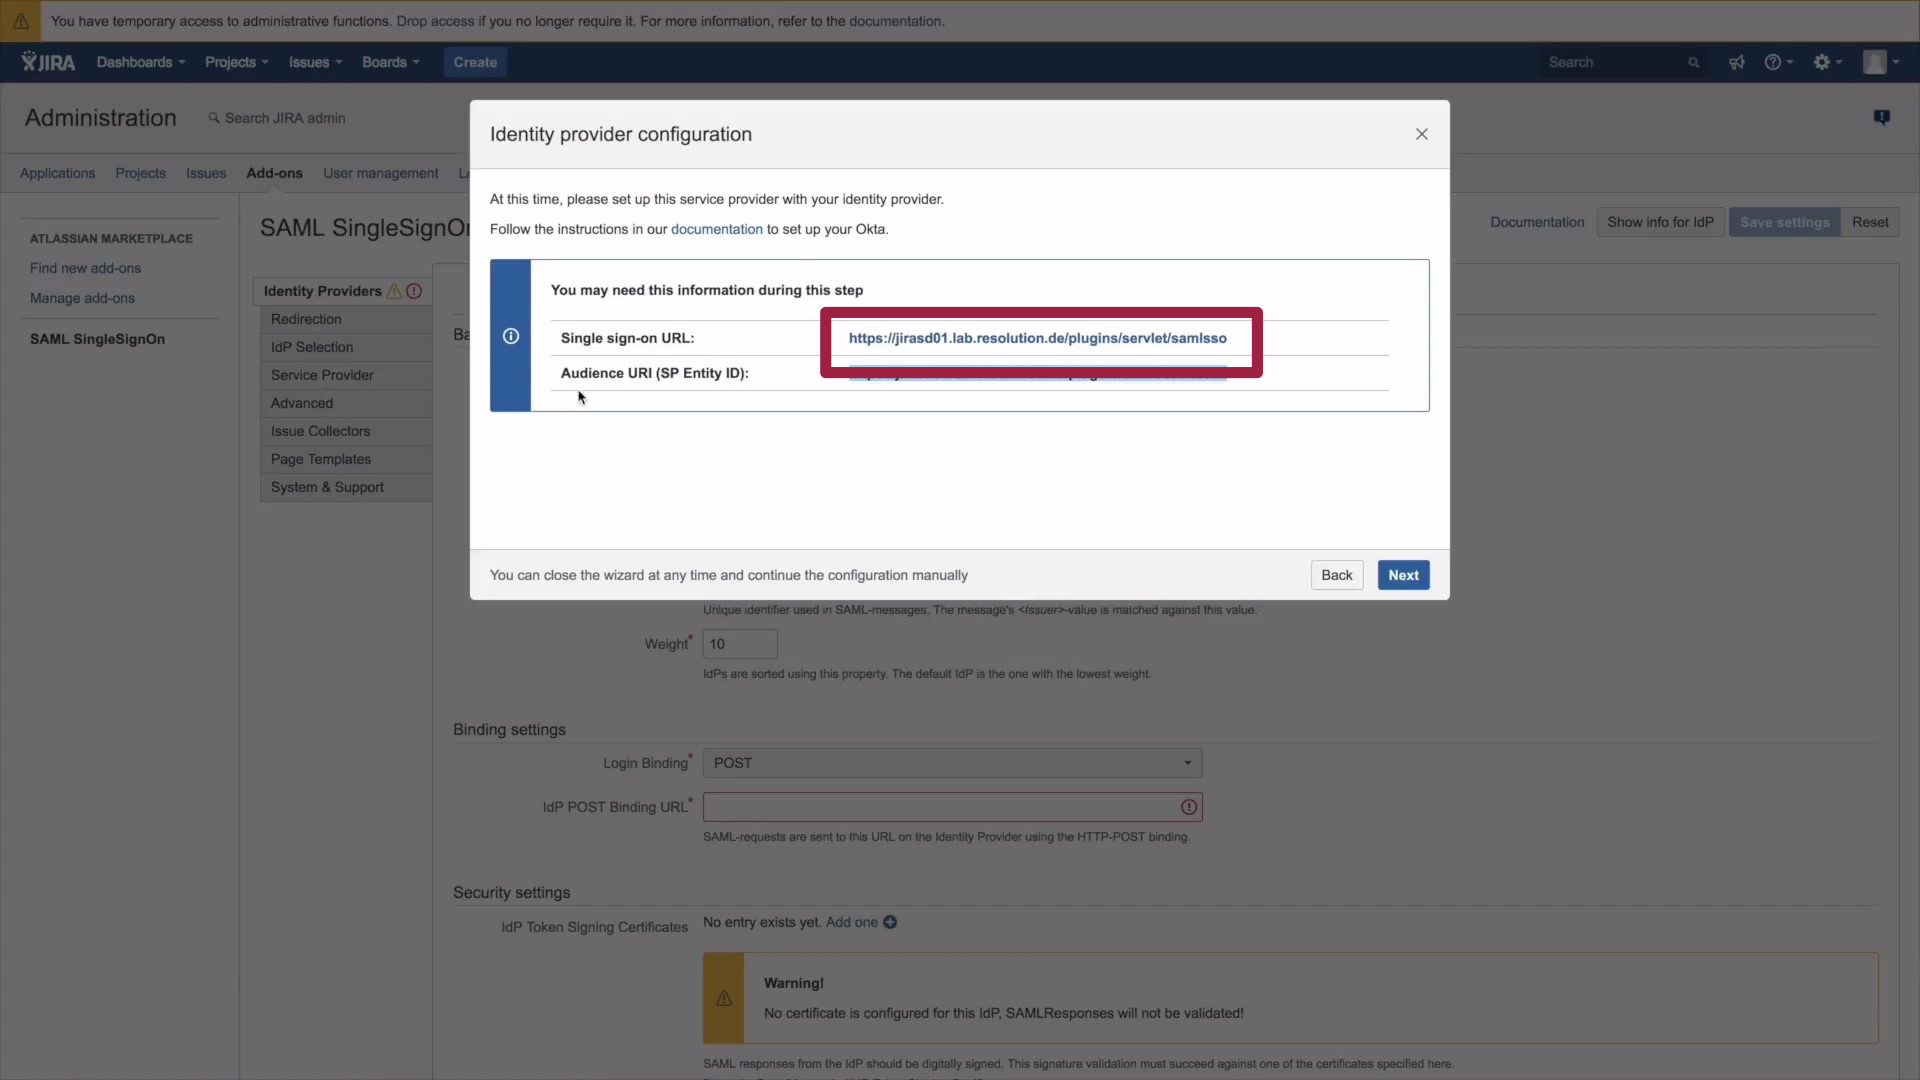
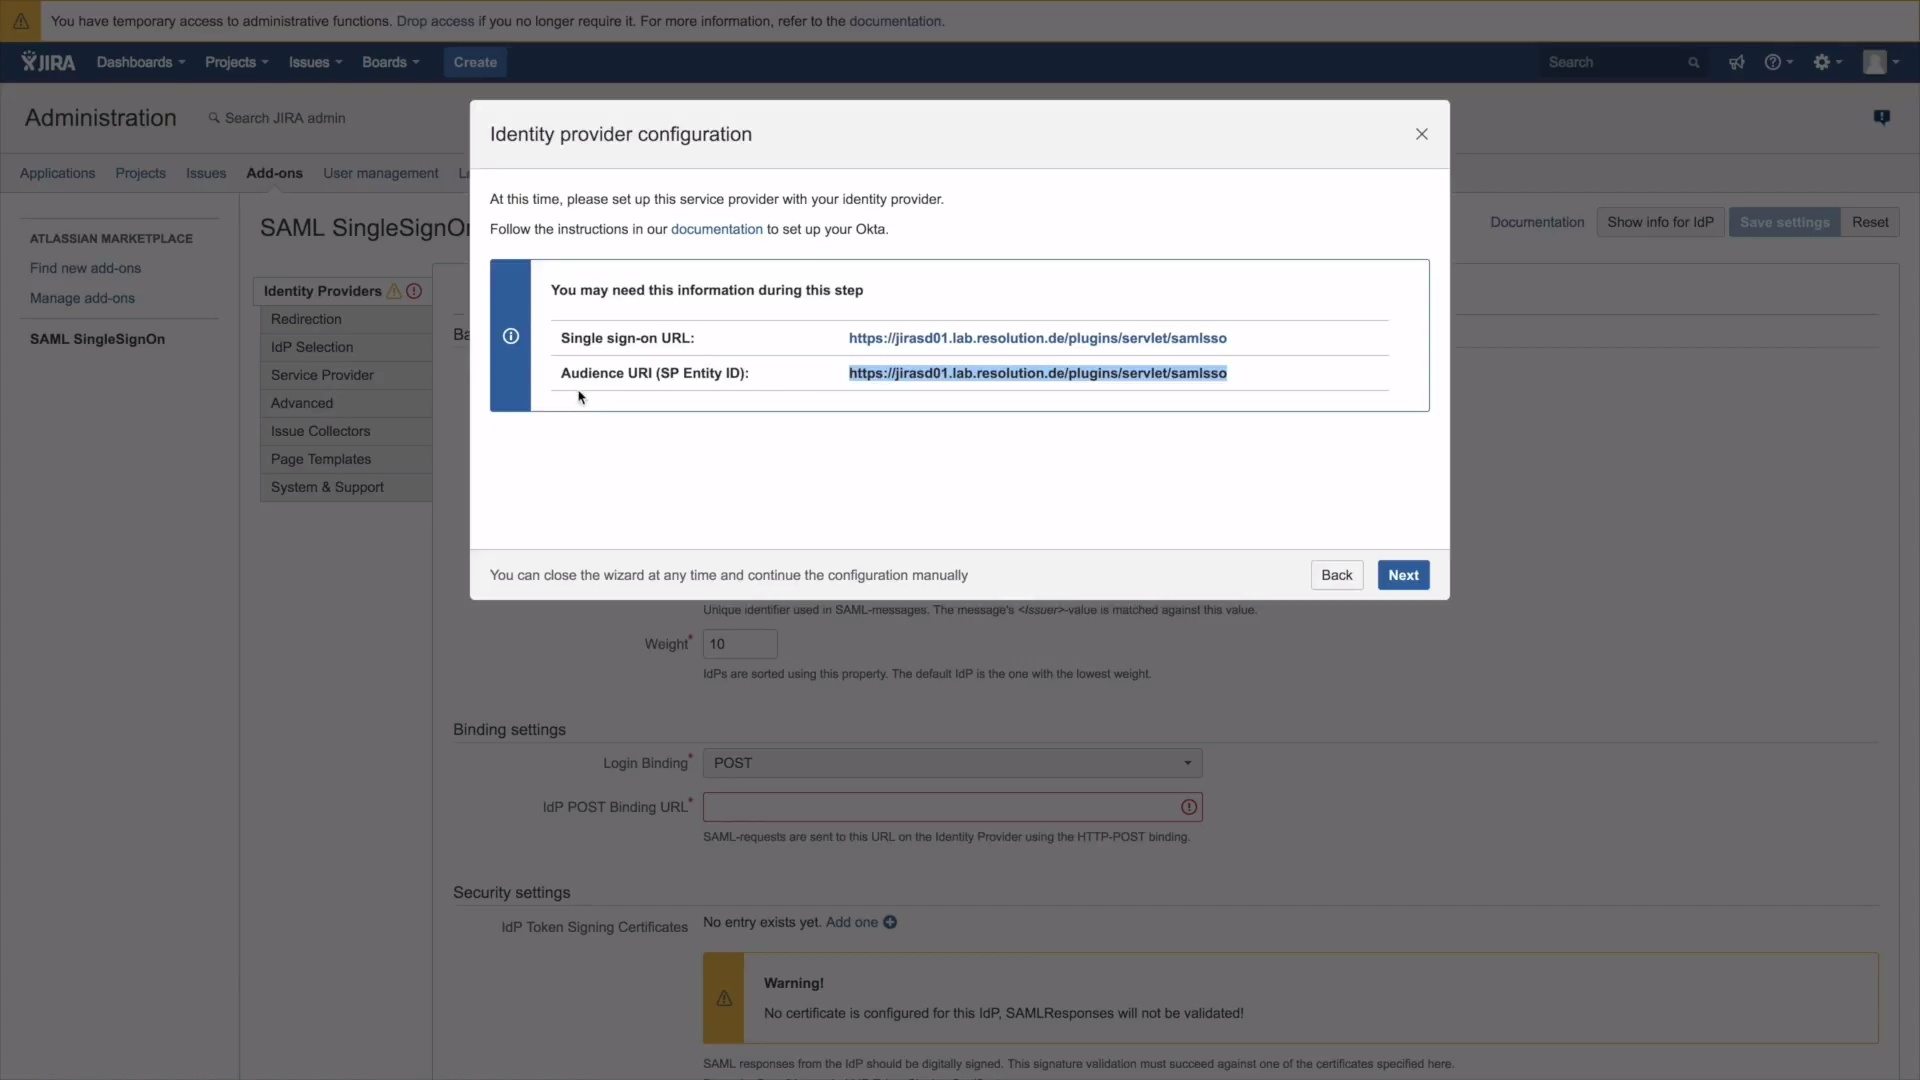
2) Please copy the Single sign-on URL
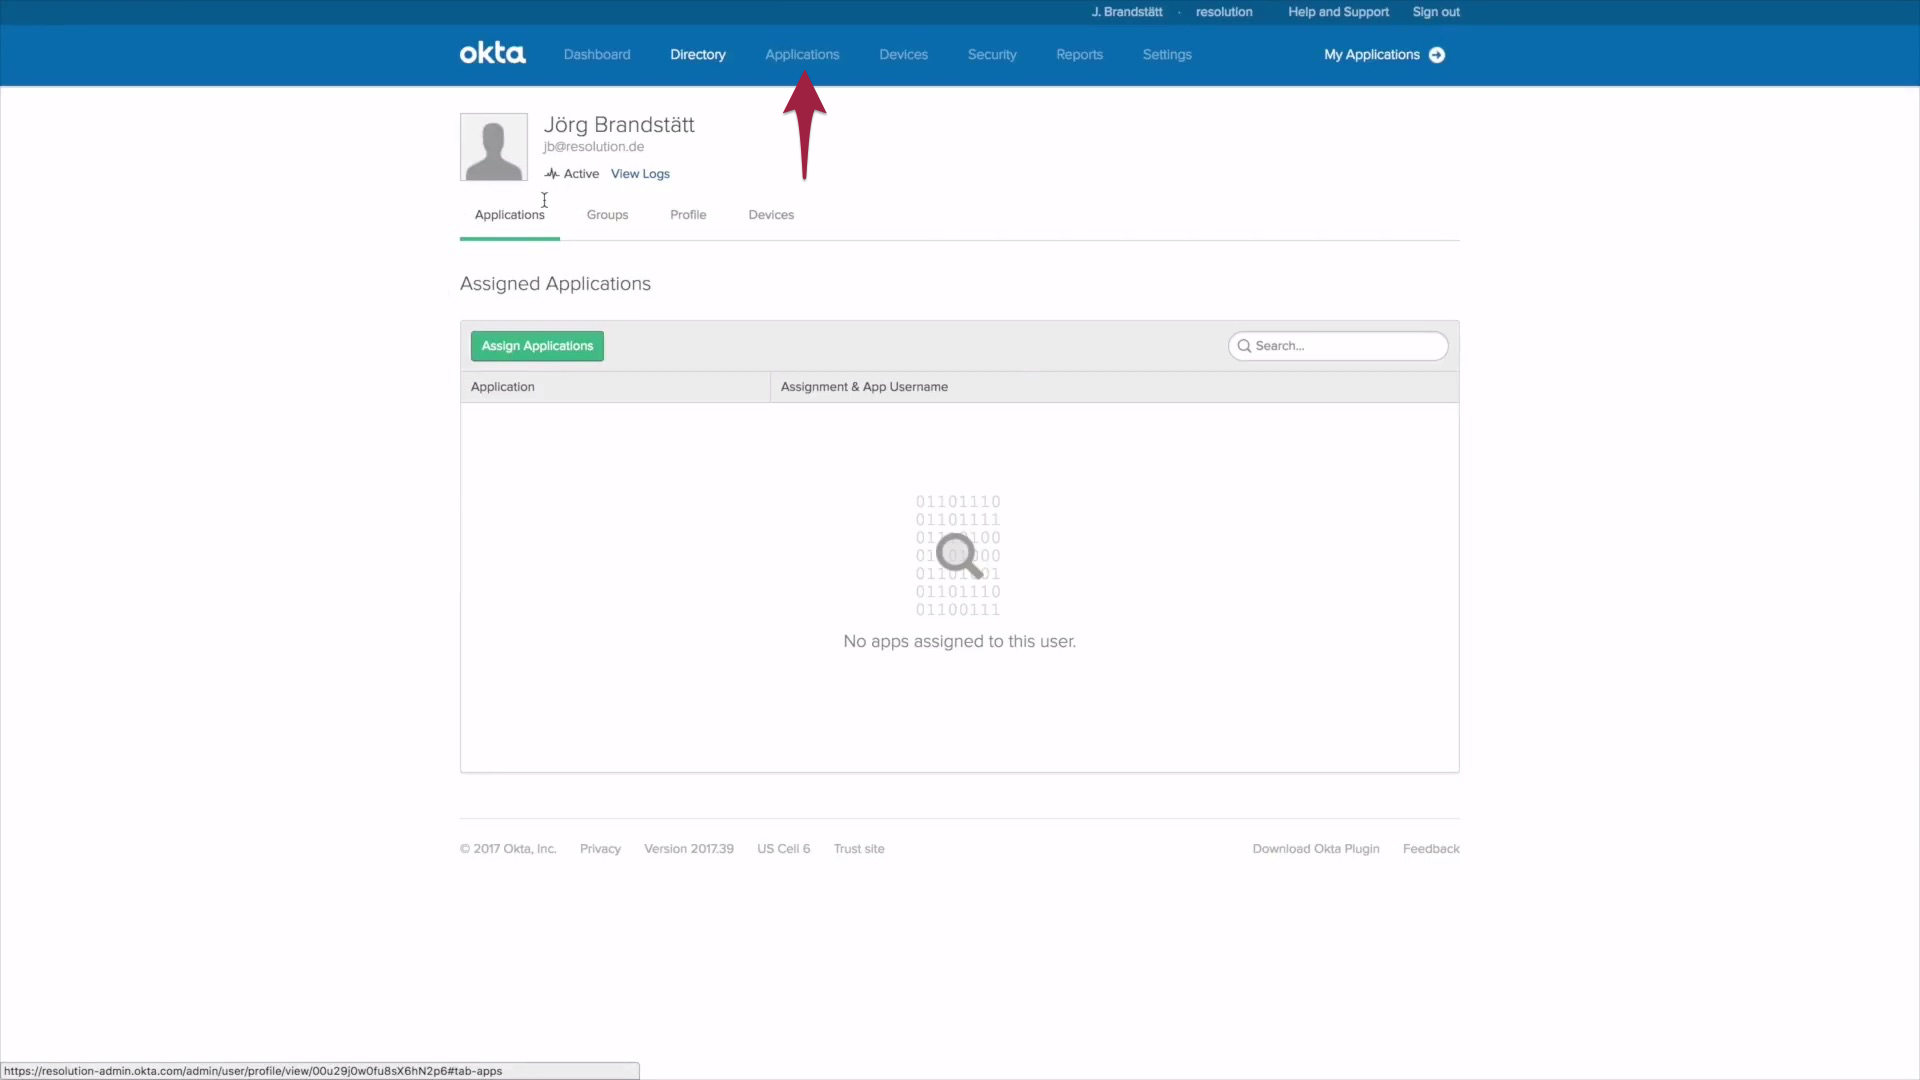
3) Now it's time to head over to Okta, please open it and make sure you're logged in as Admin. Choose Applications from the menu bar.
4) Go to Applications and click on Add an Application.
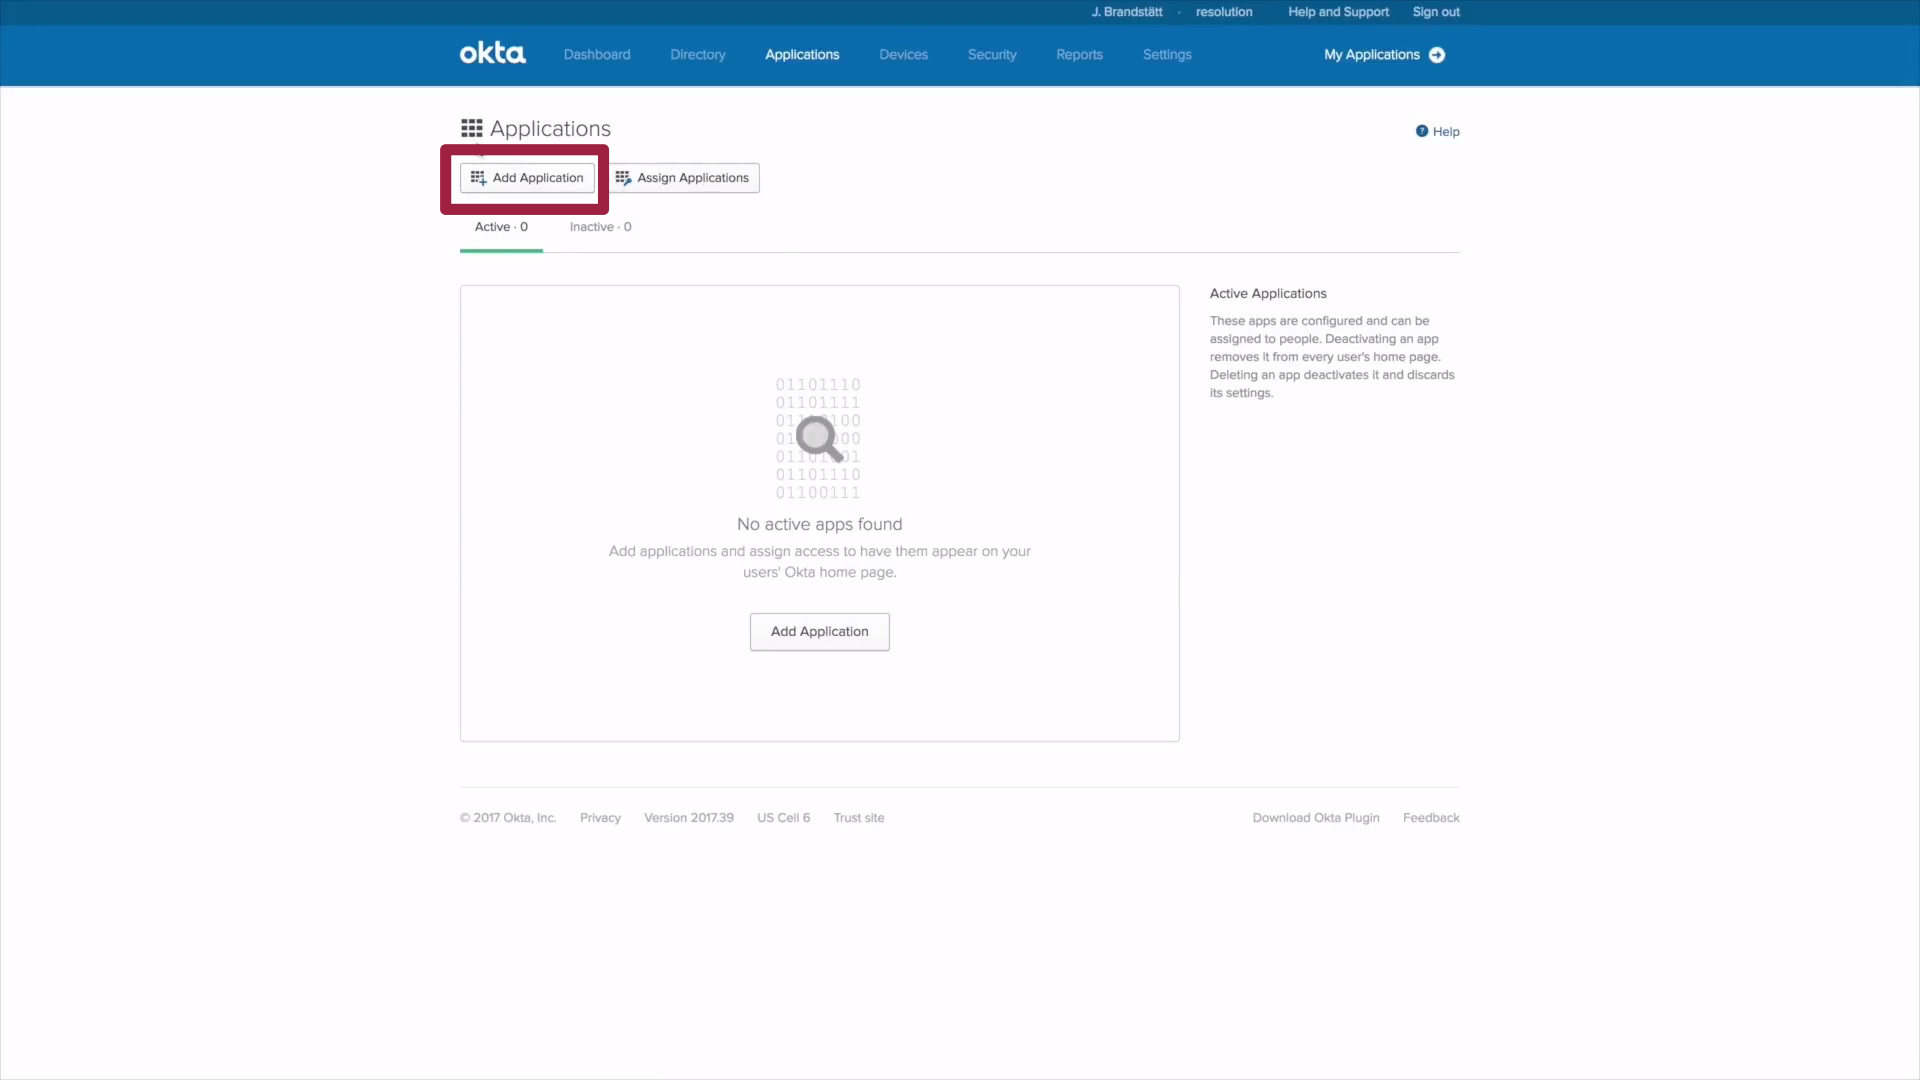
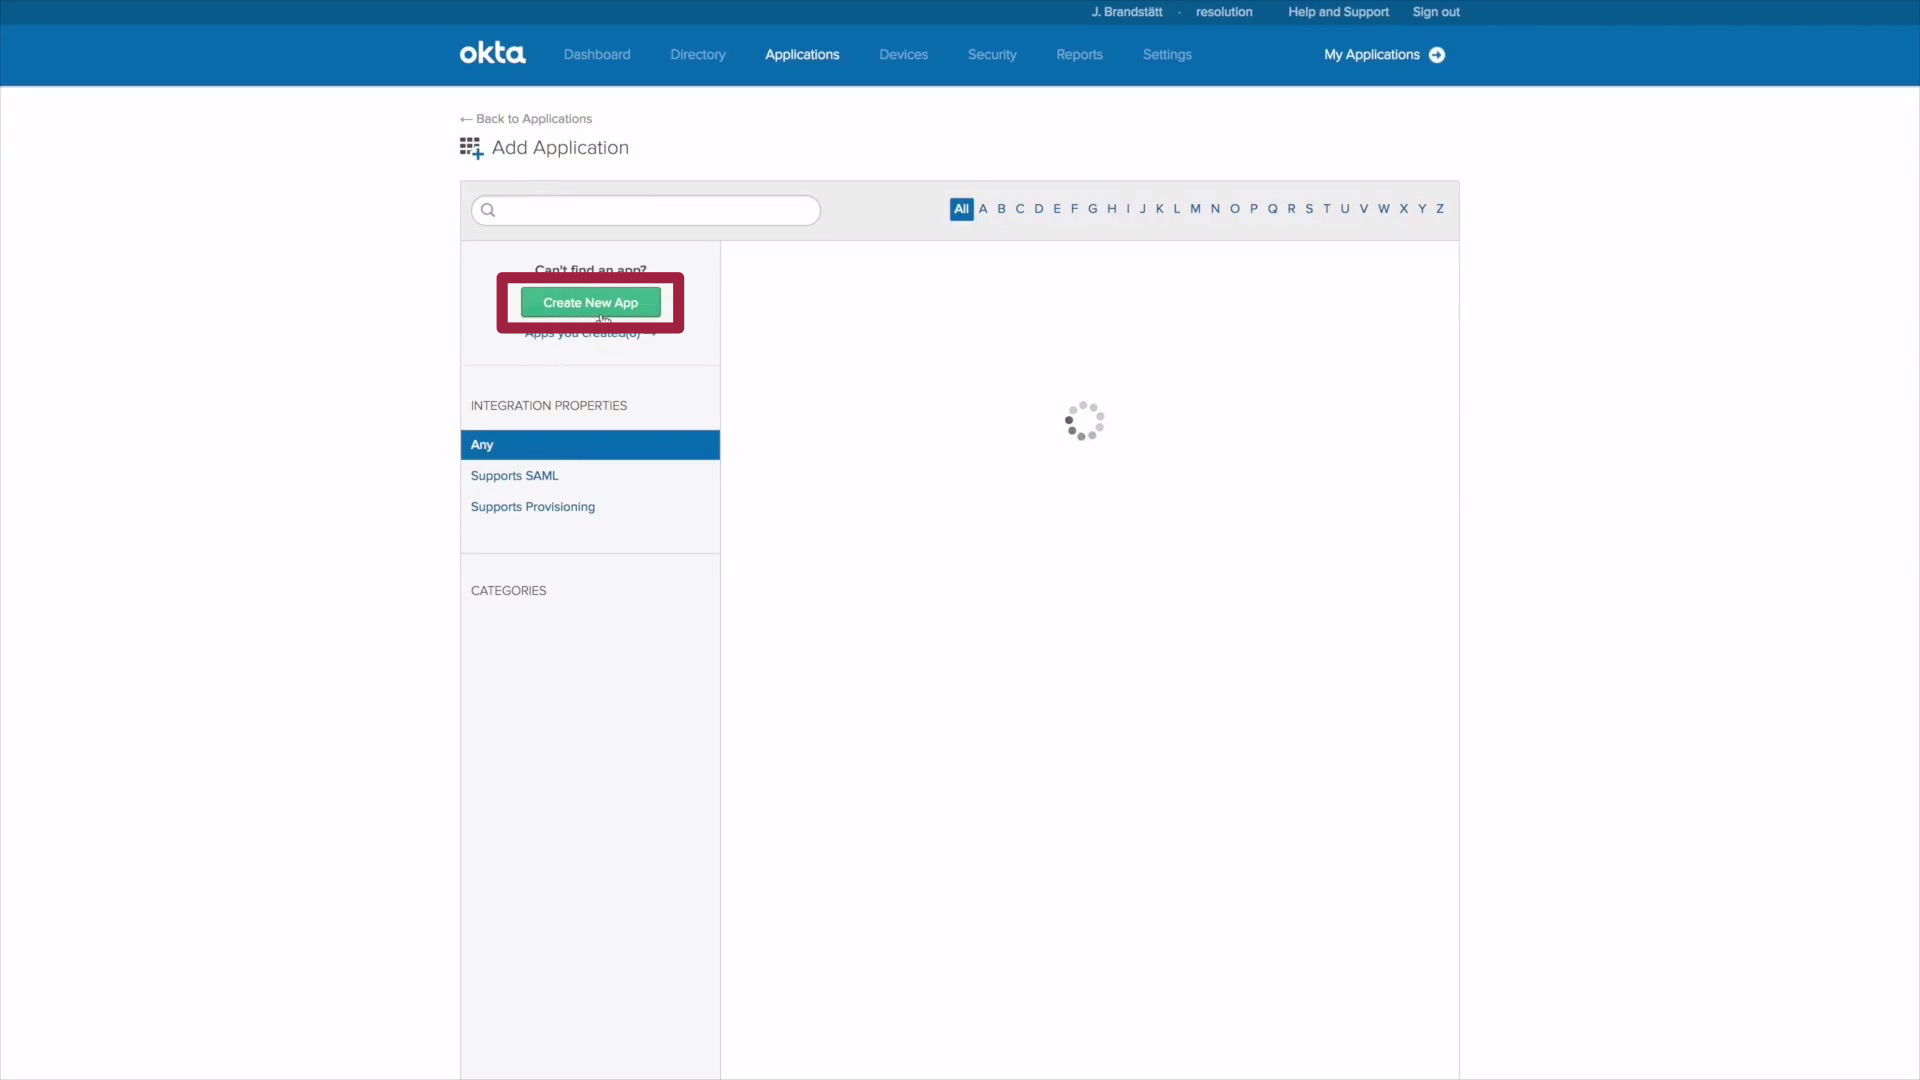
5) Click on Create new App.
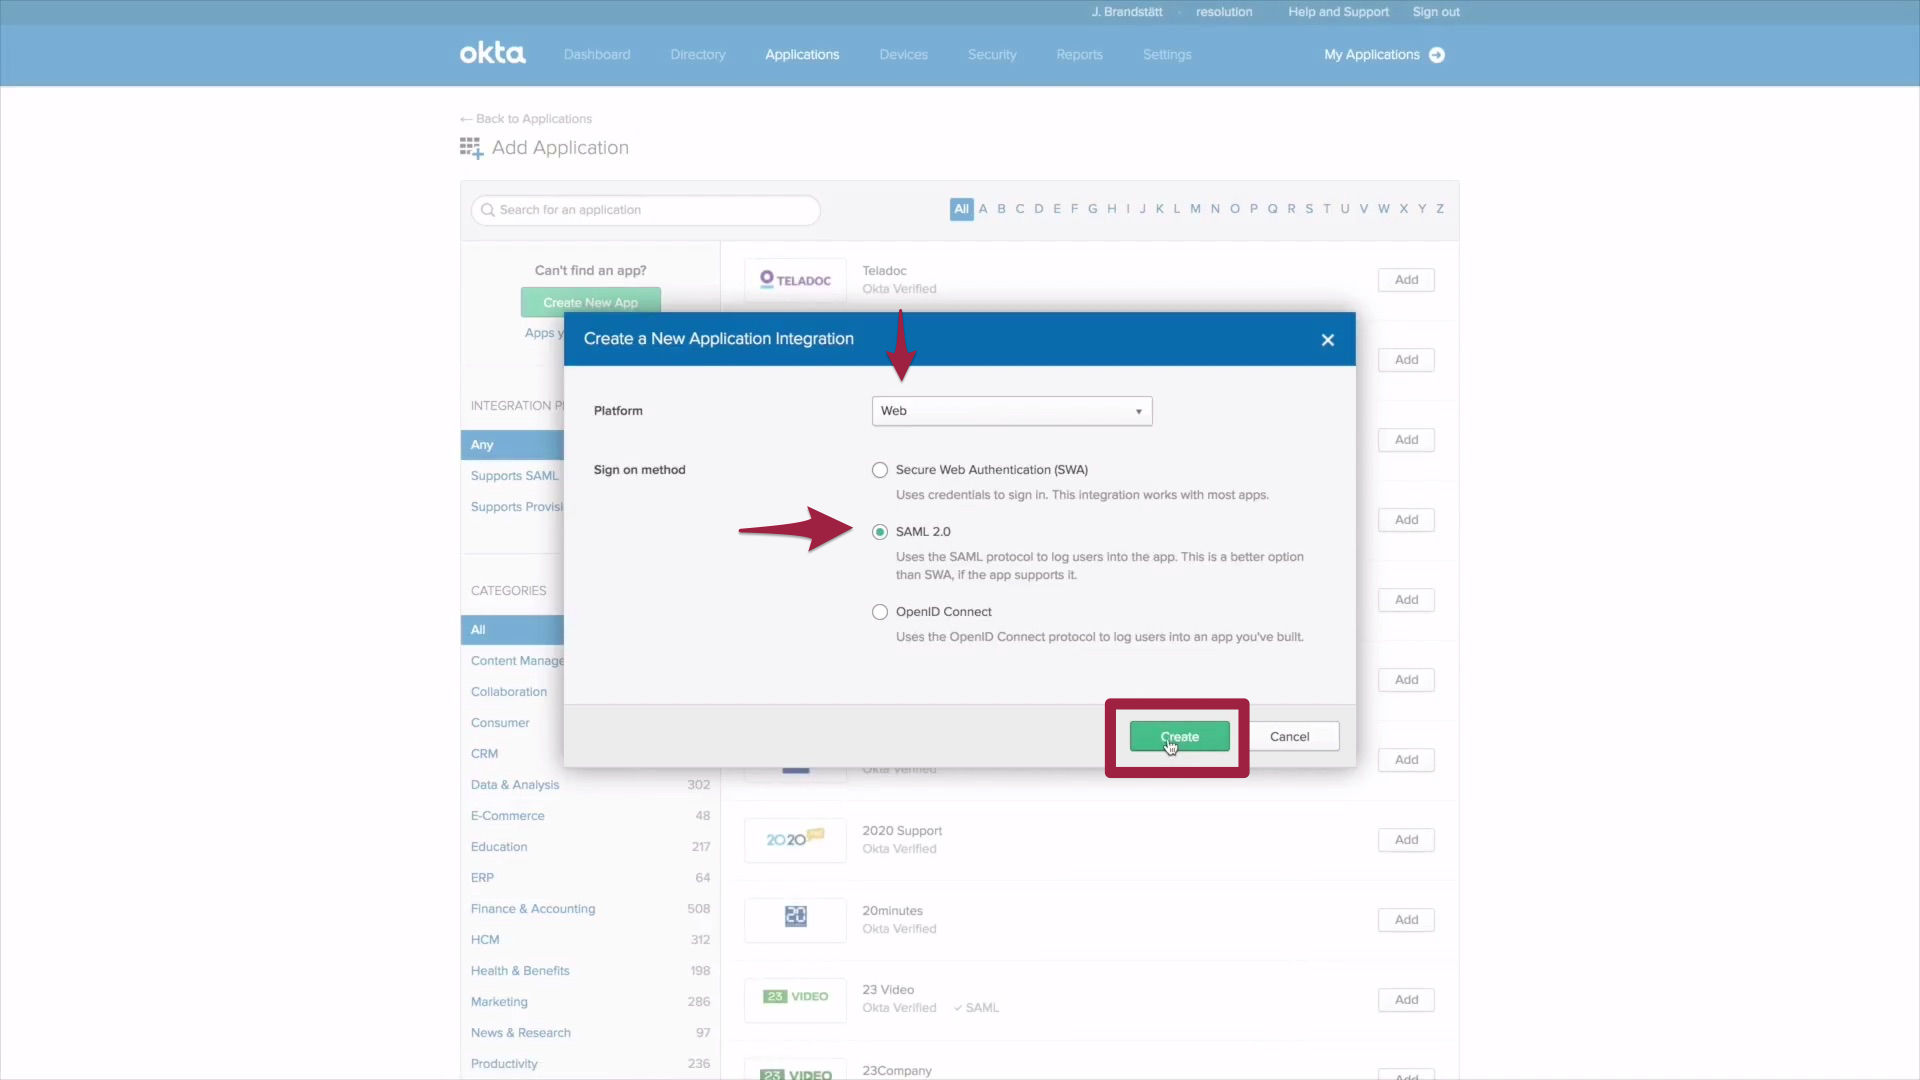
6) A Create New Application dialogue opens, choose Web from the dropdown menu and check Saml 2.0. Now click on Create.
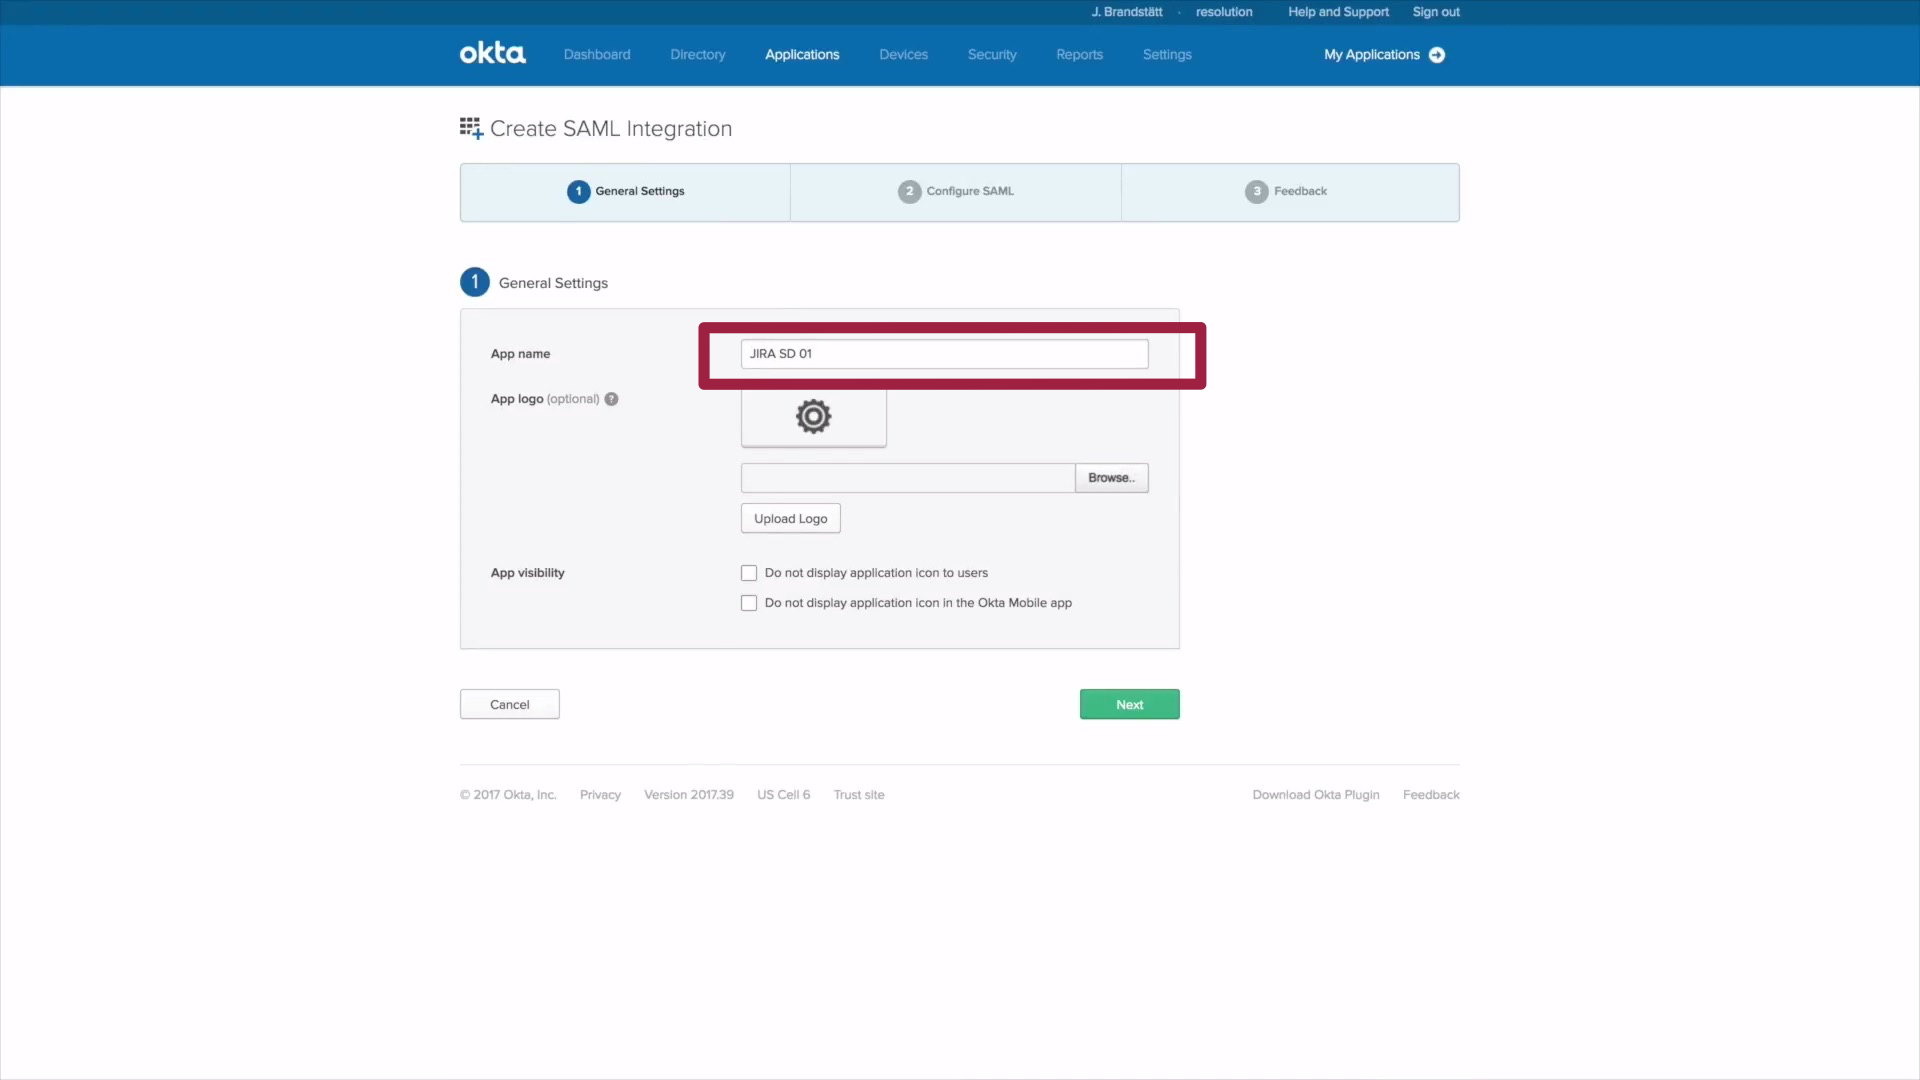
7) In the next window, please make sure to enter a name for the App, like e.g. JIRA SD01 and click on Next.
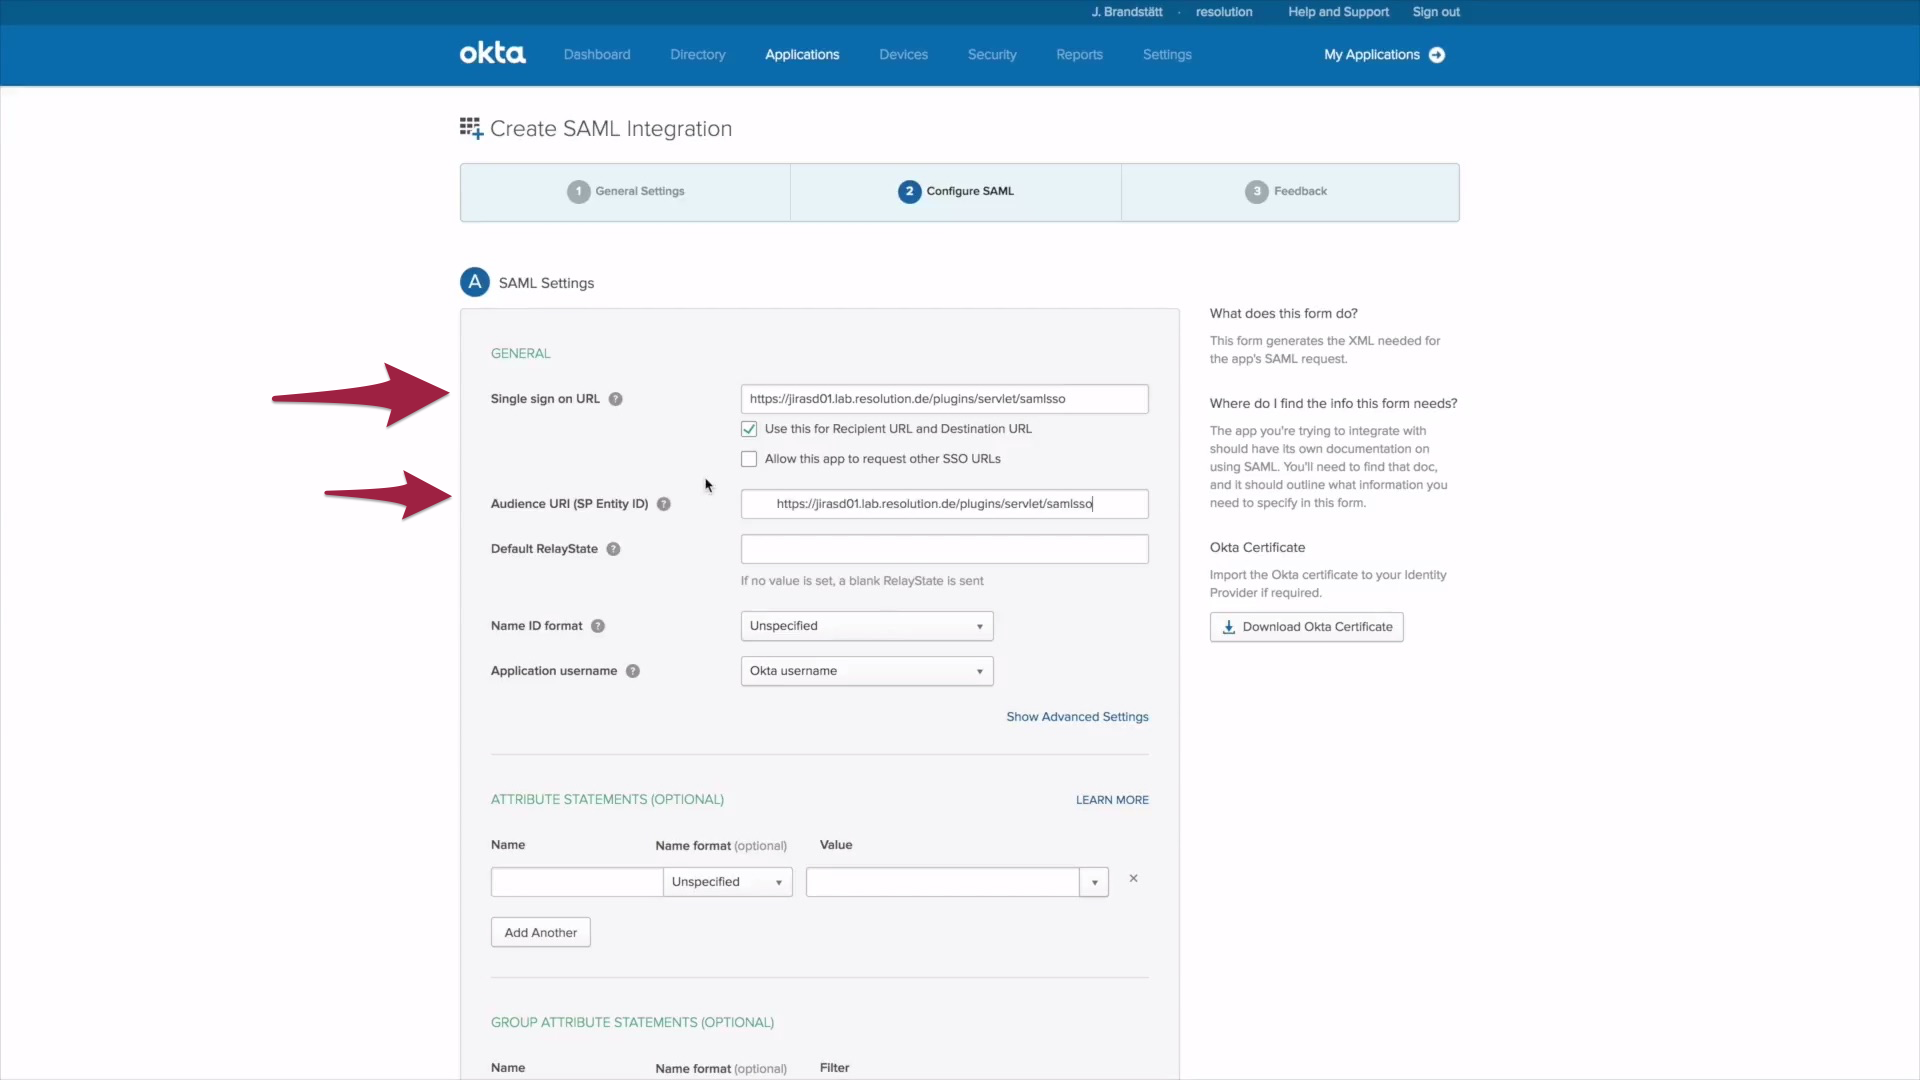
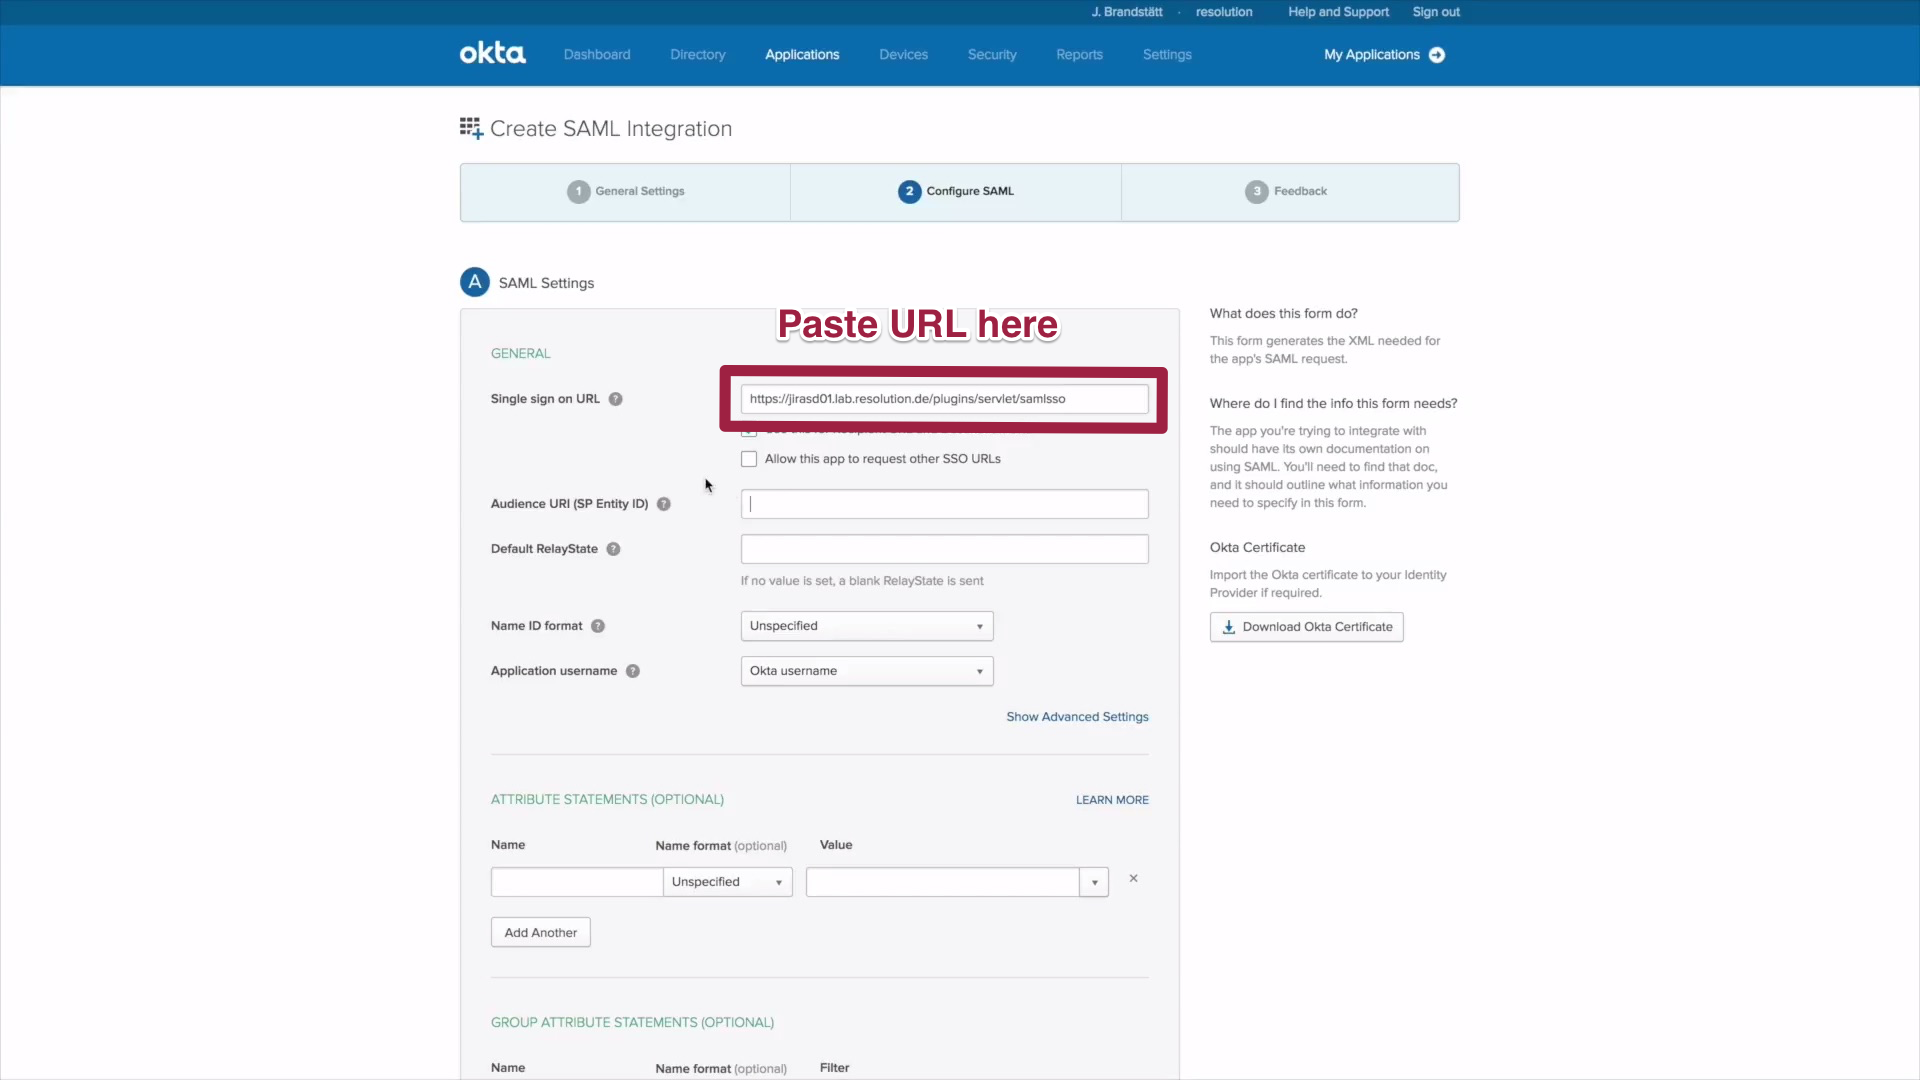
10) Now it's time to make use of the URL you just copied, please paste it into the Single Sign on URL and the Entity ID field. A default user name needs to be set, which should be the Okta user name, if you want to keep it simple. If your goal was to authenticate users, that already exist in Jira, you're all set. Click Finish and proceed to Test IdP.
B.2) How to set up Just-In-Time Provisioning
1) If you want to set up Just-In-Time provision (create users automatically, when they first log in), some additional attributes need to be mapped.
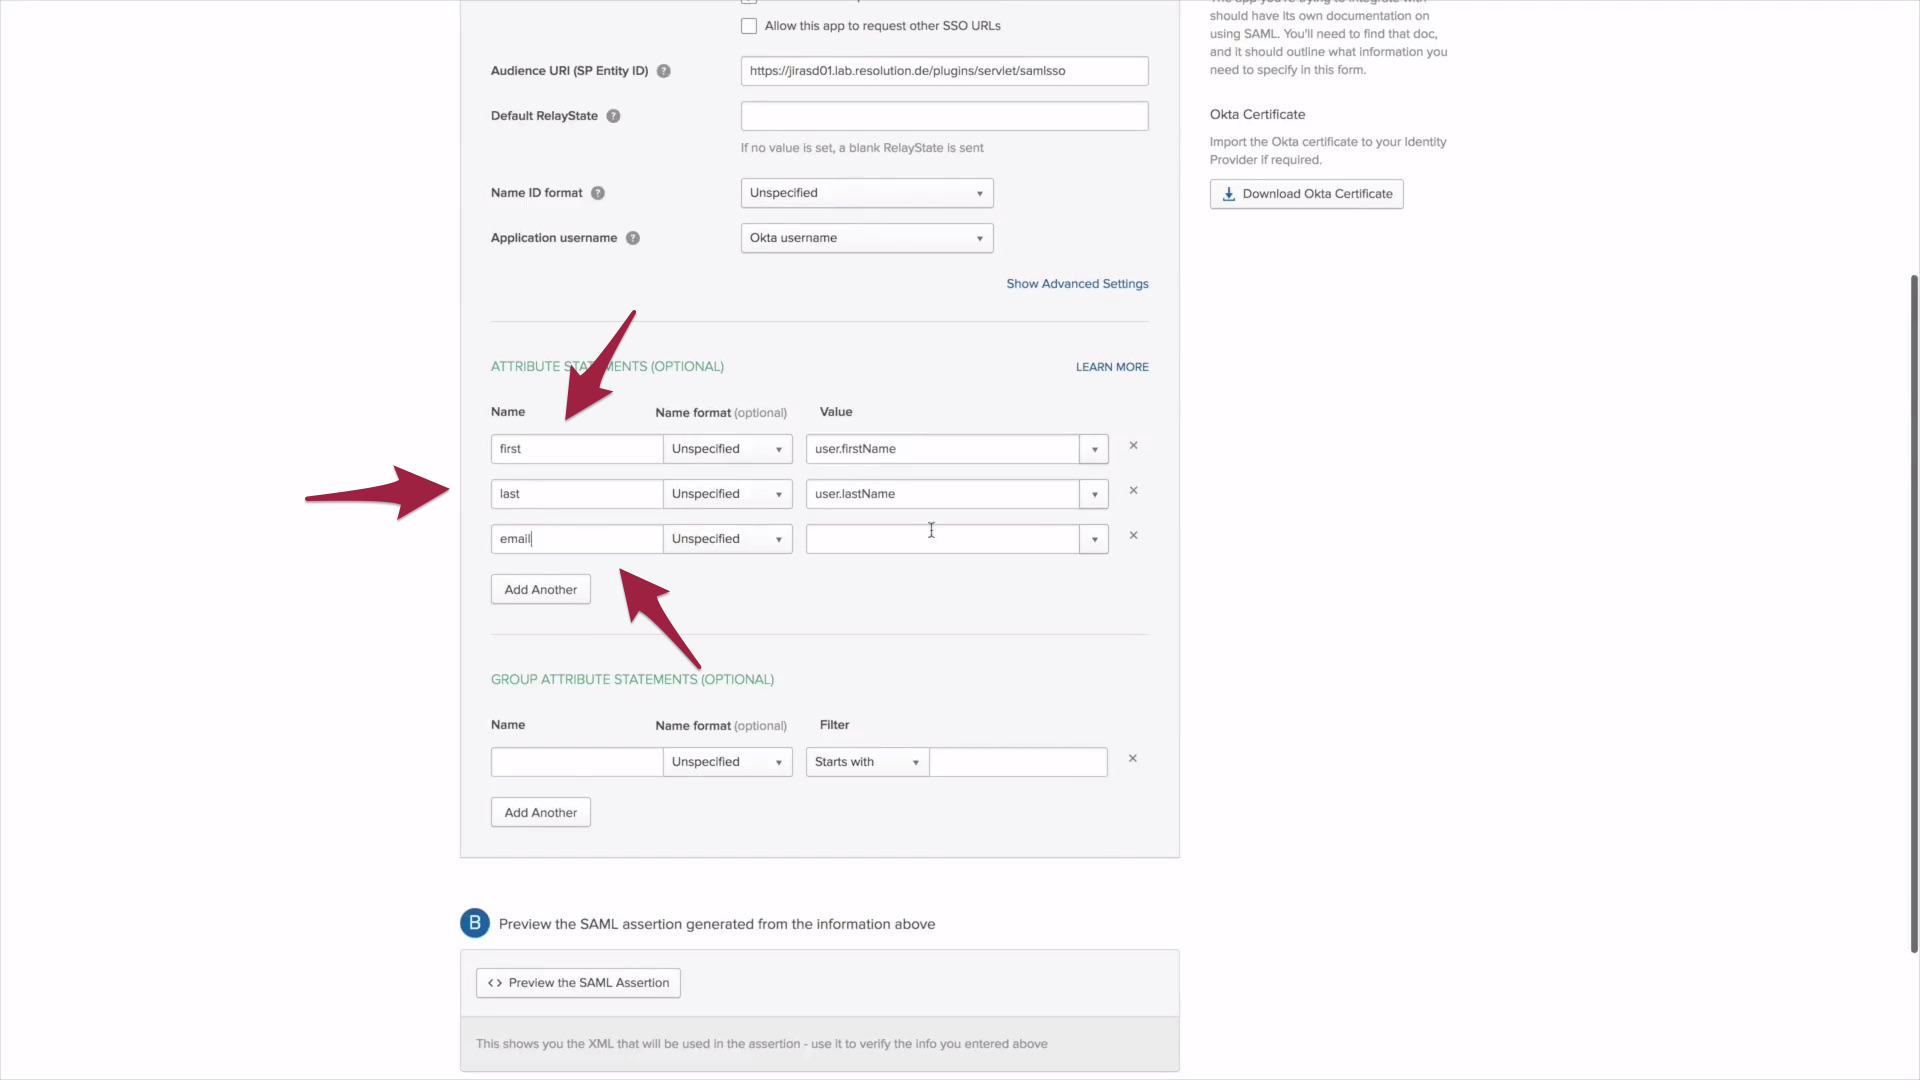
2) Now select attributes to set up Just-In-Time provision. Under value select "user first name" and call it first for easier management. Now click add attribute and select user last name, which will in turn be called last. Now repeat with user email and call it, you guessed it, email. To assign groups to Okta, a group attribute needs to be set as well. Fill in groups and choose Regex as Filter. Now click on Next.
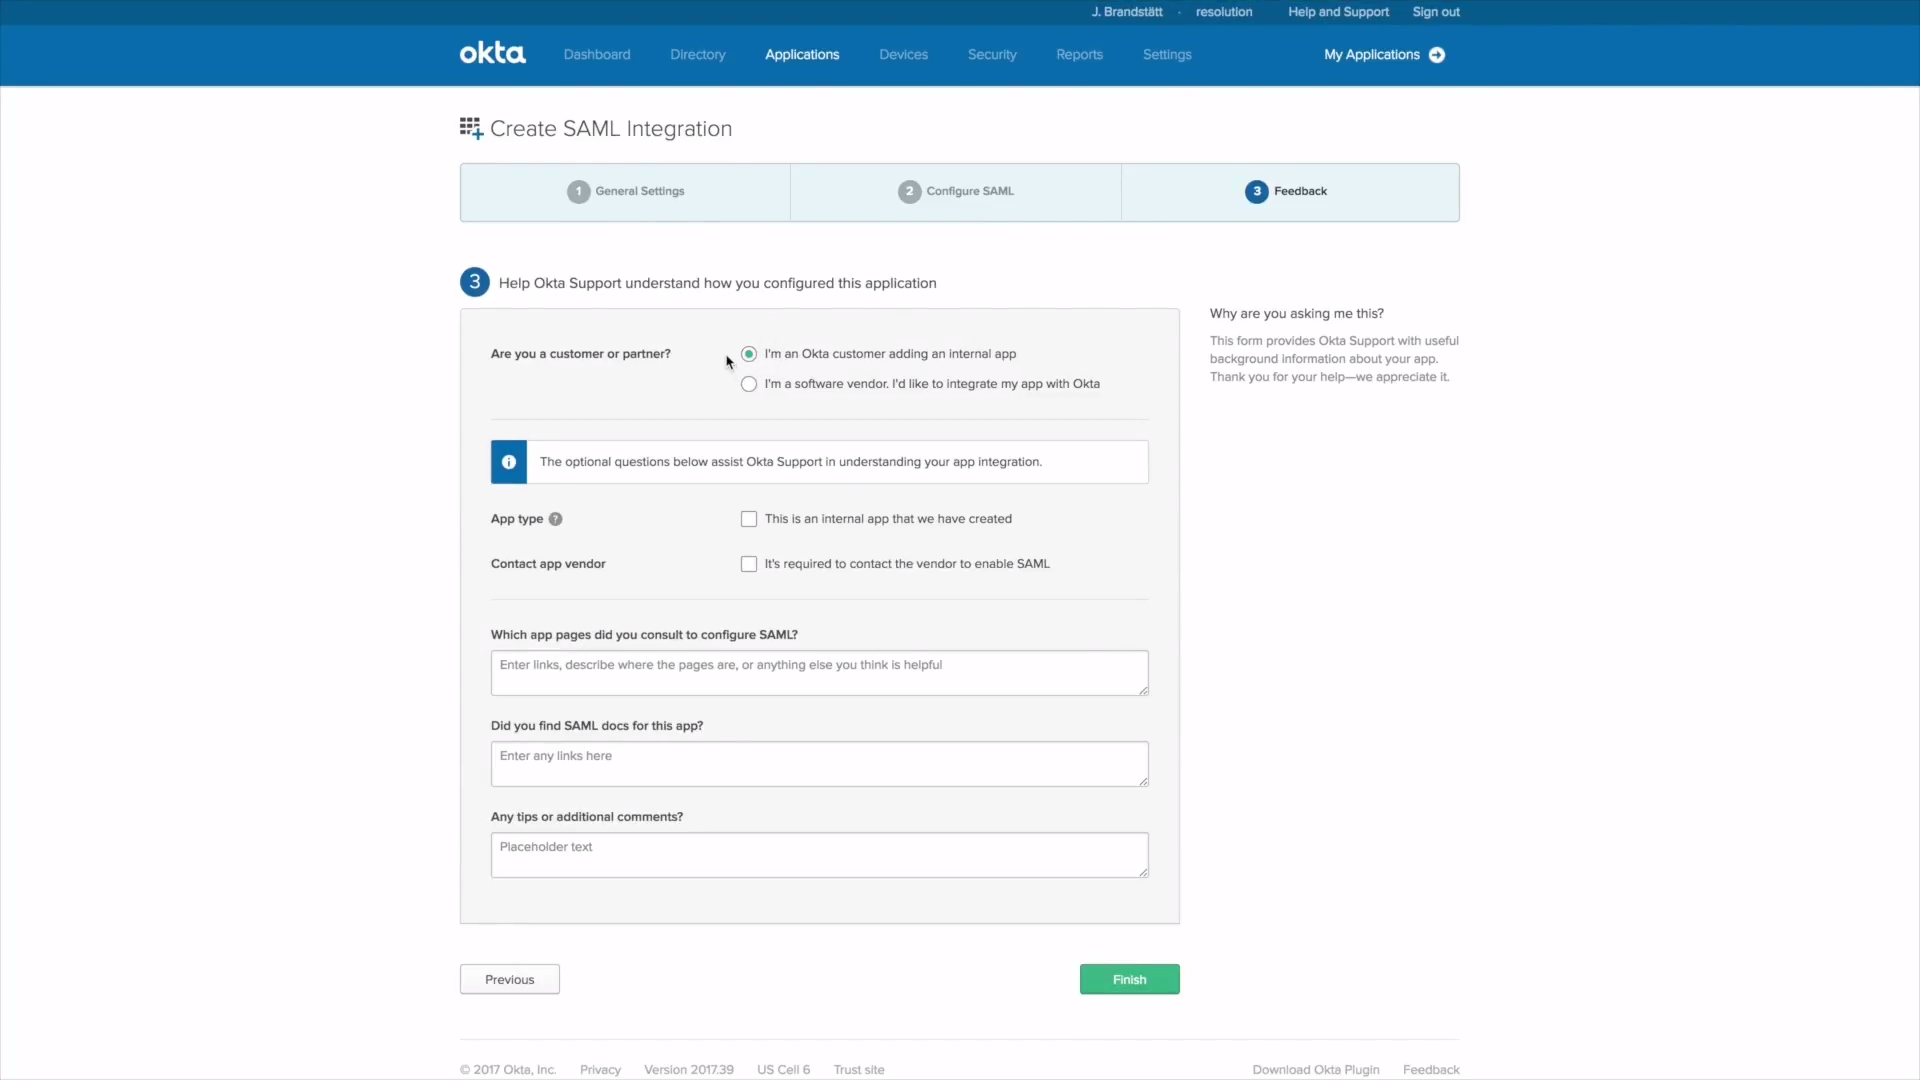
3) Now a feedback dialogue opens, please provide some short feedback. Click on Finish.
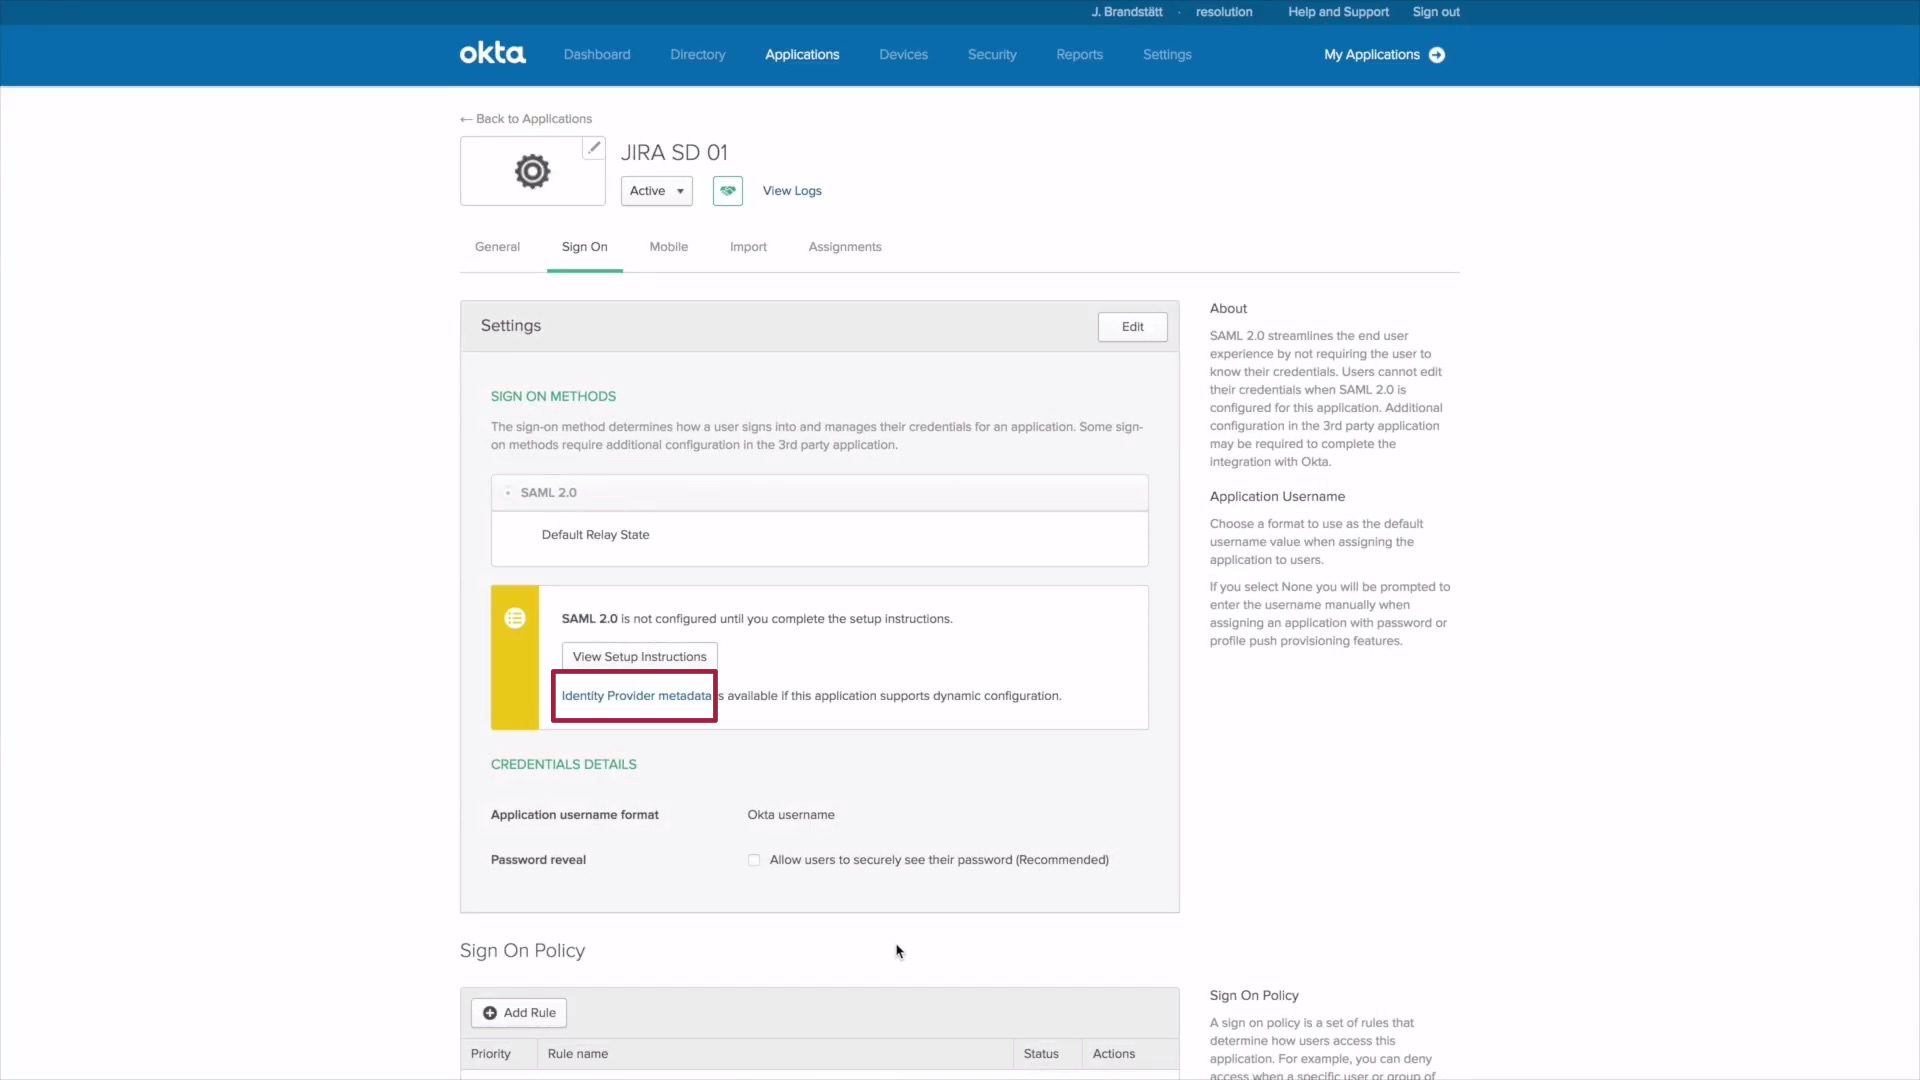
B.3) How to create the Single sign-on Application
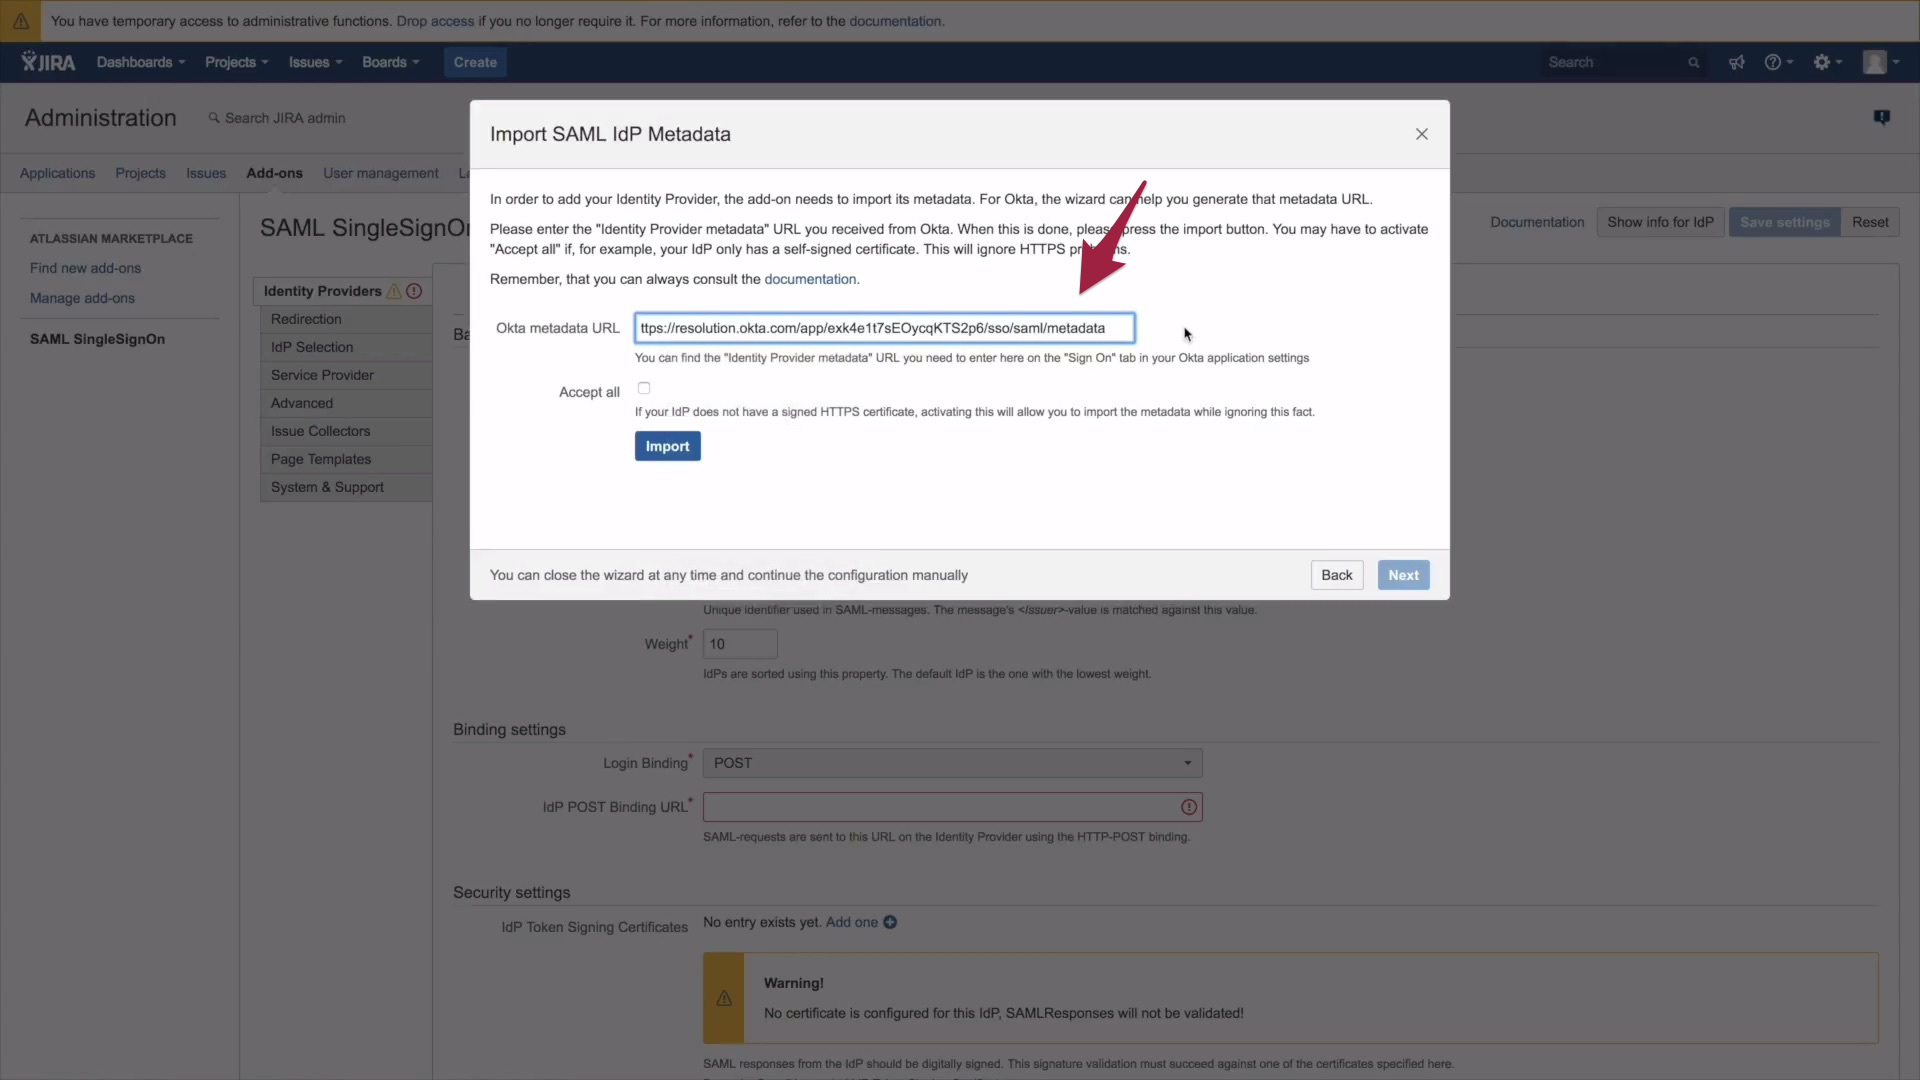
Right-click on Identity Provider metadata and copy the link.
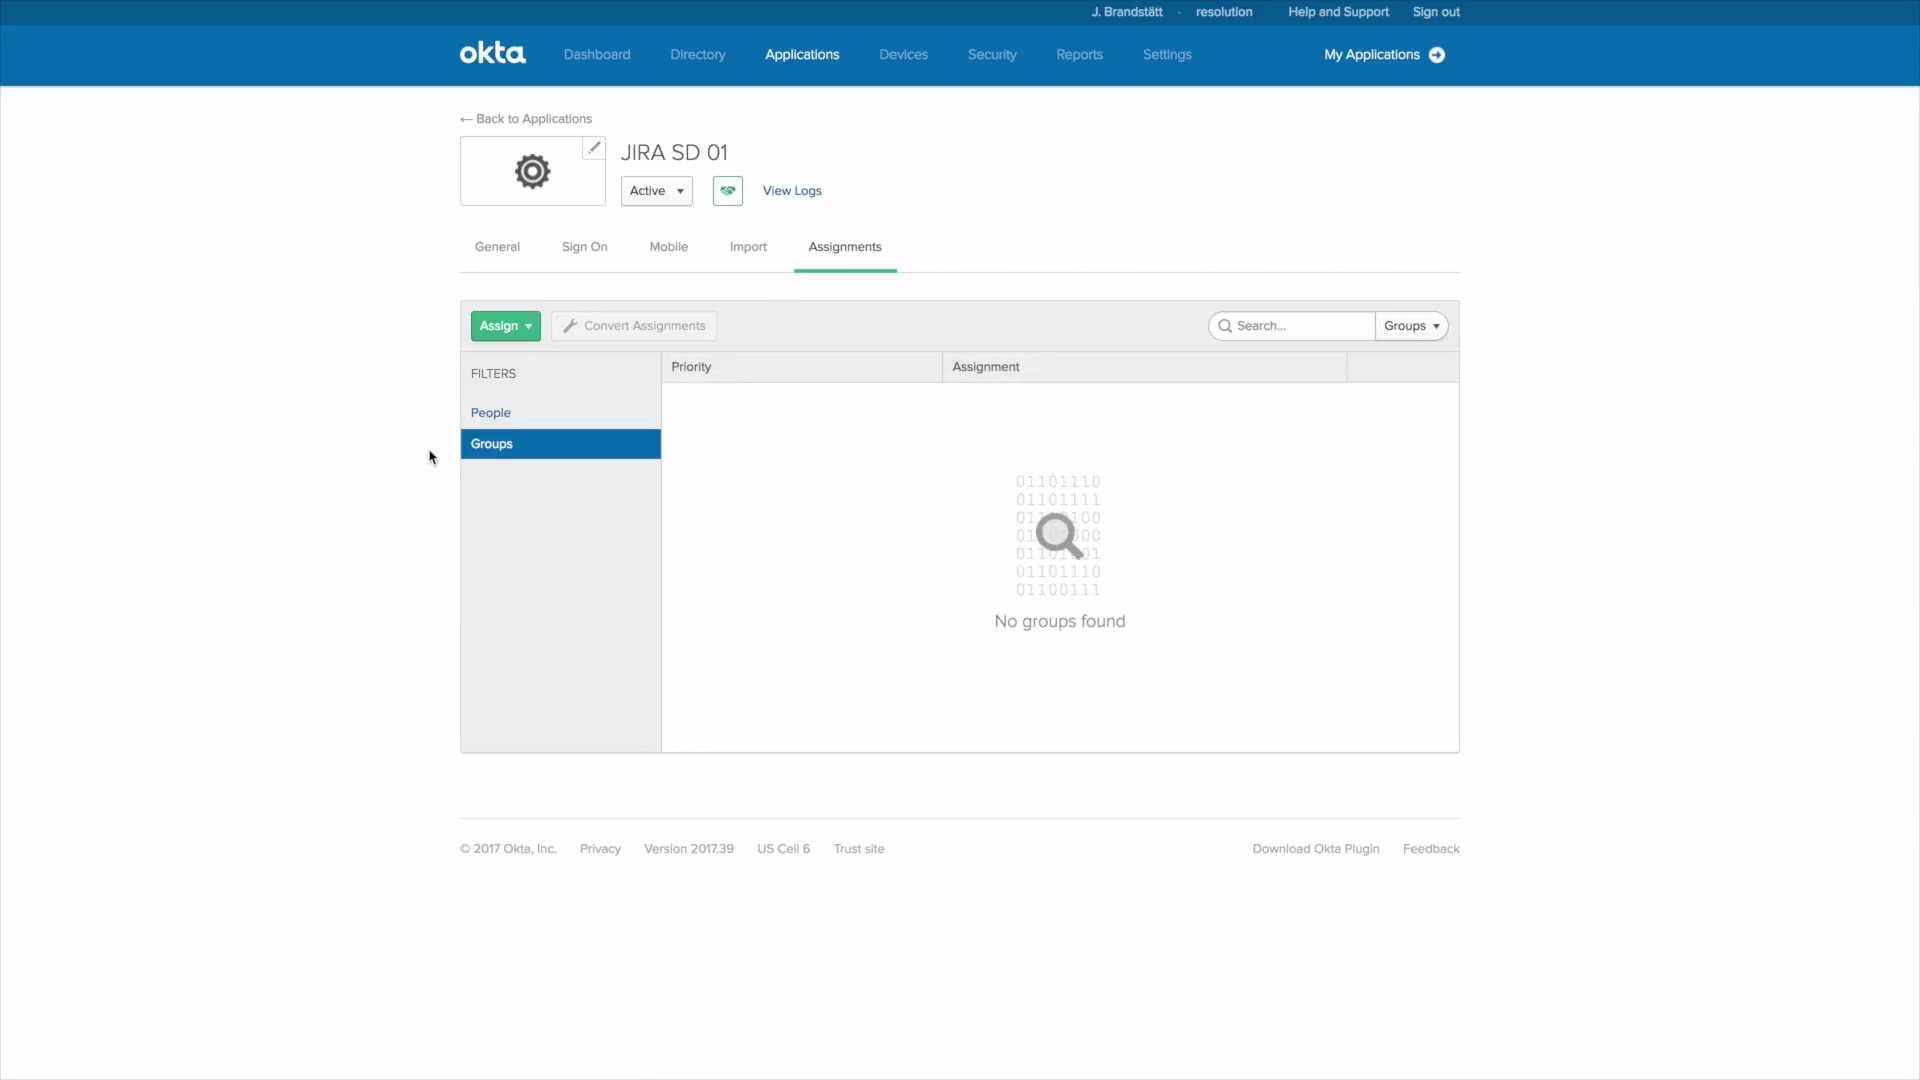
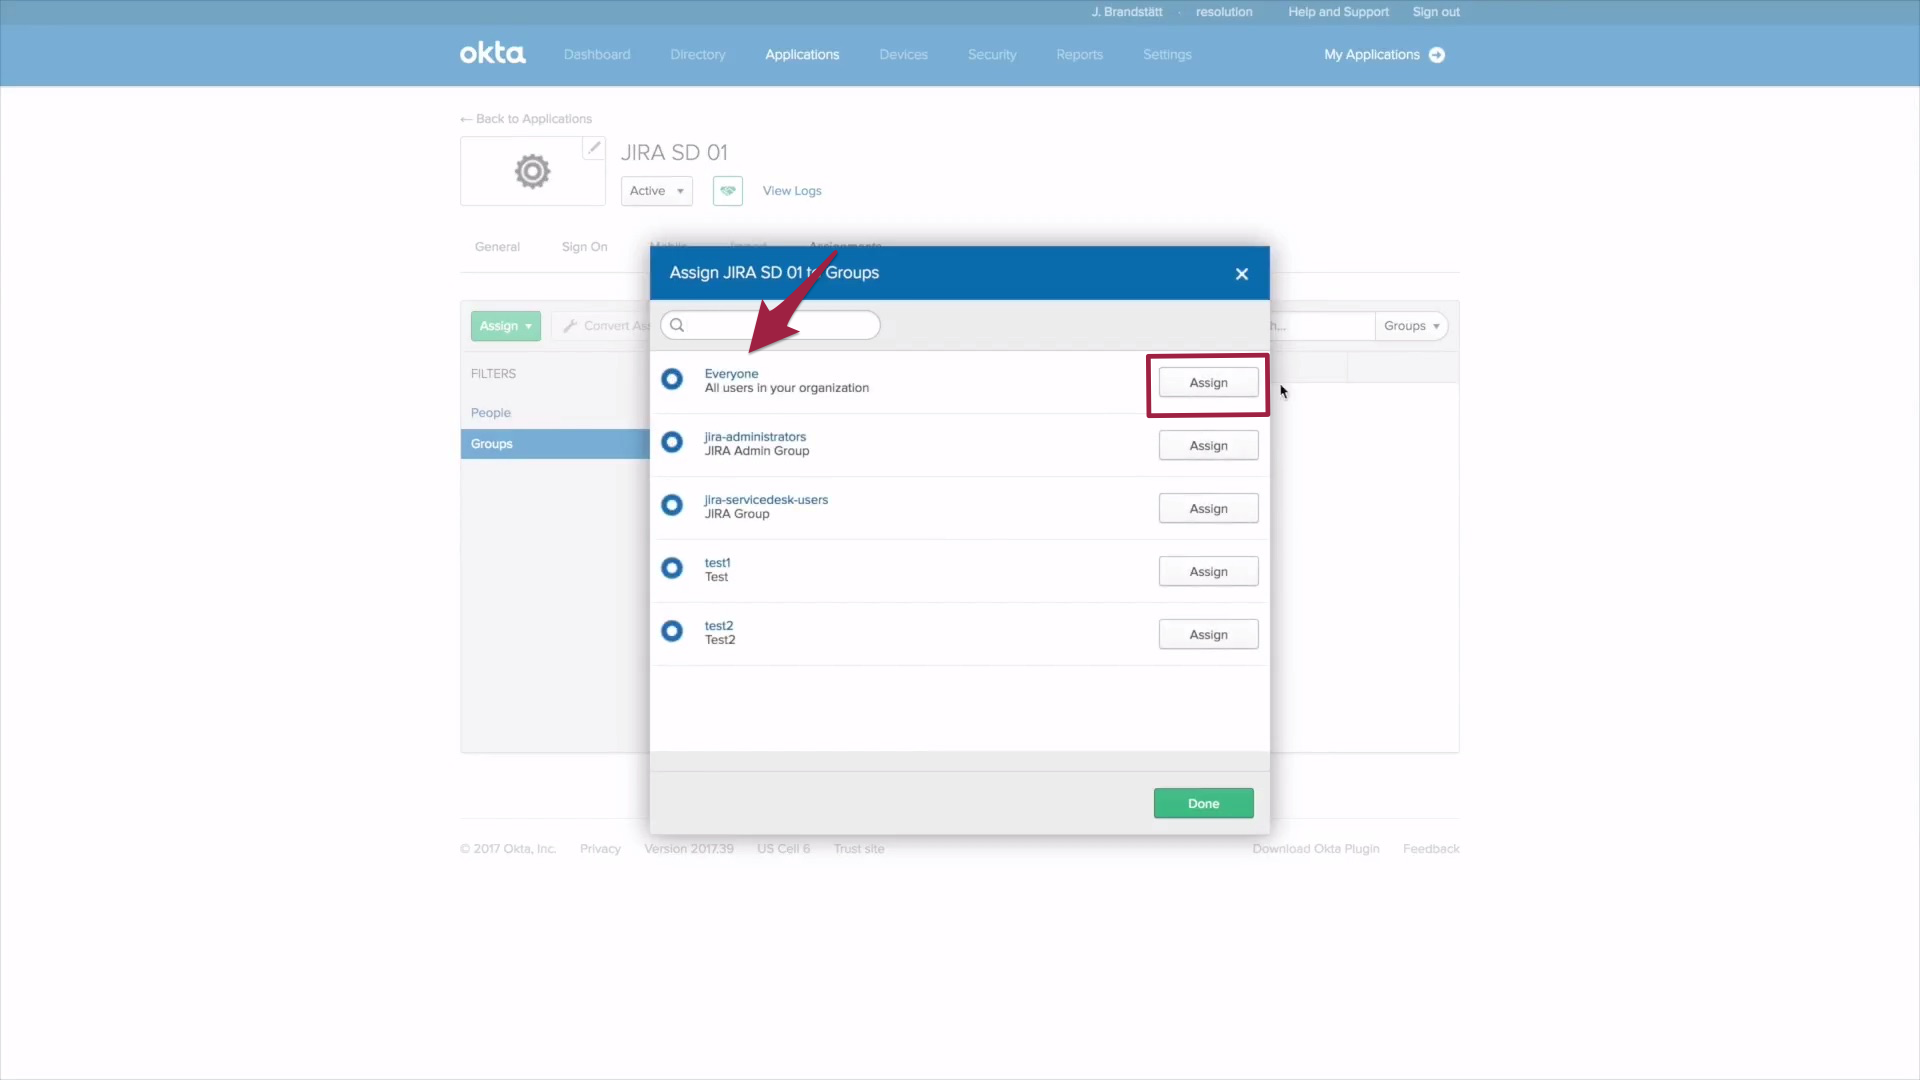
2.) Now click on Assignments. Choose Groups to allow Groups in Okta. Click on Assign and choose Assign to Groups.
3.) If you choose "Everyone" every user is able use this integration, however, you can also restrict it to certain users or groups.
4.) Time to go back to JIRA. Click Next in the Identity Provider configuration window.
5.) Paste the Metadata URL and click on Import.
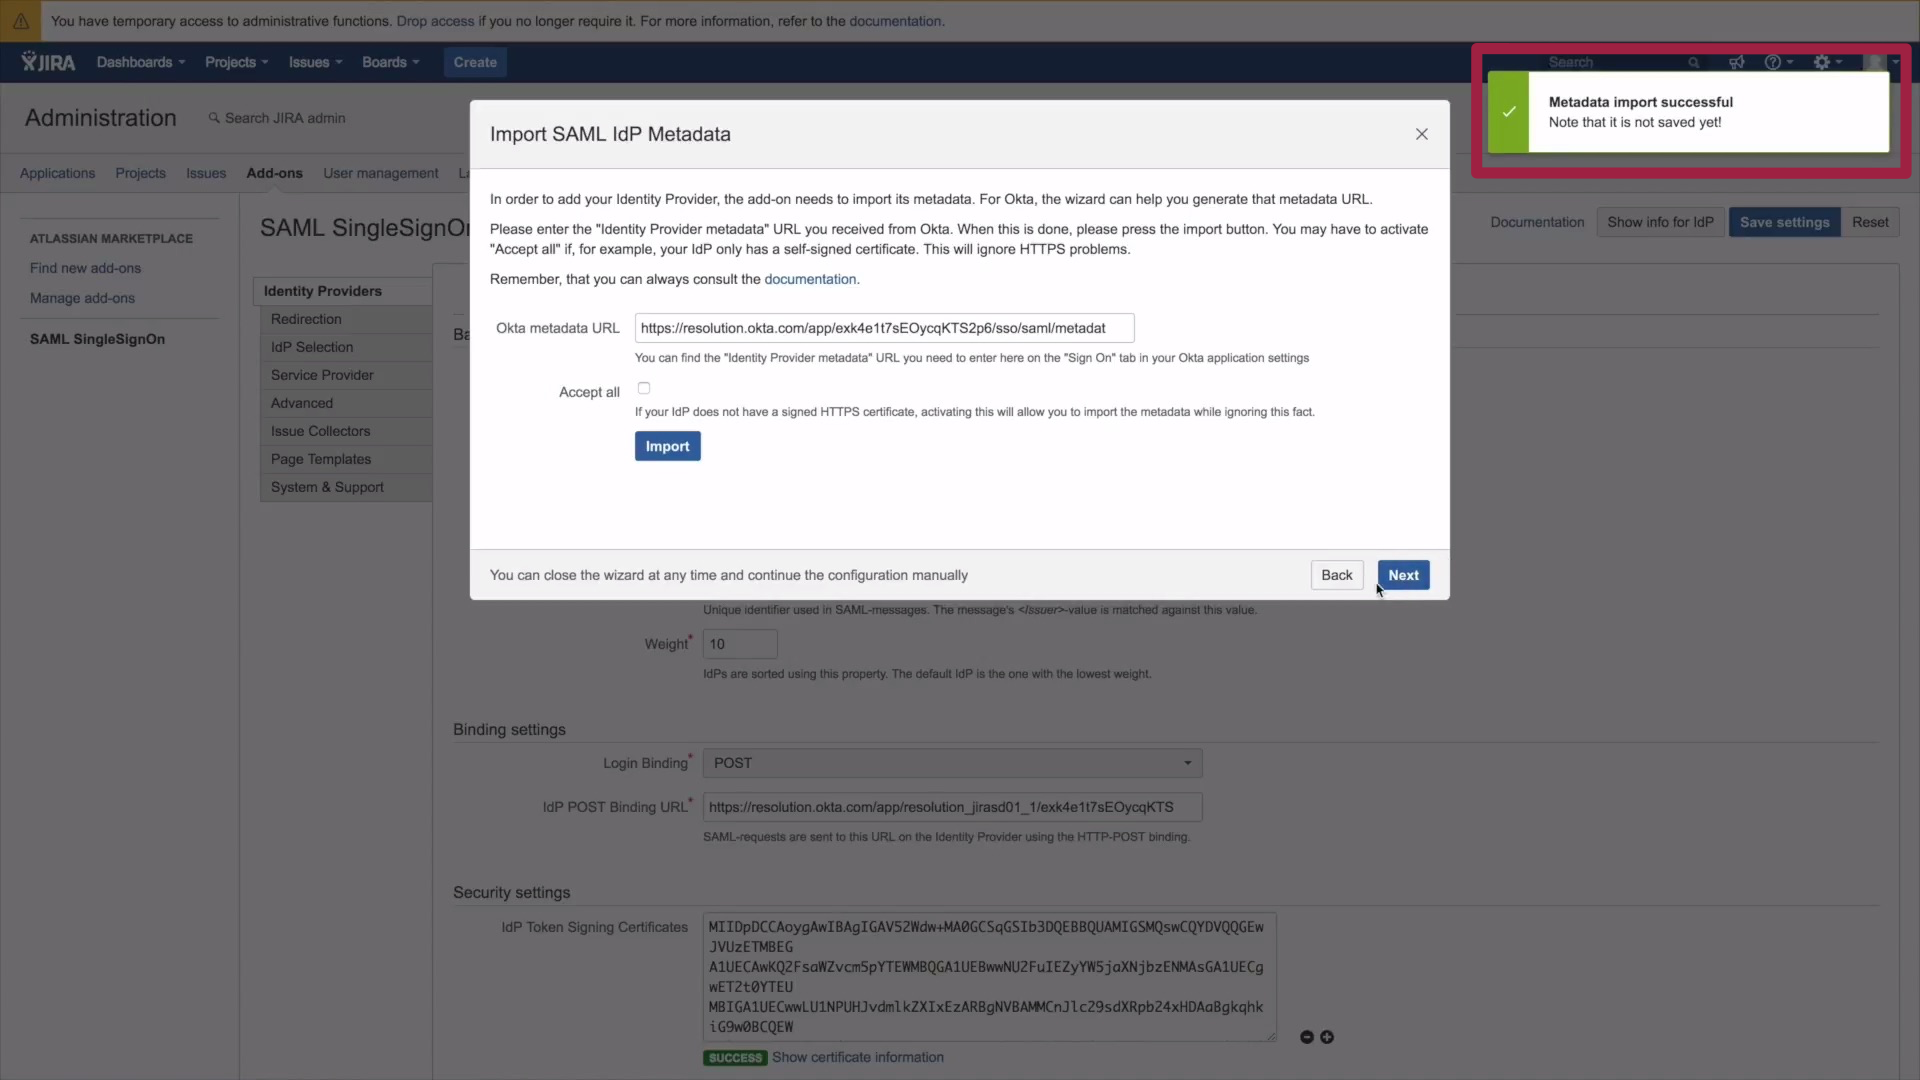
6.) If the import was successful a confirmation box opens. Click Next.
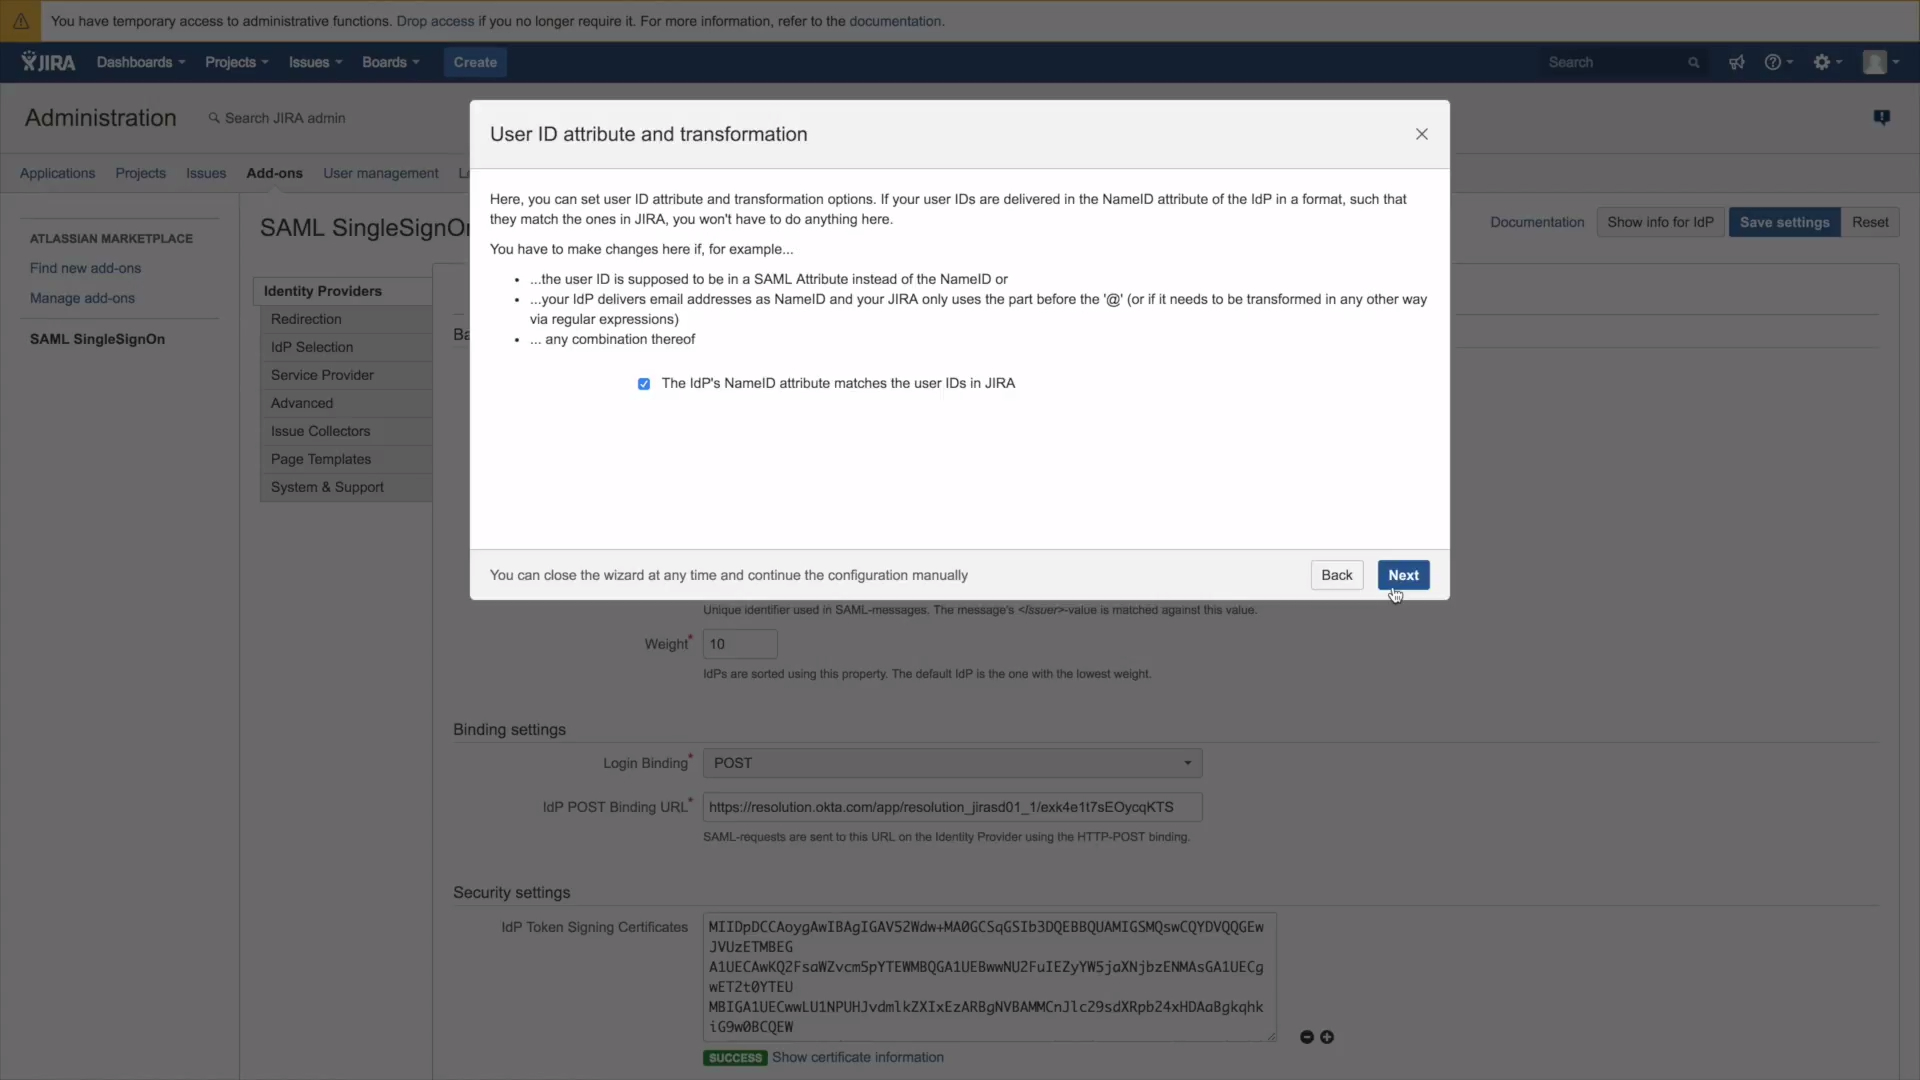
7.) In the user ID and attribute window user IDS can be modified. Please click here, if you need to modify the user ID.
If you want the OKTA user name to be the same as the Jira user name leave the box checked and click on Next.
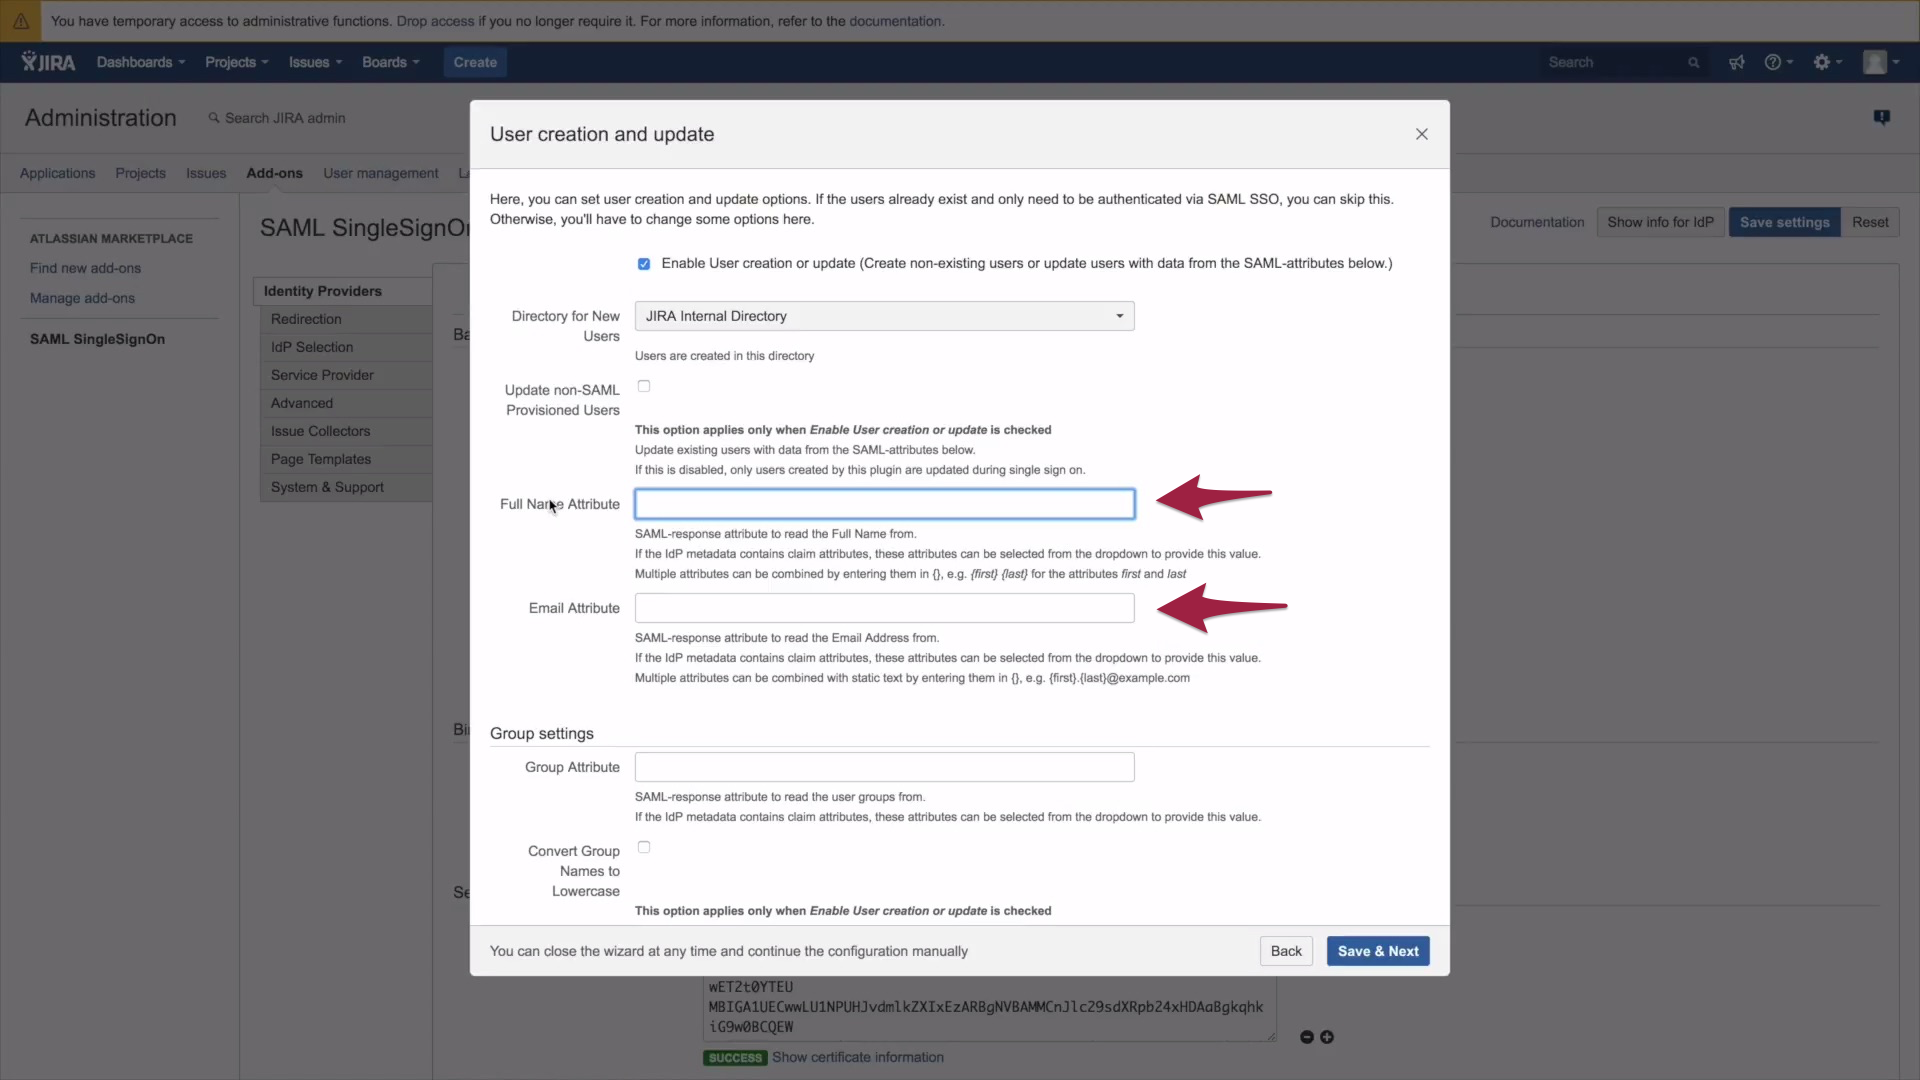
B.4) How to create a user by first Login
1.) To enable user creation or update users on a subsequent login, the full name and the email attribute need to be filled in. For the full name attribute, please follow this format to combine attributes:
{first} followed by {last}
For the Group Attribute simply fill in Groups. Now click on Save & Finish.
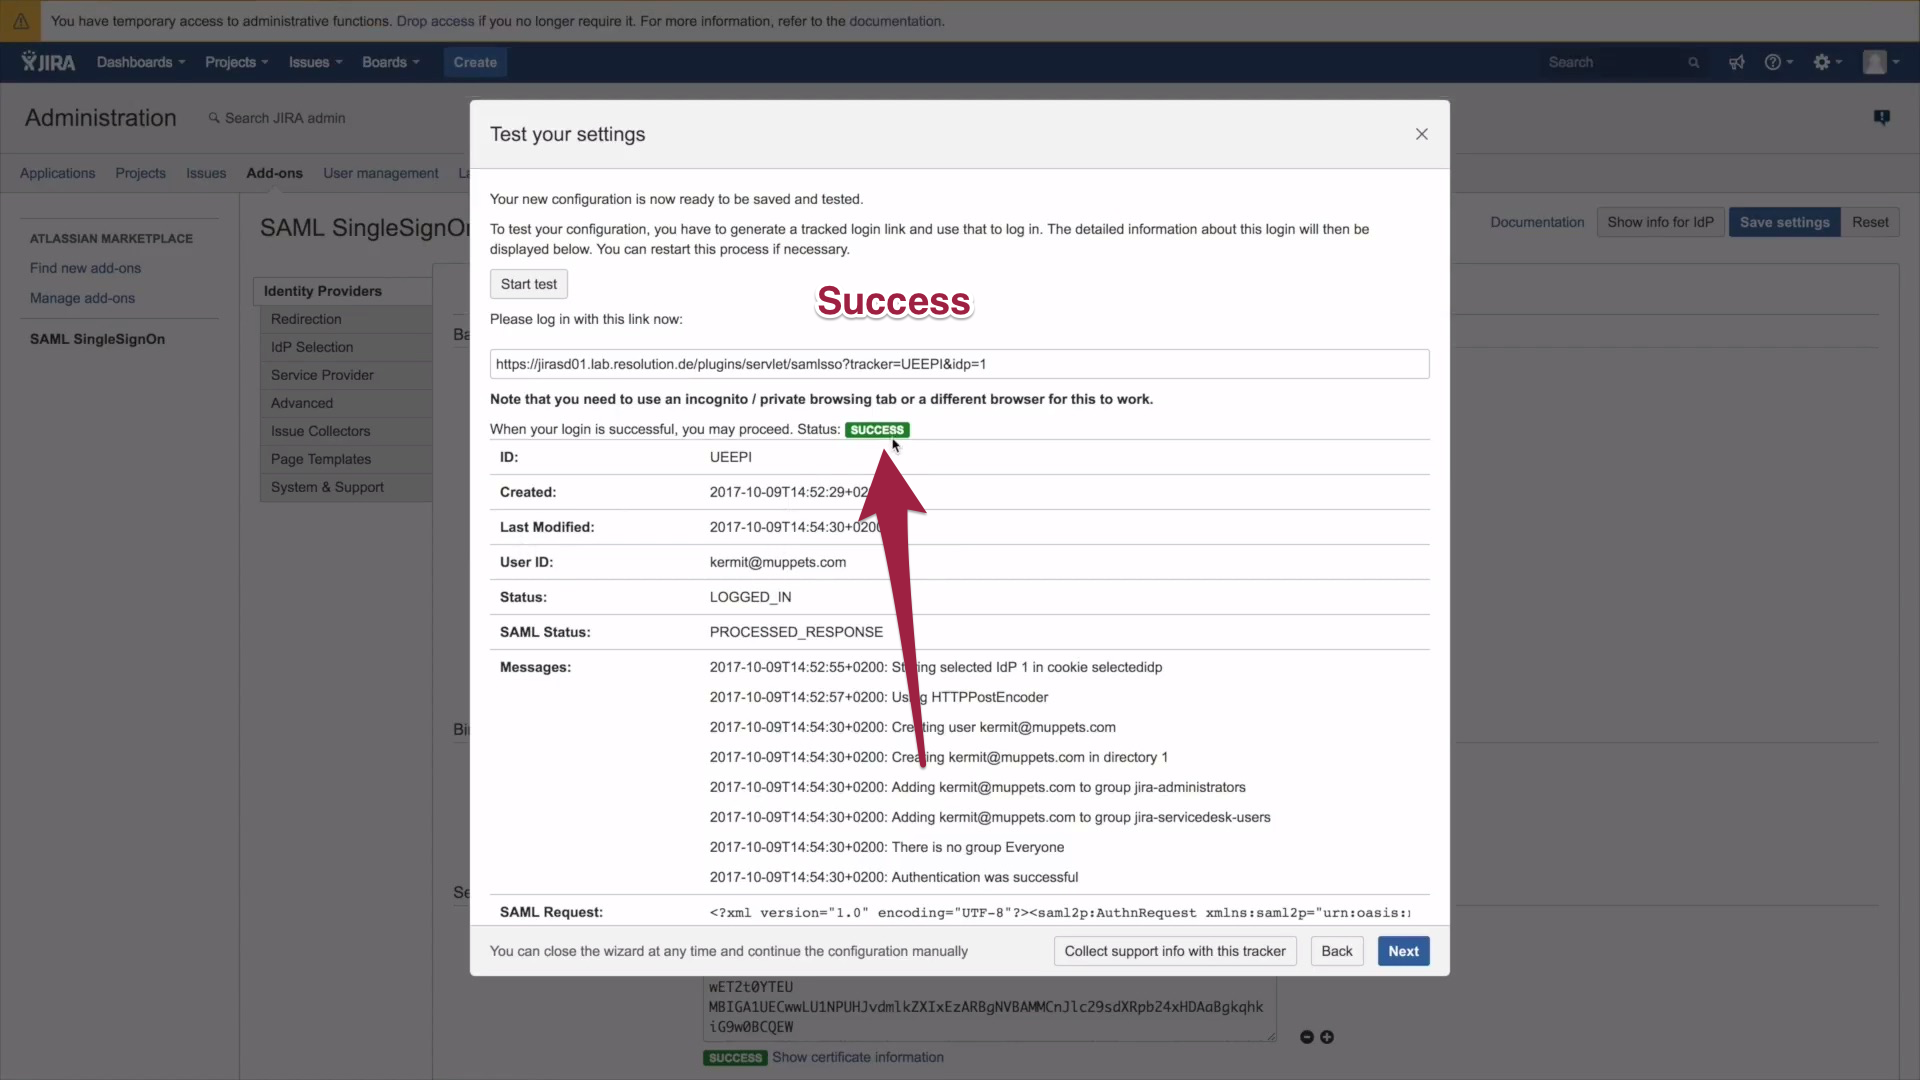
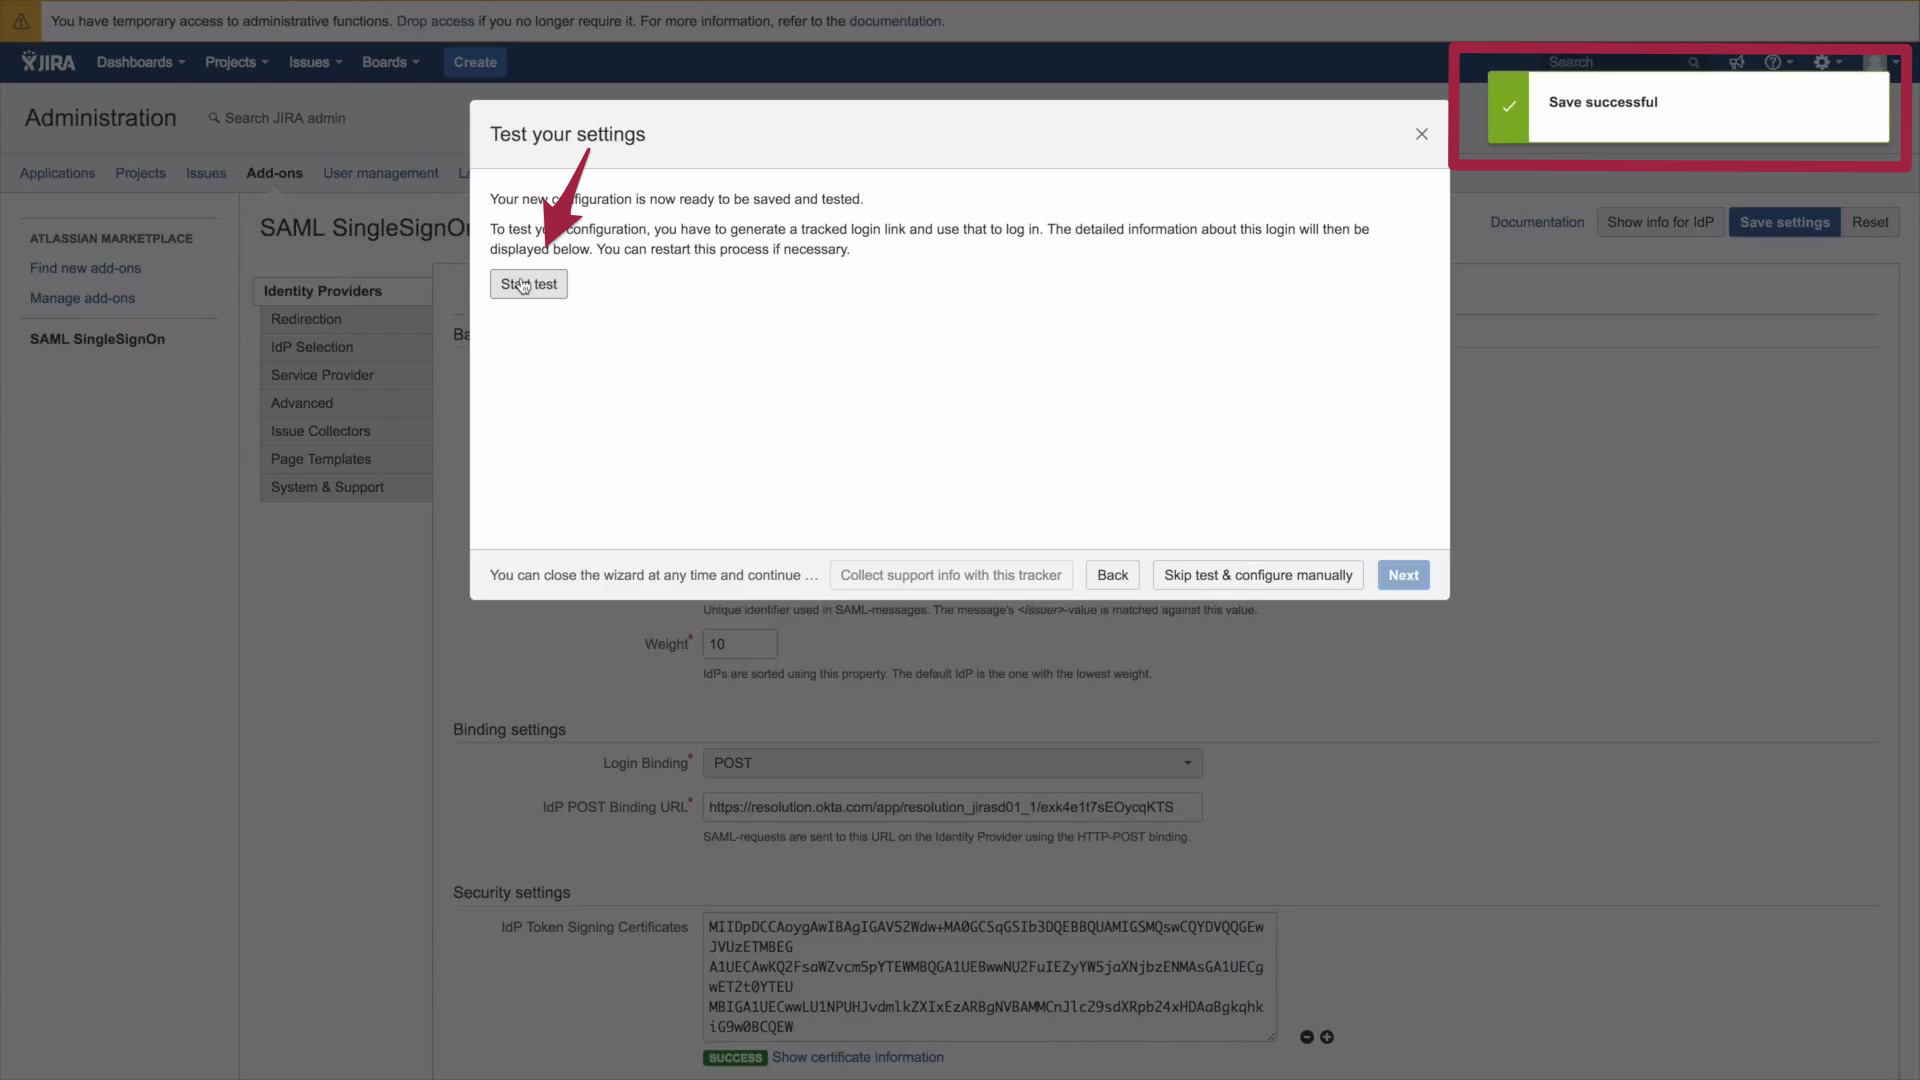
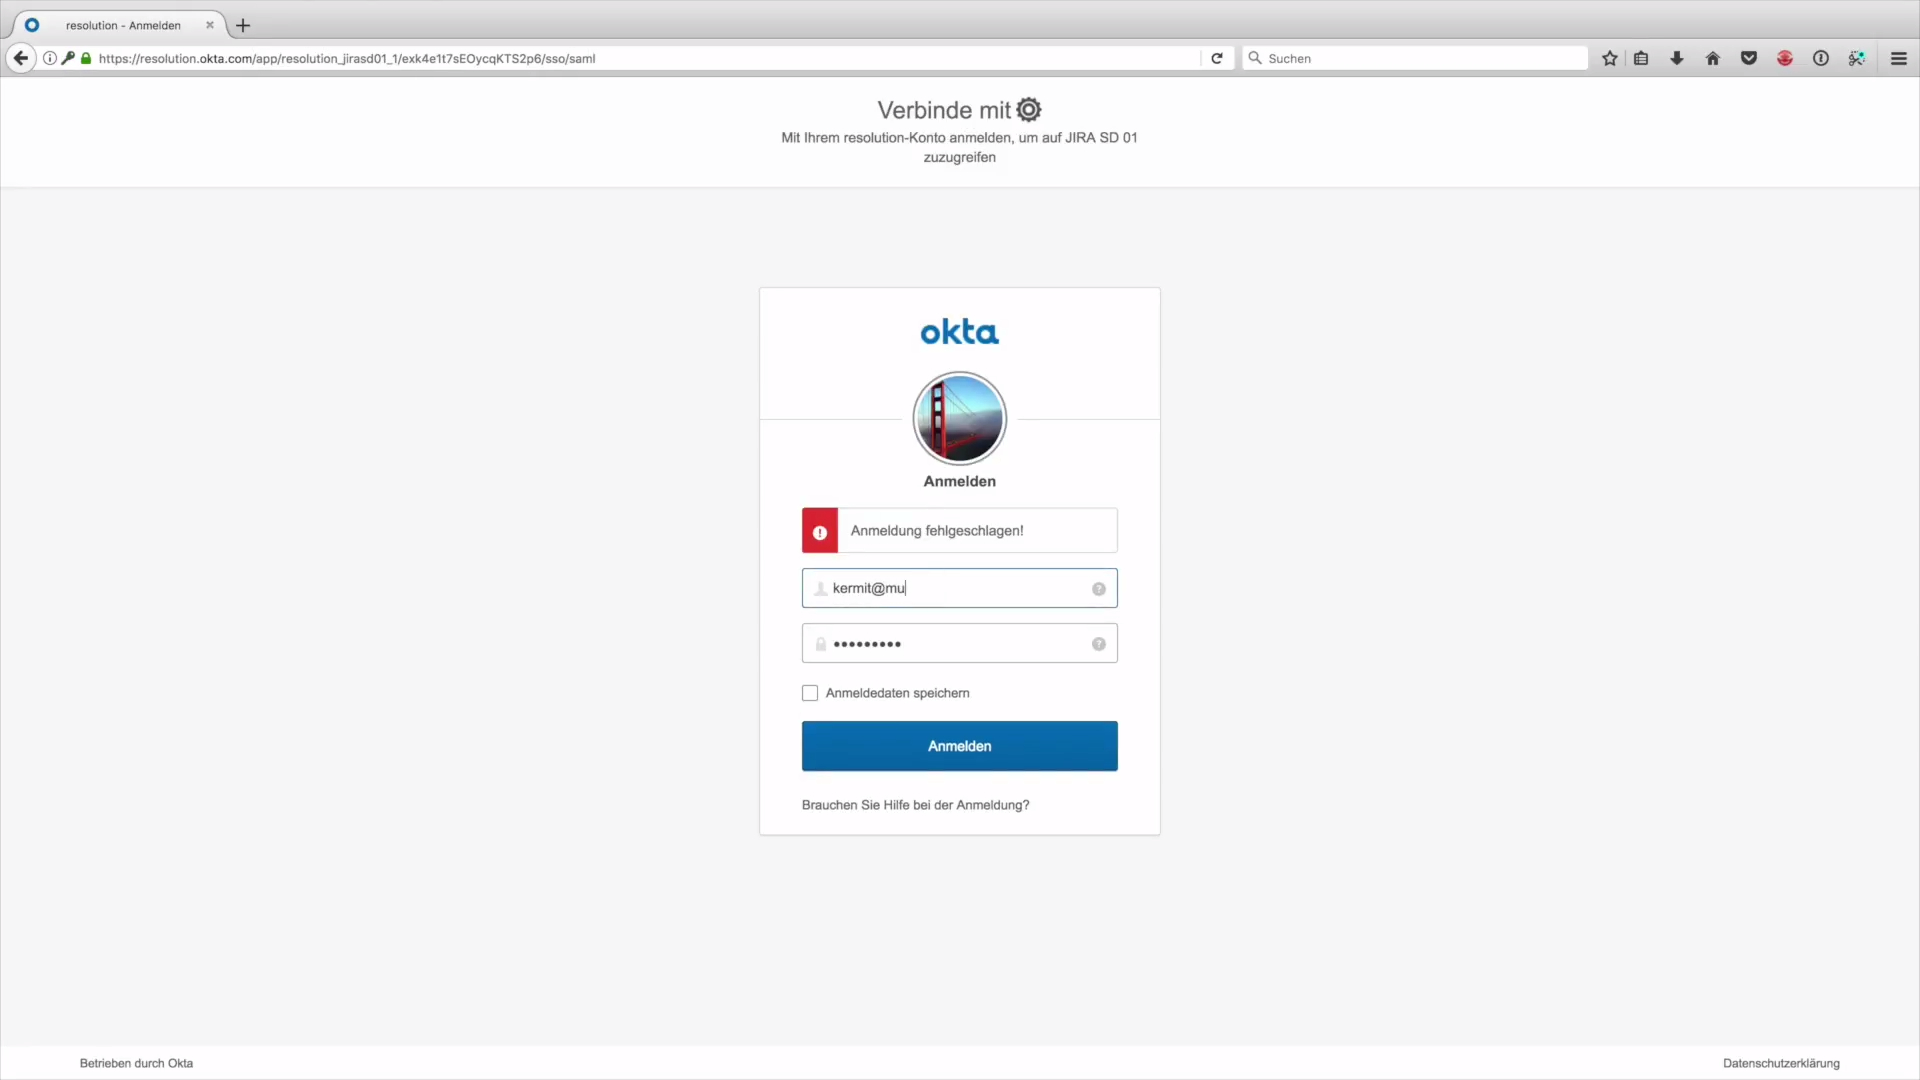
C.) Test IdP Setup
Now that you have finished setting up the IdP, let's make sure everything runs smoothly. Click on Start Test.
2. Now the authentication tracker opens, which will show you live results of an ongoing authentication. Please copy and paste the authentication tracker URL.
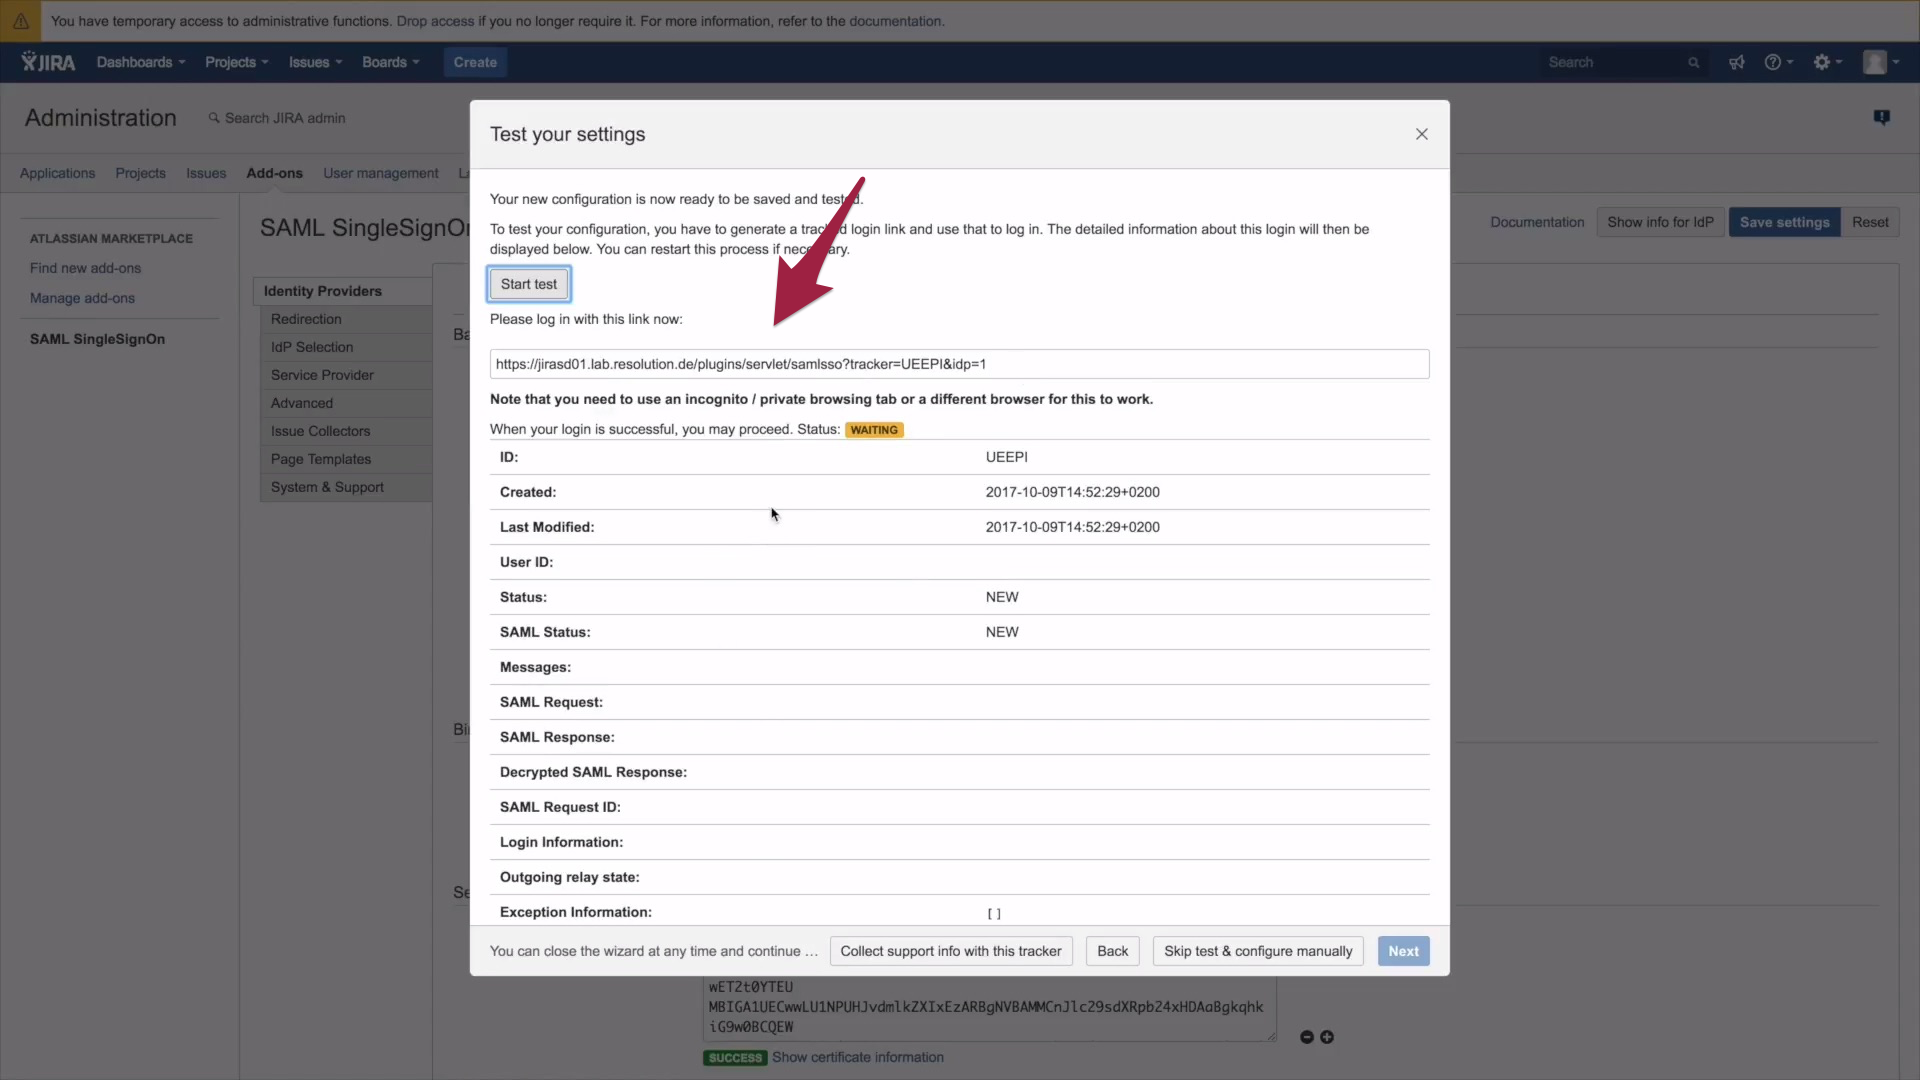
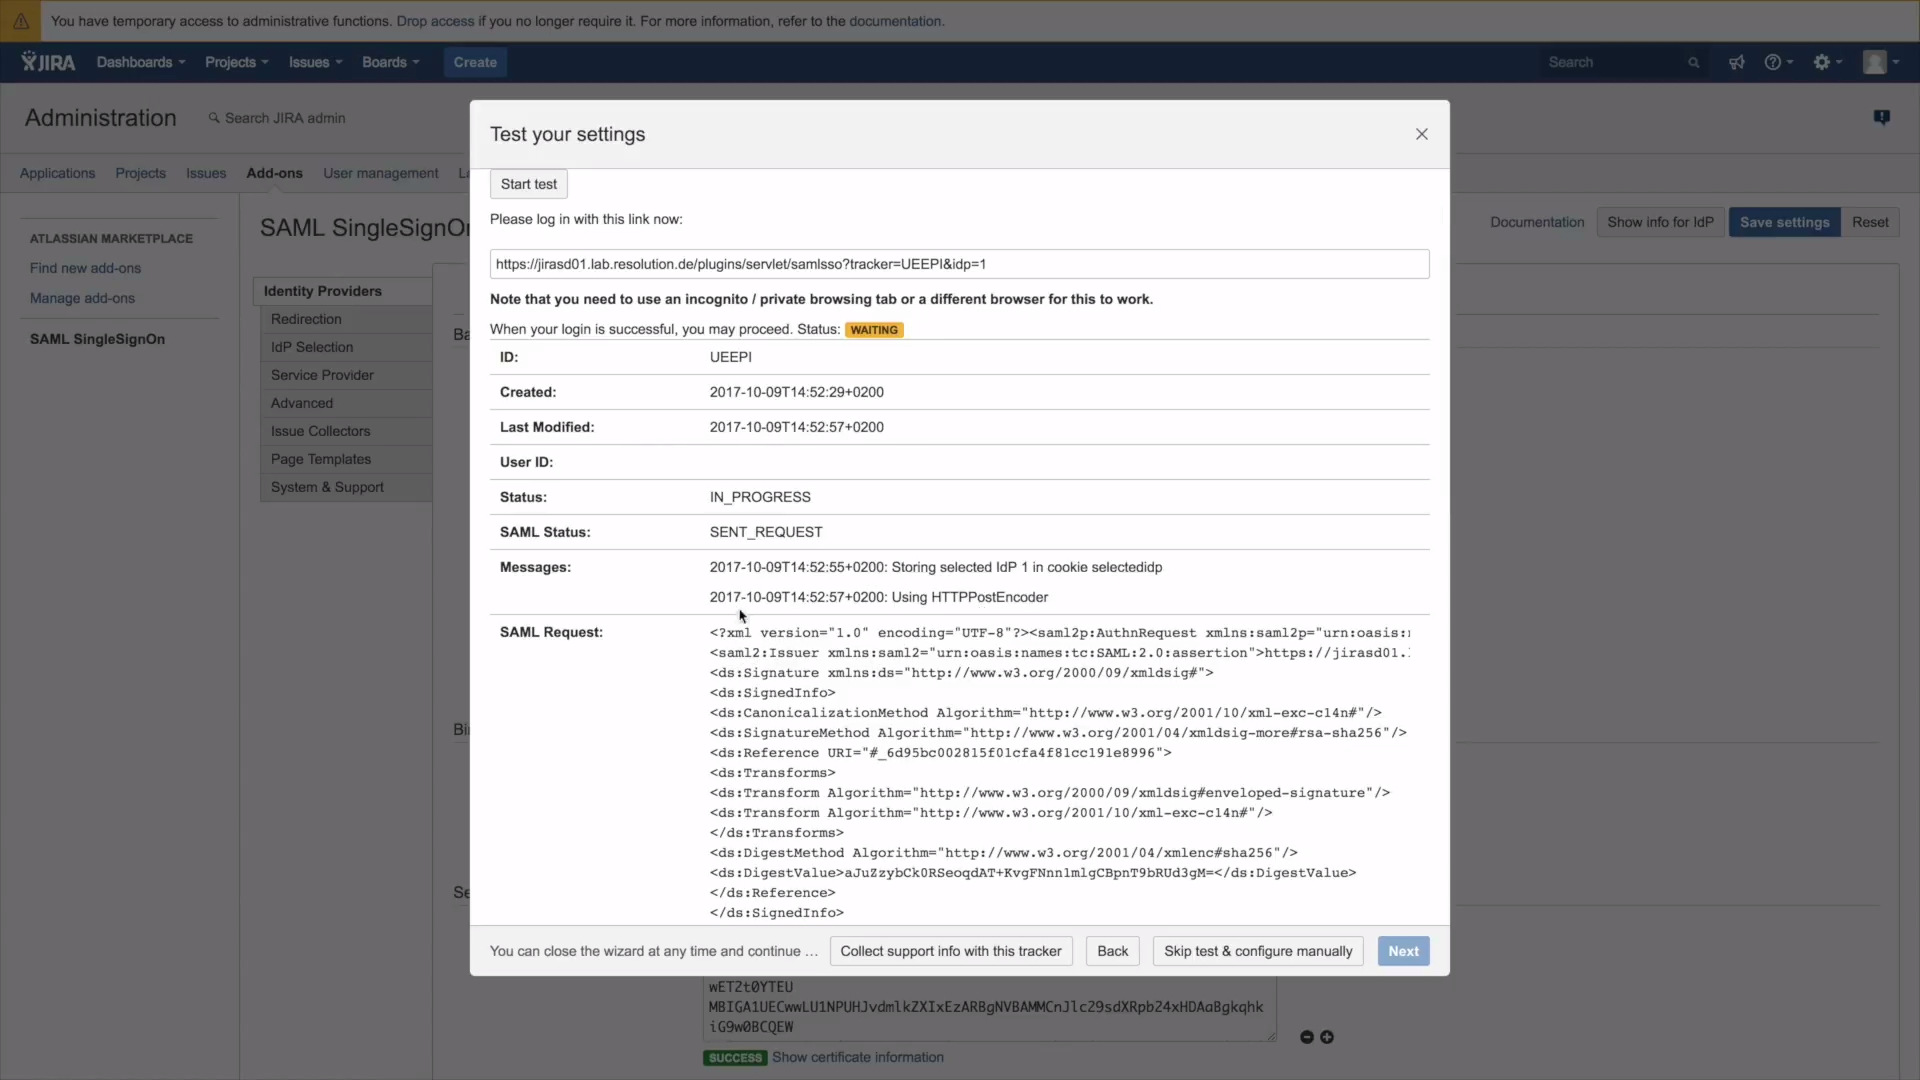
3. Open a new window and paste the tracker URL in the URL bar of your browser. Open JIRA -) if you are redirected to Okta, things go as planned. Please go back to your authentication tracker to check its status. It should say In Progress and give you an overview of the ongoing authentication.
4. Go back to Okta and log in.
5. If you are welcomed to JIRA upon Login: Congratulations, the authentication was successful. Don't worry, it will also work, if you're not one of the Muppets.
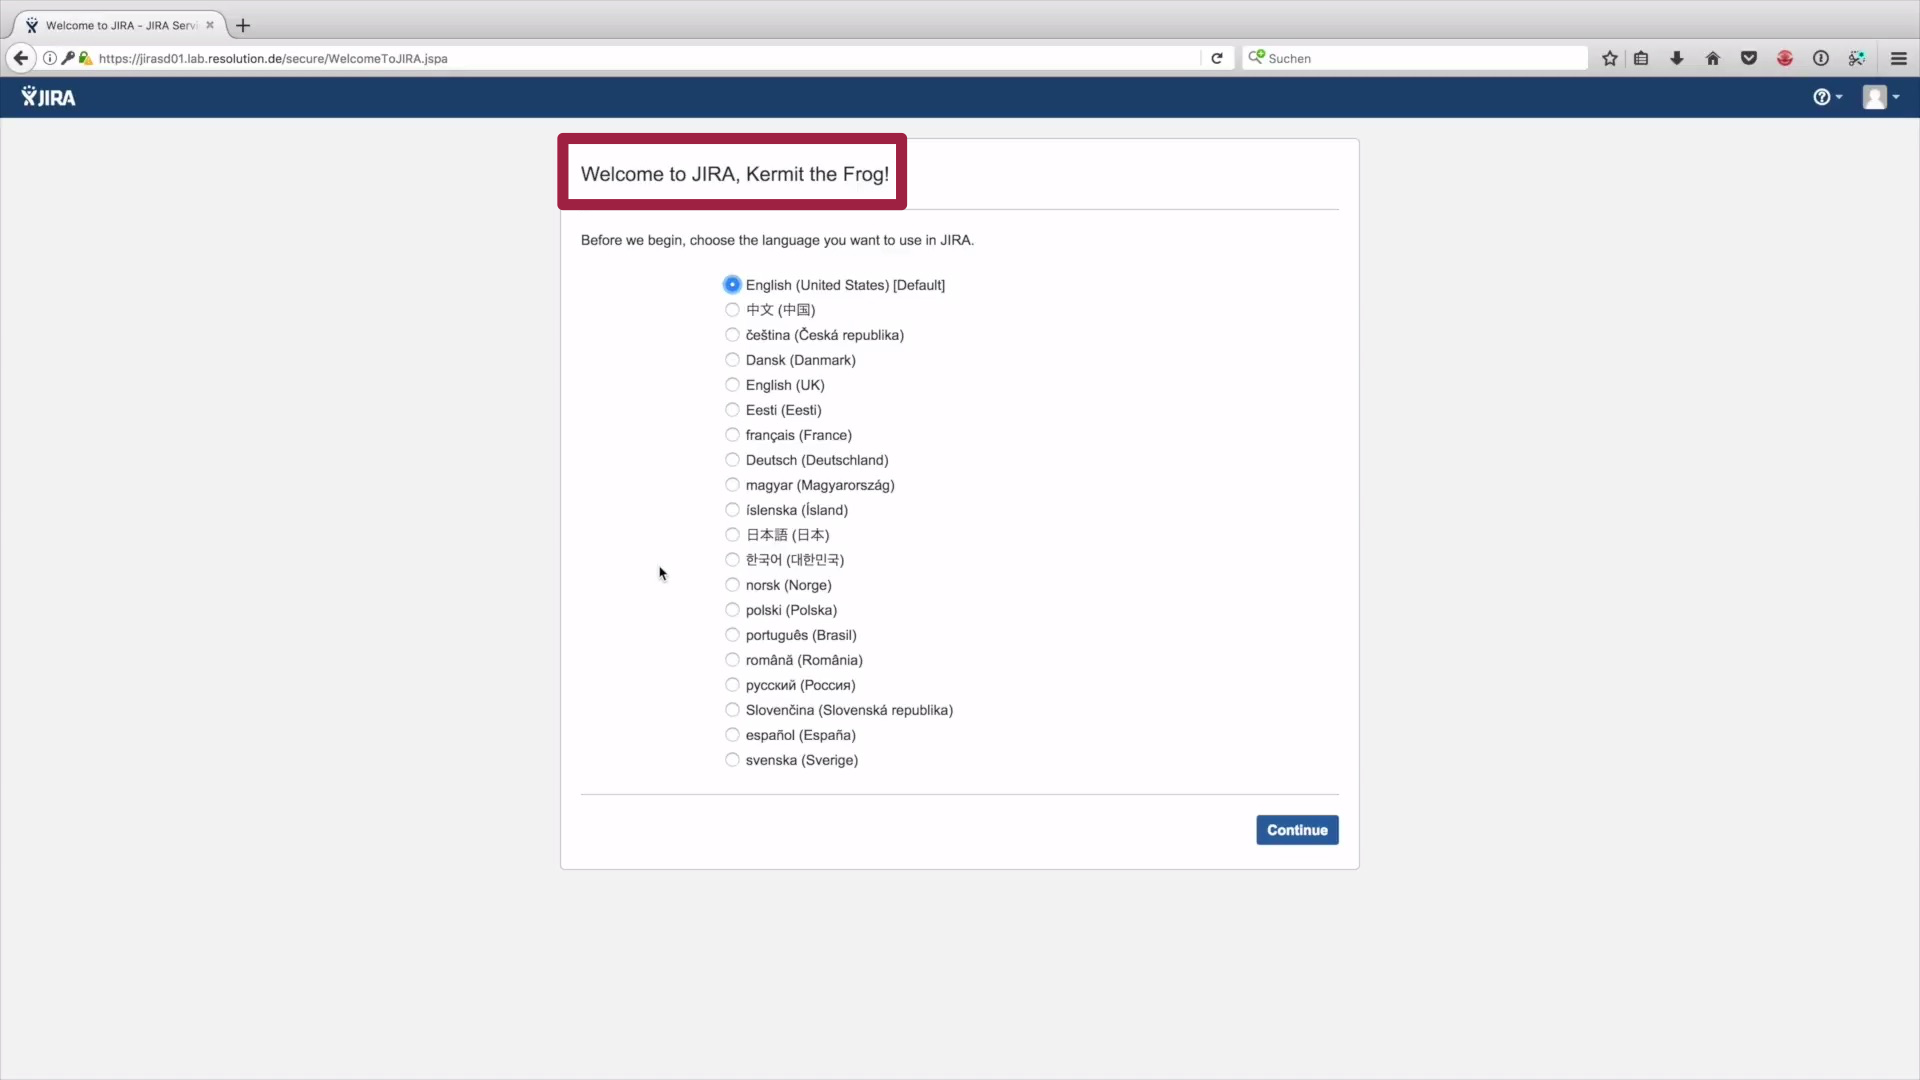
6. Go back to you authentication and check if the Status says Success. It does? Congratulations, you're all set.