Setup SAML SSO with G Suite/Google Apps (Jira)
Video Guide
The video below is an installation guide for setting up SAML SSO for Jira Server and Data Center (SAML Single Sign On (SSO) for JIRA/Confluence with Google Gsuite v 2.0).
Setup Guide
This guide describes how to complete the initial setup for SAML Single Sign On plugin version from 0.14.5 for JIRA Server and Data Center with G Suite (Google Apps) and will be updated soon for version 2.0.
If you need any further support please feel free to contact us here.
Step1 Install the plugin | Step2 Set up G Suite (A-E) | Step3 Configure the Plugin (A-B) |
|---|---|---|
Step4 Test | Step5 Enable login redirection | Step6 Advanced Configuration |
Prerequisites
G Suite Account, click here for more information.
JIRA must be accessible via HTTPS. See https://confluence.atlassian.com/jira064/running-jira-over-ssl-or-https-720411727.html for instructions.
Step 1: Install the plugin
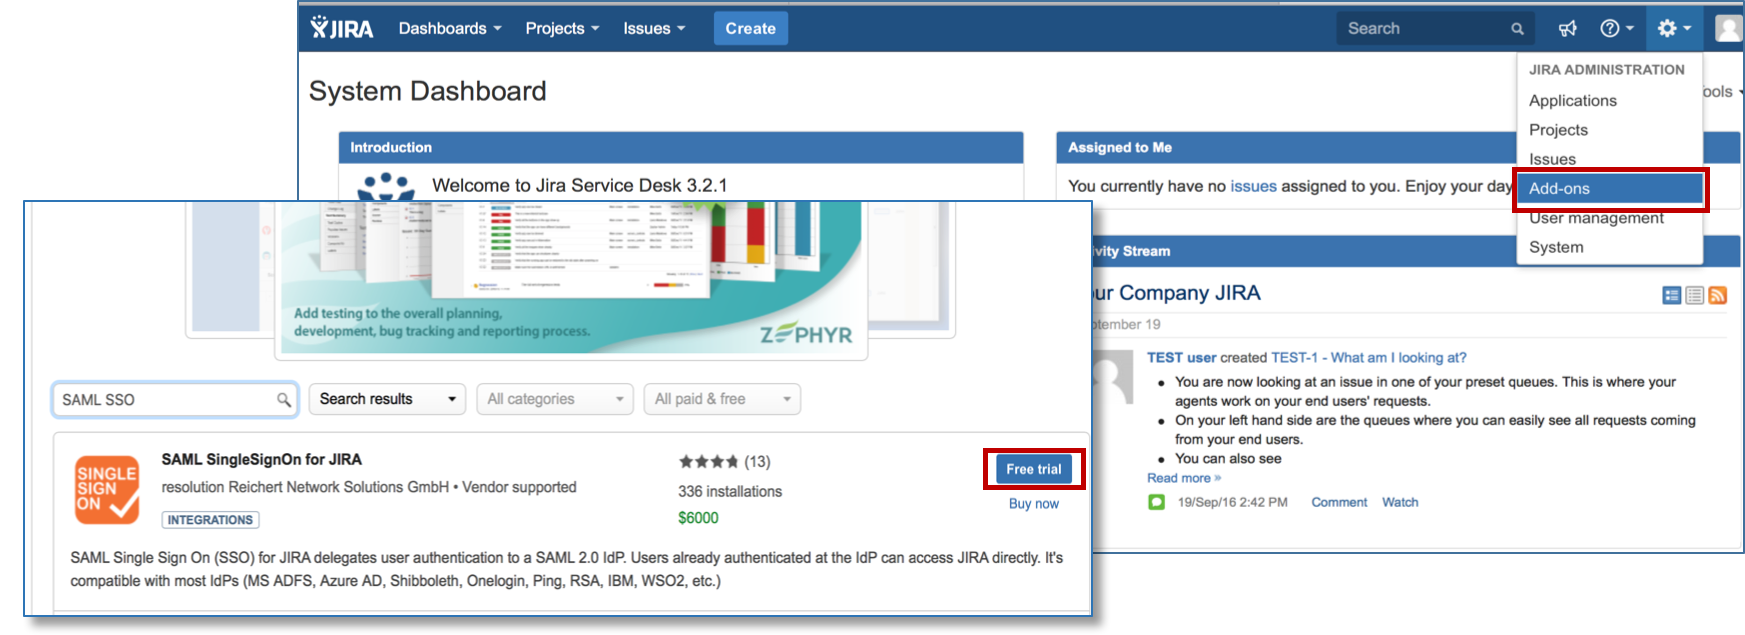
Click Add-ons under JIRA Administration on the top right corner of your JIRA interface. Then, you will be taken to Atlassian Marketplace. Search for SAML SSO and click on Free Trial to install.
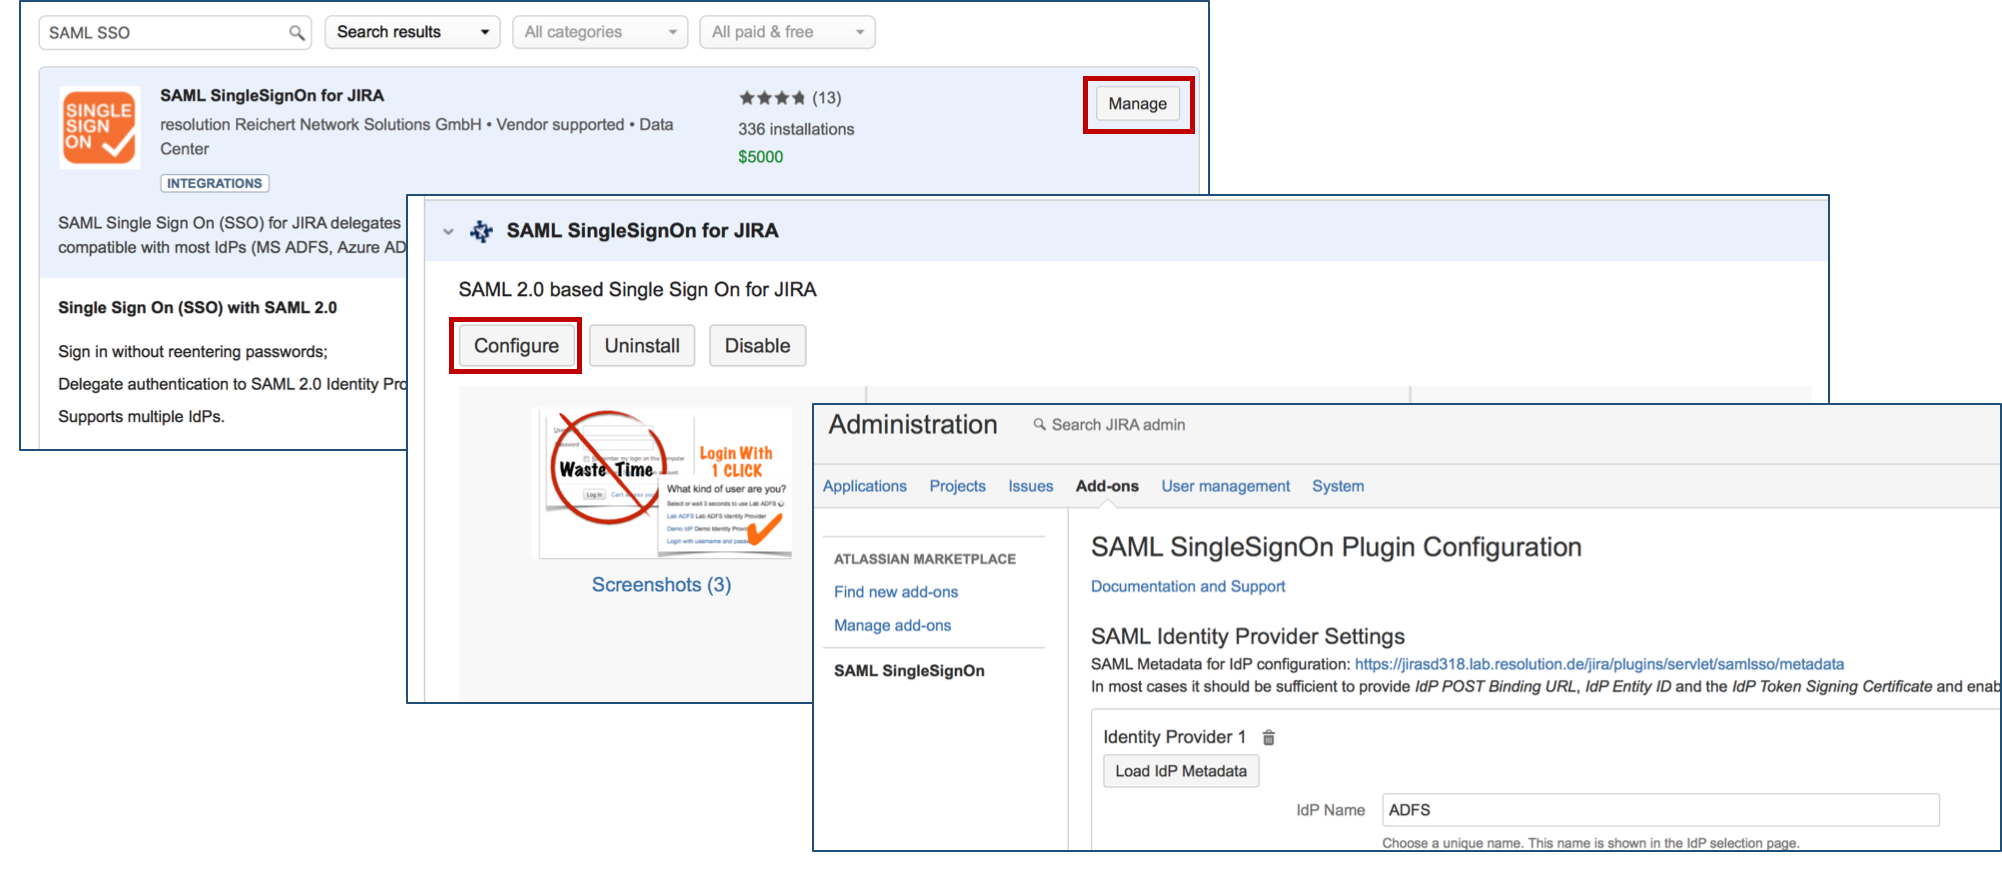
After installation succeeded, click on Manage, then choose Configure. Now, you are on the plugin configuration page.
Step 2: Setup G Suite
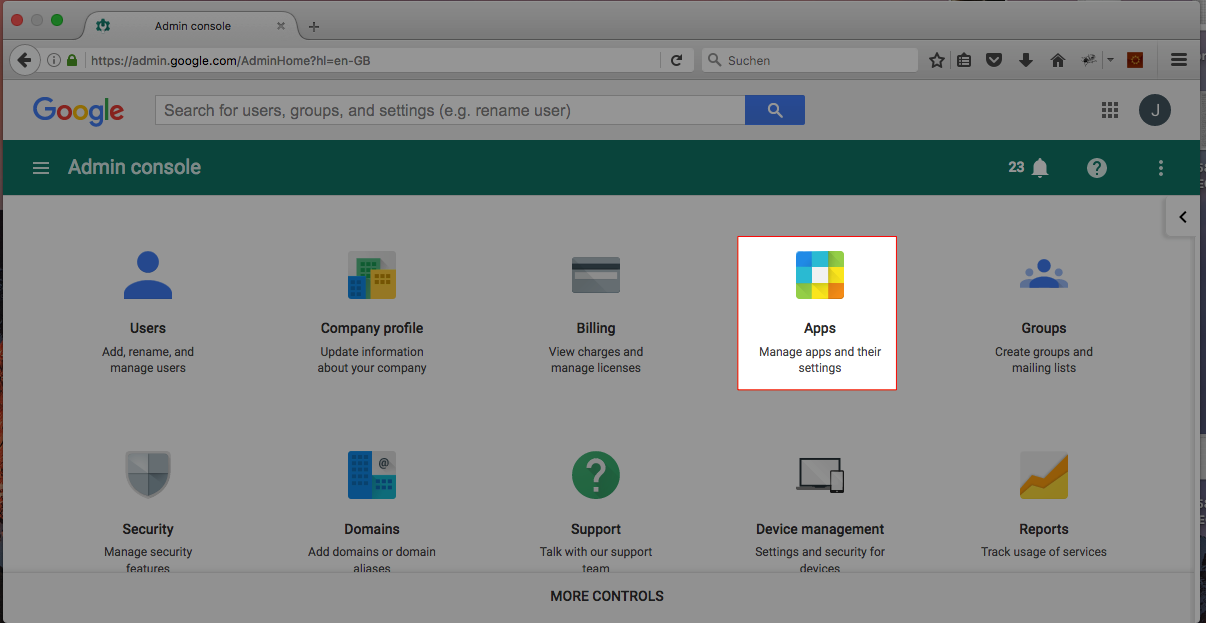
Login to the Google Admin console at https://admin.google.com
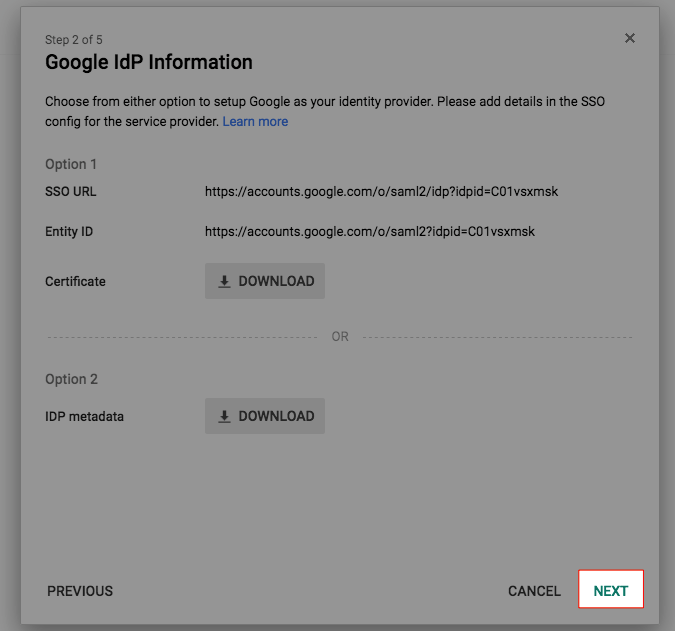
Substep A. Download IdP Meta Data.
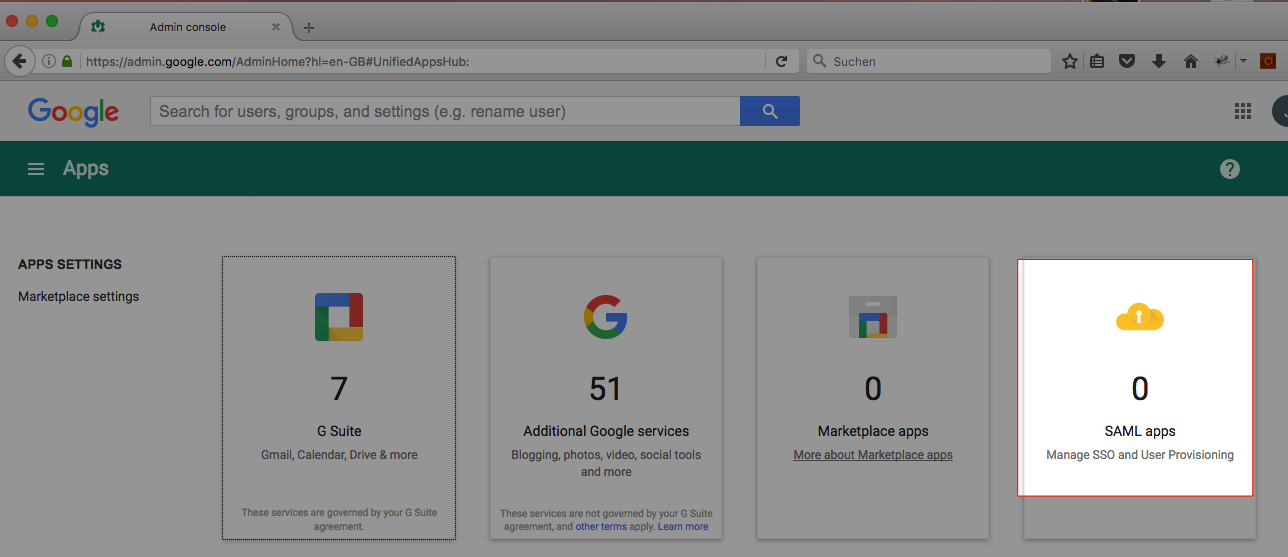
Click Apps.
Click SAML-Apps.
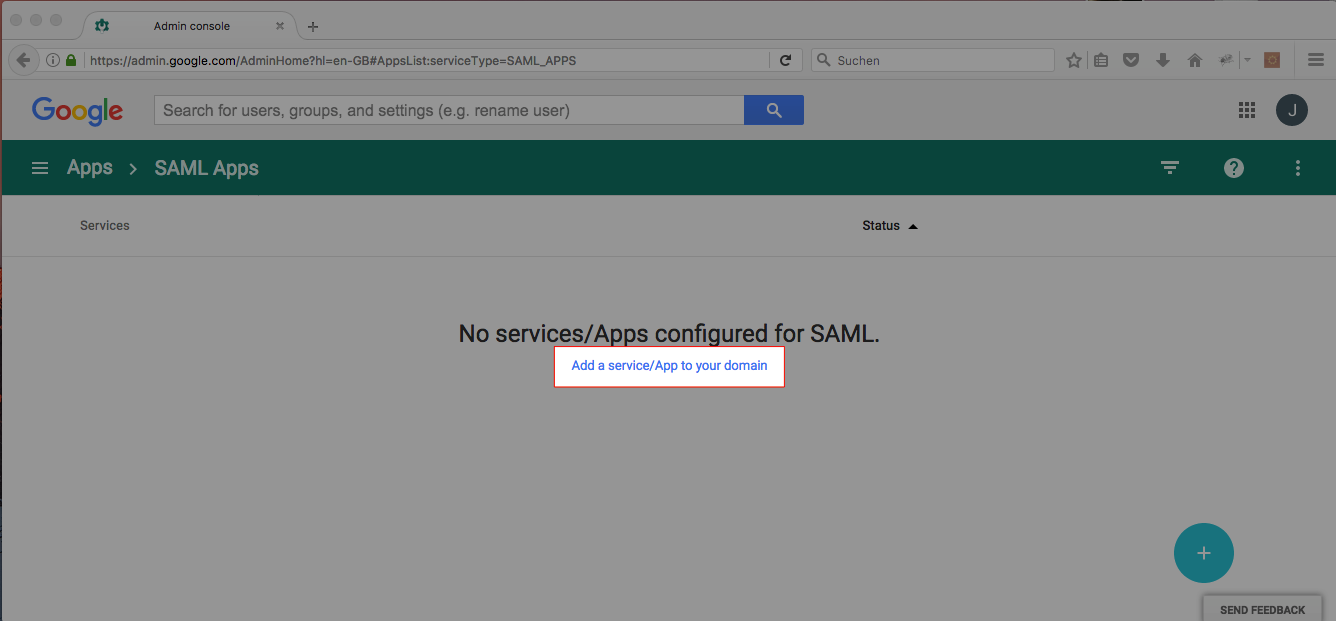
Click Add a Service/App to your domain.
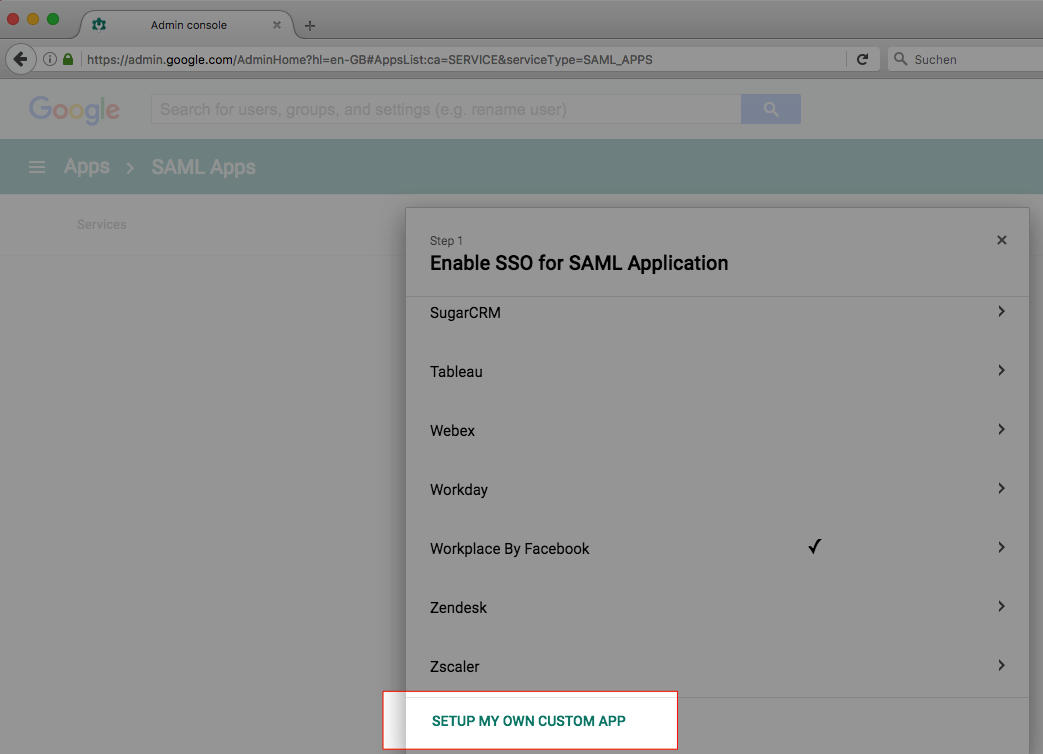
Click Setup My Own Custom App.
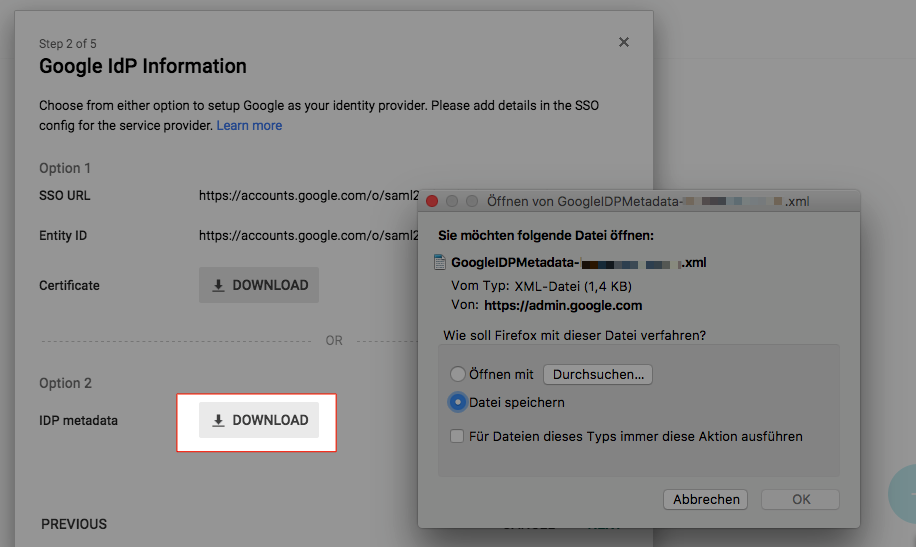
Click Download for IDP-Metadata and Save the XML file.
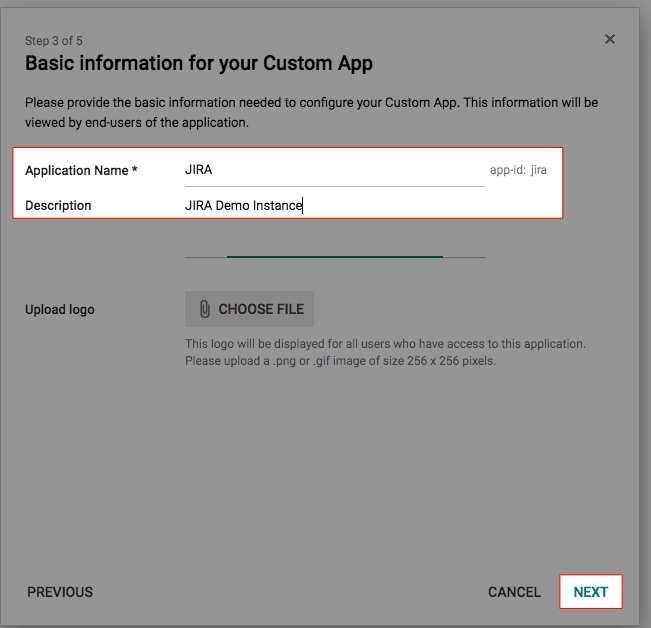
Substep B. Fill in Application Name and Description
On the G Suite admin page, click Next.
Choose an Application Name and Description and click Next.
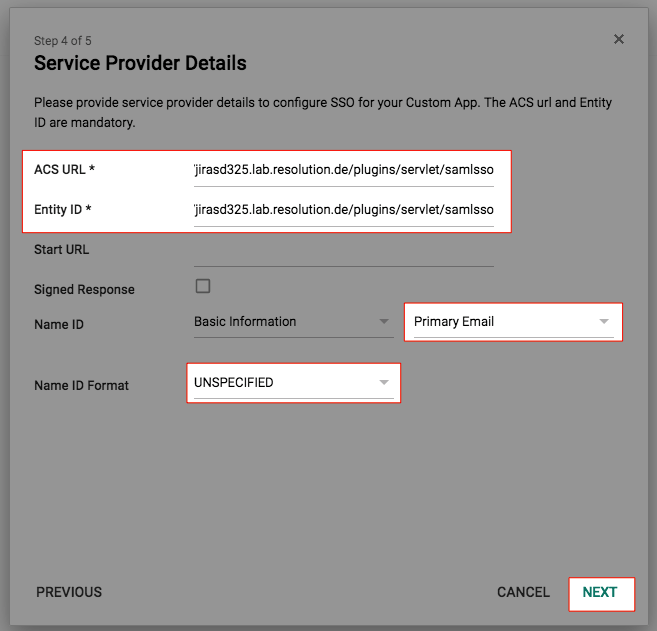
Substep C. Enter the Service Provider Details.
Both ACS URL and Entity ID are https://<base-url>/plugins/servlet/samlsso.
Select Primary Email as NameID and UNSPECIFIED as Name ID Format.
Click Next.
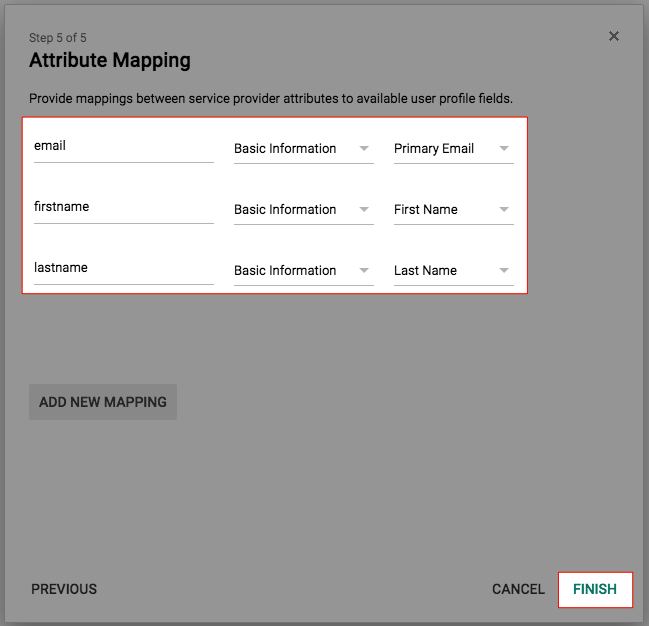
Substep D. Configure the Attribute Mapping
This Mapping defines which values are contained in the SAML-Response.
In this example, 3 fields email, firstname and lastname are defined (the attribute names can be choosen) which are mapped to Primary Email, First Name and Last Name.
Click Finish.
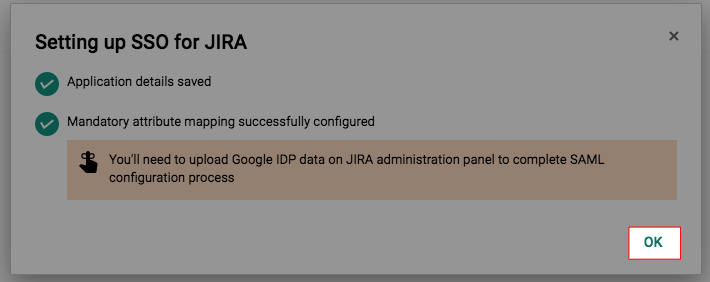
Click OK to close the Wizard.
Substep E. Enable the IdP
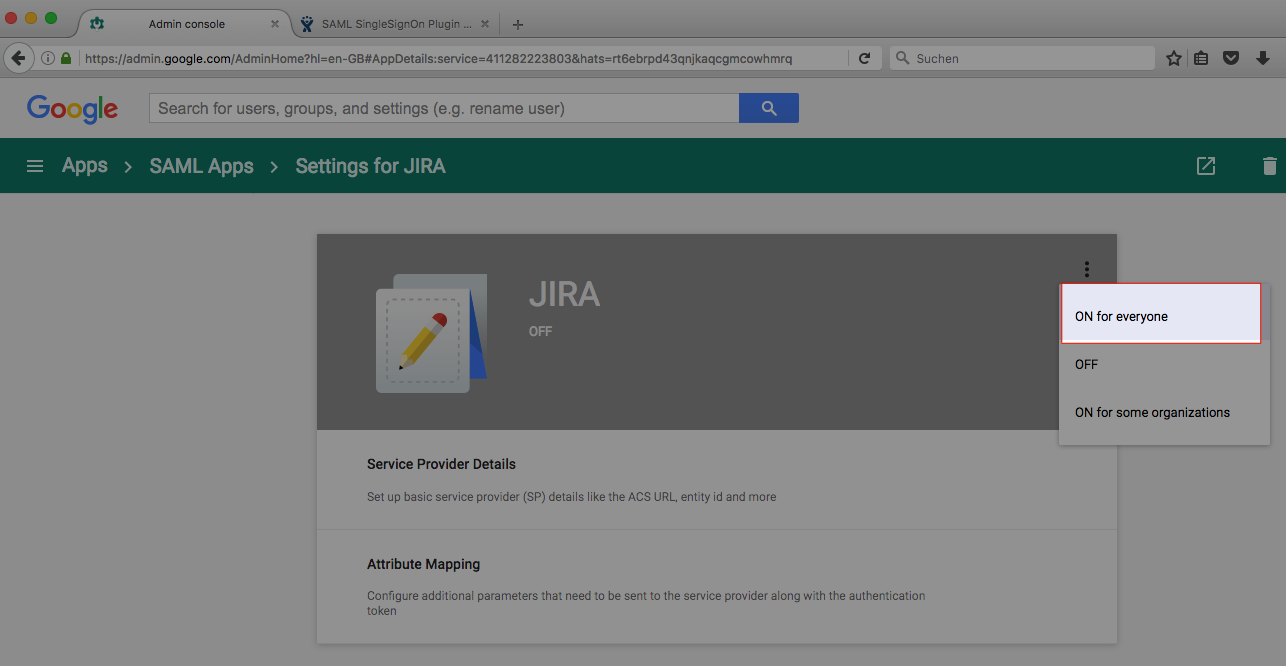
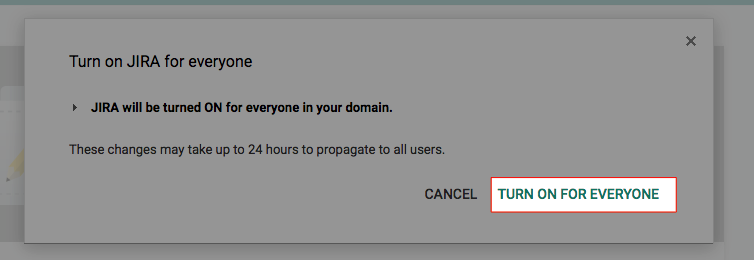
Enable the IdP by selecting ON for everyone or ON for some organizations and confirming it.
Step 3: Configure the SAML SSO Plugin for Atlassian Server and Data Center
To continue Step 3, please go back to the plugin configuration page opened in Step1.
Substep A: Load G Suite Meta Data.
On the Plugin Configuration Page, choose a Name and Description.
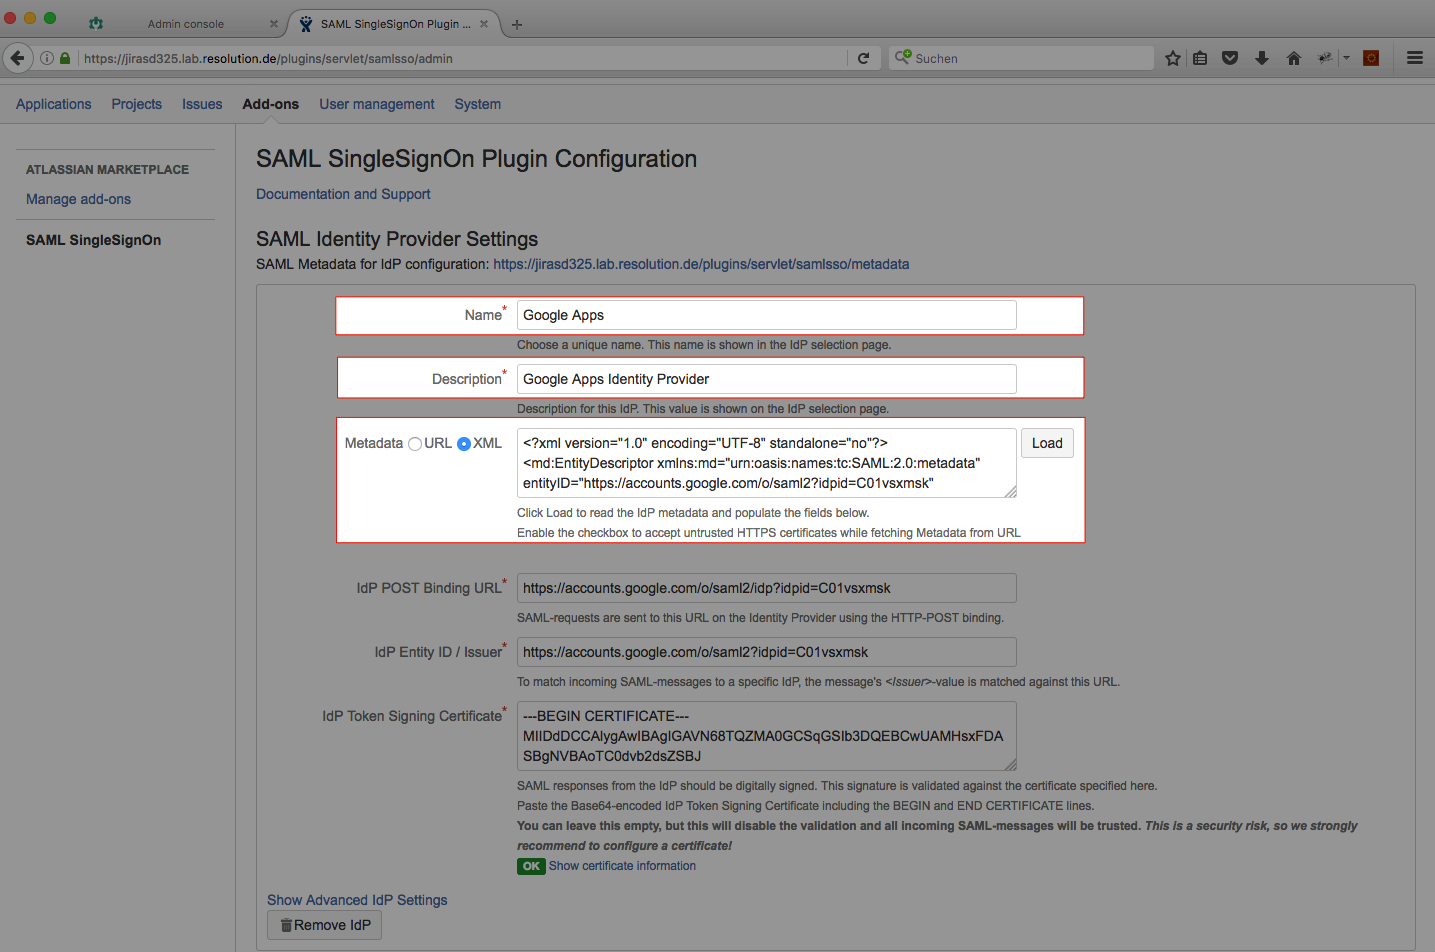
Select the XML radio button, paste the content from the Metadata file downloaded in Step2 Substep1 and click the Load button.
The IdP POST Binding URL, Entity Id and Certificate fields will be filled automatically.
Substep B: Configure general JIRA groups
If a user logs in using SAML, he will be added to the groups specified in the User Groups section. This applies to all users. The user is assigned to these groups in addition to the groups in the SAML-response's attribute.
The standard group in JIRA 6 is called jira-users.
The standard group in JIRA 7 is depending on which JIRA Version you are using:
JIRA Version | Standard group |
|---|---|
JIRA Core | jira-core-users |
JIRA Software | jira-software-users |
JIRA Service Desk | jira-servicedesk-users |

Click Save Settings at the bottom of the configuration of the page.
Step 4: Test
Create a JIRA user which has his G Suite email address as userid (if no such user already exists).
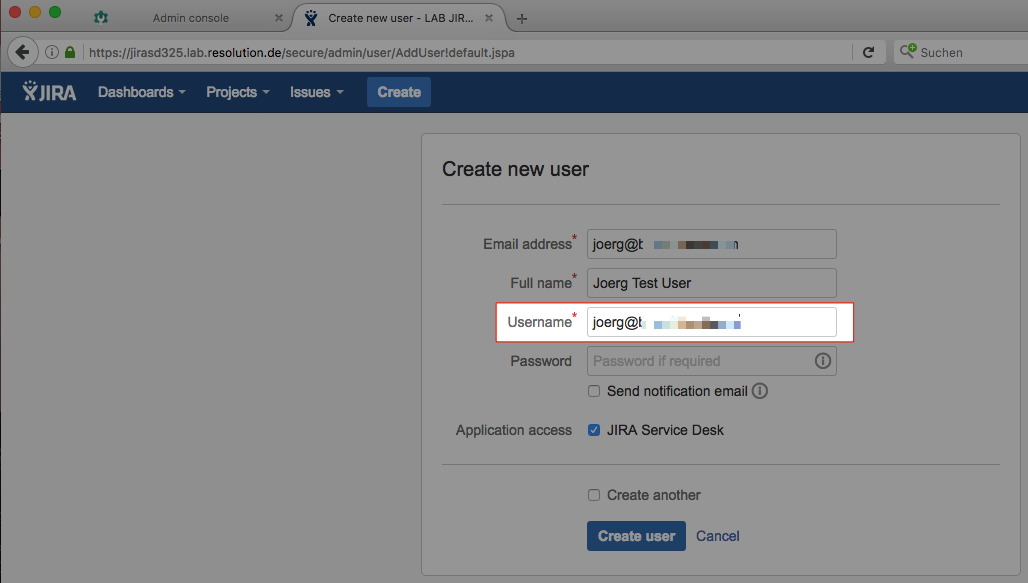
Open a private browser window (or another browser with no active session in JIRA).
Enter the SSO-URL- https://<base-url>/plugins/servlet/samlsso.

You should be redirected to the Google login.
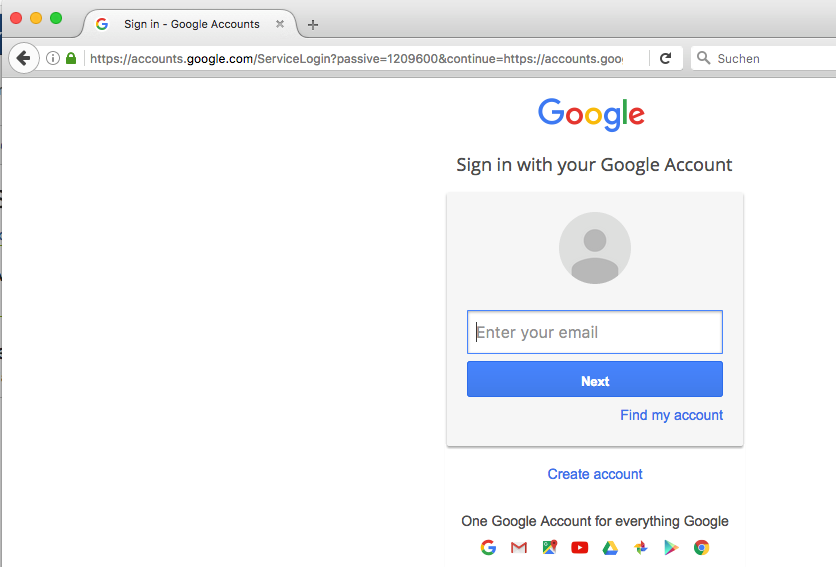
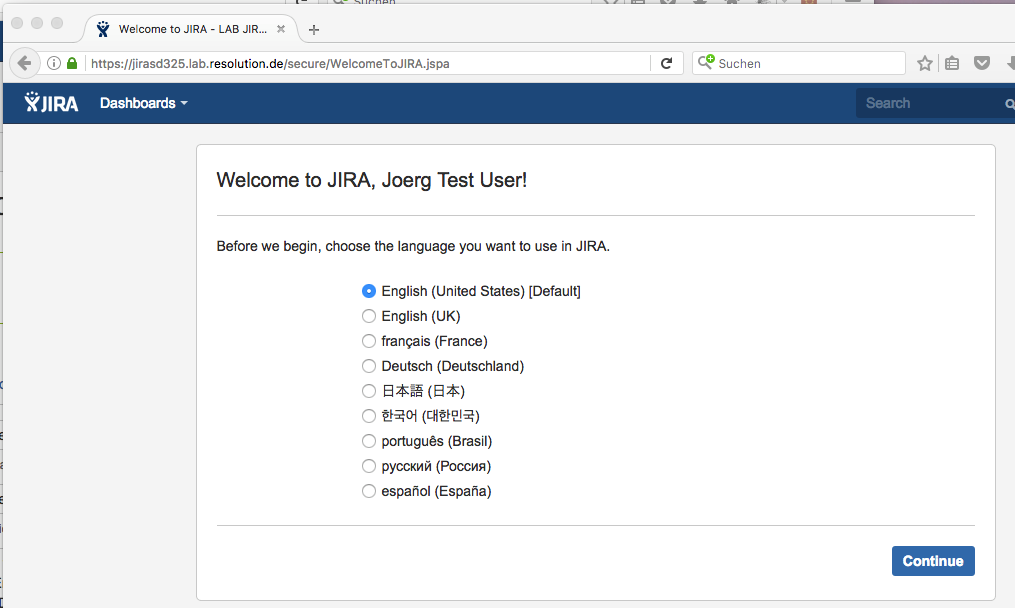
After logging in to Google, you should be logged into JIRA:
Step 5: Enable login redirection
After the setup has been tested successfully, the automatic redirection at the IdP can be enabled by checking the Enable SSO Redirect and Override Logged Out URL checkboxes:

With these settings, users accessing JIRA will be automatically redirected to the IdP. So if they already logged in at Google, then they would be also instantly logged in to JIRA.
Advanced Configurations
Advanced IdP settings
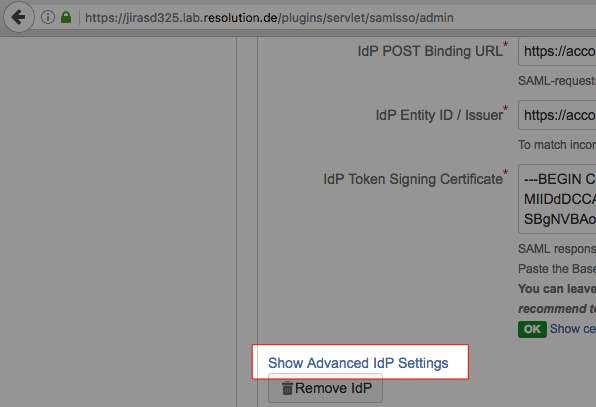
To see advanced Idp-specific settings, click Show Advanced IdP Settings in the IdP section of the configuration.
Advanced general settings
To see advanced general settings, click Show Advanced Settings in the general settings section.

All changes require clicking the save button to be active.
Userid transformation
G Suite can only provide the email address as userid. If your JIRA usernames are e.g. user with the email address user@example.com, you can transform it.
On the Plugin Configuration Page, click Show Advanced IdP Settings.
In the Userid Transformation field, enter (.*)@.* and $1. This will strip the @ and domain-part away.

User creation/update with combined fields
Users can be created during their first login (see (2.2.x) Create or update users through SAML Attributes)
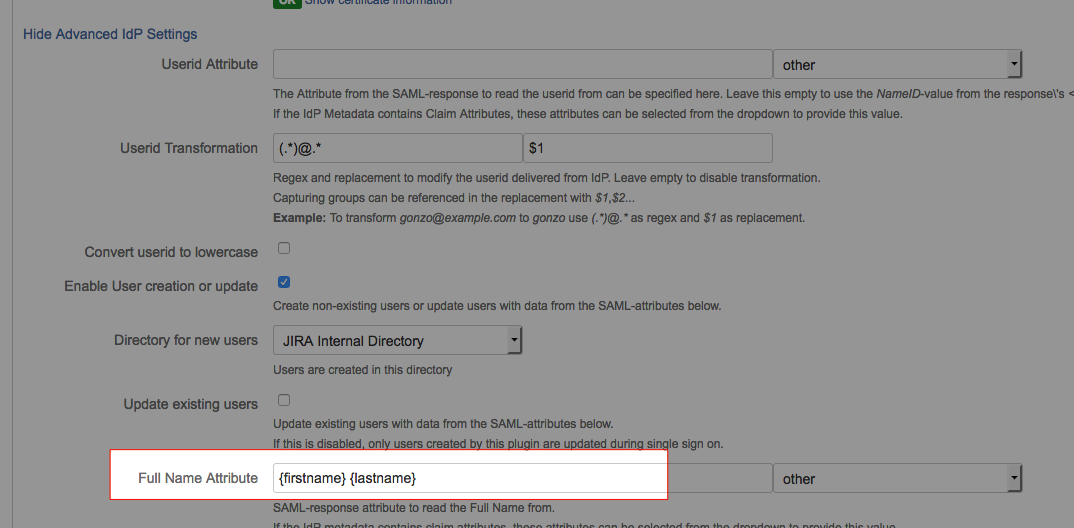
G Suite cannot provide the full name as a single field. This is why the full name attribute setting allows a special syntax:
Multiple attributes can be combined by enclosing the attribute names in {}.
