How to Add a Jira User Property via Saml
Goal
This guide shows how to save any attribute send by the identity provider as a Jira user property with SAML 4.0.
Prerequisites
You use SAML 4.0.
Your identity provider sends the attributes you want to map with the SAML response.
Guide
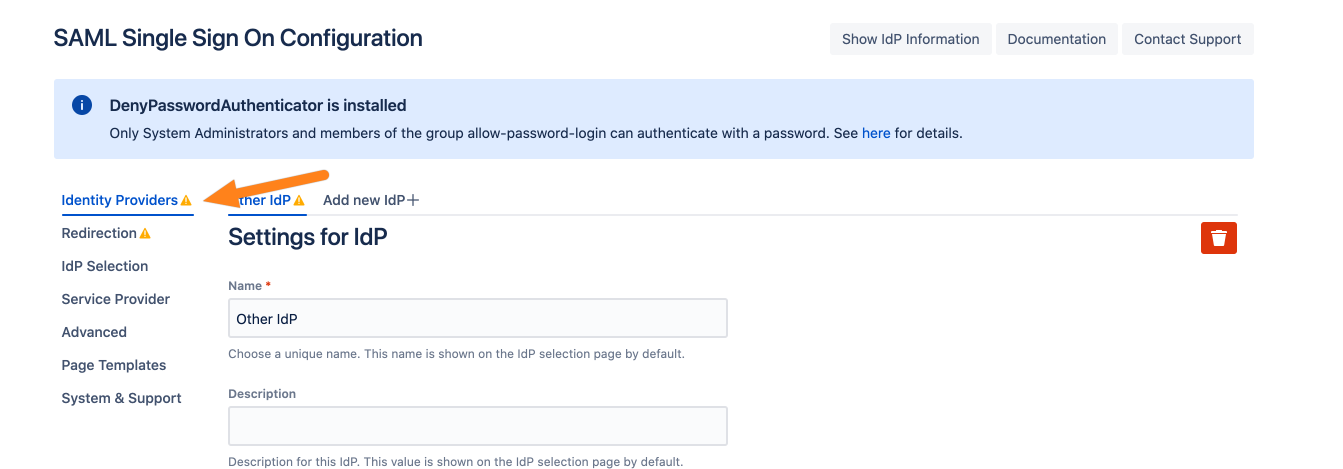
Go to the SAML SSO configuration.
Make that you are on Identity Providers tab.

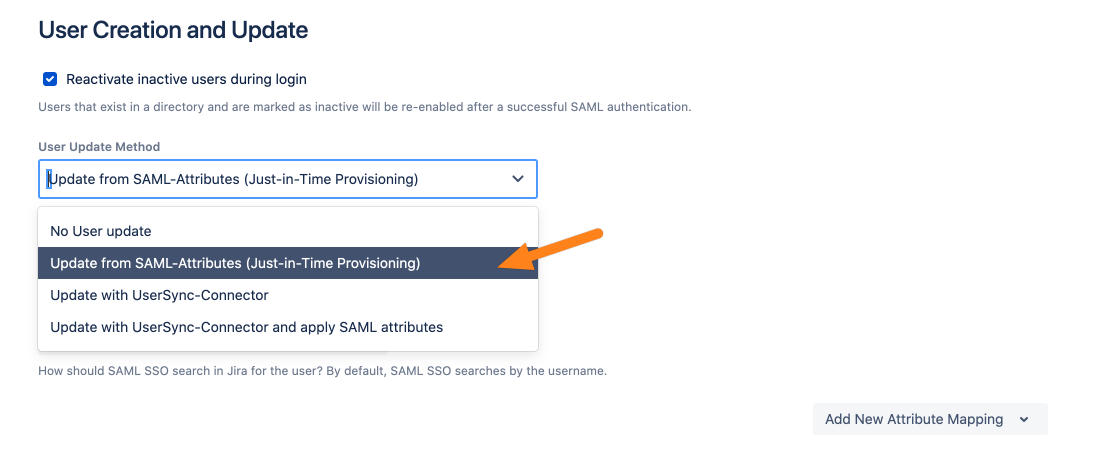
Scroll down to User Creation and Update and make sure that Update from SAML-Attributes (Just-In-Time Provisioning) is selected.

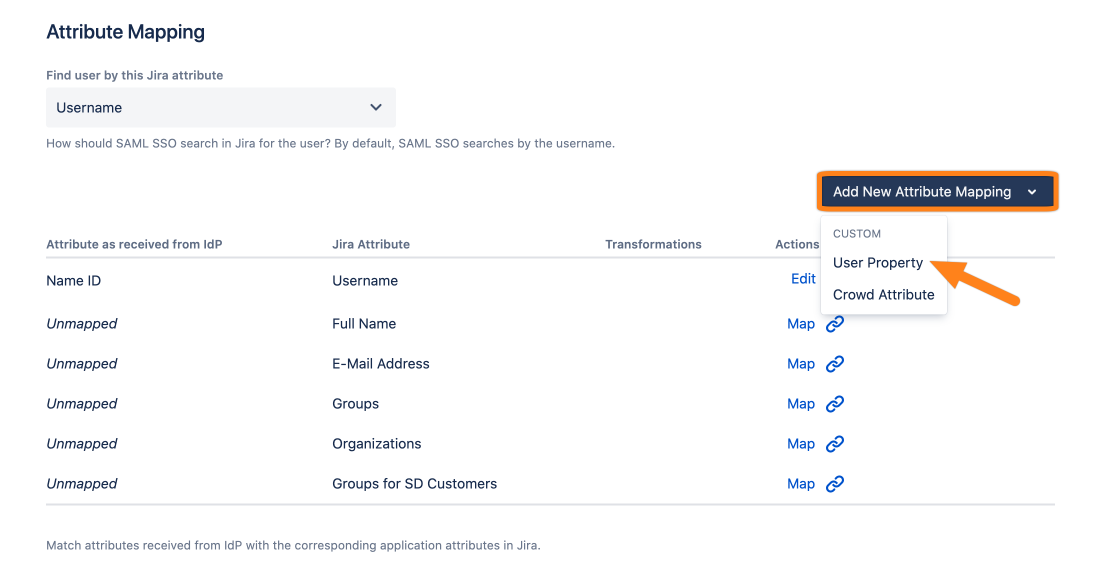
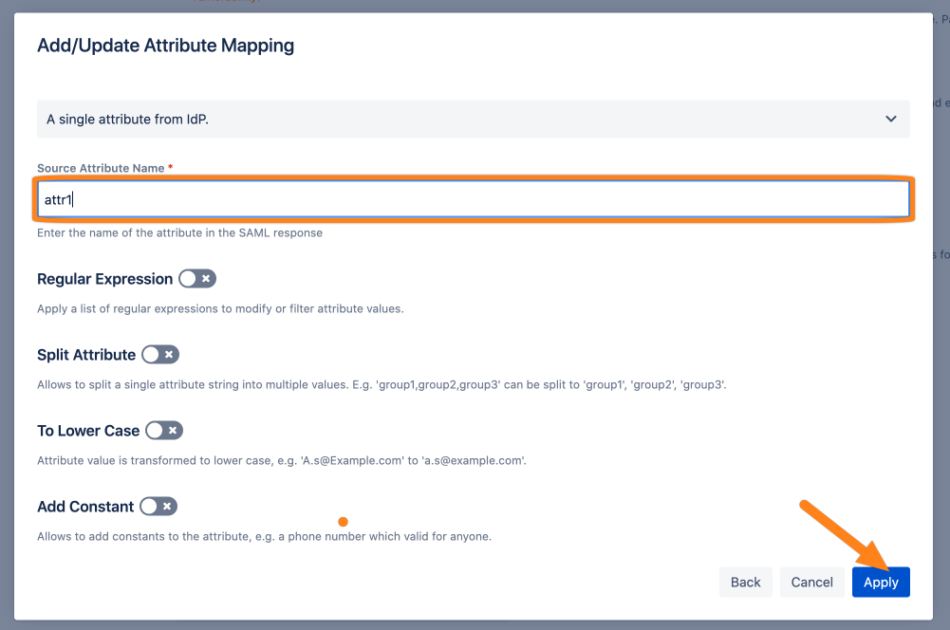
Next, go to the Attribute Mapping table, click Add New Attribute Mapping, and choose User Property.

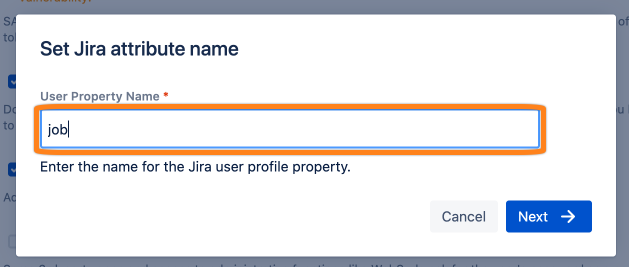
Next, enter the name for the Jira property you want to create and click Next.
Now, you must specify the name of the attribute as sent via the SAML response. You can also transform the value with the given transformers. Click Apply to finish this step.
Save your configuration.