GSuite configuration
For the following setup, it's recommended to perform it in a browser where you're just logged into the Google account you are using for configuring GSuite.
Other Google sessions might make it hard for you to walk through the setup successfully, especially when authorizing the Gsuite app from inside the connector configuration.
This page contains information for how to setup User Sync and G Suite. Note, it is recommend to follow the video or the detailed User guide. If you are familiar with setting up G Suite projects, feel free to follow the Quick start guide.
Quick start guide
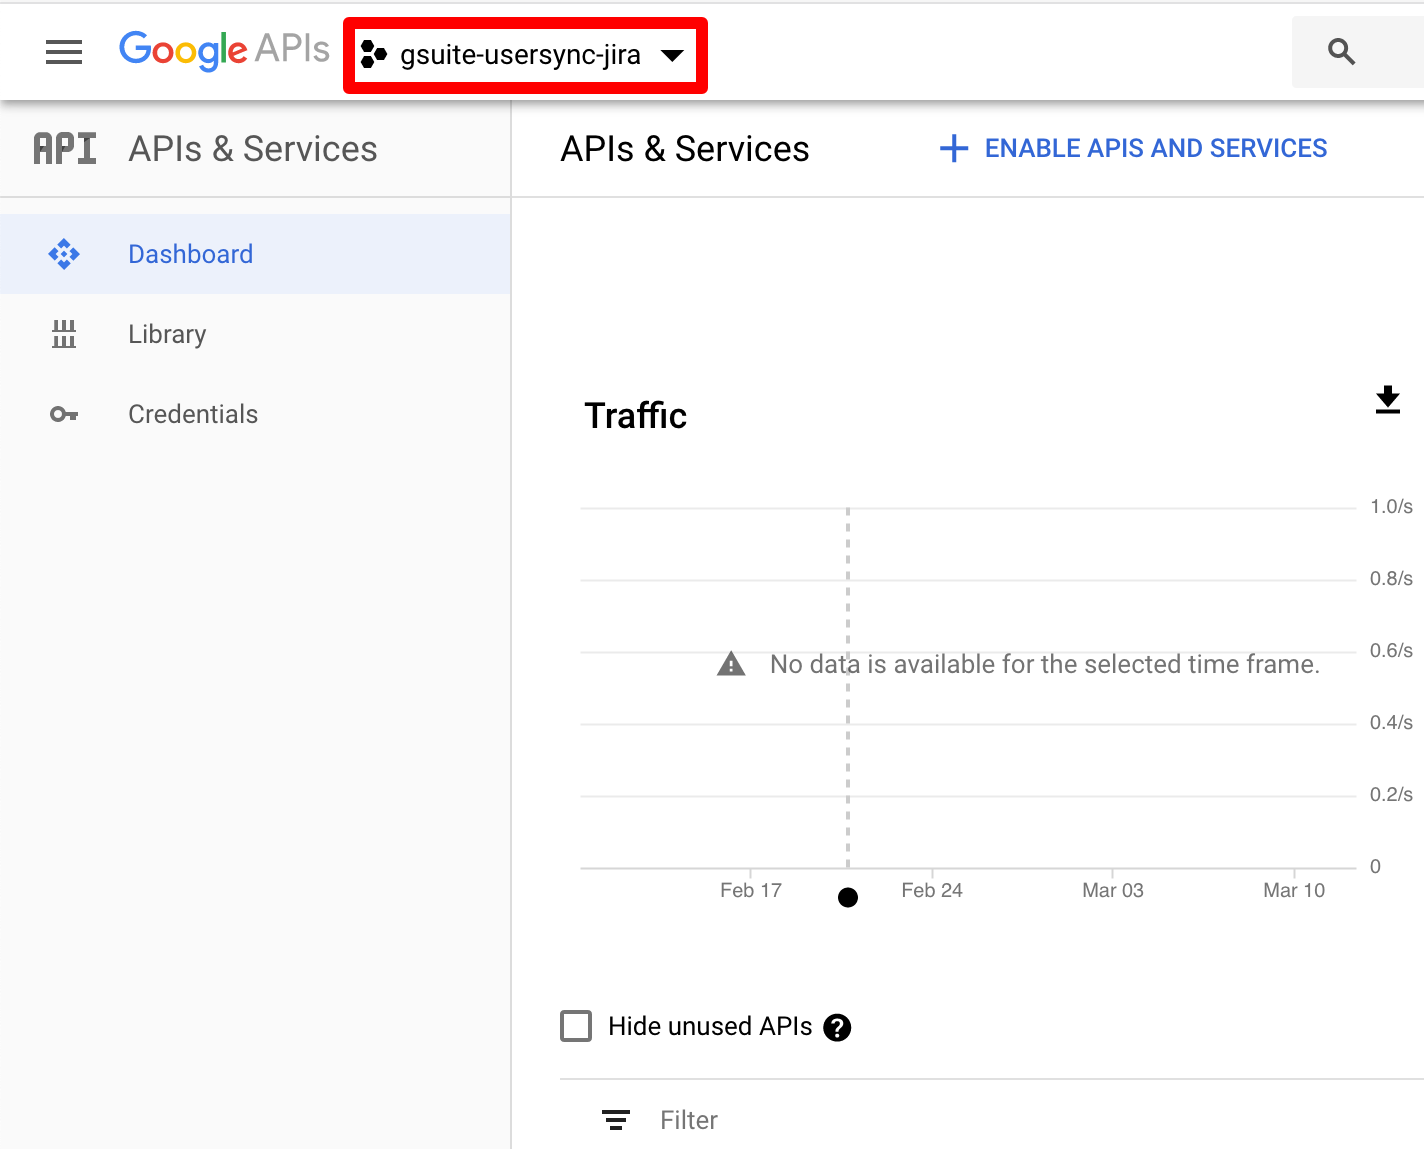
Login to the Google API Console. Click on the current active project.
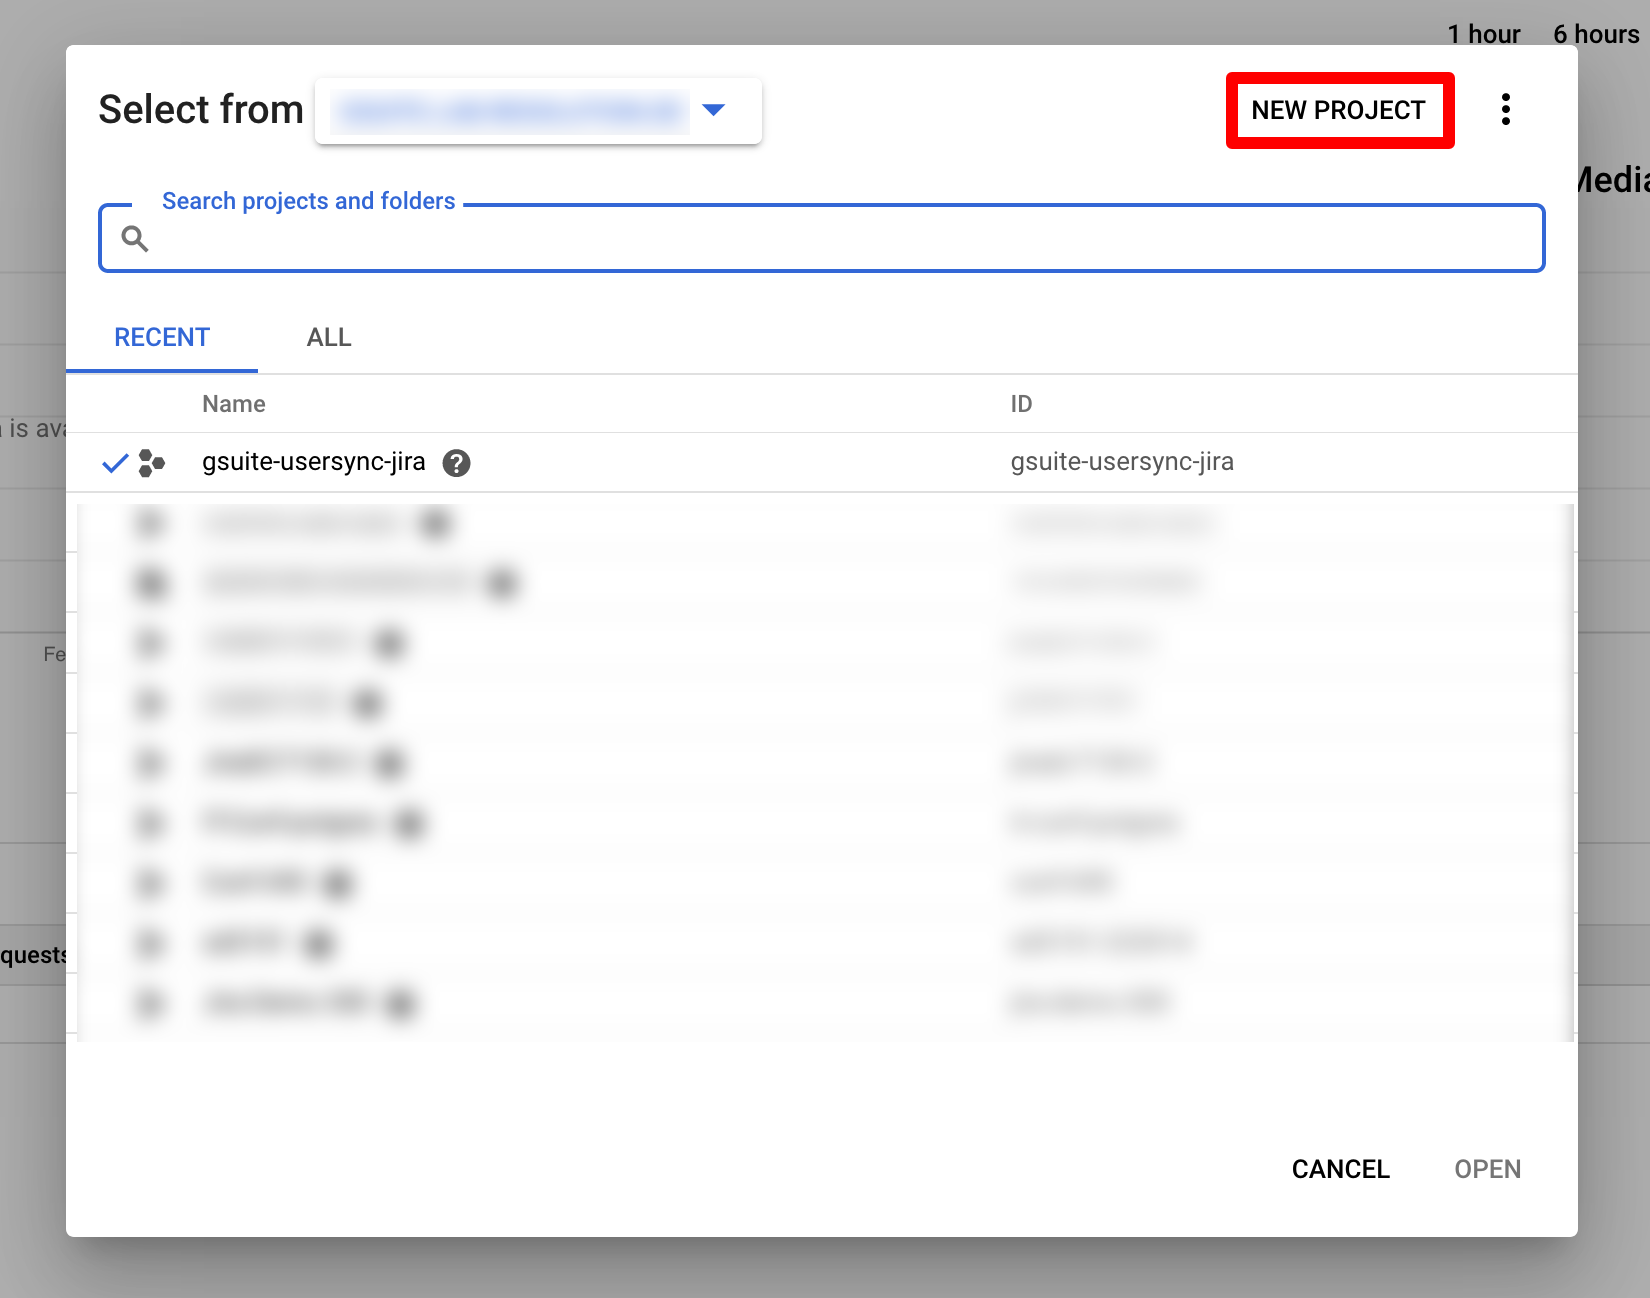
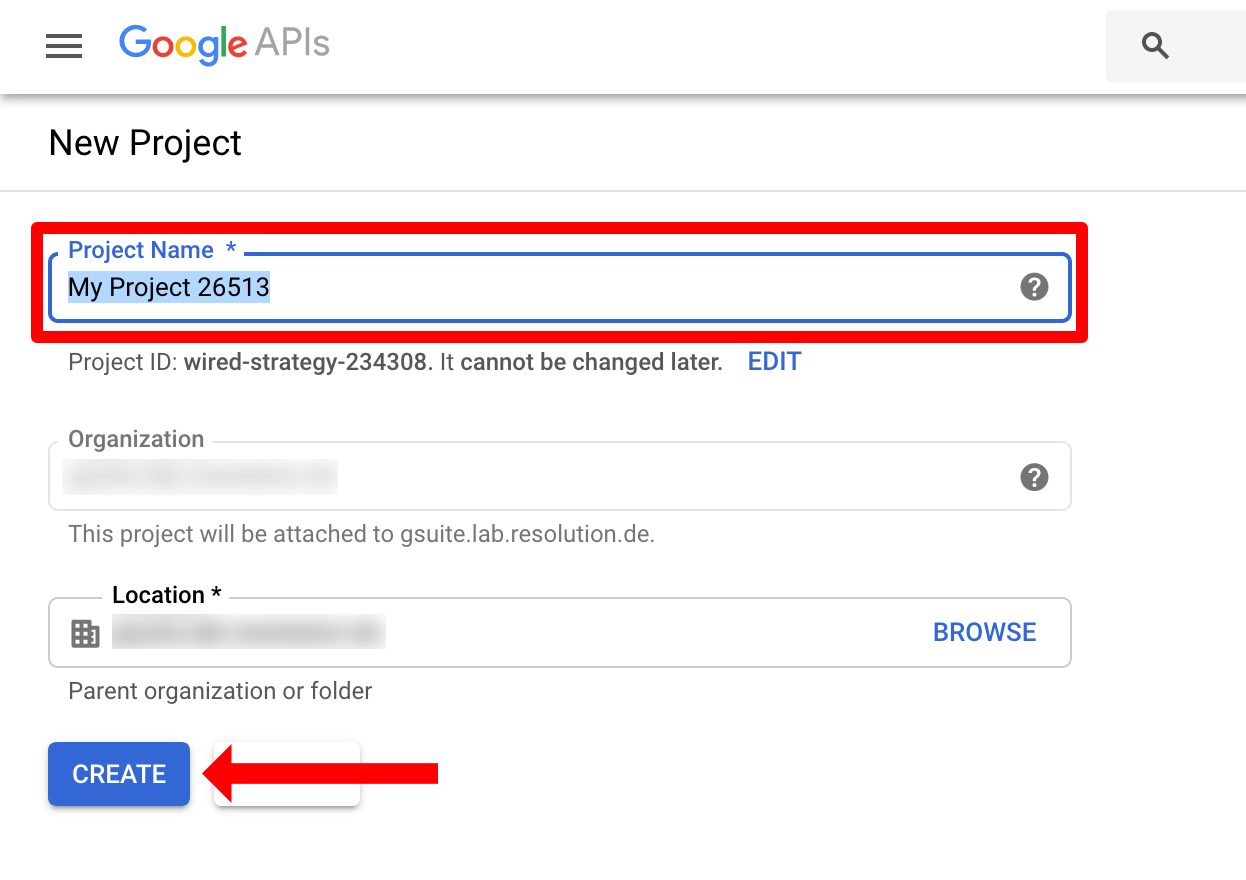
Click on "NEW PROJECT".
Enter a "Project Name" and click on "CREATE". For this tutorial, it is calls "Test Project". This can take a second.
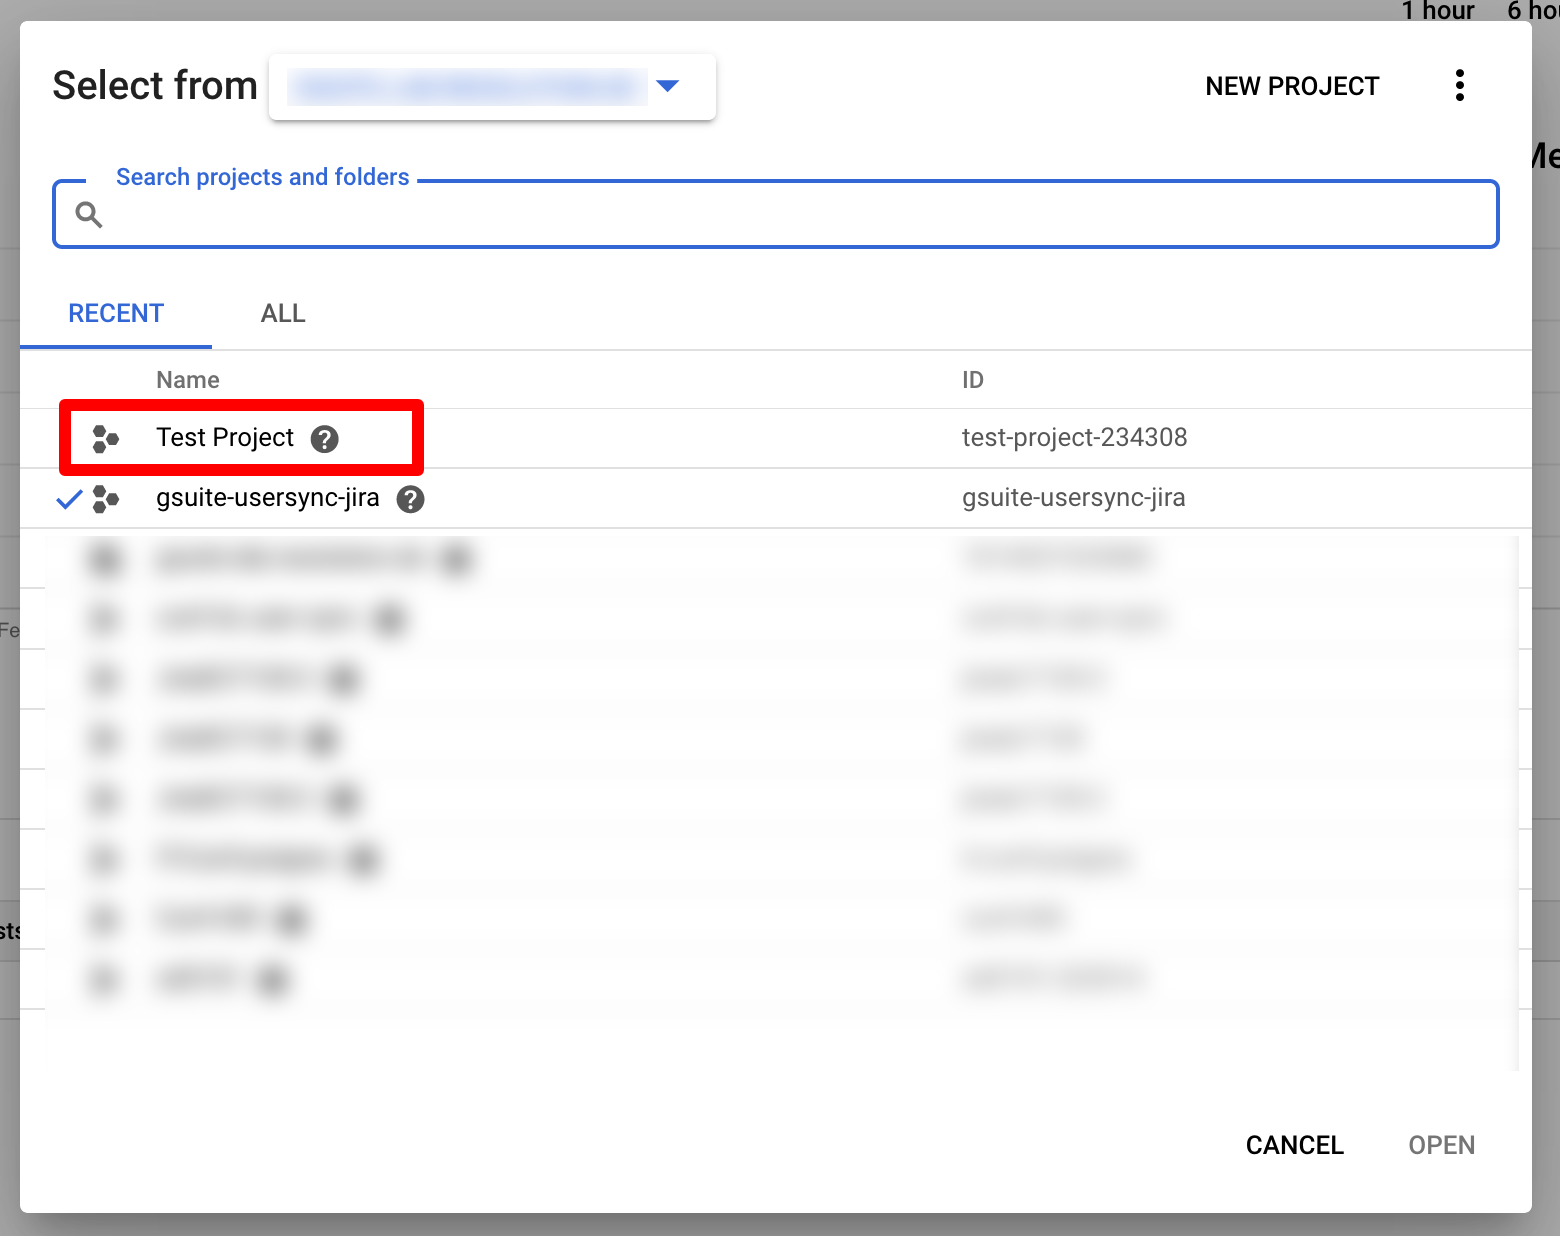
In the next window, click on your just created new project.
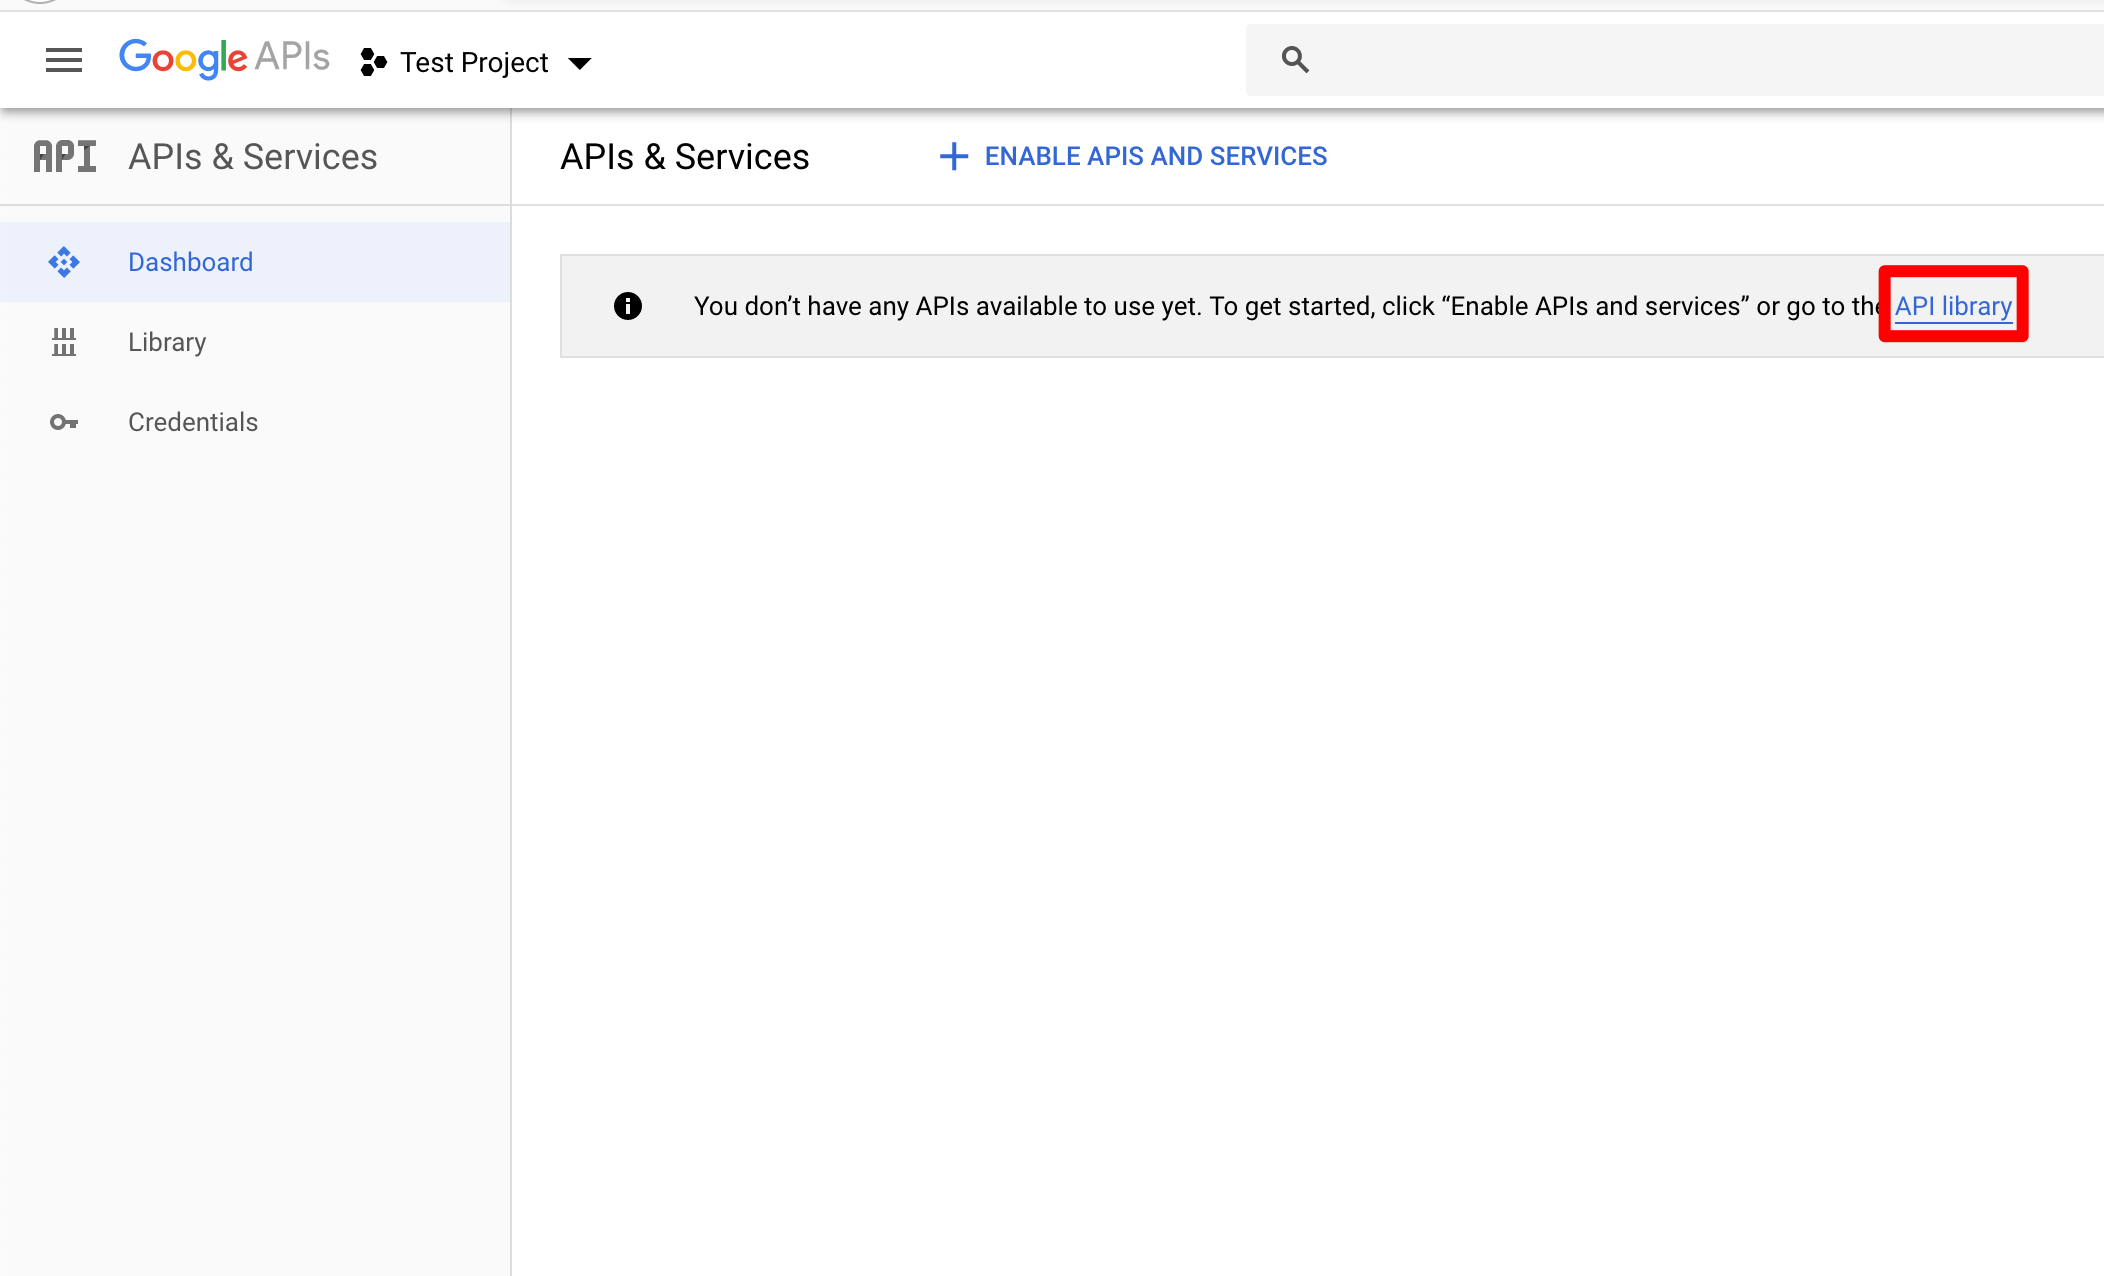
After opening your project, click on "API library".
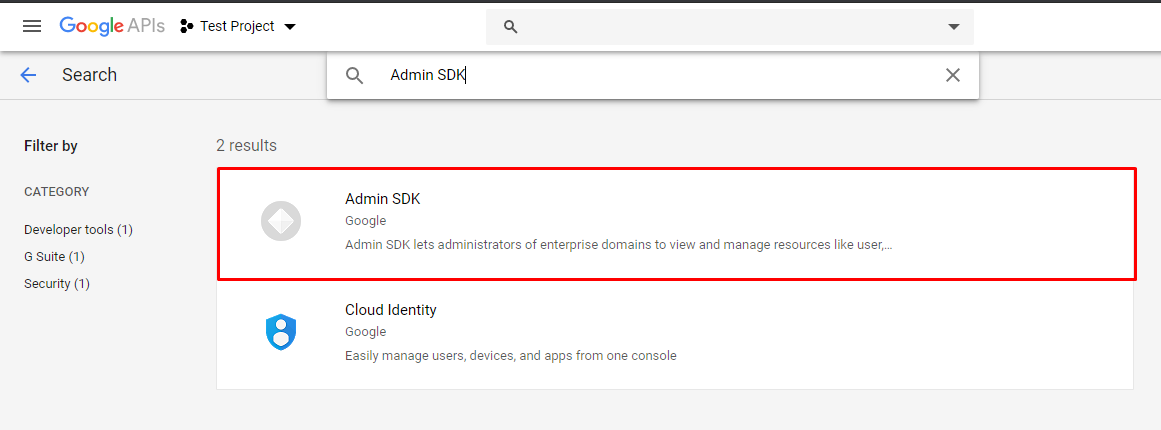
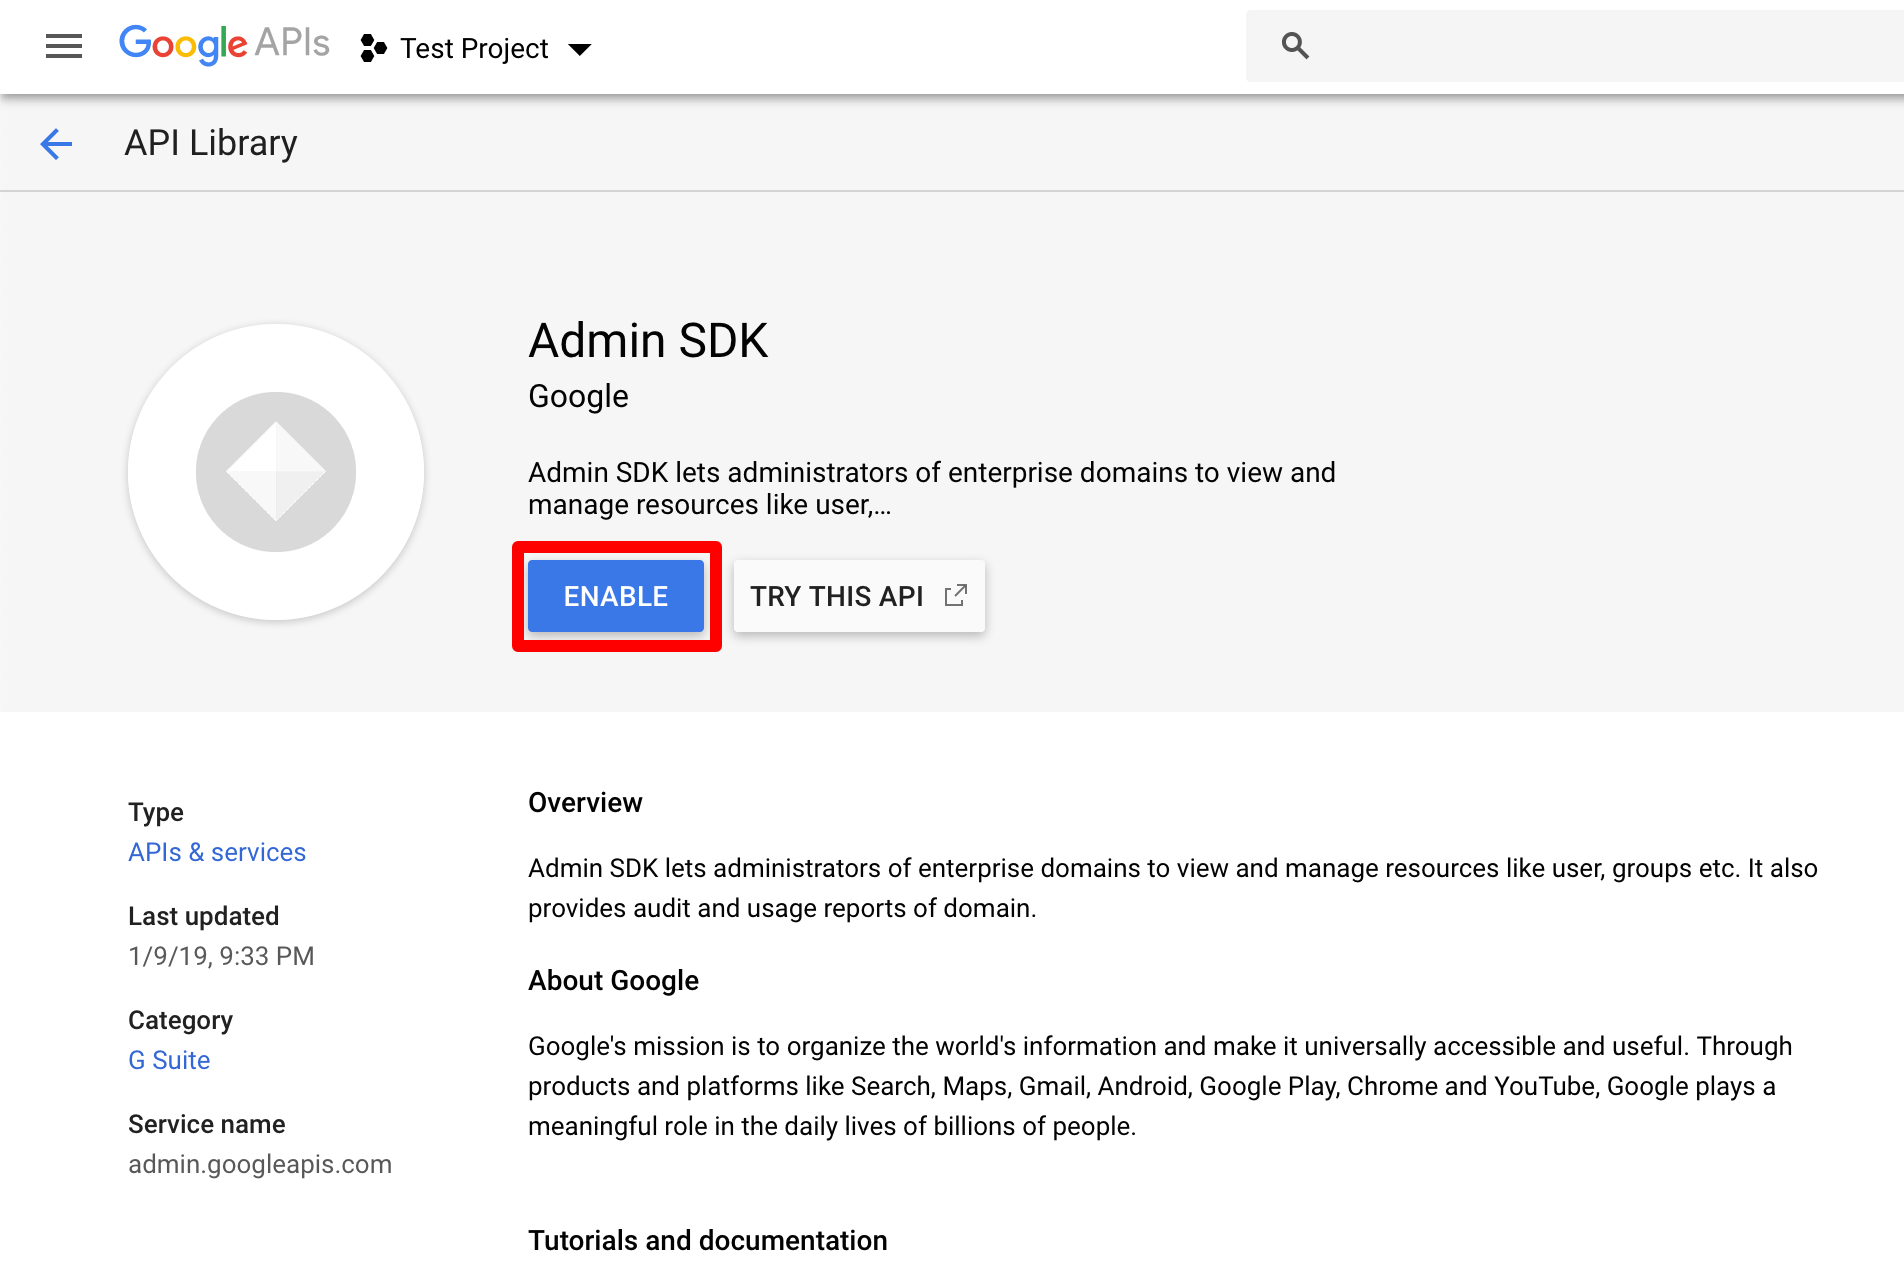
In the search bar, type "Admin SDK" and click on the "Admin SDK".
On the next page click on "ENABLE".
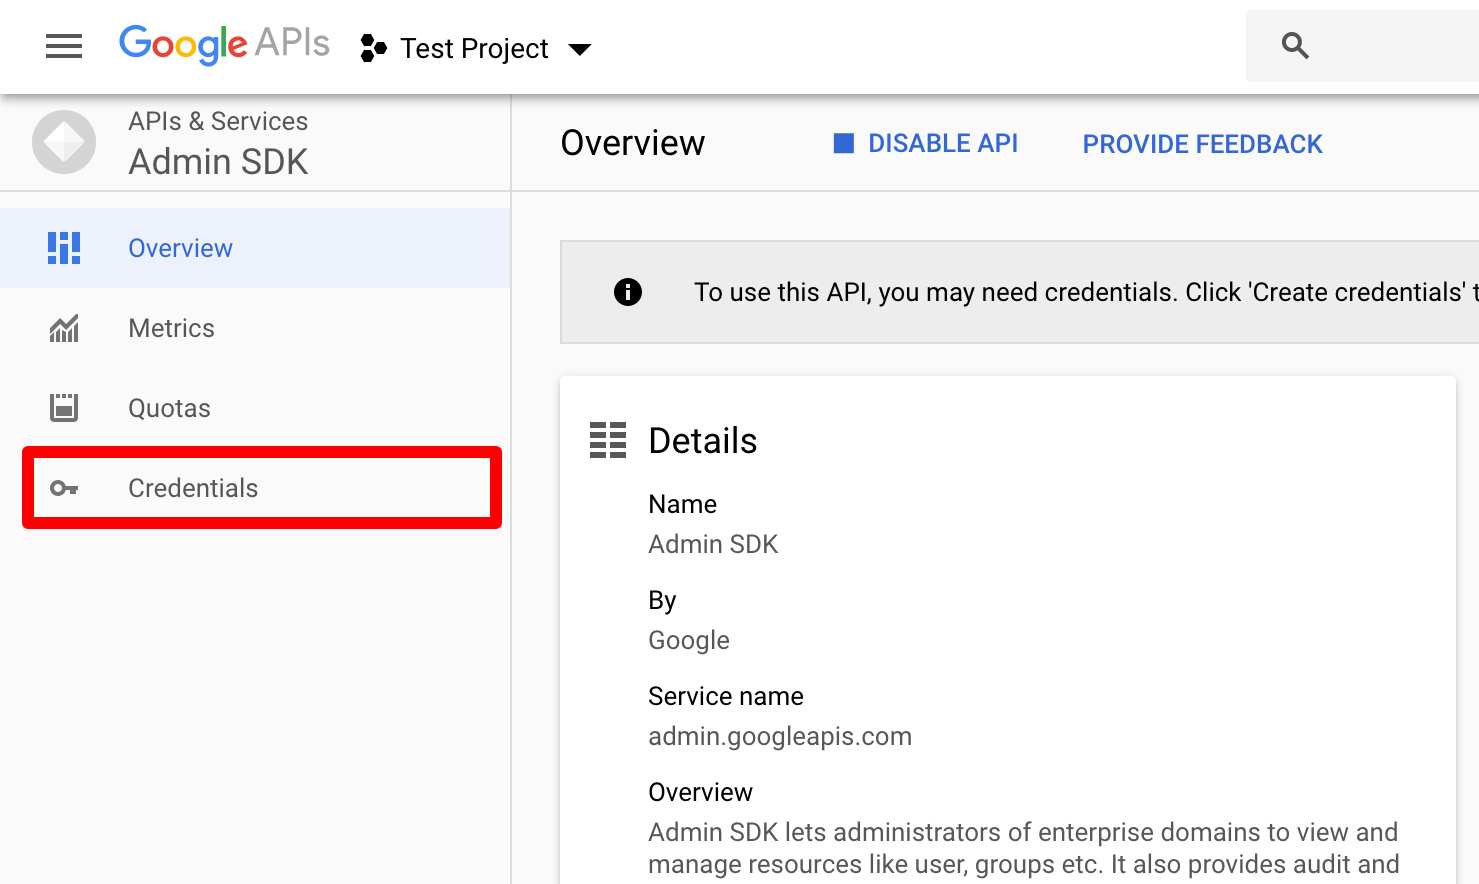
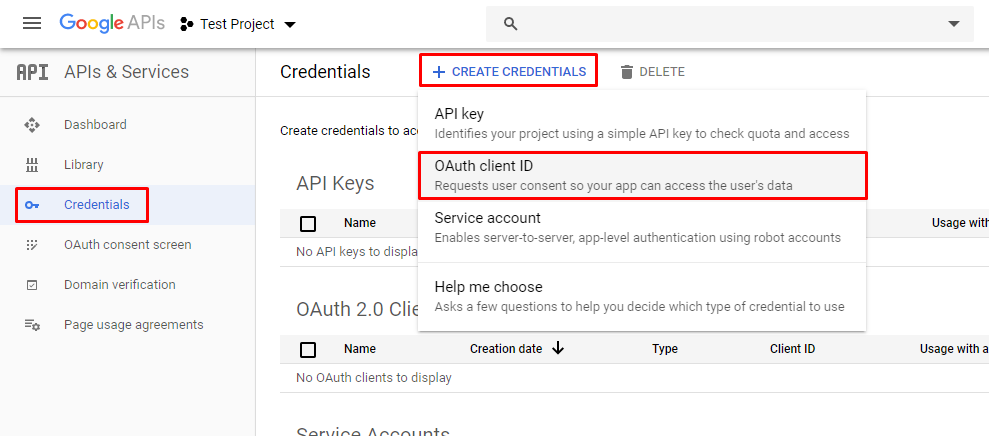
Now, click on "Credentials" in the left panel.
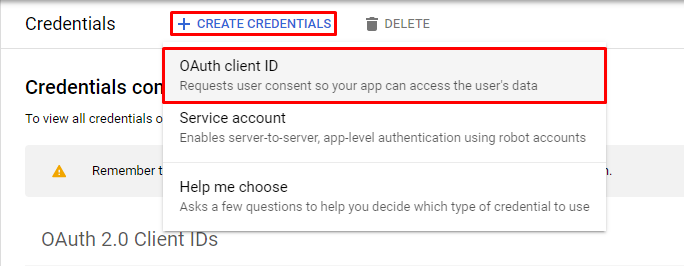
Afterwards, click on "+ CREATE CREDENTIALS" and choose "OAuth client ID".
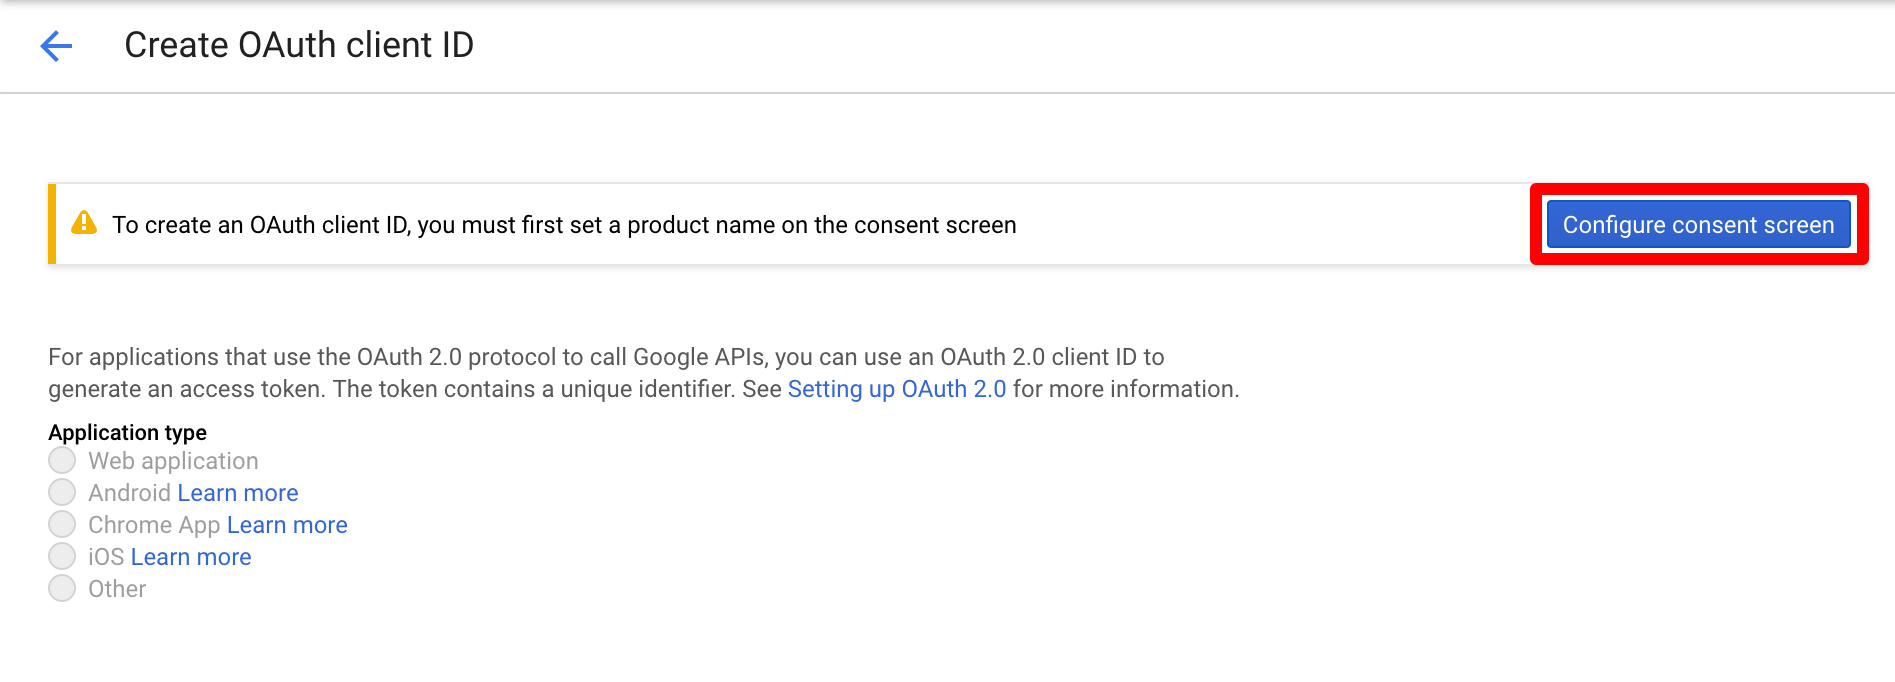
Click on "Configure consent screen" on the right side of your window.
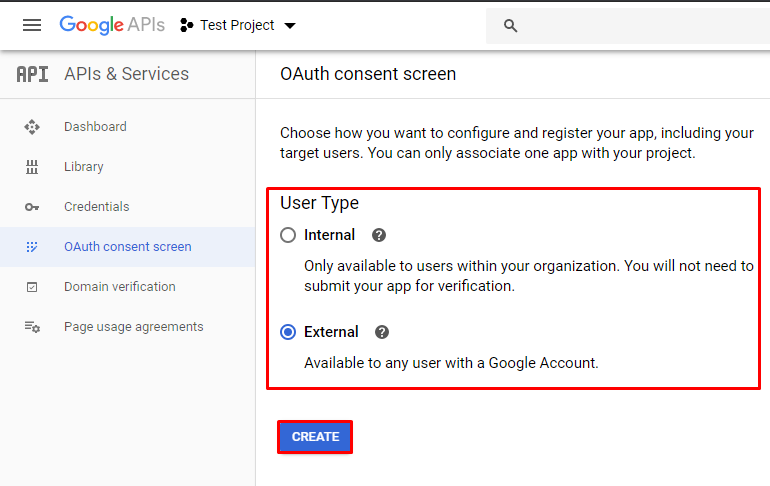
Choose an "User Type" (see https://developers.google.com/identity/protocols/googlescopes?hl=en_US) and click on "CREATE".
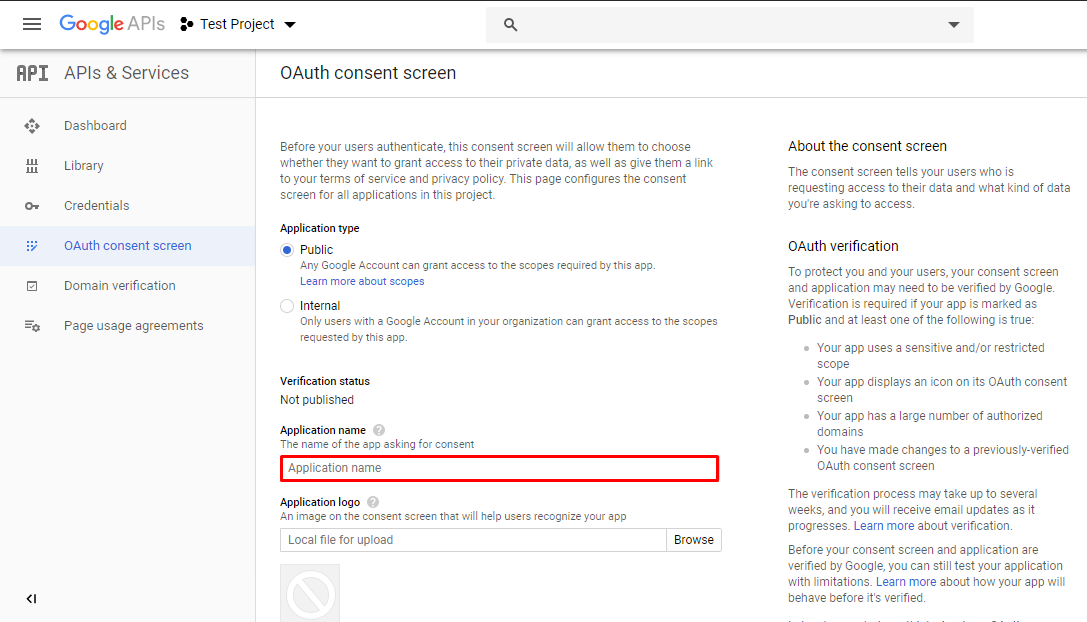
On the next screen, enter an "Application name".
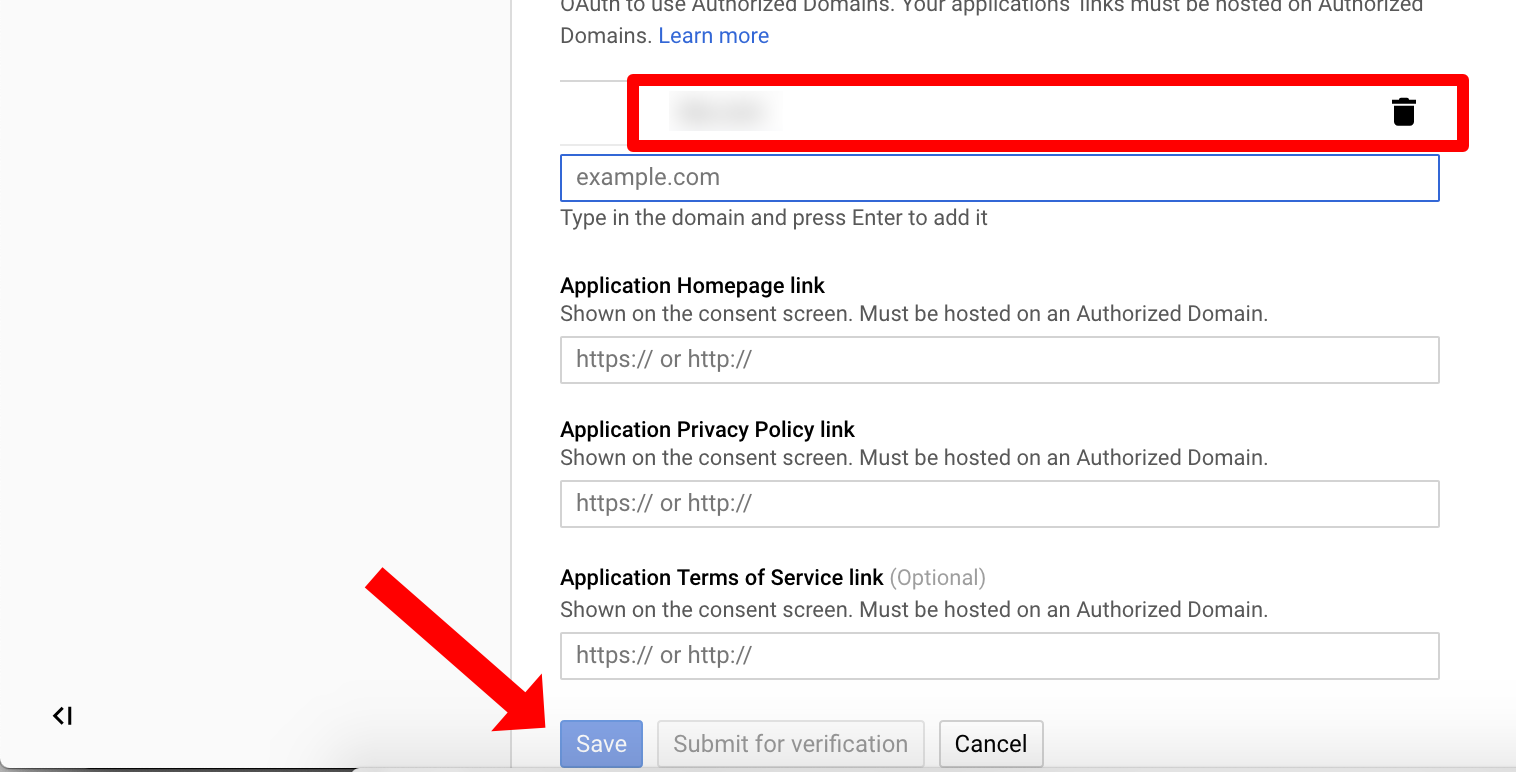
Scroll down to "Authorized domains" and enter your personal domain, e.g. "mycompany.com". Press the ENTER key to add the domain.
Press "Save" to save your configuration.
Go back to the Credentials tab on the left menu. On the next page, click at Create Credentials and click at OAuth client ID.
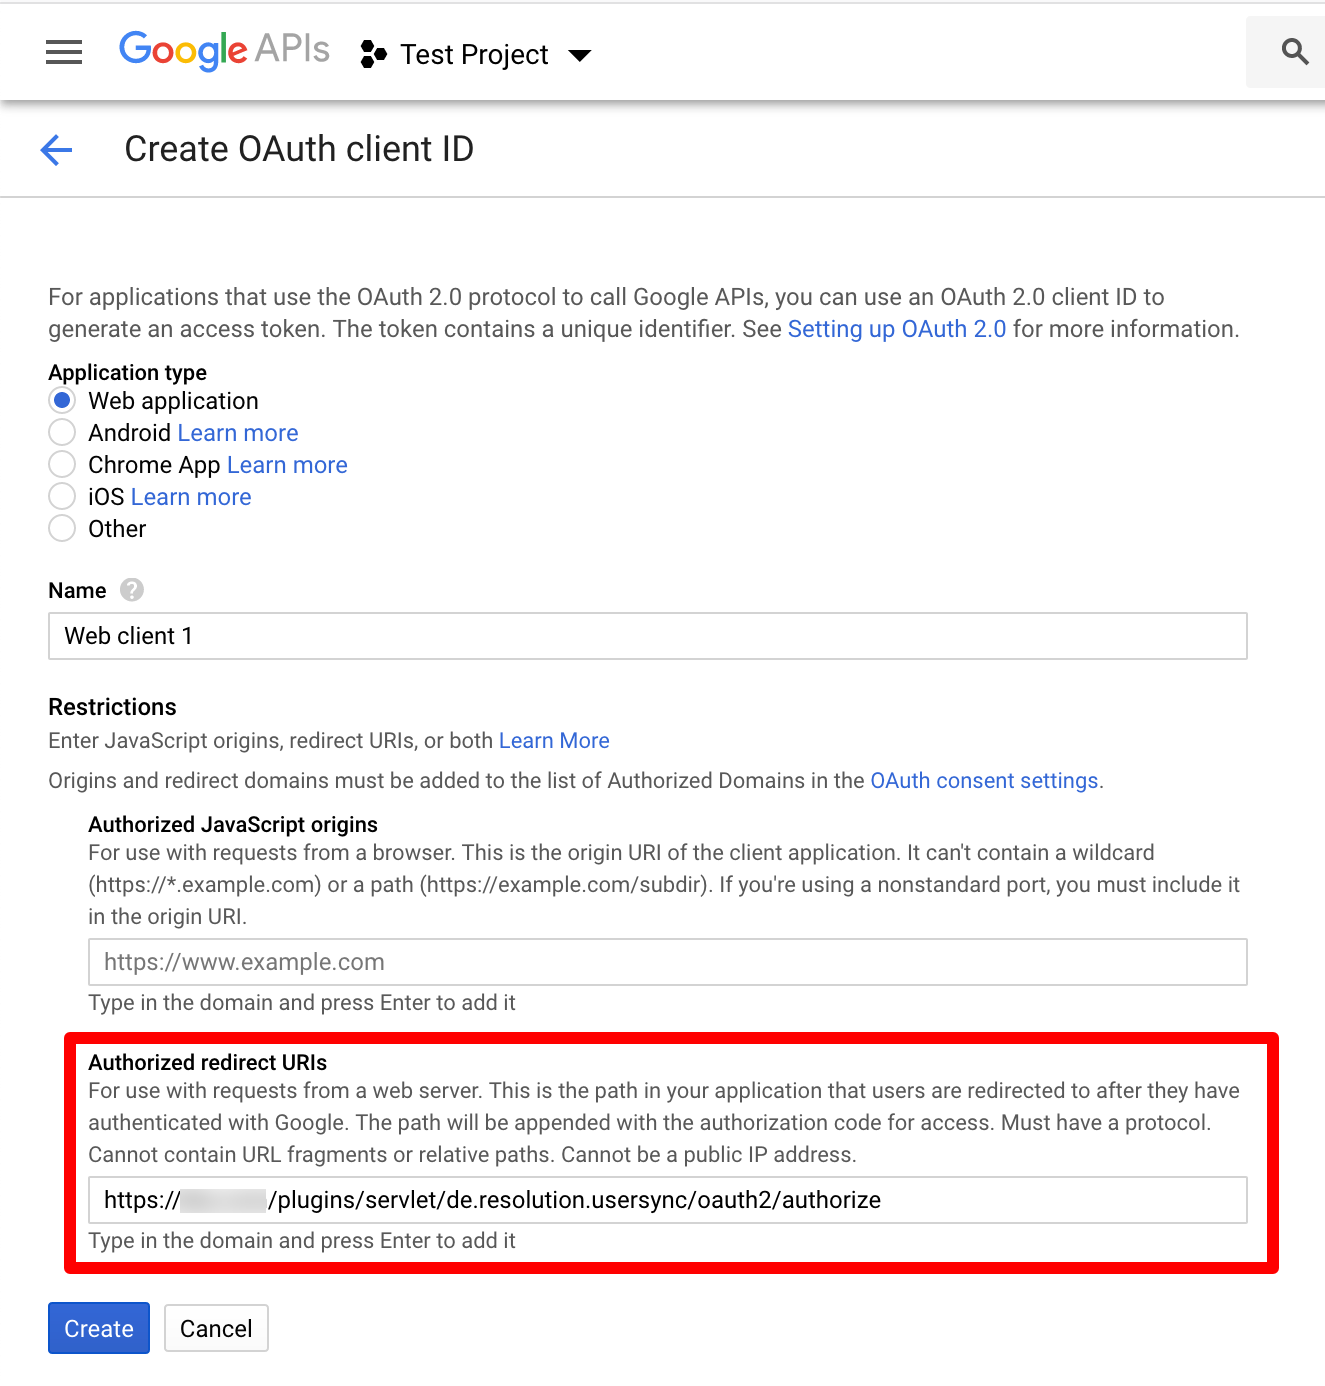
In next window, tick "Web application". Also enter an "Authorized redirect URIs" https://<your-atlassian-product-base-url>/plugins/servlet/de.resolution.usersync/oauth2/authorize and press the ENTER key confirm.
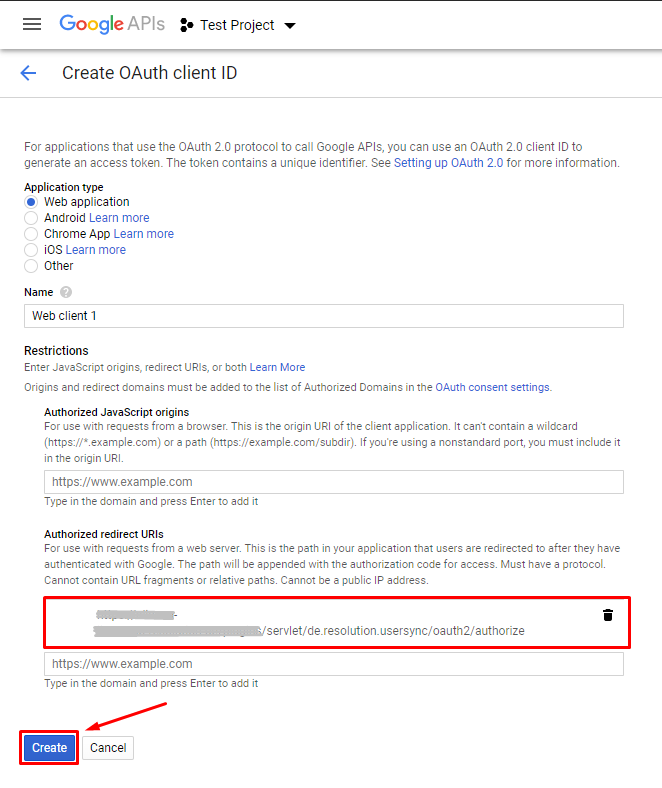
Double check that you have pressed the ENTER key. Afterwards, press "Create".
In the next window you can see your "client ID" and your "client secret". You will need both for setting up User Sync, thus save them somewhere where you can find them for the next step.
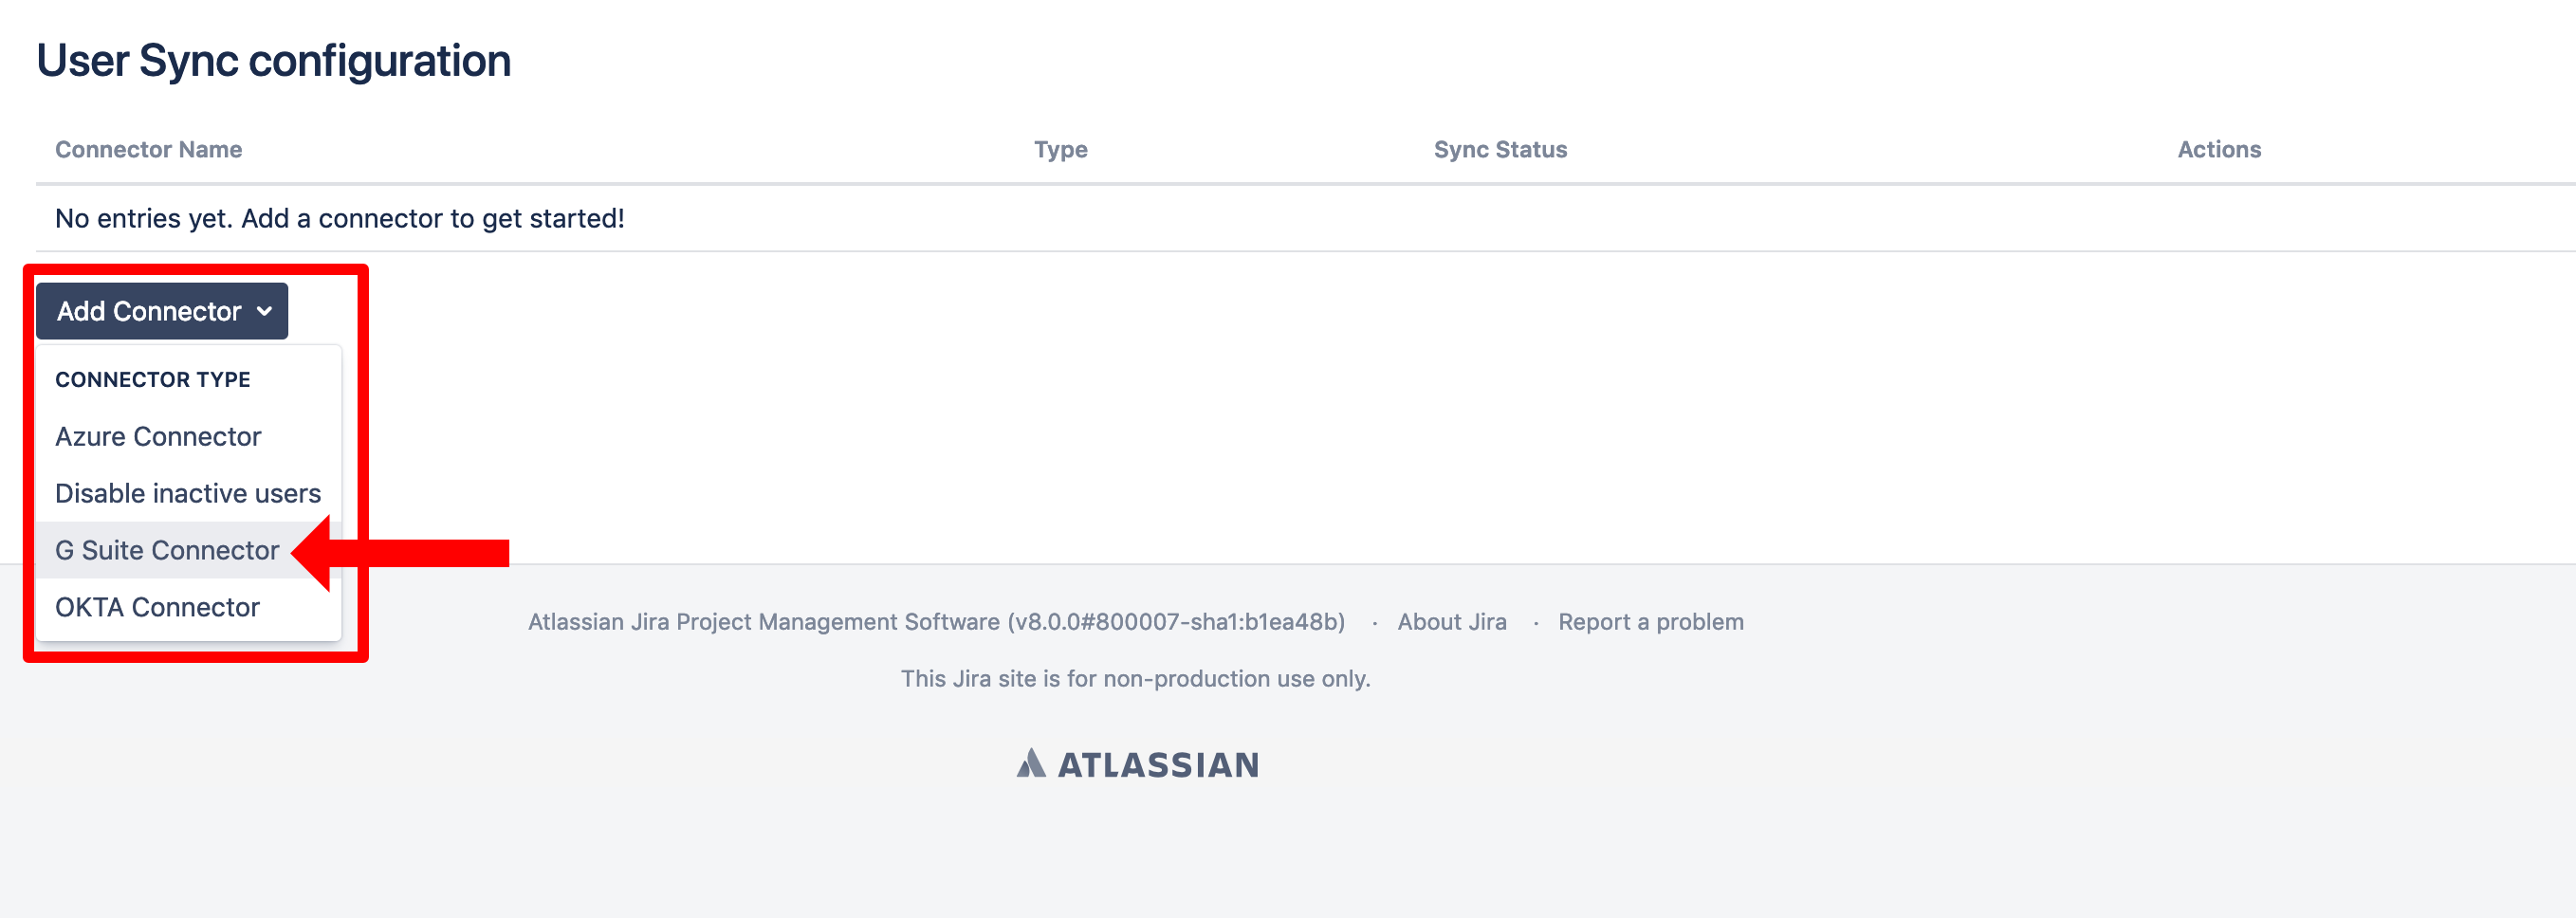
Now User Sync will be setup in your Atlassian application. Press "Add Connector" and choose "G Suite Connector".
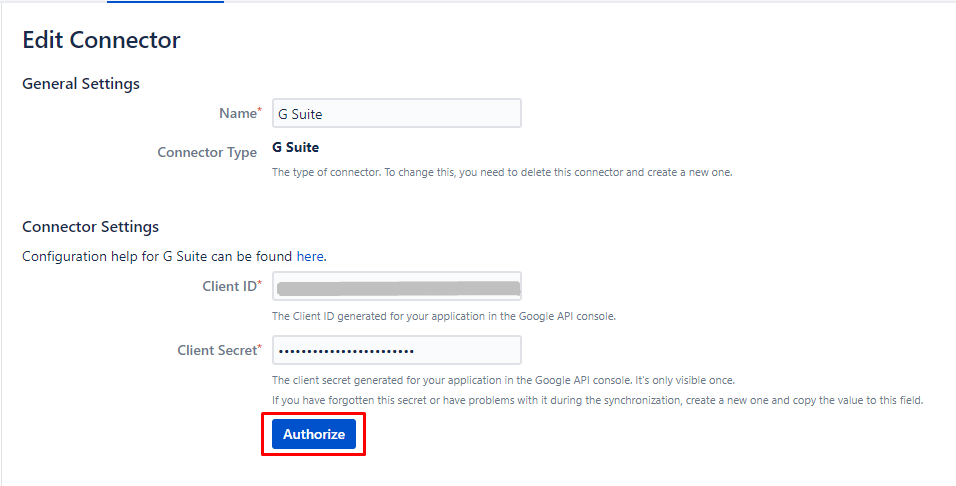
Enter your "Client ID" and "Client Secret" from step 18. Click on "Authorize".
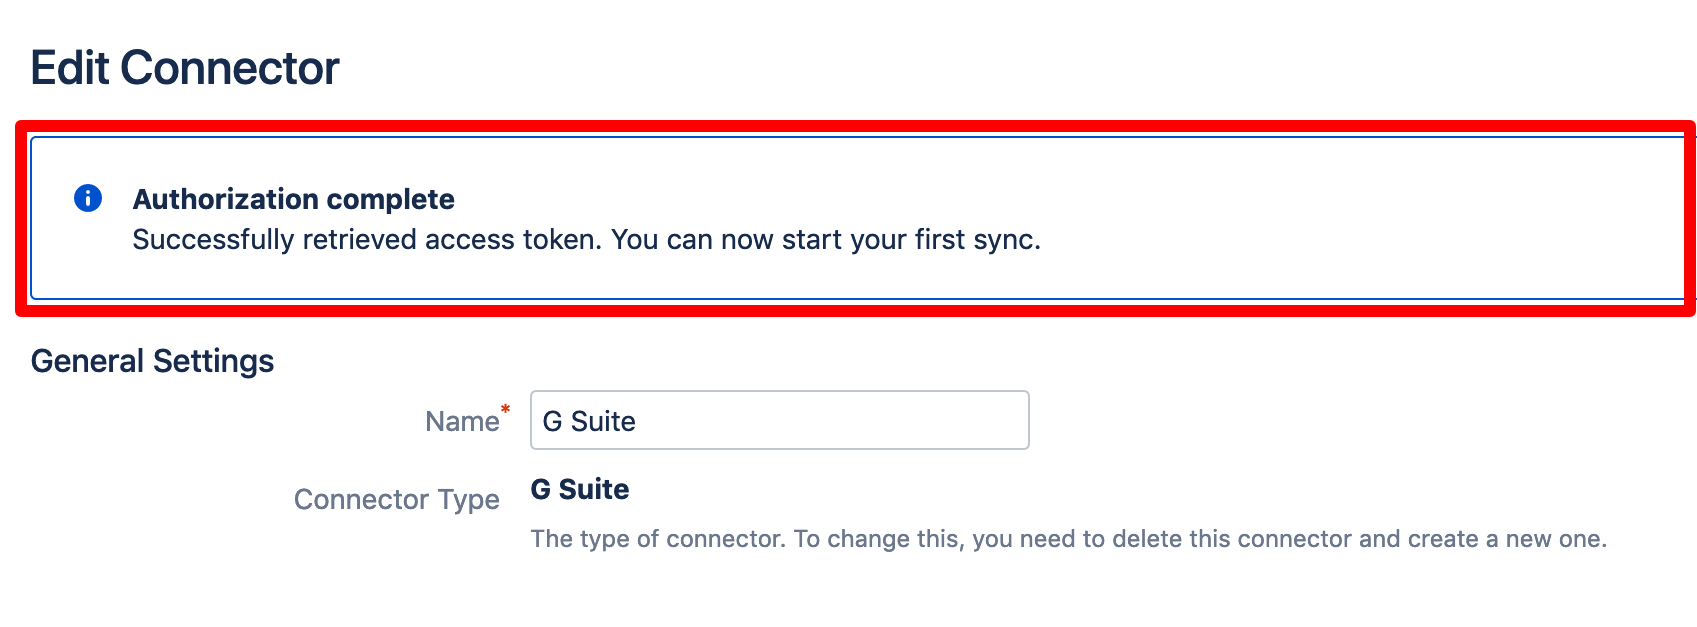
The plugin will show you if the authorization was successful.
Your configuration is now done, scroll down and click on "Save".
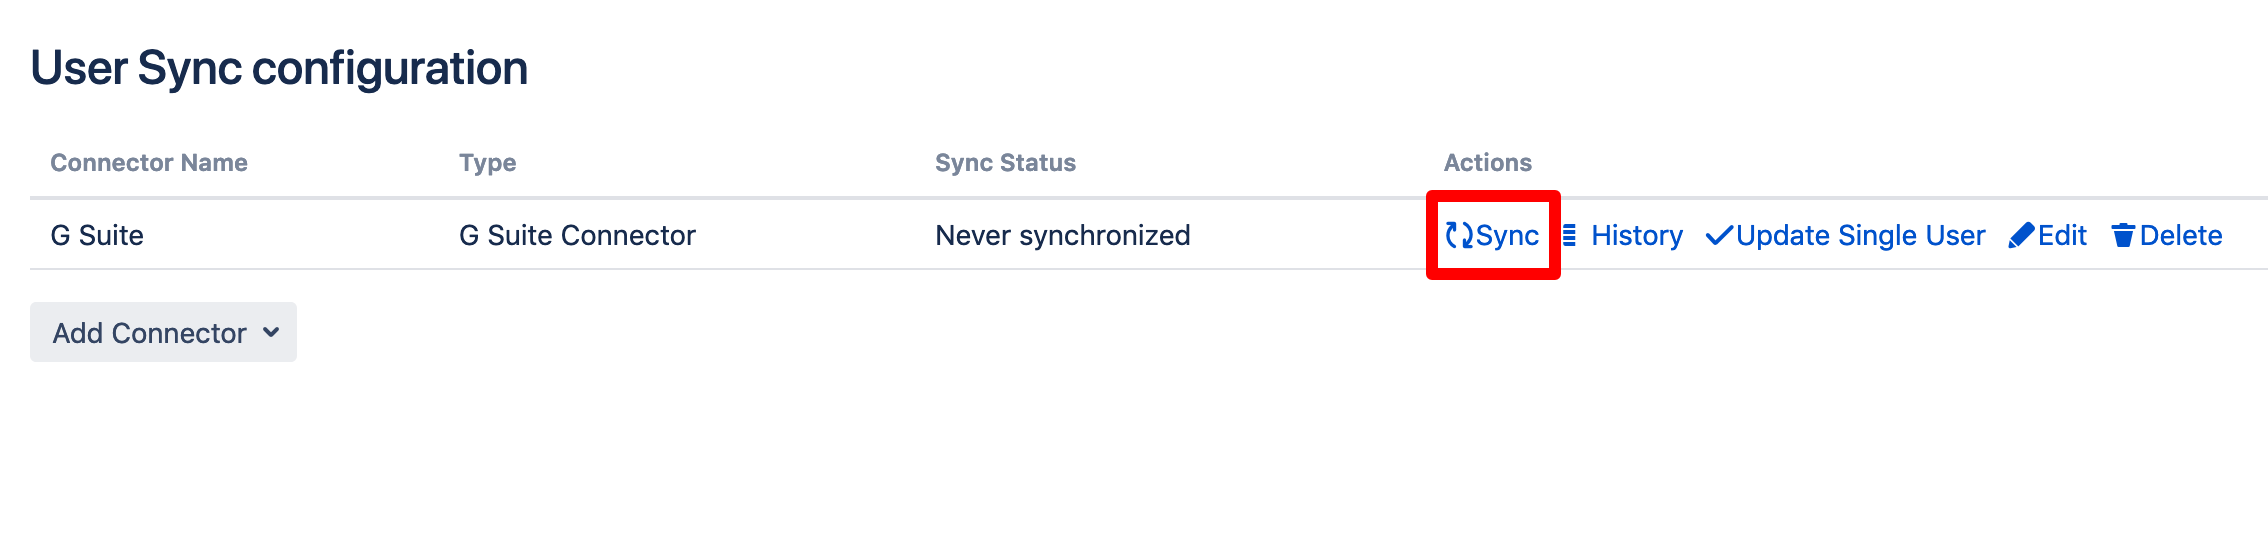
You are now ready for your first sync. Click on "Sync" in the Connector overview.
User guide
Login to the Google API Console. Click on the current active project.
Click on "NEW PROJECT".
Enter a "Project Name" and click on "CREATE". For this tutorial, it is calls "Test Project". This can take a second.
Open your project list again and click on your just created new project.
After opening your project, click on "API library".
In the search bar, type "Admin SDK" and click on the "Admin SDK".
On the next page click on "ENABLE".
Now, click on "Credentials" in the left panel.
Afterwards, click on "+ CREATE CREDENTIALS" and choose "OAuth client ID".
Click on "Configure consent screen" on the right side of your window.
Choose an "User Type" (see https://developers.google.com/identity/protocols/googlescopes?hl=en_US) and click on "CREATE".
On the next screen, enter an "Application name".
Scroll down to "Authorized domains" and enter your personal domain, e.g. "mycompany.com". Press the ENTER key to add the domain.
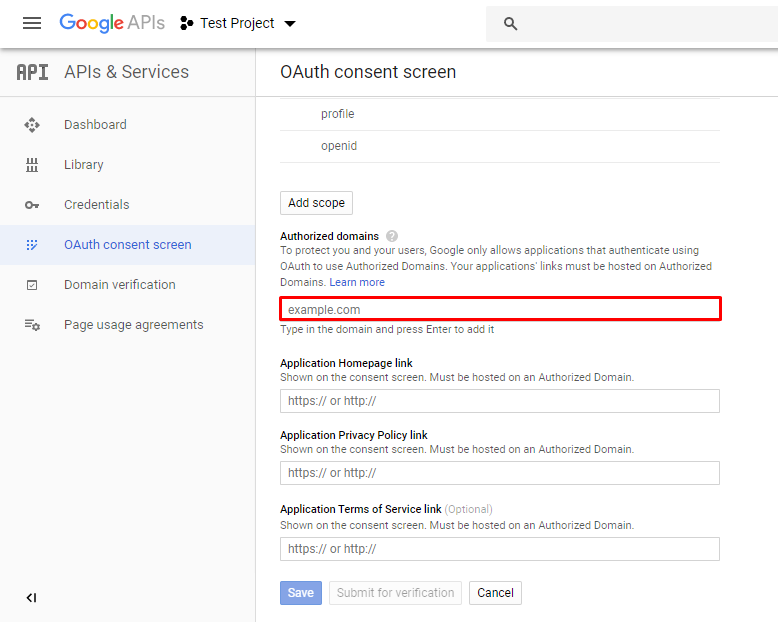
Press "Save" to save your configuration.
Go back to the Credentials tab on the left menu. On the next page, click at Create Credentials and click at OAuth client ID.
In next window, tick "Web application". Also enter an "Authorized redirect URIs" https://<your-atlassian-product-base-url>/plugins/servlet/de.resolution.usersync/oauth2/authorize and press the ENTER key confirm.
Double check that you have pressed the ENTER key. Afterwards, press "Create".
In the next window you can see your "client ID" and your "client secret". You will need both for setting up User Sync, thus save them somewhere where you can find them for the next step.

Now User Sync will be setup in your Atlassian application. Press "Add Connector" and choose "G Suite Connector".
Enter your "Client ID" and "Client Secret" from step 17. Click on "Authorize".
If the authorization was successful, you will see the following.
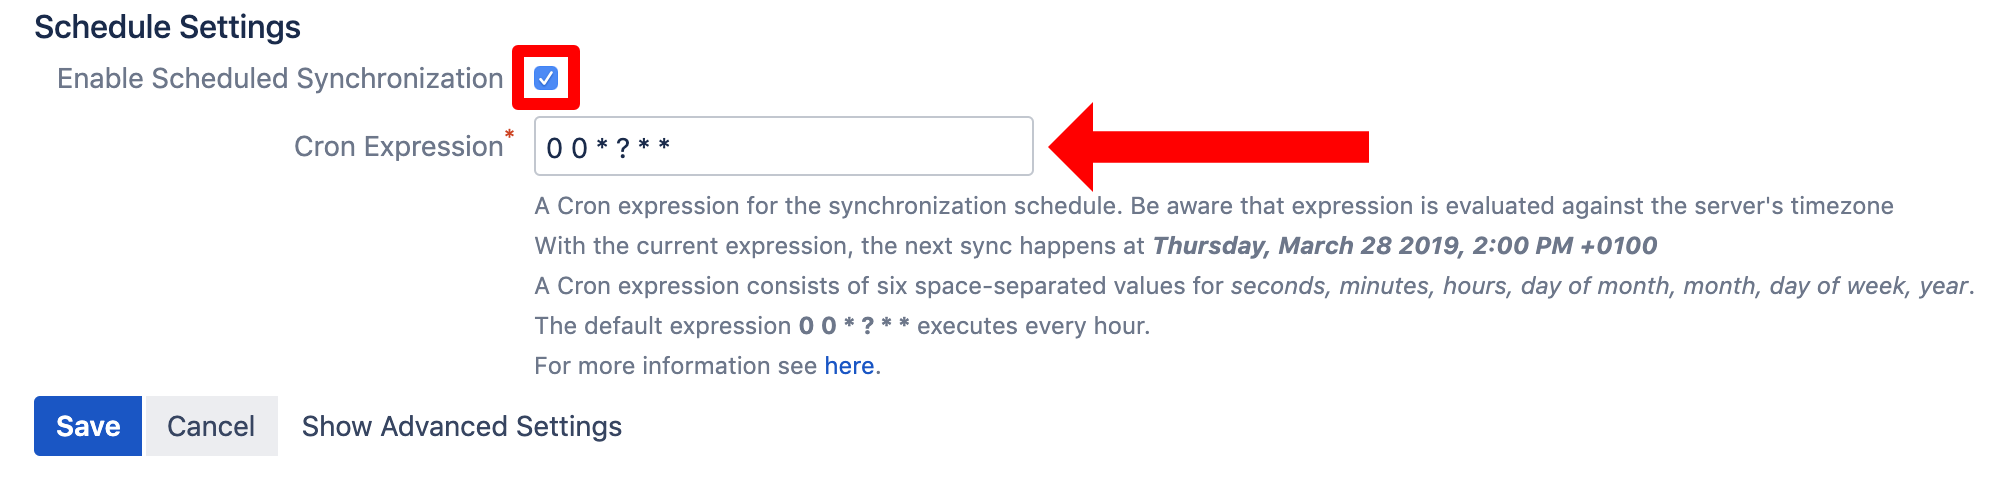
To take the full advantages of User Sync, scroll down and tick "Enable Scheduled Synchronization". You can control the sync interval via a Cron Expression.
Do not forget to save your configuration. Scroll down to the bottom of the page and hit "Save".
You are now ready for your first sync. Click on "Sync".