Azure AD SCIM 2.0 configuration
User Sync Configuration
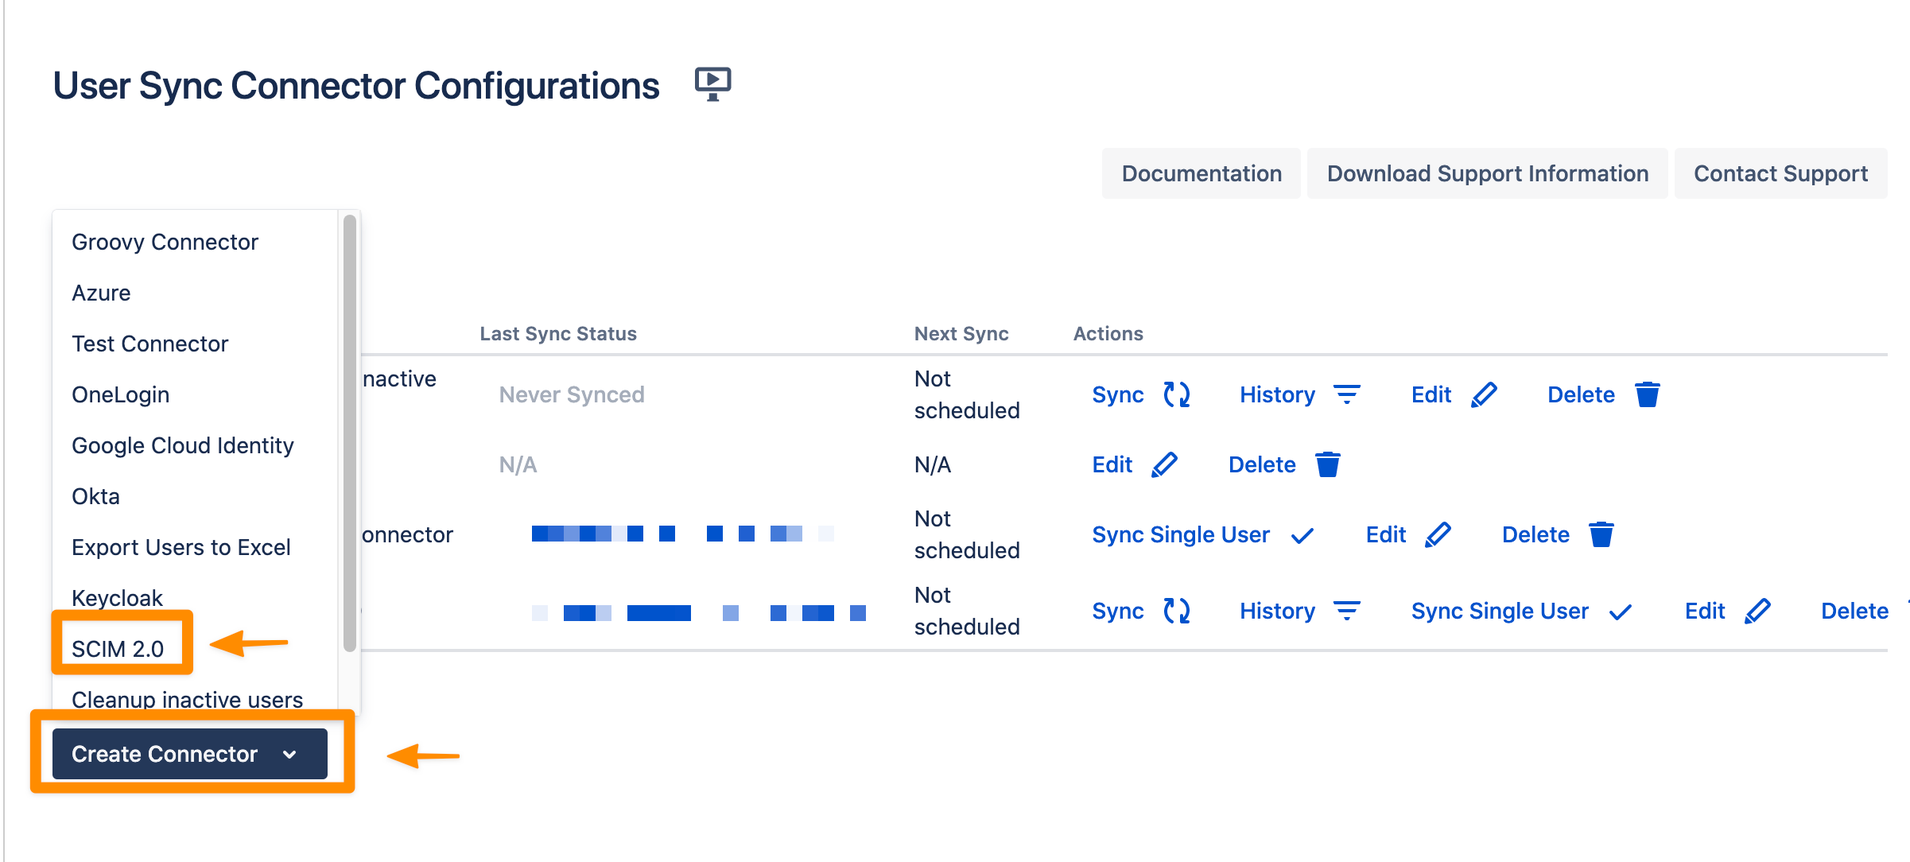
Go to your Atlassian product and navigate to the User & Group Sync settings. Click Create Connector and choose SCIM 2.0.
You can change or add a Name for your SCIM 2.0 Connector. You can copy your SCIM Base URL and the Bearer Token. We will need both later for the configuration of the IdP SCIM application.
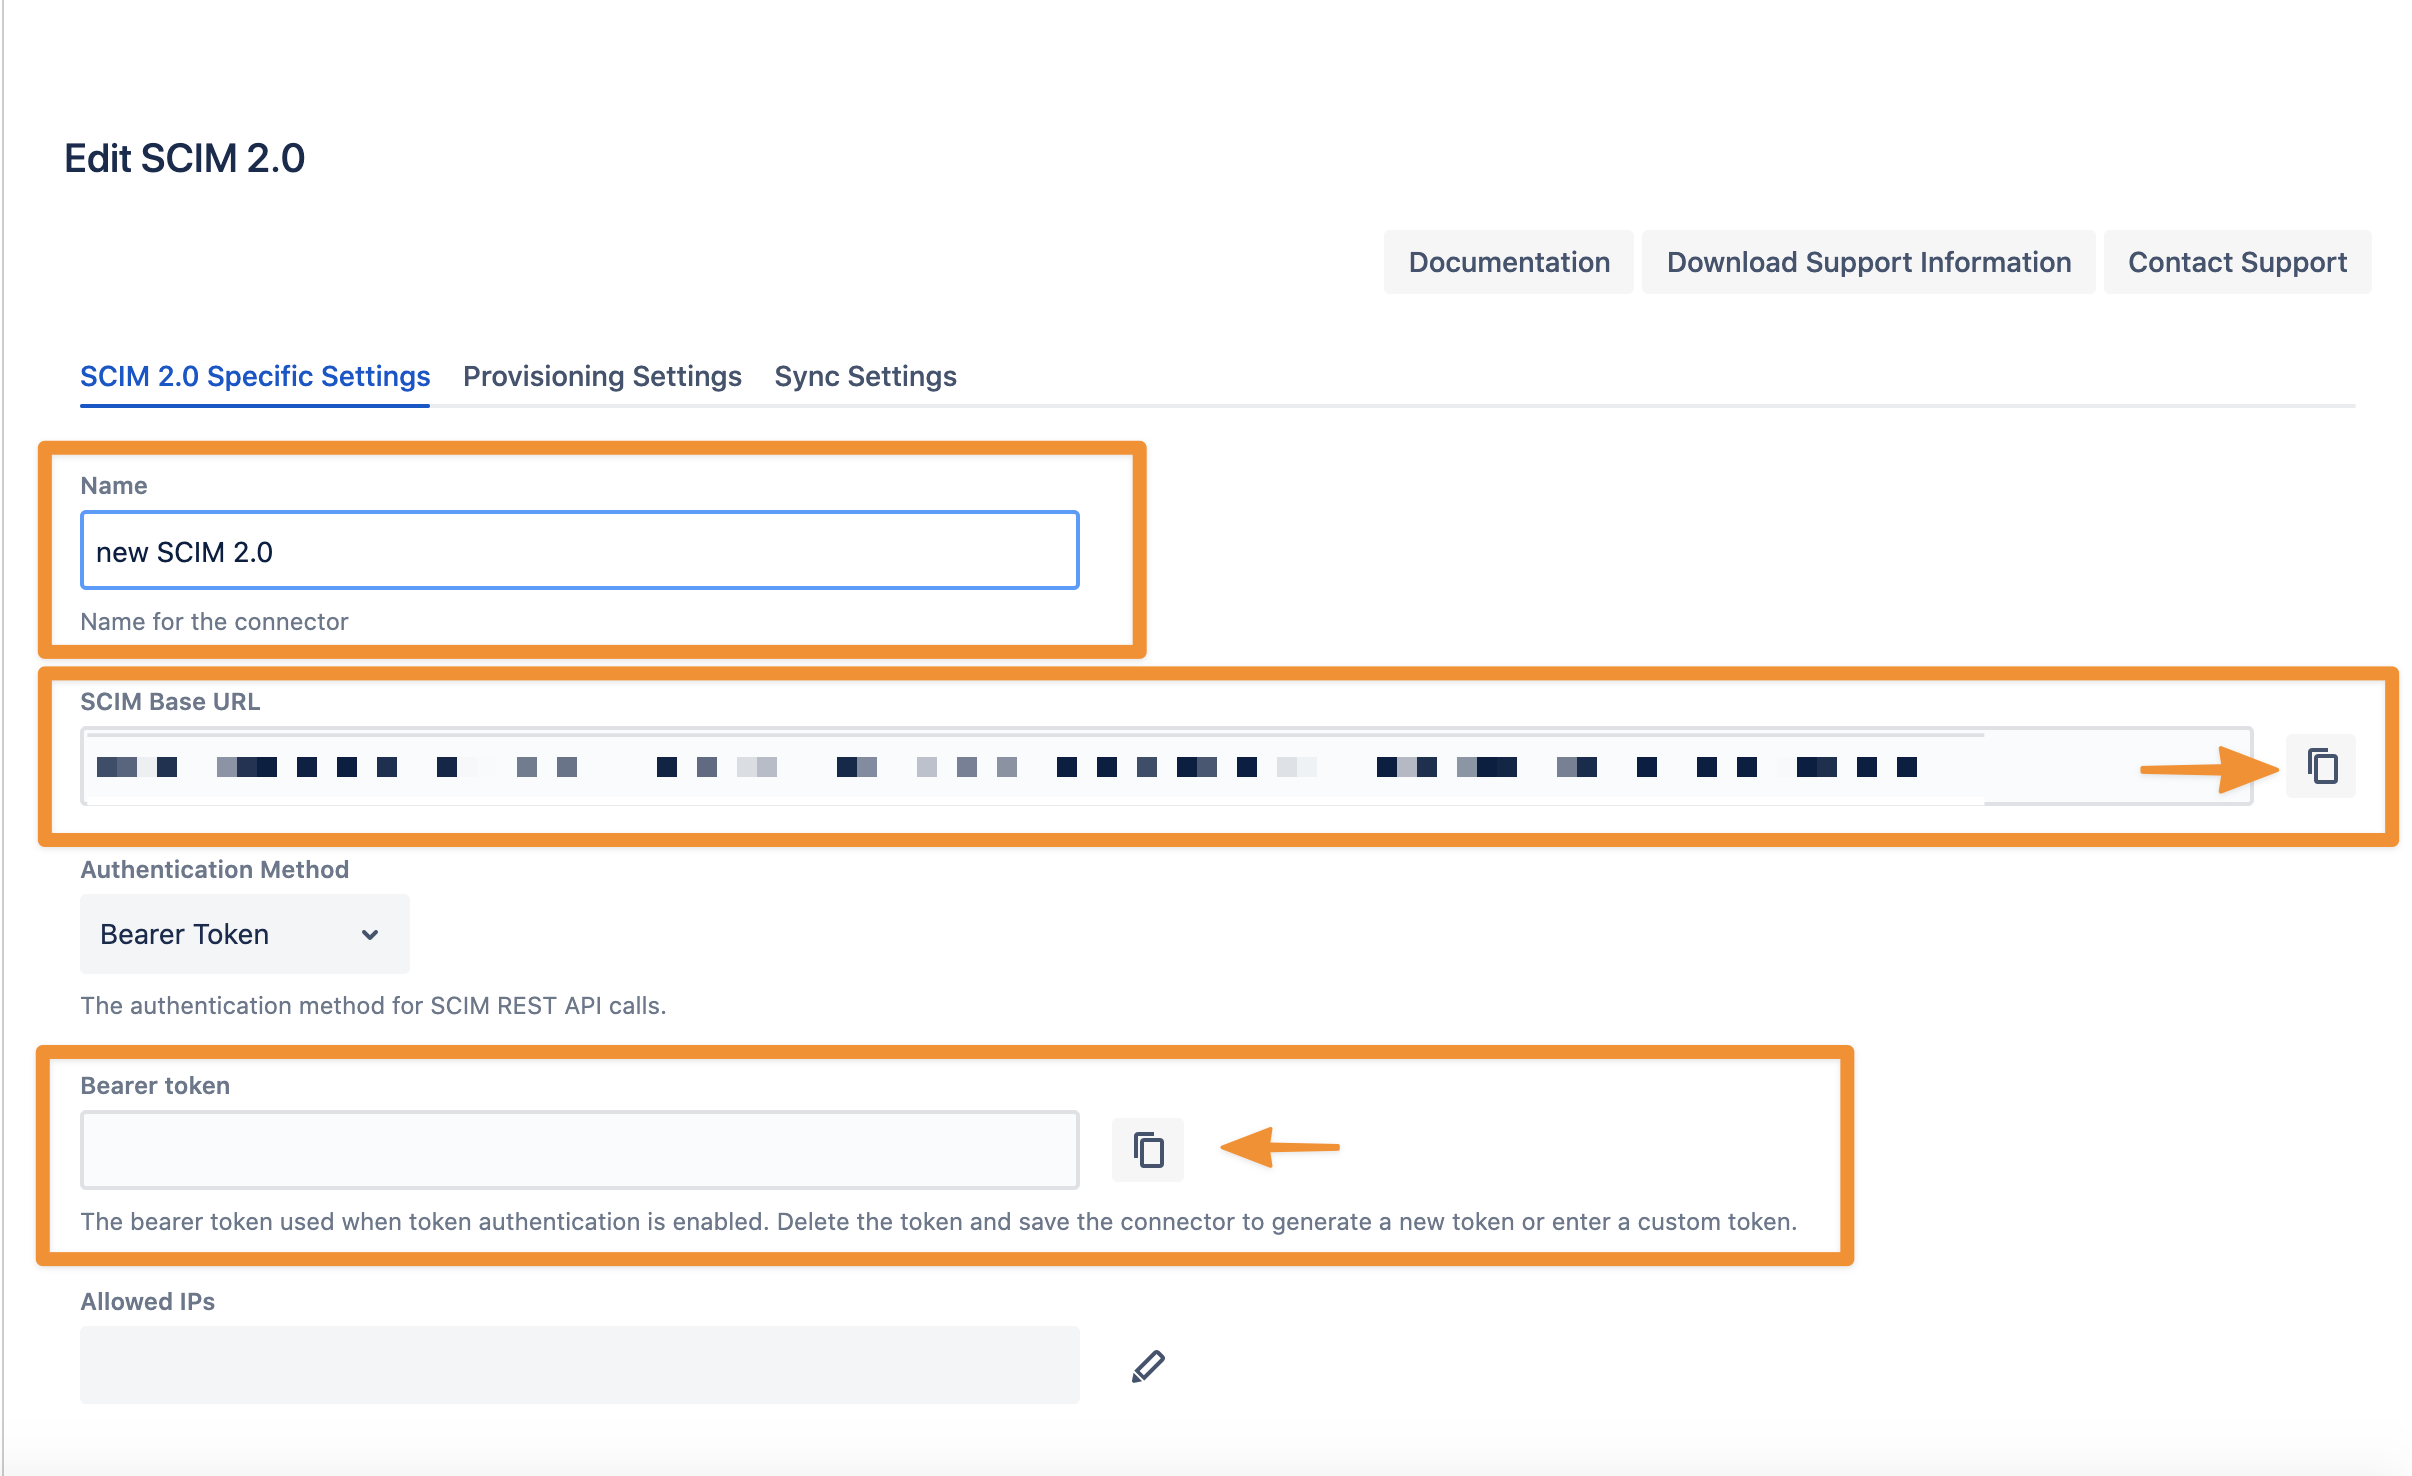
Don't forget to save "Save and Return" your settings!
We will have a look at the 'Provisioning' and 'Sync' settings later. However, first, we create an Application (SCIM client) in your Azure portal.
Azure AD (SCIM Configuration)
We assume that you already have SAML configured (or don't need it)
Create a new application
Open the Azure admin portal at https://portal.azure.com
Go to Azure Active Directory
Open the Enterprise applications menu
Add a new non-gallery application
Click the + New application button (plus button at the top)

Select Create your own application and pick Integrate any other application you don't find in the gallery (Non-gallery) and give the application a suitable name (What's the name of your app?) and click Create for the app to be added.

Configure application
Provisioning Mode
We will need to enable automatic provisioning.
Open the Provisioning menu, and change the provisioning option from Manual to Automatic.
Automatic
The Automatic option will let us configure user account provisioning to specify settings for admin credentials, mappings, starting and stopping, and synchronization. Otherwise (manual mode), e.g. user accounts would not be provisioned to your Atlassian instance.
Admin Credentials
Copy the tenant URL (your SCIM Base URL) and application secret (your Bearer token) for your User Sync Azure SCIM 2.0 Connector, as shown in the below screenshot.
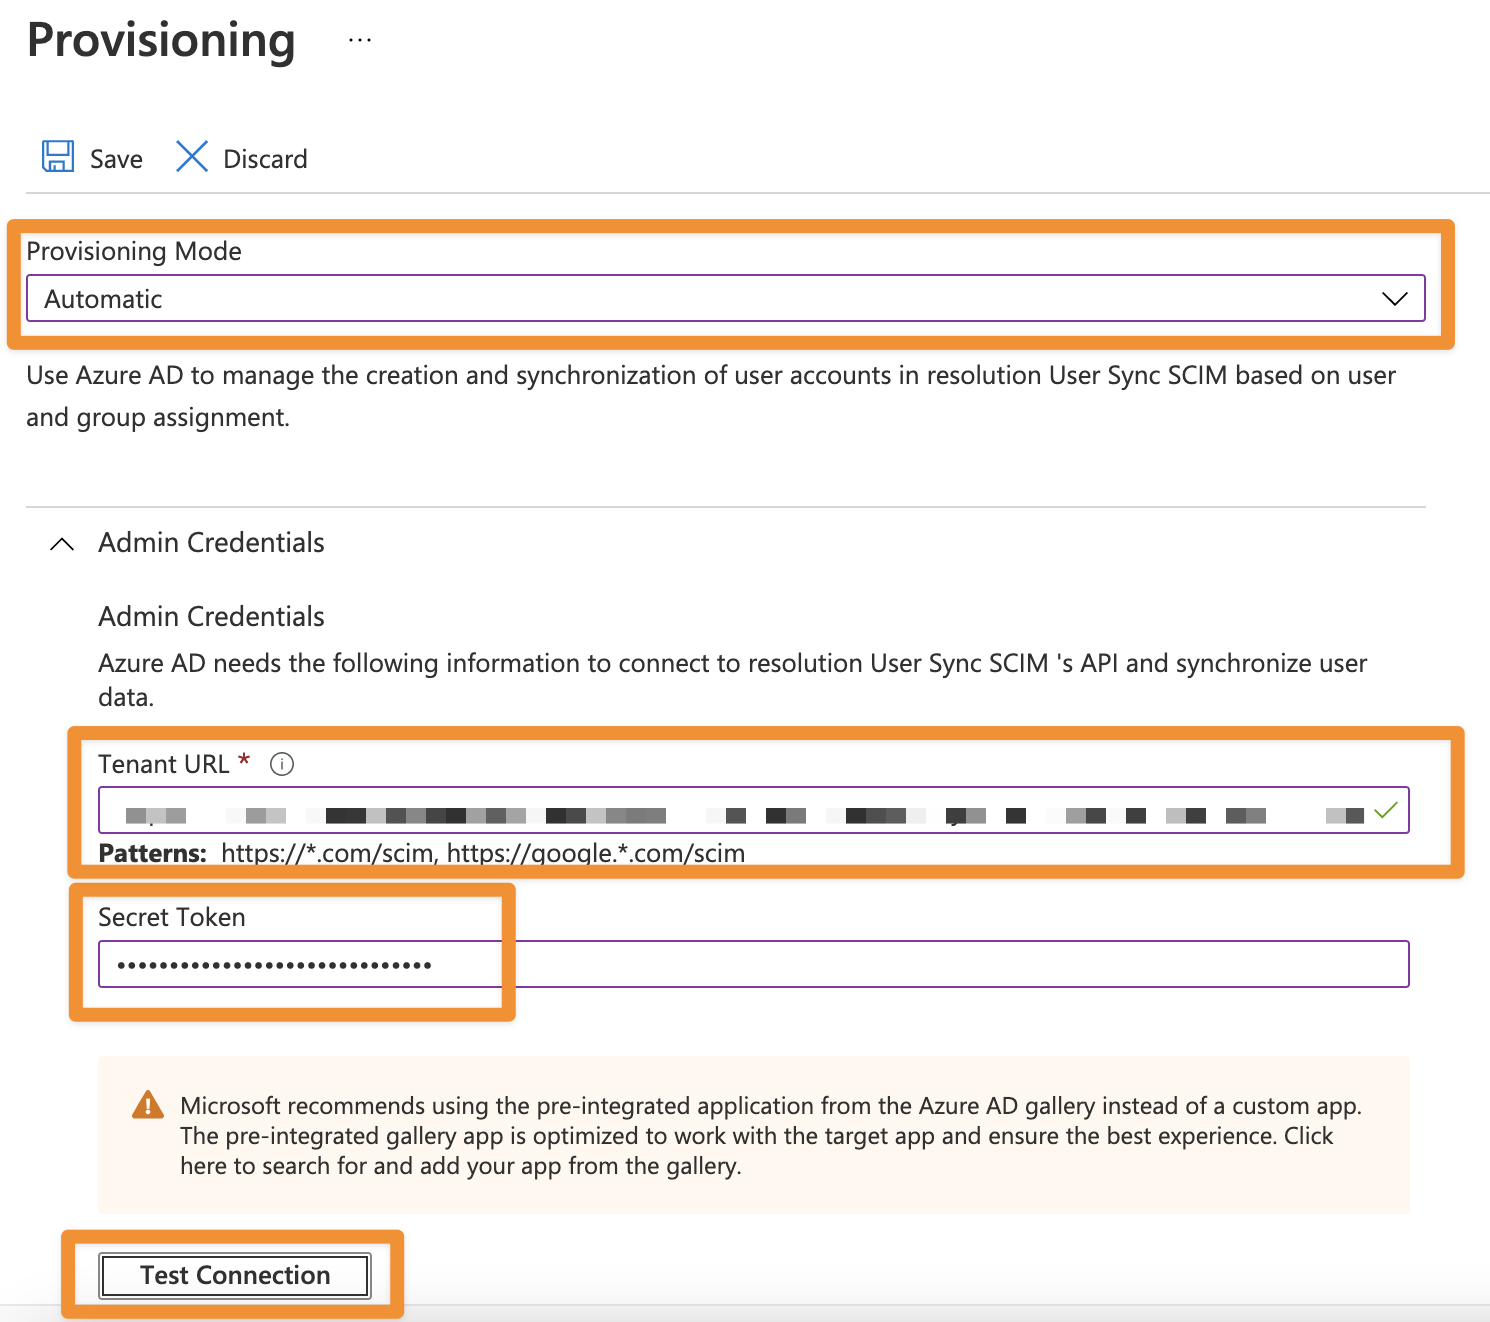
Click the Test Connection button. If everything is working, you will get a notification

Save the configuration
Set the provisioning Status
Set the provisioning Scope to Sync only assigned users and groups (this will leave the provisioning status OFF).
Using the Scope Sync only assigned users and groups will give you better control over which users/groups will be synchronized or not when you have tens of thousands of Azure AD users.
Keep in mind, that you will need to assign users and/or groups later (see Assign users and groups). Otherwise, no users/groups will be provisioned.
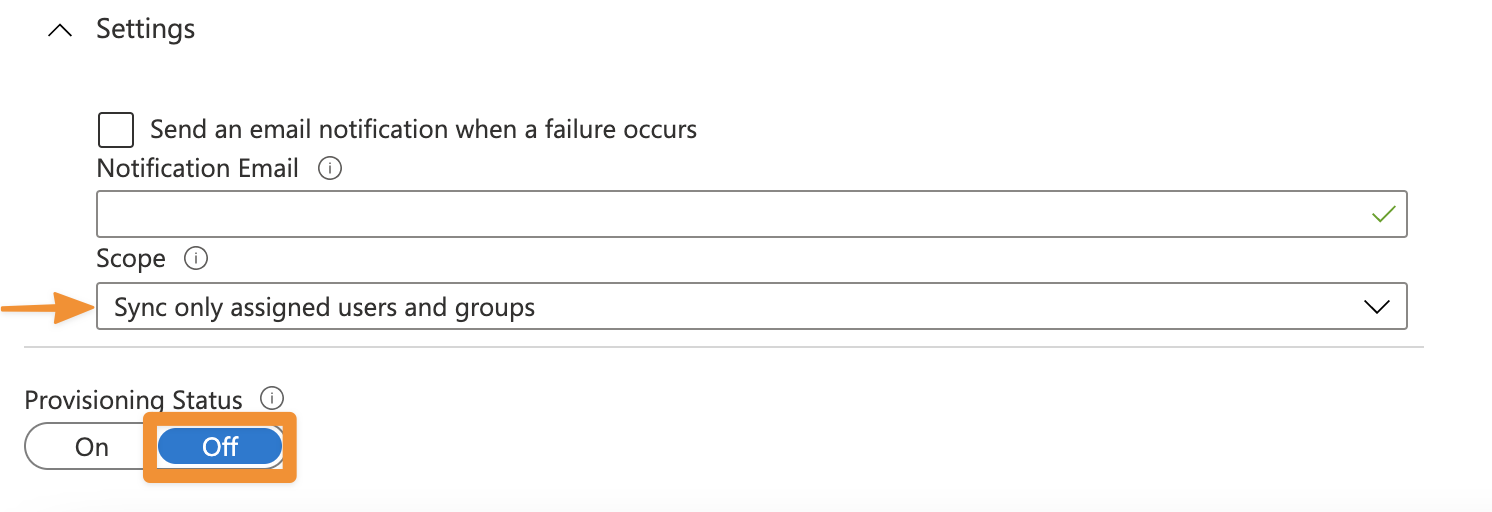
Scope
If you change the Scope to Sync all users and groups, all your Azure AD users will be synchronized to your Atlassian instance. That's why we recommend using Scope Sync only assigned users and groups.
Configure attribute mappings
Mappings control the user account attributes that flow from Azure to SAML SSO.
Under Provisioning settings, expand the Mappings drawer, then click Synchronize Azure Active Directory Users to customappsso.
Now you could change, add or modify the attribute mapping to your needs.
Assign users and groups
Go to Users and groups and assign the users and groups that should be able to use the application and need provisioning.
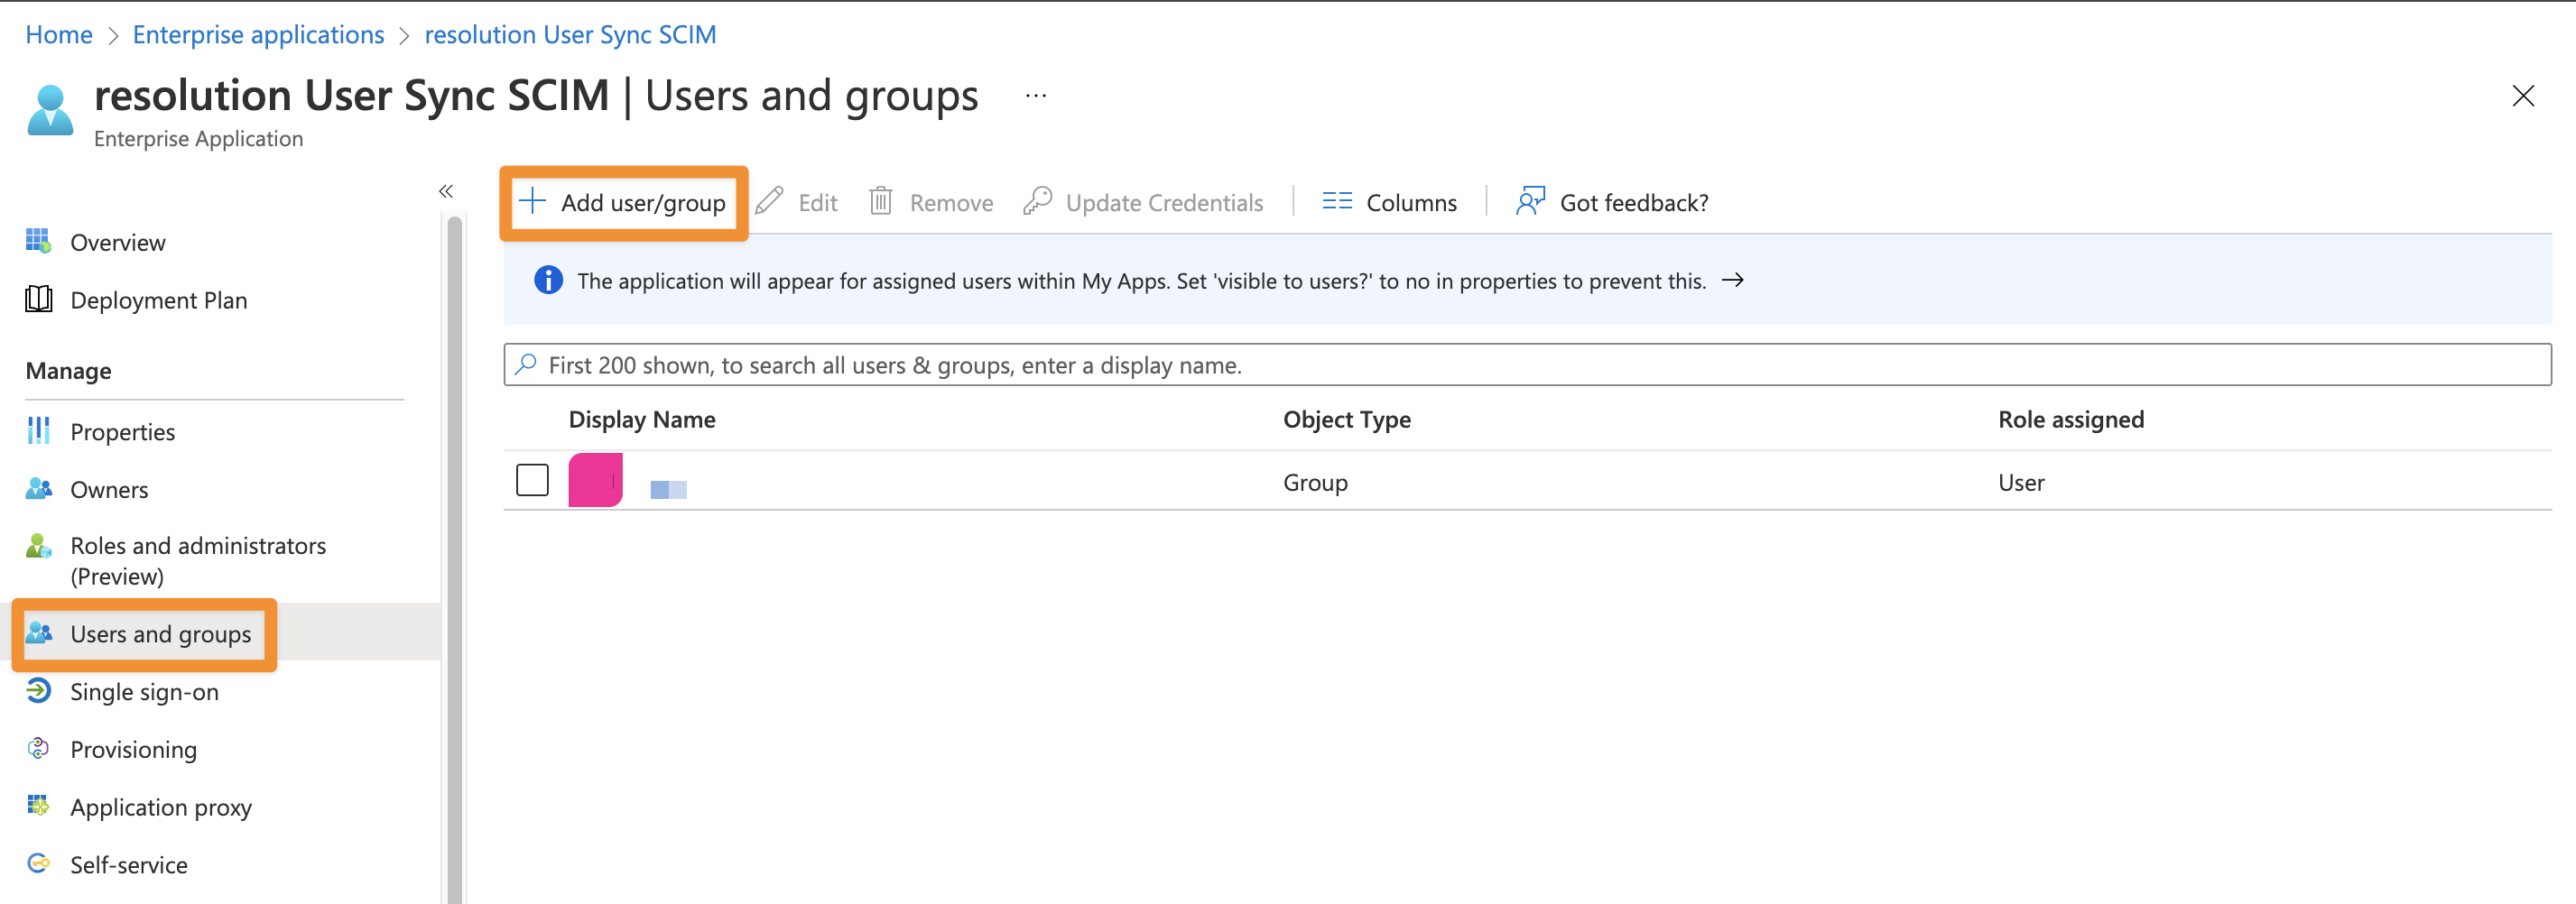
Enable provisioning and save
Return to provisioning settings. Enable Provisioning & click save.
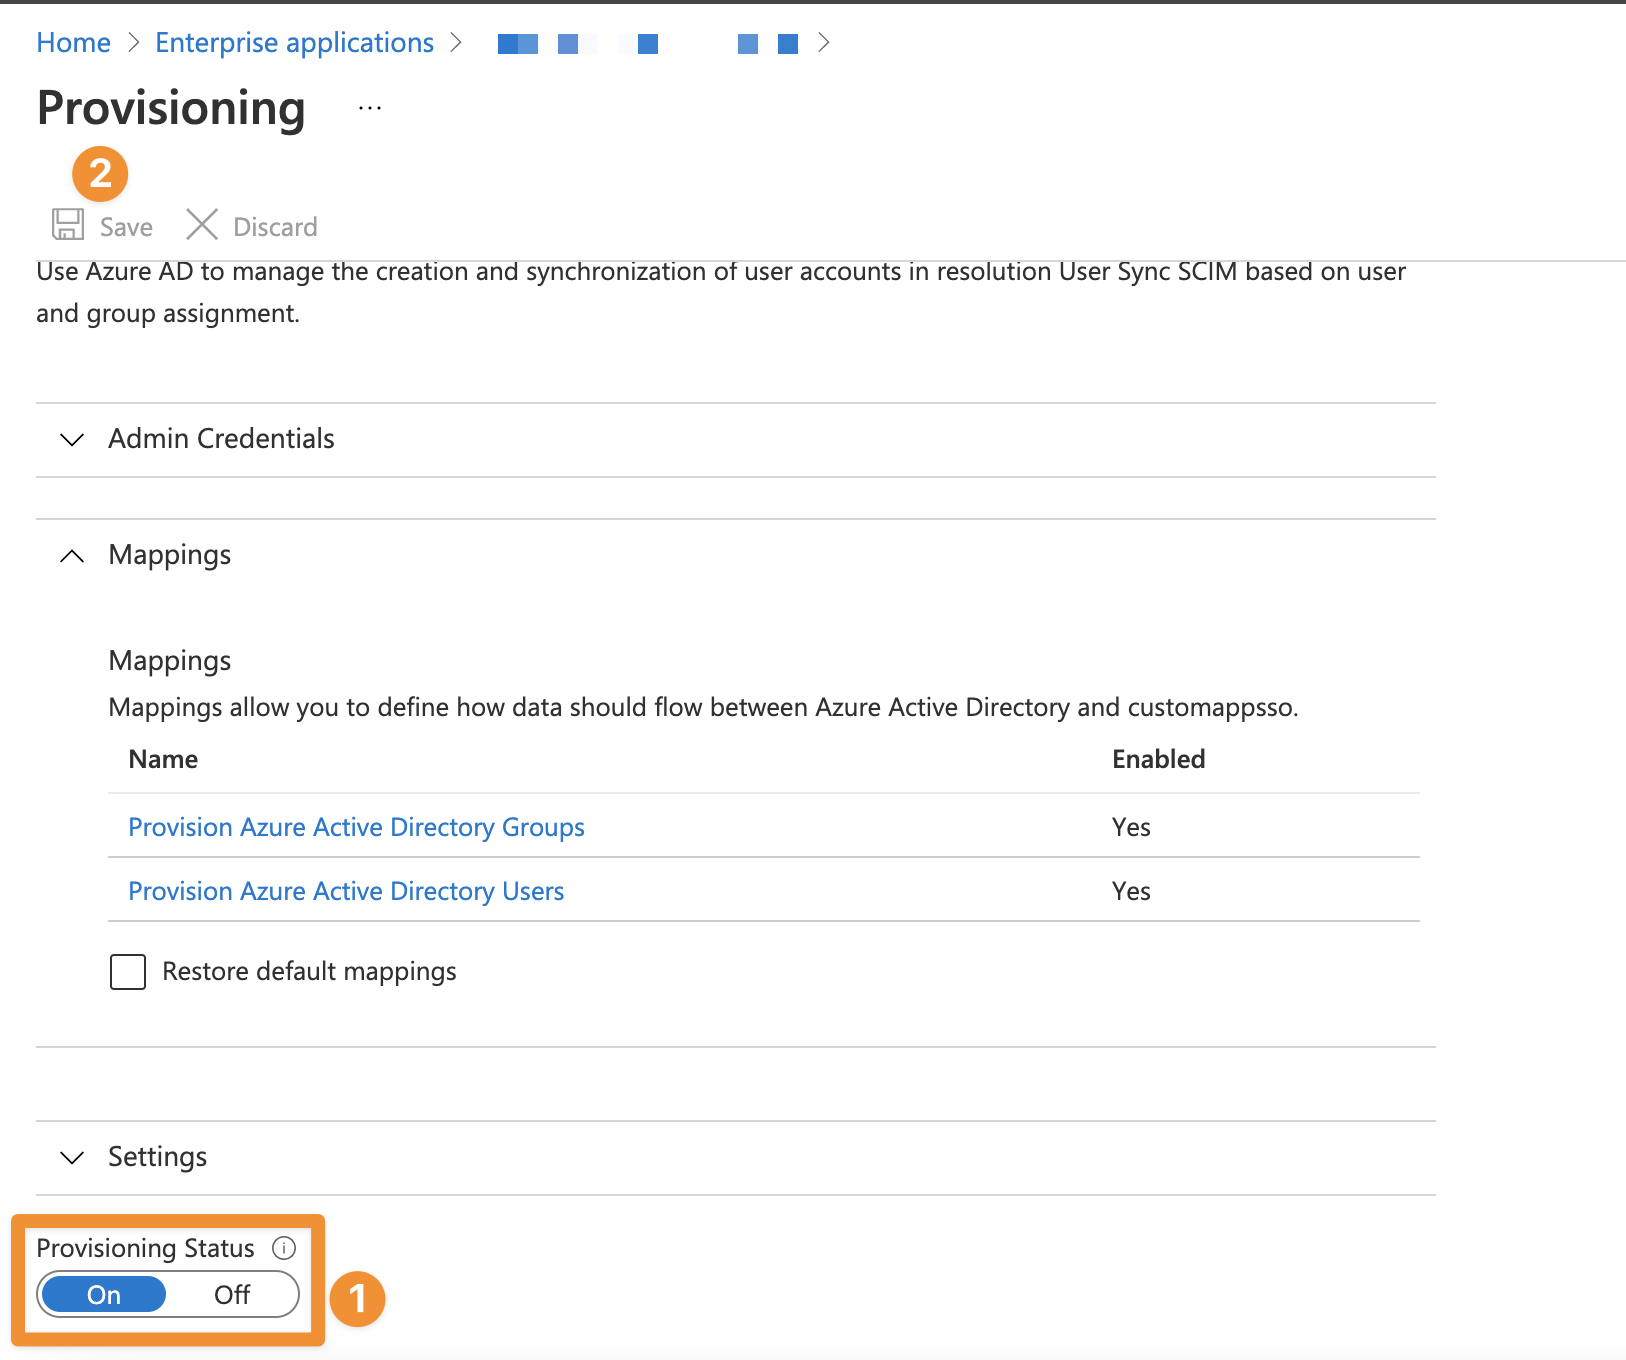
Keep in mind, Azure AD works on a 20-40-minute timer, for re-sync and non-immediate changes. If you need to test any changes or error corrections, it can take some time.
The initial Azure Active Directory sync is triggered immediately after you enable provisioning. Subsequent syncs are triggered every 20-40 minutes, depending on the number of users and groups in the application. See Provisioning summary report in the Azure Active Directory documentation (https://learn.microsoft.com/en-us/azure/active-directory/manage-apps/check-status-user-account-provisioning#provisioning-summary-report).
Provision on demand
Azure allows provisioning users on demand, outside of the fixed interval. Unfortunately, group memberships are not getting updated, neither if you select a group or a single user.
User Sync fine-tuning
Back to our SCIM 2.0 User Sync Connector. Let's have a look at the Provisioning Settings tab first.
You can configure three main sections in the provisioning settings.
Copy Behaviour
Copy behaviour is useful if you add User Sync to an existing Atlassian application like Jira or Confluence and want to migrate existing data. It allows you to find the user record with the same username in a different Atlassian application directory and copy the contents to the User Sync directory (i.e. Group memberships, last login time, user properties, etc.).
Attribute Mapping
Within the Attribute Mapping, you can map data coming from SCIM 2.0’s API to fields within the Atlassian Application. You can also apply a lot of advanced functions to transform, change or filter the data from SCIM 2.0 before applying it to the Atlassian Application.
Group management
Group management can be one of the trickiest elements to understand in User Sync. Atlassian does not have the concept of groups from different sources, i.e., from SCIM 2.0 or groups created locally.
In its default configuration, User Sync treats SCIM 2.0 as the single-source of truth for group memberships of users synchronized from SCIM 2.0. If a synchronized user is a member of a group in your Atlassian application (i.e. locally assigned) but not in SCIM 2.0, the next sync does remove that membership. With the settings below, you can adjust this behaviour to your use case.
Common configurations are:
Automatically assign groups to every synchronized User
Do not use groups from SCIM 2.0 and treat every given group as local
Limit the groups assigned & imported from SCIM 2.0 to specific patterns
Allow mixed-use, where you define some groups as locally managed and others to be assigned & managed from SCIM 2.0.
IdP group management
Here, you configure in detail how the plugin deals with groups loaded from the Identity Provider. The two settings are:
Only Assign these Groups
If you add group names here, the plugin will only assign these from the IdP and drop all others that the IdP sends for a particular User. Essentially, this is a IdP group whitelist.
You can also use regular expressions (e.g: to match multiple group names at once, like jira-.* for everything that starts with jira-)
Never assign these Groups
If you add group names here, the plugin will never assign the groups from the IdP, but assign all others that the IdP sends for a particular User. Essentially, this is a IdP group blacklist.
You can also use regular expressions (e.g: to match multiple group names at once, like jira-.* for everything that starts with jira-)
Usually you only use one of the options and not necessarily both at the same time.

Local group management
Here, you control how the plugin adds/ removes groups that you may have assigned locally to the user.
Always assign Users to certain Groups
This allows you to add every user to the groups listed in this field. For example, it can be handy to add every user to an application access-group like jira-users. This is re-applied during every sync, so if you manually remove a user from one of these groups, he will be re-added during the next sync.
More flexible use-cases can be achieved with the attribute mapping's transformation features.

Never remove users from these Groups
You control which groups are not automatically removed by User Sync from users. By default, if we detect that a synchronized user is a member of a group in Jira, but that membership is not reported by SCIM 2.0, we would remove the User from that group. That is great for group memberships you want to be managed on SCIM 2.0. It's not suitable for those you would like to assign manually from within Jira via the UI.
You need to list all groups that User Sync should not remove in this setting. This can either be by listing the Group names as they appear in Jira or by using regular expressions.

Note
Applying .* in "Never Remove Users From These Groups" and .* in "Never Sync These SCIM 2.0 Groups" will only synchronize User Data from SCIM 2.0 but no group memberships. Essentially something like a "remote directory with local groups" that you know from Atlassian LDAP connections.
See https://wiki.resolution.de/doc/usersync/latest/knowledge-base/group-management-and-filtering-with-user-sync for more information.
Sync Settings
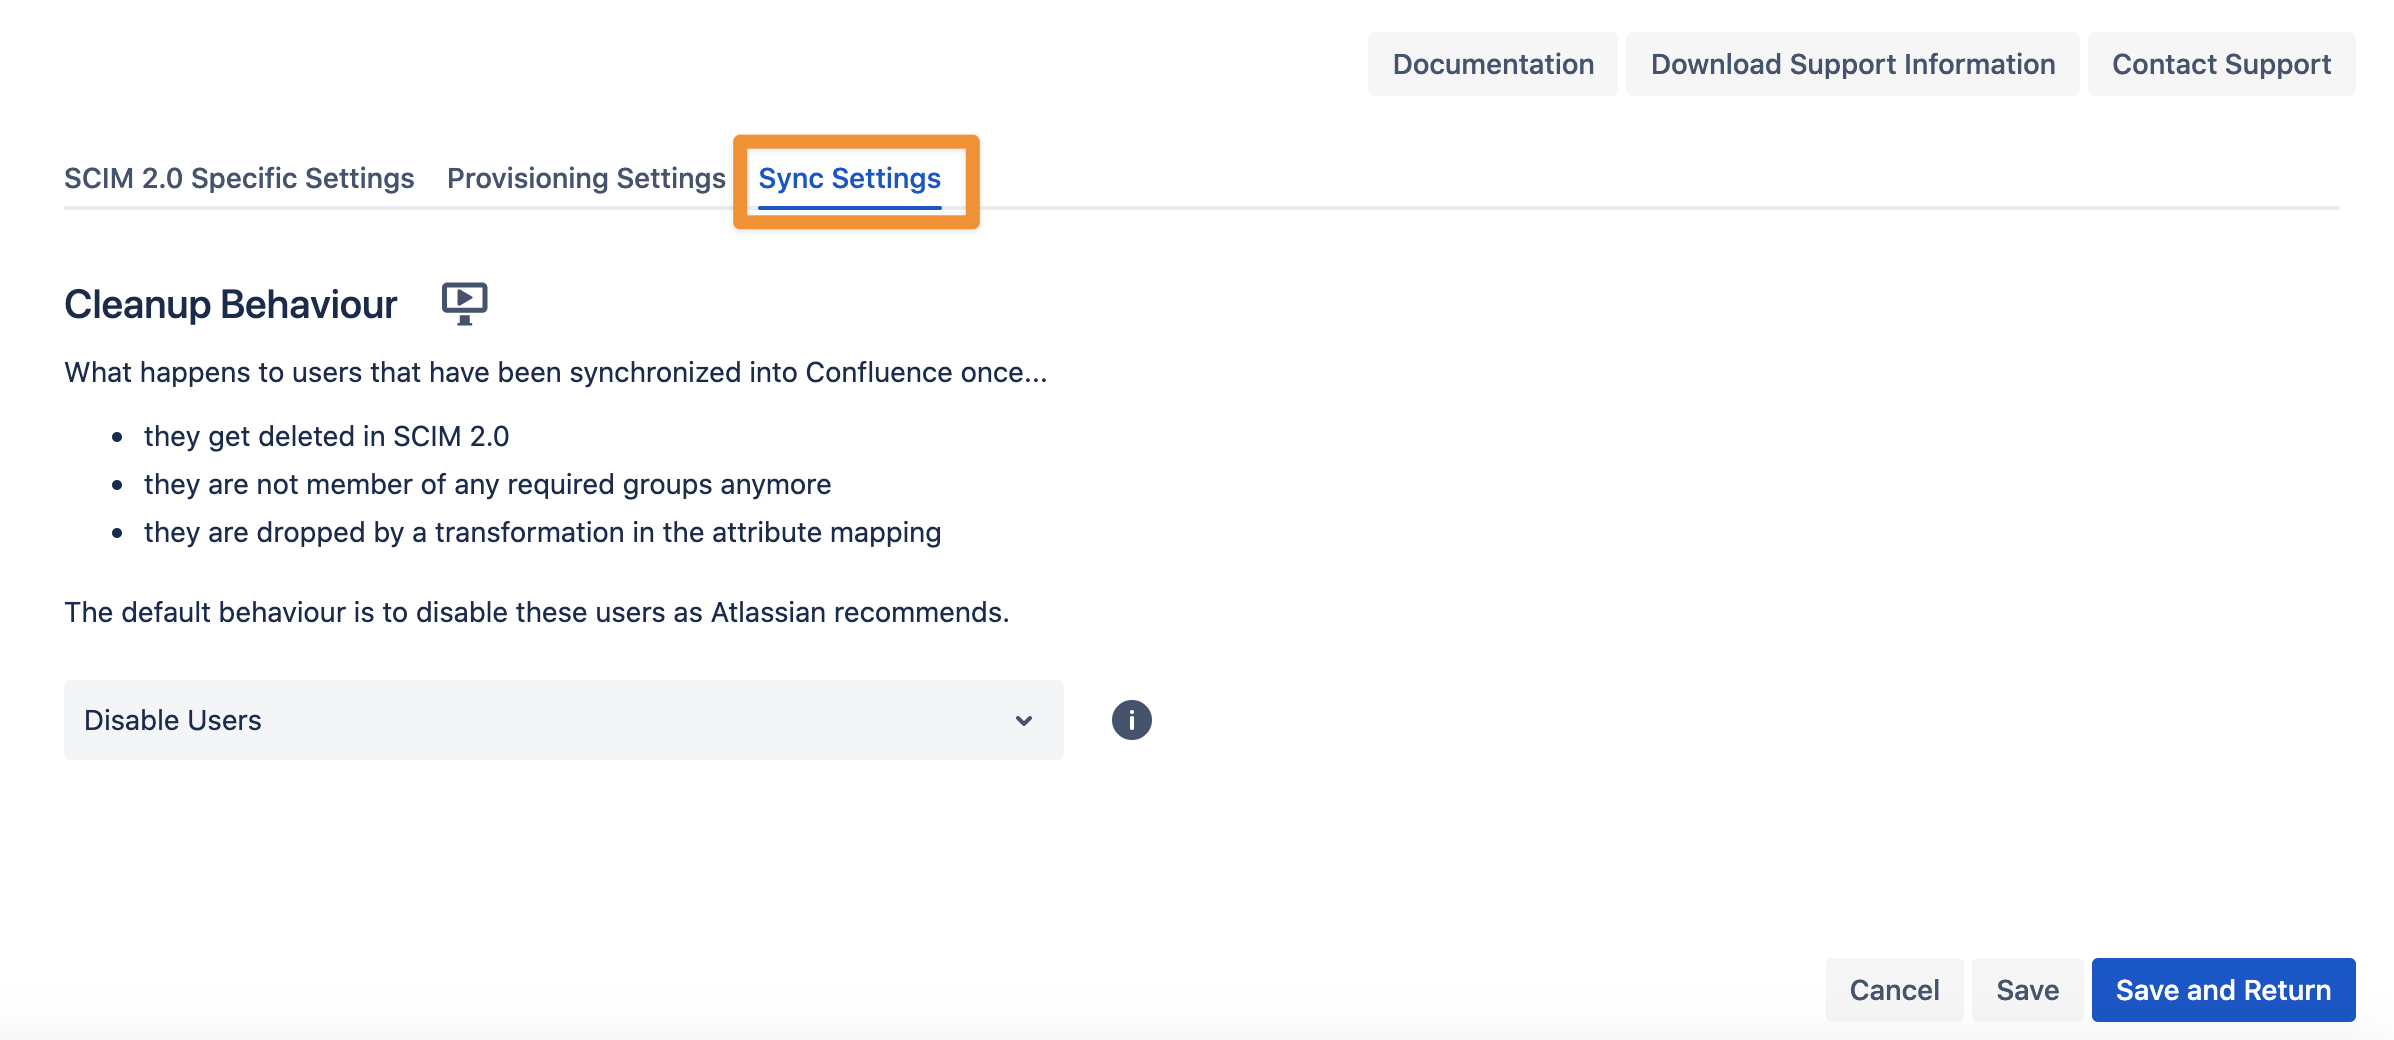
The Sync Settings give you the possibility to configure the Cleanup Behavior. What happens to users that have been synchronized into Confluence once...
they get deleted in SCIM 2.0
they are not member of any required groups anymore
they are dropped by a transformation in the attribute mapping
The default behaviour is to disable these users, as Atlassian recommends.
