
Just-In-Time Provisioning
Goal:
After completing this guide, the AWS ALB & Amazon Cognito Authentication will create and update users with the claims as sent by the load balancer. If you get stuck or need help, please contact us at https://www.resolution.de/go/support or book a free meeting via https://www.resolution.de/go/calendly!
Prerequisites:
Completed initial setup of the app
App version >= 2.x
Step-By-Step Setup Guide
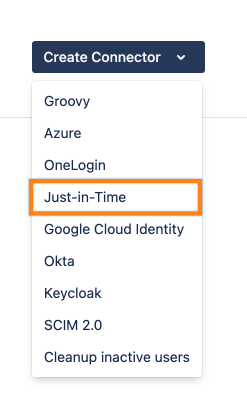
Go to UserSync and click Create Connector. Choose Just-In-Time from the dropdown.
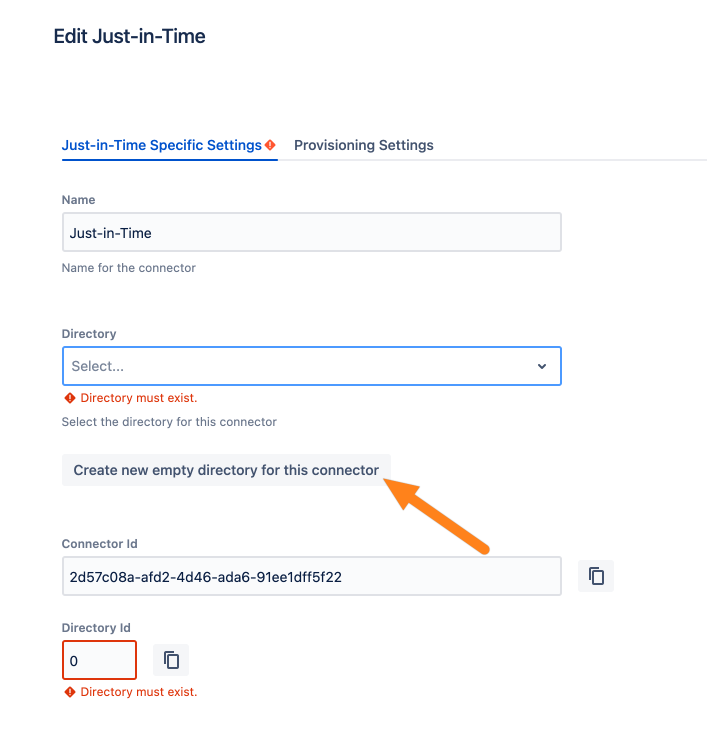
On the Just-in-Time Specific Settings, you either must choose an existing directory, or create a new one with the Create new empty directory for this connector button.
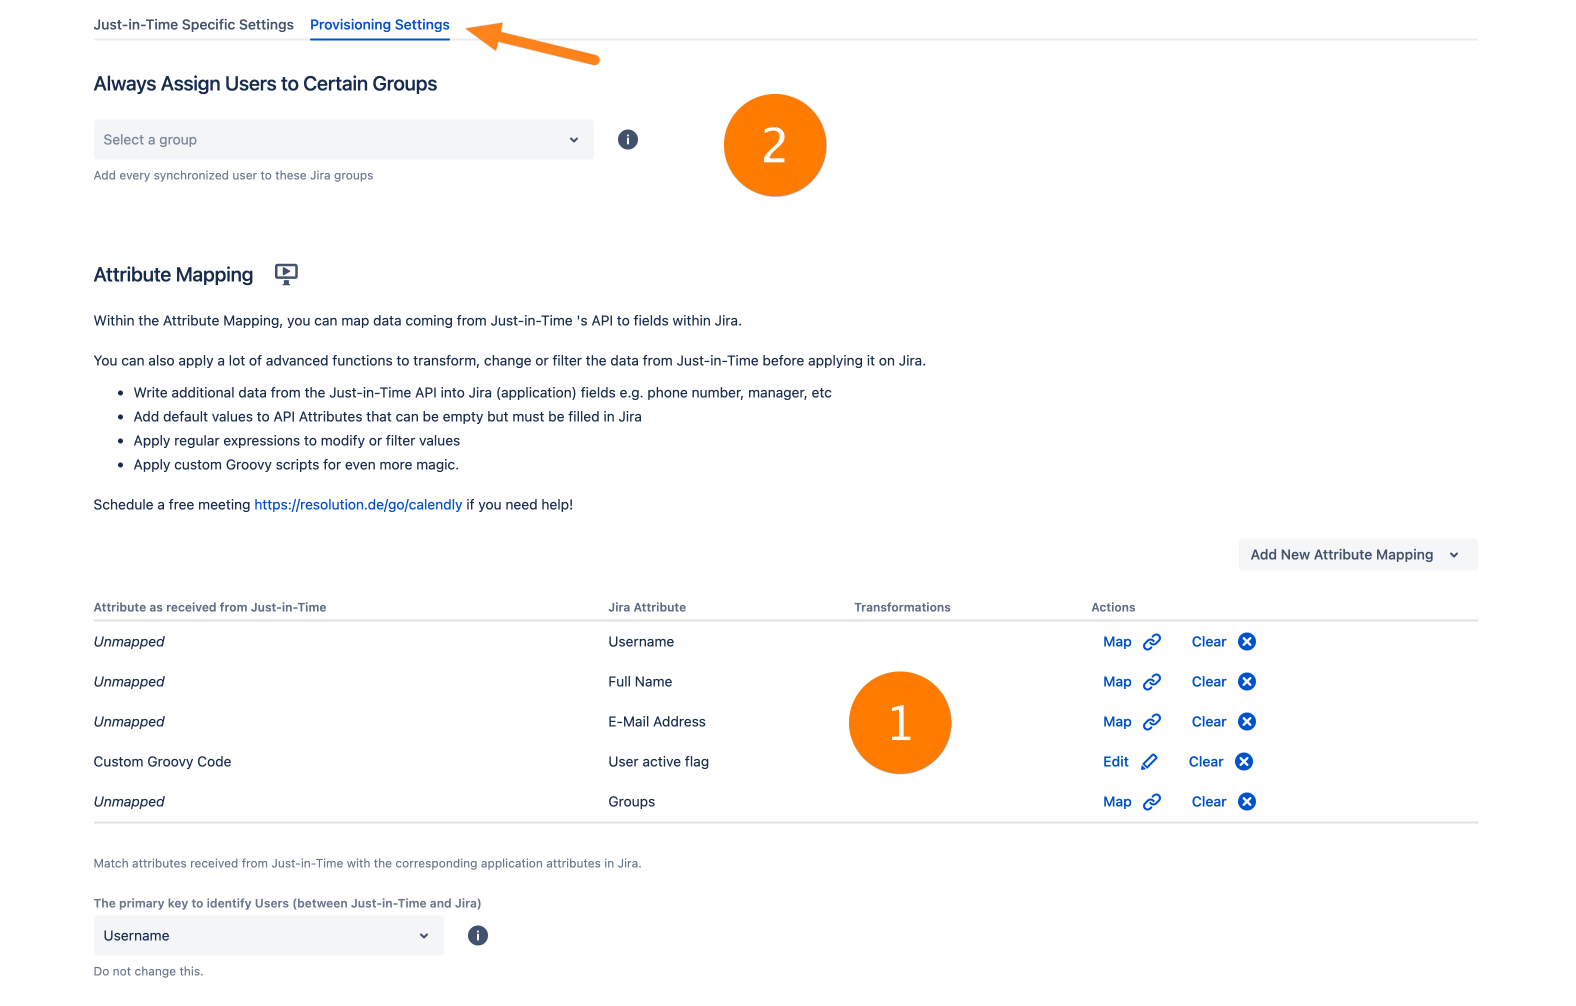
Next, go to the Provisioning Settings tab. For the user update/creation to work, you must map the claims as sent by the load balancer to the Atlassian user (1).
E.g., if the username of the user is sent via the upn claim, you must enter upn for the username mapping.
You can do so by clicking the Map button. You can also do transformations on the attribute values. Please see https://wiki.resolution.de/doc/usersync/latest/knowledge-base/usersync-2-0-features-highlights-and-the-advanced-attribute-mapping for more information.
For user creation, you must map Username, Full Name, and E-Mail Address.
*Please note that a user must be in a group with application access for being able to log in. With (2) you can set a group that is always assigned to a user during login.
E.g. the standard application access group for Confluence is confluence-users and for Jira Software is jira-software-users.
Finish the configuration of UserSync by clicking the Save button.
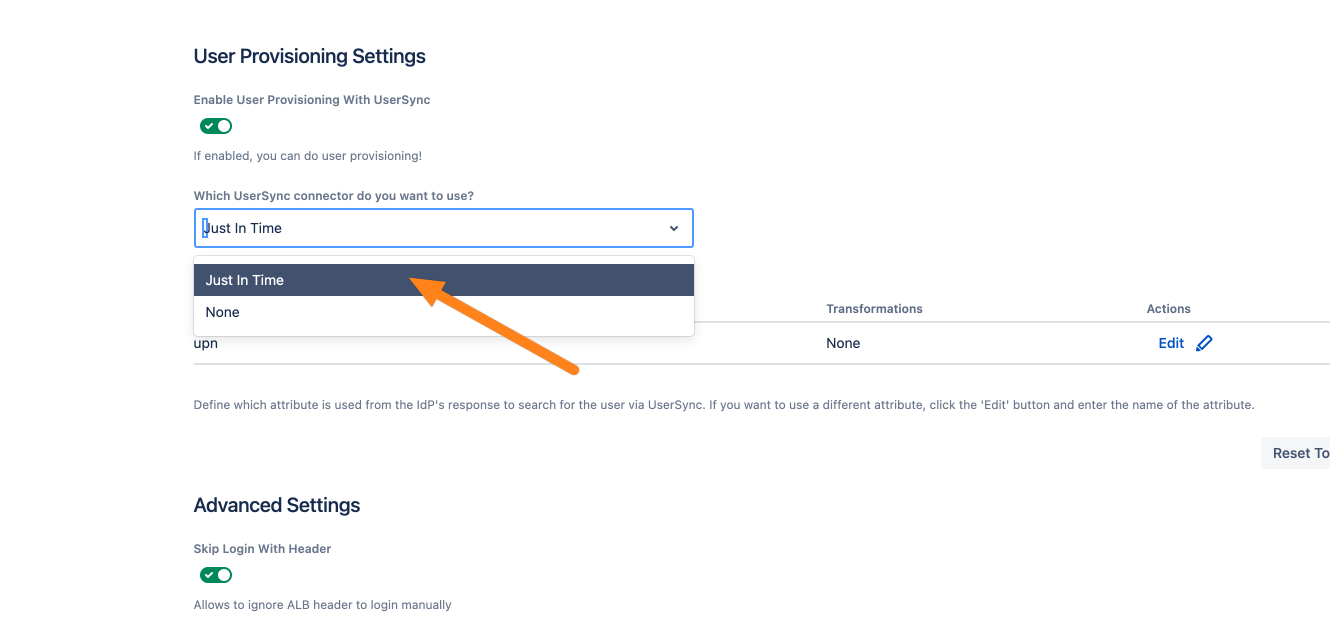
Now, go to the AWS ALB & Amazon Cognito Authentication configuration and scroll down to the User Provisioning settings. Tick Enable User Update with UserSync.

Choose the just-created connector in the drop-down. You can ignore the setting below the connector dropdown. This setting is only applicable for a connector that is not a Just-In-Time connector.

Finish the configuration by clicking Save.
If you set up everything correctly, users will be created and updated when they log in. If you encounter any problems or if you have questions, please contact us at https://www.resolution.de/go/support or book a free meeting via https://www.resolution.de/go/calendly.
Possible problems
You must know how the Username, Email, and Fullname are sent via the JWT token. Additionally, you also must map all three for user creation.
If the user who is logged in is not a member of a group with application access, the login will fail. In step 3, you can see how to always assign a group to a user on the login.
If you transform the username with the Just-In-Time connector, that user will be logged in. An example:
In the AWS configuration, you selected upn for the username claim that contains an email address. In the JIT settings, you did a transformation to cut off the domain name. E.g., a.example@domain.com is transformed to a.example.
On login, the email address is transformed and the user a.example is logged in while the original value of the upn claim (a.example@domain.com) is ignored.