
UserSync 2.0 - Features, Highlights and the Advanced Attribute Mapping
Overview
With UserSync 2.0, we made mapping IdP attributes easier and more powerful. We added built-in IdP specific transformation presets and common transformations can be chosen with a single click.
For advanced use cases, we allow adding Groovy scripts that we will develop within support cases.
Highlights
Some of our new features include
Strip off email domains without the need for custom regular expressions
Convert Azure guest users email addresses to regular email addresses
Define alternative attributes if the primary attribute is not sent for some of the users
Combine multiple attributes into one
Groovy script-based transformers for total control about your transformations
Video Guide
Prerequisites
In the following section, we will show what is possible with UserSync 2.0. Please note that there are special presets for specific identity providers which may or may not look different for your connector
This tutorial assumes that you have an existing configuration.
After the initial UserSync configuration (or if you have an existing configuration), the following steps show you how to use our new attribute mapping.
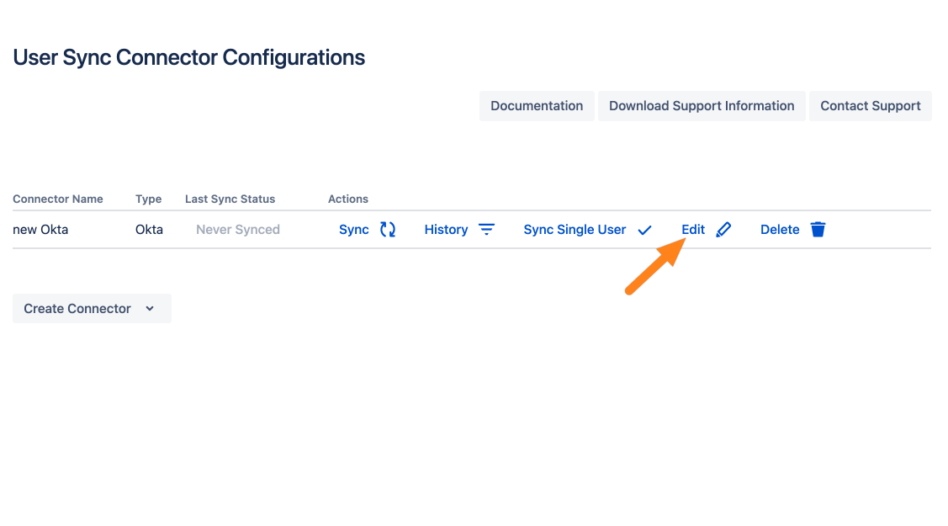
Go to the UserSync and click Edit for your UserSync connector.
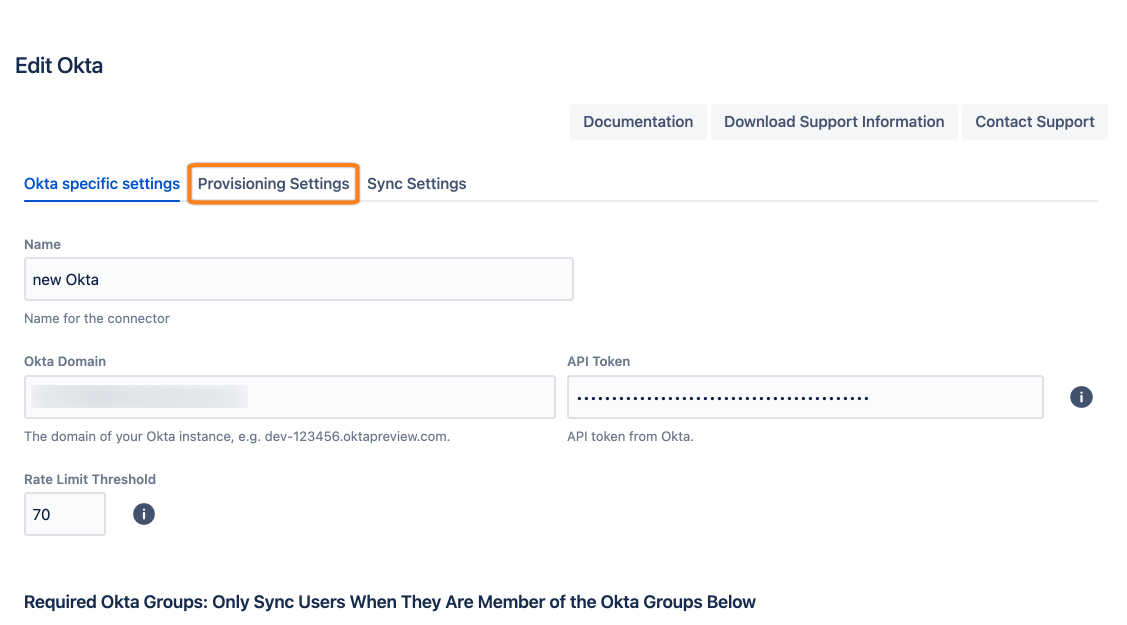
Click the Provisioning Settings tab and scroll down to the Attribute Mapping.


For the remainder of this tutorial, we will use an Okta configuration for simplicity.
Overview
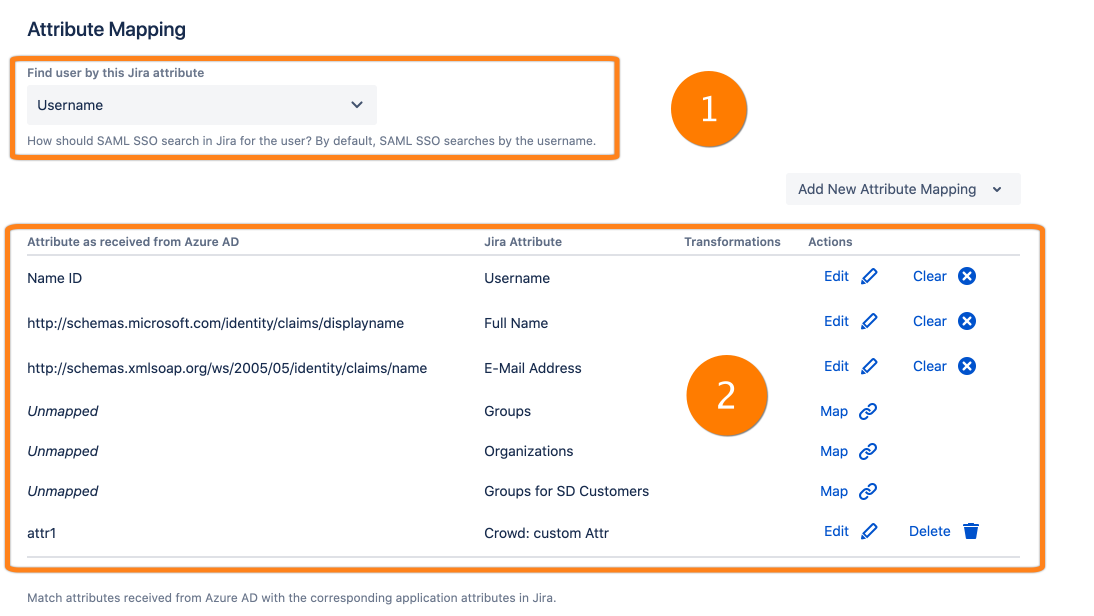
The new attribute mapping has two important parts as marked on the screenshot above. In the following, we will present part 1 and 2.
1 The primary key to identity Users (between ... and Jira/Confluence/...)
With this option, you can specify how UserSync identifies users. Please note that most of our installations are fine with the default settings, i.e. by using the specific user id, we allow for renaming users.
2 Attribute Mapping Table
The attribute mapping table defines how attributes sent by the identity provider are mapped to attributes of the user of your Atlassian application. For all major identity providers like ADFS, Azure, Okta, and Google Cloud Identity, we have default values for all these fields.
With Edit you change an existing mapping. For system attributes such as username, email and fullname, you can reset the mapping by clicking Clear. For a custom attribute, there is also a Delete button to delete the mapping.
Click Map to an attribute.
With Add New Attribute Mapping, you can add a new mapping for an IdP attribute.
Depending on the Atlassian product, we have different options that can be mapped:
For Confluence, we allow mapping user profile attributes such as phone or location. Please see How to Synchronize Profile Data to the User Profile in Jira or Confluence for more. Additionally, we also allow syncing with Linchpin user profiles (see Sync attributes to Linchpin)
For Jira, we allow mapping user properties for use in scripts. Please see How to Synchronize Profile Data to the User Profile in Jira or Confluence for more.
For all platforms, we allow mapping Crowd attributes which can be used for scripting too.
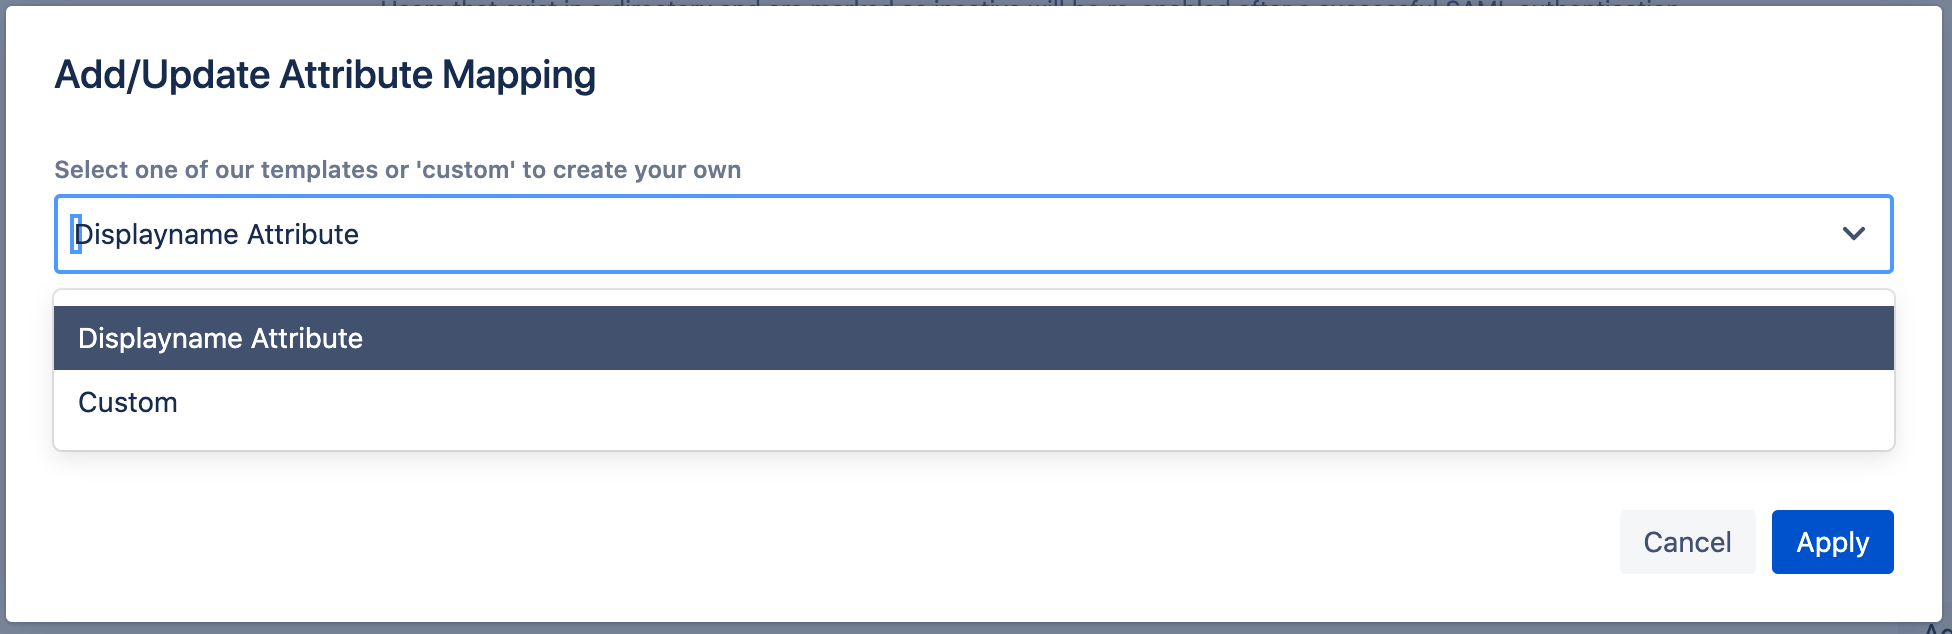
Presets
Depending on the identity provider, we provide templates to be used to make your life easier. In the best case, you are fine with one of the presets. But, you can still customize the presets or start from scratch
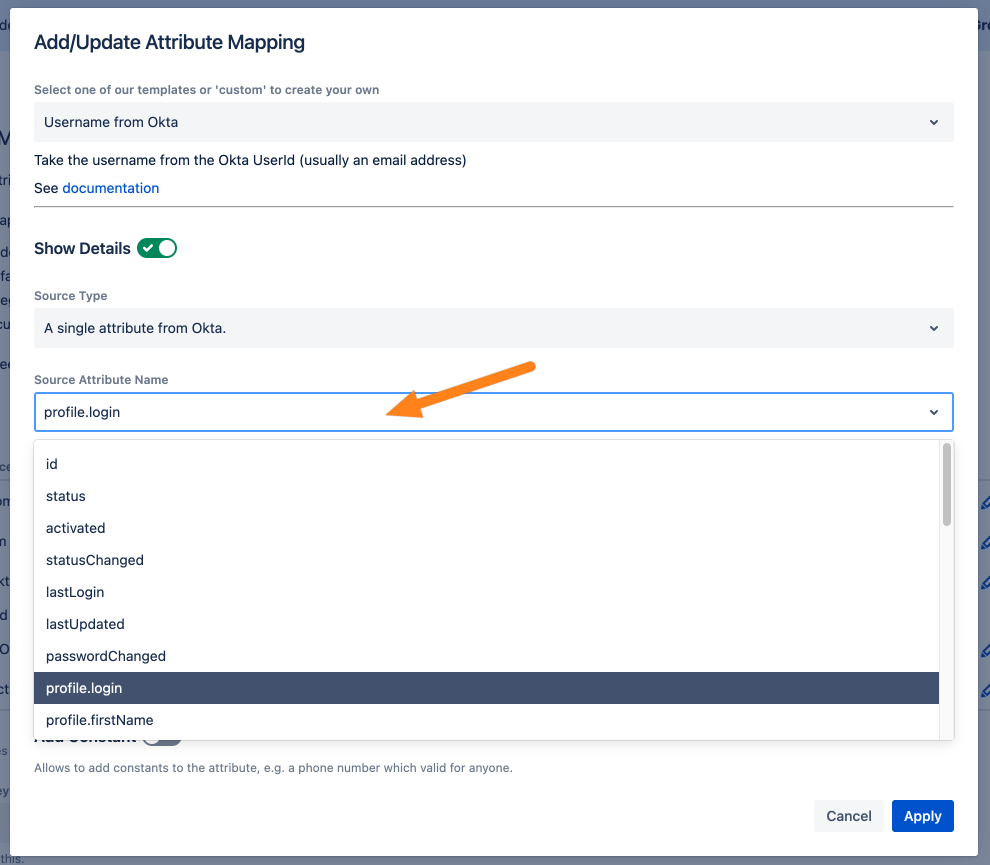
In the screenshot below, you can see the preset for the full name for an Okta configuration.
By default, we use the profile.login as sent by Okta. You can see how this works by clicking on Show Details.
Transformations
Let's examine the preset for the fullname mapping.
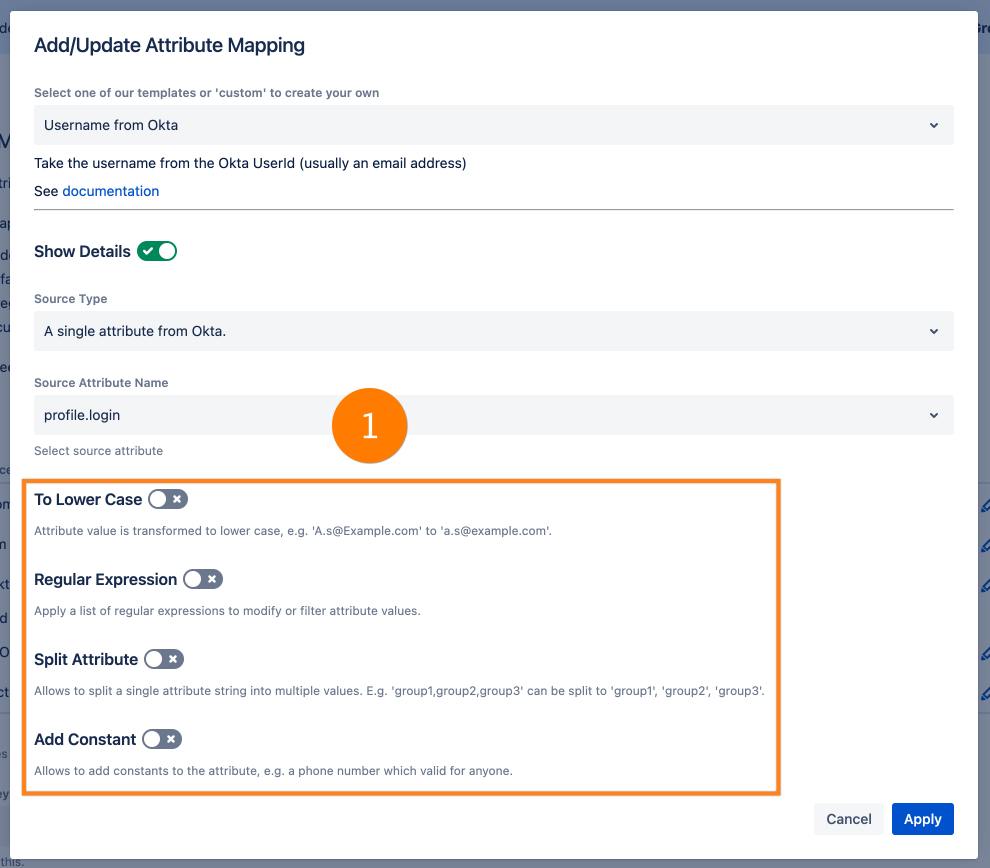
The fullname is taken from a single Okta attribute. The Source Attribute Name is the name of the API attribute. Down below, you can see our standard transformers:
If you need your attribute value in lower case, then use the To Lower Case transformer.
You can use Regular Expression to modify the input.
If the identity provider sends multiple attributes as a single string, you can use the Split Attribute transformer to fix this. E.g. if "A,B,C" is sent, you can define "," as the separator and the result is "A", "B" and "C".
You can also add constant values. E.g. if you map the phone attribute and there is a personal phone number for each user but also a general number which is the same for everyone, you can add this here.
Advanced options for mappings
As you have probably seen, "A single attribute from Okta." is not the only possibility you can use attributes:
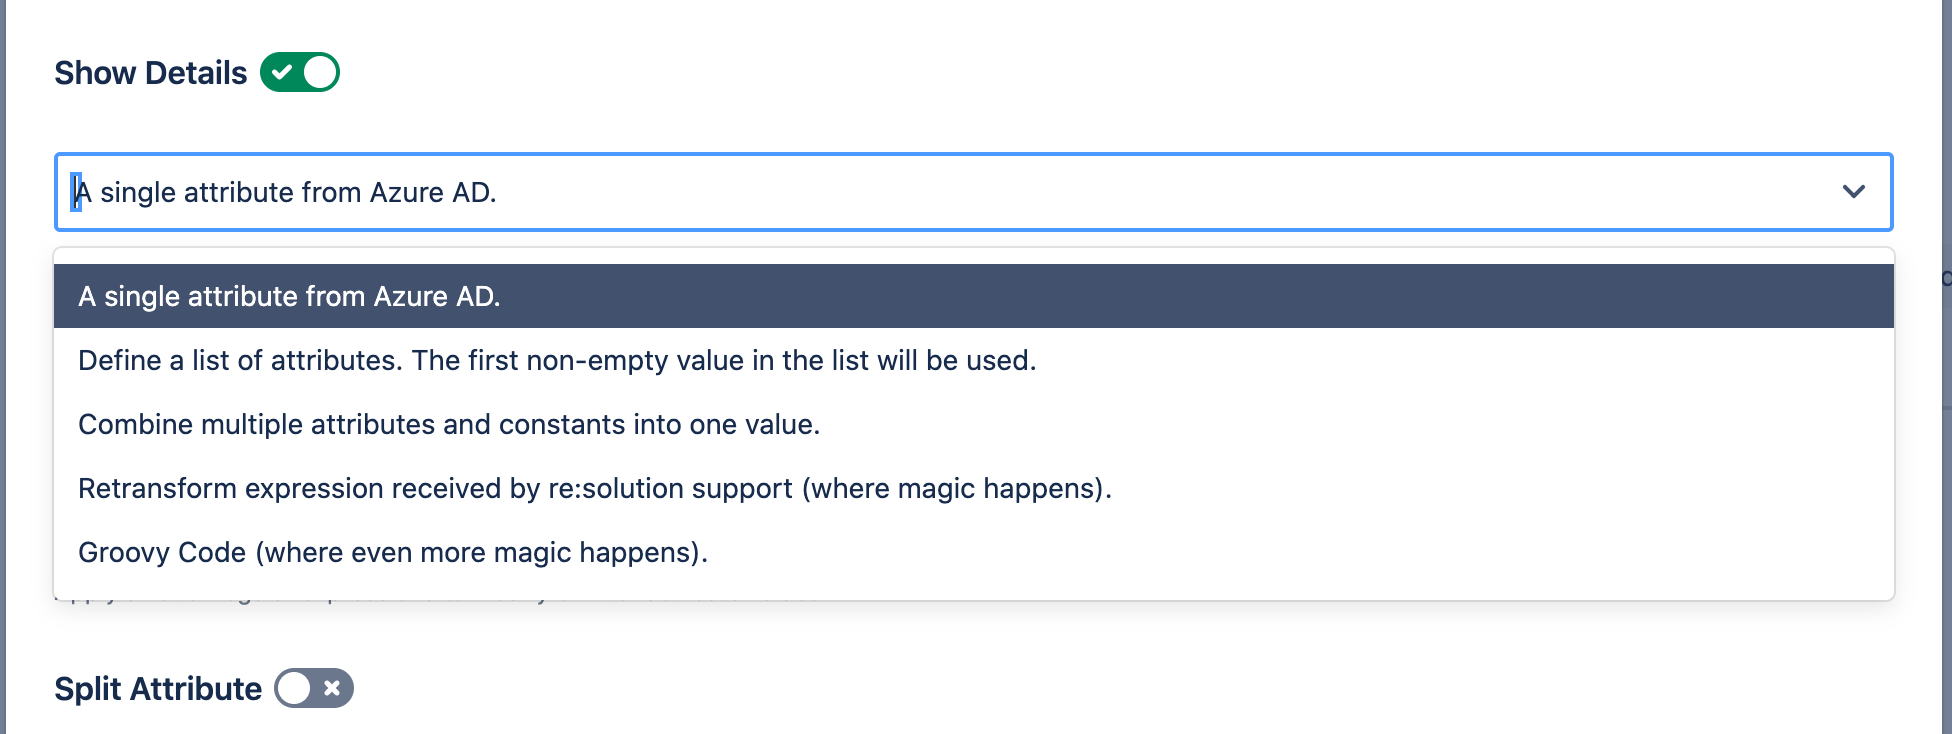
A single attribute from ... Use a single attribute from the API.
Define a list of attributes. The first non-empty value in the list will be used. E.g. for 9 of 10 users, the fullname is sent via attribute 1, but for 1 user, it is sent via attribute 2.
Combine multiple attributes and constants into one value. Allows you to combine the value of multiple attributes into one. E.g., if the first name and last name are sent with two attributes, this allows you to combine them.
Groovy Code. Allows writing custom transformations with the full power of Groovy-based scripting.
A single attribute From ...
You can select one of the available API attributes or enter a custom one that is not available in our list. You can also apply any transformation below.
Define a list of attributes. The first non-empty value in the list will be used
Define a primary and alternatives attributes. The first present value for a synced user is used. With Add Item you can add as many alternatives as you need.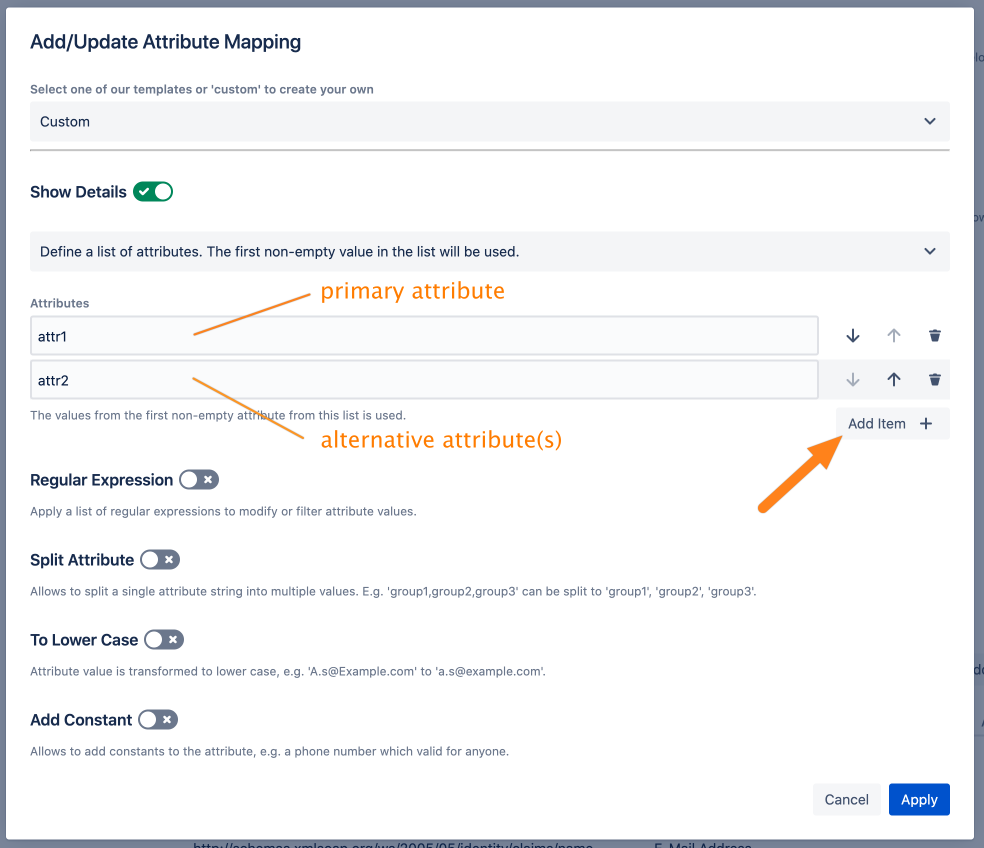
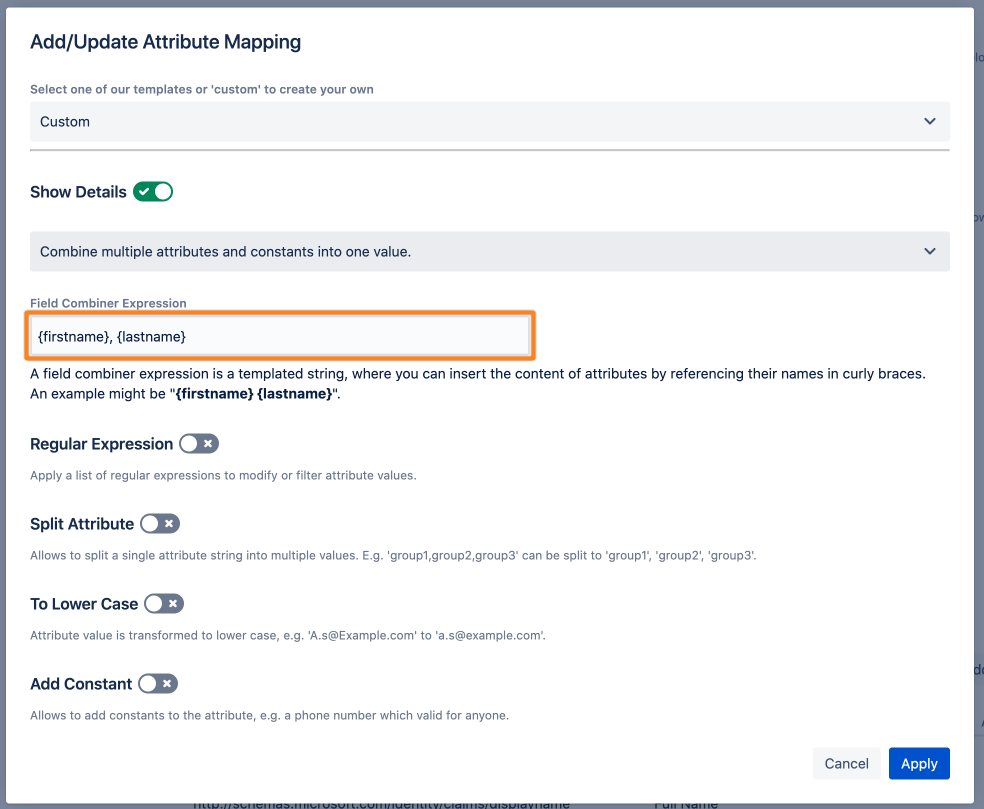
Combine multiple attributes and constants into one value
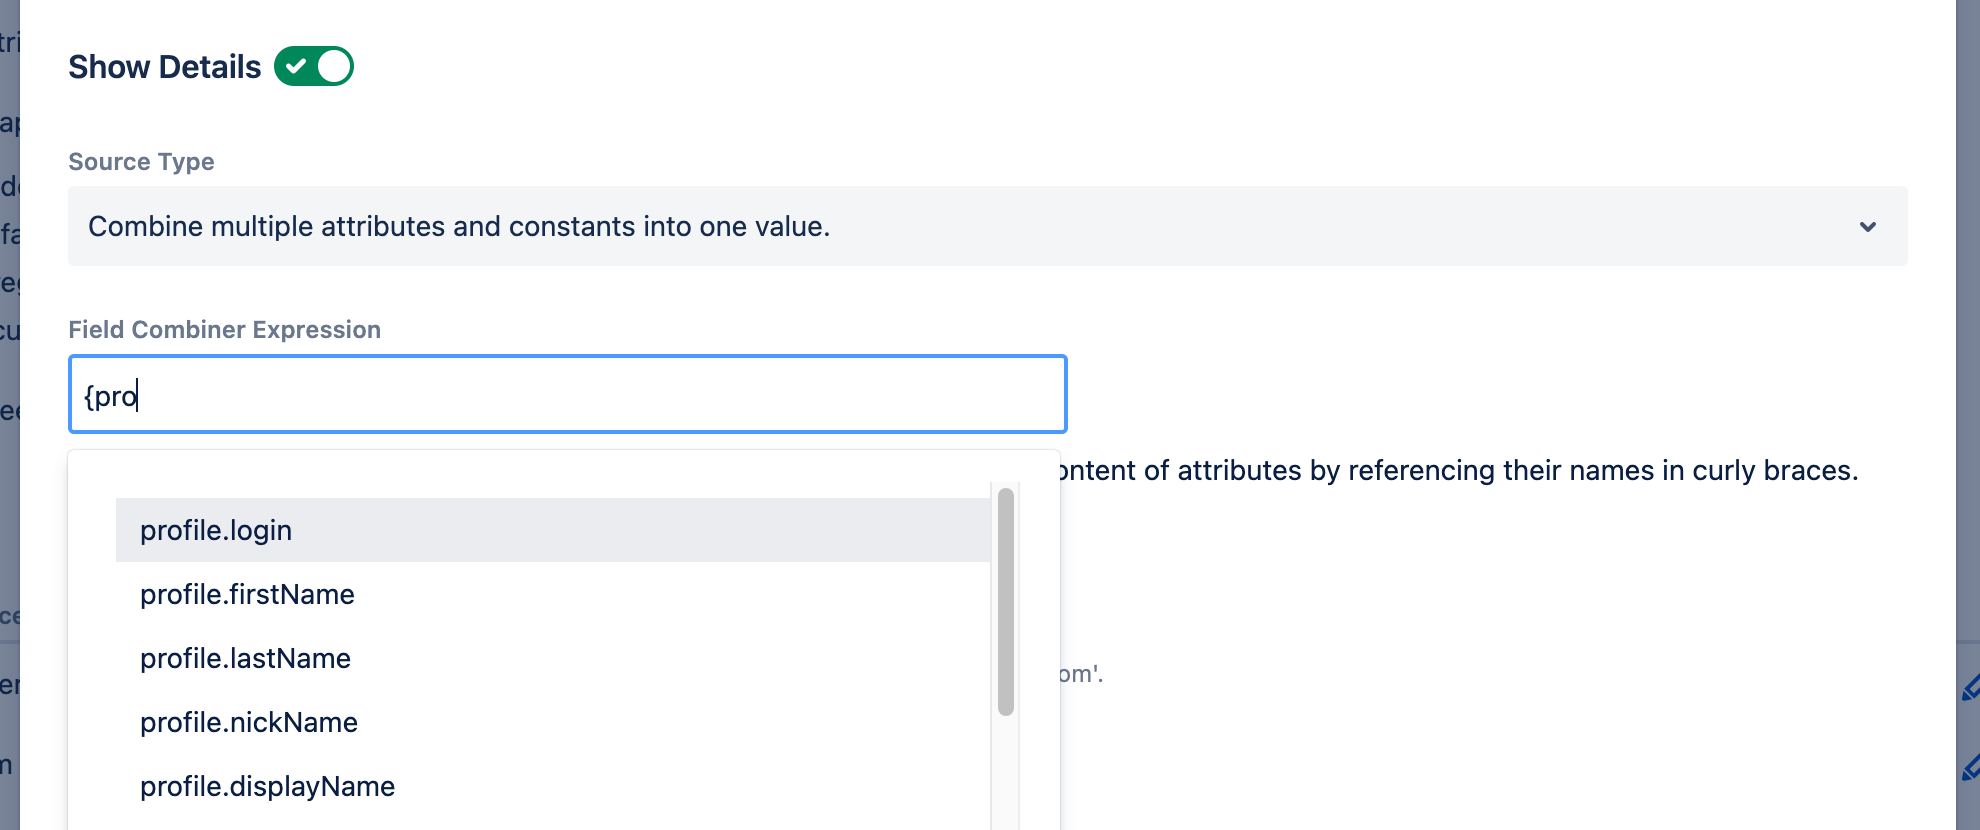
This allows to combine multiple attribute values (and constants) to a single value. Use {} to reference the API attribute.
When you enter a "{" and start typing, we try to autocomplete which attribute you want to enter:
In the example below, we use {profile.firstName} {profile.lastName}. This uses the first name and last name user profile attribute and combines them into a single one. You can also add static text. E.g.{profile.lastName}, {profile.firstName} would result in "Doe, John" with the "," being static text.
Groovy Code
You can also use Groovy code to use and combine any attributes sent by the identity provider. Please contact our support at https://www.resolution.de/go/support to explore your options with us.
As of now, we have no public documentation for this.