Jira Service Desk Organizations and Usersync
Goal
Creating organizations based on connector attributes and assigning the user to them.
You could also only assign users to organizations that already exist.
Limitations
organizations are currently created for all service desks in your Jira
a user with administrative permission needs to be added to the Users and roles section for each project
the role type is not important, only that the admin user is assigned one in the first place
if an admin is not assigned to a role on a project, creating organizations on the following projects will fail
so if one is already missing on service desk project 1, creating organizations will fail on project 2+
Please do not hesitate to contact us via https://www.resolution.de/go/support, if the below guide won't work for you.
Prepare a support zip already (https://confluence.atlassian.com/support/create-a-support-zip-790796819.html), so that we check the log files for errors.
Setup-Guide
Ensure an administrator user is assigned to the service desk project (Users and roles).
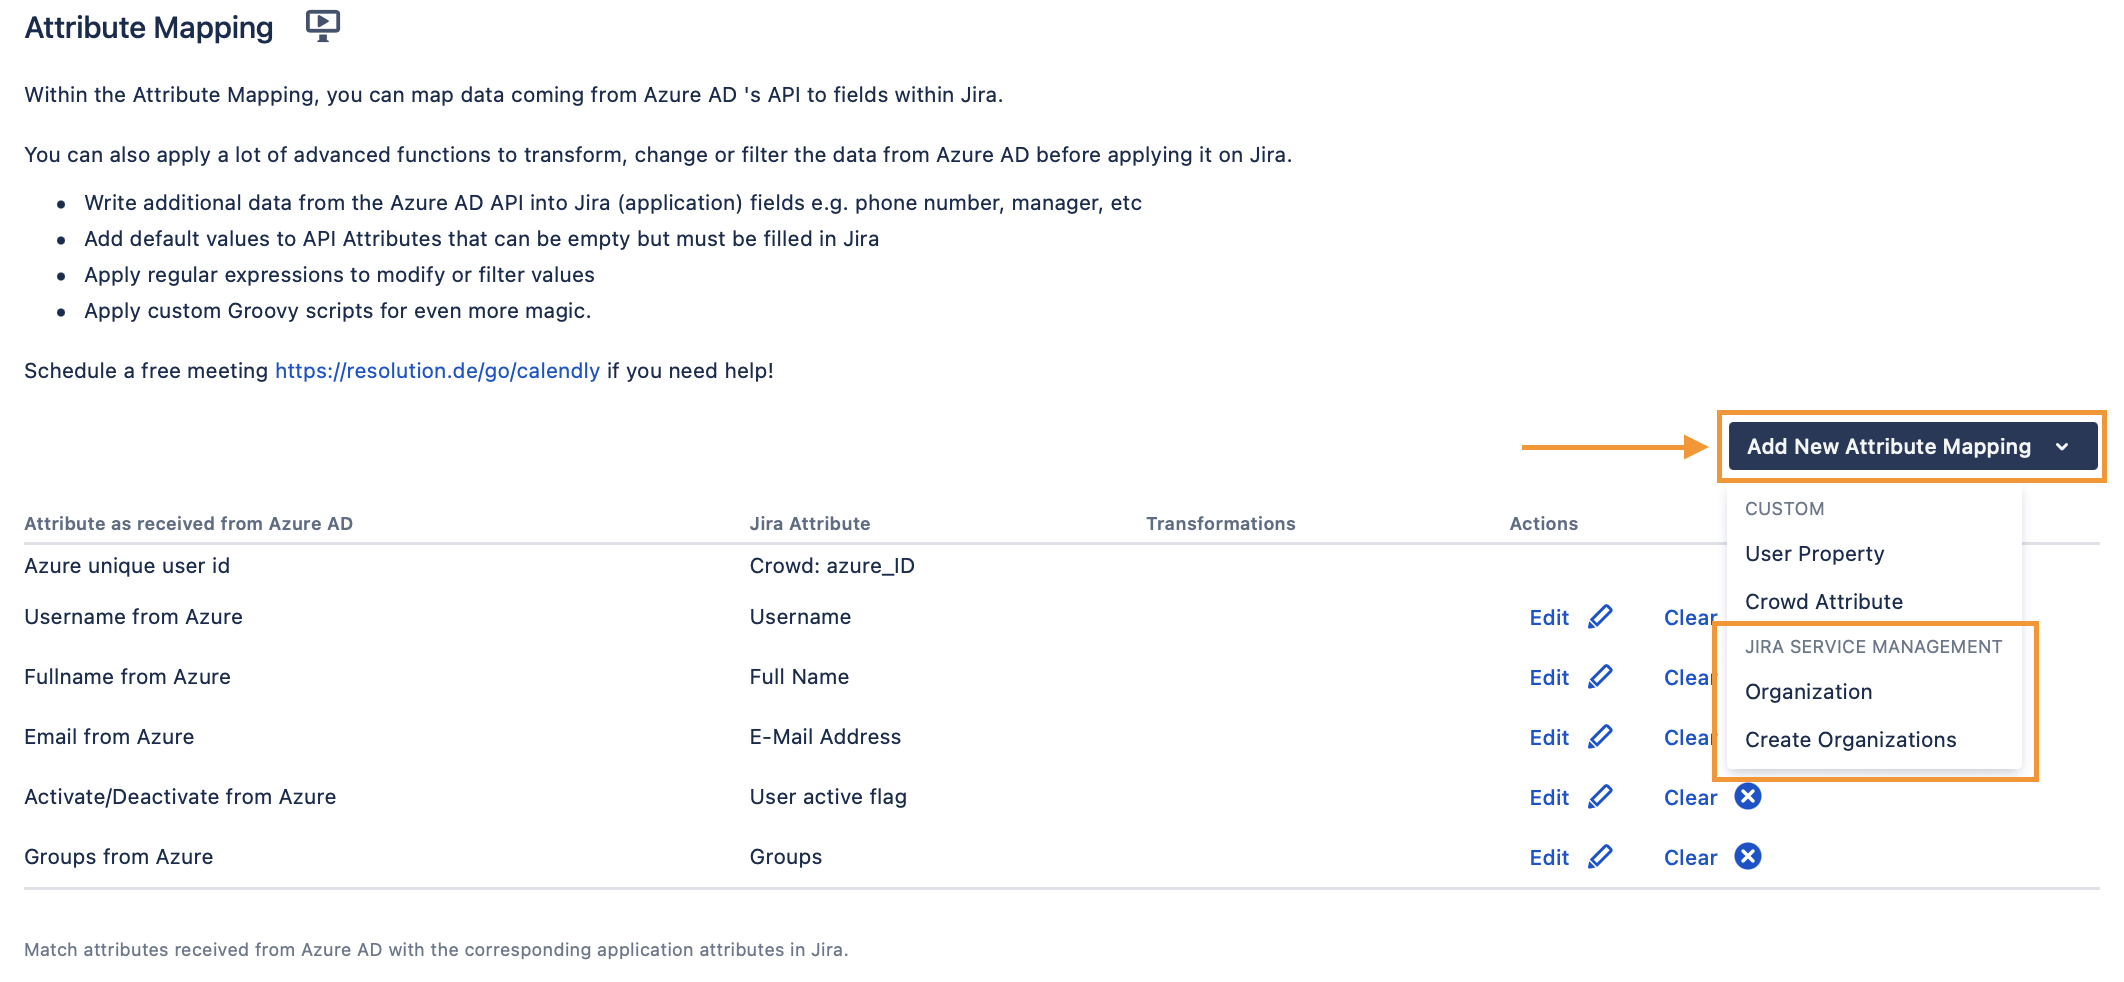
Edit your User Sync connector and switch to the Provisioning Settings tab. Scroll down to Attribute Mapping.
Click on the Add New Attribute Mapping button.

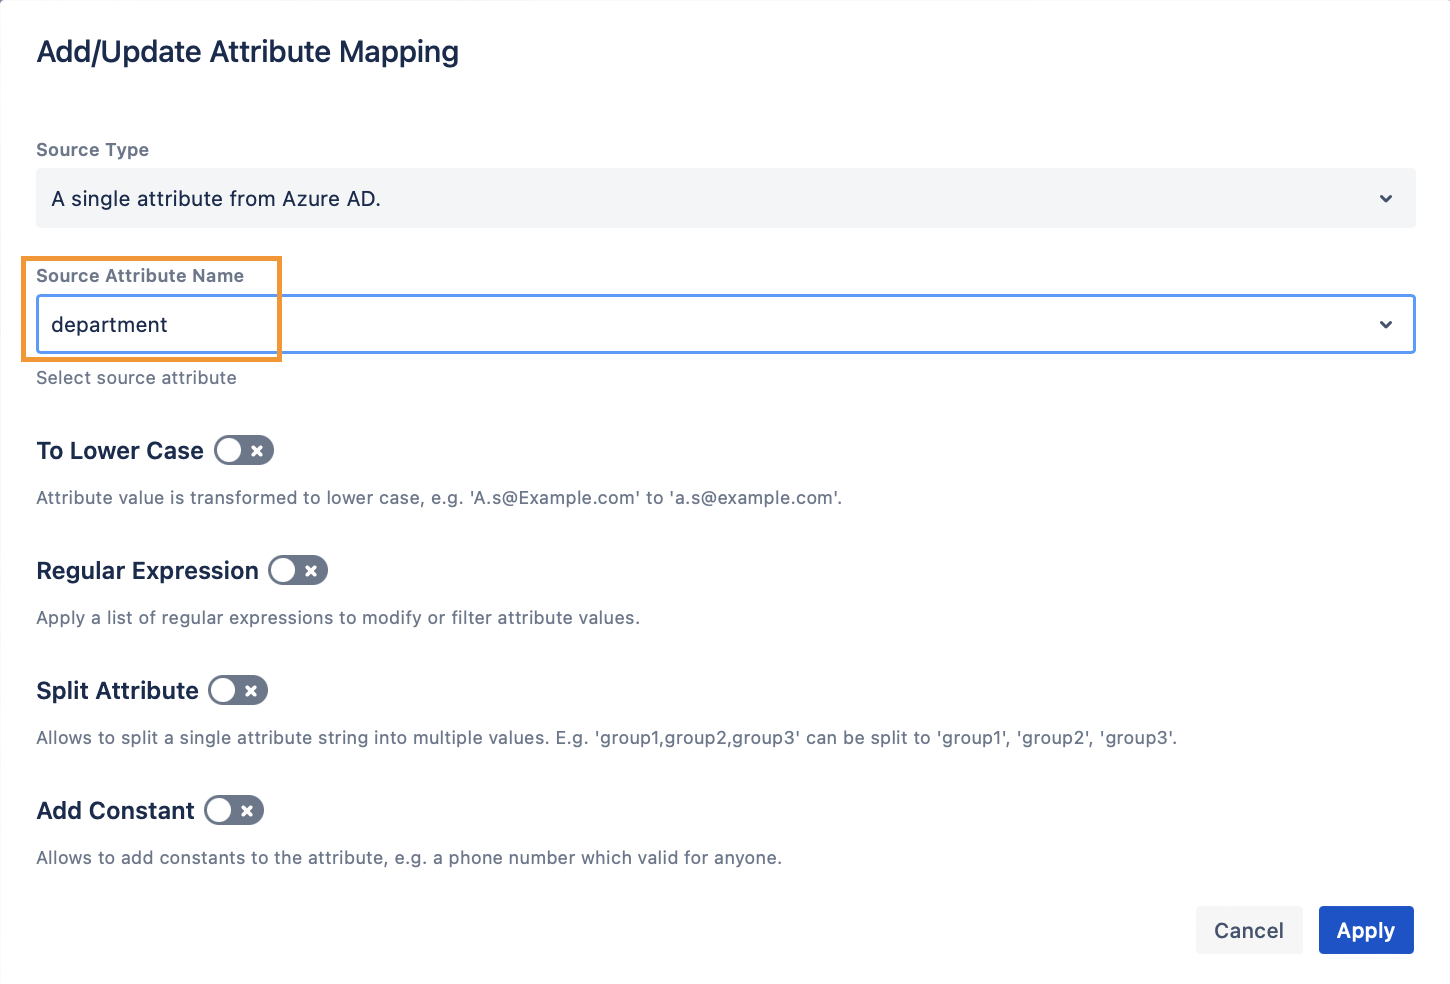
Choose "Organization", and choose the "Source Attribute Name" as what your IdP API returns ("department" in the example below).

Click on Apply.
Optional (only if you want to create organizations not existing yet):
Choose "Create Organizations" and "Yes" from the templates.

Click on Apply.
This is what the mapping would look like:

If you don't want to create organizations, don't create the second mapping.
