Keycloak configuration
Configuration in the Keycloak Web Console
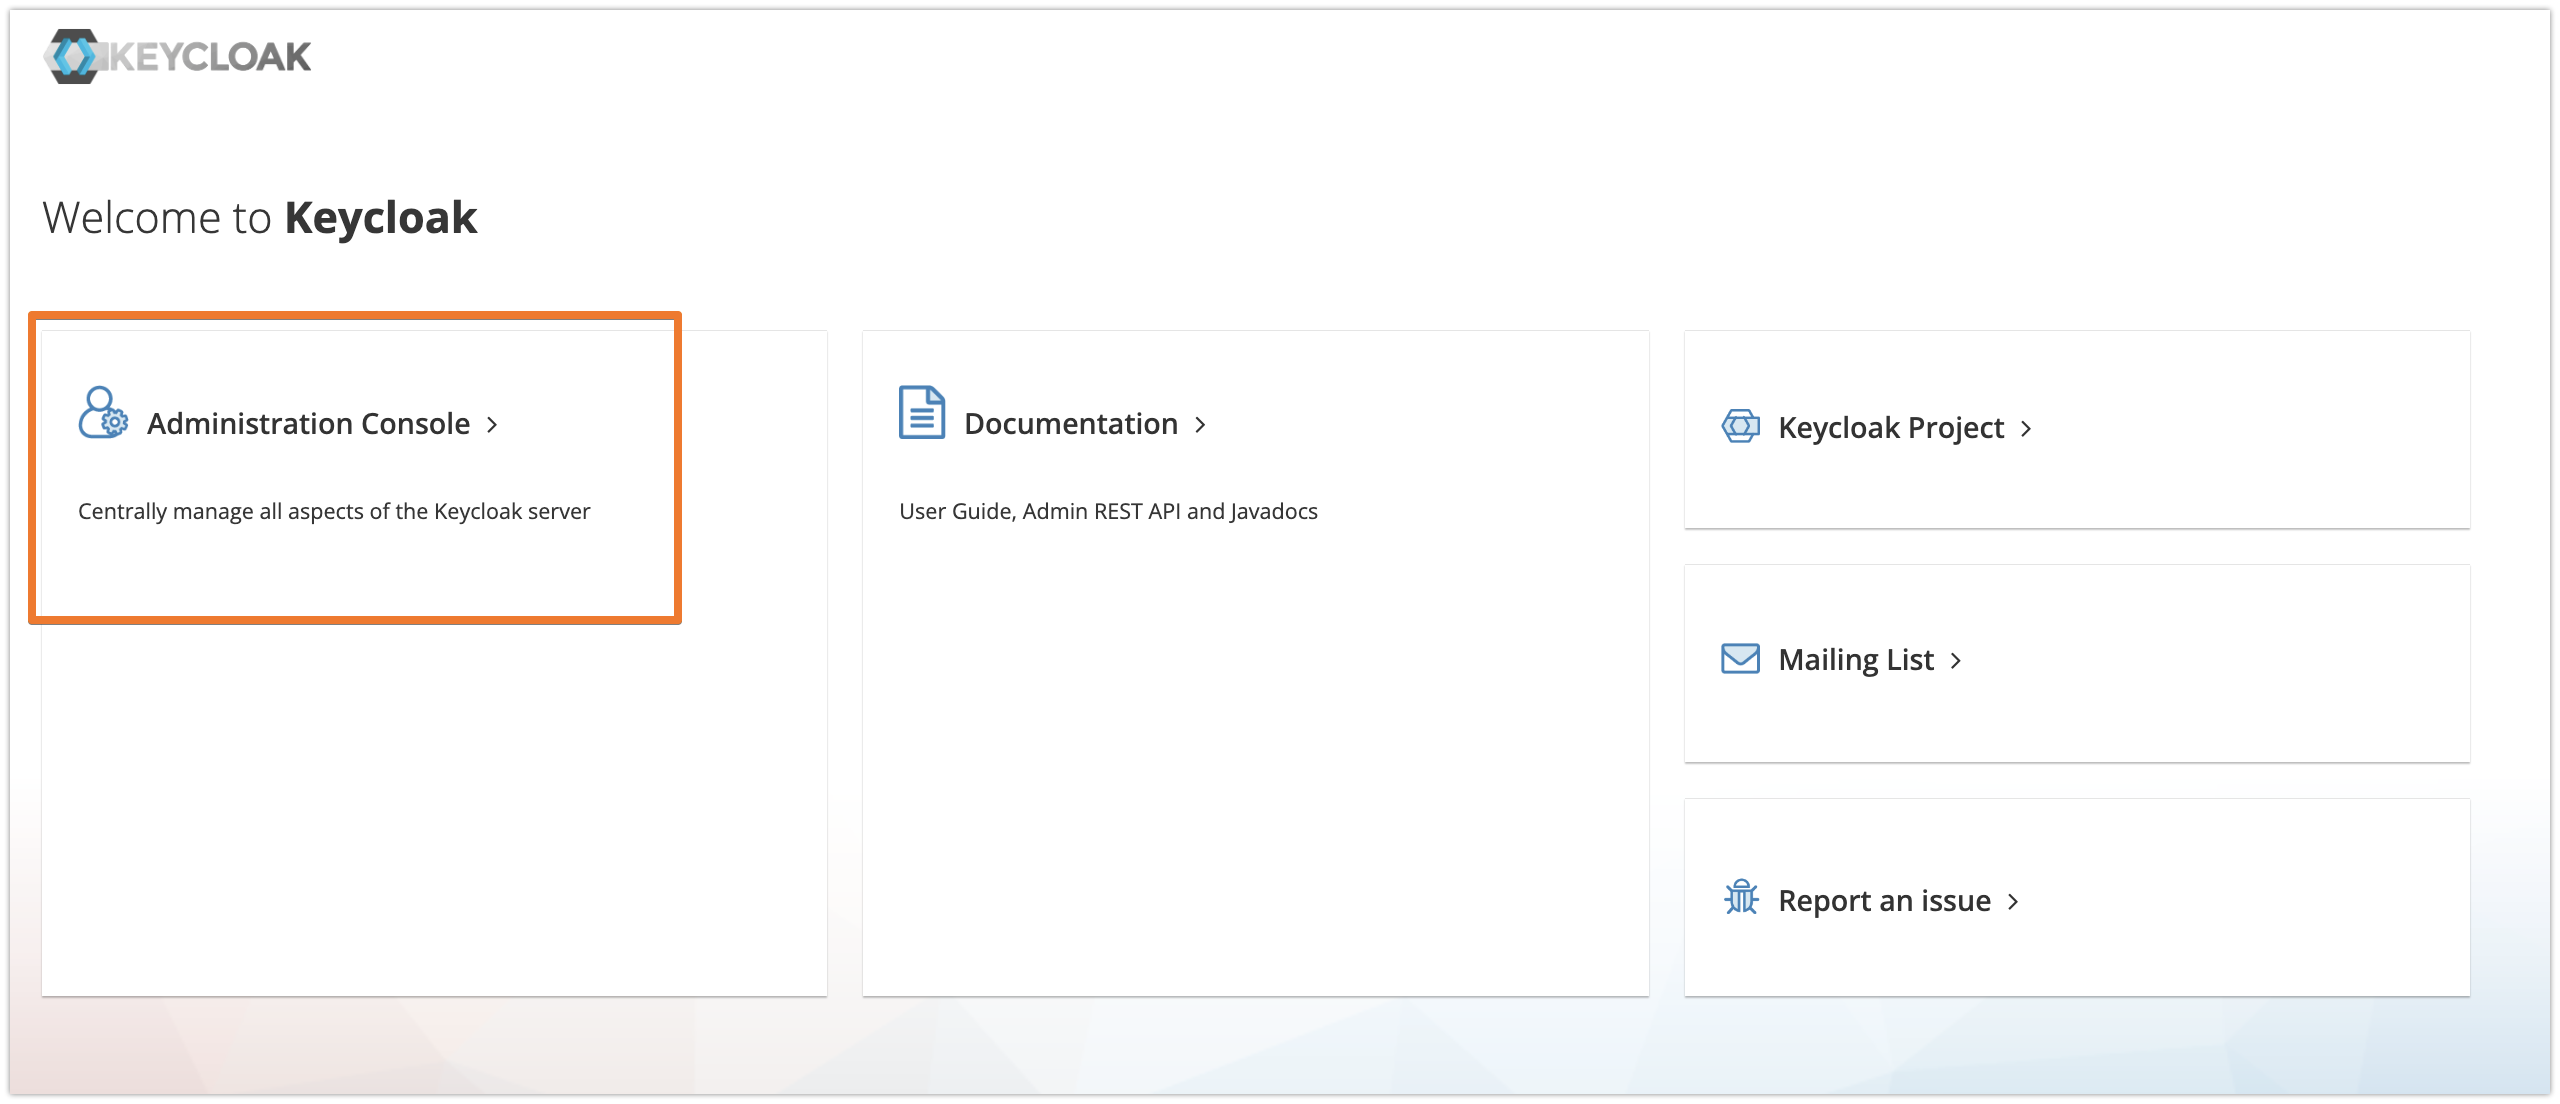
Login to your Keycloak instance with administrator privileges and enter the Administration Console.
Select the realm of the users who should be synchronized and click on Clients in the left-hand navigation bar.

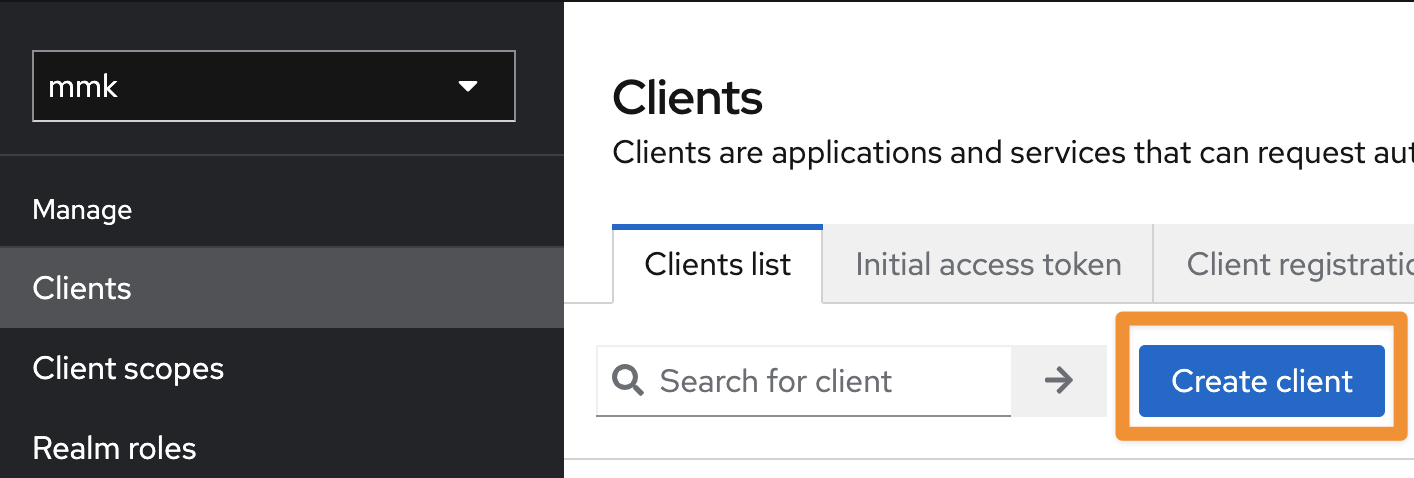
Click on the Create client button of the client view to register a new client for the User & Group Sync connector.
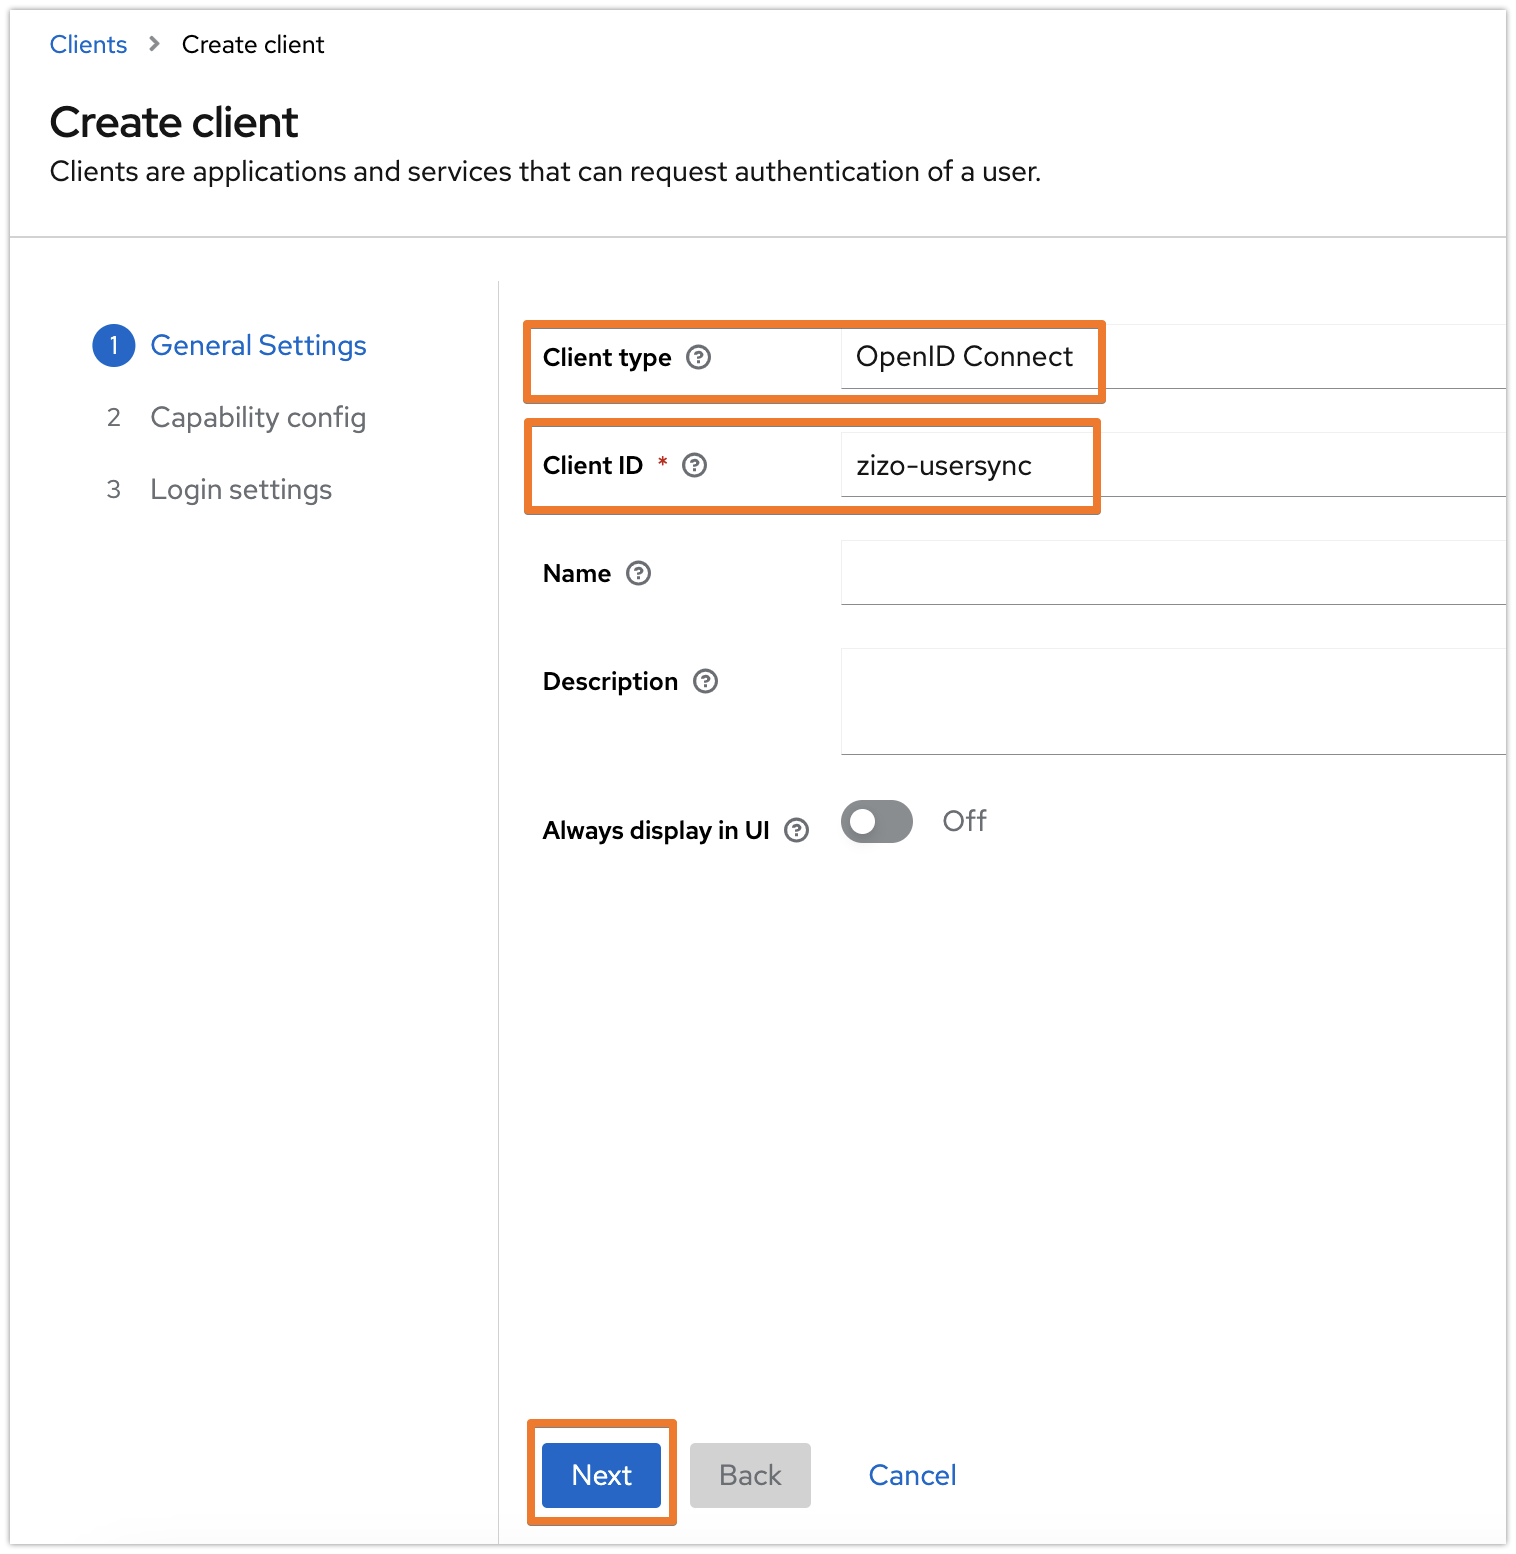
Provide a name for the Client ID and make sure that the Client type is OpenID Connect and click on Next.
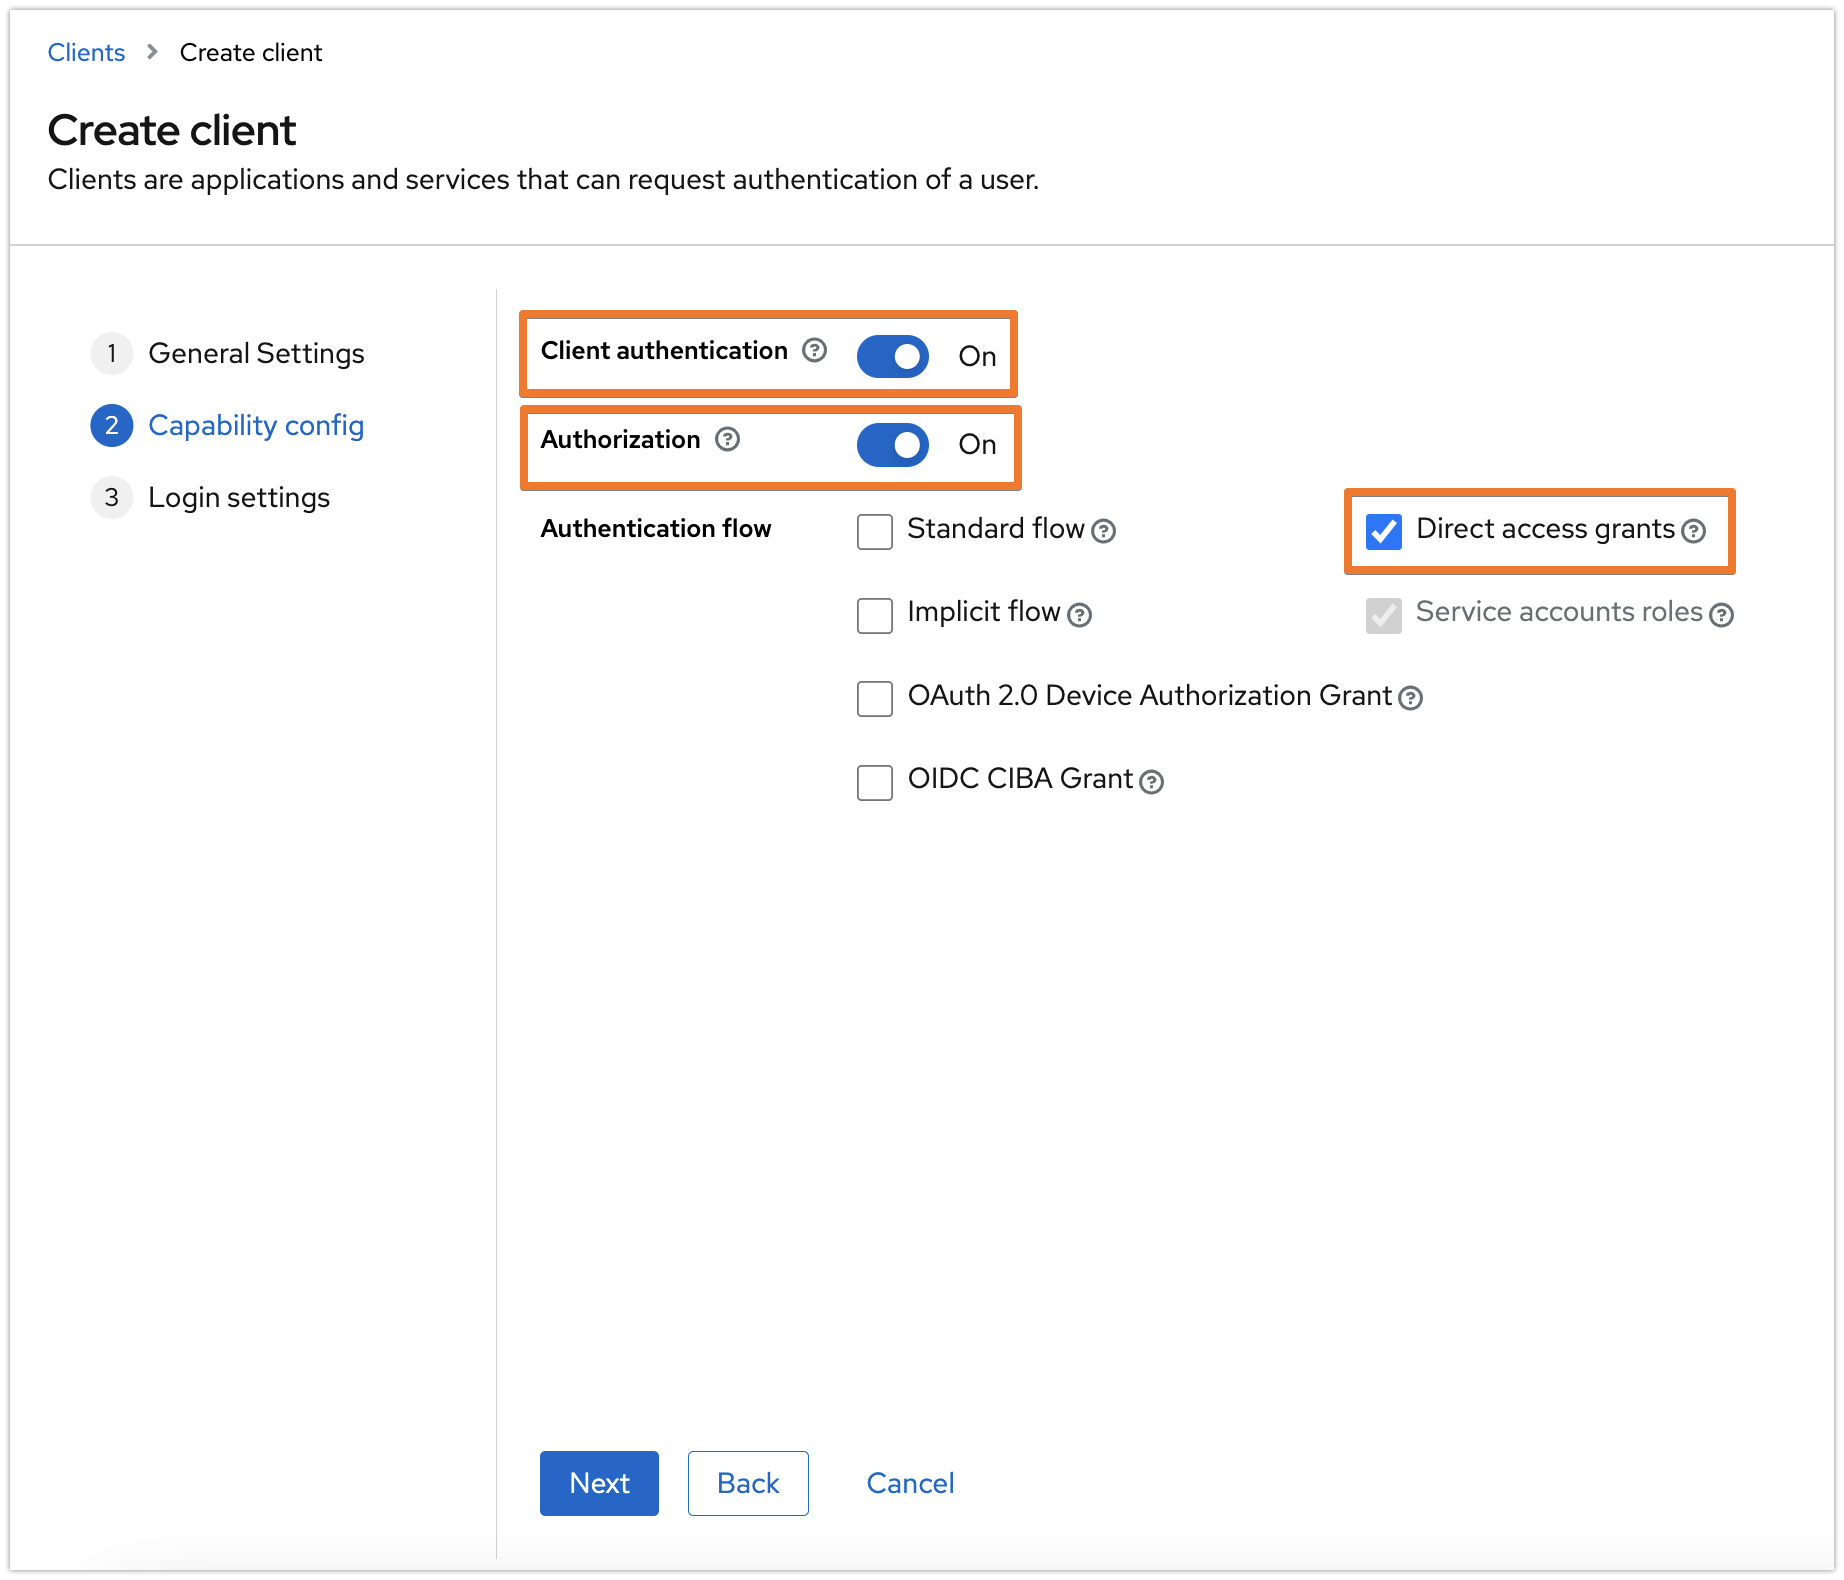
In the Capability config tab, enable both the Client authentication and Authorization options, and have the other options as the following screenshot, then click on Next:
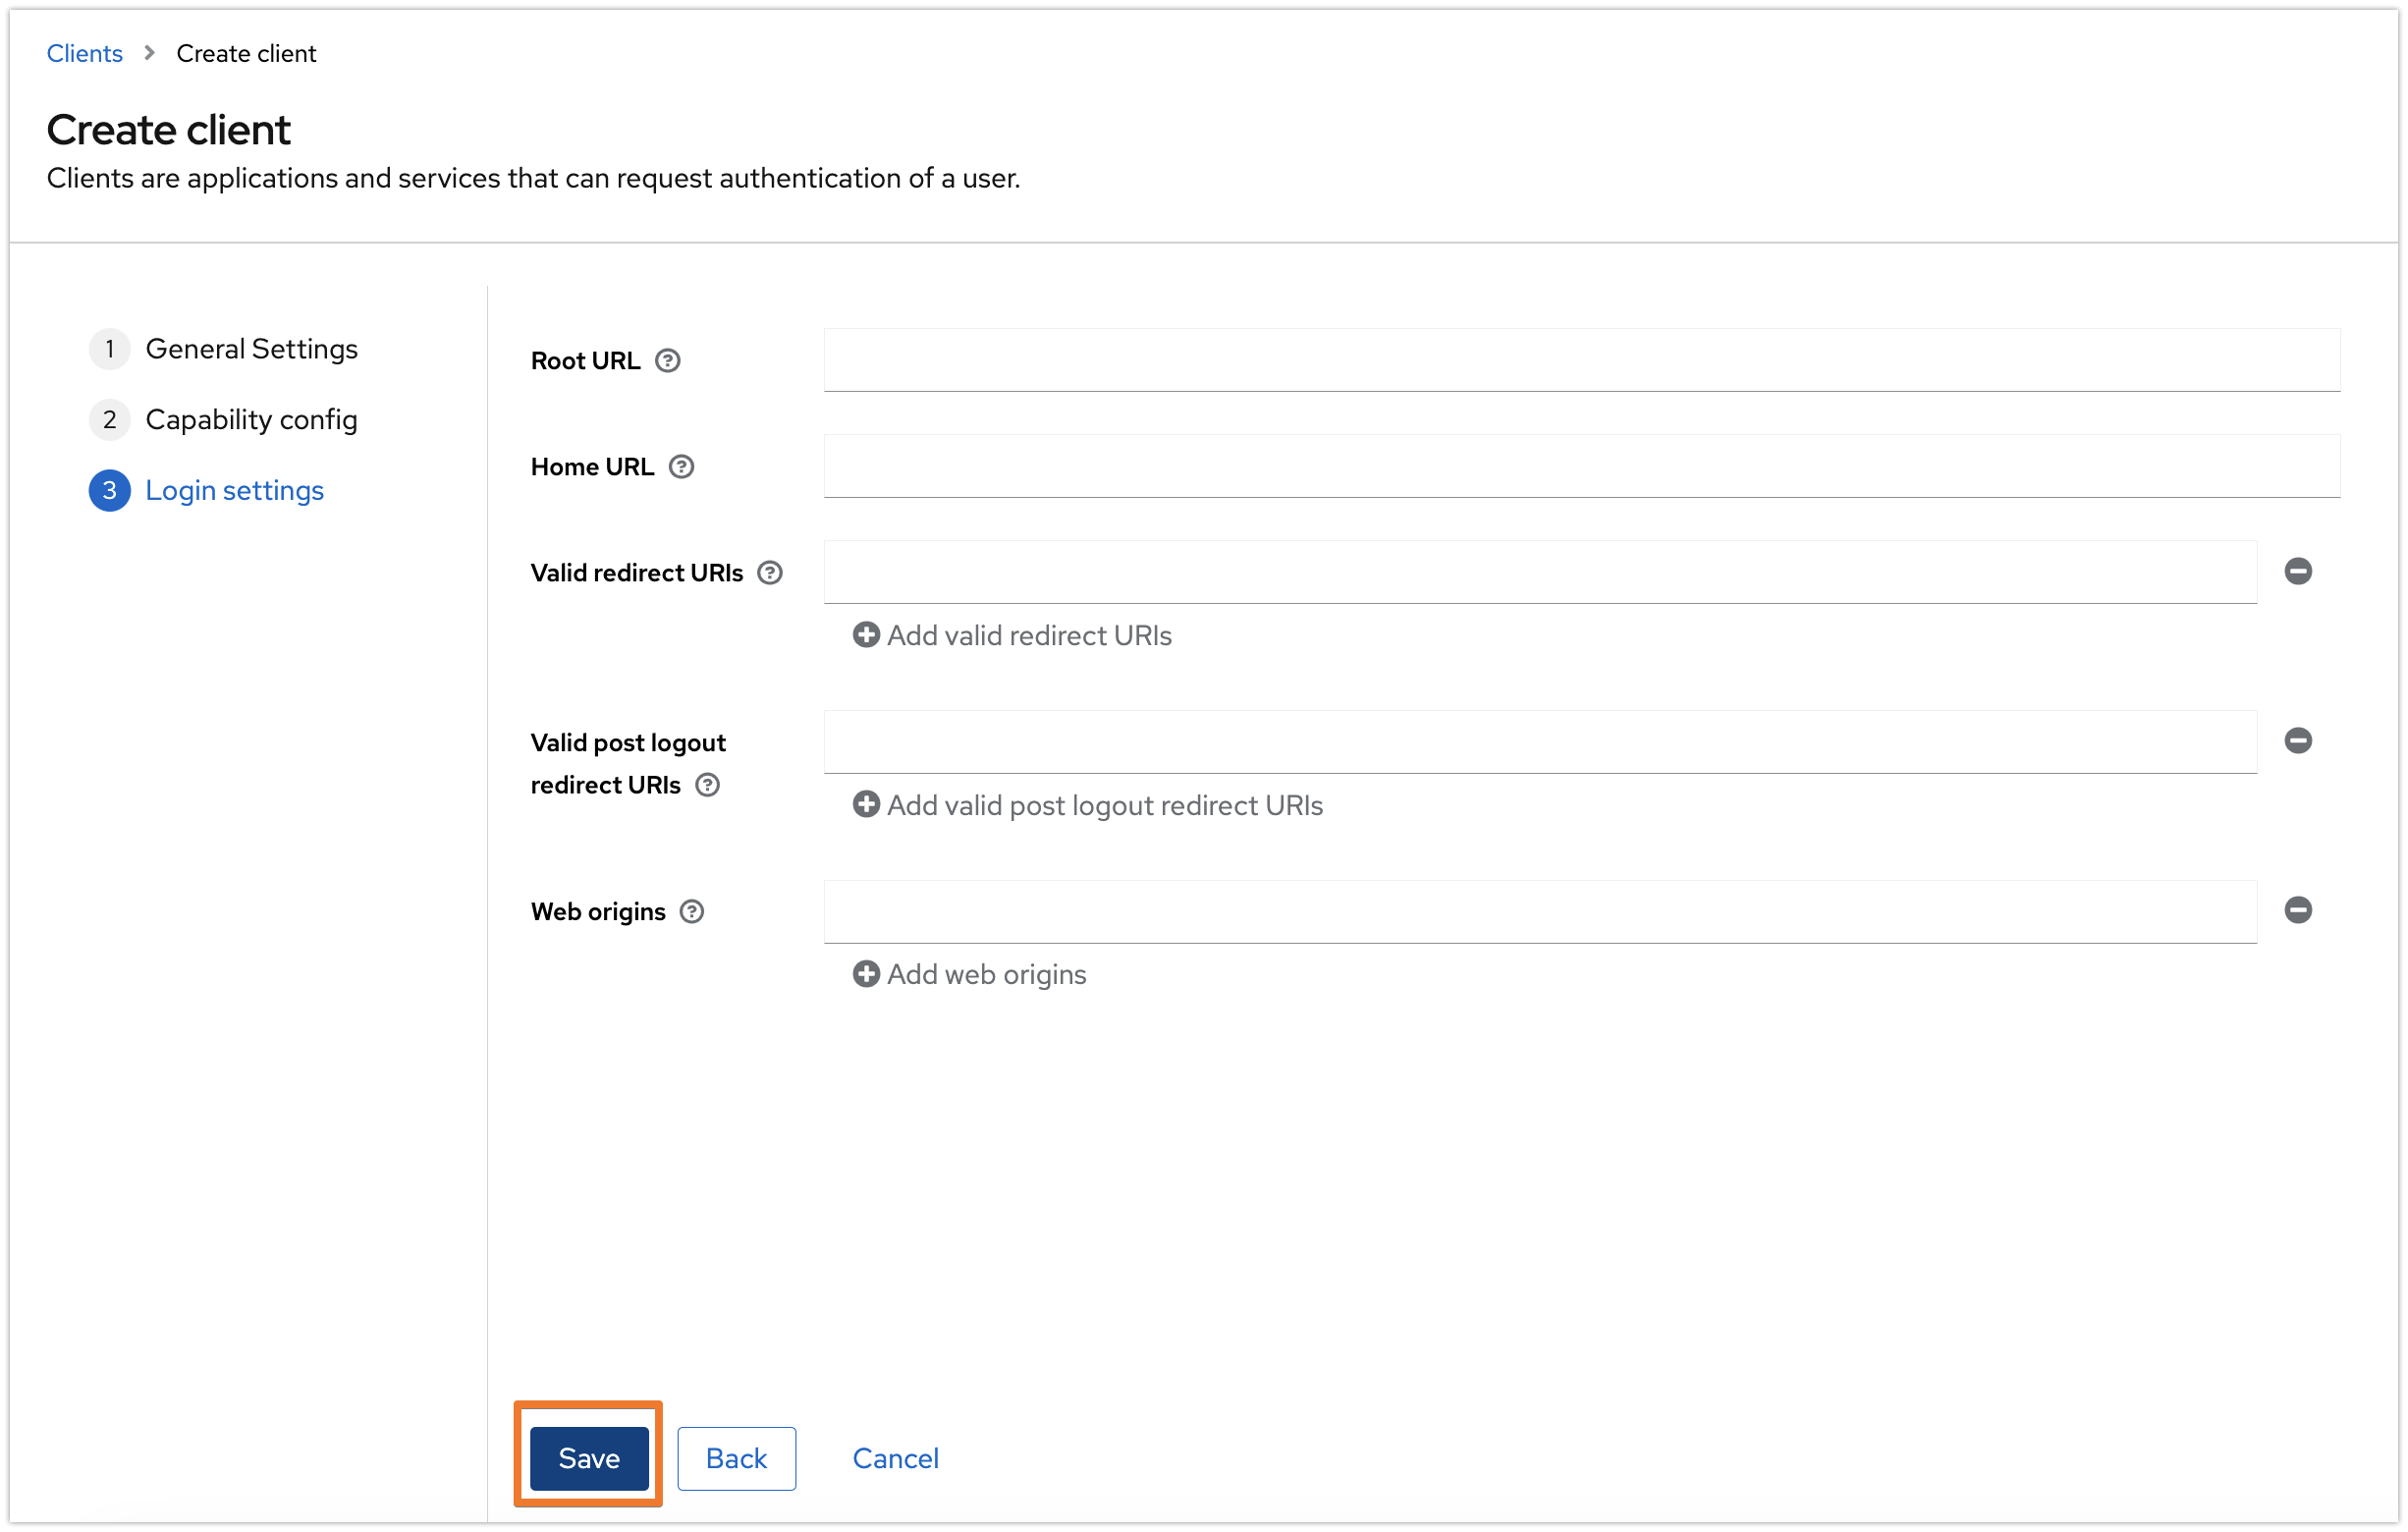
Keep the settings in the next tab as is, and click on Save.
The following assignment might not be required when registering a client in the master realm.
Switch to the Service account roles tab and click on the Assign role button.
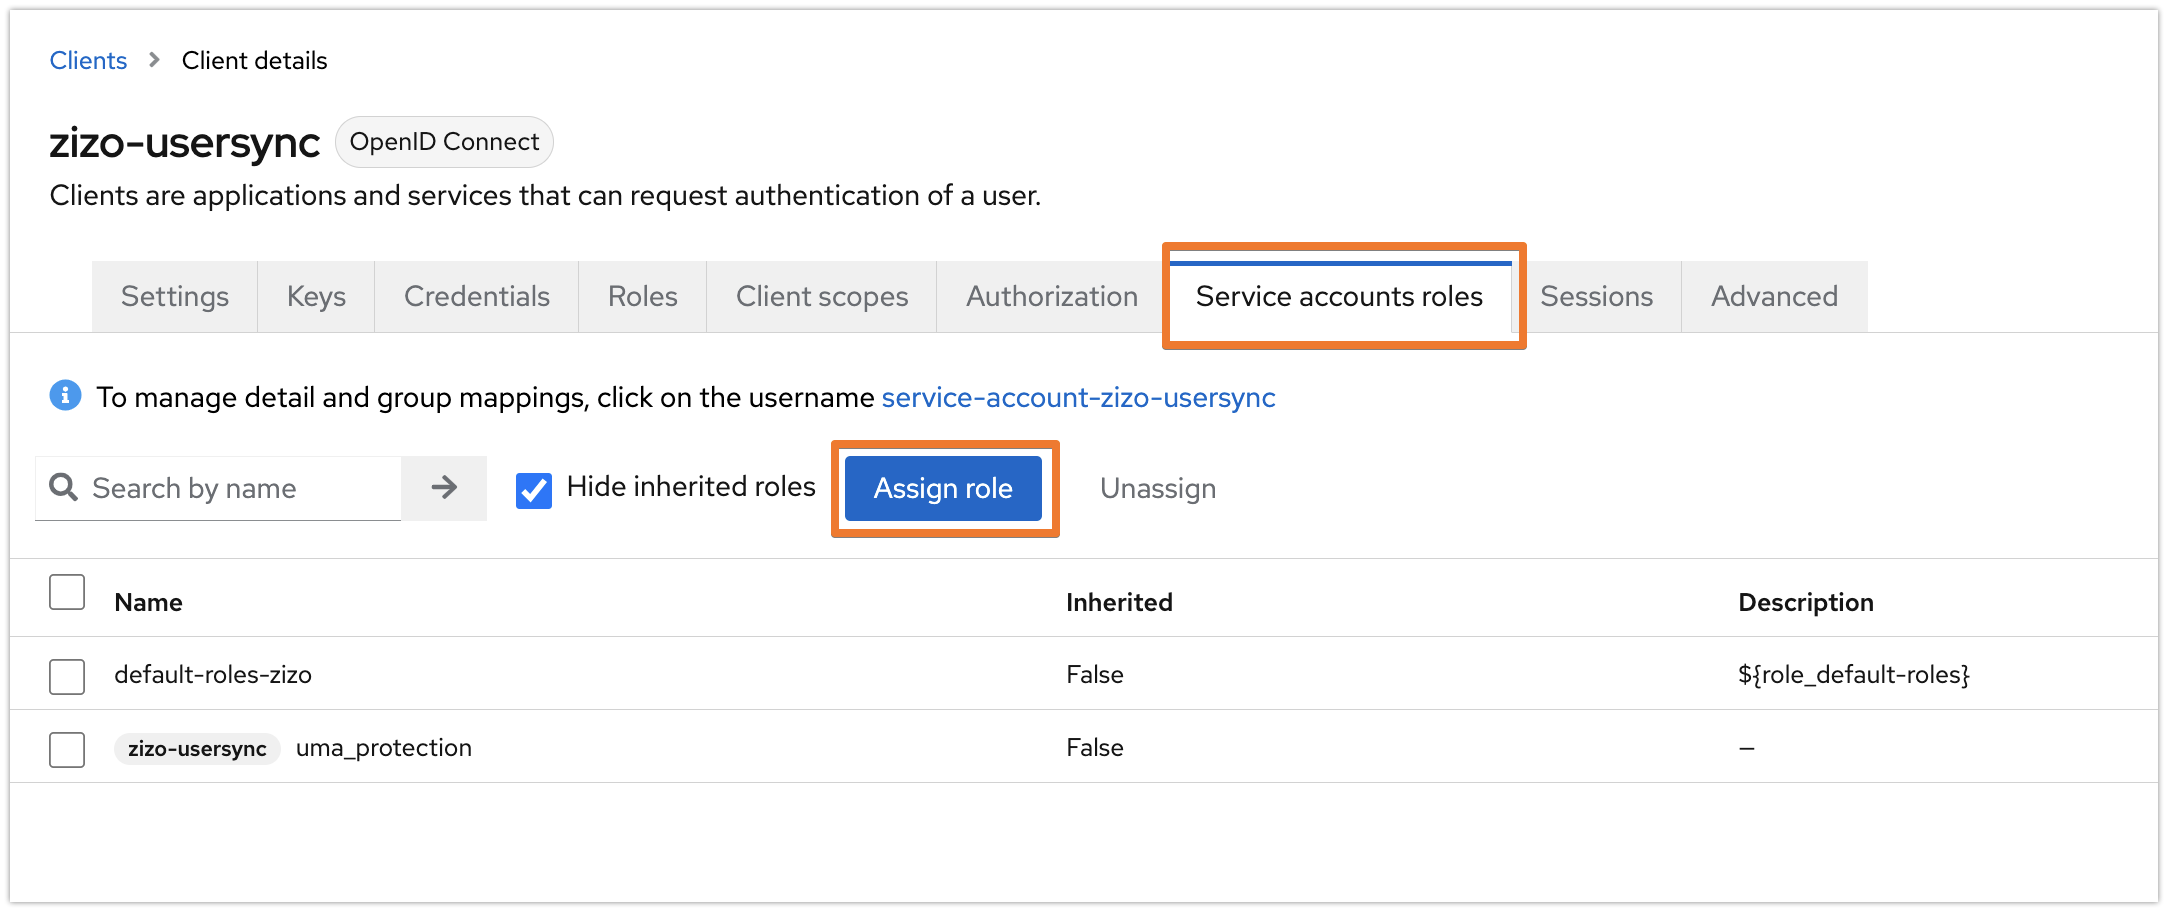
Select "Filter by clients" and search for "manage-users" then click enter. Choose "realm-management / manage-users" and click on Assign.
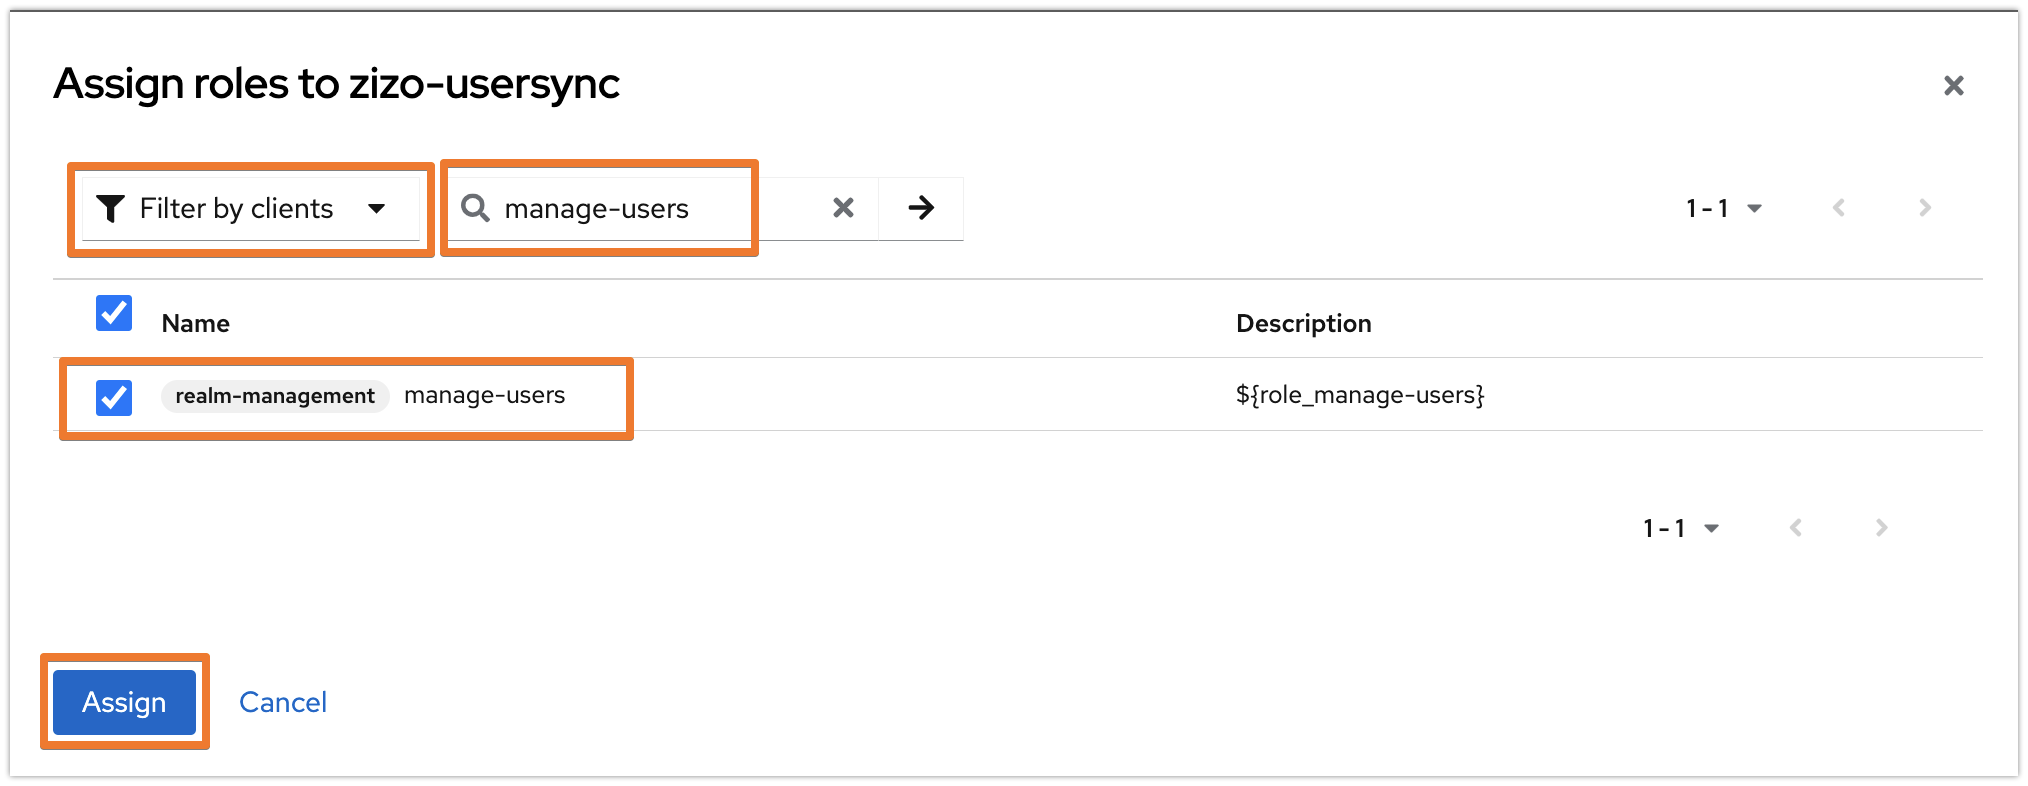
The settings should look like the below now:
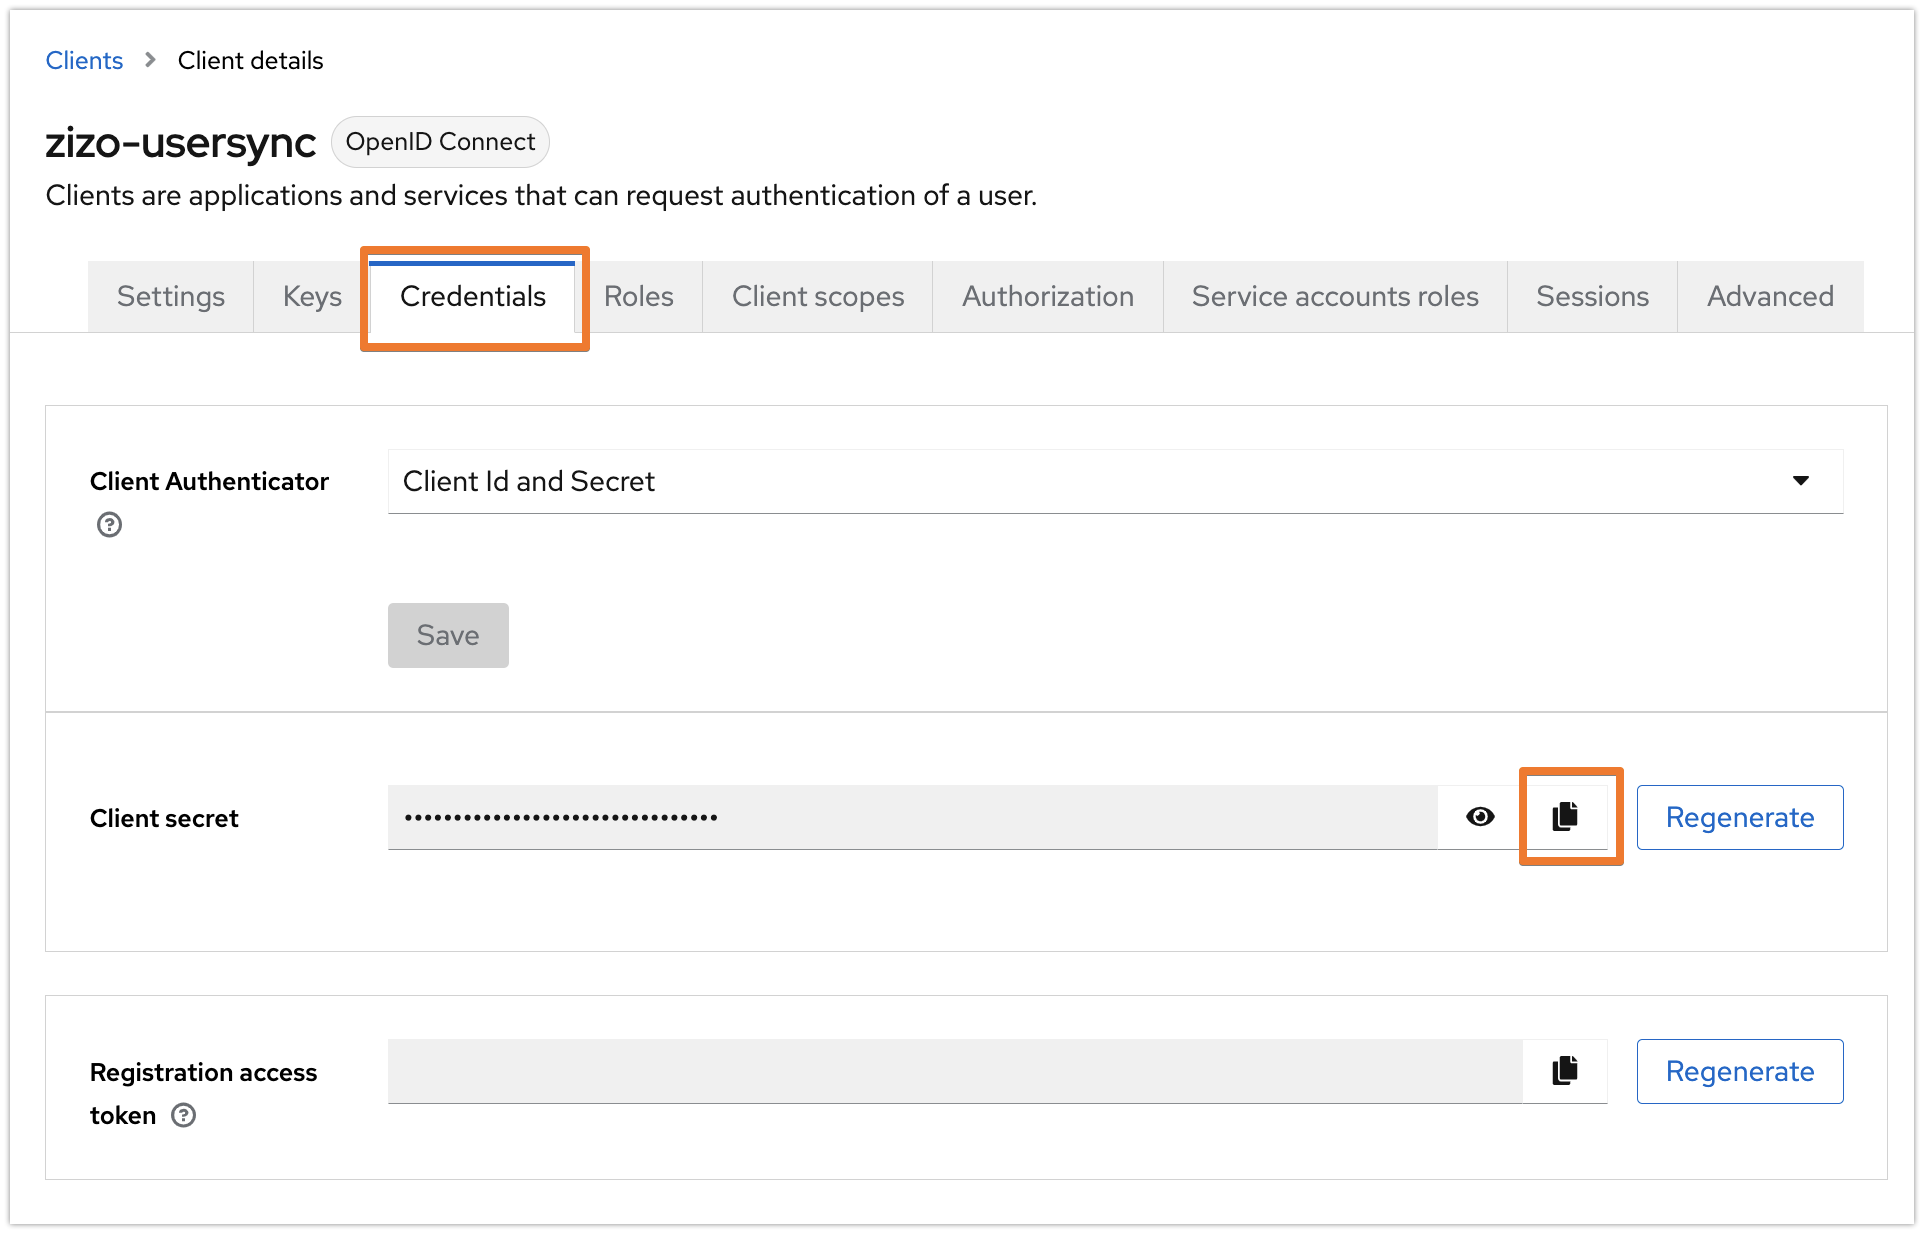
Go to the Credentials tab, and copy the Client secret. You may regenerate it at any time.
Configuration in User & Group Sync Configuration page
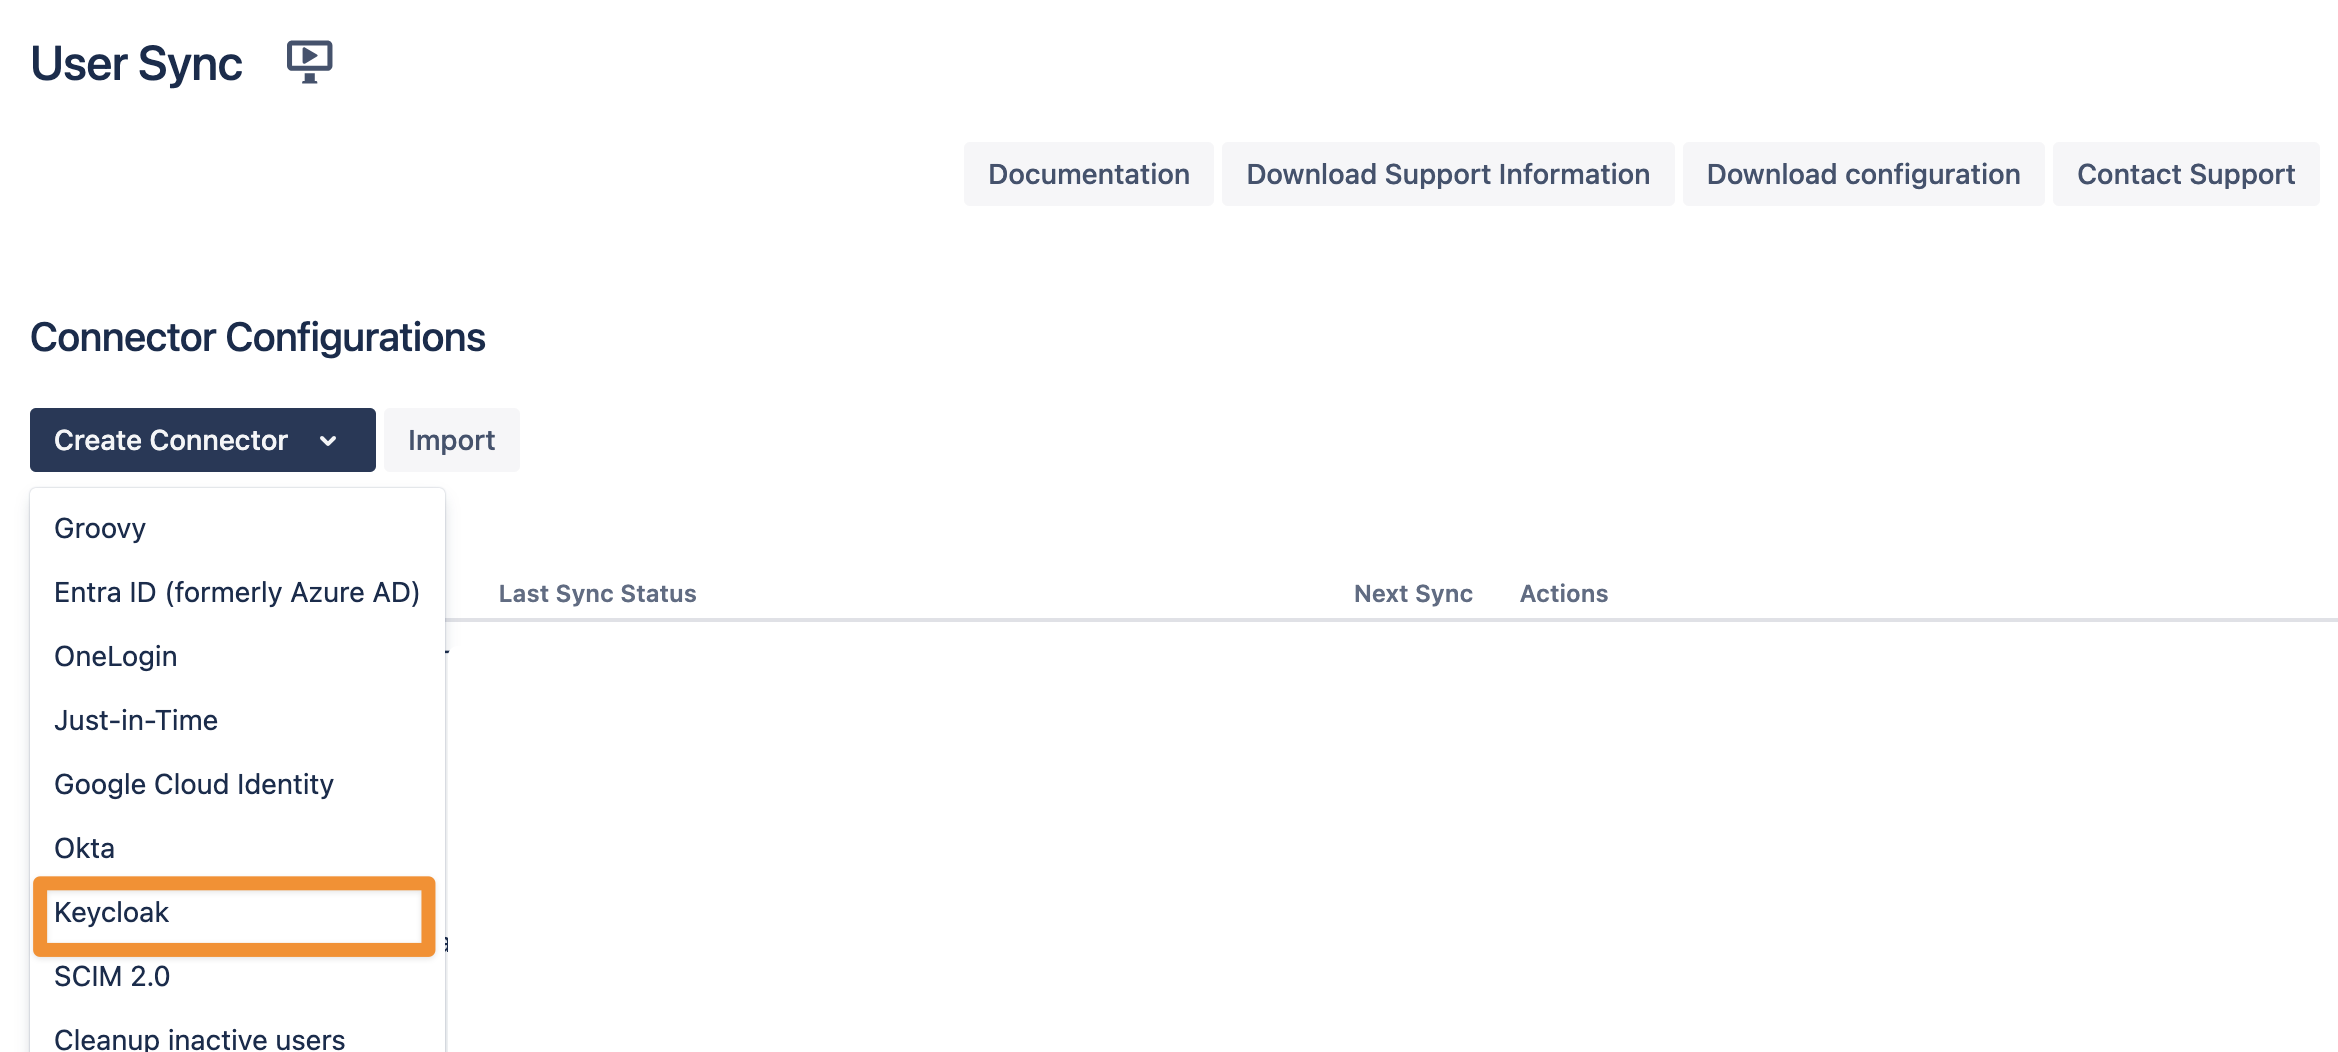
In your Atlassian application, go to User Sync, click Create Connector, and select Keycloak.
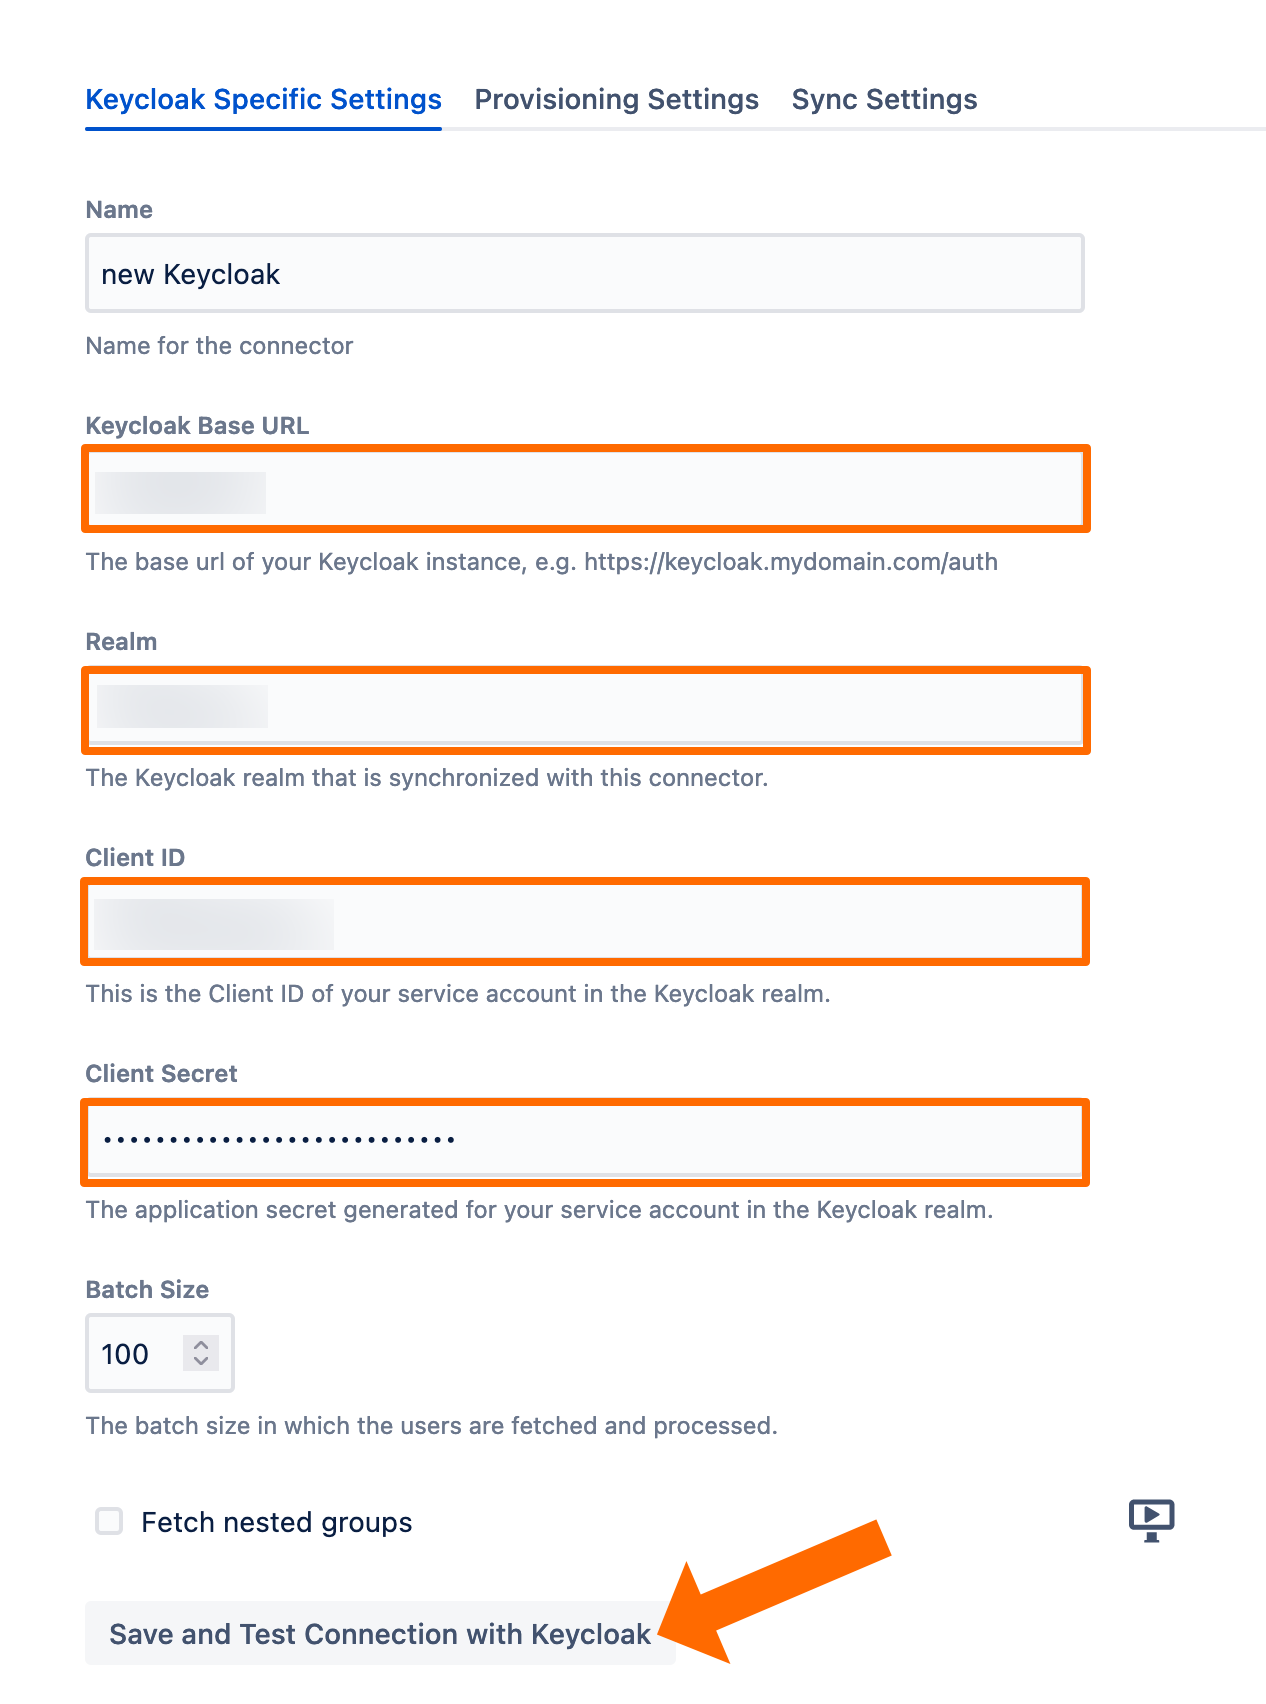
Set a name, insert your Keycloak URL appending /auth at the end, and provide
realm name
client-id
secret
as per your Keycloak setup earlier. Use the Save and Test Connection button to check if User Sync can connect to Keycloak successfully.
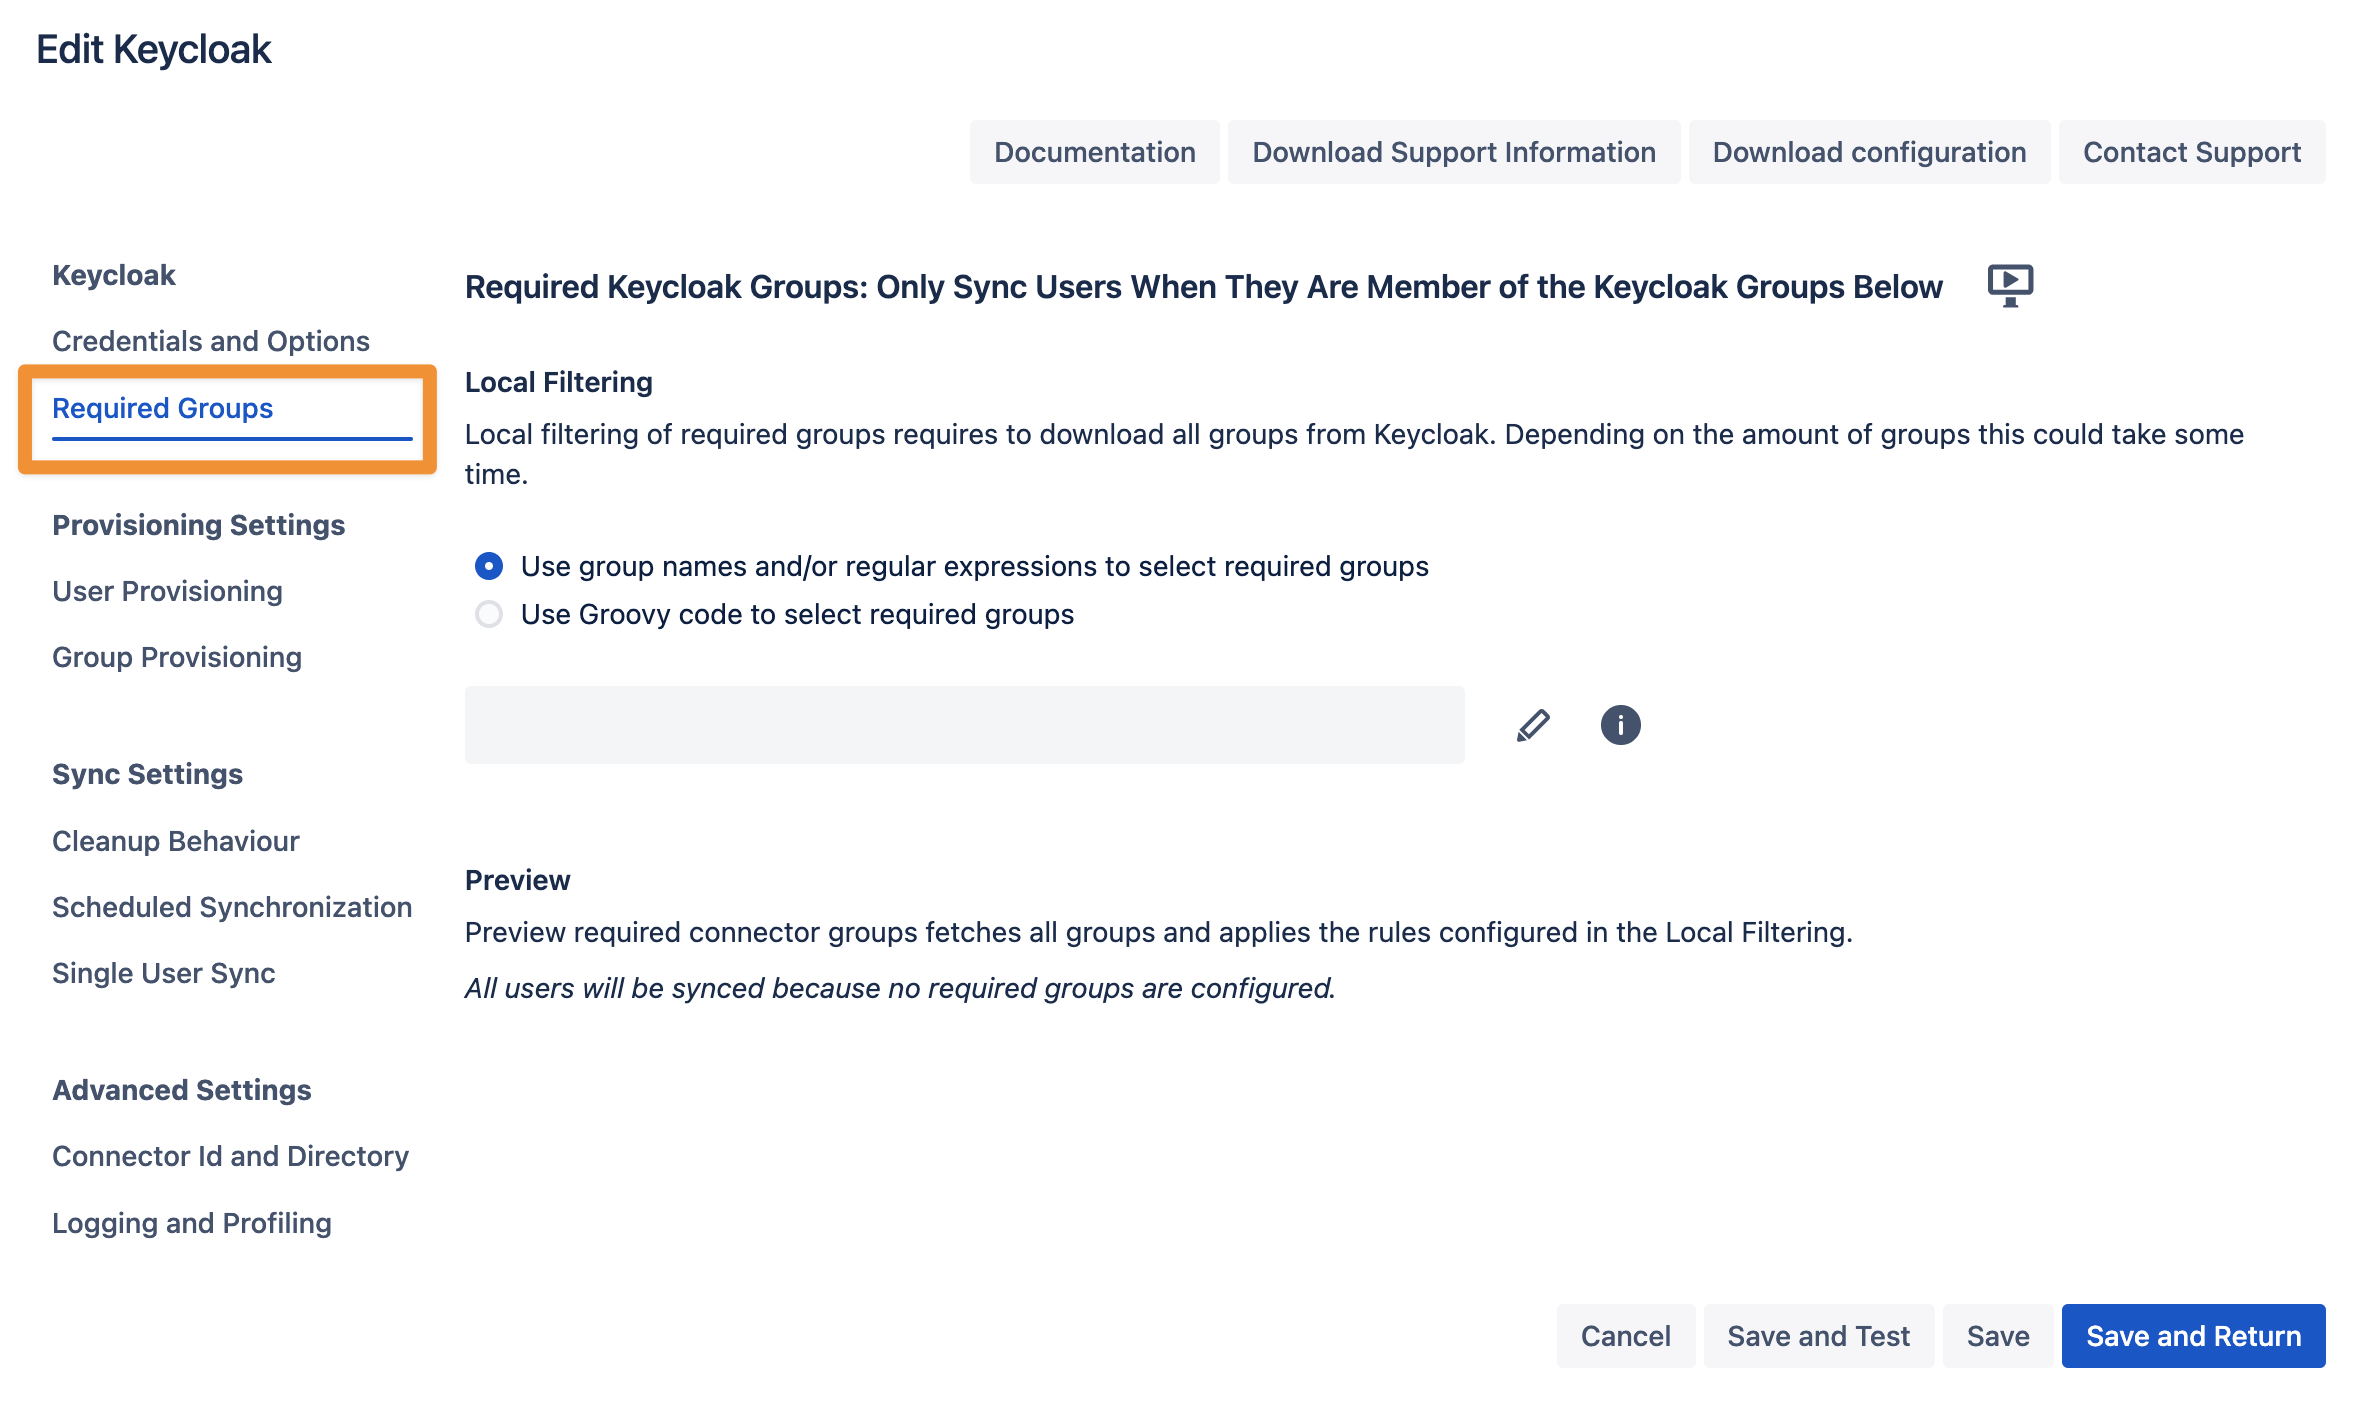
If you want to limit the number of users you sync from Keycloak you can set this up in the Required Groups tab. If you want to sync all users from your realm, you can skip this configuration step.
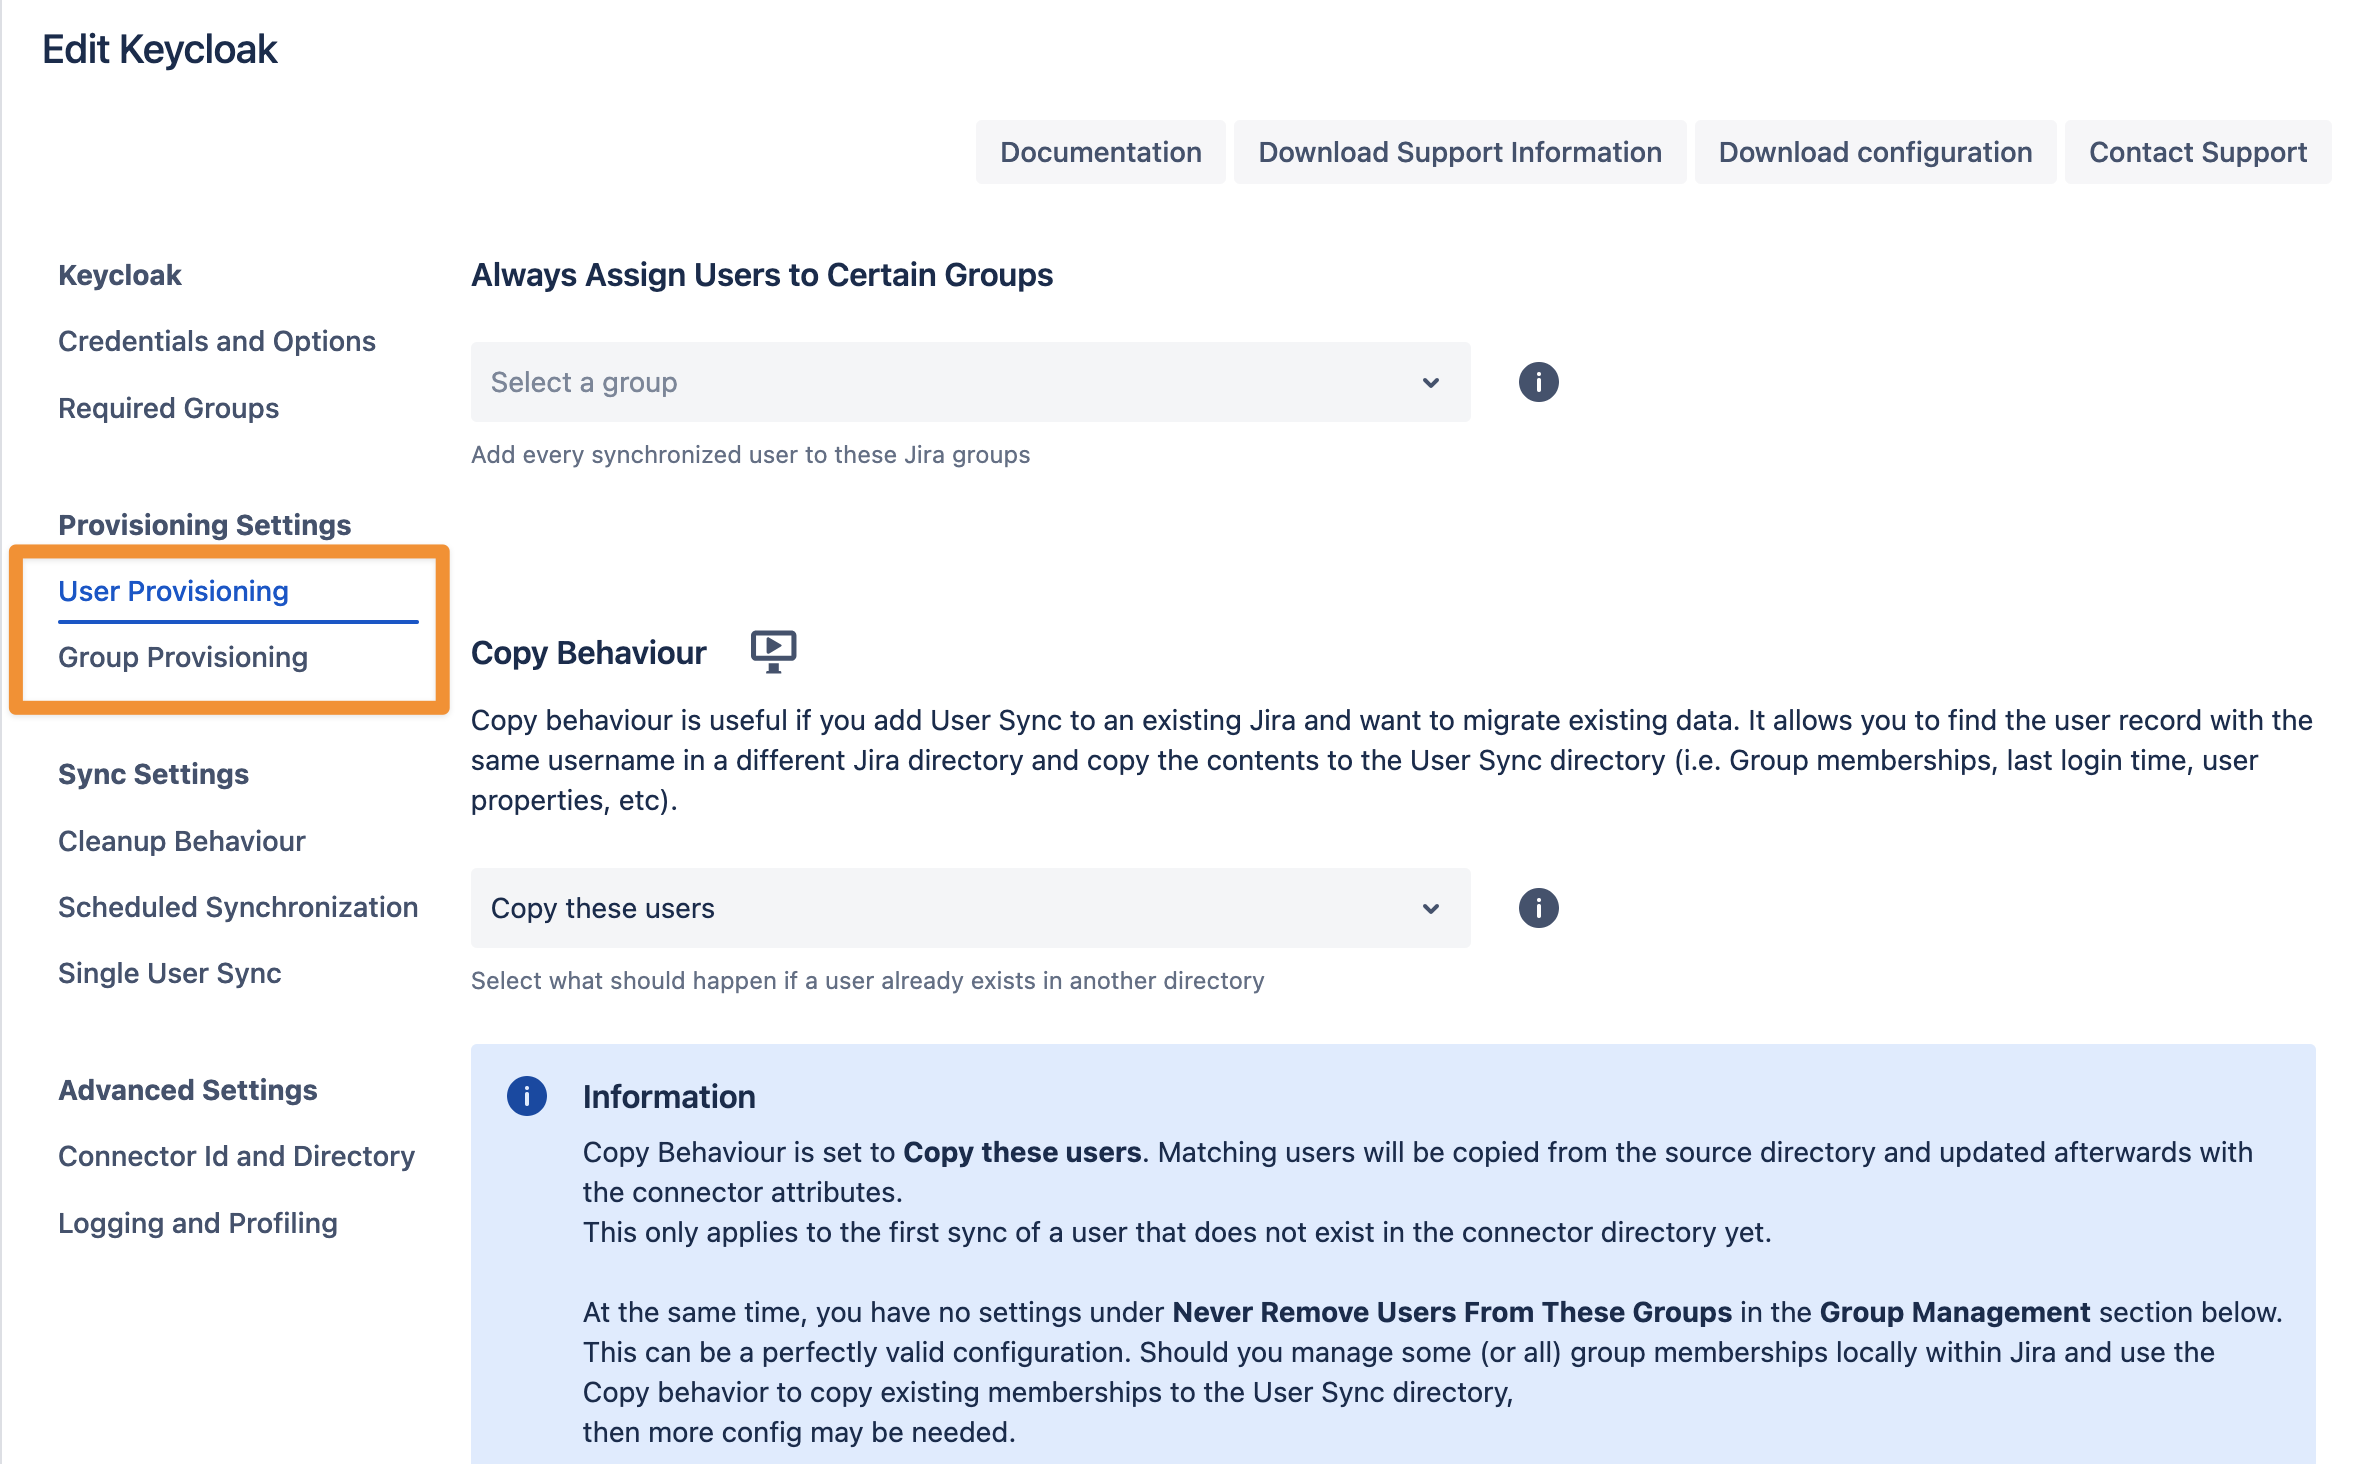
In the User Provisioning and Group Provisioning tab, you can change the attribute mapping for the user and define what groups should be assigned to users in case you don't need all groups from Keycloak. If you leave the settings unchanged, the standard user attributes are synced together with all the groups that have been assigned to the user.
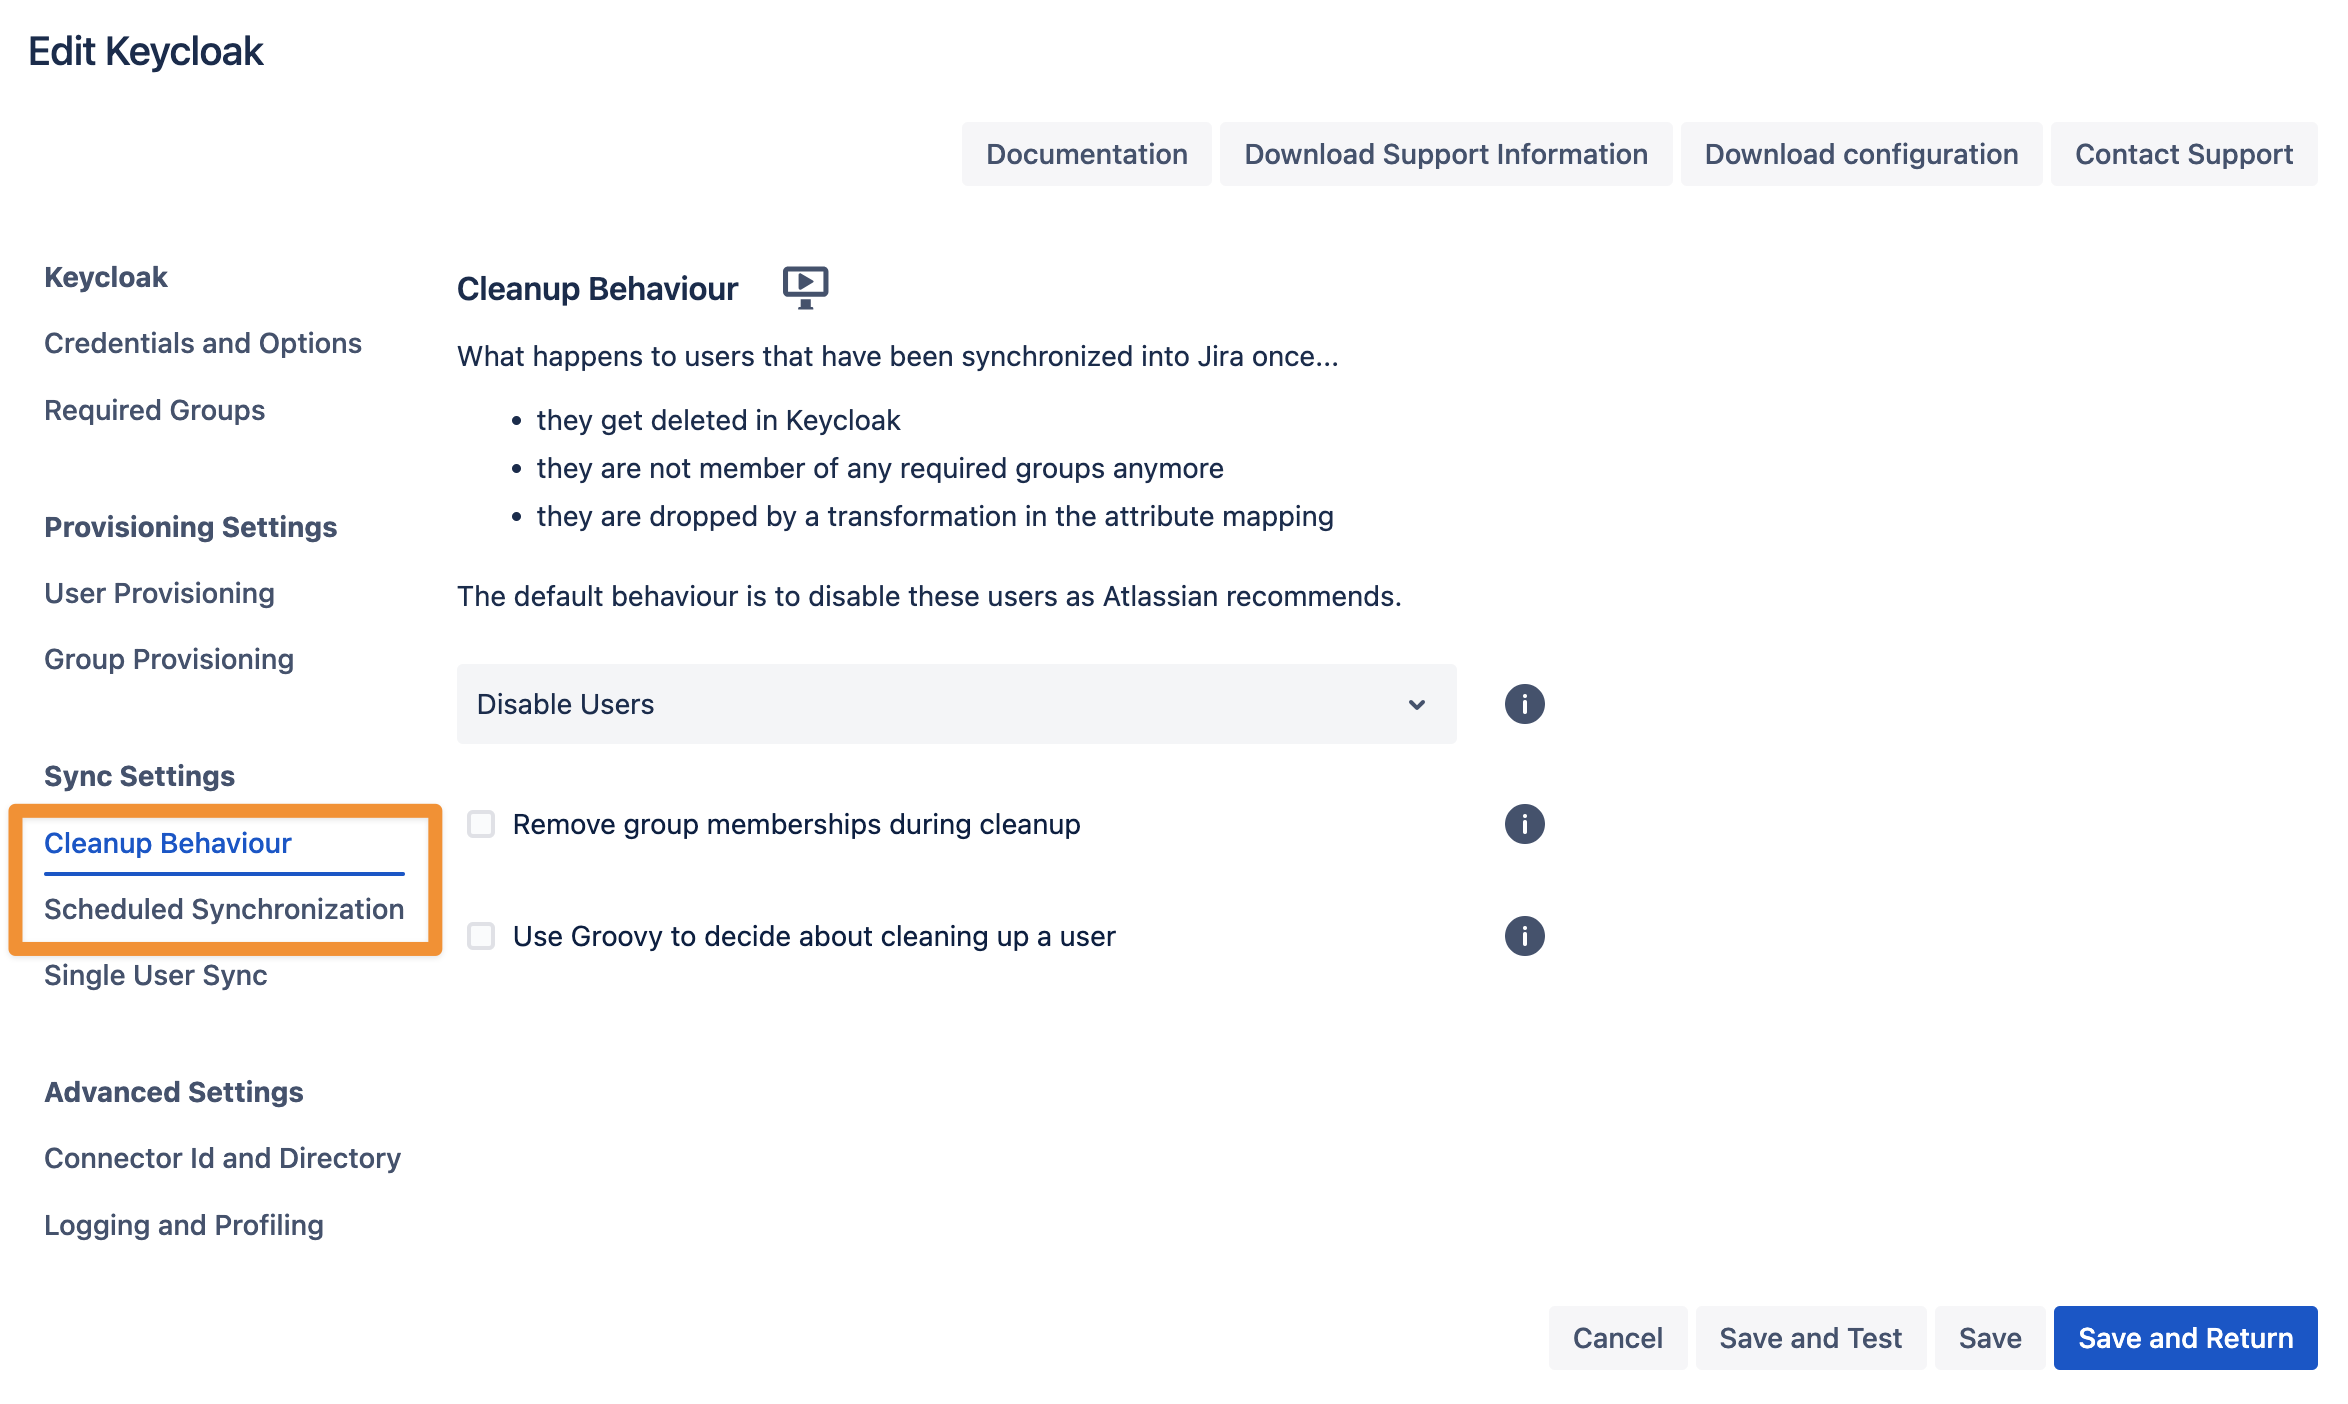
In the Sync Settings section, you can configure the Cleanup Behavior and the Scheduled Synchronization. The clean-up defines what should happen to the user when it is not returned by Keycloak any more. The default is deactivating the user. By configuring the Scheduled Synchronization, you can have the sync run periodically without manual interaction. When enabled, the sync runs daily at 2 am, but you can change this if you want.
Please ensure that you Save your configuration.
You are now ready to commence either a simulated or a full sync. By simulating the sync first you will be able to verify your configuration and see what changes User Sync would apply like what users will be added, modified, or not modified. With the full sync, User Sync will apply those changes. Both sync actions will run a full sync and will have the same sync duration. For more information on the sync simulation, please refer to Using the Simulated Sync Feature.

