OneLogin configuration
Video Guide
User Guide
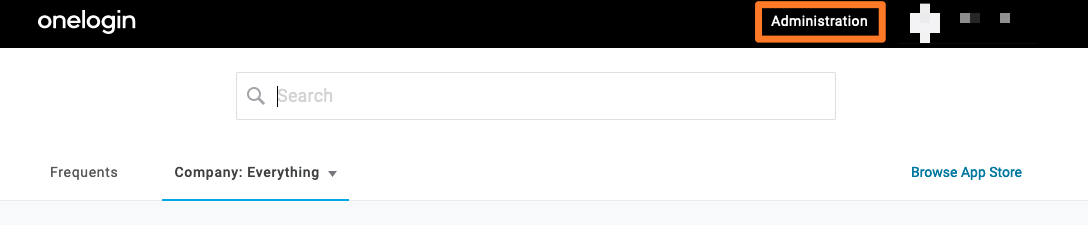
First, login into your OneLogin domain and click Administration.
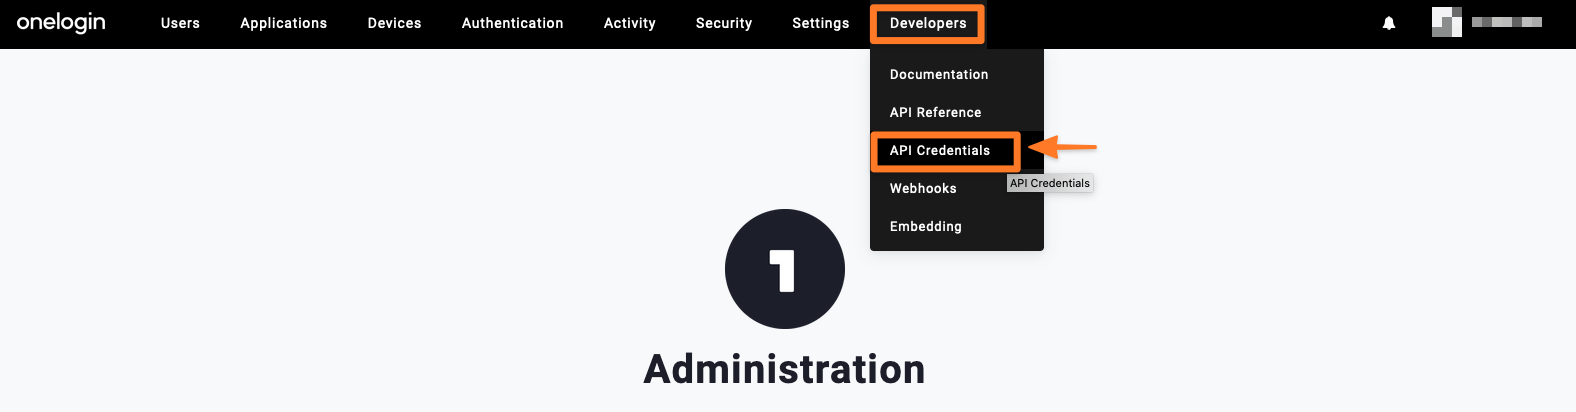
Next, hoover over DEVELOPERS and click API Credentials.
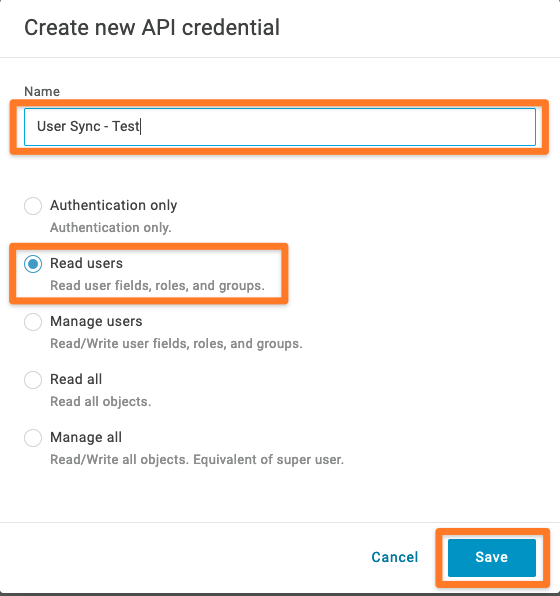
Then, click New Credential.

Please provide a Name and choose Read users. Click Save to continue.
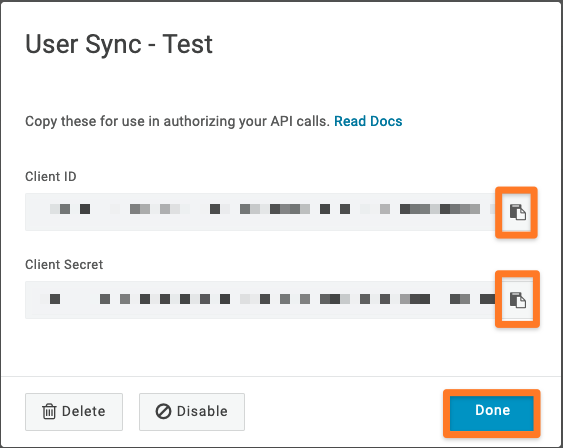
Please copy & paste the Client Secret and the Client ID to a text editor of your choice.
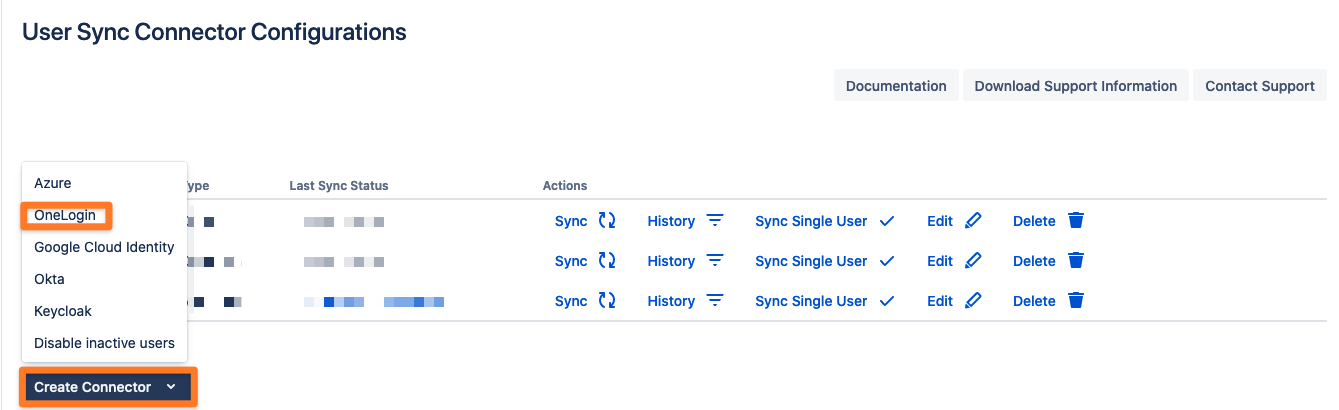
In your Atlassian application, go to User Sync, click Create Connector, and select OneLogin.
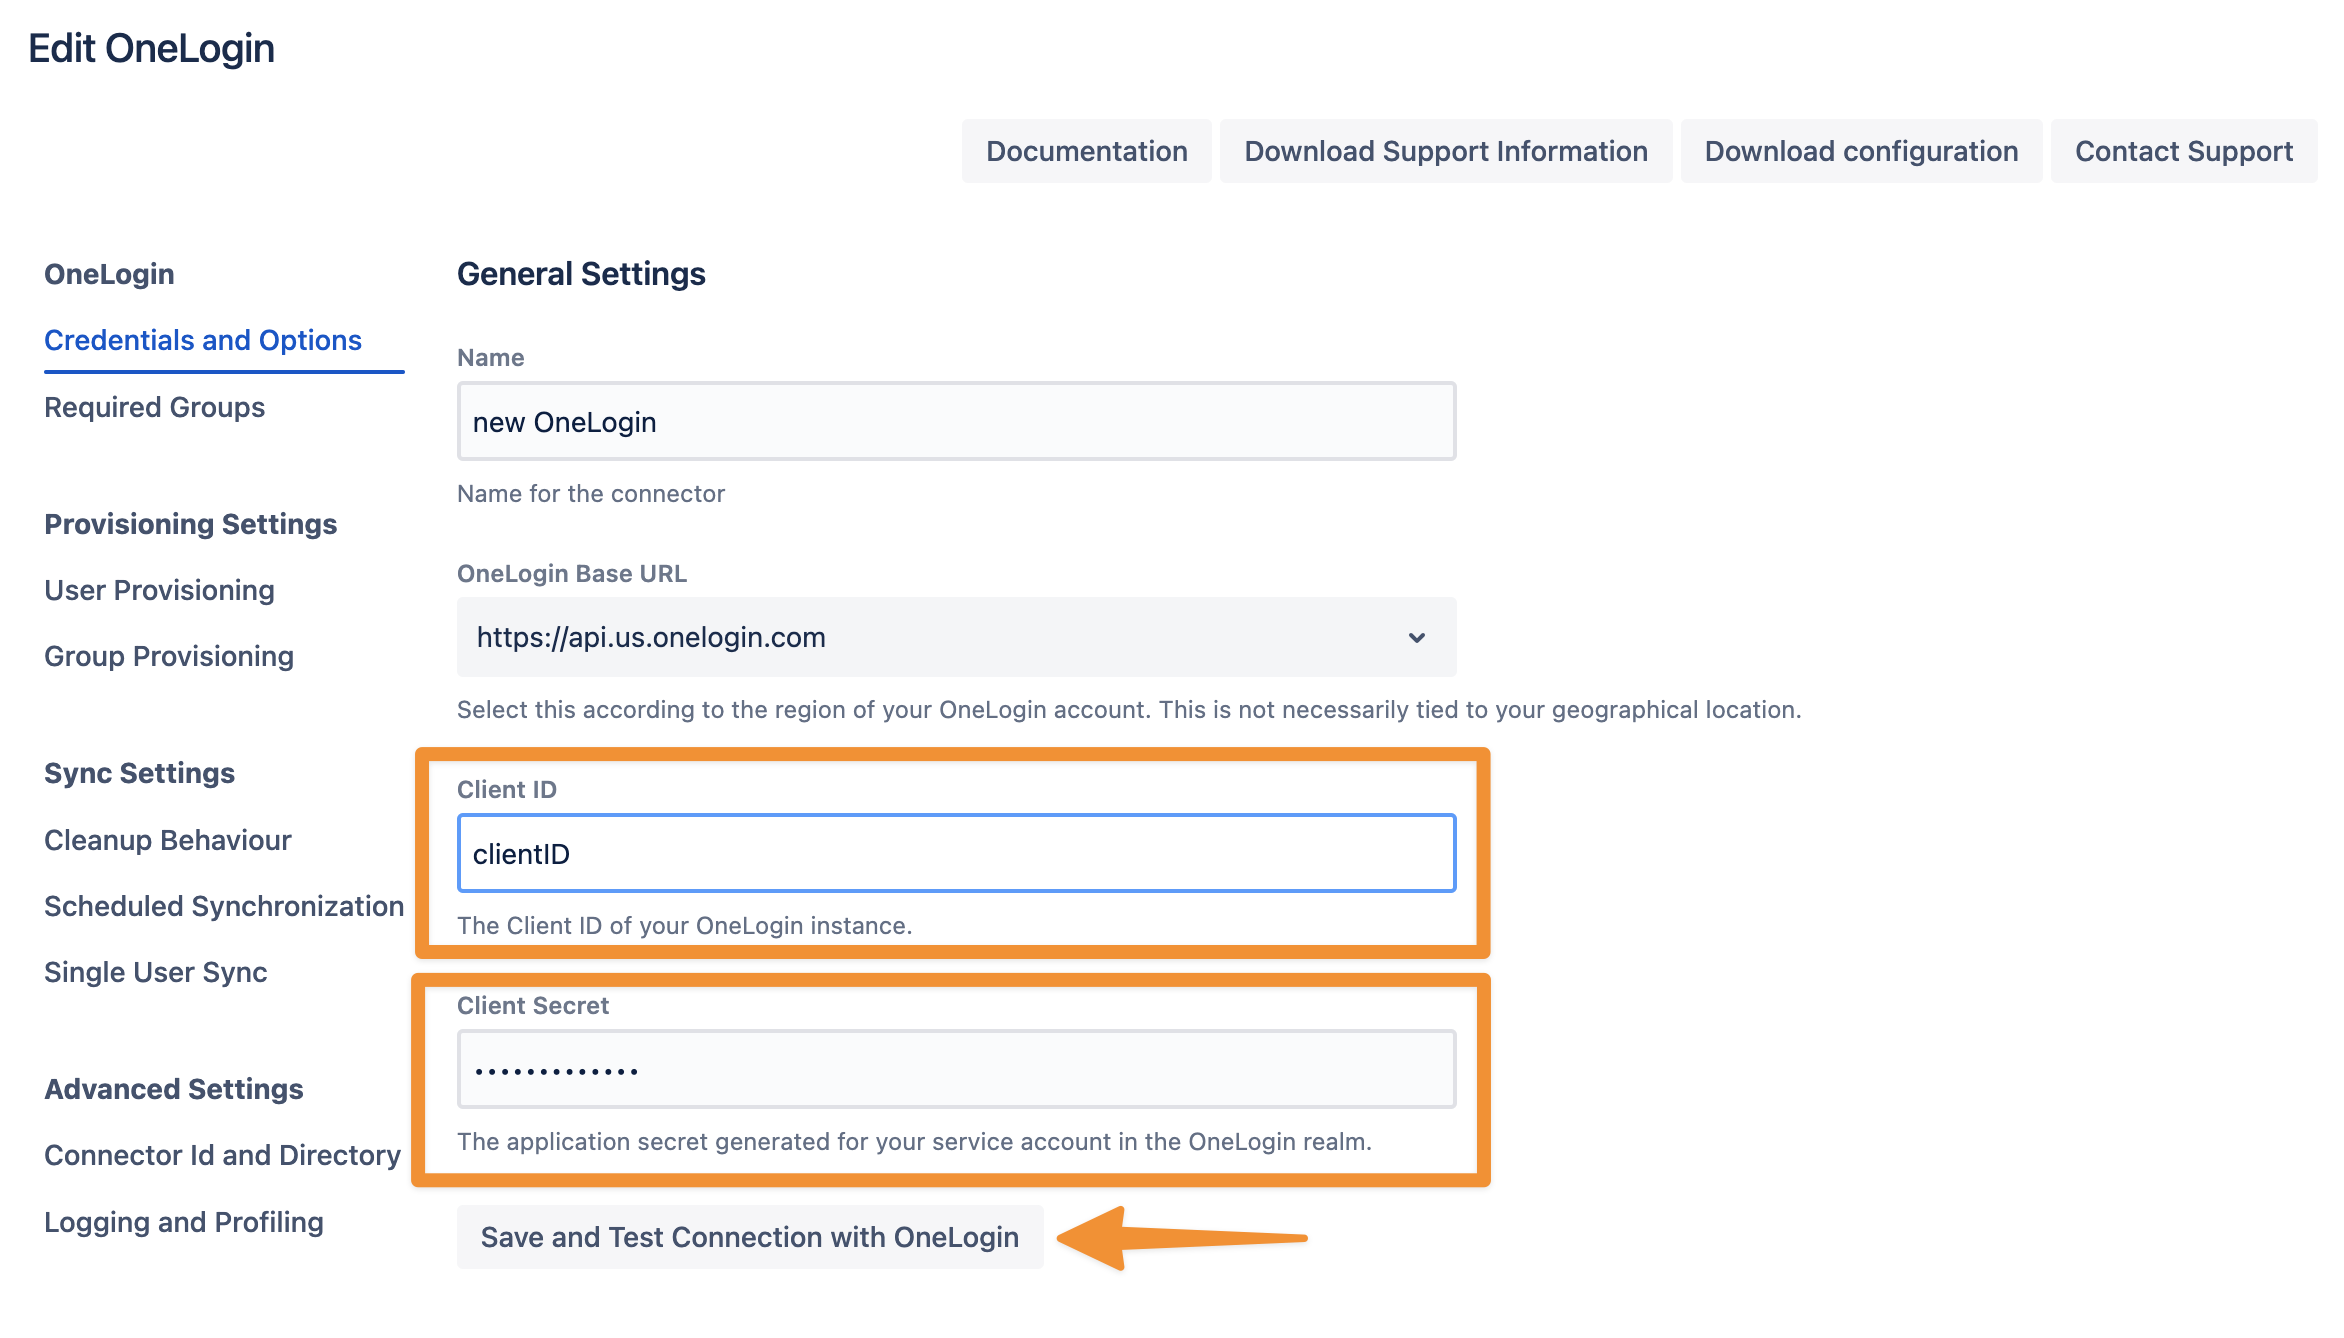
Add the Client ID and the Client Secret. Use the Save and Test Connection button to check whether OneLogin API endpoints are reachable and API permissions are set correctly.
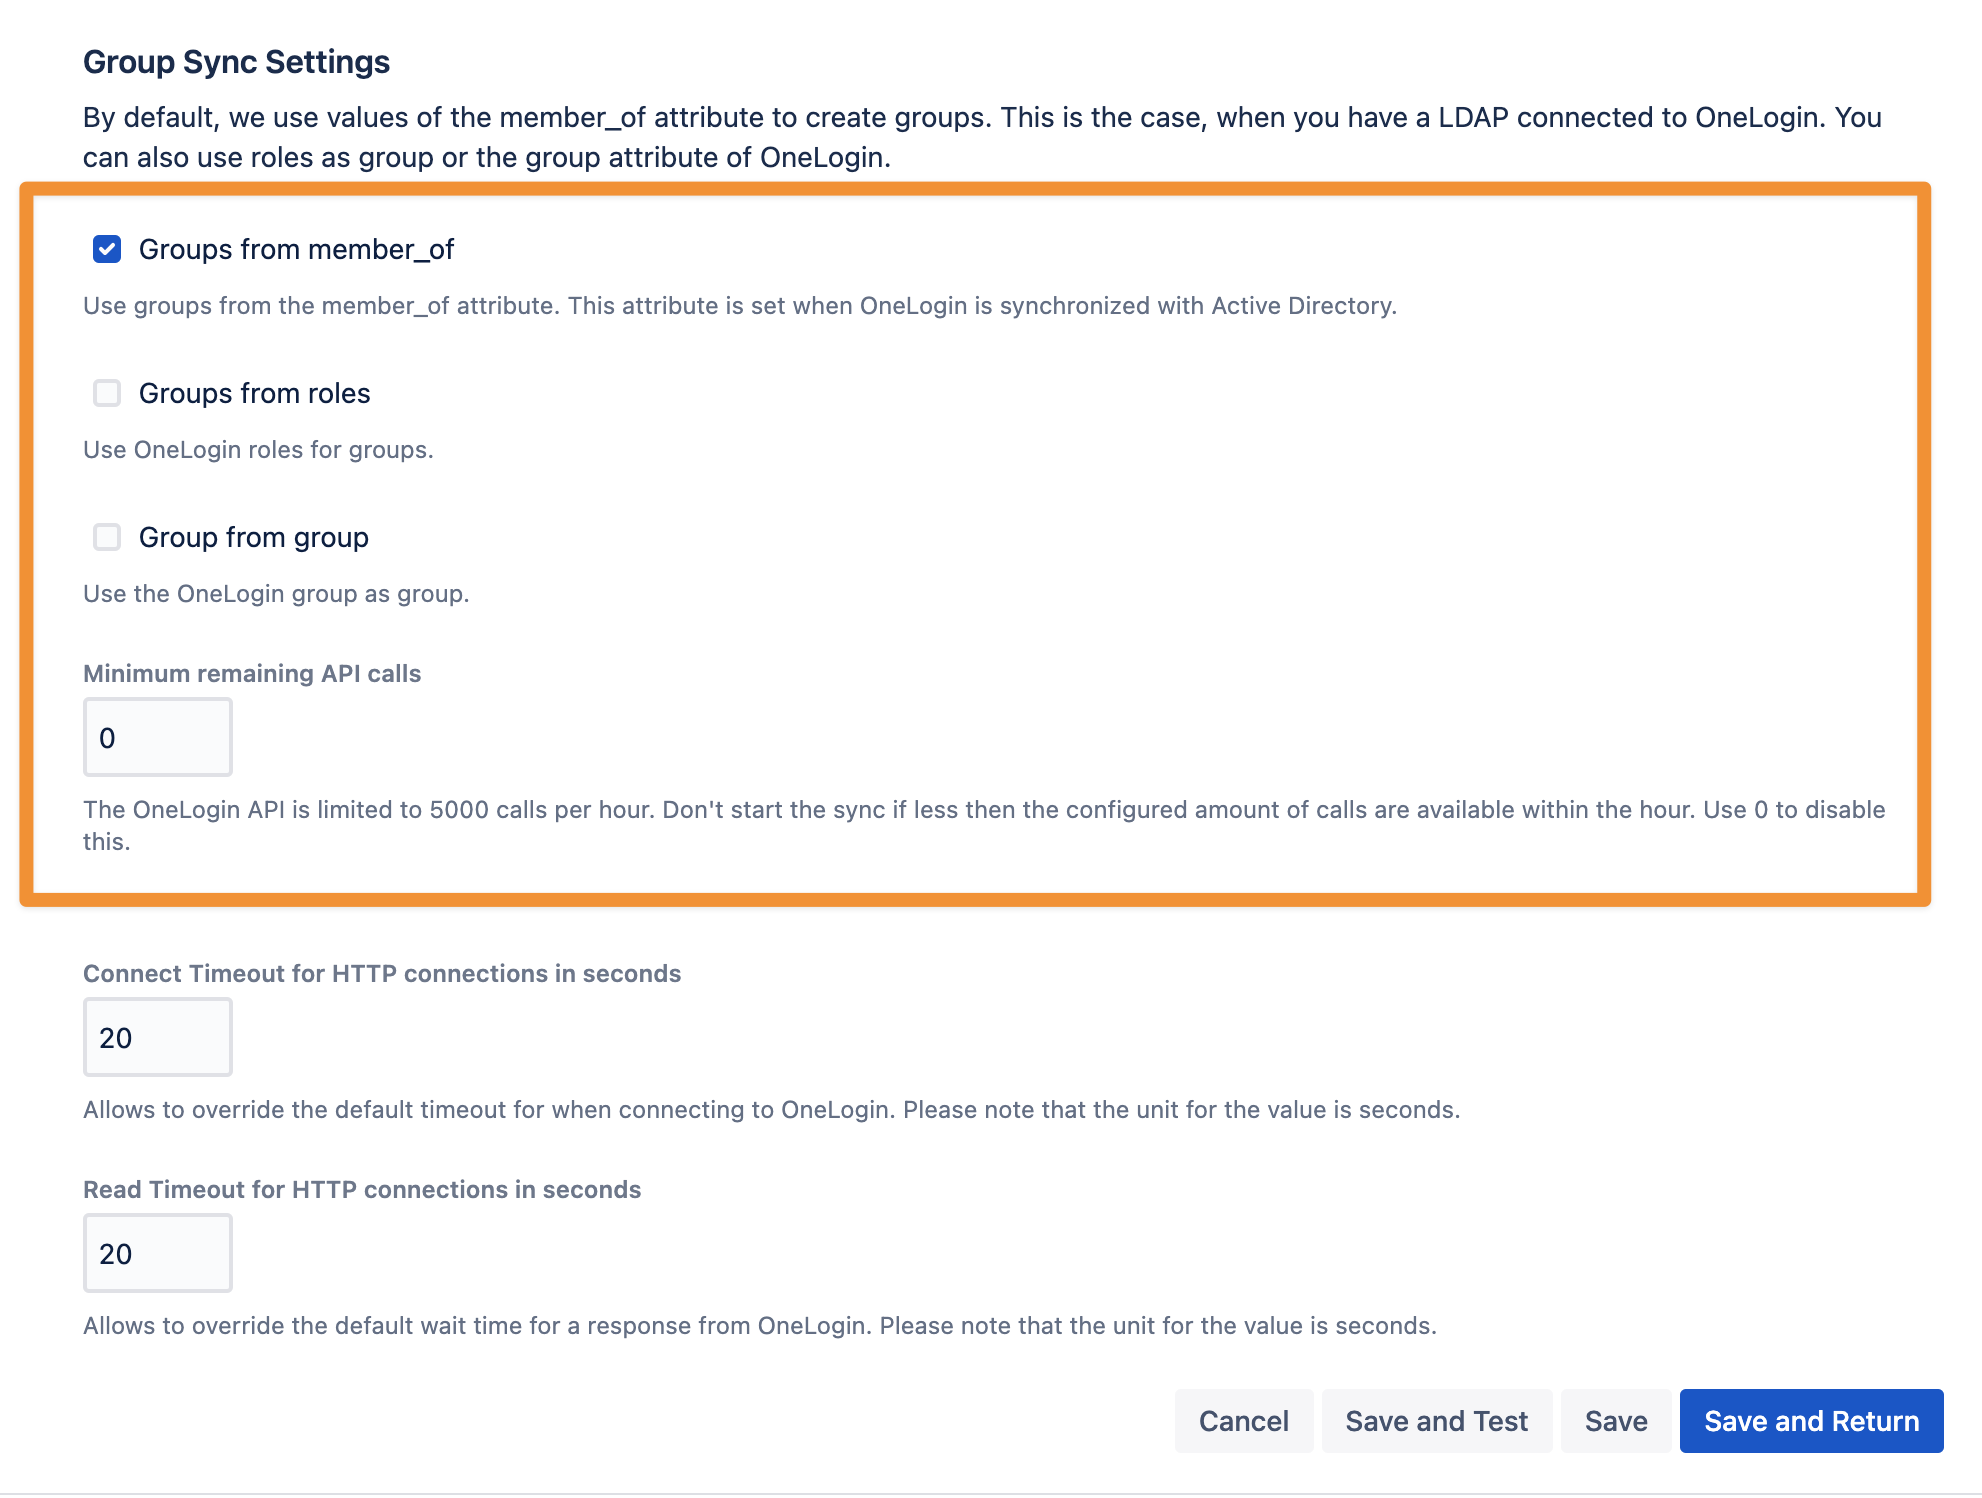
Next, scroll down and select the matching Group Sync Settings. You can sync the Groups from member_of (default), Groups from roles, and you can sync the OneLogin Group from group of a user.
You could also modify the Minimum remaining API calls. In this case, the sync doesn't start if less than the configured amount of calls is available within the hour.
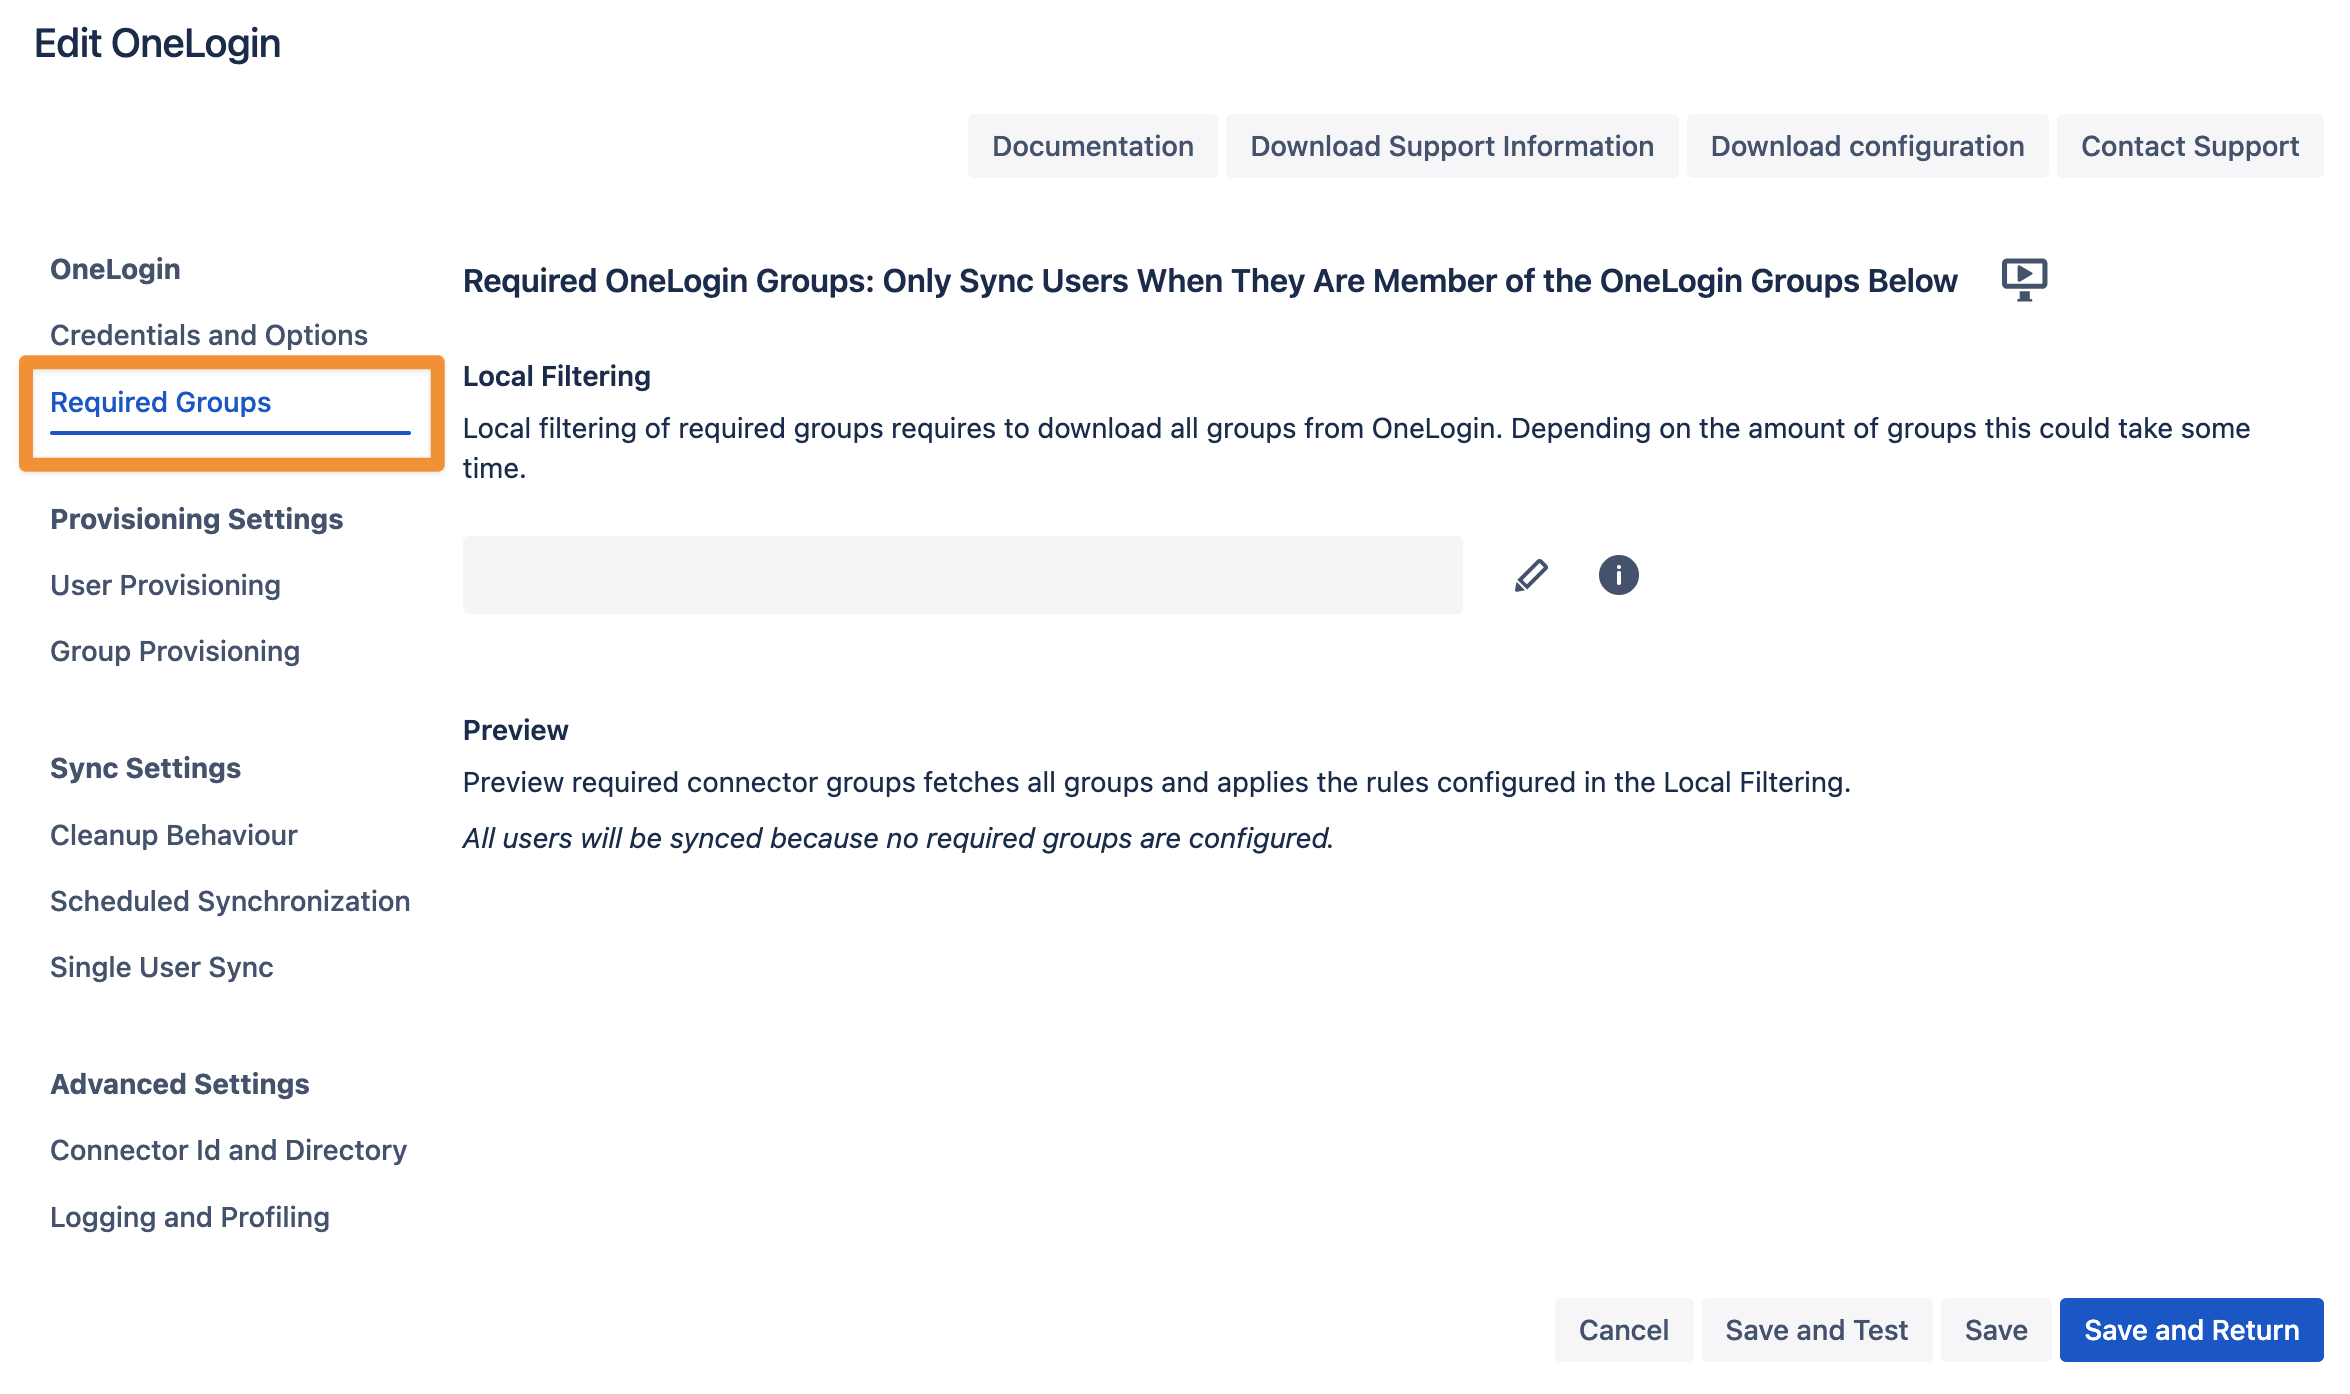
If you want to limit the number of users you sync from Keycloak you can set this up in the Required Groups tab. If you want to sync all users from your realm, you can skip this configuration step.
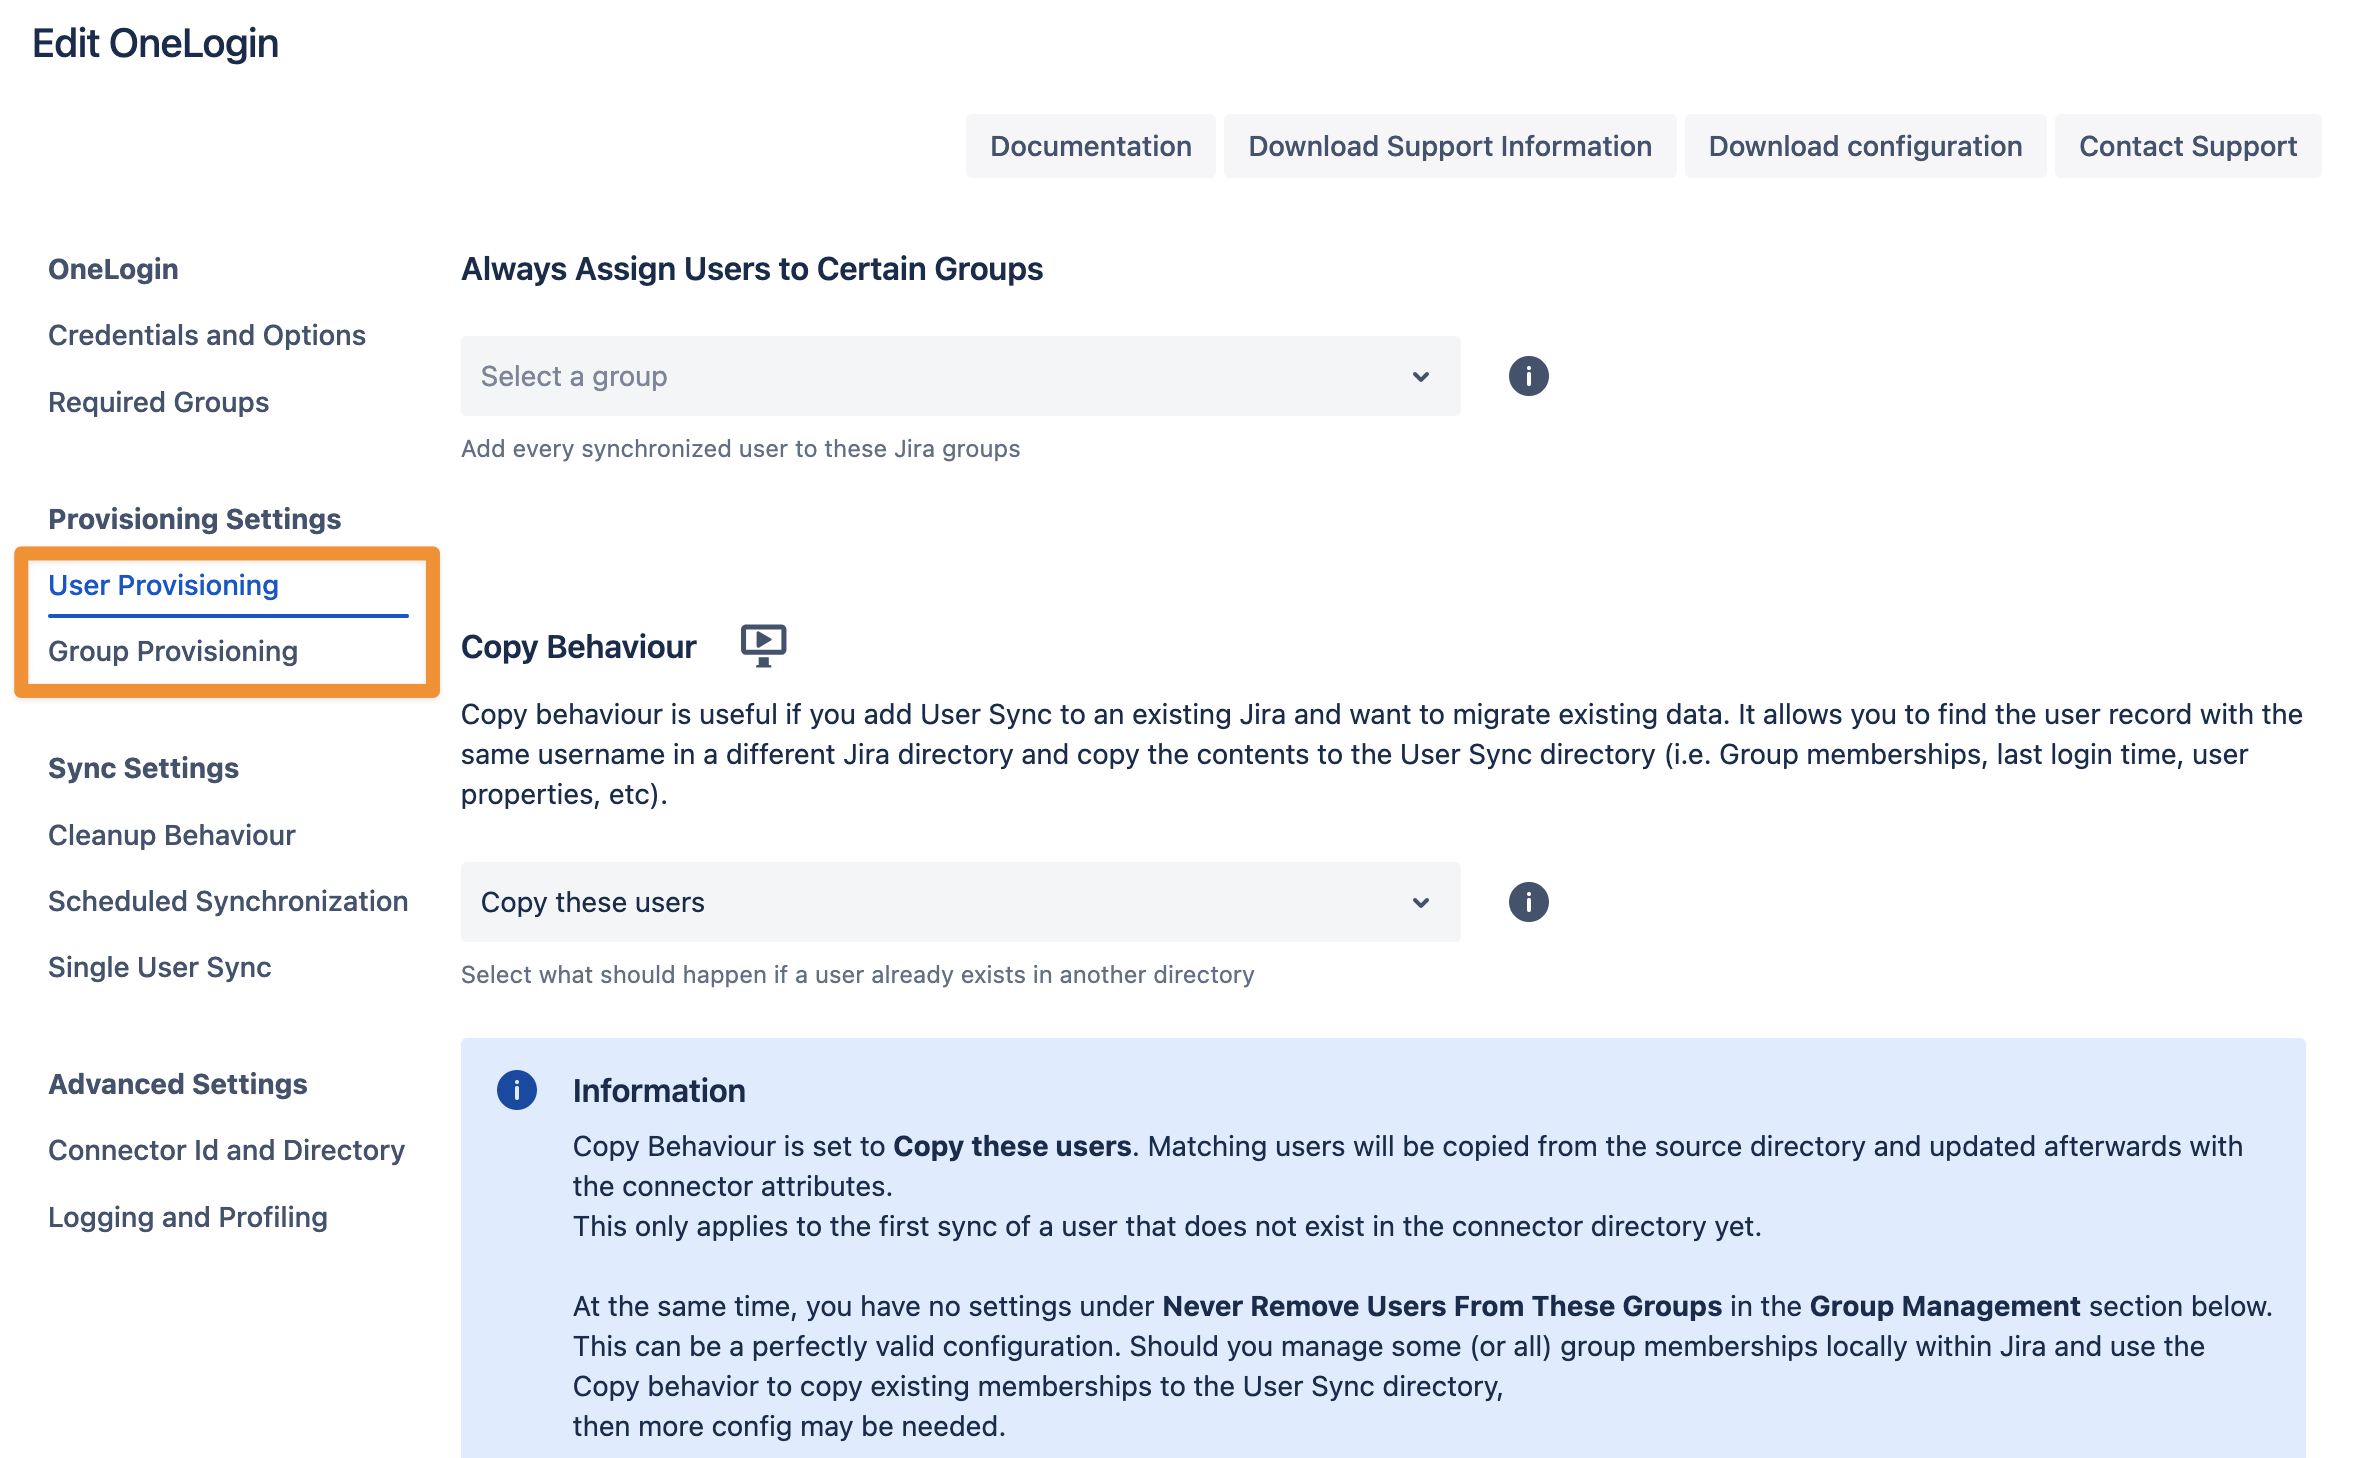
In the User Provisioning and Group Provisioning tab, you can change the attribute mapping for the user and define what groups should be assigned to users in case you don't need all groups from Keycloak. If you leave the settings unchanged, the standard user attributes are synced together with all the groups that have been assigned to the user.
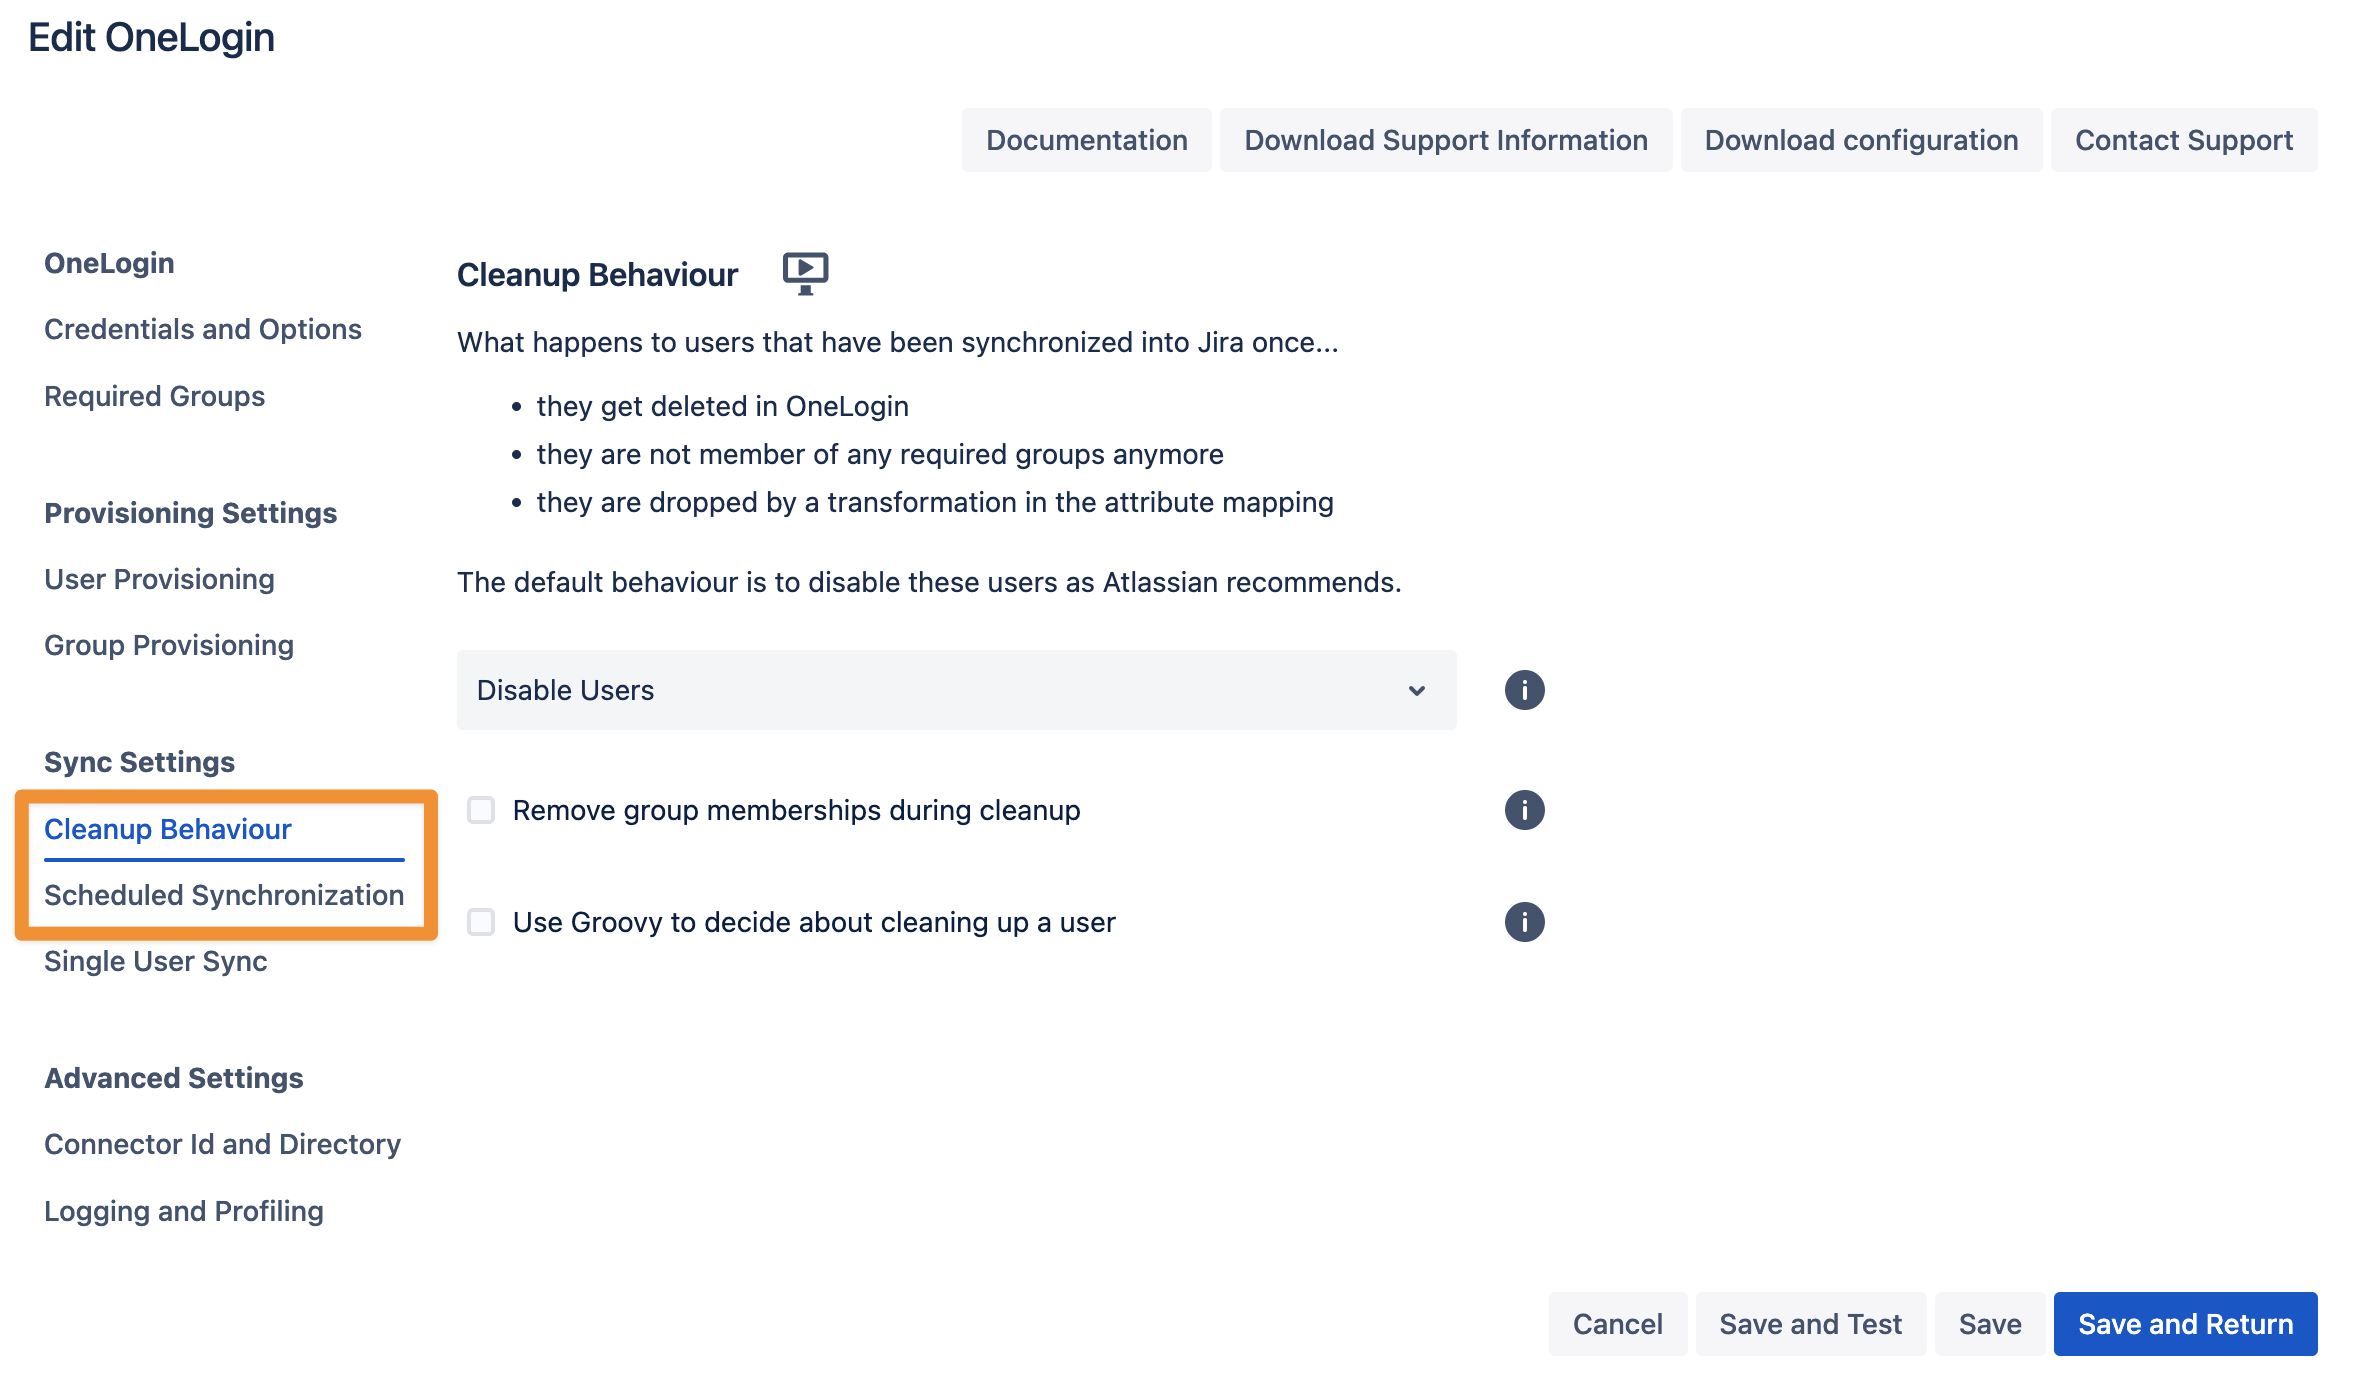
In the Sync Settings section, you can configure the Cleanup Behavior and the Scheduled Synchronization. The clean-up defines what should happen to the user when it is not returned by Keycloak any more. The default is deactivating the user. By configuring the Scheduled Synchronization, you can have the sync run periodically without manual interaction. When enabled, the sync runs daily at 2 am, but you can change this if you want.
Please ensure that you Save your configuration.
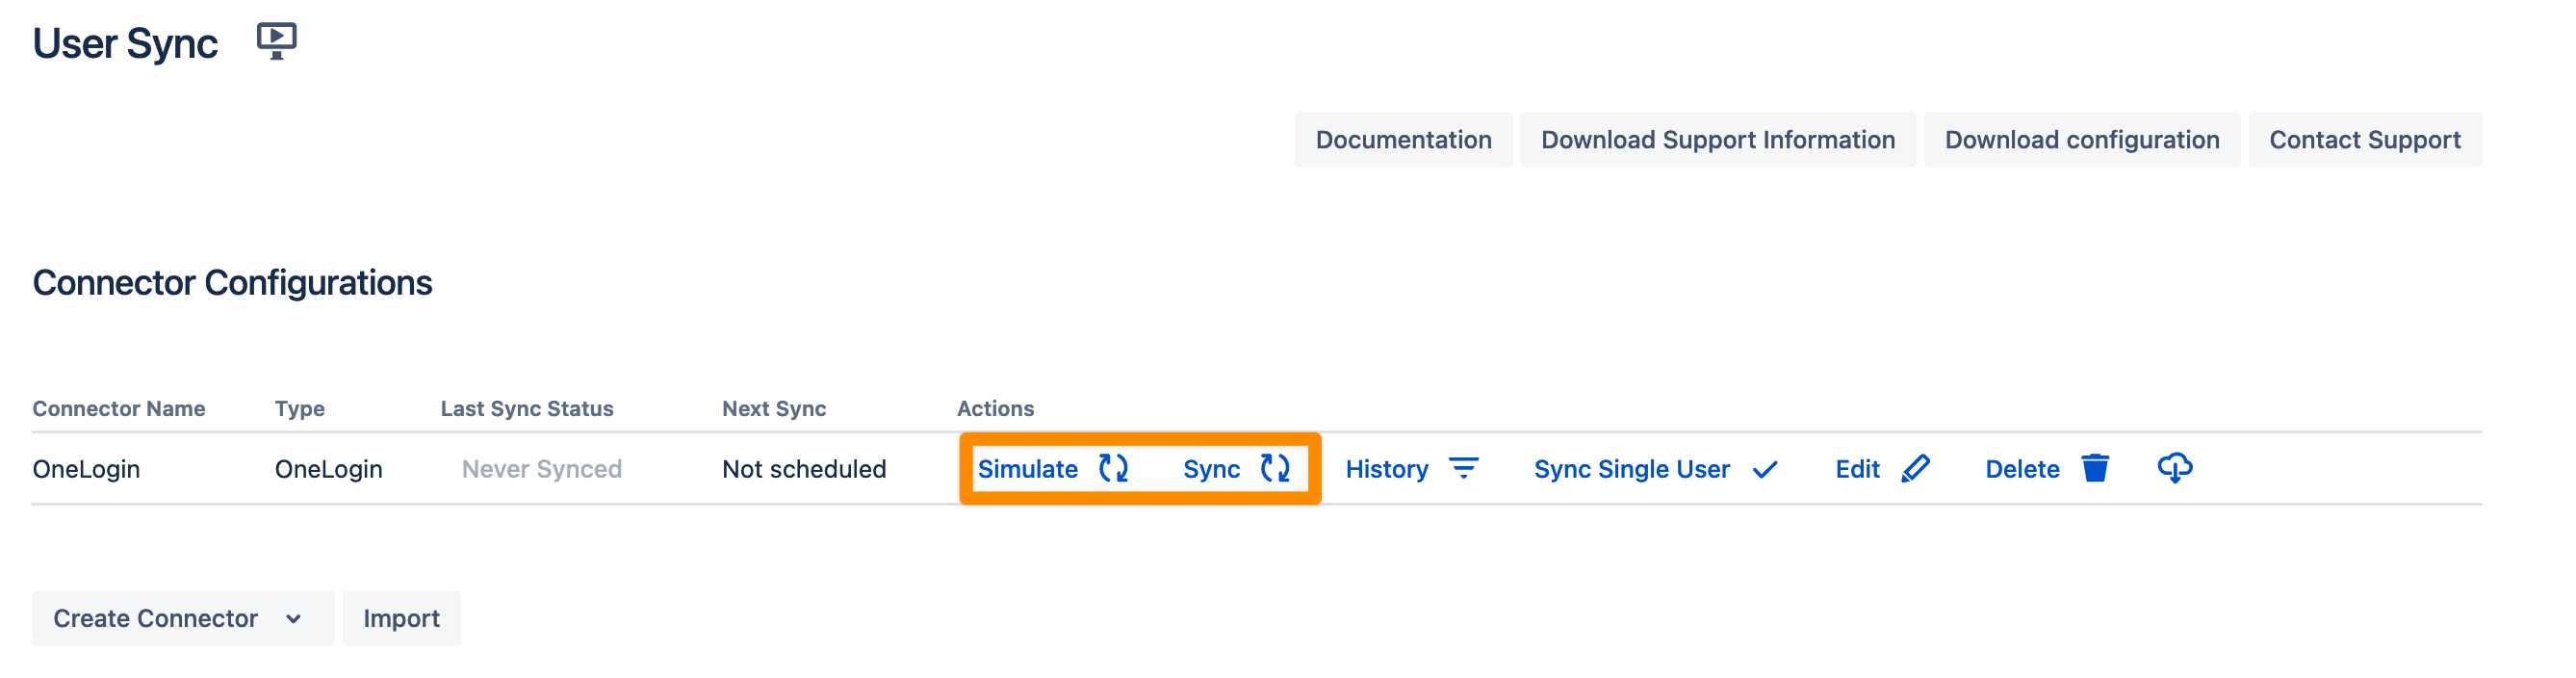
You are now ready to commence either a simulated or a full sync. By simulating the sync first you will be able to verify your configuration and see what changes User Sync would apply like what users will be added, modified, or not modified. With the full sync, User Sync will apply those changes. Both sync actions will run a full sync and will have the same sync duration. For more information on the sync simulation, please refer to Using the Simulated Sync Feature.