
Sync attributes to Linchpin
Goal
UserSync 2.0 supports syncing any IdP attributes into Linchpin profile fields. This tutorial will show how to configure this.
Requirements
User Sync 2.0 or later
Linchpin User Profiles 2.21 (or later) / Linchpin Intranet Suite 3.1.0 (or later)
Steps
There are two scenarios for Linchpin user profile fields:
Already existing Linchpin fields
No existing Linchpin fields
Linchpin configuration
The following steps show how Linchpin needs to be configured. We show the steps in Linchpin and UserSync.
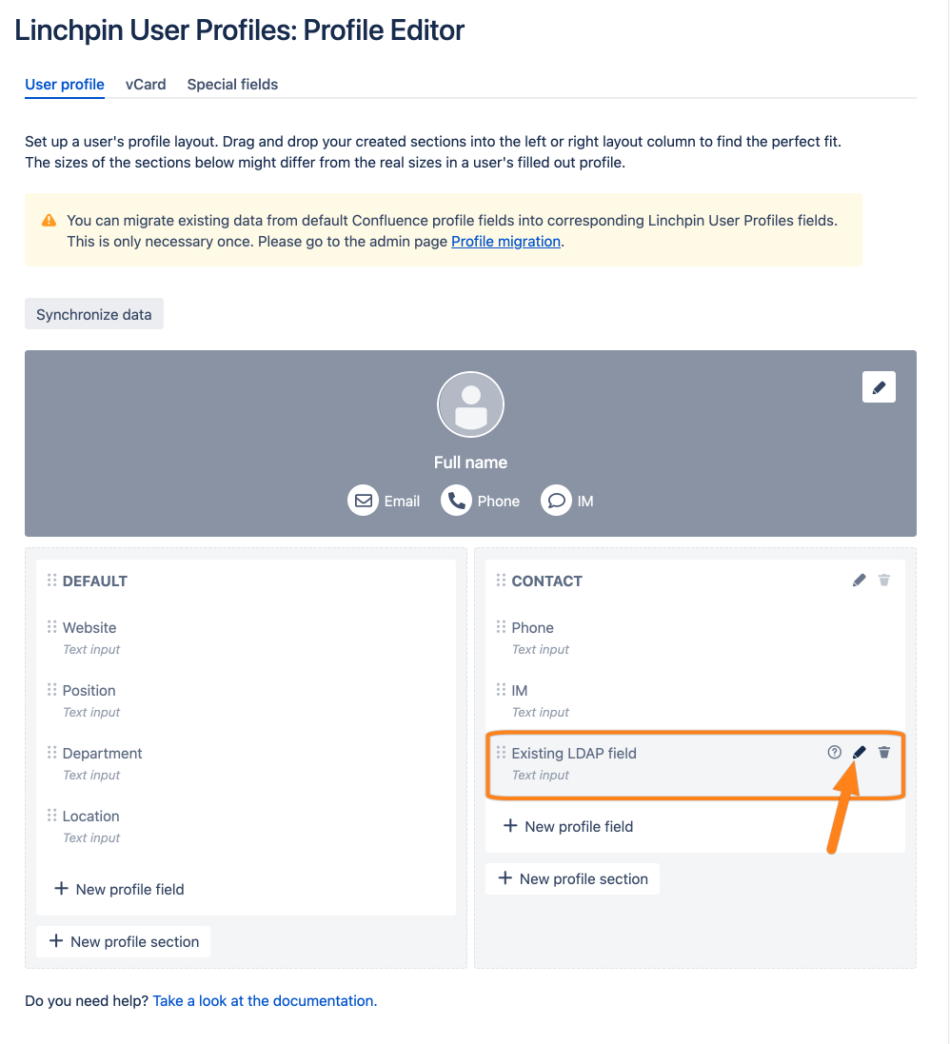
Existing Linchpin Attribute
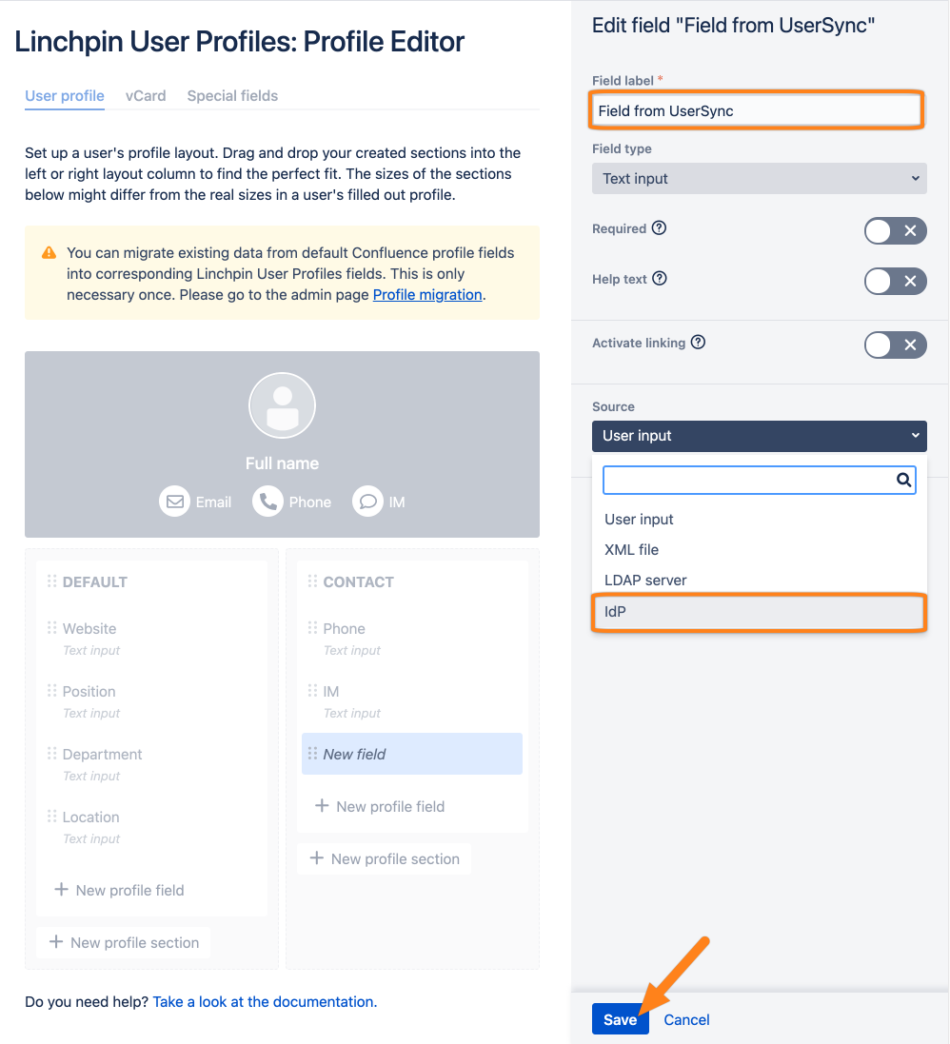
Go to the Profile Editor of Linchpin.
Click Edit (pen symbol) on the field.
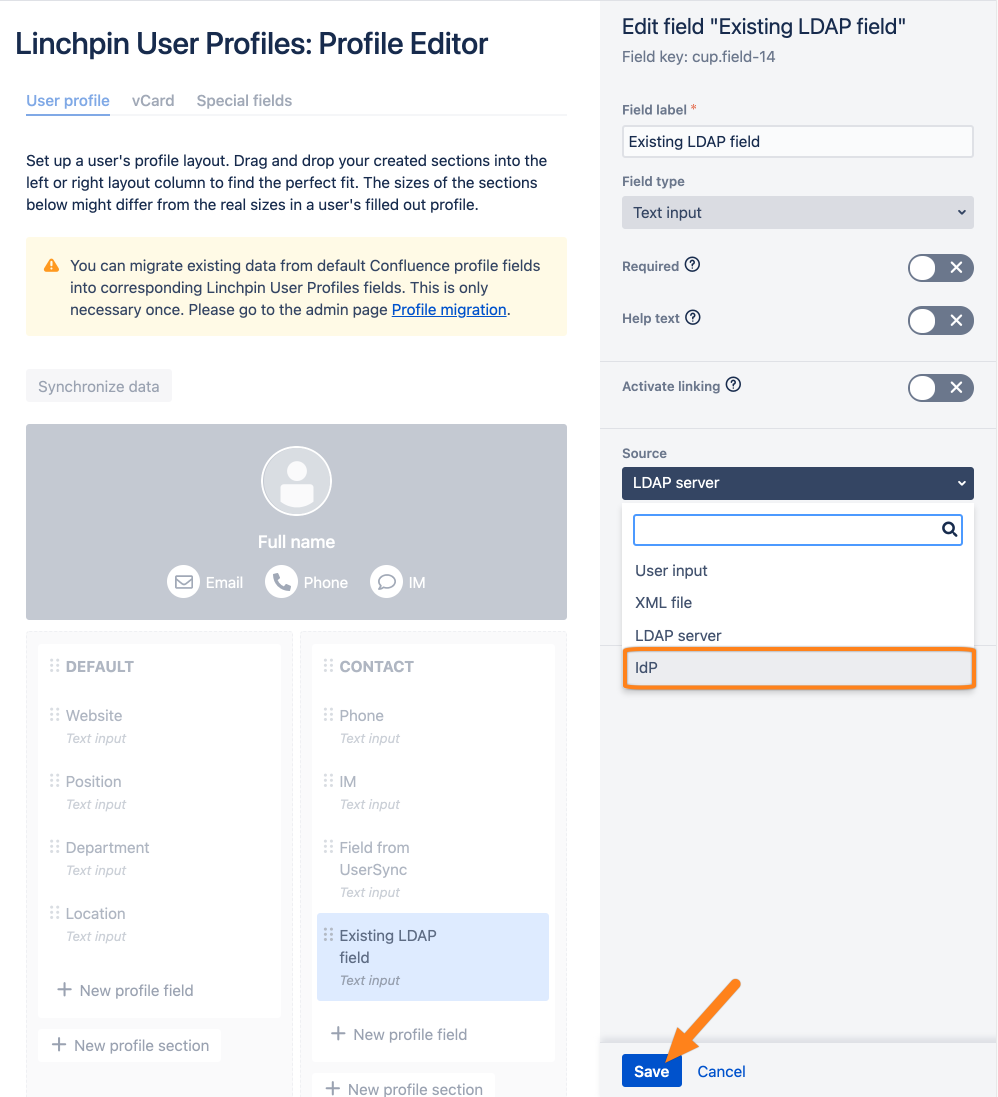
Change the Source to IdP and click Save to finish the configuration of Linchpin.

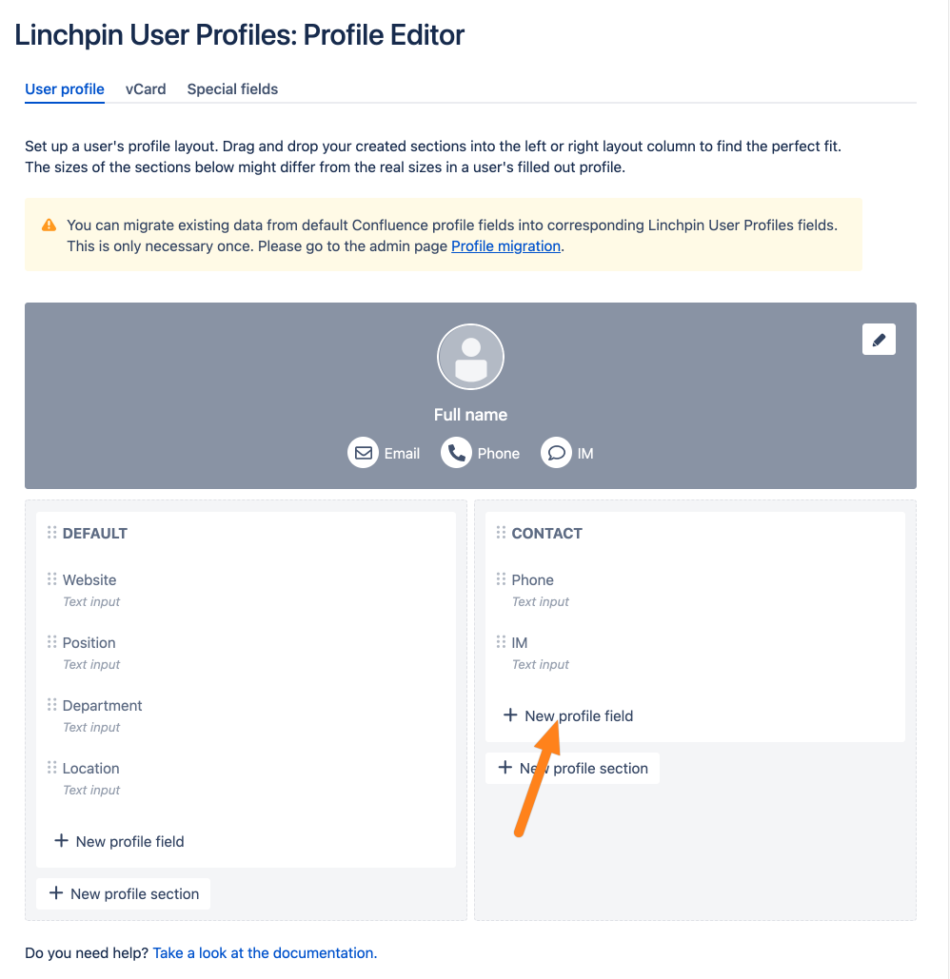
Create a new Linchpin Attribute
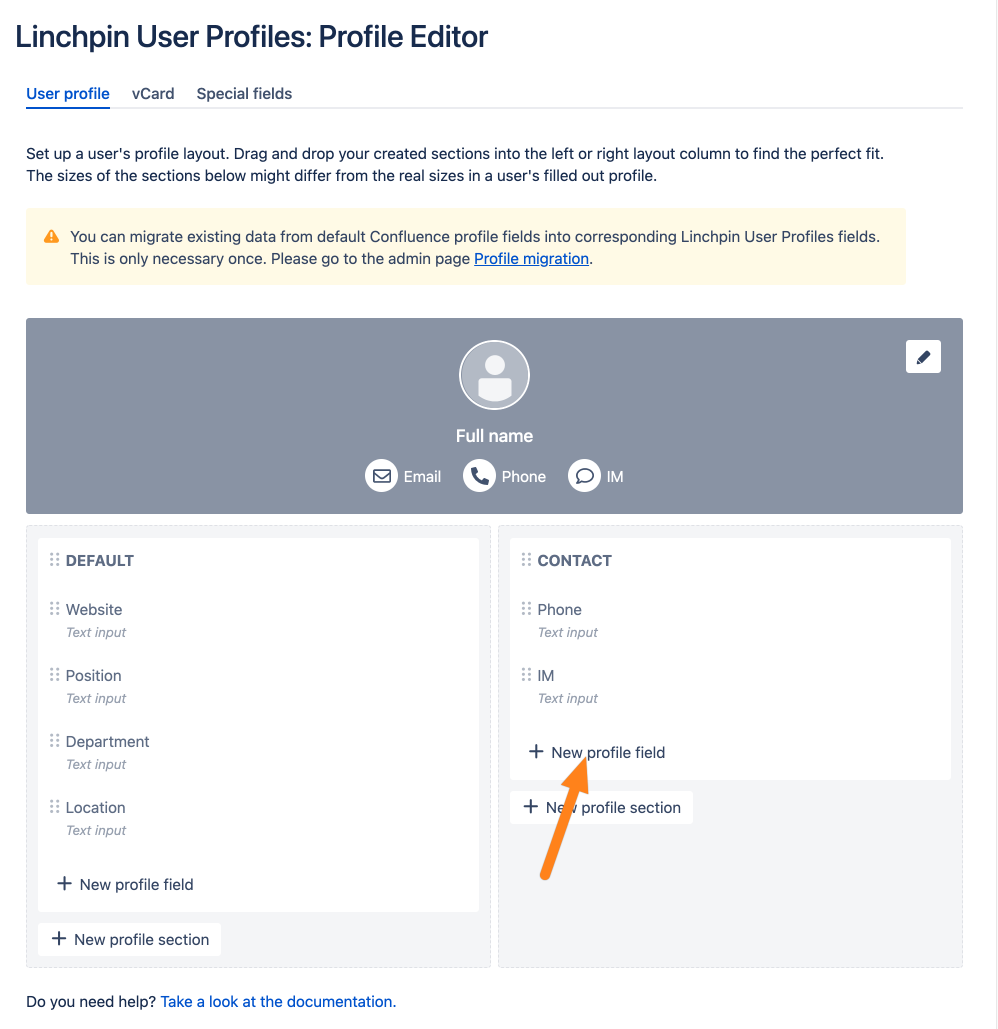
Go to the Profile Editor of Linchpin.
Click New profile field.
Enter a Field label, set the Source to IdP , and click Save to finish the configuration.

UserSync configuration
After setting up Linchpin, we show now how to configure a UserSync connector to sync the attributes.
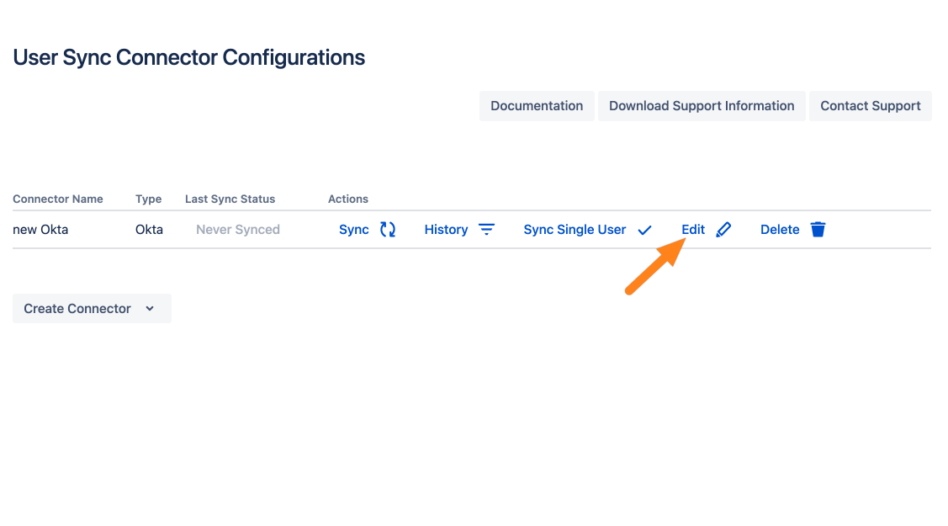
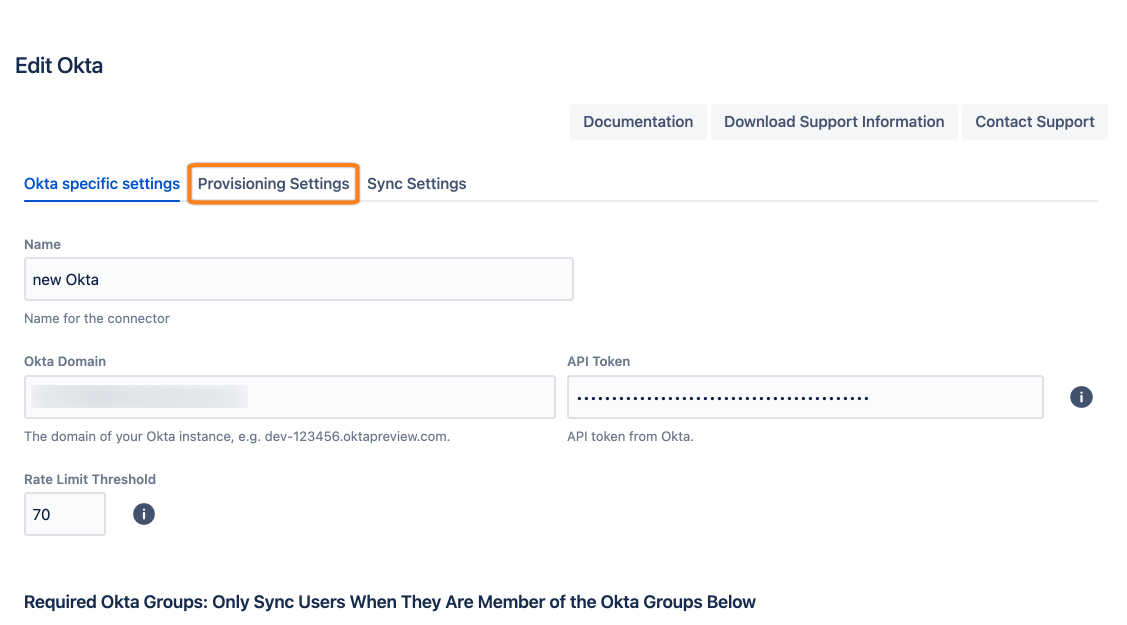
Go to UserSync and click Edit for your UserSync connector.
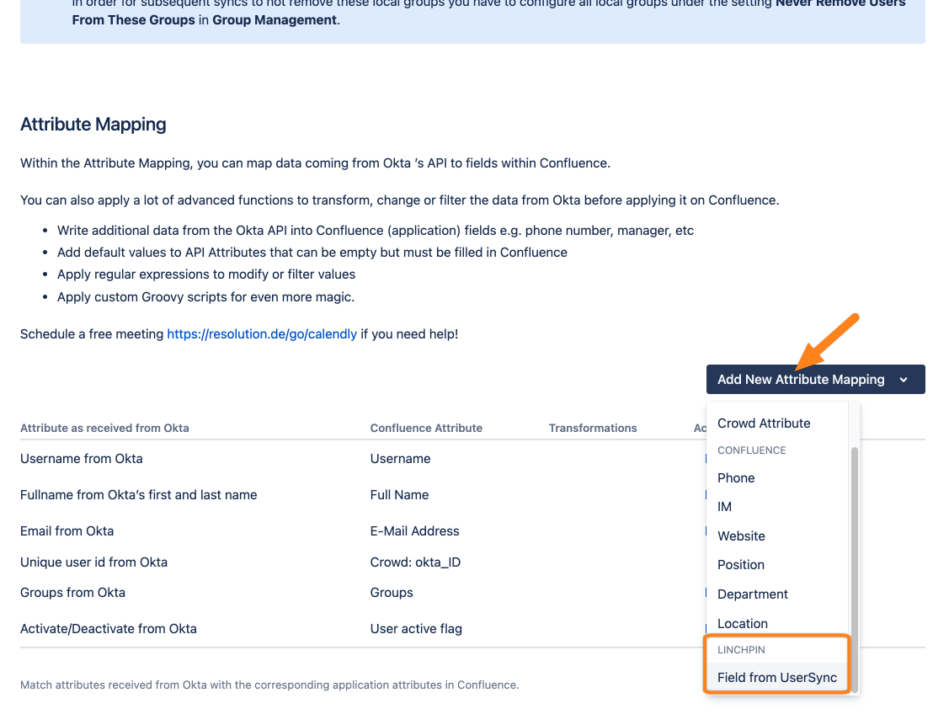
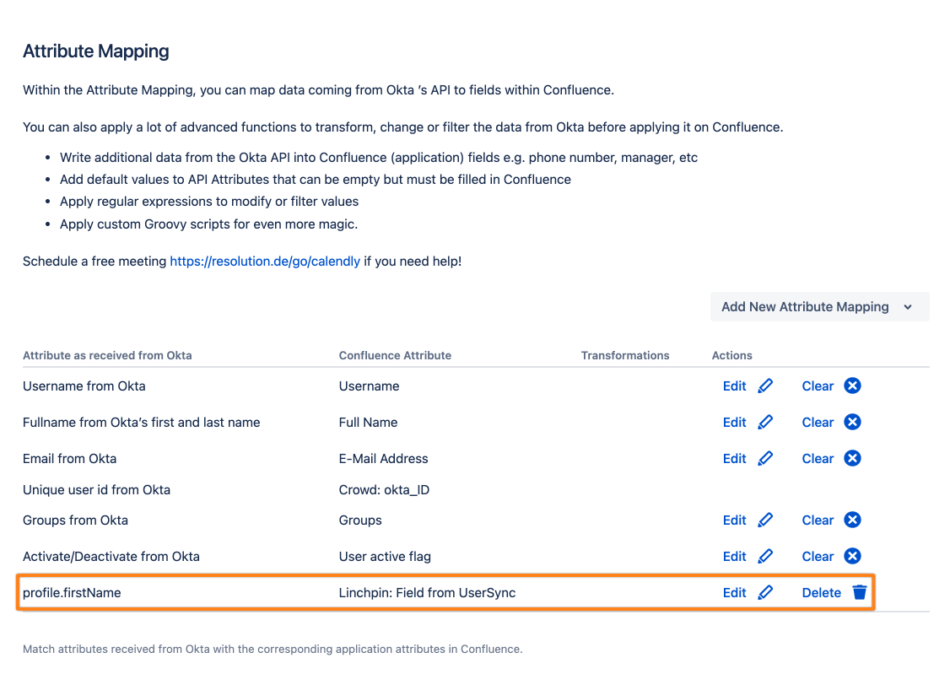
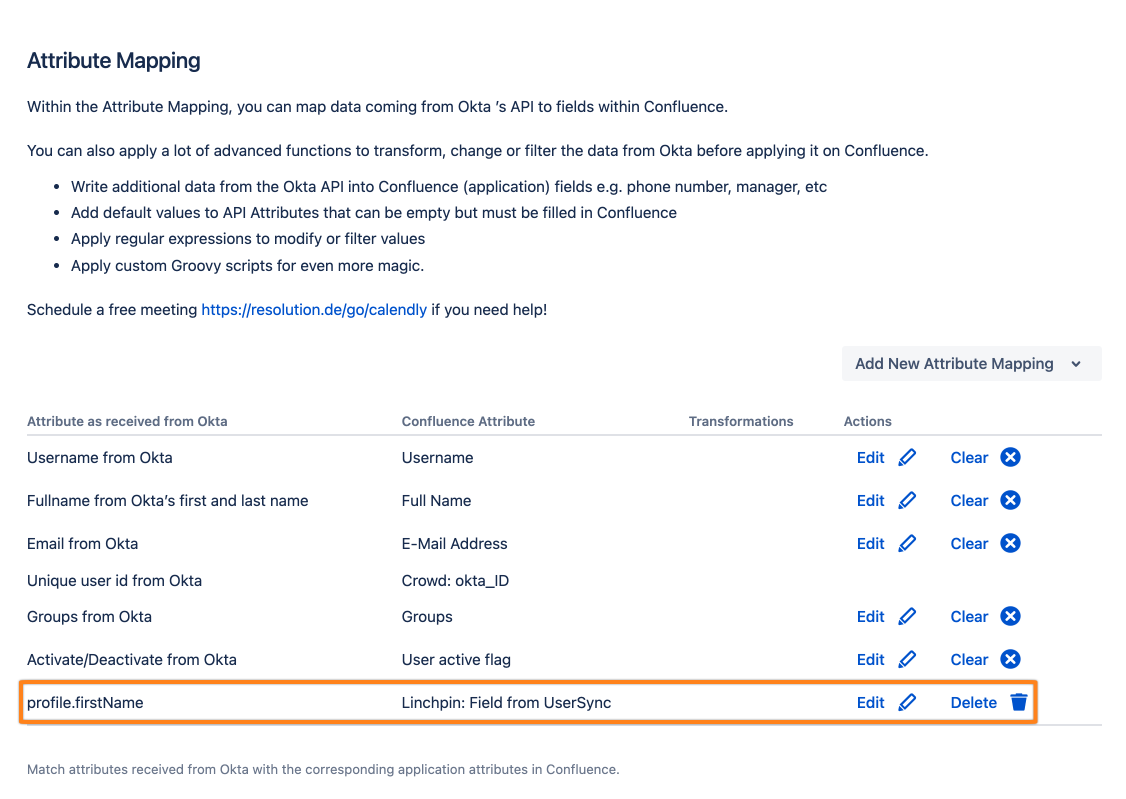
Go to Provisioning Settings and scroll down to the Attribute Mapping table.

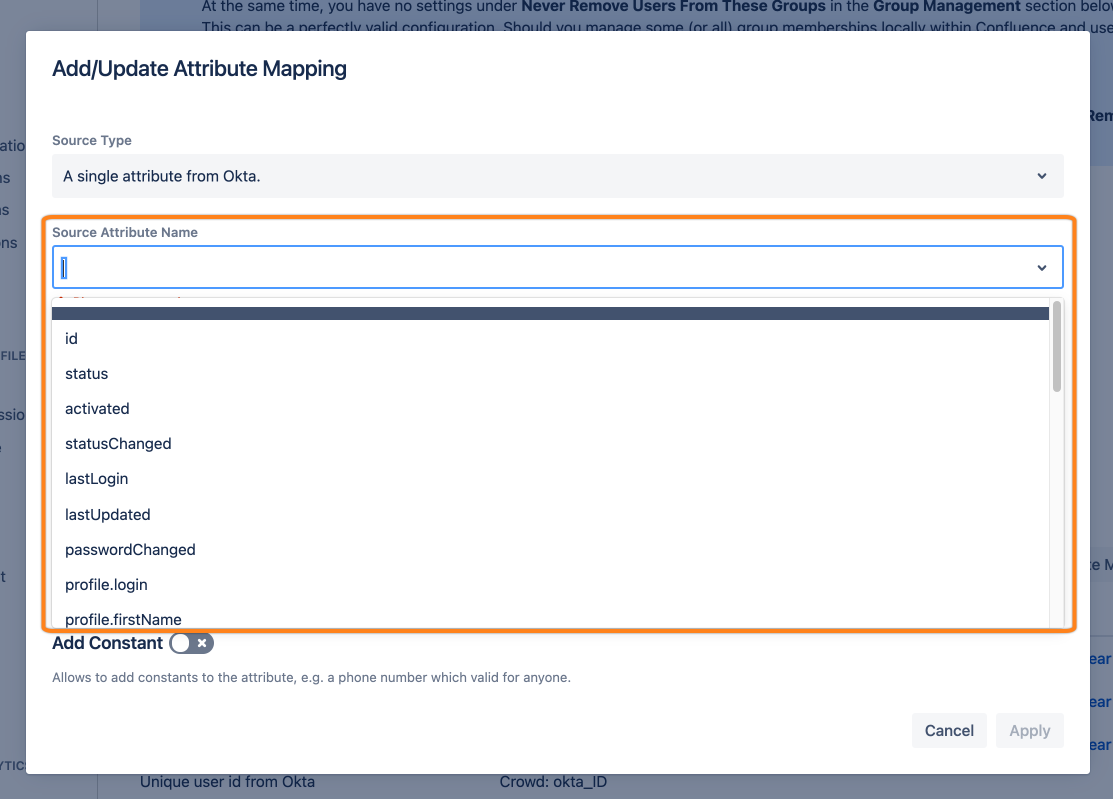
Click New Mapping and select the Linchpin field you want to map. You may have to scroll down in the popup to find it.
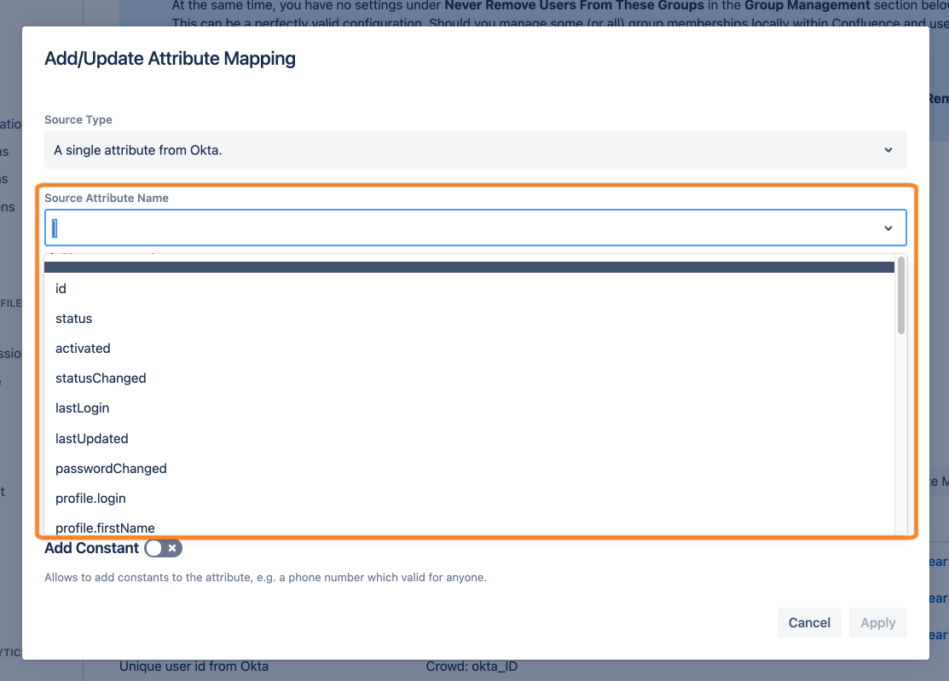
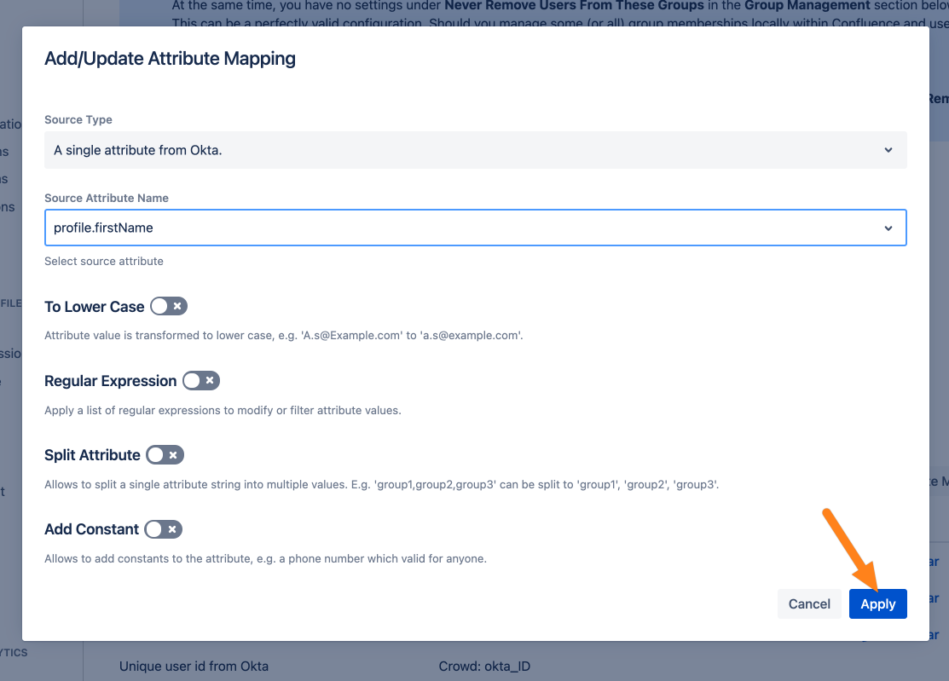
Select which attribute from the IdP should be the data source. You can also do any transformation.
Click Apply to close the modal. You can see the new mapping in the table.
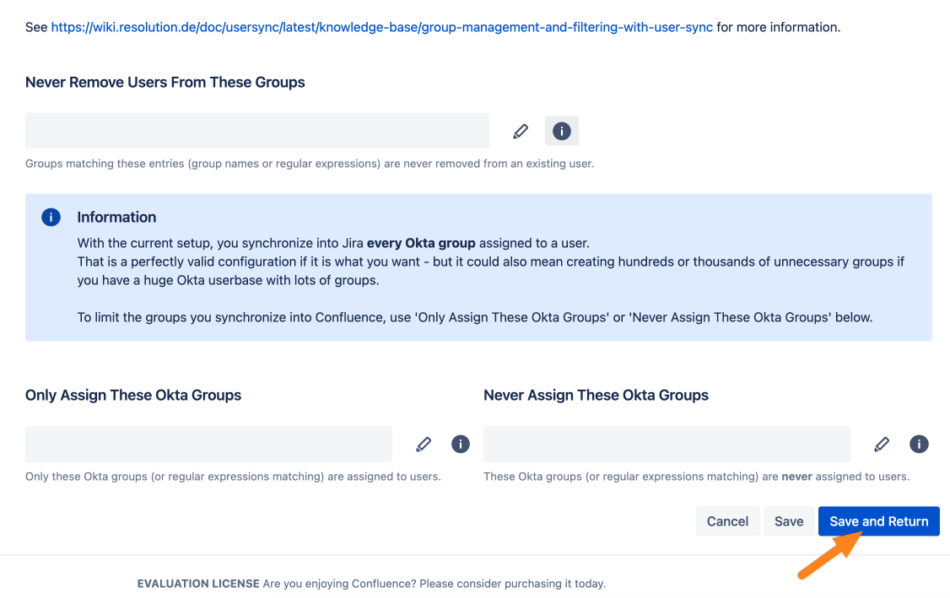
Click Save and Return to finish the configuration.


Result
After syncing users, you can see the field in the Linchpin user profile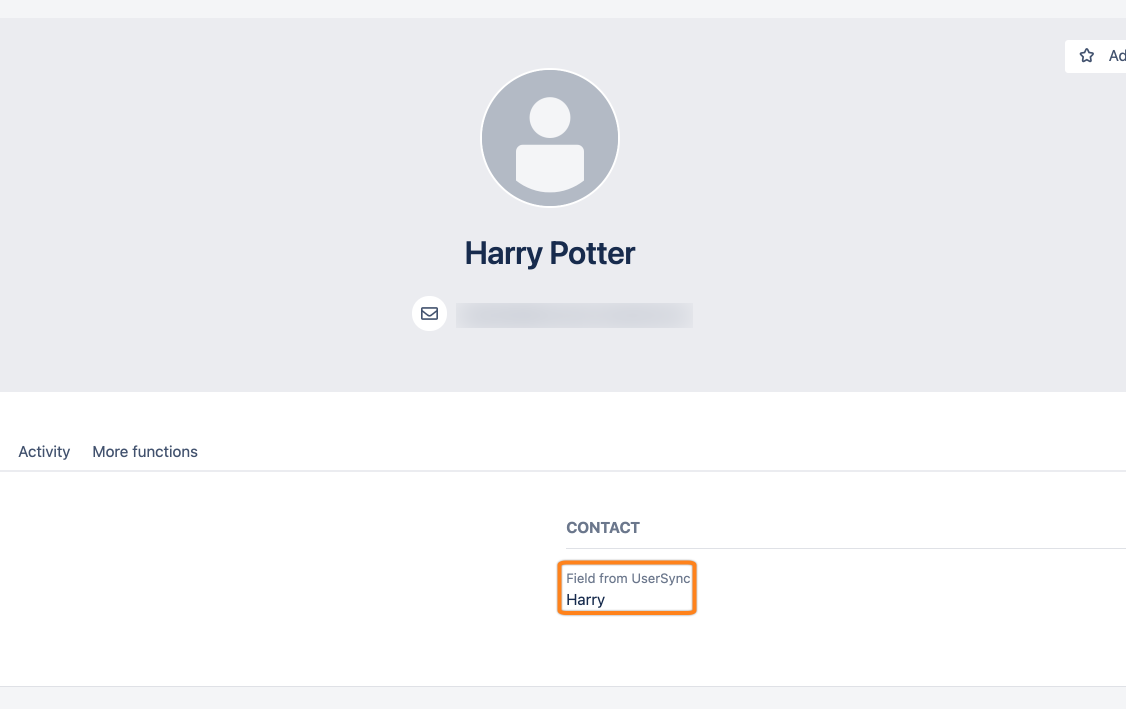
Possible Problems
I can not see the Linchpin field in the User Sync configuration!
Make sure that the Linchpin field has its type set to IdP.
I see that the IdP and User Sync has the correct attribute (e.g., phone number), which is also transferred, but is not changed in Confluence.
Linchpin has the same fields as Confluence (e.g., location, job, etc.). In addition, Linchpin does not know when an update/entry is made in the Confluence fields.
If the values do not change frequently, then the migration button can be used in the Linchpin app.
Go to → Confluence administration → Linchpin User Profiles → Profile Migration (here you will find one button: Start migration).
Then the Confluence user property fields are transferred to the Linchpin fields.