
Important Update Effective February 1, 2024!
Due to recent changes in Jira and Confluence, we've made the tough decision to discontinue the OpenID Connect (OIDC)/OAuth app and no longer provide new versions for the newest Jira/Confluence releases as of January 31, 2024.
This is due to some necessary components no longer shipping with Jira/Confluence, which would require some extensive rewrites of the OIDC App.
![]() Important Update! This app will be discontinued soon!
Important Update! This app will be discontinued soon!
Due to recent changes in Jira, which no longer ships with some components required for our Read Receipts app to run, we've made the tough decision to discontinue the app, as of Februar 5, 2025.
![]() Important Update! This app will be discontinued soon!
Important Update! This app will be discontinued soon!
We've made the tough business decision to discontinue the app, as of January 11, 2025.
User Provisioning with UserSync
Goal
After following this tutorial, you will have set up UserSync together with our AWS app. UserSync will create or update the user during login with the data from your Identity Provider.
If you need a Just-In-Time setup (create/update users with the claims sent by the load balancer), please see here.
Prerequisites
- AWS ALB & Amazon Cognito Authentication version >= 2.x
- A configured UserSync connector. Please find the latest documentation for this here https://wiki.resolution.de/doc/usersync/latest
Step-By-Step Guide
After setting up a UserSync connector, please follow these steps:
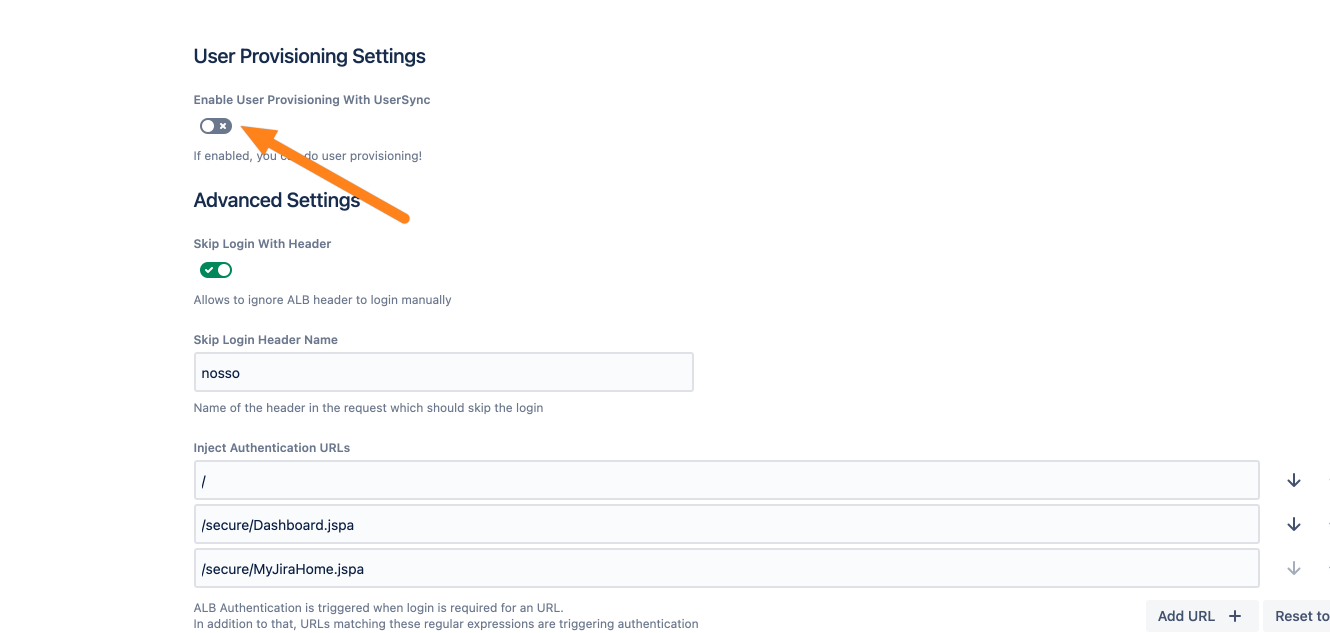
- Go to the AWS ALB & Amazon Cognito Authentication configuration and scroll down to the User Provisioning section. Tick Update with UserSync to show the UserSync settings.
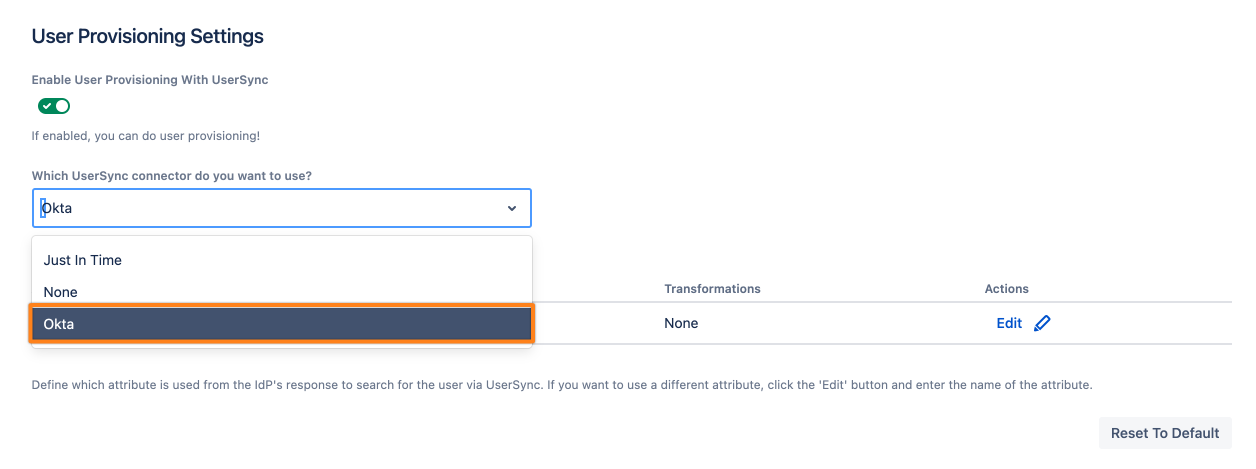
- Click the Which UserSync connector do you want to use?. Dropdown and choose the connector you have configured before (Okta for this example).

If you haven't configured the connector yet, make sure to follow the corresponding guide:
Now, we must configure the UserSync lookup attribute. This is how UserSync searches remotely for the user. The value depends on the identity provider.
Please see the table below for the respective value:Azure Okta Google Cloud Identity AWS Cognito Keycloak Attribute name to be used oid or upn (preferably oid) email email email email
Click Edit to continue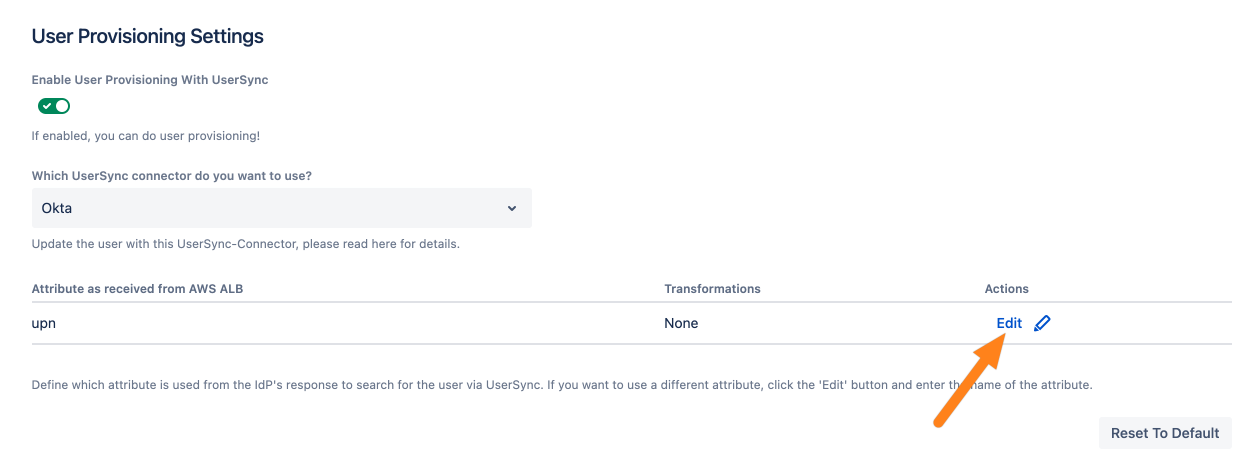
- If you need to adjust the value, click Edit and replace the standard configuration with the name from the table above.
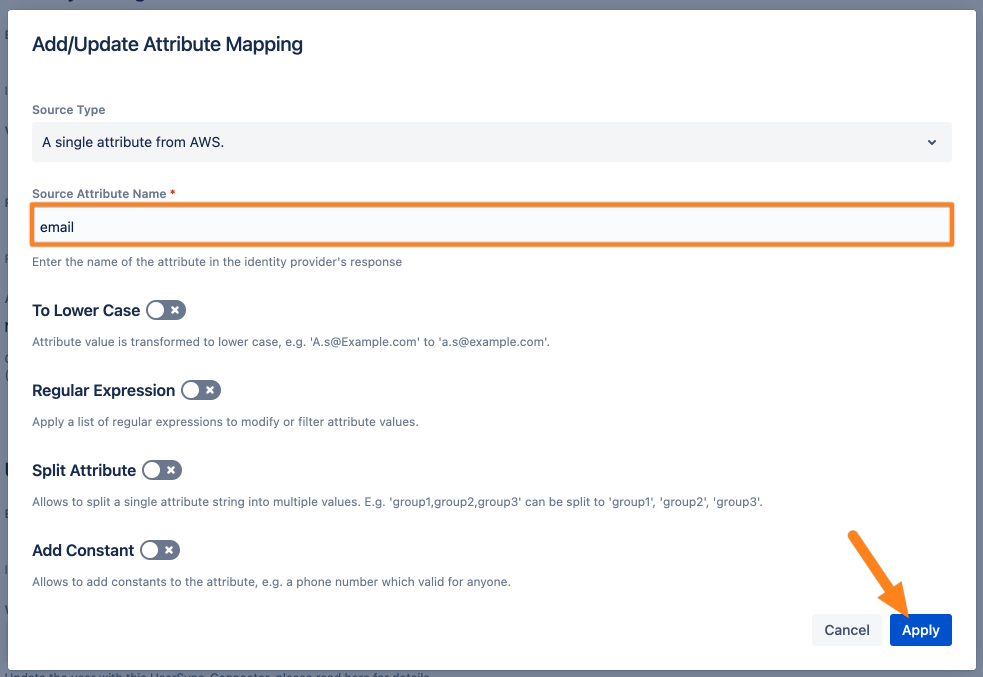
- Save your configuration
When logging in, your user should now be updated or created by the UserSync connector.