Move to SAML SSO by re:solution
As part of our commitment to our customers, this tutorial describes how to move from the OpenID Connect (OIDC)/OAuth app to our SAML SSO app.
User Provisioning
The OpenID Connect (OIDC)/OAuth app only supports Just-In-Time provisioning when a user logs in. While SAML SSO also supports this, it also includes User Sync which allows synchronizing users periodically or during log-in. For most of our customers, this can be beneficial for their setup when it is supported by their identity provider. To discuss the best option for your Atlassian product, please contact us at https://www.resolution.de/go/support or book a meeting via https://www.resolution.de/go/calendly.
Setup
While you could in theory copy over the credentials from OpenID Connect to SAML SSO, you also need to make changes at your identity provider. Thus, if you get stuck during setup, neither login via OpenID Connect (OIDC)/OAuth app nor SAML SSO would work. As of this, we recommend creating a new configuration following our guides.
To set up Saml SSO, please follow our tutorial guides. For the complete list of identity provider tutorials, please see here. Based on our existing setup guides for the OpenID Connect (OIDC)/OAuth app, here are some quick links that point directly to the corresponding tutorials:
In general, SAML SSO should support any OpenId Connect or social OAuth2-based login provider, just choose Other of the identity provider type in our setup wizard.
If you can not find your identity provider in the provided lists, please contact us at https://www.resolution.de/go/support and we will help you with your setup.
Customizing the Experience
OpenID Connect (OIDC)/OAuth app displays a button per identity provider on the login page of Jira and Confluence, as well as on the Jira Dashboard. Saml SSO also supports this, however, SAML SSO also supports an automatic redirect to the identity provider whenever a user tries to access a page for which they must be logged, the login page, or any page matching the configurable force SSO URLs. Effectively with using the redirection, users will not see the login prompt of Jira or Confluence and they will be directly redirected for login at the identity provider.
SSO Redirection
If you want to configure Jira or Confluence to not allow users to log in via the local login prompt, please see https://wiki.resolution.de/doc/saml-sso/latest/jira/further-configuration/deny-password-authentication. While the redirection will effectively hide the login prompt for users, it is still there. The deny password authenticator will not allow users to log in via username and password, except for admins or users of a configurable group.
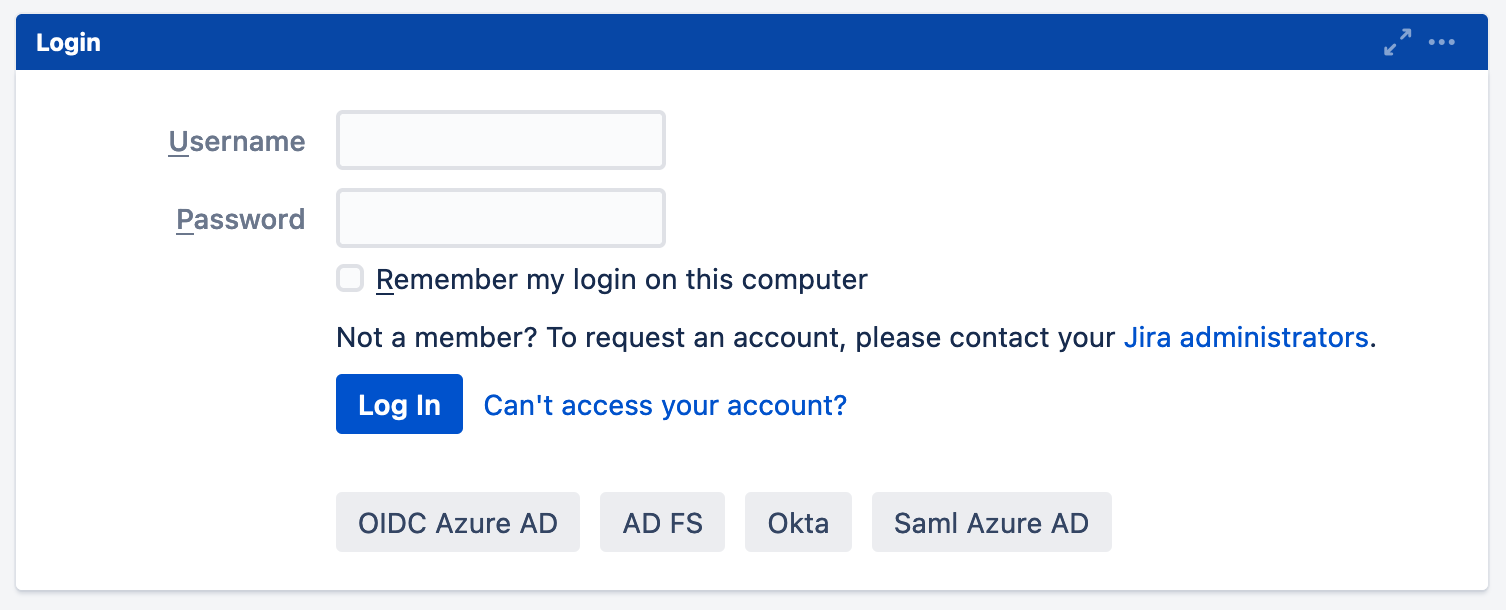
Display a Button per Identity Provider
With this setup, SAML SSO will display a configurable button per identity provider on the login page (or the Jira dashboard) without using the redirection.
For this, please follow these steps.
Go to the SAML SSO configuration.
SAML SSO allows you to configure for which idp you want to display a button. Additionally, it allows to customize the button text. If you do not enter a text for the button, it will use the Name of the identity provider configuration, thus "OIDC Azure AD" in this case.
To display the button, click Display a button. (The text for Confluence will only refer to the login page because there is no dashboard).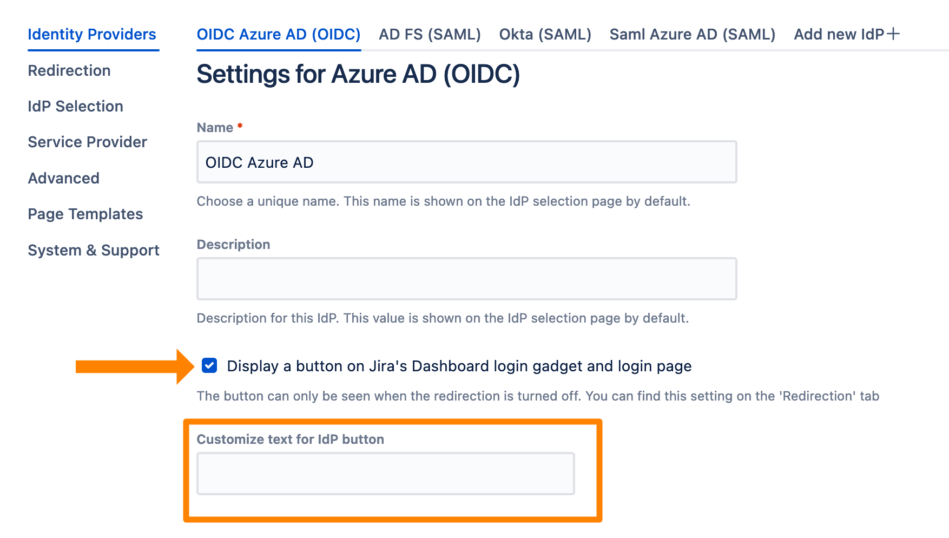
Save the configuration.

SSO Redirection
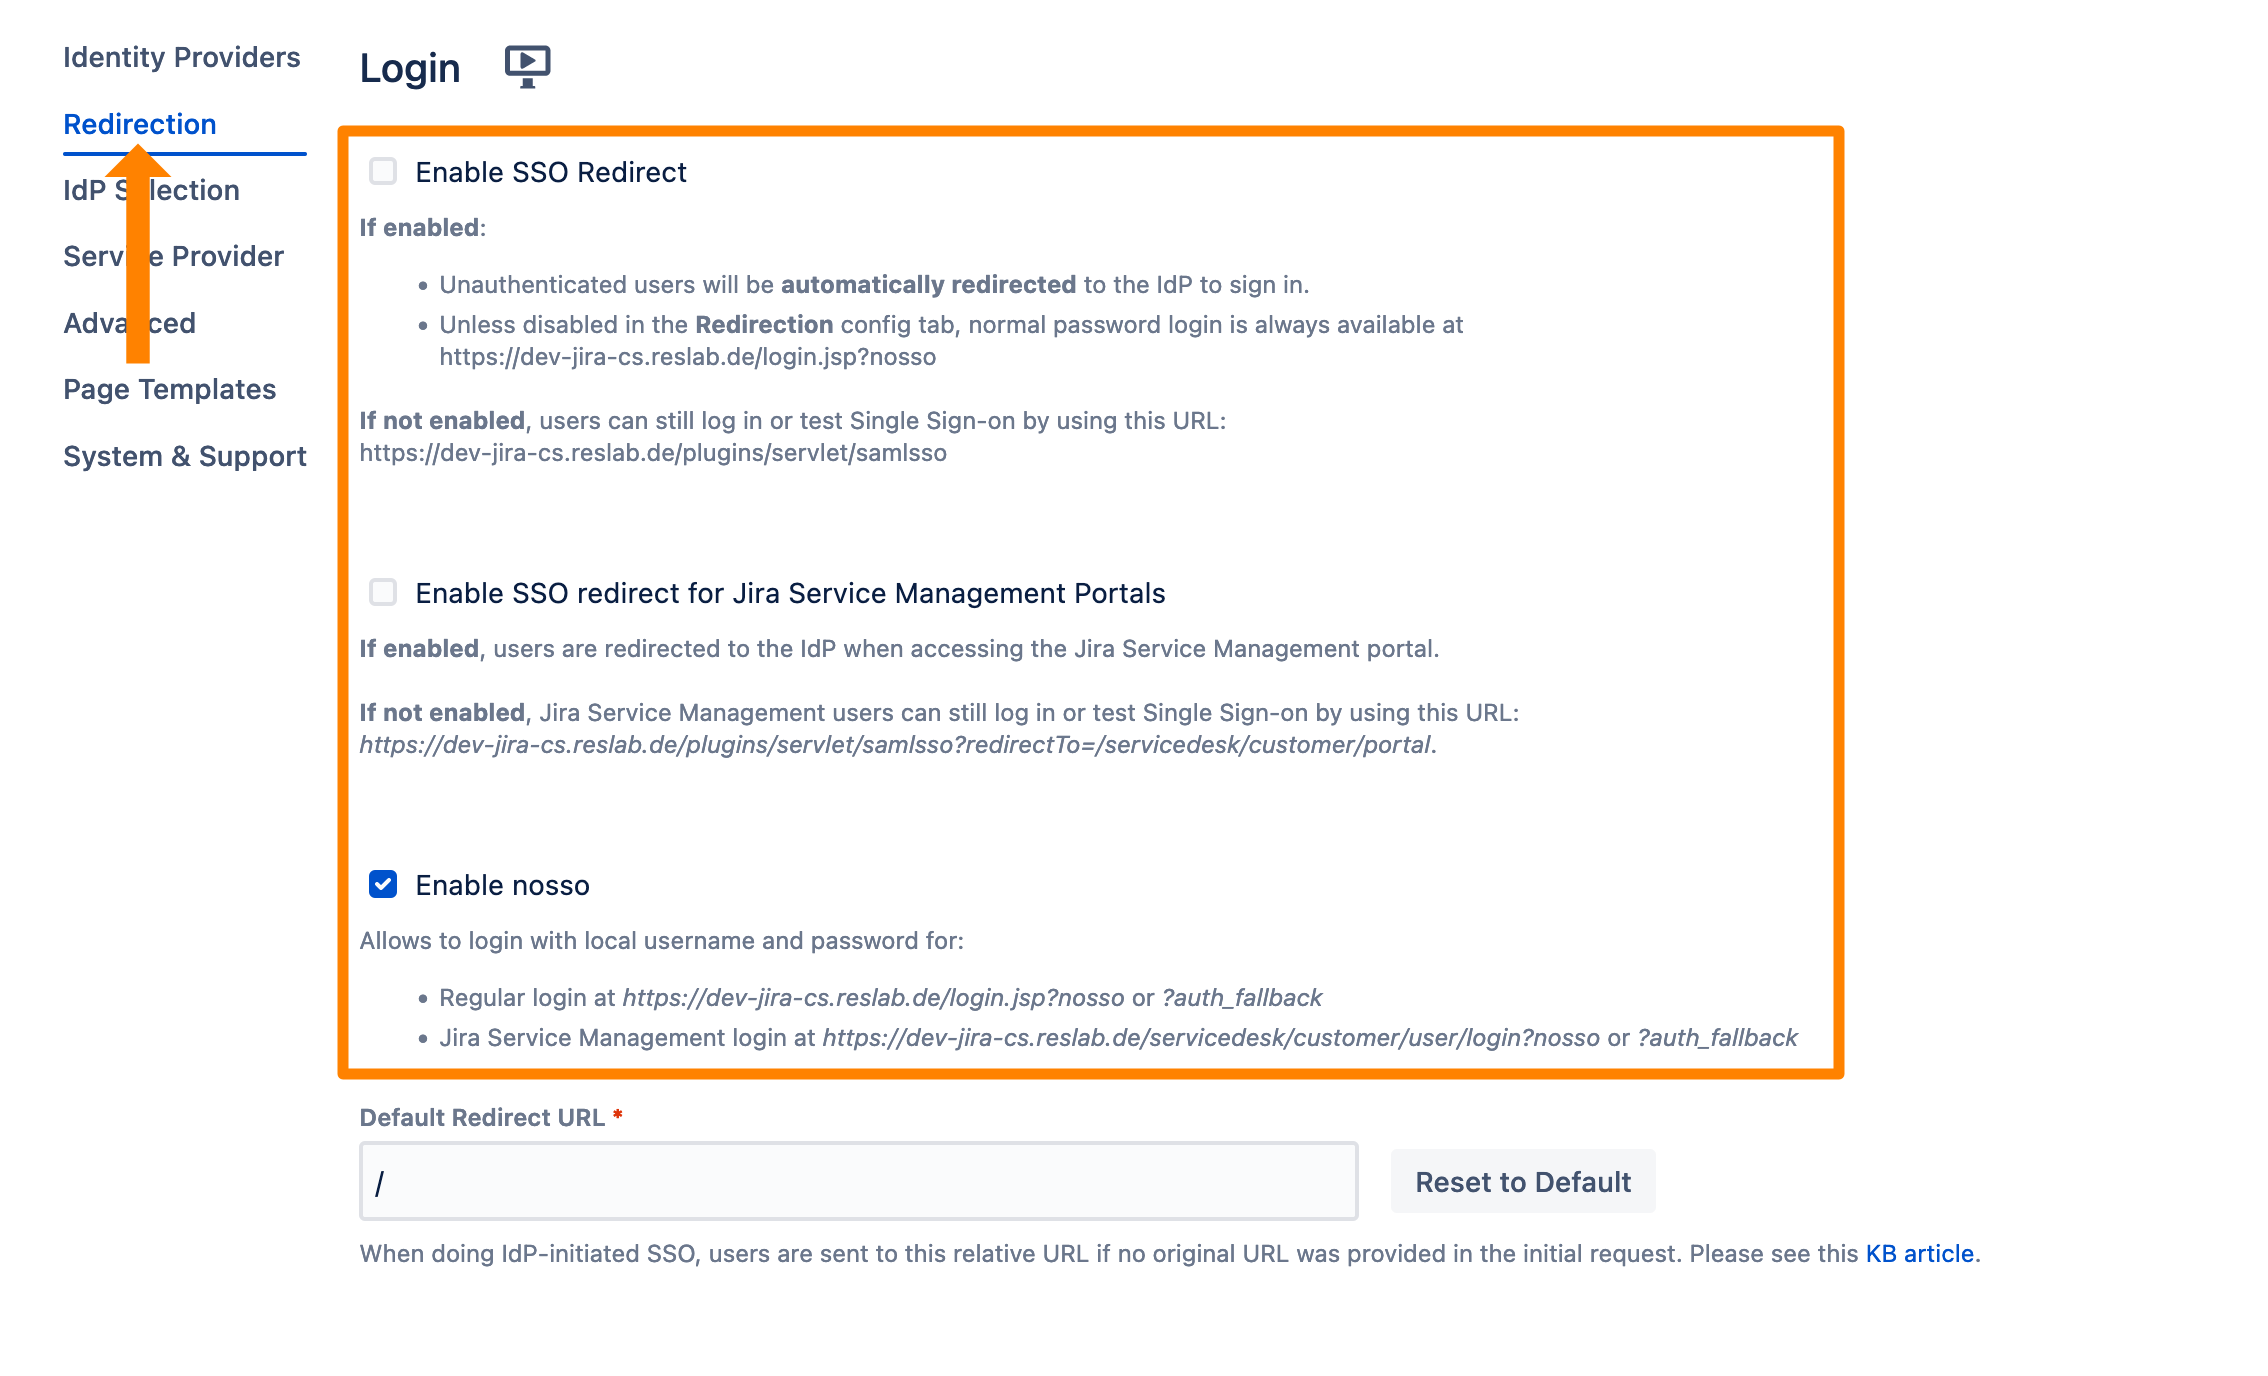
The SSO Redirection will redirect all unauthenticated users to the identity provider for login. However, in certain cases, you might still want to be able to log in locally. For this, we have the nosso feature. By adding the "?nosso" parameter to the Jira or Confluence login page URL (Jira: baseUrl/login.jsp?nosso | Confluence: baseUrl/login.action?nosso), the local login prompt will be shown. Of course, you can disable this feature (see screenshot below).
Go to the SAML SSO configuration.
Click the Redirection tab.

Click Enable SSO Redirect to activate the SSO redirection. For Jira Service Management, you can also activate a redirection. Nosso can be deactivated by unchecking Enable nosso.
If you disable nosso and you accidentally lock out yourself from your instance, please see https://wiki.resolution.de/doc/saml-sso/latest/jira/knowledgebase-articles/technical/cannot-access-jira-confluence-bitbucket-bamboo-fisheye-crucible-anymore-bypass-ssoSave the configuration.