How To Bulk-Rename Users With The User Sync Excel Connector
Goal
You want to bulk-rename users in an internal directory without breaking the references to tickets, pages etc.
Important
This actions described here should always be tested in a staging/ dev environment first, so that any negative impact can be avoided.
If you have doubts about the process or questions, please do not hesitate to contact us via https://www.resolution.de/go/support.
Requirements
SAML SSO 3.5.4 or later or User Sync 1.4.4 or later
Access to the file system of Jira/ Confluence or wherever you are renaming the users
Step-By-Step Guide
Installing the Excel Connector
You can install the Excel Connector for User Sync by copying the the link matching your SSO- or User Sync version to your clipboard
and then use it in the app/ add-on manager to install it.
SAML SSO Version (inlcudes User Sync) | User Sync Version | Excel Connector Download |
|---|---|---|
3.5.4 | 1.4.4 | http://builds.resolution.de/master/de.resolution.usersync.connector.excelimporter-1.4.4.obr |
3.5.5 | 1.5.0 | http://builds.resolution.de/master/de.resolution.usersync.connector.excelimporter-1.5.0.obr |
3.6.0 | 1.5.1 | http://builds.resolution.de/master/de.resolution.usersync.connector.excelimporter-1.5.1.obr |
3.6.1 | 1.5.1 | http://builds.resolution.de/master/de.resolution.usersync.connector.excelimporter-1.5.1.obr |
3.6.2 | 1.5.1 | http://builds.resolution.de/master/de.resolution.usersync.connector.excelimporter-1.5.1.obr |
We always recommend upgrading to the latest version of SAML SSO/ User Sync, so that you can use the latest version of the Excel Connector as well.
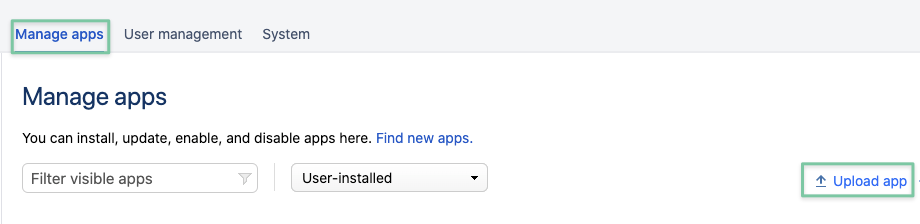
Below example shows how to install the Excel connector in Jira:
Click on the Upload app link
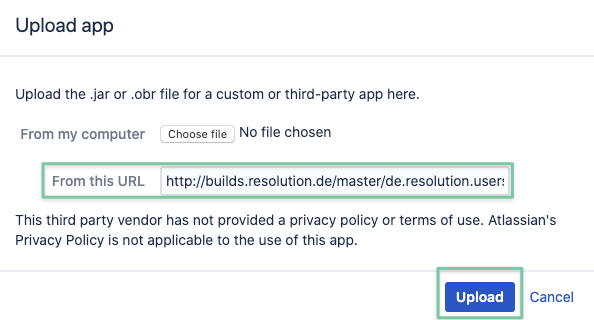
Paste the URL into the corresponding field and press Upload:
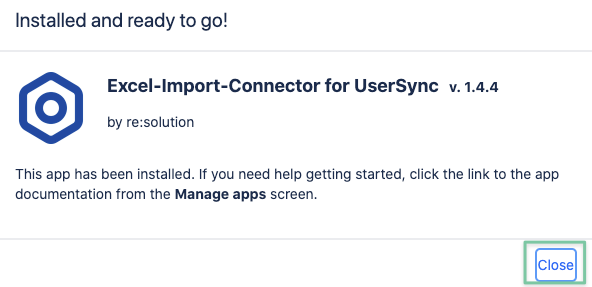
The connector will now be installed and should present a screen like this in the end:
Exporting Users to be Renamed from a Directory
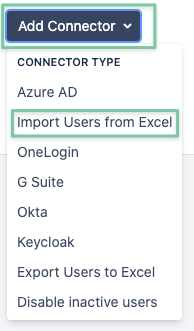
Navigate to User Sync and add a new connector, below example is Jira again but User Sync looks the same in all Atlassian products:
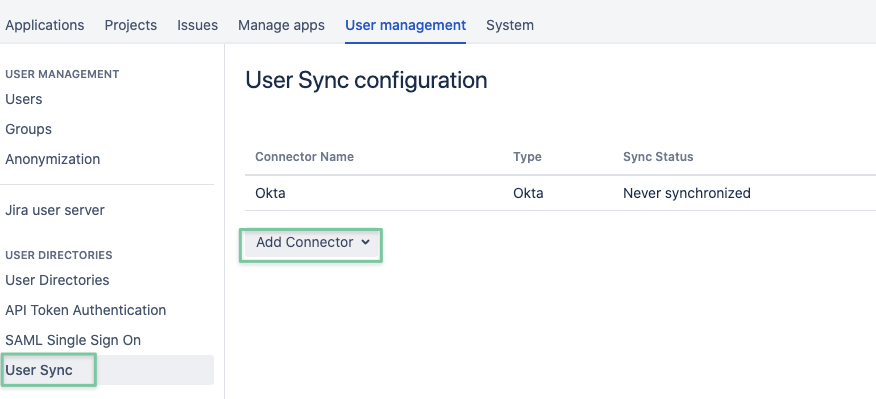
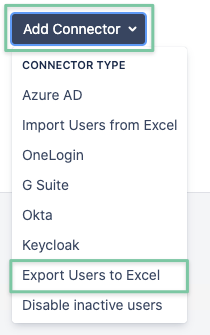
Select the Export Users to Excel option
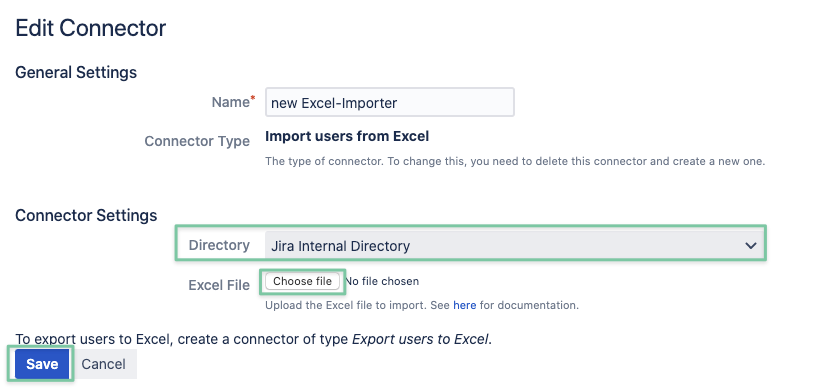
The next screen will present you a few options, you'll really only need to select the right directory here to export the users you want to rename:
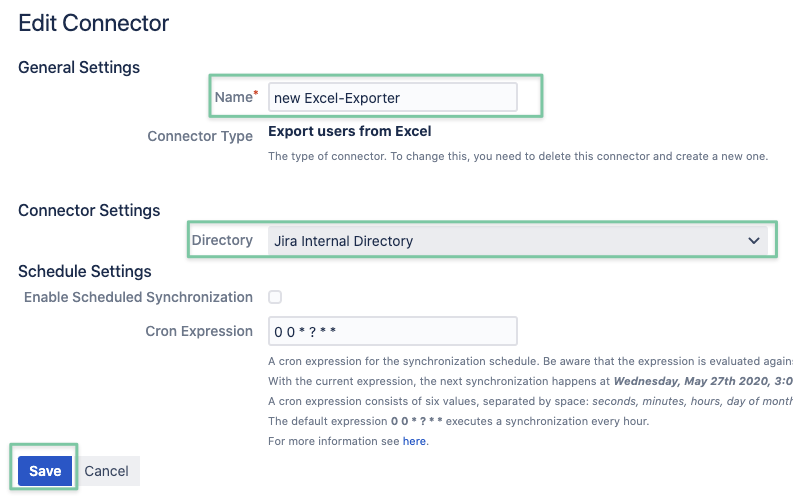
After saving the connector, you can press the Sync button
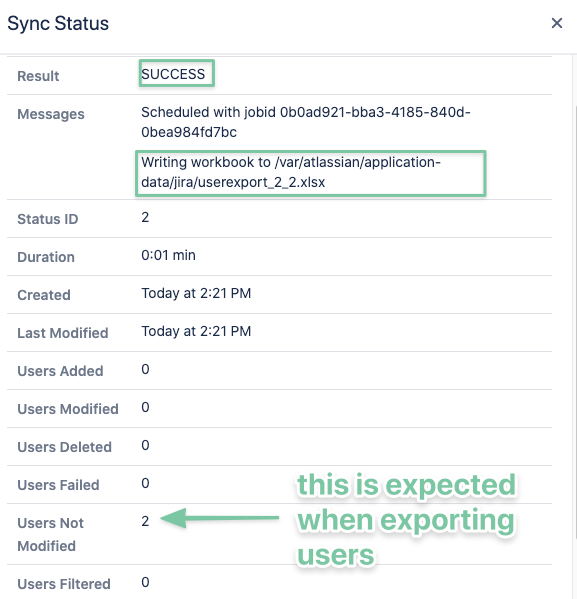
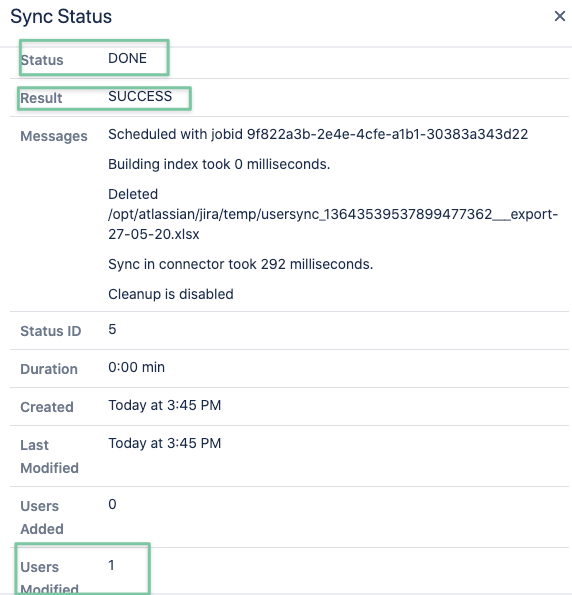
If that has been successful, the Result message will reflect that and you'll see the location and file name of the export on the server.
We'll offer a download for that file in one of the next Excel Connector releases.
Copy the file from the server to your local computer, for instance with scp or an SFTP client of your choice.
Modify the Export for the Bulk-Rename Operation
Open the excel file and you'll notice as many lines in it as users in the directory.
Each line contains a lot of columns, you'll need only a few for renaming users.
Below two sample lines and all the original columns:

Remove Columns not Required
Remove all columns starting with column D, the ATTR_ACTIVE column.
Only the following existing columns are required:
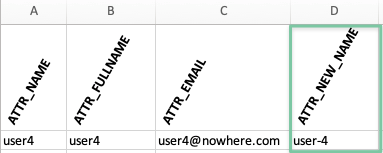
ATTR_NAME
ATTR_FULLNAME
ATTR_EMAIL
Add another new column after ATTR_EMAIL and call it ATTR_NEW_NAME
This needs to contain the new username.
In the following example you can see a user called user4 which would be renamed to user-4 in the next step.
Important Tasks Before Proceeding
As you'll most likely will have a lot of users to be renamed, be aware of the following:
make sure there are no empty lines in between each user line
make sure that the file only contains users you want to rename
delete all other lines
make sure each ATTR_NEW_NAME column contains the new username value
user names need to be unique, make sure you don't provide the same ATTR_NEW_NAME twice
this would result in an error for the second user being renamed to one existing already
it is always time consuming to correct such errors
Also:
if any line contains a username in ATTR_NAME which is not existing (anymore) in the directory, the users will be added
that usually only happens, if you upload the same file again, after you've renamed all users already
so don't ever upload/ sync the same Excel file twice with the importer,
otherwise you'll end up with the renamed users and the original users,
where the original users/ usernames don't have any groups assigned
Importing/ Renaming Users from Excel
Now it's time to add another connector of type Import Users from Excel
Select the same directory from which you've exported the users and select the Excel file modified in the last step.
Save the connector.
Now you can start the sync process for that connector to rename the users based your file:
Once complete, you'll see the amount of users modified:
After that, you'll notice the connector displaying an Invalid! warning. This is normal and just means the file is not present anymore.
It basically prevents you from running another sync/ bulk rename again. There is also no Sync button anymore.
Removing Excel Connectors
After you've renamed the users, you can safely delete both the Excel exporter- and importer connectors:

Miscellaneous
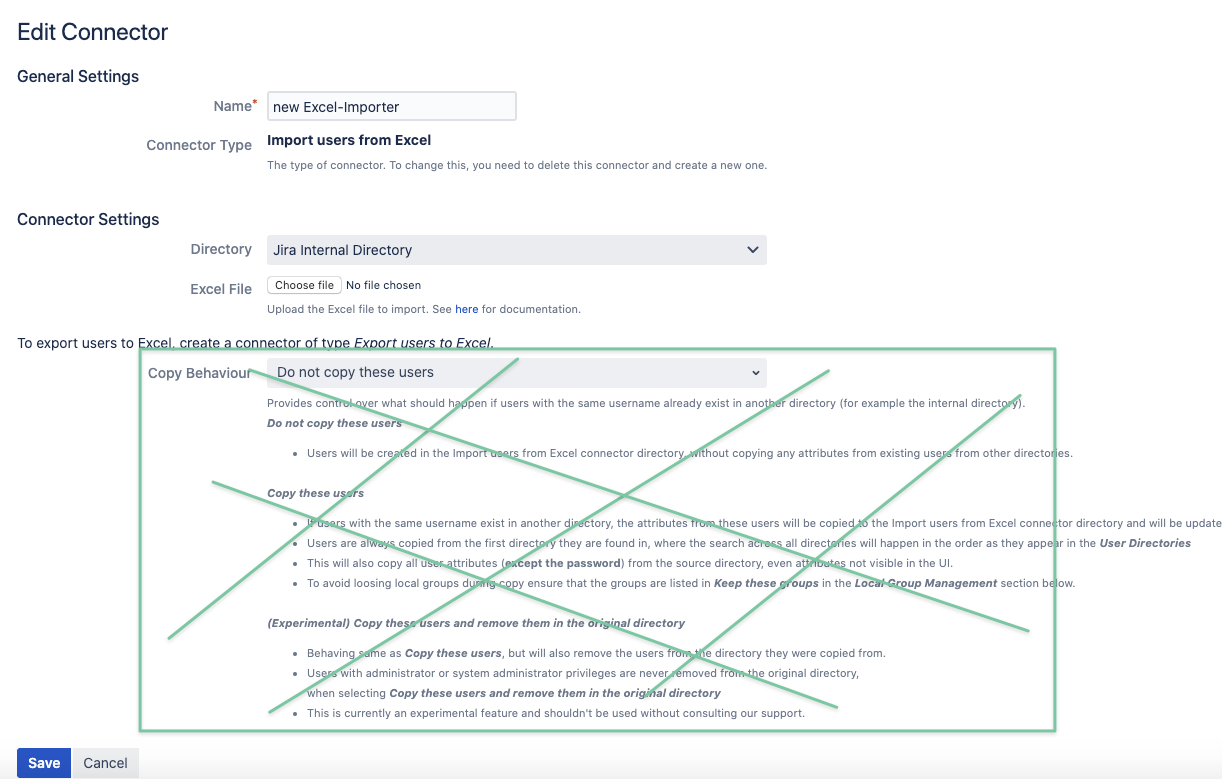
Should you edit an Excel connector again (i.e. for changing the file you want to upload again), don't be confused by the Copy Behaviour section as in the screenshot below.
It will be removed in a later version and doesn't server any purpose.