
Excel Connector
User Guide for the Excel Connector
Excel Connector Overview
The excel connector is a custom connector for User Sync internally developed by the resolution team to aid with support cases. This connector has been published in the Atlassian Marketplace for its ease of use and numerous advantages as an alternative to direct database modifications. Note that the import option should be used with caution.
By design, the Excel Import option of the Excel Connector will modify the information stored in your user directory to include data that has been manually manipulated and transformed on an excel file.
To avoid unexpected results, make sure you understand the consequences of every import, and always test in a development or staging environment before using the connector.
If you have doubts or questions about the process, please do not hesitate to contact us via https://www.resolution.de/go/support.
Features
Export the set of users from either the internal user directory of the Atlassian application or your Identity Provider into an Excel file
Import users and their attributes from an existing Excel file
Note that the following attributes are read-only and won’t be modified with any import:
ATTRIBUTE_ID
ATTRIBUTE_IS_ADMIN
ATTRIBUTE_IS_SYSADMIN
ATTRIBUTE_JIRA_KEY
ATTRIBUTE_CONFLUENCE_KEY
Use Cases
Migrations
Ensure username matches to prepare migrations from the Atlassian application’s internal directory to an Identity Provider with User Sync
Export users and import them back into the Atlassian application’s internal directory before deprecating LDAP
Periodic exports
Create scheduled reports for auditing purposes
Bulk operations
Create new users
Migrate users from one directory to another (see full tutorial)
Update user profiles
Rename users (see full tutorial)
Modify user attributes
Modify group memberships
Requirements
SAML SSO 3.5.4 or later or User Sync 1.4.4 or later
Access to the file system of Jira, Confluence, Bitbucket, Bamboo, or wherever you are renaming the users
A staging/development environment to test the functionality before applying any changes to the user directories.
How to install the Excel Connector
You can install the Excel Connector for User Sync from the App Manager in Jira. Make sure to install the version of the connector that corresponds to your SAML SSO or User Sync Version.
We always recommend upgrading to the latest version of SAML SSO/ User Sync, so that you can use the latest version of the Excel Connector as well.
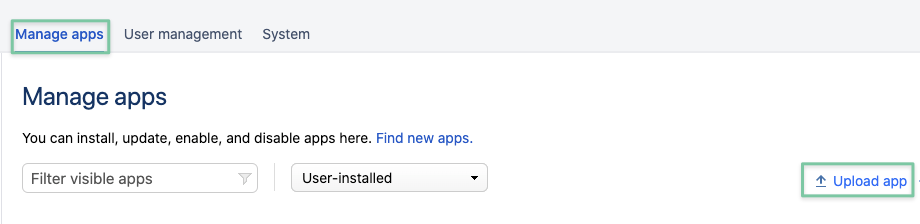
Step 1: Click Upload App on the App Manager
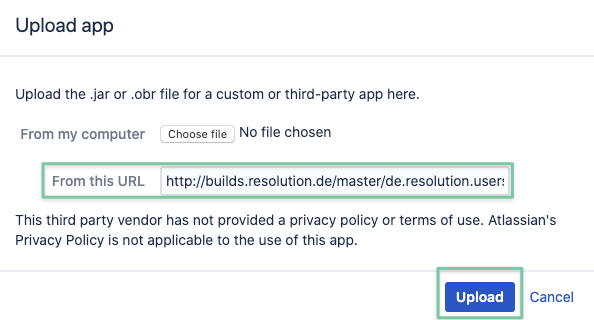
Step 2: Paste the app link
Paste the following link into the “from this URL” field, as shown in the image, then press Upload:
http://builds.resolution.de/master/de.resolution.usersync.connector.excelimporter-1.5.2.obr
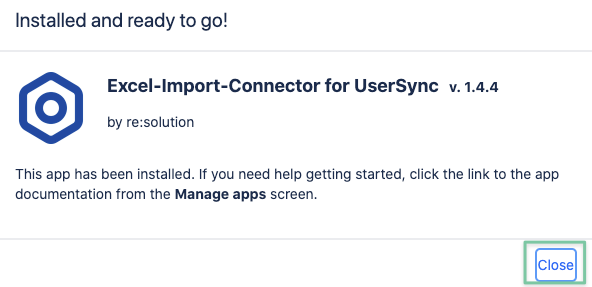
After the connector installs, it should present a screen like this:
How to Export Users with the Excel Connector
With the Excel Connector you can export the users stored in any user directory connected to your Atlassian applications.
The Excel Connector will export every user stored in the selected directory.
If you want to use the export to make modifications to existing users and import them back into the same user directory, remember to import only the modified users and delete the users without changes from the file.
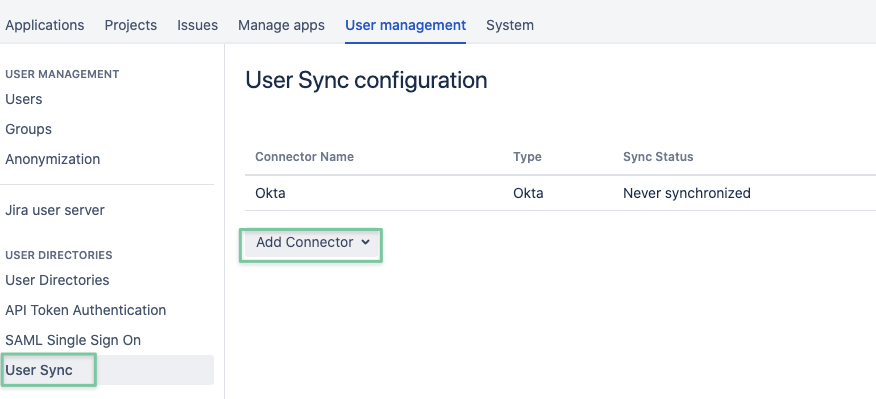
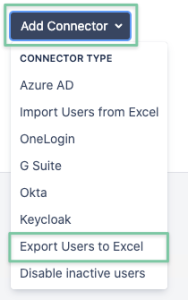
Step 1: Adding a new User Sync Connector
Navigate to User Sync in the User Management tab of the Administration section.
Click on Add Connector
Select the Export Users to Excel option
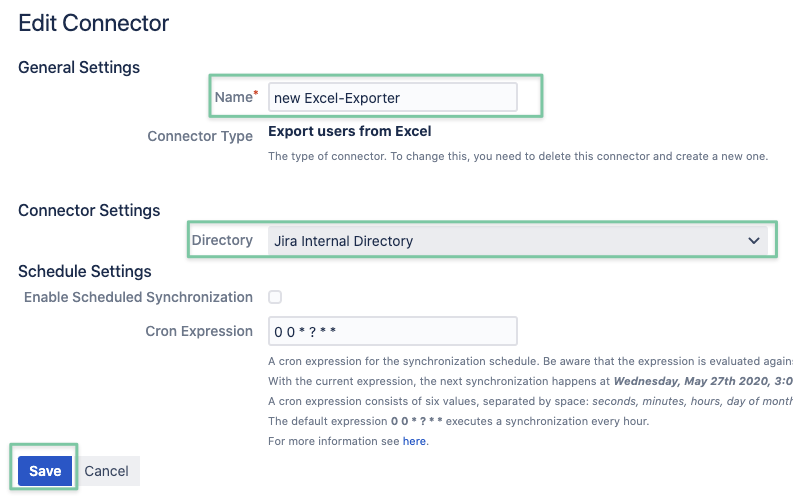
Step 2: Export settings
Name the excel export connector
Select the User Directory you want to export
If you’re using the export for reporting or auditing, you can also enable scheduled synchronization
Hit Save
Step 3: Running the synchronization
After saving the connector, you can press the Sync button
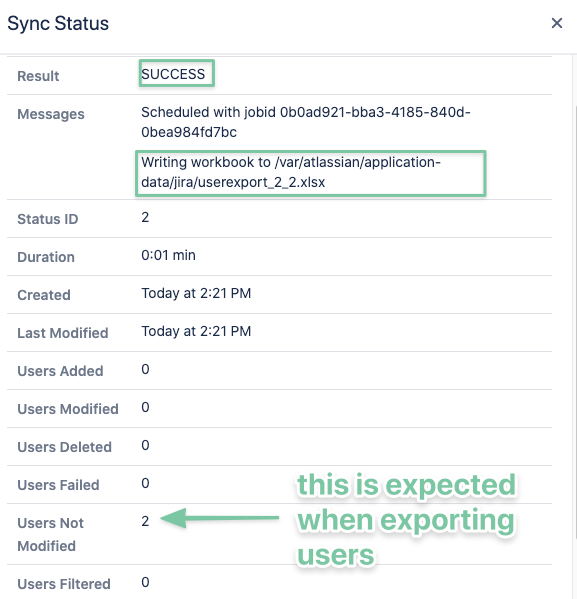
Step 4: Checking the Sync Status message
The Result field will confirm whether the synchronization has been successful or not
The Messages field will include the location and file name of the export on the server
Step 5: Opening the excel file
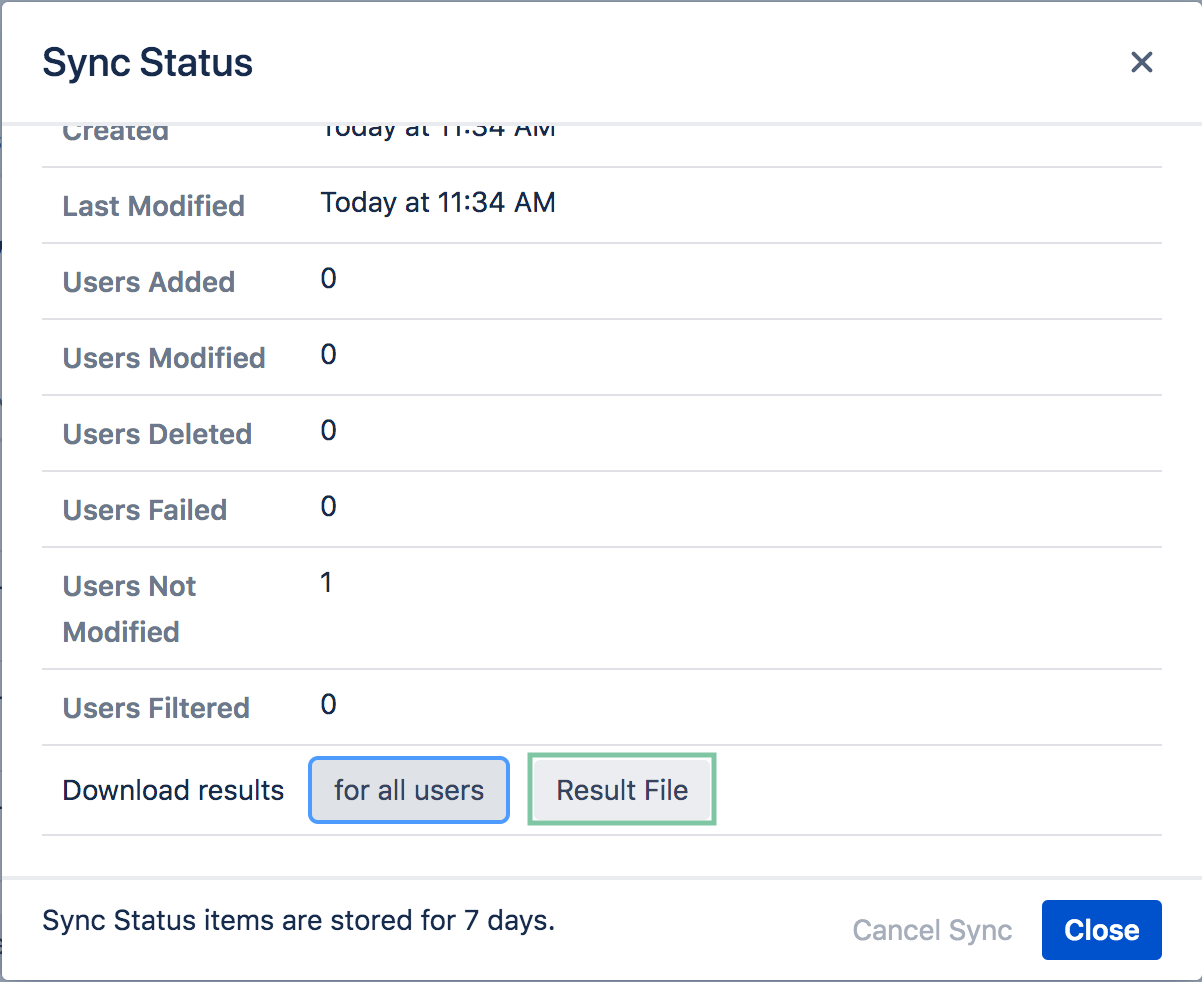
Scroll down to the bottom of the modal window, then press on Result File to download the excel file.
How to Import Users with the Excel Connector
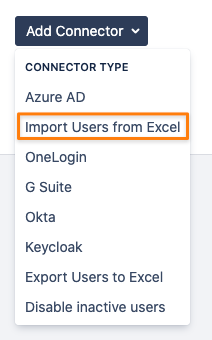
Step 1: Adding a new User Sync Connector
Navigate to User Sync in the User Management tab of the Administration section.
Click on Add Connector
Select the Import Users to Excel option
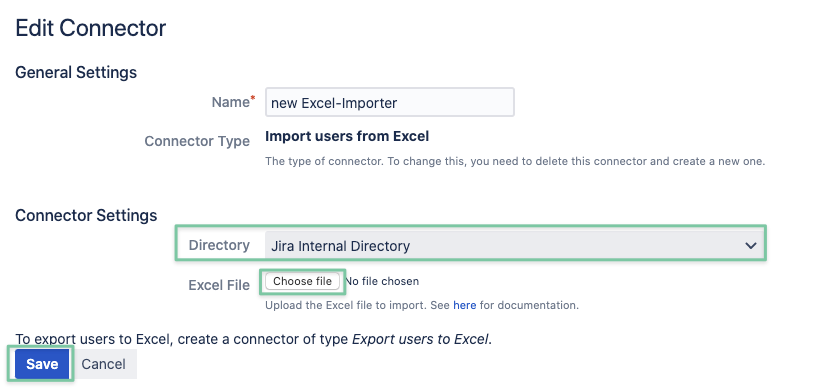
Step 2: Import settings
Name the excel import connector
Select the target User Directory
Choose the excel file
Hit Save
Step 3: Running the synchronization
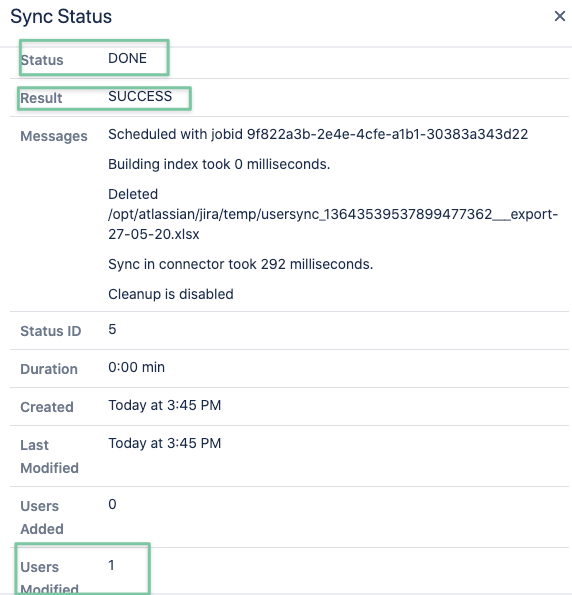
Now you can start the sync process.
Once complete, you'll see the amount of users modified:
Step 4: Maintenance
Once synchronized, an excel import will display an Invalid! message, indicating that the original file is no longer present.
Note that the sync button has disappeared and the synchronization cannot be run again.
At this stage, it’s safe to delete the entry and remove it from your list of connectors.
