Getting Started
Welcome
With Google Analytics for Confluence, you will be able to track and view your Atlassian Confluence Cloud data without moving away from Confluence! Follow this quick guide to get started.
Prerequisite:
For a flawless configuration, you must have the next prerequisites:
Admin access to your Confluence instance.
Admin access to a Google Analytics account.
Google Analytics Measurement ID. It has the format G-1234565789. Follow the instructions here to learn how to set up a property, create a website data stream, and get your measurement ID.
Step 1: Connecting Your Google Account
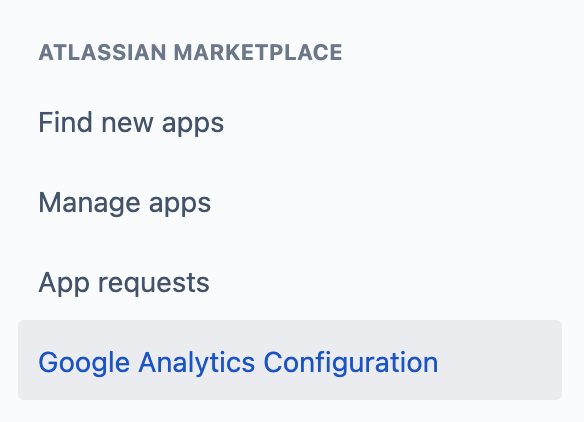
Find the Google Analytics Configuration panel in Confluence Settings -> Atlassian Marketplace
Click on Sign in with Google

Click Ok, login to Google with your Google Analytics credentials, and grant the scopes.
If you don't want to connect your Google Analytics account and just want to track Confluence data on Google Analytics, please read the (6.0) Configuration without account connection setup guide.
Step 2: Account Settings
Set the groups that will be allowed to watch the analytics.
Set the account, property, and view/stream entries according to the setup created on Google Analytics
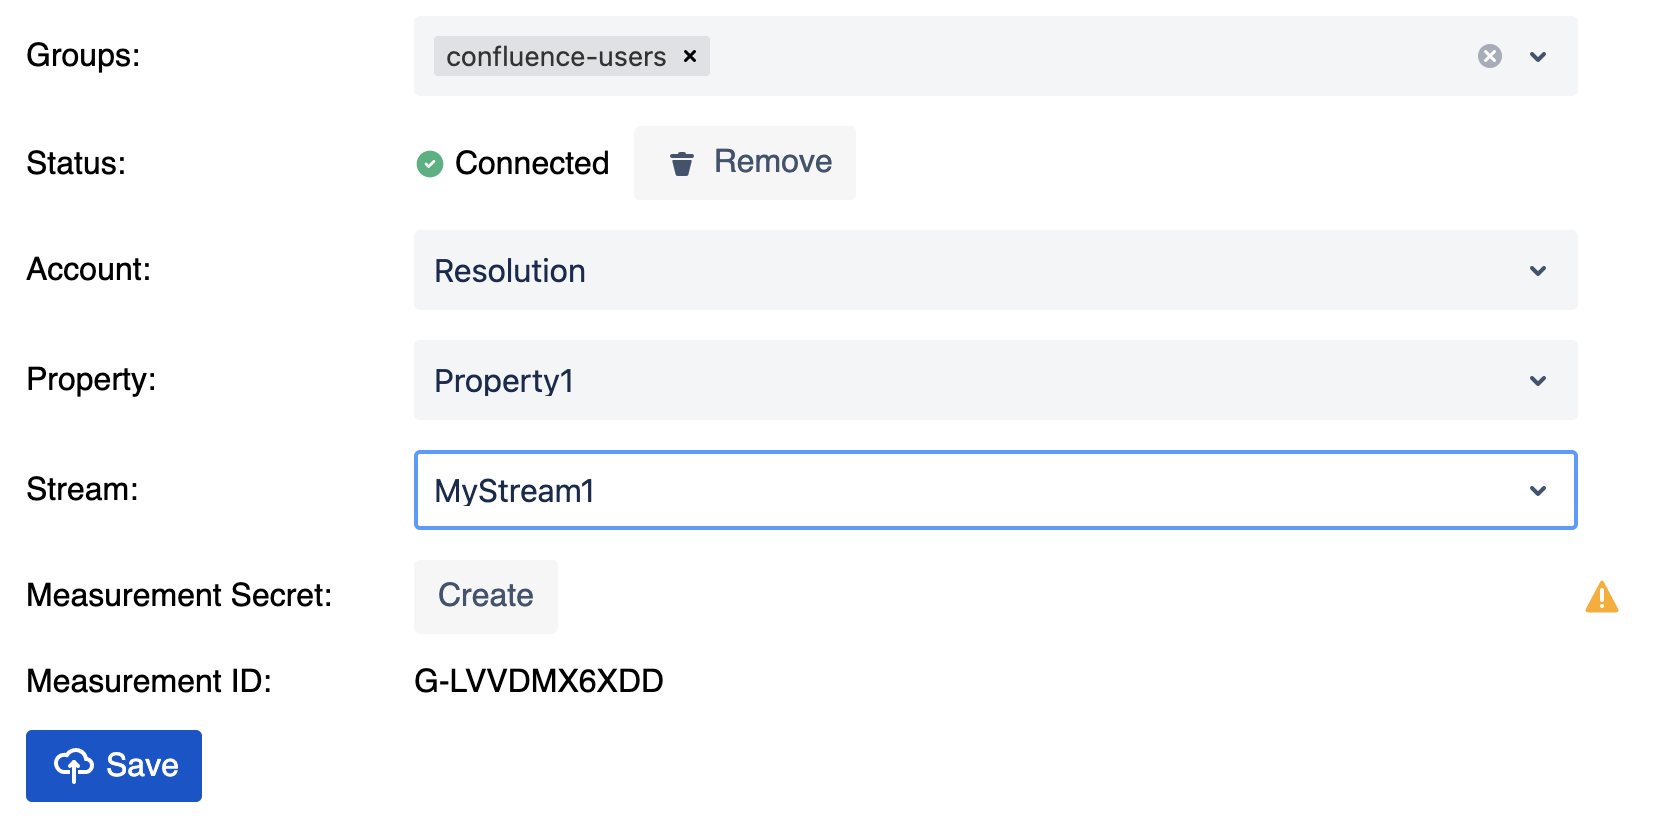
For GA4 you have to create a Measurement API Secret. If you have one, you can select it. Otherwise, click the Create button.

Select the property and the stream
Save your unsaved changes
You might encounter an error message while creating the Measurement Protocol API Secret. See here for further instructions.
Step 3: Custom Dimensions
Click the Set Dimensions button to configure your custom dimensions automatically
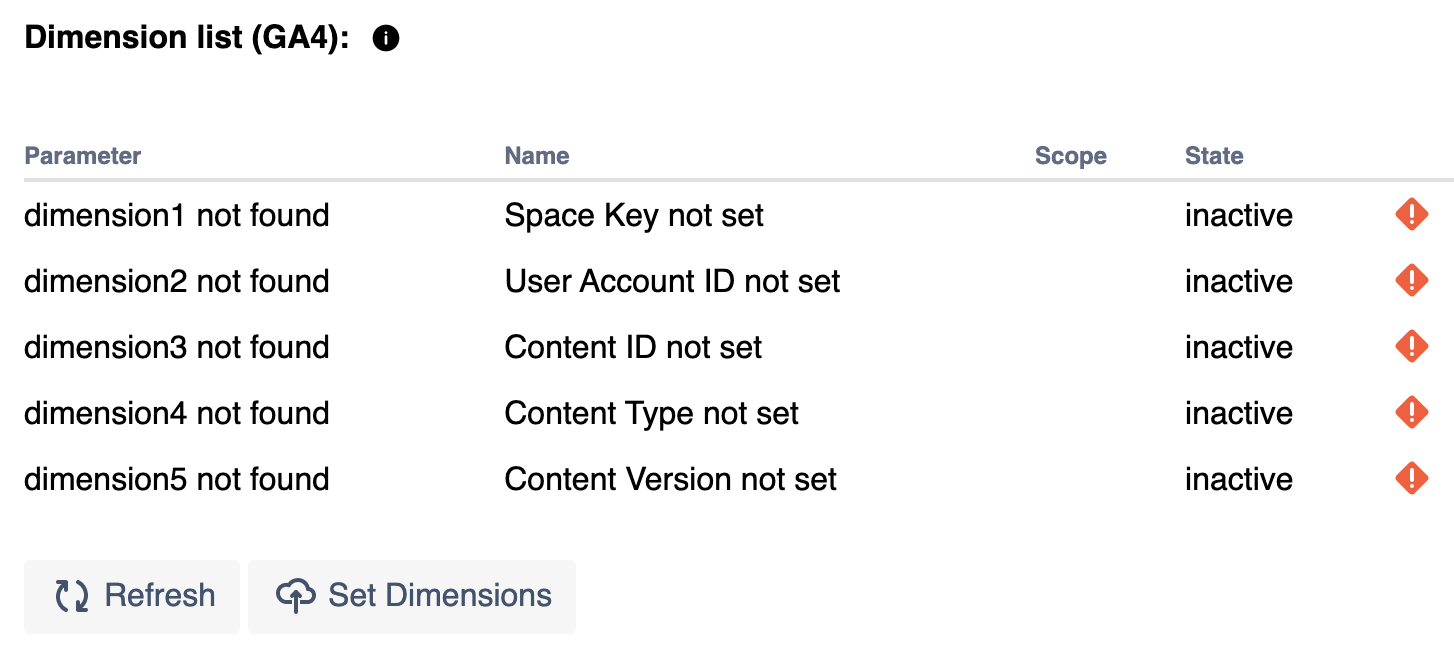
The custom dimensions will be created in a matter of seconds. If the table doesn't refresh automatically, you can click on Refresh.
Step 4: View your data
There are 3 levels of data you can visualize: General (whole instance), Space, Page:
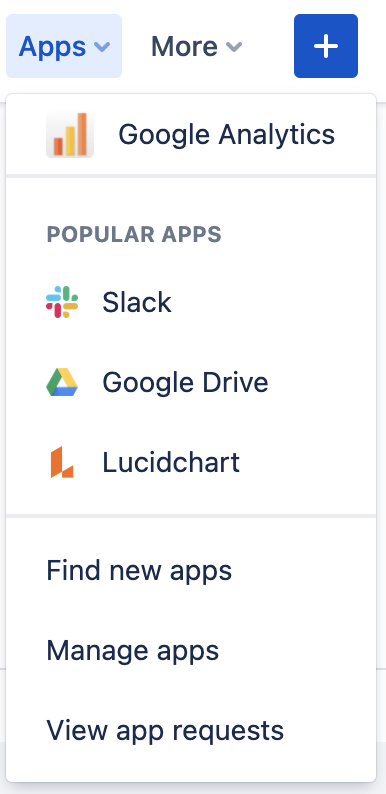
For instance analytics, open the Overview page in the Apps tab on the main menu
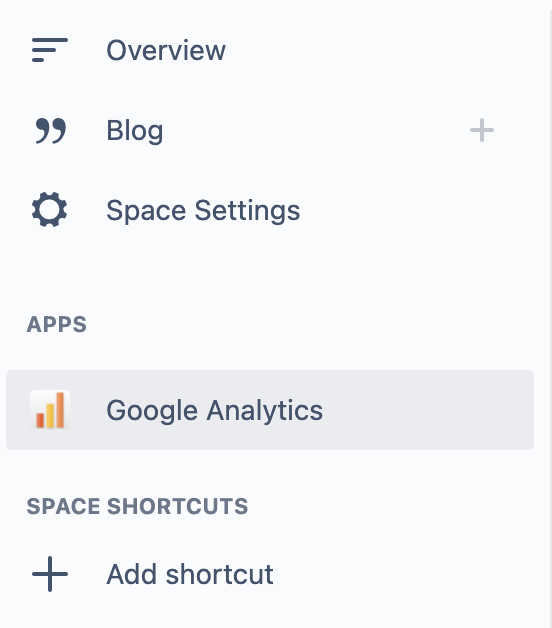
For space analytics, go to the space you want to analyze and click on Google Analytics on the left panel.
For page analytics, click on the icon next to the space name on the desired page.

Please read on in the (6.0) User Guide about all the features and how to make the most of the app.
TRANSLATE with x
English
TRANSLATE with
COPY THE URL BELOW
Back
EMBED THE SNIPPET BELOW IN YOUR SITE
Enable collaborative features and customize widget: Bing Webmaster Portal
TRANSLATE with x
English
TRANSLATE with
COPY THE URL BELOW
Back
EMBED THE SNIPPET BELOW IN YOUR SITE
Enable collaborative features and customize widget: Bing Webmaster Portal