RSA SecurID Access
Goal
Setup SAML SSO with RSA SecurID Access
The following tutorial is currently only intended to provide at least minimum information on how to setup SAML SSO with a RSA SecurID Access Idp.
Should you get stuck, we suggest raising a support ticket with us: https://jira.resolution.de/servicedesk/customer/portal/1
or book a 1:1 screen share directly: https://calendly.com/resolution-support
Prerequisites
RSA SecurID Access
Jira, Confluence, Bitbucket, Bamboo with SAML SSO and a fully qualified domain name for the instance (i.e. jira-dev.company.local or jira.company.com)
Step-by-Step Setup Guide
Install the SAML SSO app
In your Atlassian product, open the in-product marketplace as described in the Atlassian documentation.
Search for "resolution saml" and click "Install" for SAML Single Sign On (SSO) by resolution Reichert Network Solutions GmbH.
After the installation is complete, click on Manage, then choose Configure.
Now, you are on the Add-on / app configuration page and the first step of the setup wizard will appear.

Configure SAML SSO app, Part 1
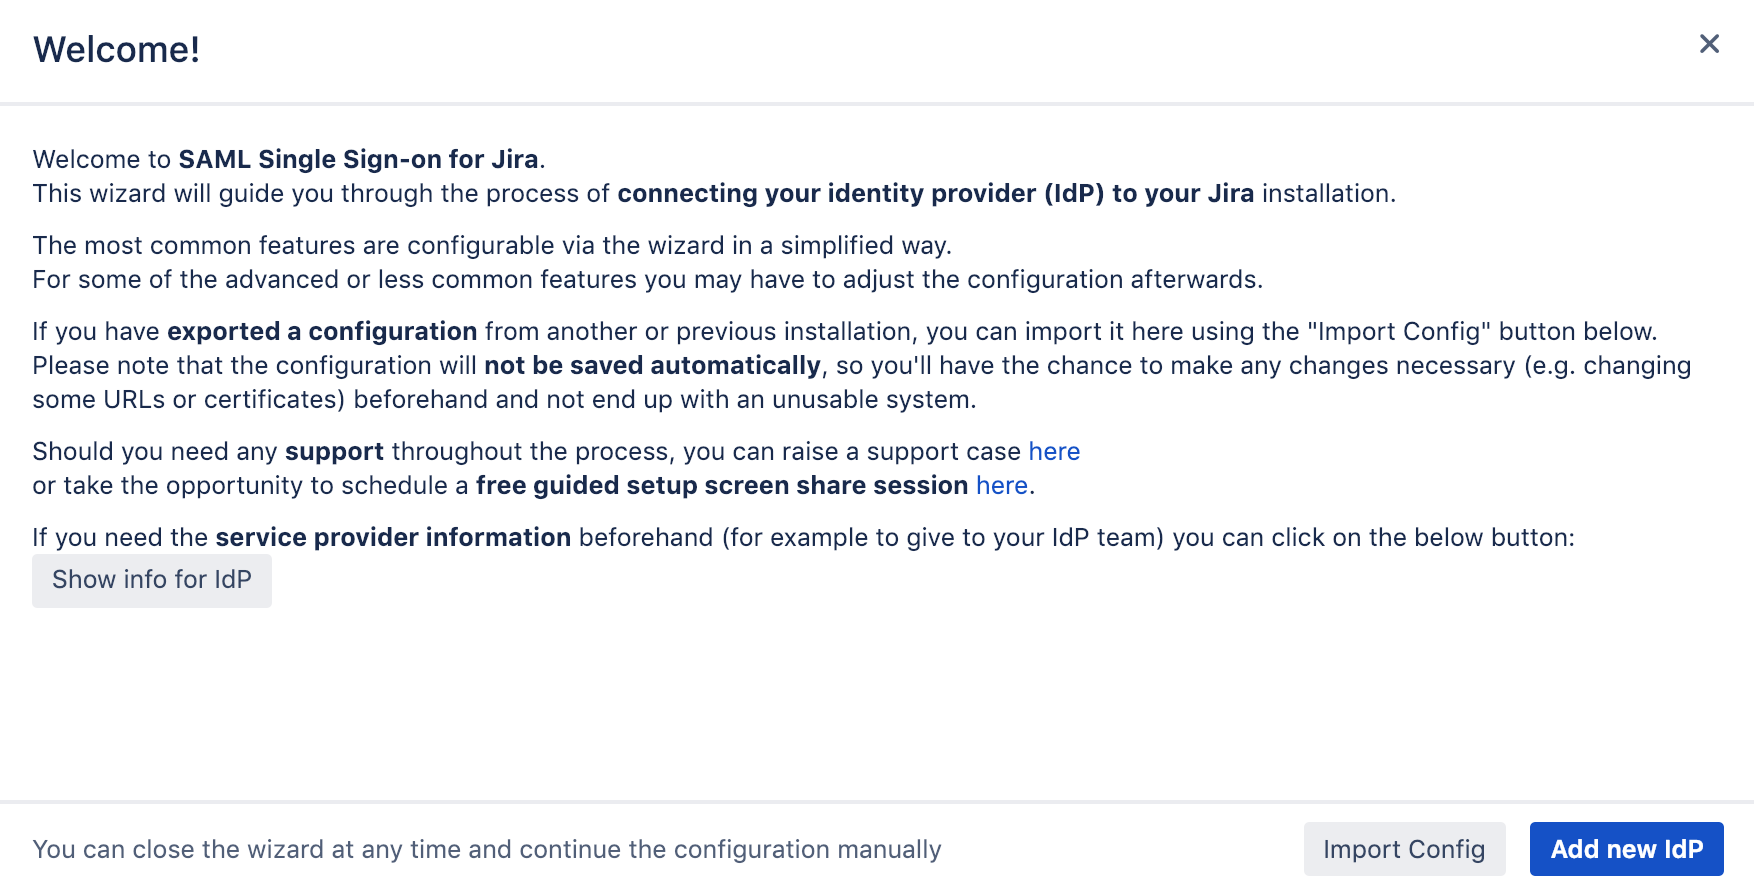
Add new Identity Provider (IdP)
Click on Add new IdP to start the wizard.
Adding a new IdP can also be done outside the wizard in the app configuration section Identity Providers

Select Other SAML Identity Provider as IdP Type.
You may also change the name and add a description. The name needs to be unique.
Click on Next.

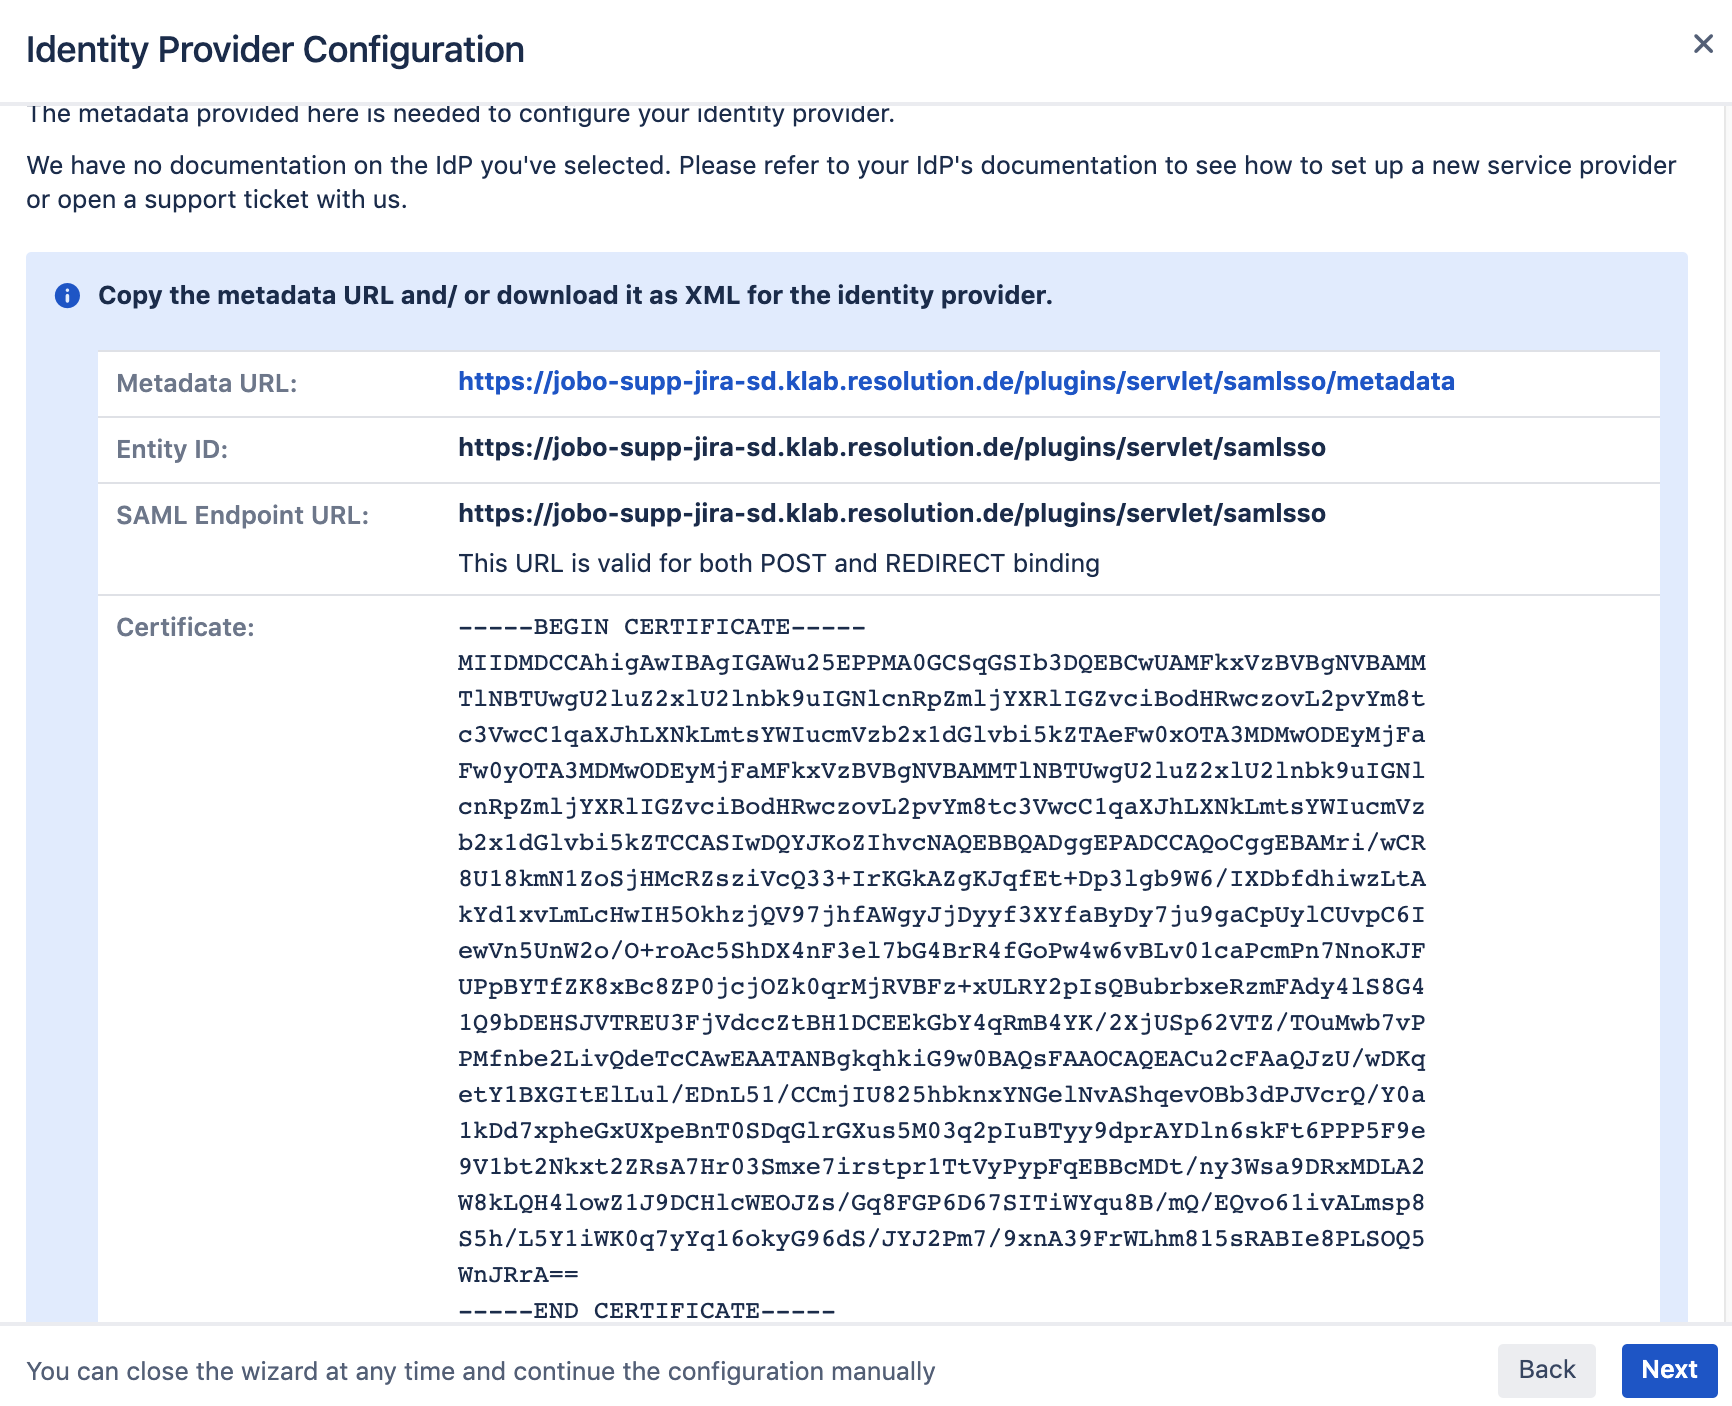
Copy the Metadata URL and Entity ID from the next screen, as you'll need when setting up the RSA IdP configuration
Configure RSA SecurID
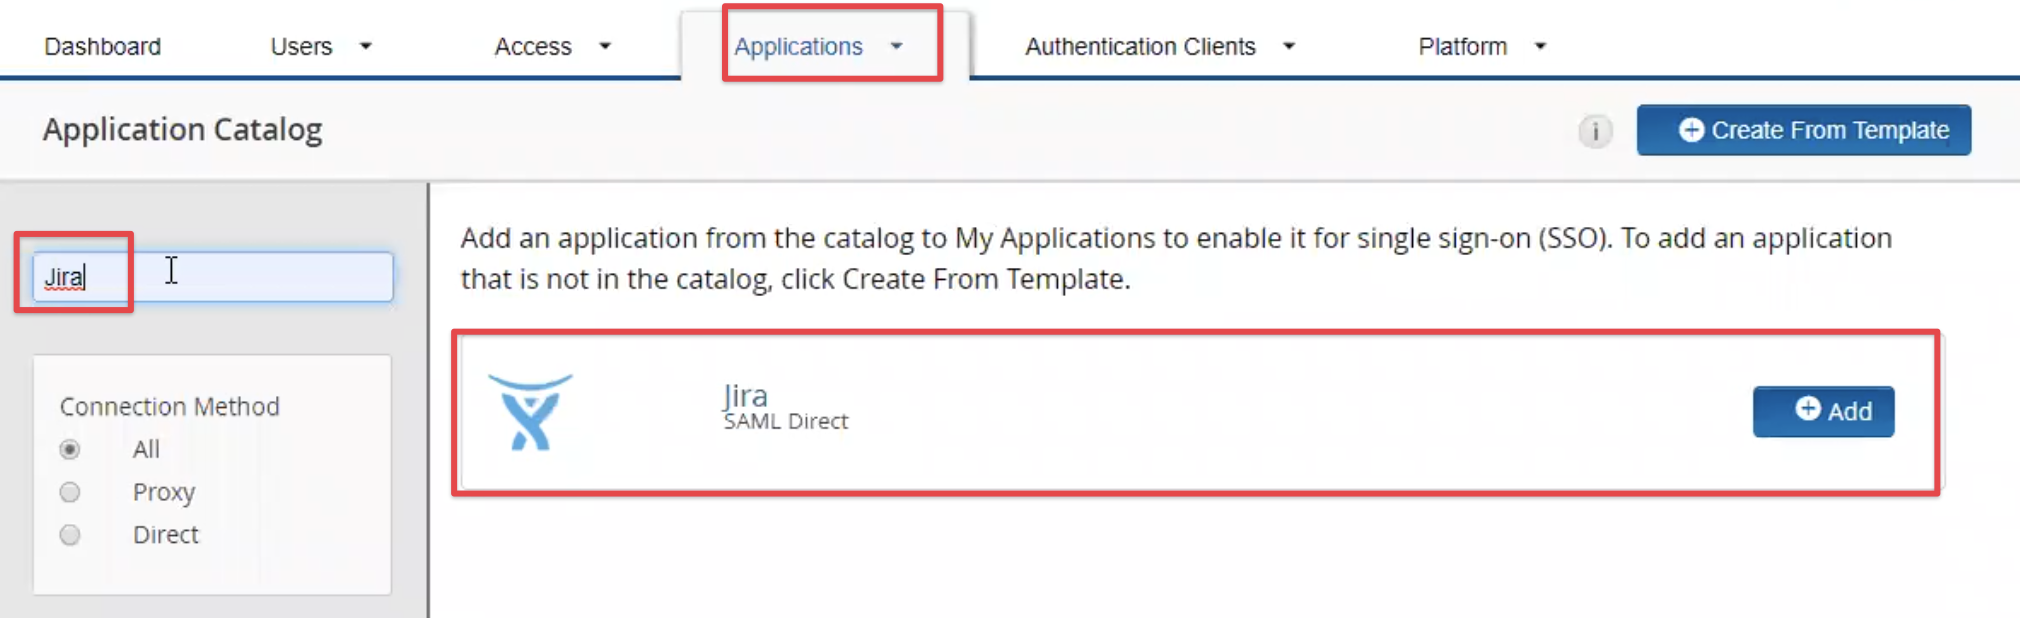
Navigate to your RSA SecurId admin portal and add a new application from the Application Catalog

Search for Jira or Confluence and click on the Add button once the result has been retrieved.
You can also use the Jira template for Bitbucket, Bambooo and Fisheye/ Crucible.
Provide some basic information for it:
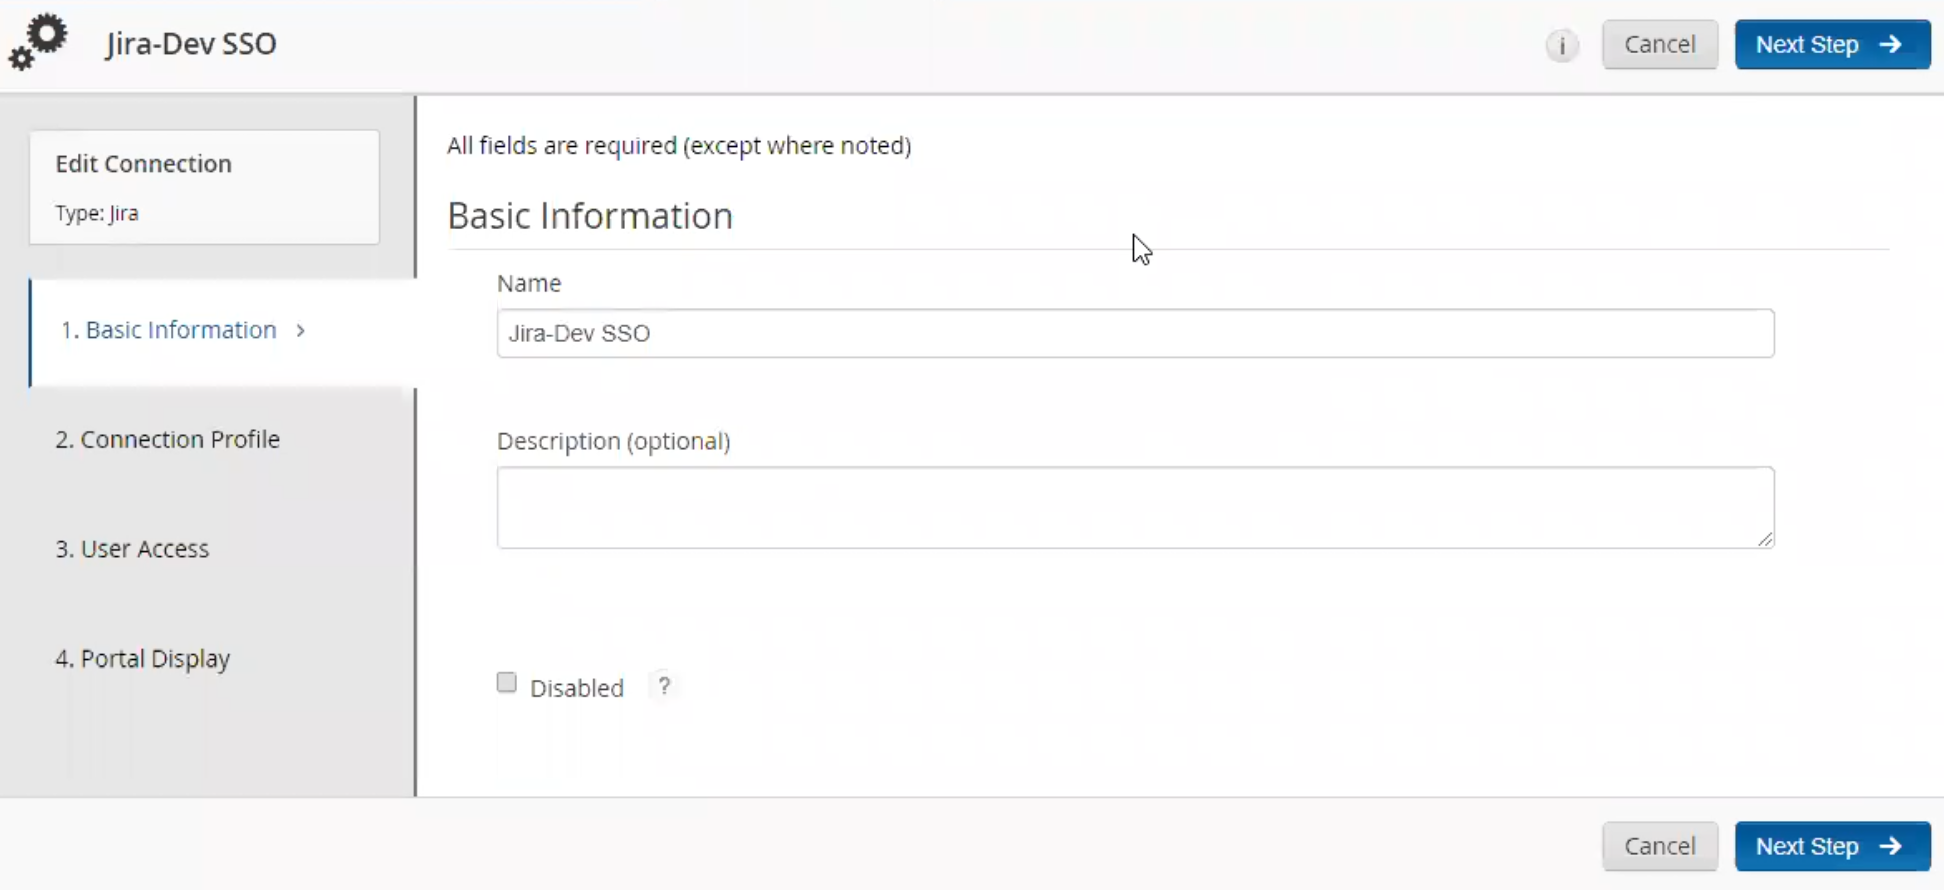
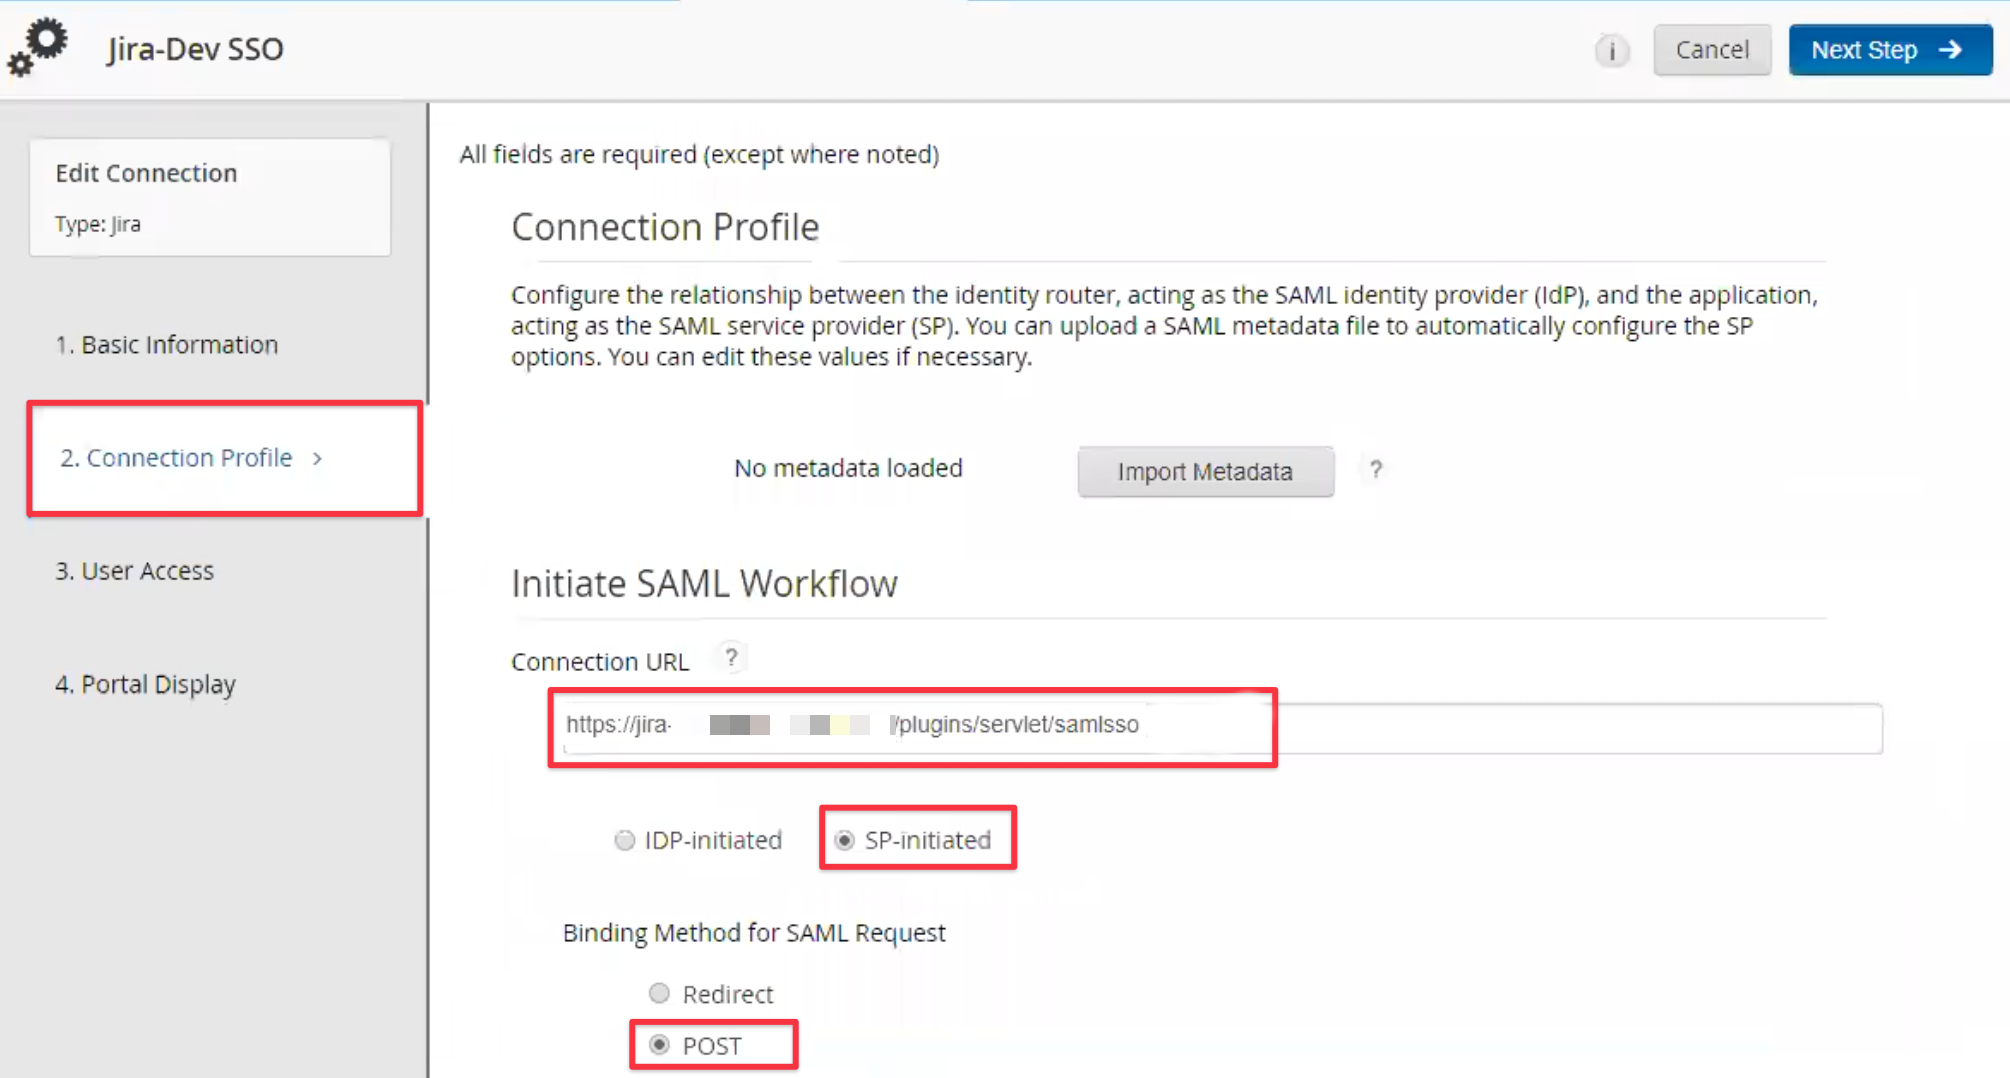
as connection URL, enter the Entity ID copied earlier, it will always be the base URL of your Atlassian instance and /plugins/servlet/samlsso at the end
set the initiation method to SP-initiated
set the binding method to POST
From further down the screen, copy the Identity Provider URL and save it somewhere, as you'll need it to complete the SAML setup.
Override the Issuer Entity ID with the same value.
In order to setup the SAML Response Signature signing, you need to load a private key and a certificate.
You might need to generate the cert bundle first, so proceed with step 1-3 as depicted below:

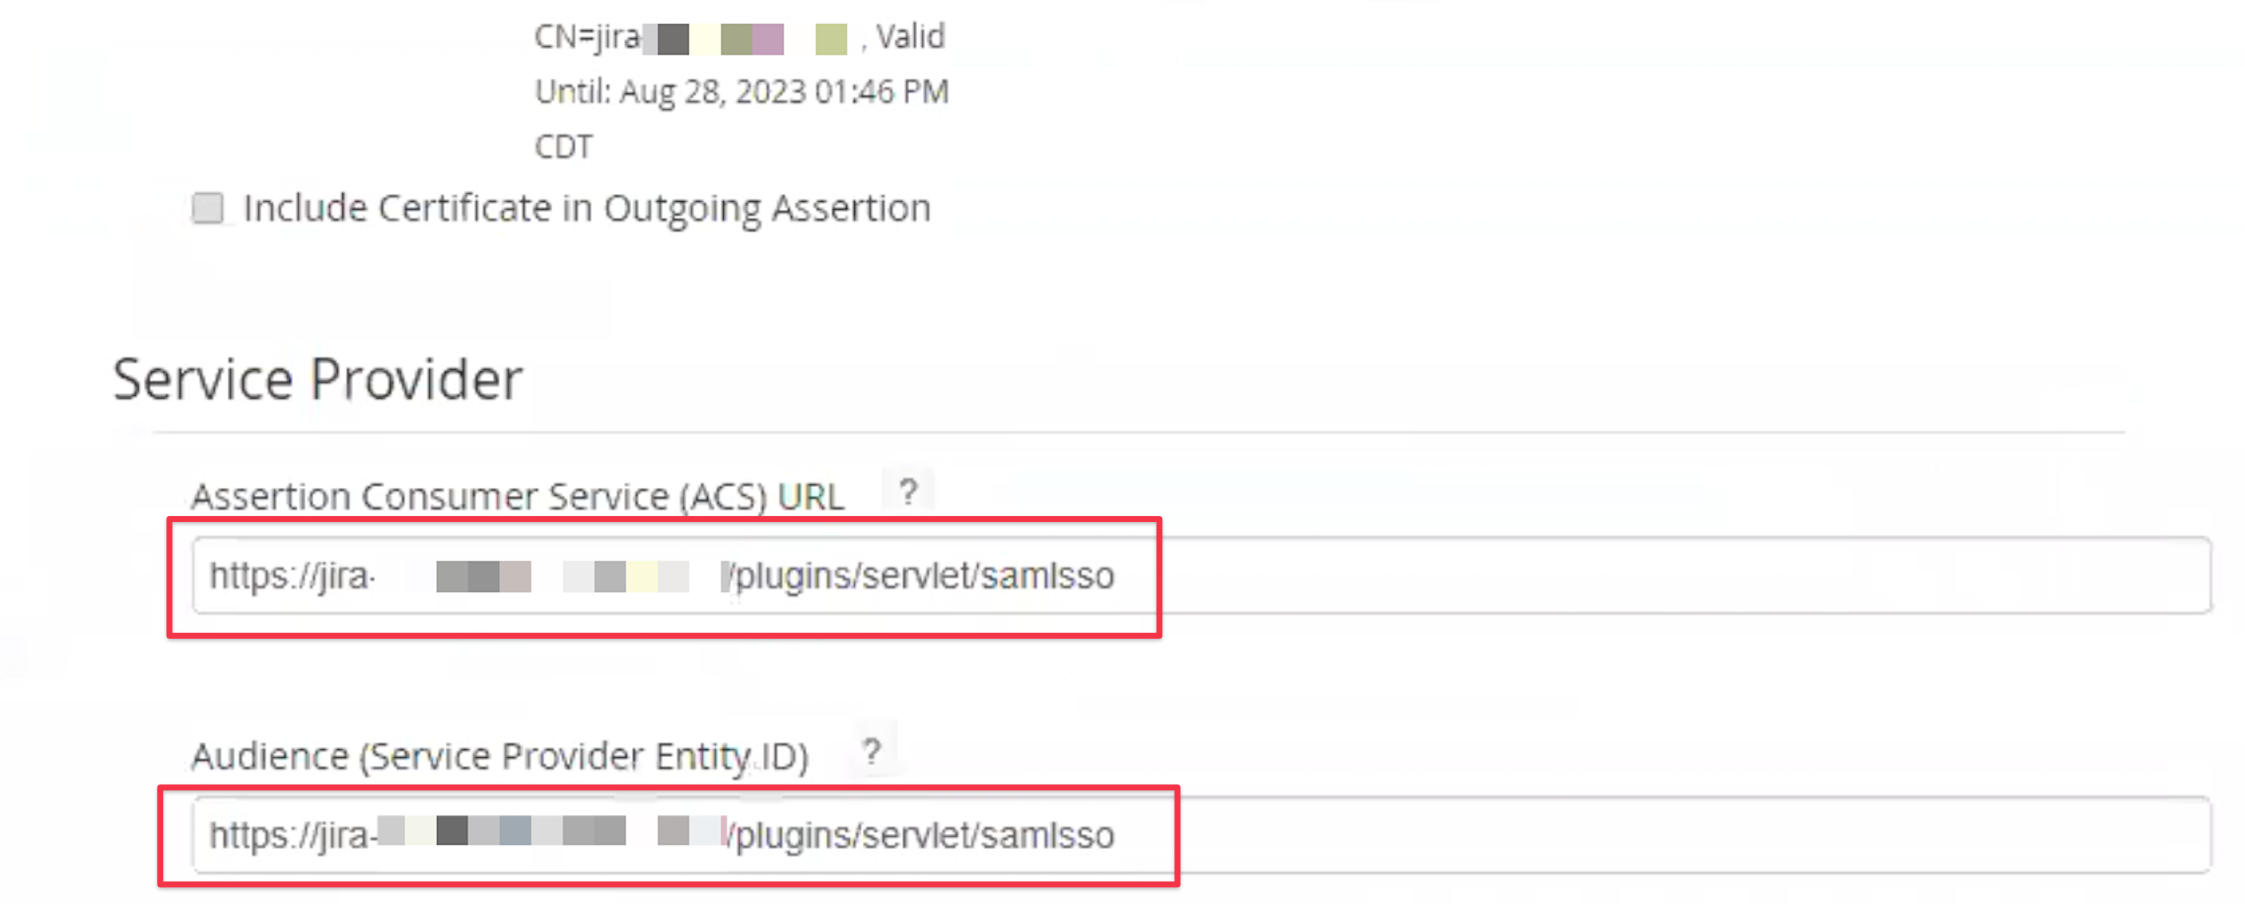
Make sure that Assertion Consumer Service ACS URL and Audience in the Service Provider section is set to the entity Id
from earlier, when starting the SAML SSO app setup, i.e. https://jira.instance.com/plugins/servlet/samlsso
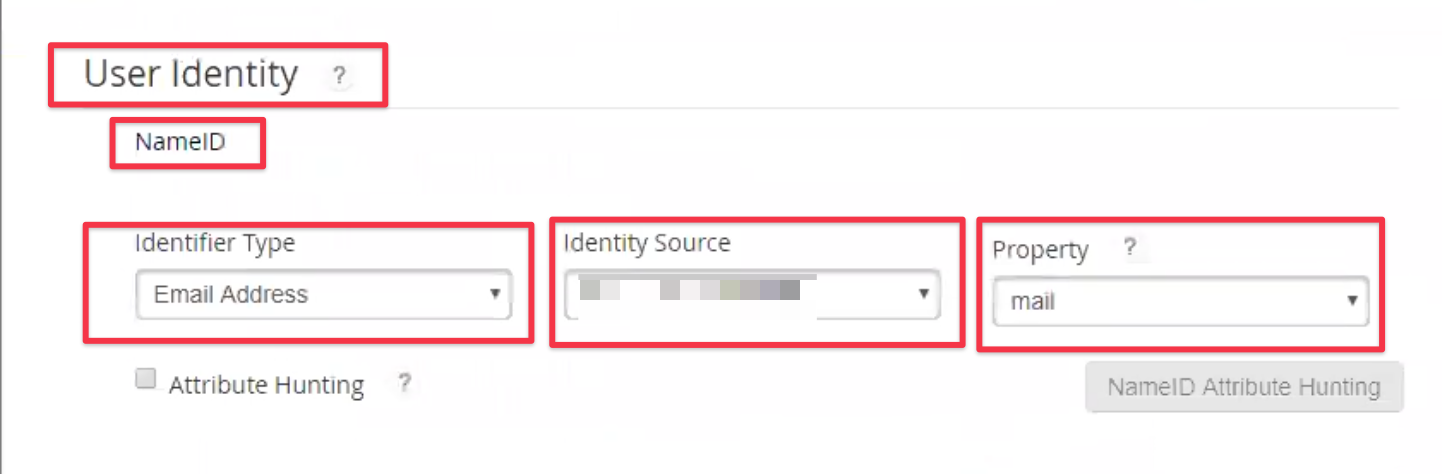
The User Identity section holds information about the NameID being sent and you should set it to
Identifier Type = Email Address
select the record available in Identity Source, usually one record referring to your user directory
Property = mail
Attribute Extension defines additional attributes for Just-In-Time user provisioning, if required.
Provide two additional attributes called fullname and email, mapped against displayName and mail.

Complete the setup by saving and confirming the following setup steps.
Decide who should be able to access SSO for the Atlassian application. If you've defined policies for that already, choose one.

Configure if and how the app should be available through the RSA portal page:
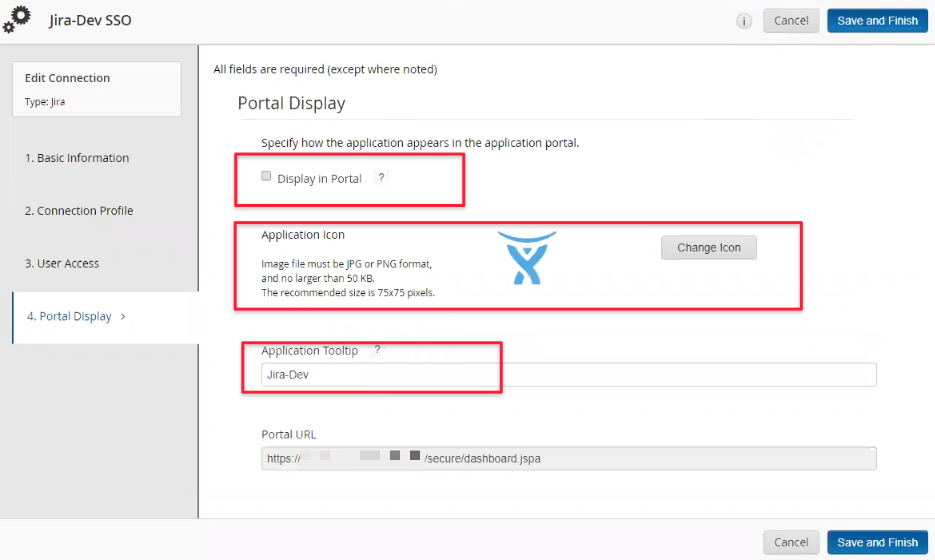
Save and Finish the configuration. Once back in the application list, locate the SSO entry again and click on
Export Metadata and save it somewhere. You'll need that to complete the SAML SSO app in the next chapter.
There might be a link behind that download option, the metadata URL. If your Atlassian application has access to that URL,
the preferred way would be to load the metadata via URL. If this is not possible, use the file downloaded.

It's now time to proceed with configuring the SAML SSO app.
Configure SAML SSO app, Part 2
Complete Identity Provider (IdP) setup
It's now time to import the metadata, depending on what you did in the last step.
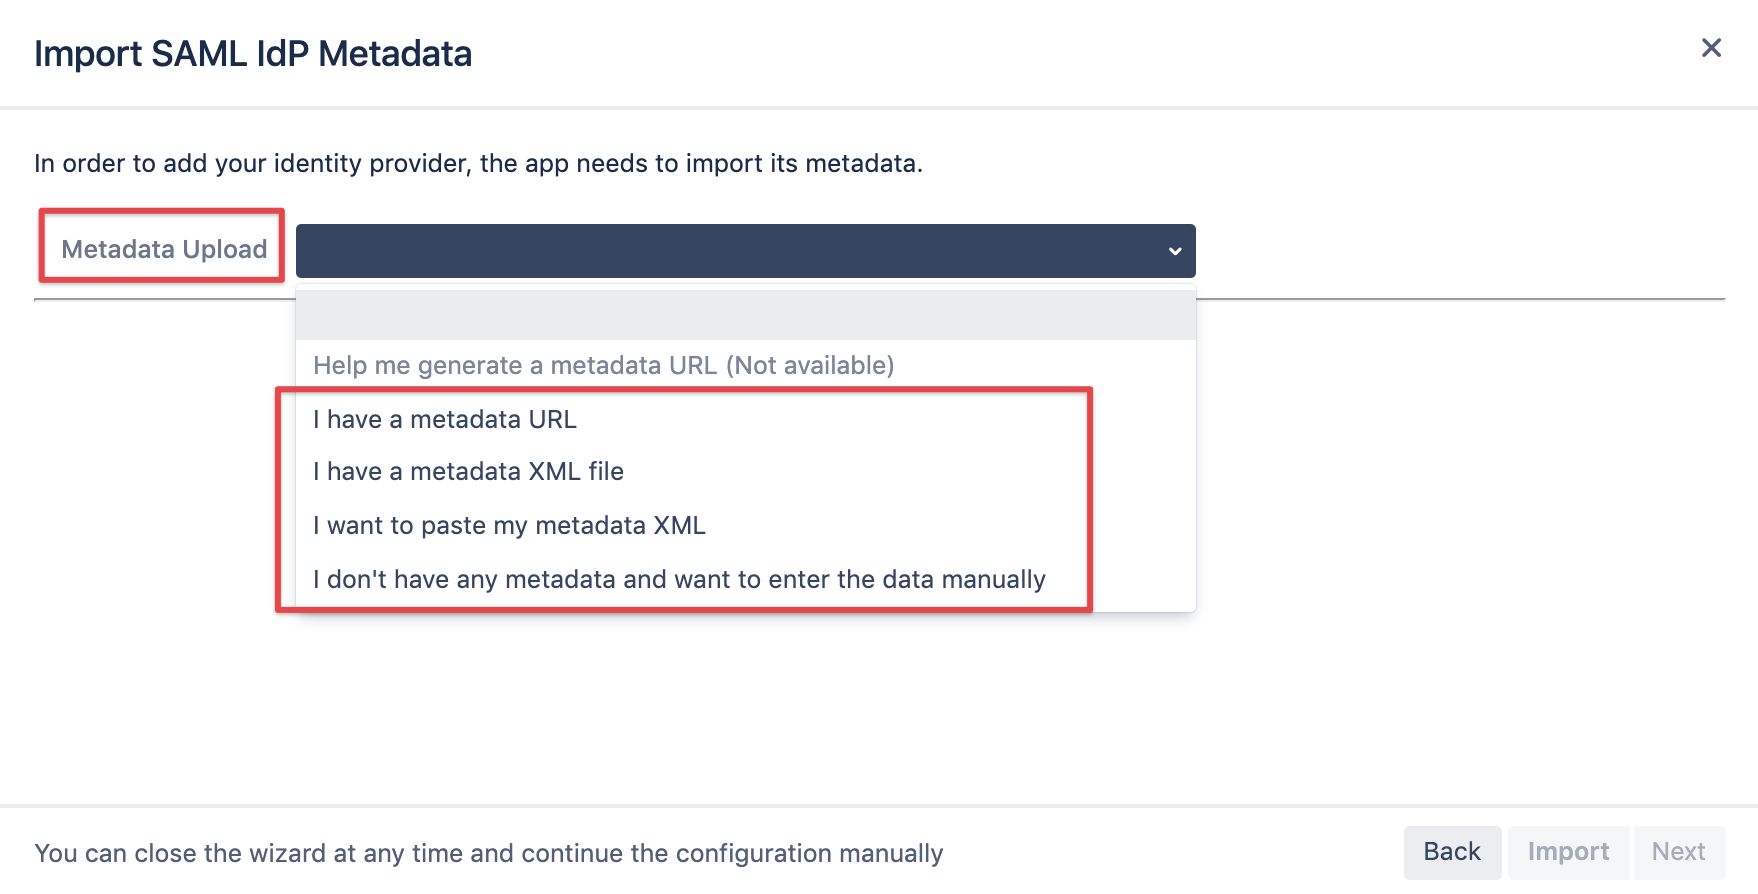
Click the Import button and then Next
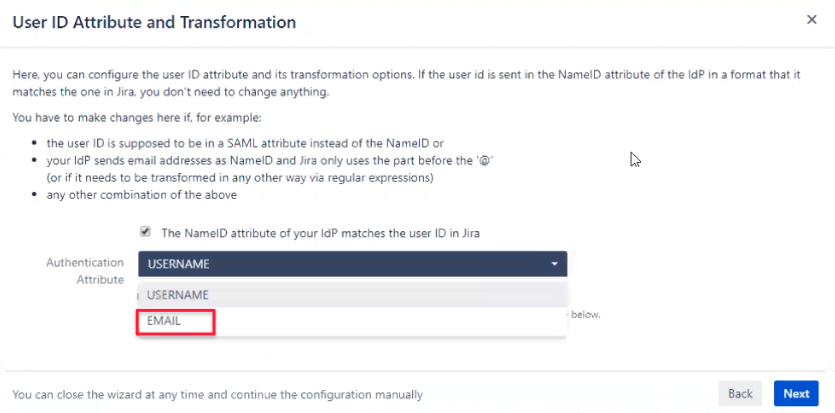
On the next page, select EMAIL as authentication attribute and click Next.
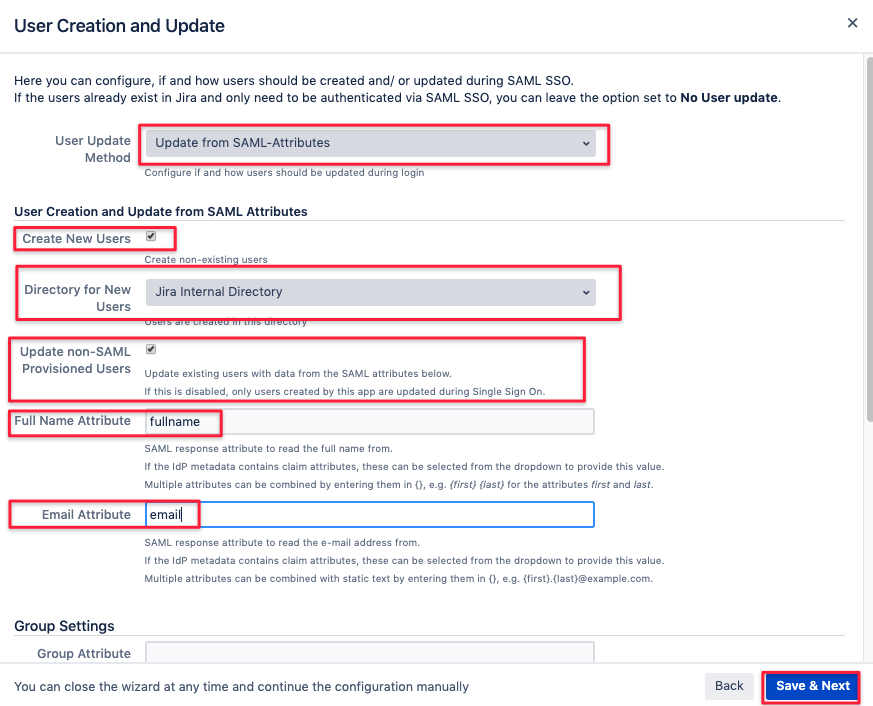
The next page allows to configure how users should be created and updated.
Select Update from SAML-Attributes and adjust the settings as depicted below.
The options are individually described, most important here is to provide the exact attribute keys created in RSA earlier,
fullname and email in our example. Click on Save & Next
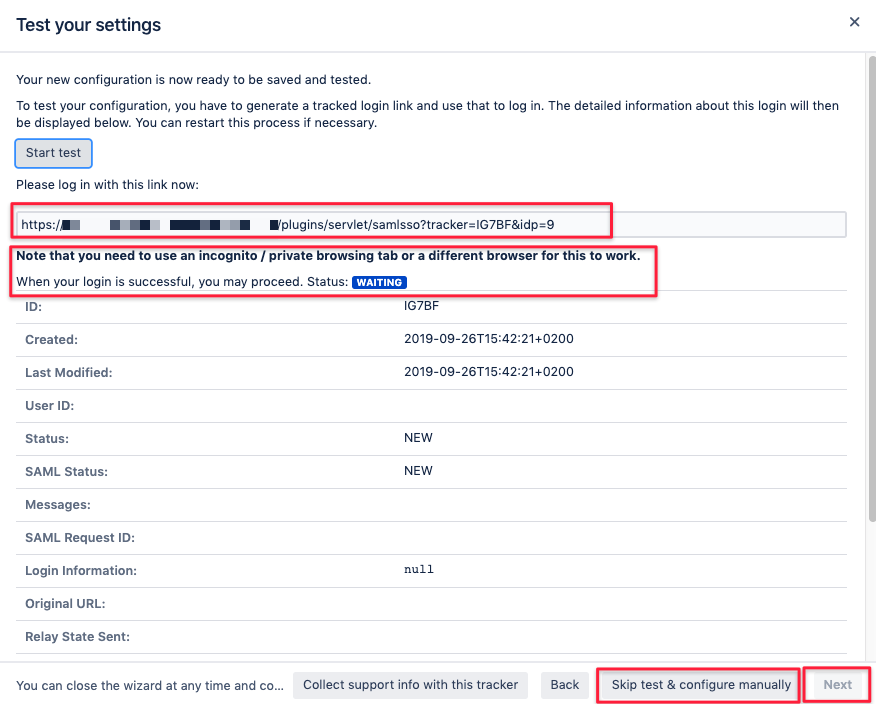
As a last step you can already test your configuration:
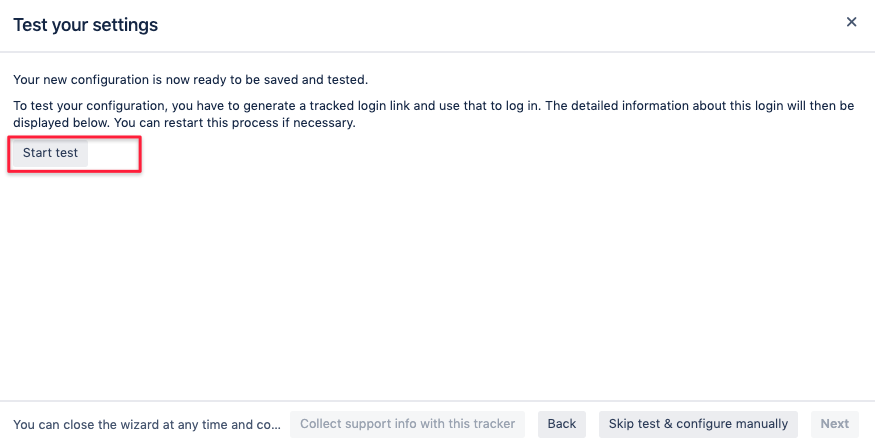
The click on Start test will provide a link you should open in a new incognito window of your browser, making sure there is no
other incognito window with a previous test for that setup.
You can then test authentication and you'll be able to monitor the
results in real time. Should that not work and you get stuck, we suggest raising a support ticket with us:
https://jira.resolution.de/servicedesk/customer/portal/1
or book a 1:1 screen share directly: https://calendly.com/resolution-support
You can also skip the test and proceed or finish the setup after a successful test.
Don't forgot to save the changes.