Gluu Server
This setup guide describes how to complete the initial setup for our SAML Single Sign On (SSO) add-on for Atlassian Data Center / Server applications with Gluu Server, applicable for add-on version from 2.0.0. If you need any further support please feel free to contact us here.
Step1 Install the Add-on | Step2 Configure the Add-on (A-E) | Step3 Setup the Gluu Server (A-E) | Step4 Test | Step5 Enable login redirection |
|---|
Prerequisites
Gluu Server (https://gluu.org/docs/ce/installation-guide/install/)
Please add Install Shibboleth SAML IDP as Setup Option for 3. Run
Step 1: Install the Add-on
In your Atlassian product, open the in-product marketplace as described in the Atlassian documentation.
Search for "resolution saml" and click "Install" for SAML Single Sign On (SSO) by resolution Reichert Network Solutions GmbH.
After the installation is complete, click on Manage, then choose Configure.
Now, you are on the Add-on / app configuration page and the first step of the setup wizard will appear.

Step 2: Set up the Gluu Server
Substep A: Add new IdP or import config
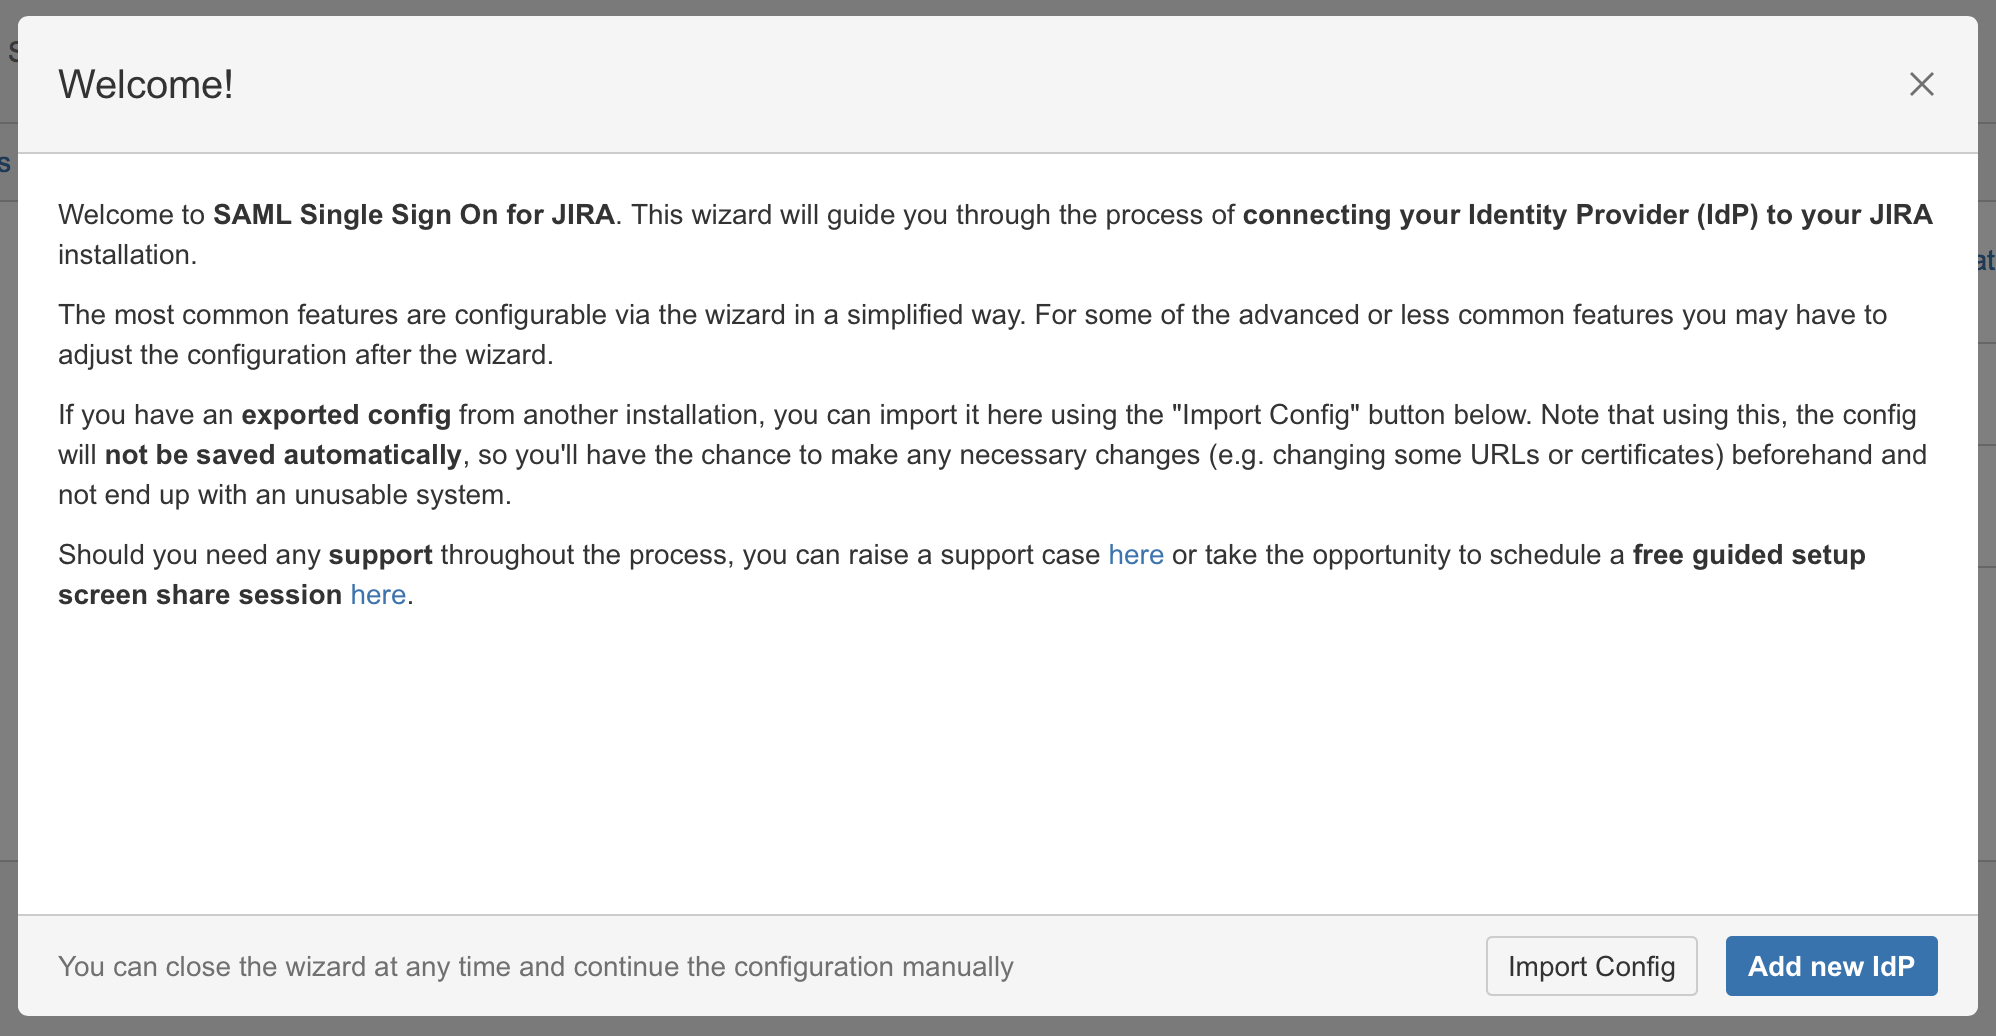
Since version 2.0.0, our add-on offers an intuitive configuration wizard that is presented on first start. In the first step it's possible to import an existing configuration or to start with a fresh configuration. Click on Add new IdP to start the wizard.
Substep B: Choose your SAML Identity Provider
Select Import Metadata from URL as IdP Type, choose a name and click on Next (Description is optional).

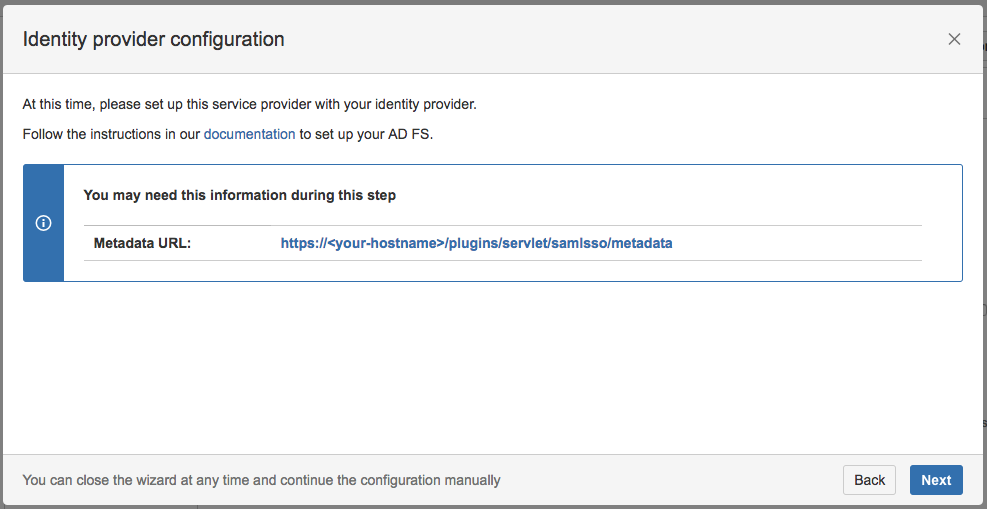
Substep C: Copy/Download the SAML Metadata URL
Copy the SAML Metadata-URL from your SAML Single Sign On config page - or, if your Gluu Server has no connection to this instance - save the linked metadata.xml of the SAML Metadata URL and move the saved metadata.xml to your Gluu Server to a location of your choice.
Substep D: Add and configure a Trust Relationship
The rest of Step 2 will be completed in Gluu Server.
At the Gluu Panel, select Add Trust Relationship.
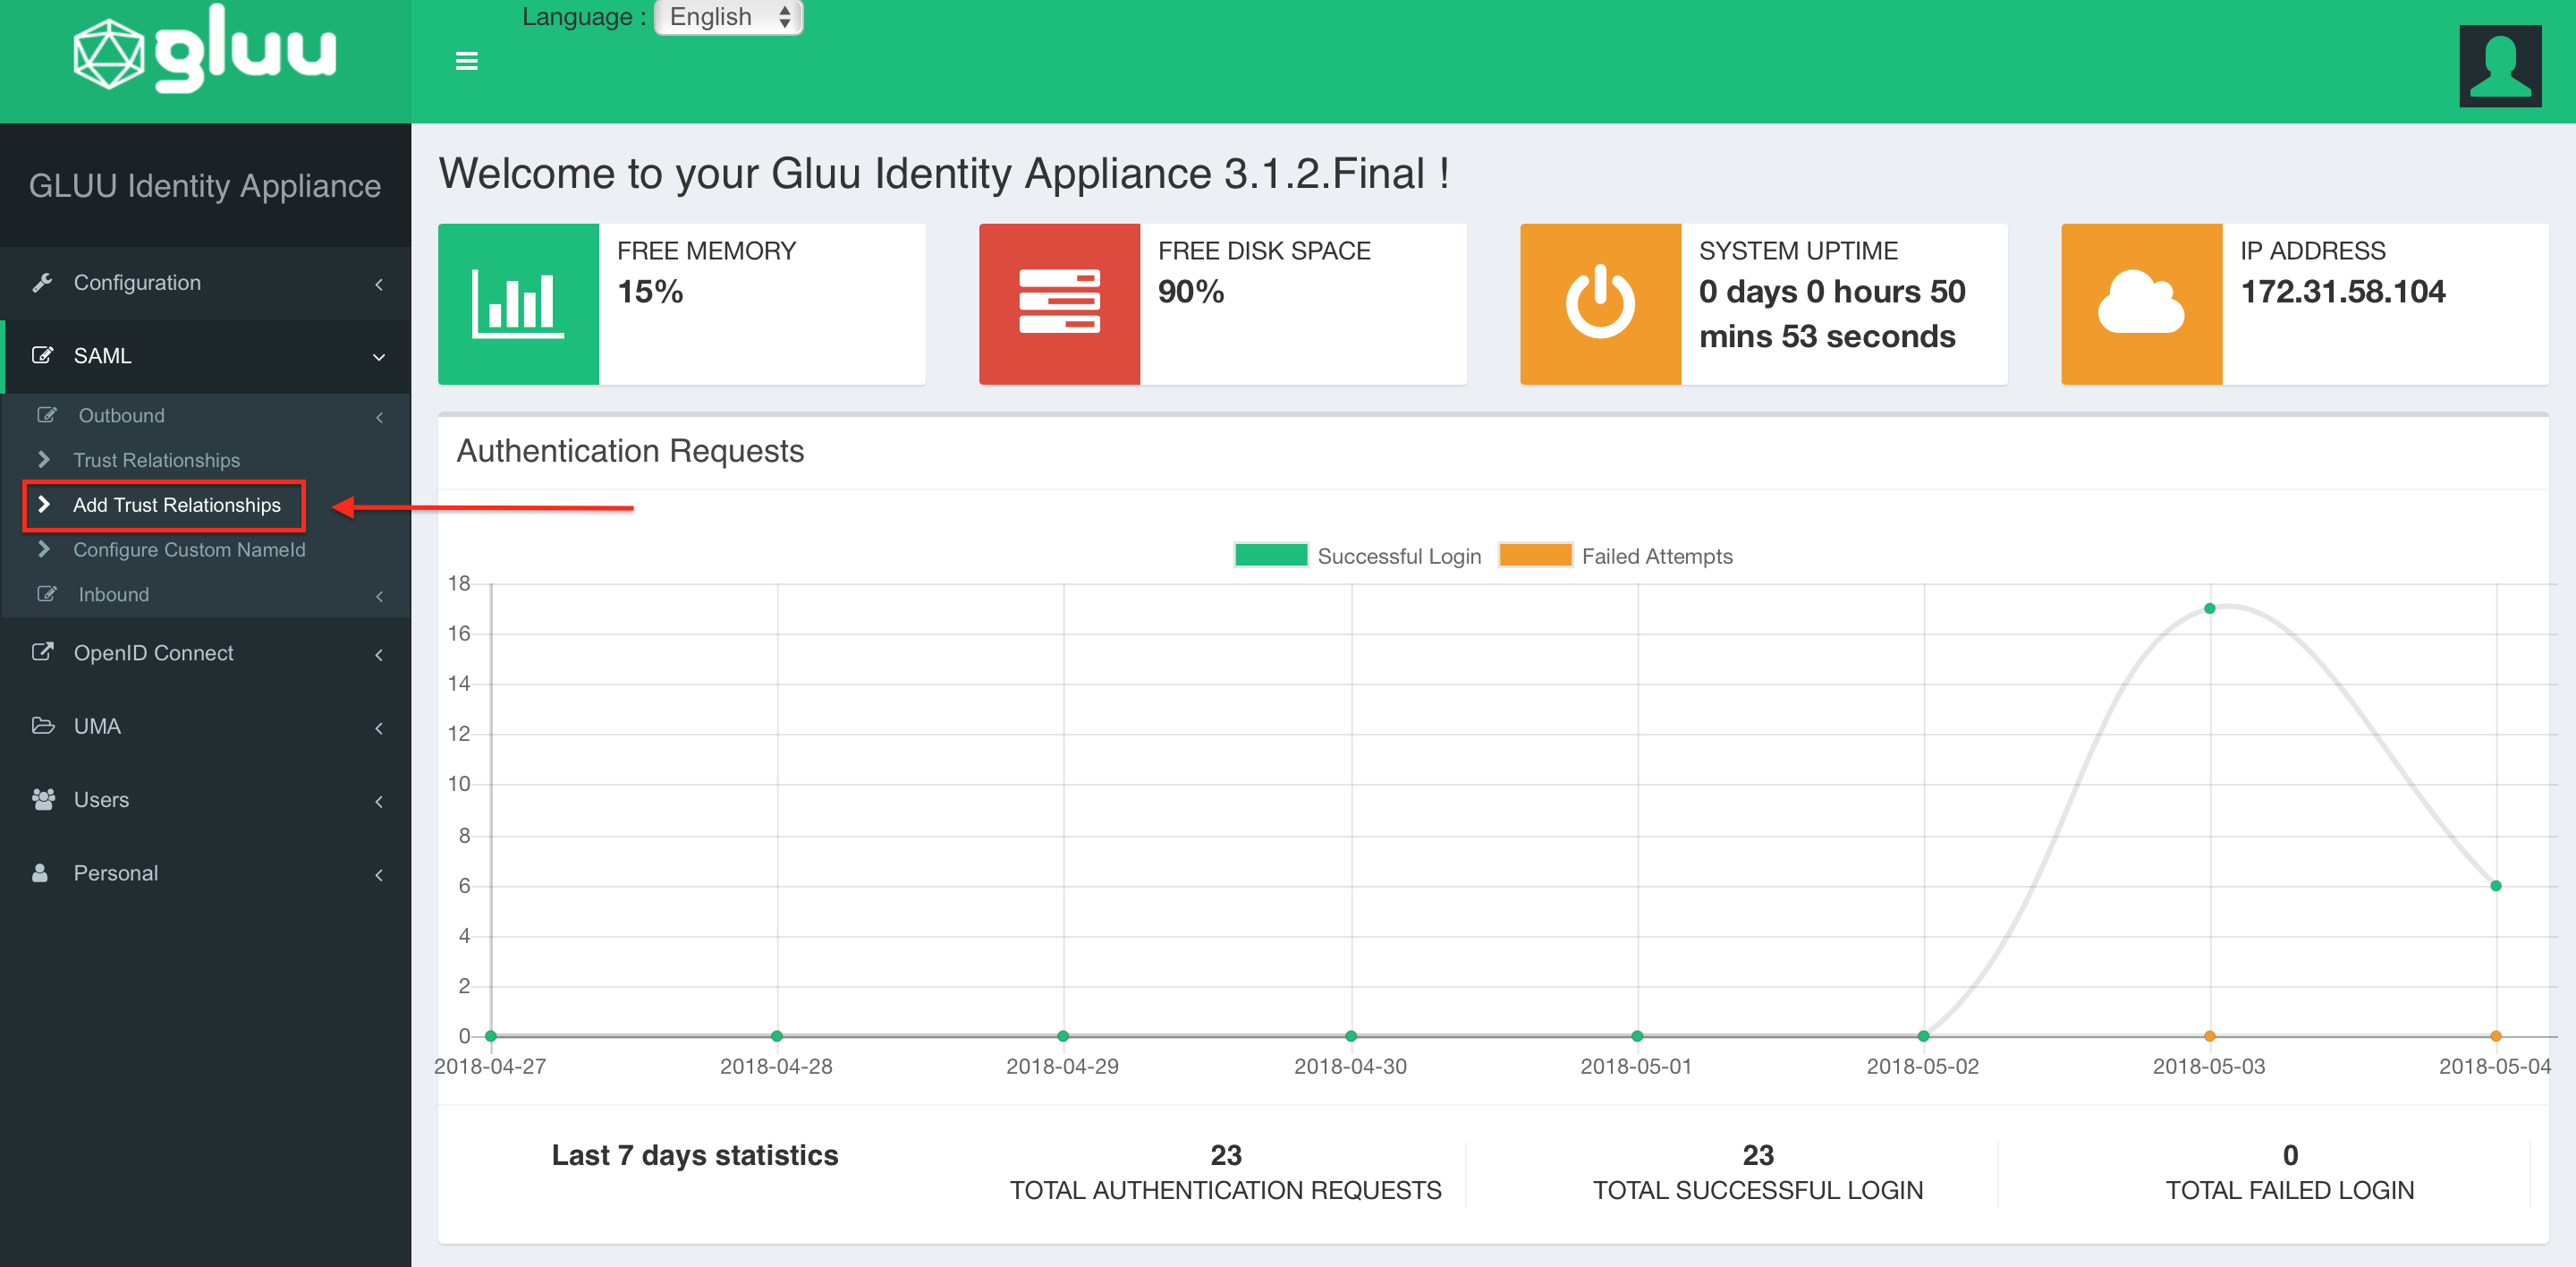
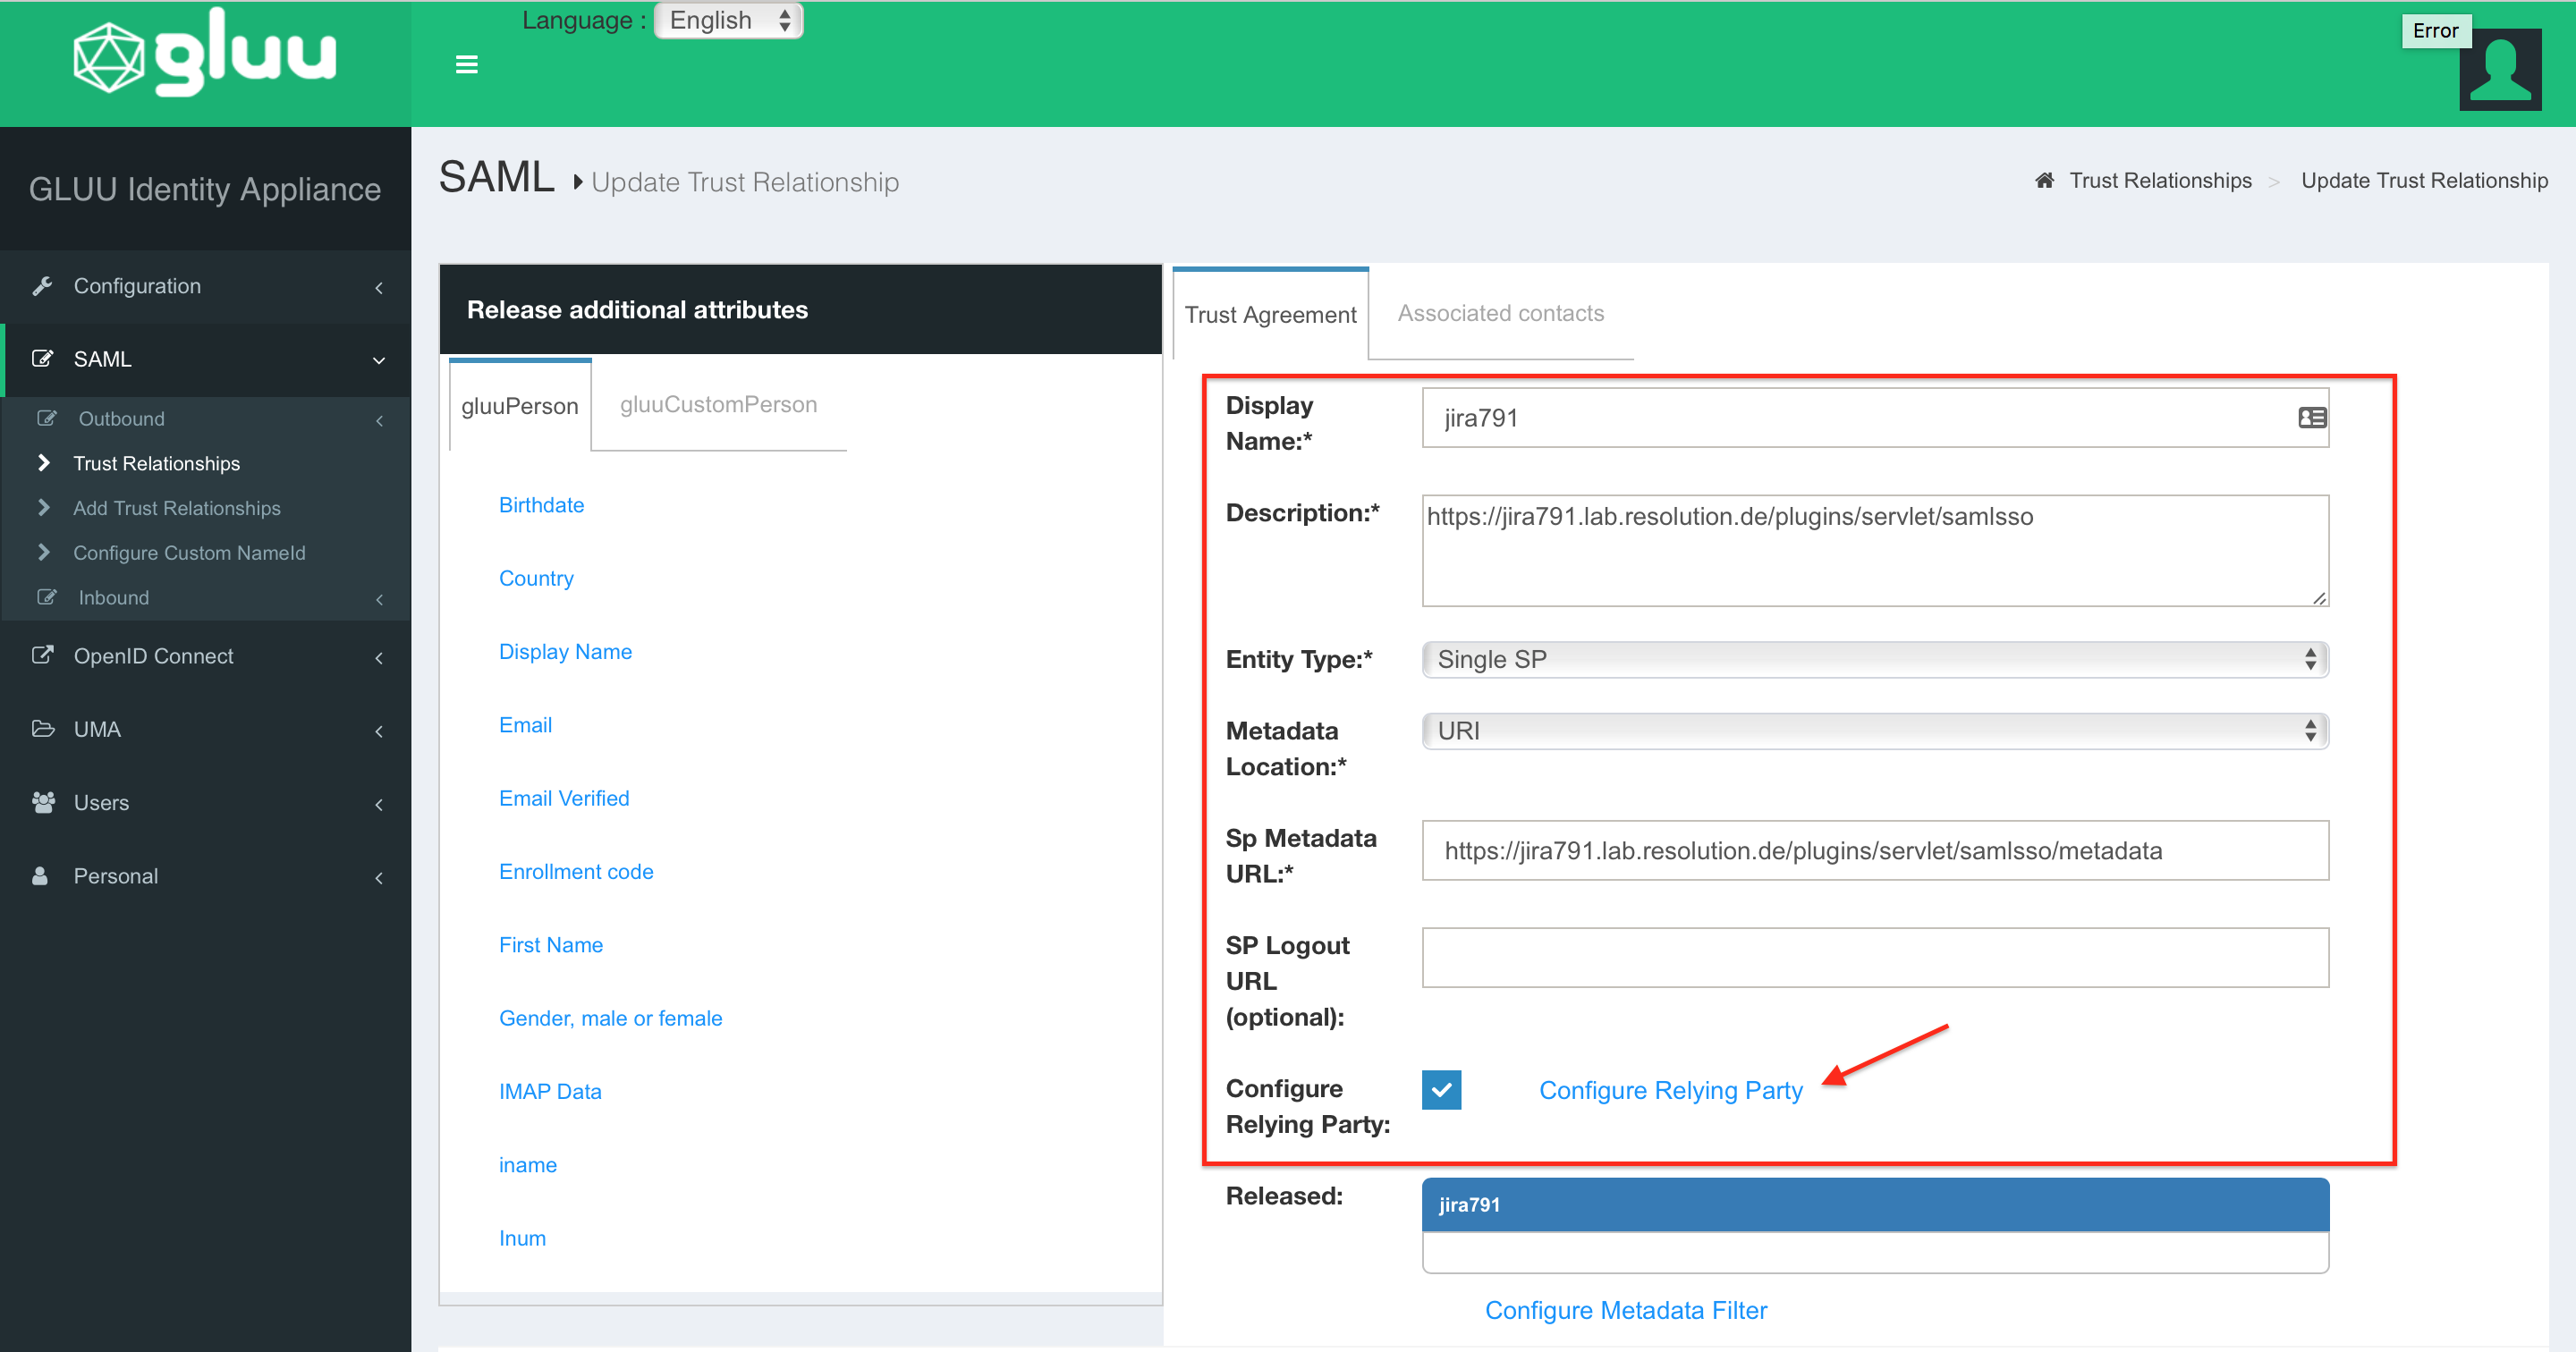
In the Trust Relationship configurations, add the following Service Provider informations:
Display Name and Description: Choose yourself
Entity Type: Single SP
Metadata Location: URI
Sp Metadata URL: "https://<baseurl>/plugins/servlet/samlsso/metadata"
SP Logout URL (optional): Leave empty
Configure Relying Party: Enable the checkbox and select "Configure Relying Party" to make additional configurations. A new window will appear.
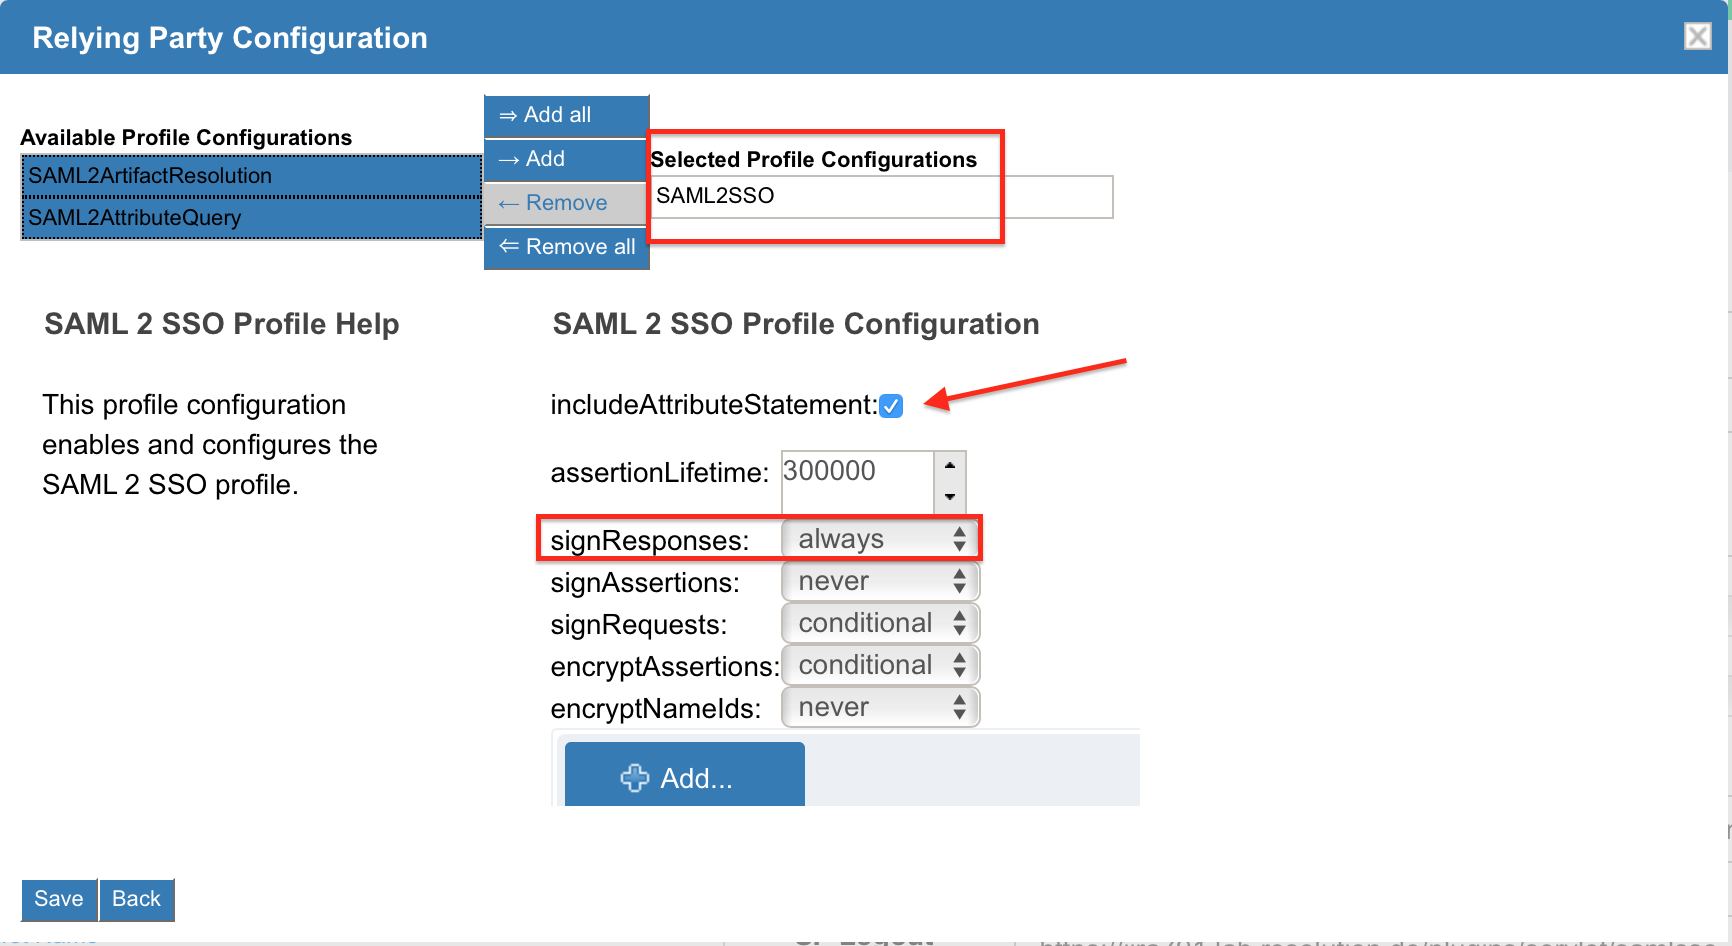
As Profile Configuration, please add SAML2SSO and enable the checkbox includeAttributeStatement. For signResponses choose always.
All further configurations are optional. Click on Save as soon as you are done.
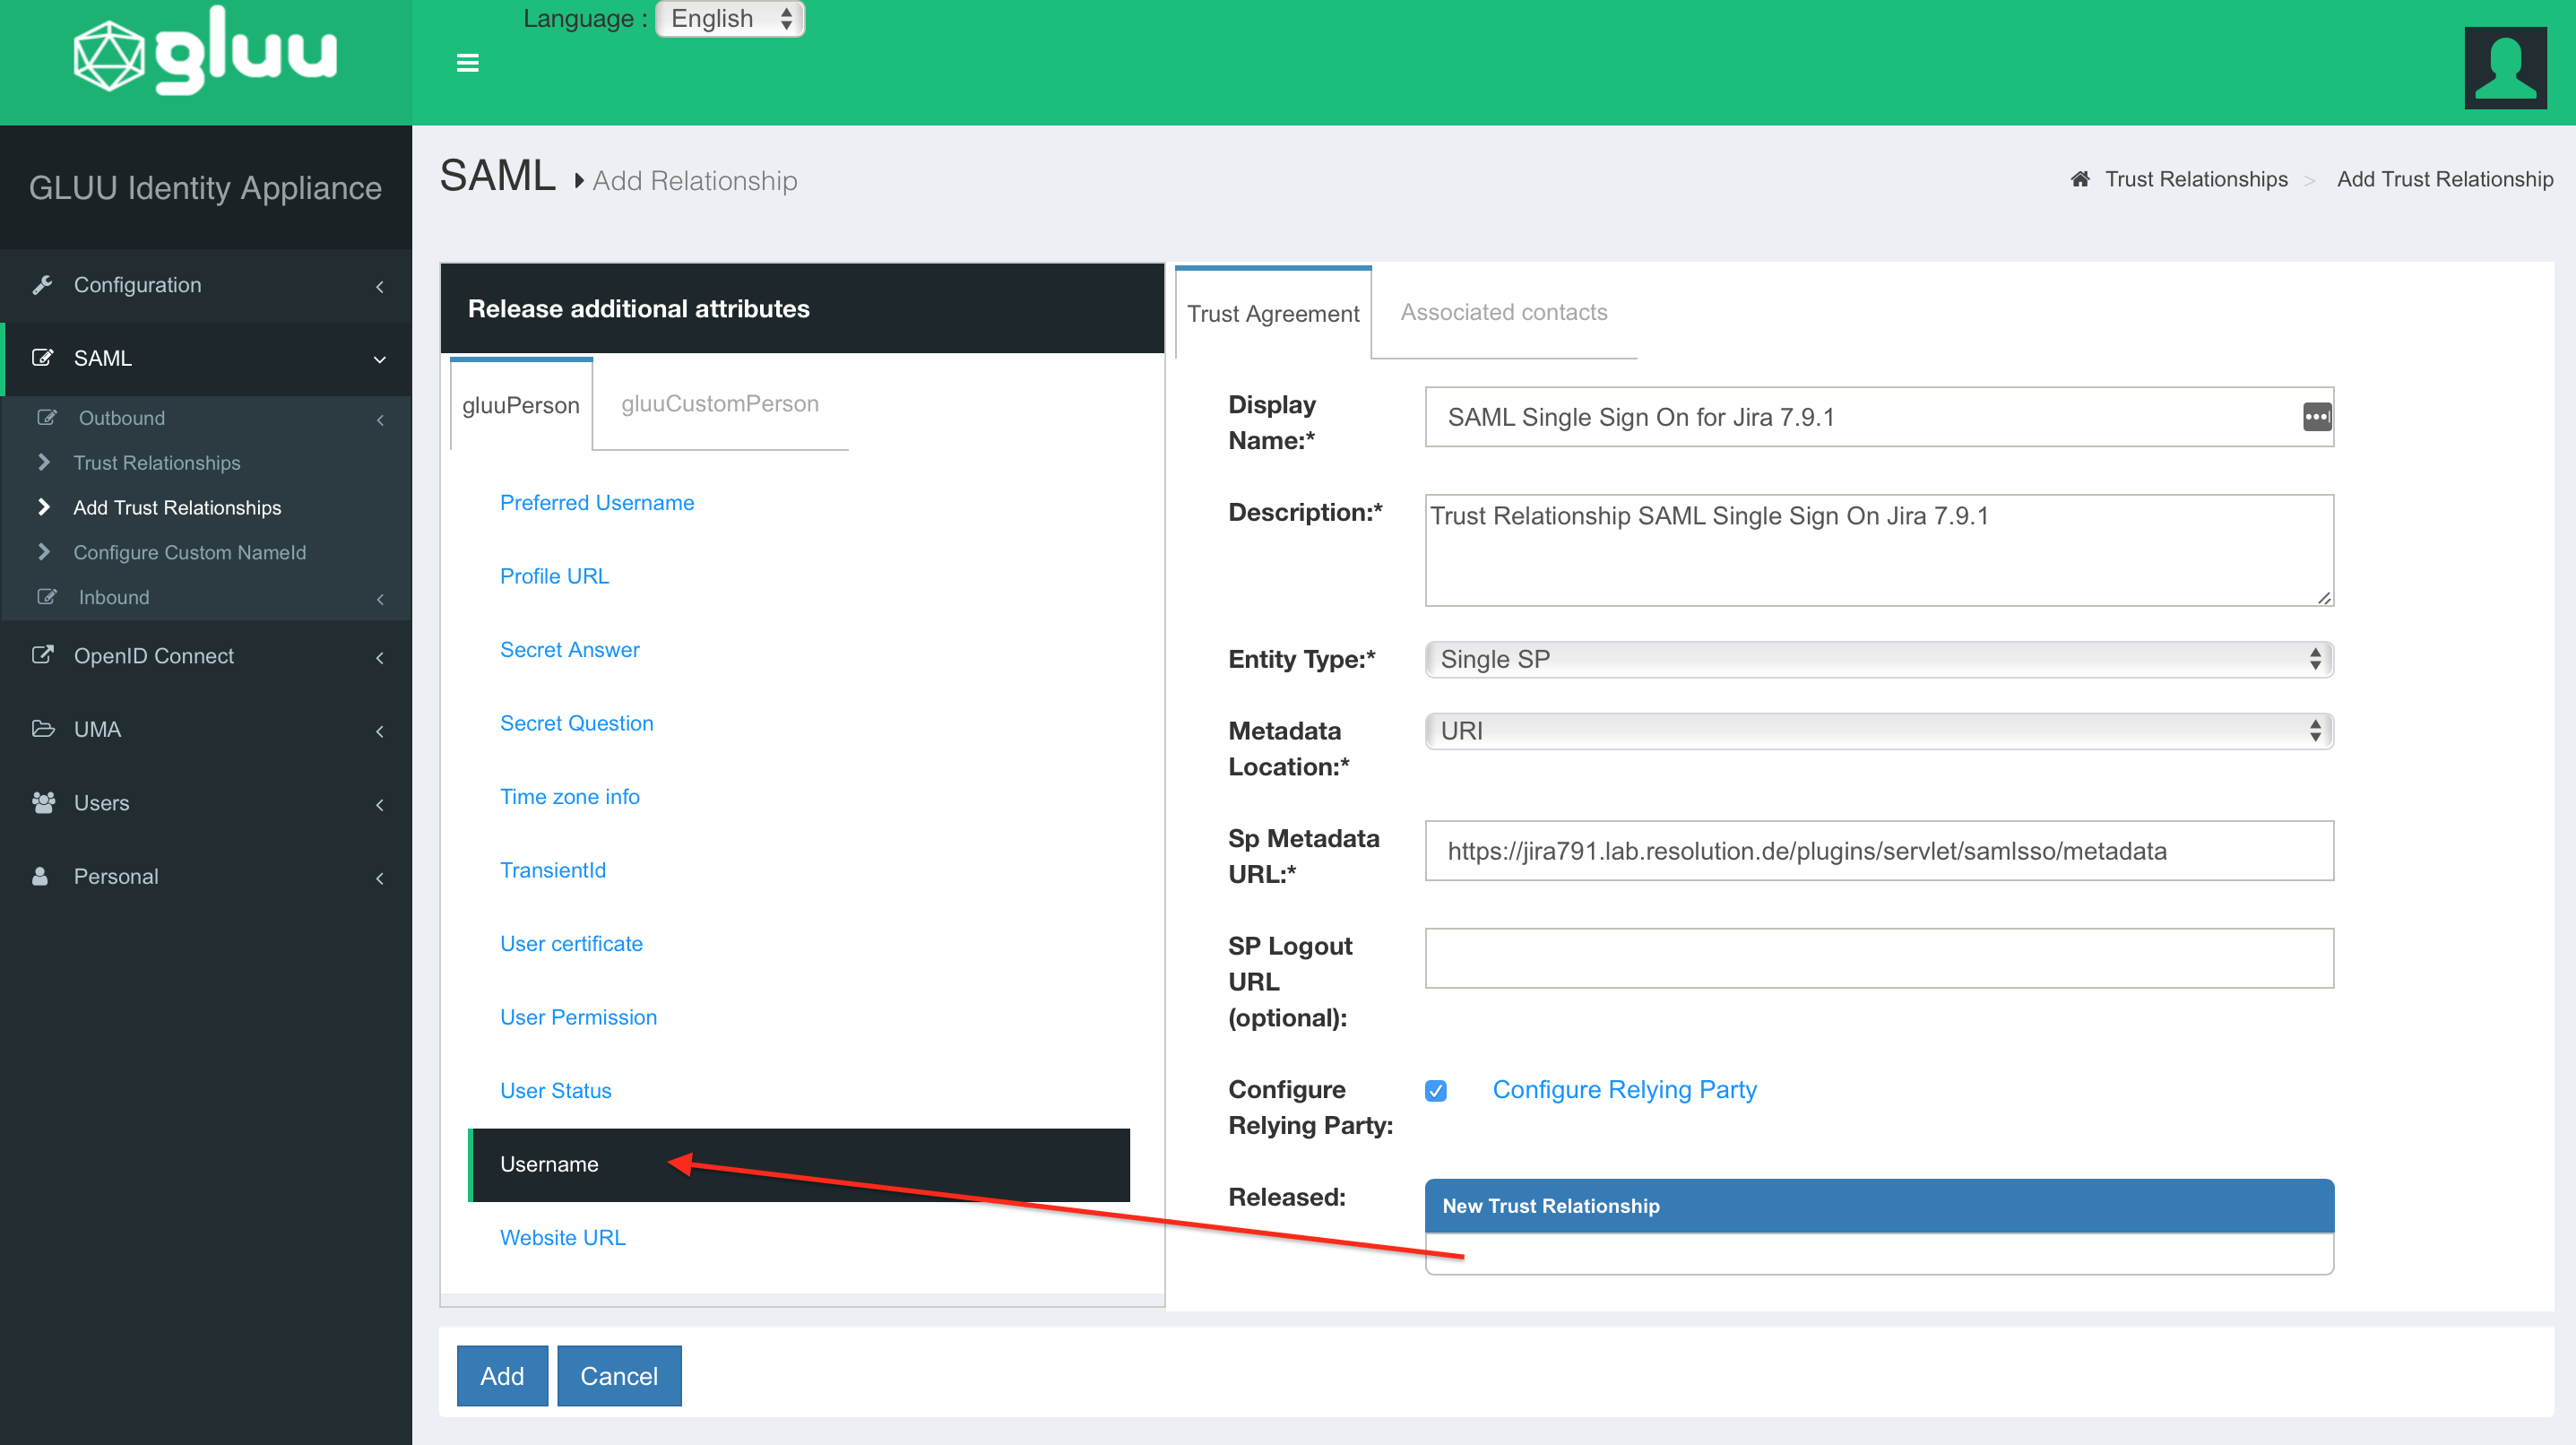
Substep C: Release and rename the additional SAML attributes
To release the first attribute Username, select the attribute from the Release additional attributes → gluuPerson list and click on Add.
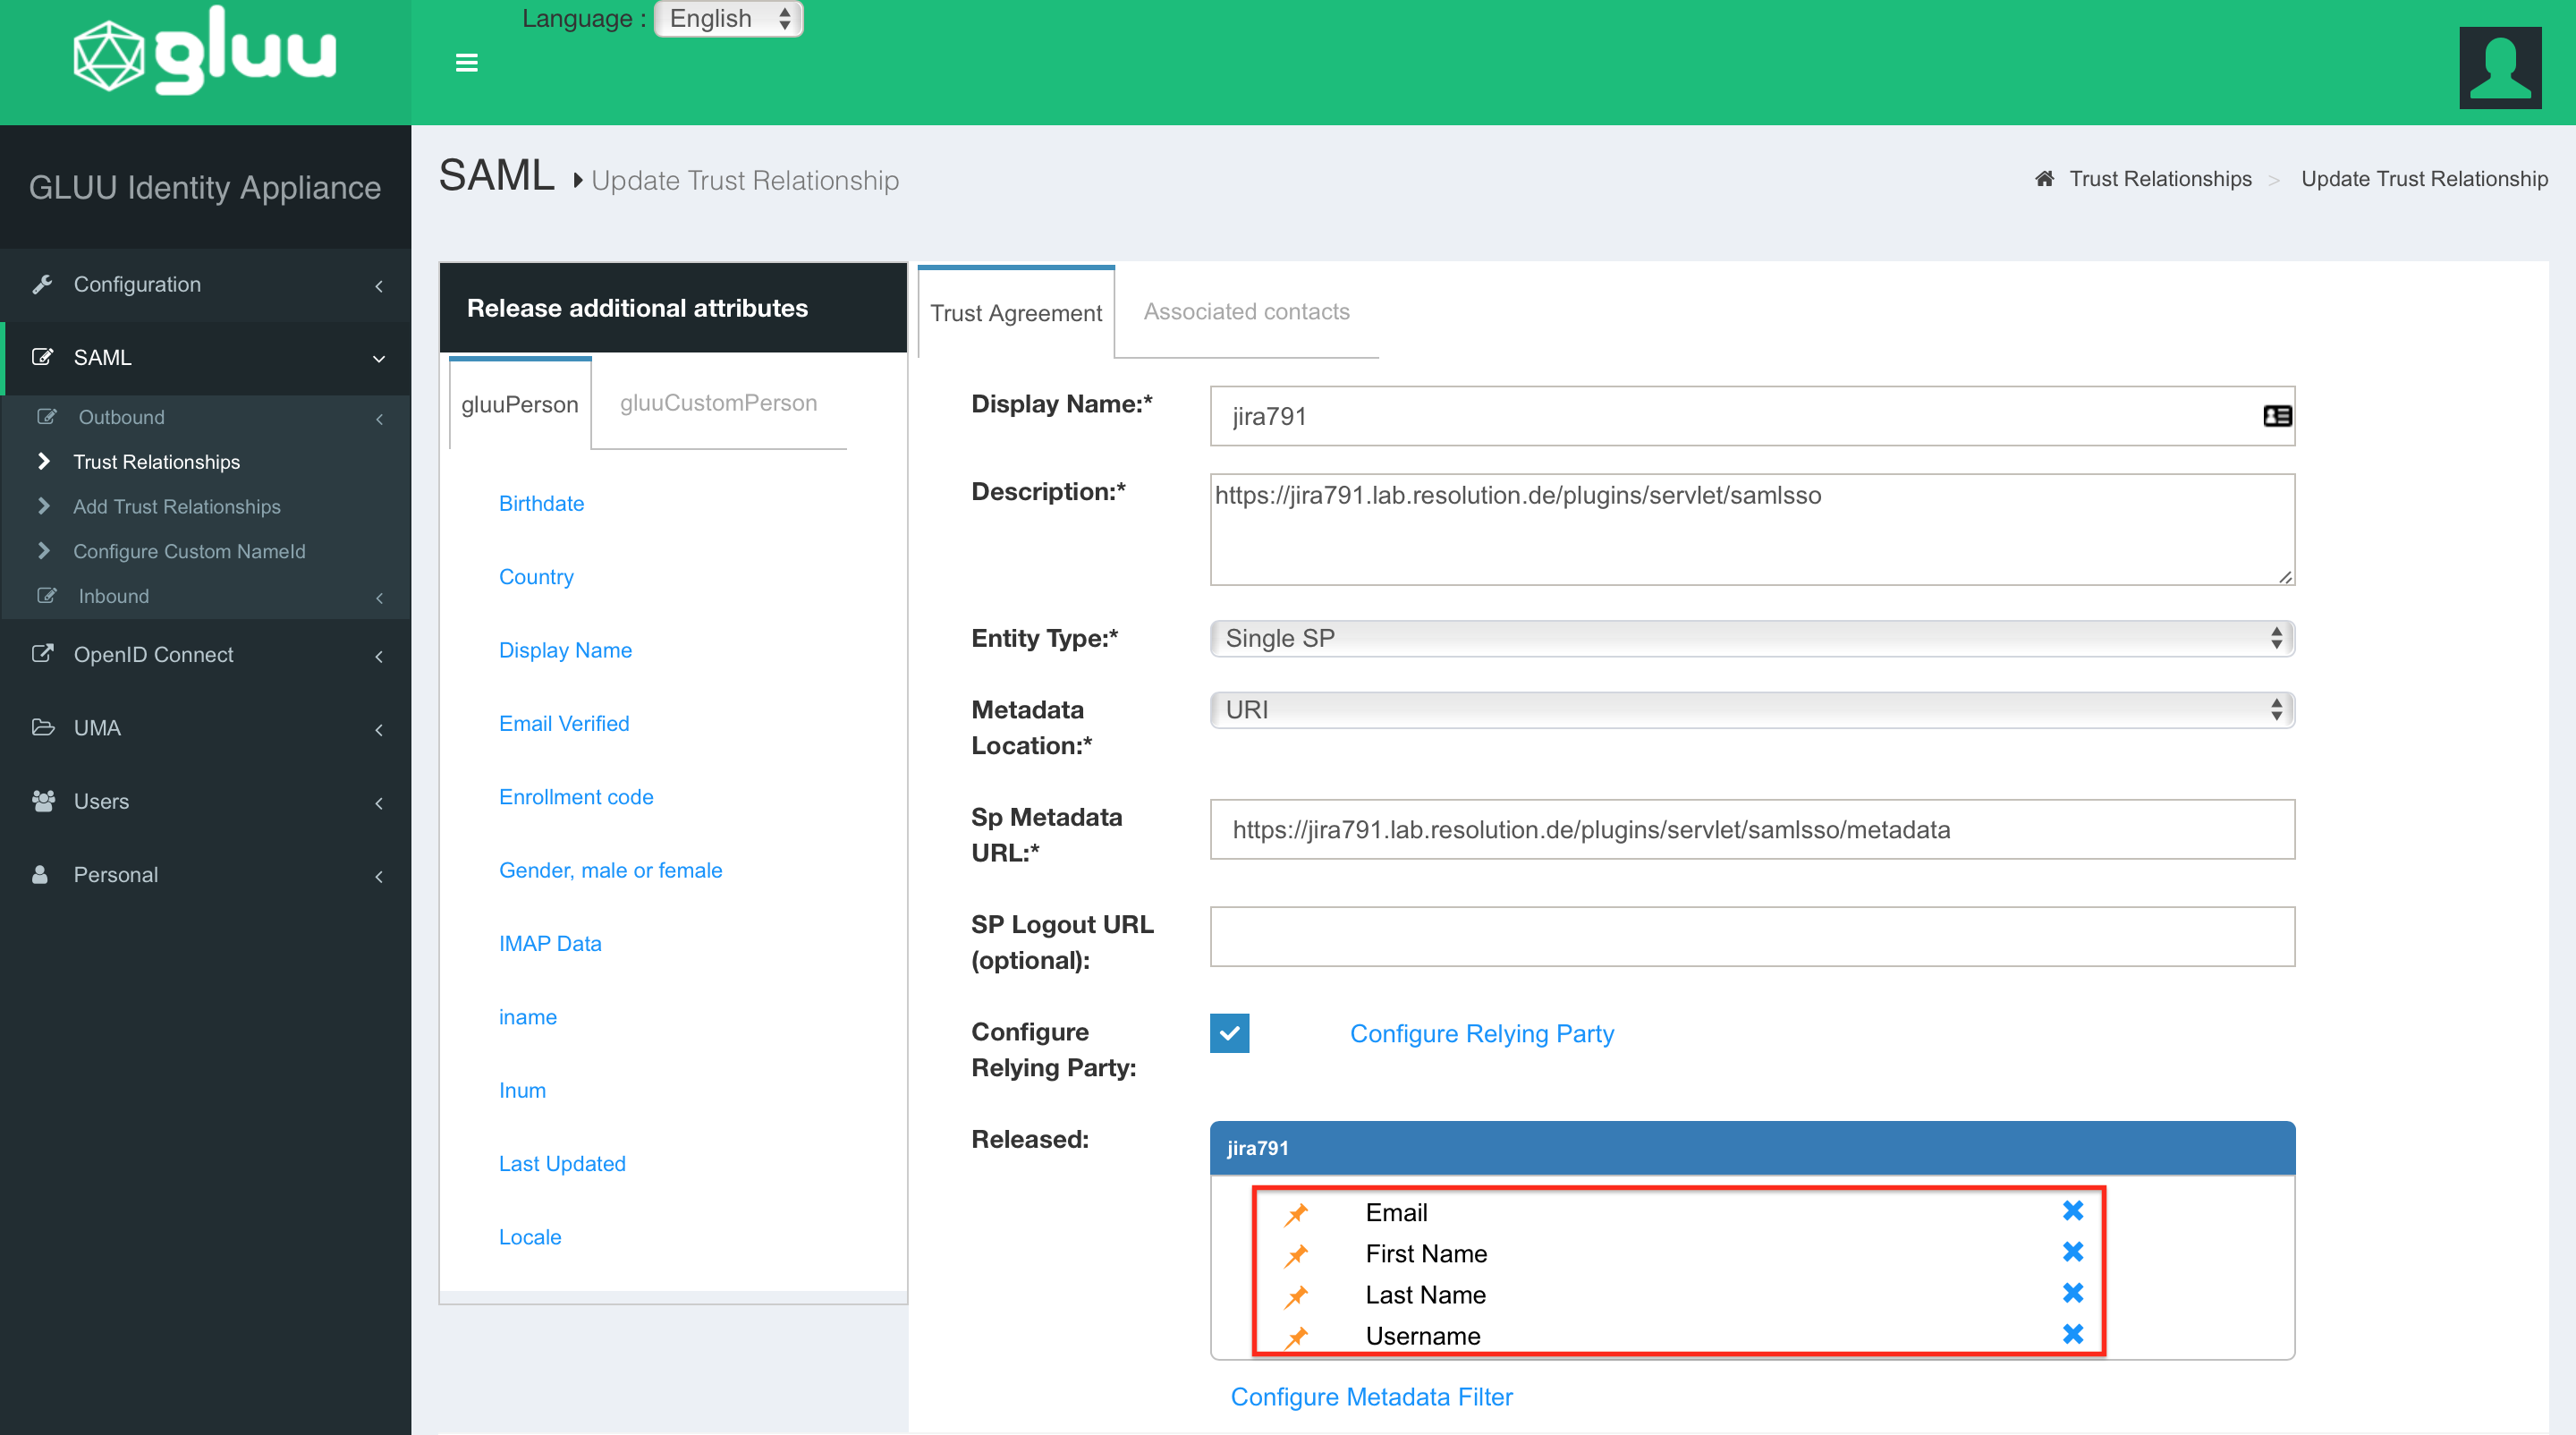
Repeat the last step for Email, Firstname and Lastname until all attributes are listed in the Released box. Click on Update to save all changes.
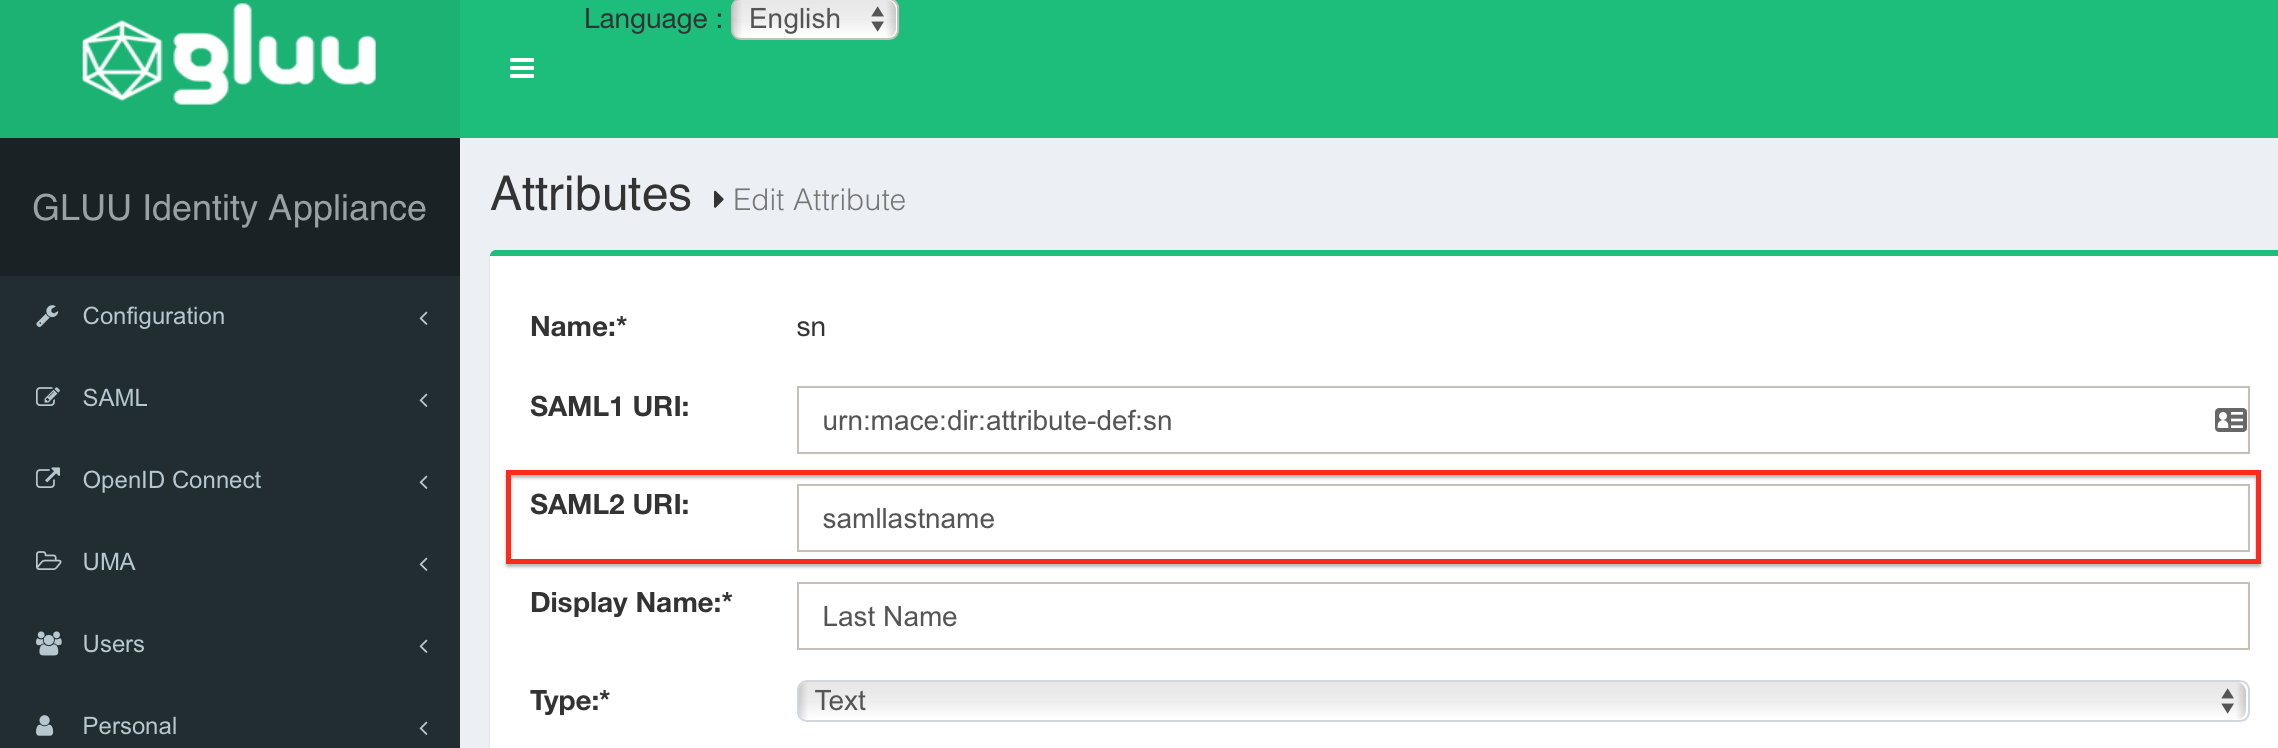
Switch to the Configuration → Attributes page.
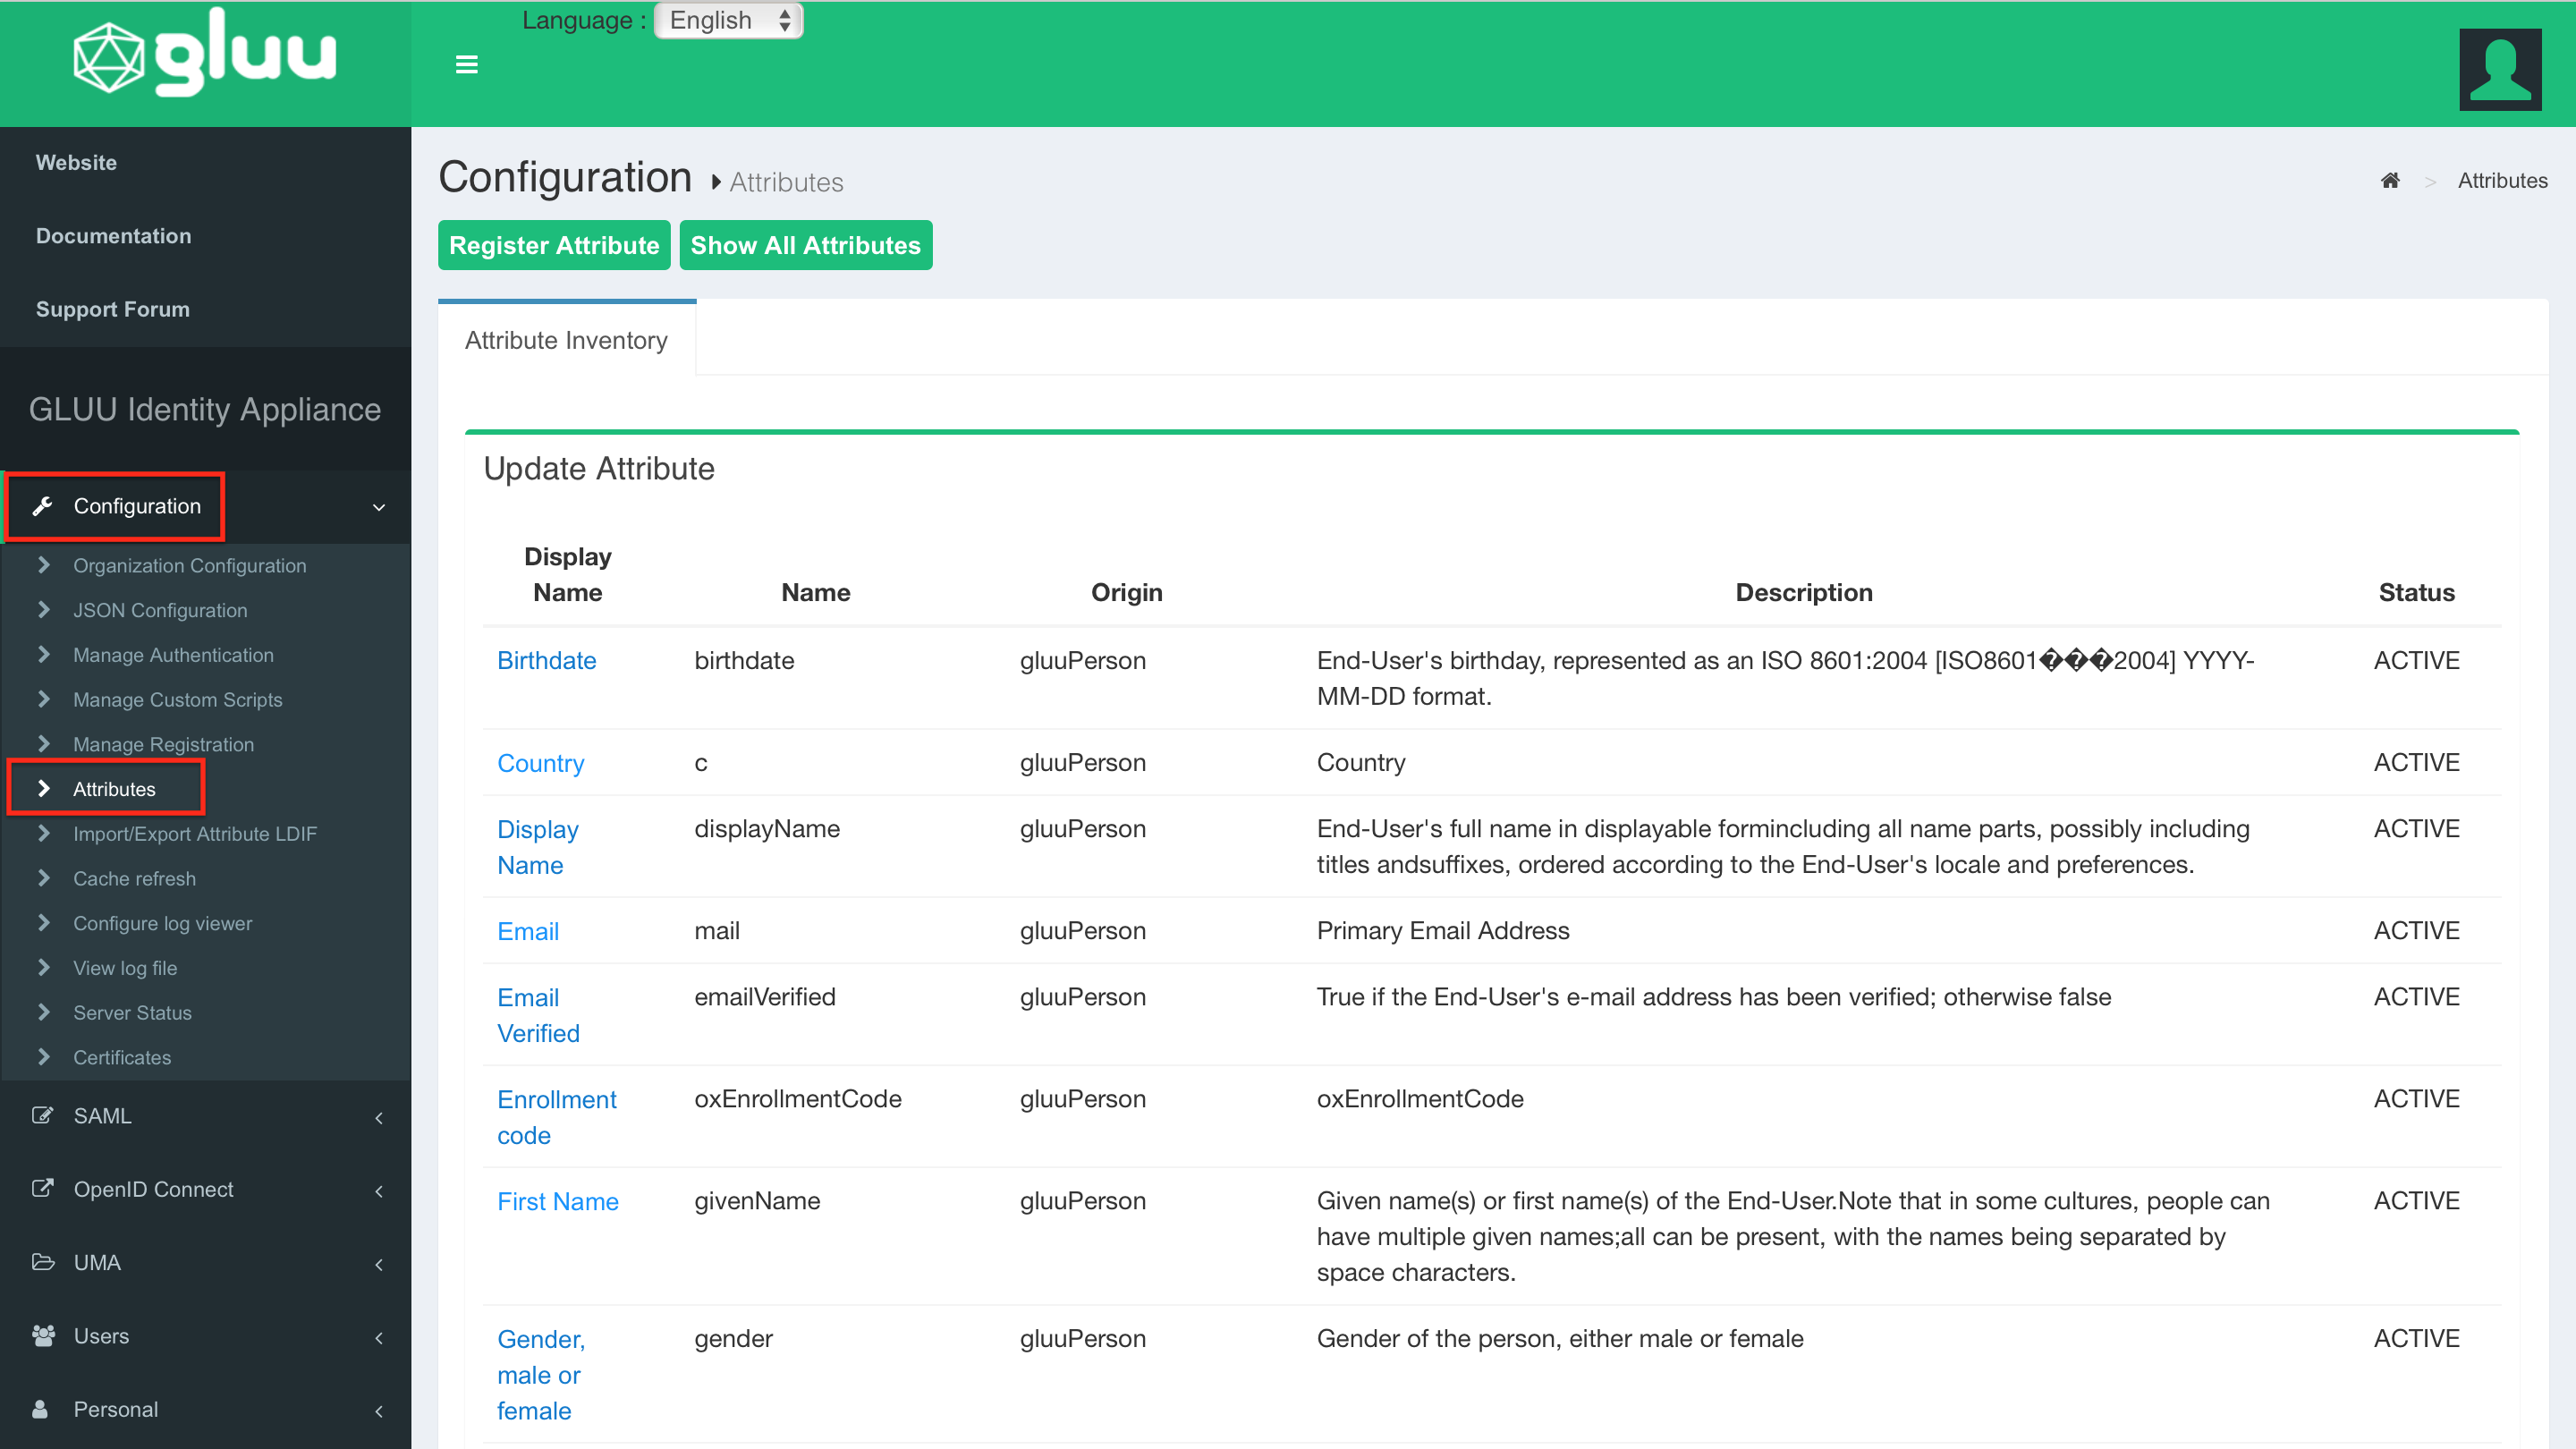
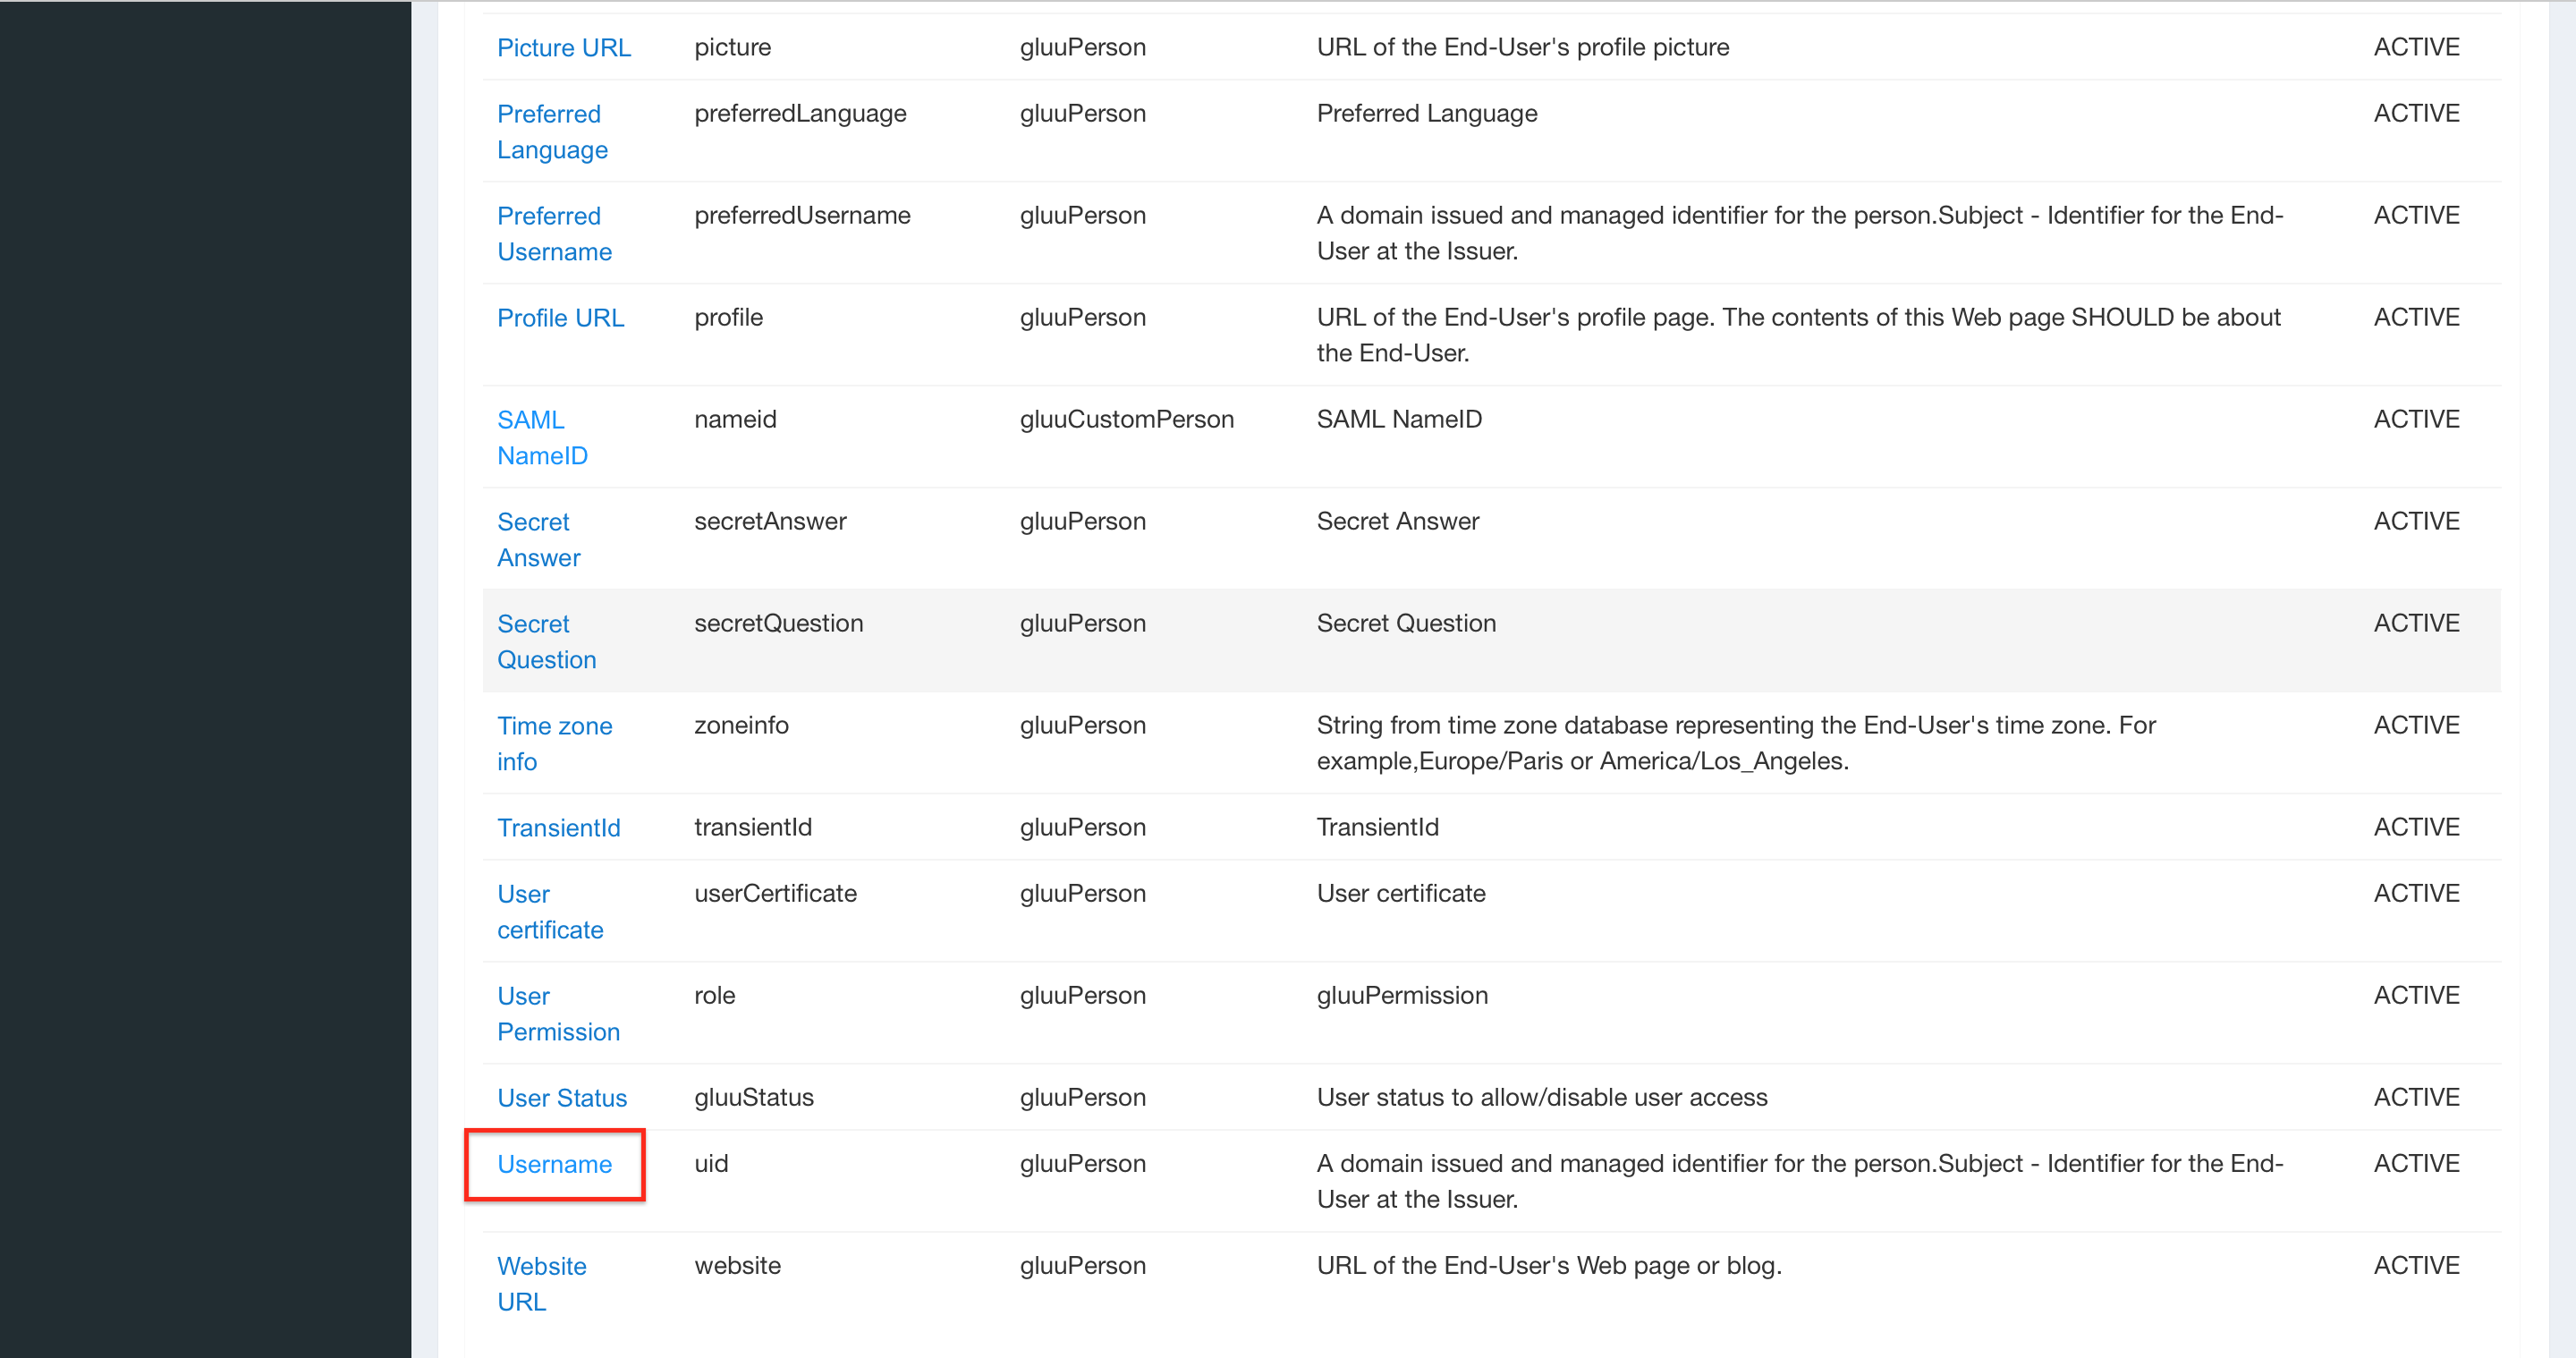
In the Update Attribute list, scroll down until you find Username. Open the properties via click.
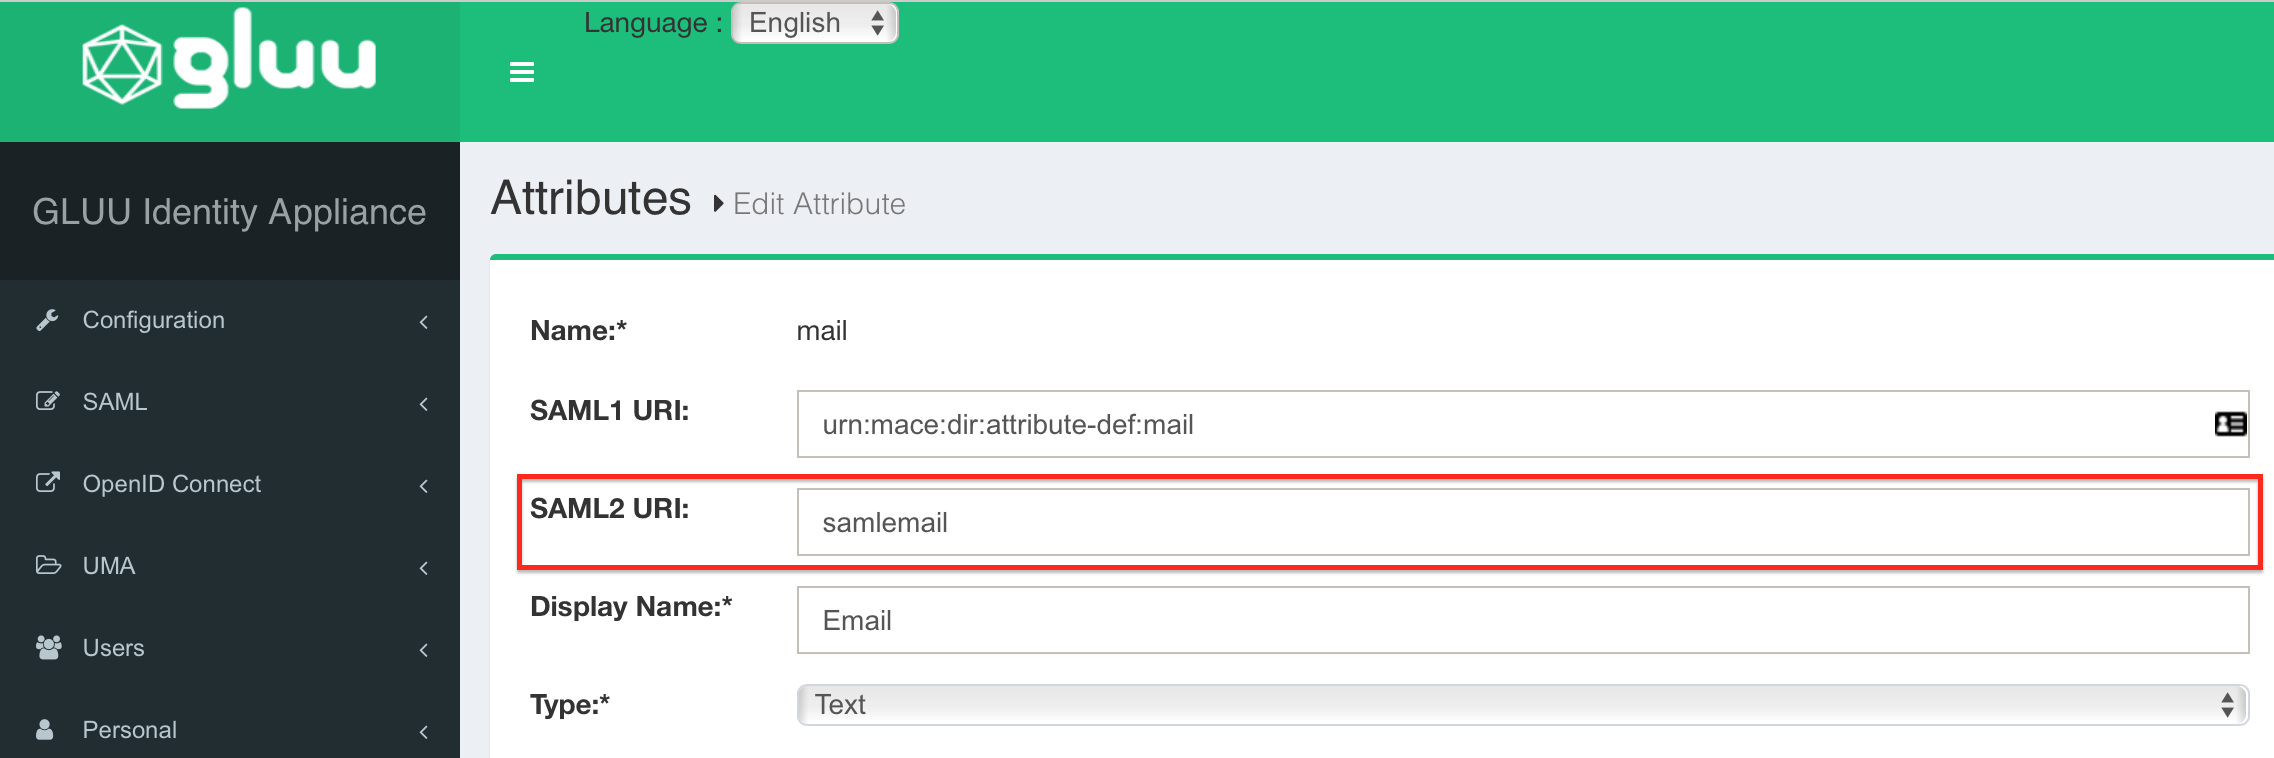
As SAML2 URI replace the current value with the same userid attribute name configured on STEP 2 SUBSTEP D. In this guide the userid is named as samluserid.
At the end of page, click on Update to save the change.

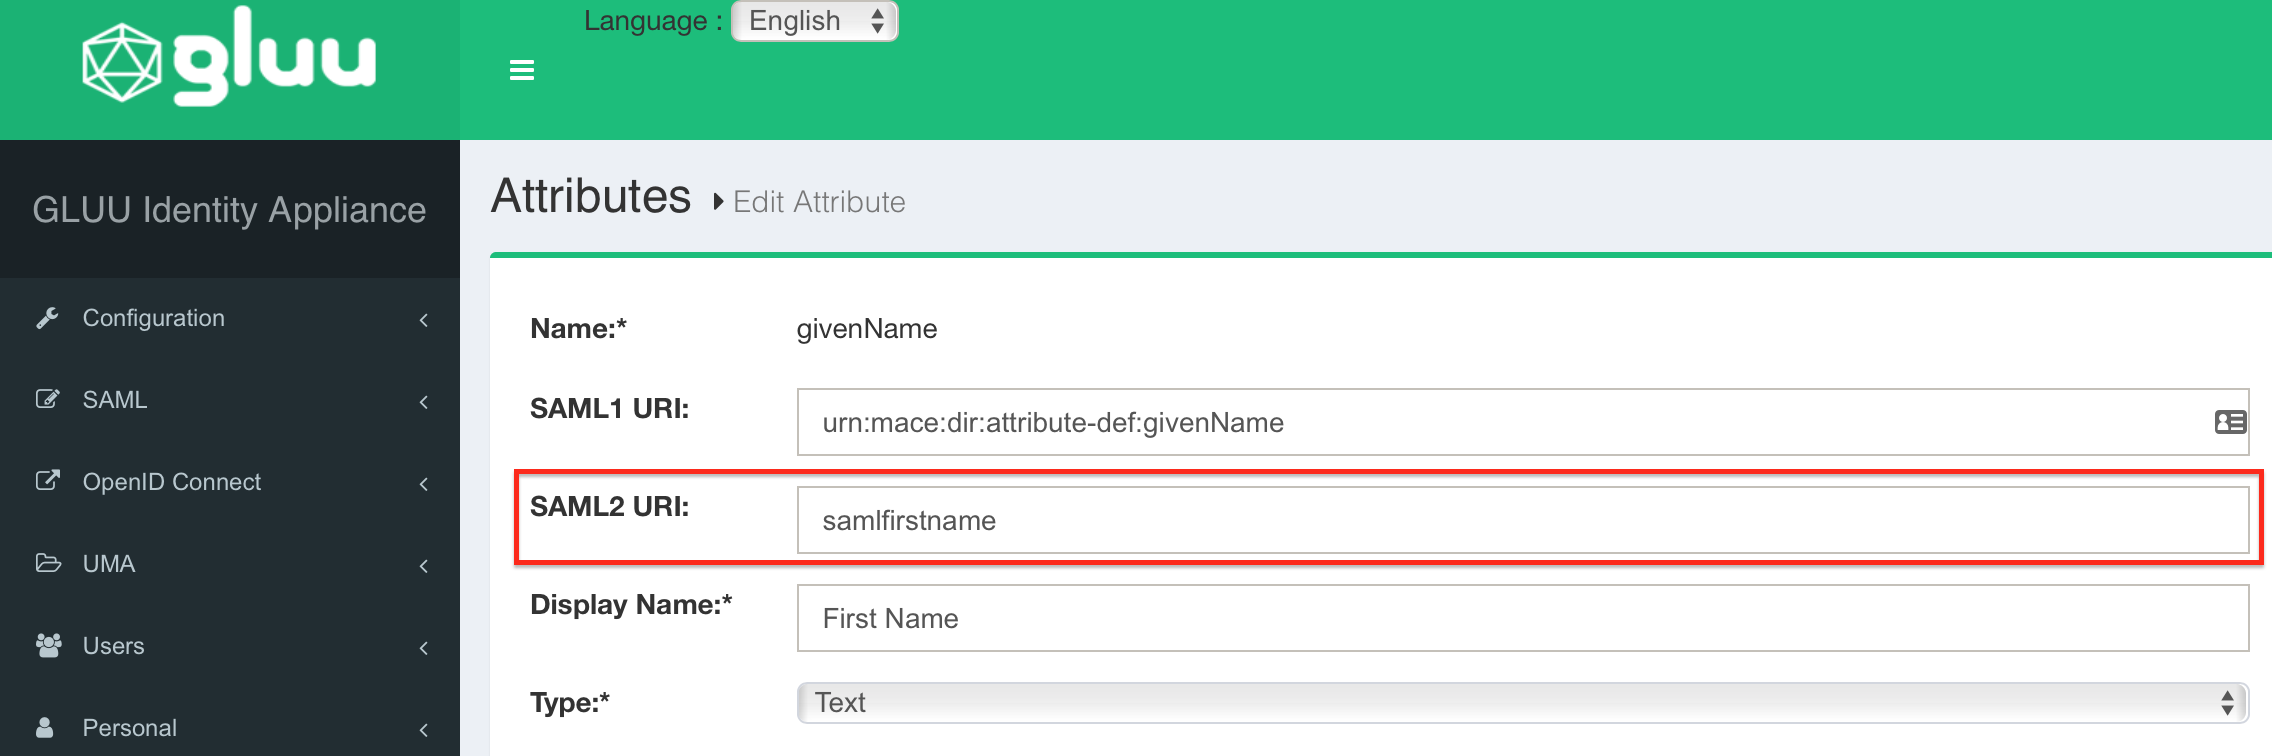
Repeat the last step for Email (mail) → samlemail, Firstname (givenName) → samlfirstname and Lastname (sn) → samllastname.
All changes are done. Please restart your Gluu Server now to get your changes active.
Step 3: Configure the SAML SSO Add-on for Atlassian Data Center
Substep A: Add new IdP or import config
Since version 2.0.0, our add-on offers an intuitive configuration wizard that is presented on first start.
In the first step it's possible to import an existing configuration or to start with a fresh configuration. Click on Add new IdP to start the wizard.
Substep B: Choose your SAML Identity Provider
Select Import Metadata from URL as IdP Type, choose a name and click on Next (Description is optional).
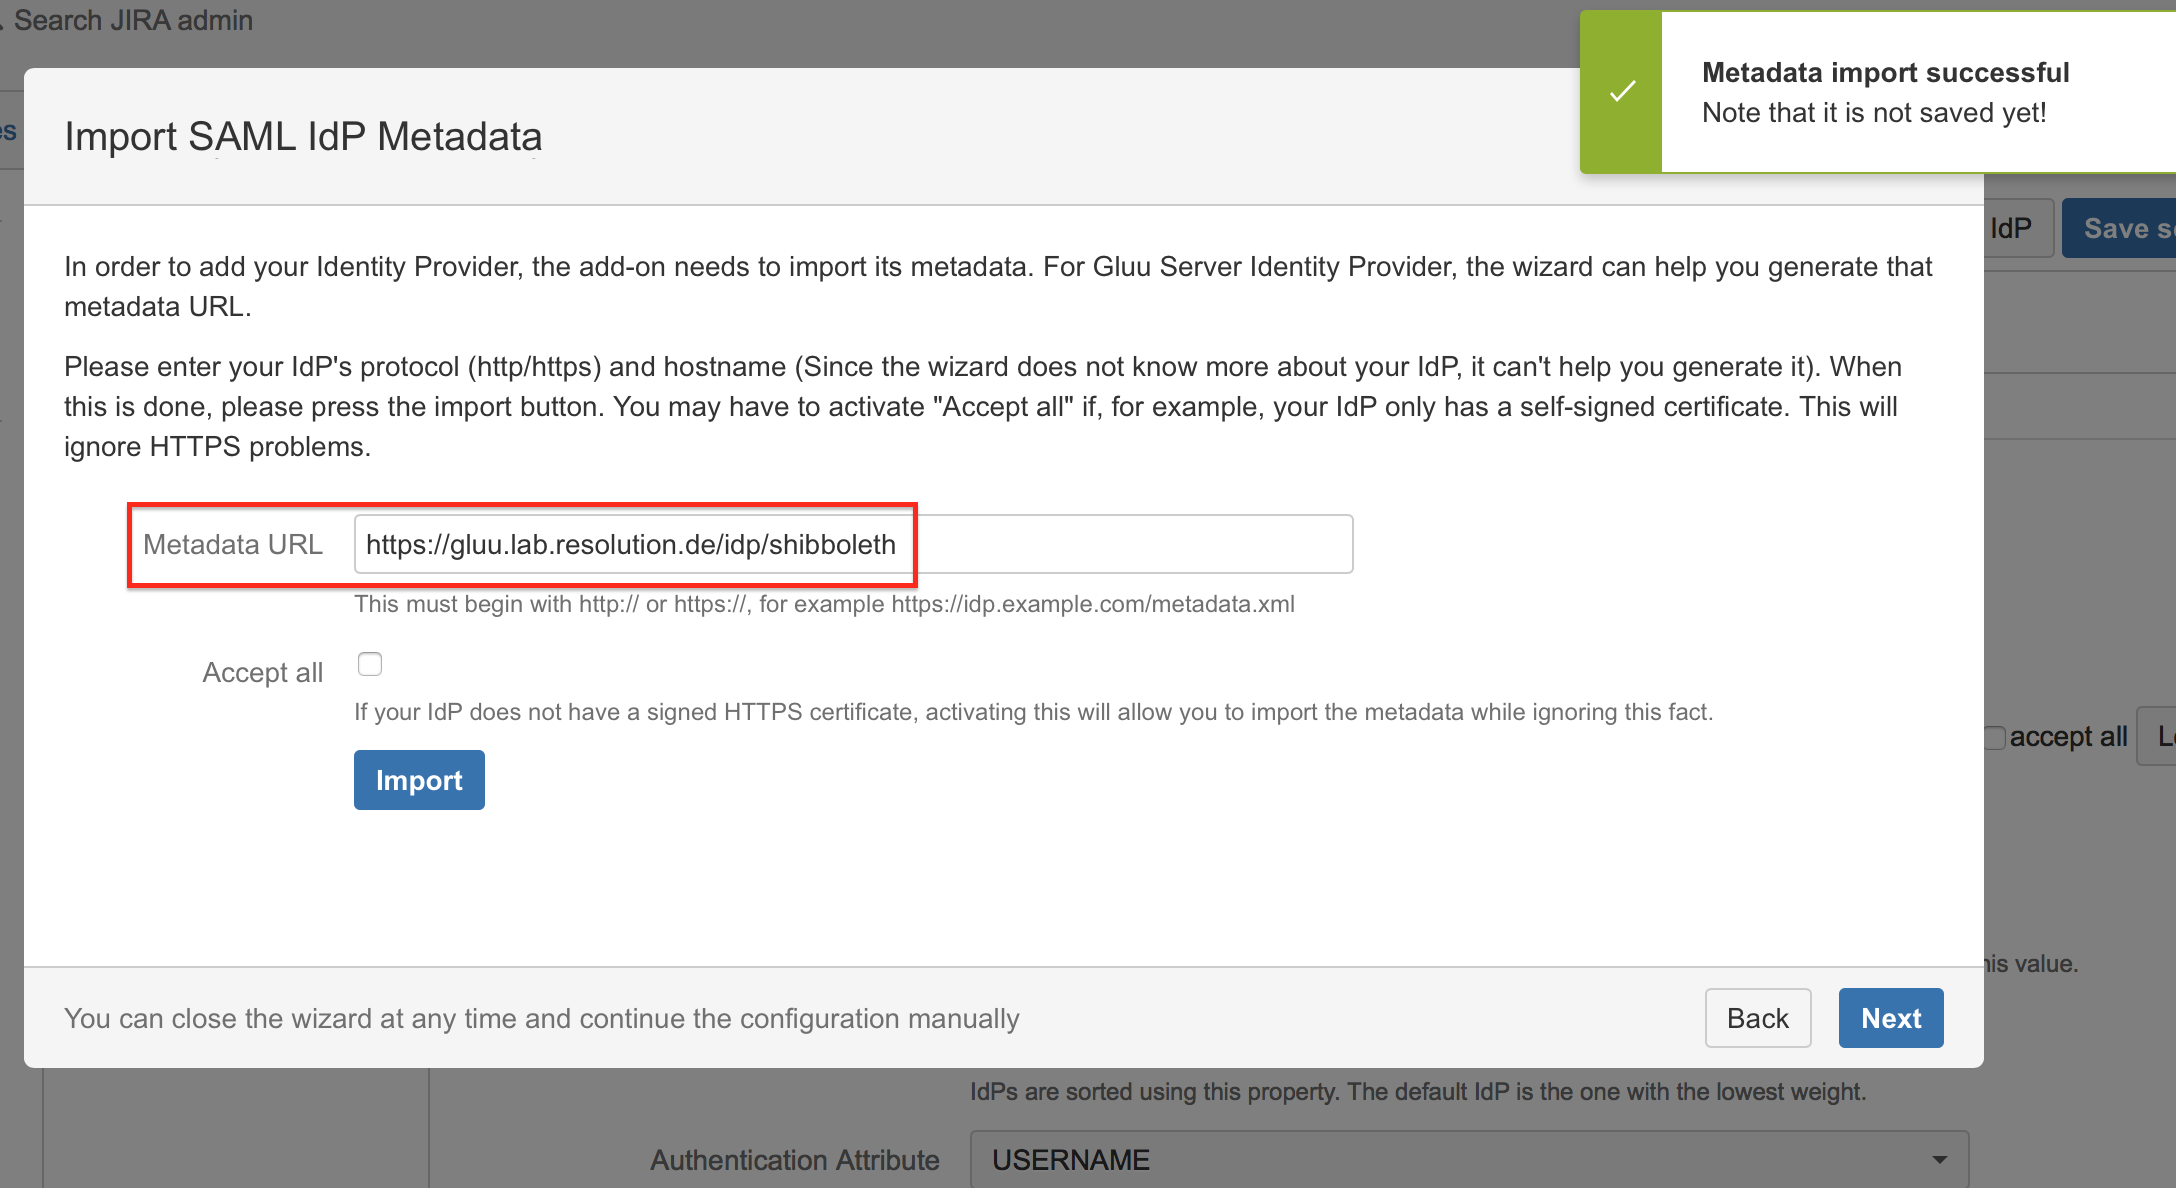
Substep C: Import SAML IdP Metadata
The recommended way to setup the Gluu Server is to import metadata from URL.
Enter the Gluu Server Metadata URL which has the format: https://<gluu-hosturl>/idp/shibboleth
Check Accept all if your IdP's https-certificate is not in your JIRA instance's trust store.
Click on Import.
If for some reason the Gluu Server metadata is not accessible via this URL, you can always go back to substep 2B to import the metadata from an XML file or configure the IdP manually.
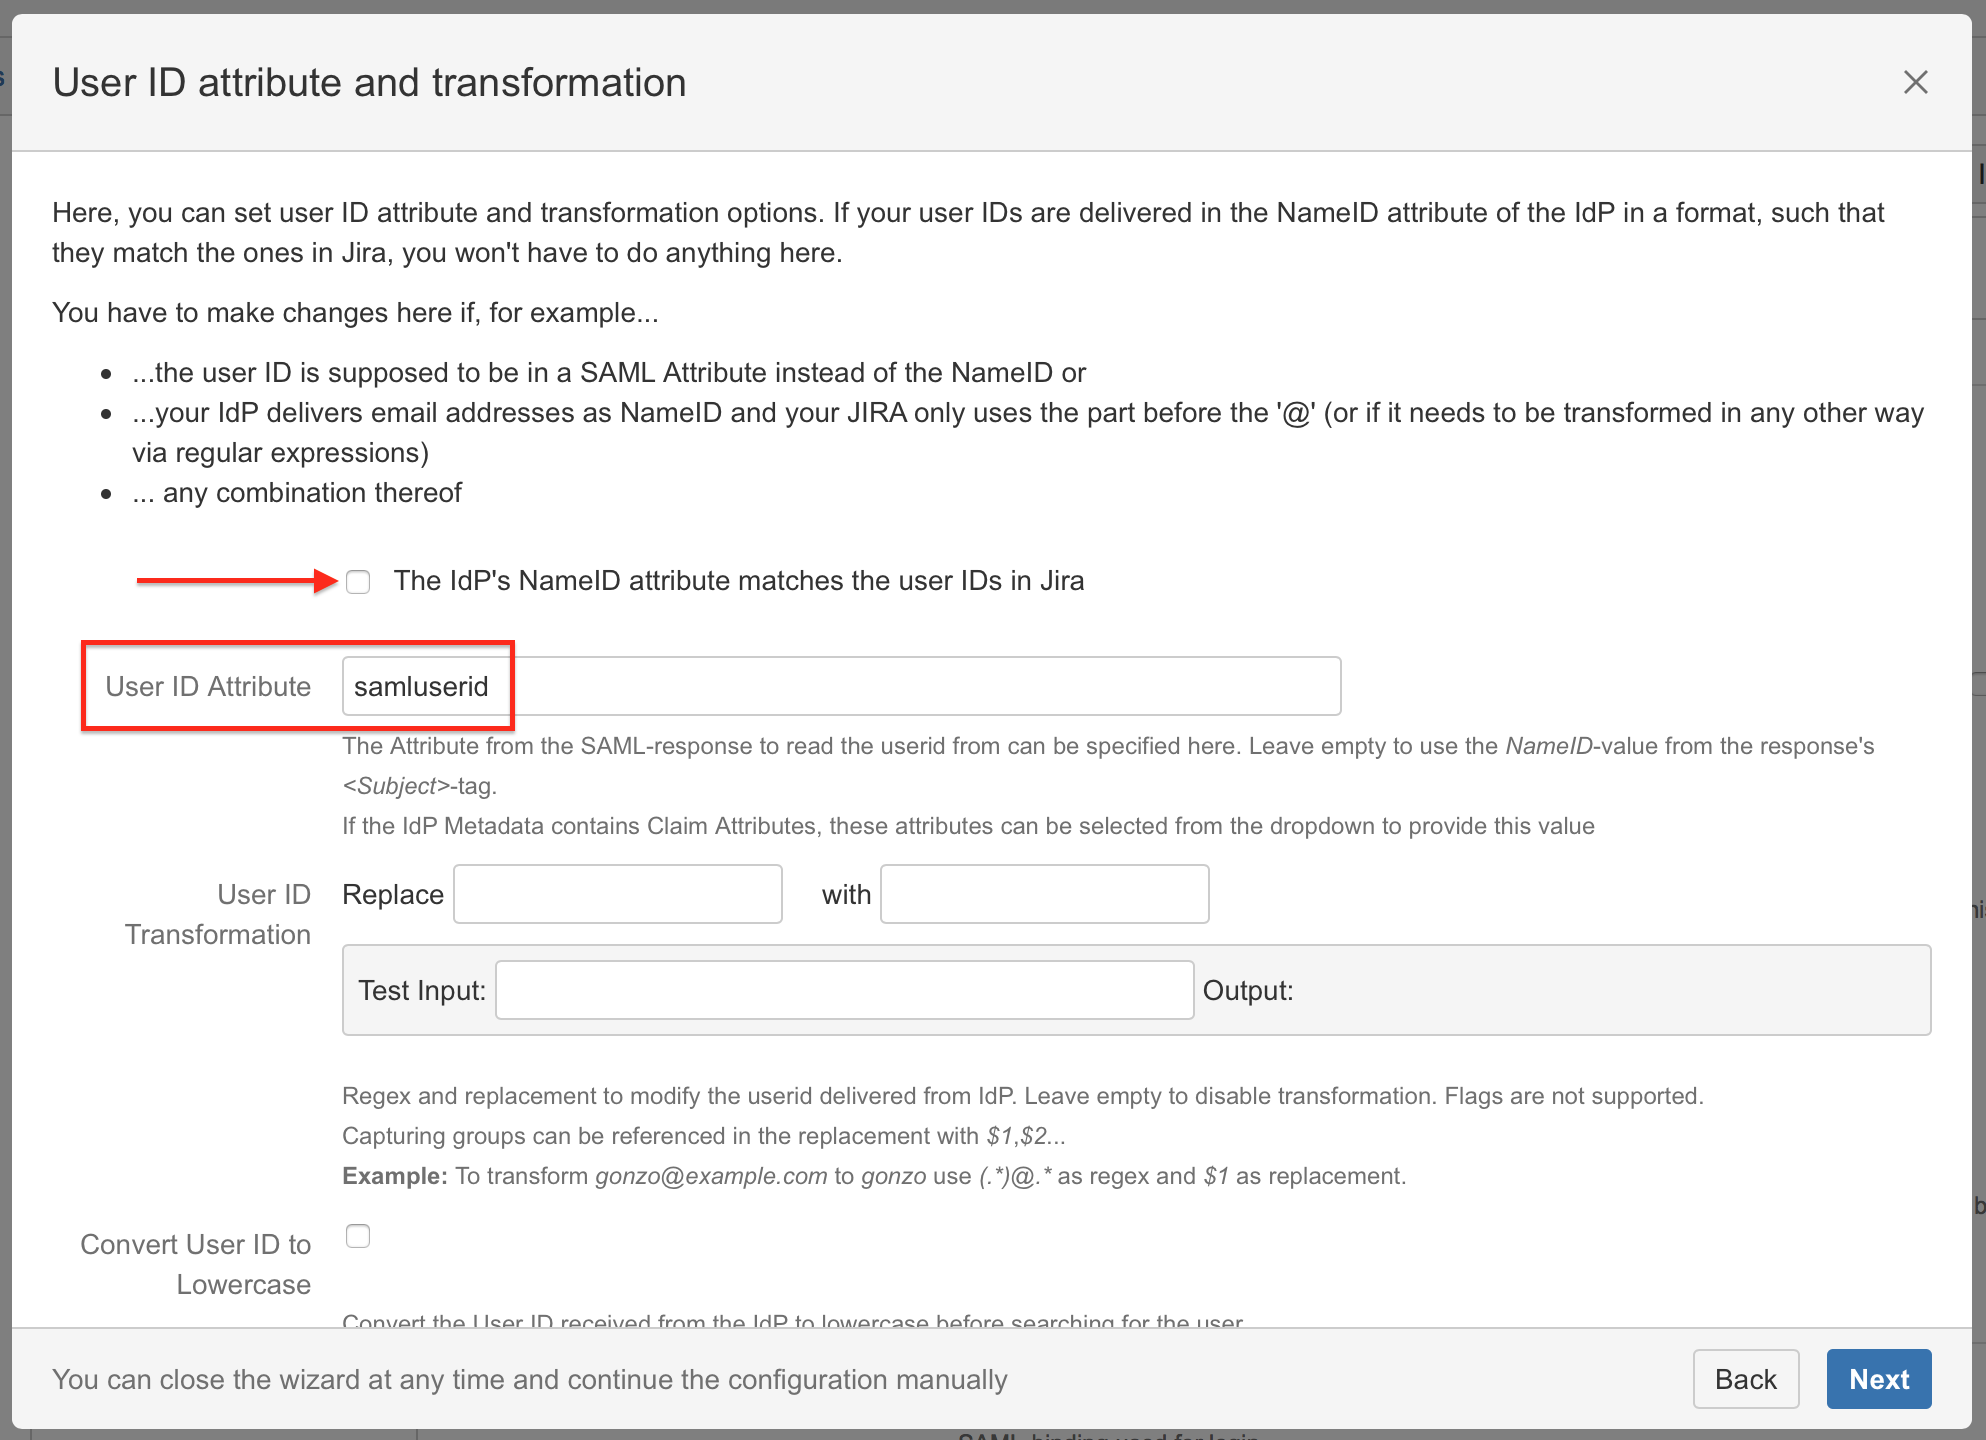
Substep D: User ID attribute
Uncheck The IdP's NameID attribute matches the user IDs in Jira, because a custom User ID Attribute definition is required for Gluu Server.
The name samluserid is used for this guide, but can be choosen freely.
Keep in mind, that the name defined here and all other attributes (see next Substep E) needs to match the appropriate attribute in the Gluu Server configuration (STEP 3 SUBSTEP C).
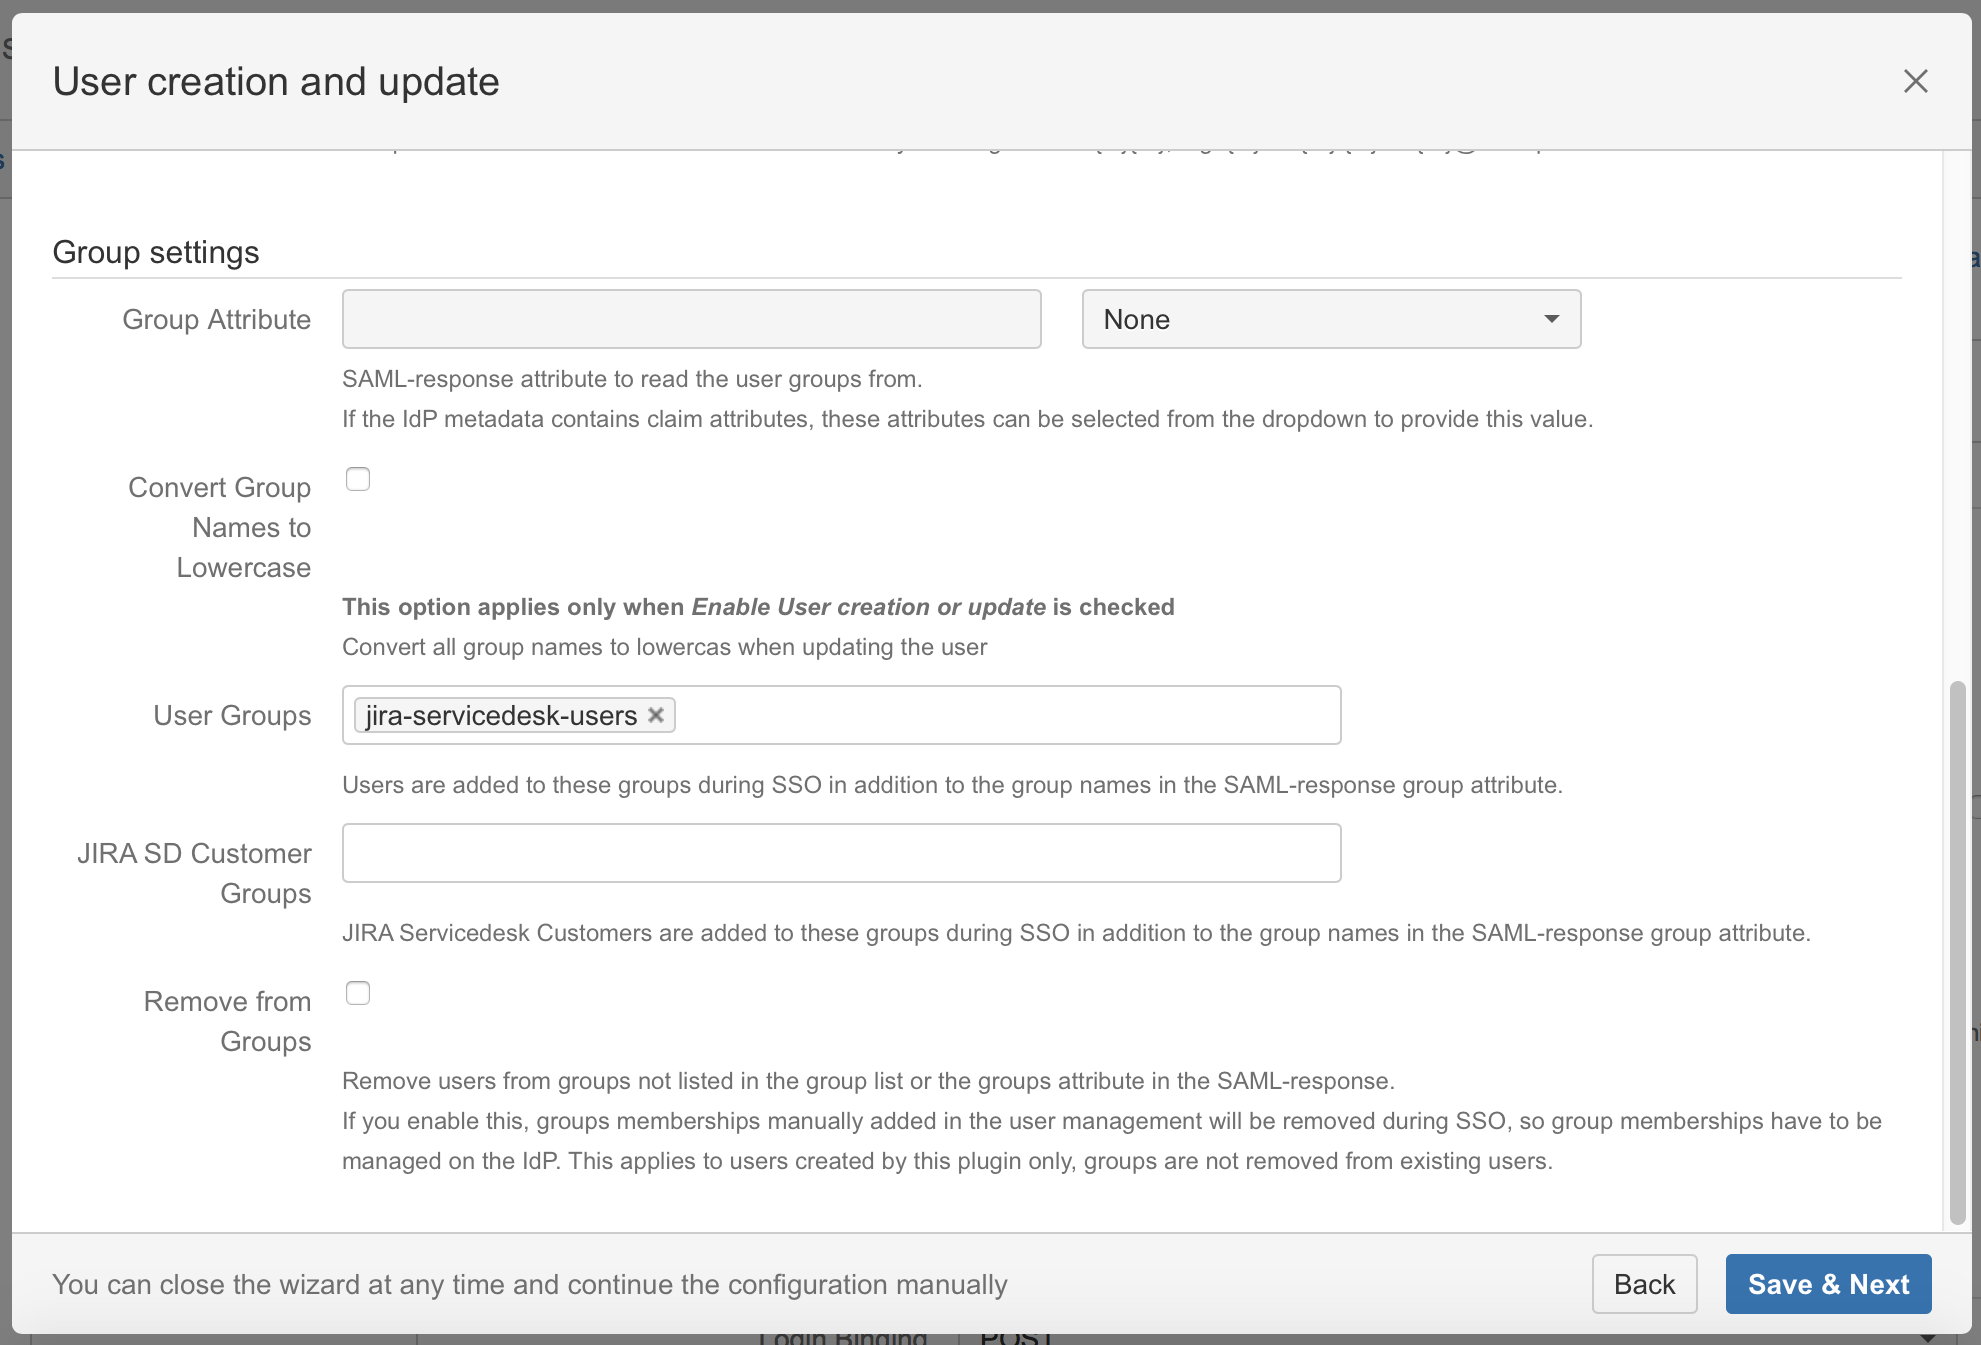
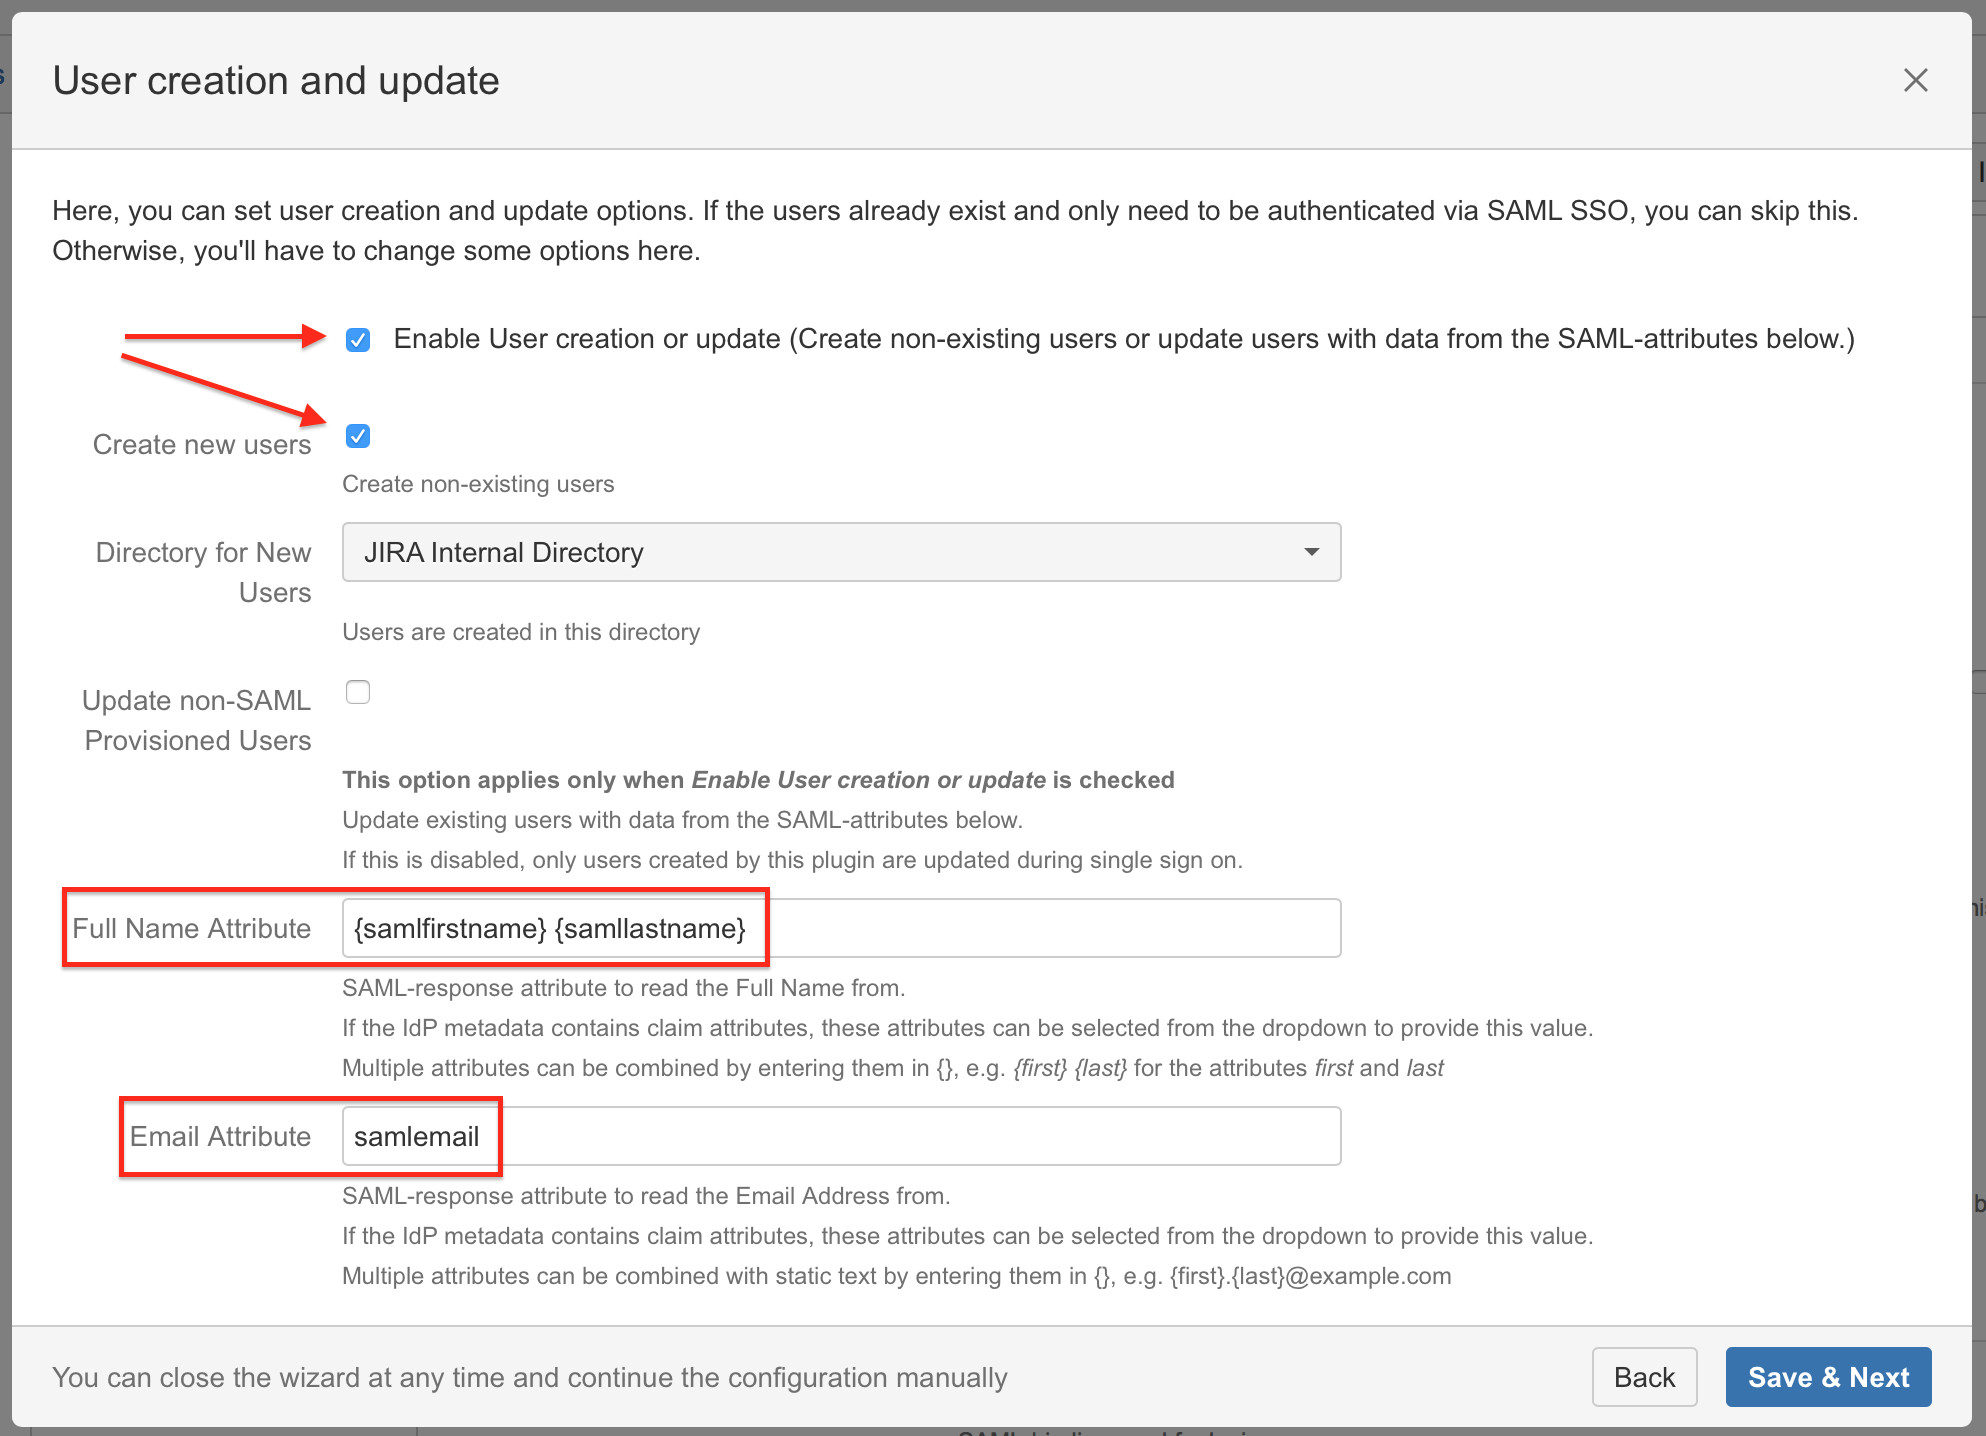
Substep E: User creation and update (Just-in-time provisioning)
We recommend to enable User Creation and Update (Just-in-time provisioning) in combination with the Gluu Server:
Activate the checkboxes Enable User creation or update and Create new users.
Enter Fullname Attribute "{samlfirstname} {samllastname}".
Enter Email Attribute "{samlemail}".
Substep F: Default group assignment
If you want to assign a default group, scroll down within the Enable user creation or update part and define the default group in the User Groups field.
If a user logs in using SAML, he will be added to the groups specified in the User Groups section. This applies to all users.
Groups in Gluu Server are managed by Group Ids and cannot be paired with the group names in Jira for group provisioning.
Click on Save & Next to continue with the configuration of your Gluu Server.
The standard group in Jira 7 is depending on which Jira Version you are using:
JIRA Version | Standard group |
|---|---|
JIRA Core | jira-core-users |
JIRA Software | jira-software-users |
JIRA Service Desk | jira-servicedesk-users |
Confluence | confluence-users |
Bitbucket | bitbucket-users |
Bamboo | bamboo-users |
Step 4: Test
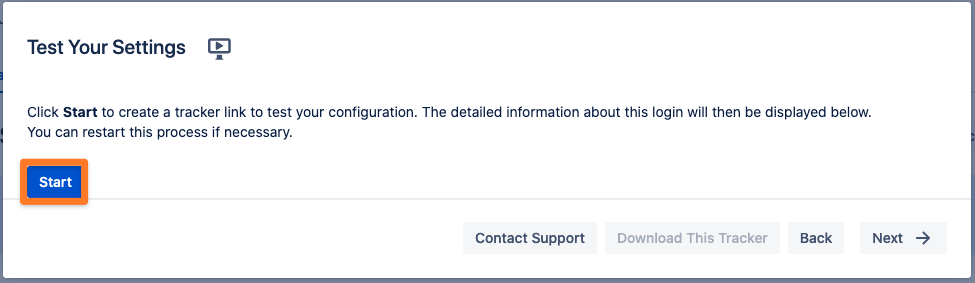
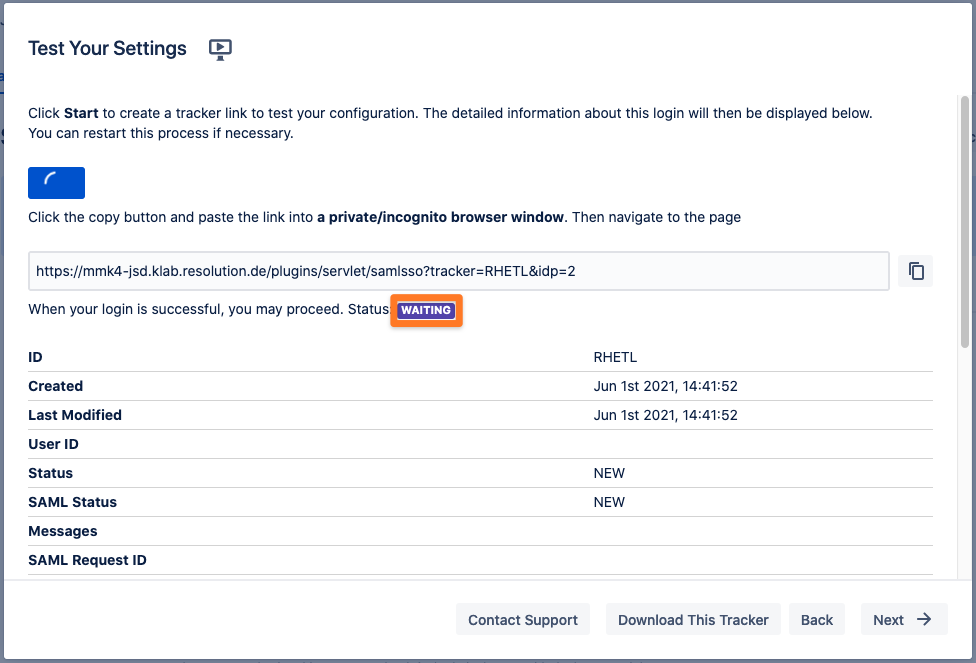
You are now able to perform a test with an authentication tracker, to see if your configuration is working as intended. To start the test, click on the Start test button, copy the displayed link, paste it into a new incognito / private browsing window, and execute a login with Identity Provider. The status of the authentication process is permanently updated in the wizard.
Step 5: Enable login redirection
If the authentication test was successful, it is now safe to activate the redirection on login.
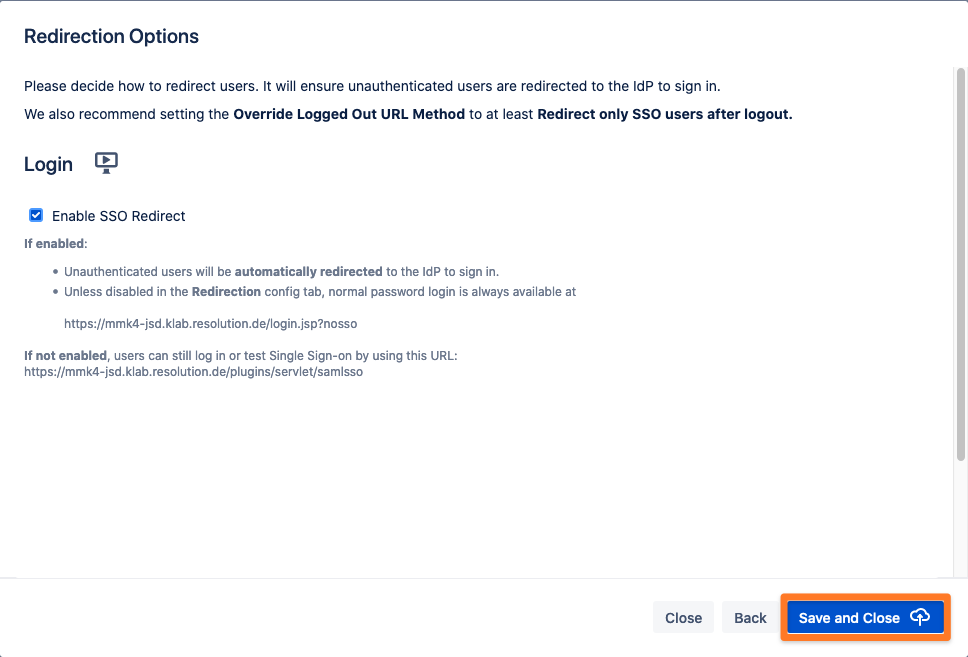
Click on Save & Close. The Add-on is now configured and ready to use.
If Enable SSO Redirect is enabled, you can login to JIRA Server / Data Center manually by browsing https://<your-JIRA>/login.jsp?nosso. Use this URL if you need to login a local user unknown to the Gluu Server or if there are any issues with Single Sign On.