
Okta configuration
This page shows how to configure User & Group Sync for Okta.
Video Guide
Quickstart guide
On Okta side:
Log in to your Okta organization as a user with administrator privileges.
Any type of administrator role is fine. If you limit this administrator role to manage only specific groups, only users in those groups are synced.
API tokens have the same permissions as the user who creates them, and if the user permissions change, the API token permissions will also change.when in normal mode, click on the API tab at the top and then on Tokens
in the developer console mode/ classic view, expand Security in the left menu bar, click on API, and then on the Token tab in the top middle
Click on Create Token.
Name your token and click on Create token.
Copy your Token Value, you will only see it once.
User & Group Sync Configuration (https://your-base-url/plugins/servlet/samlsso/usersync)
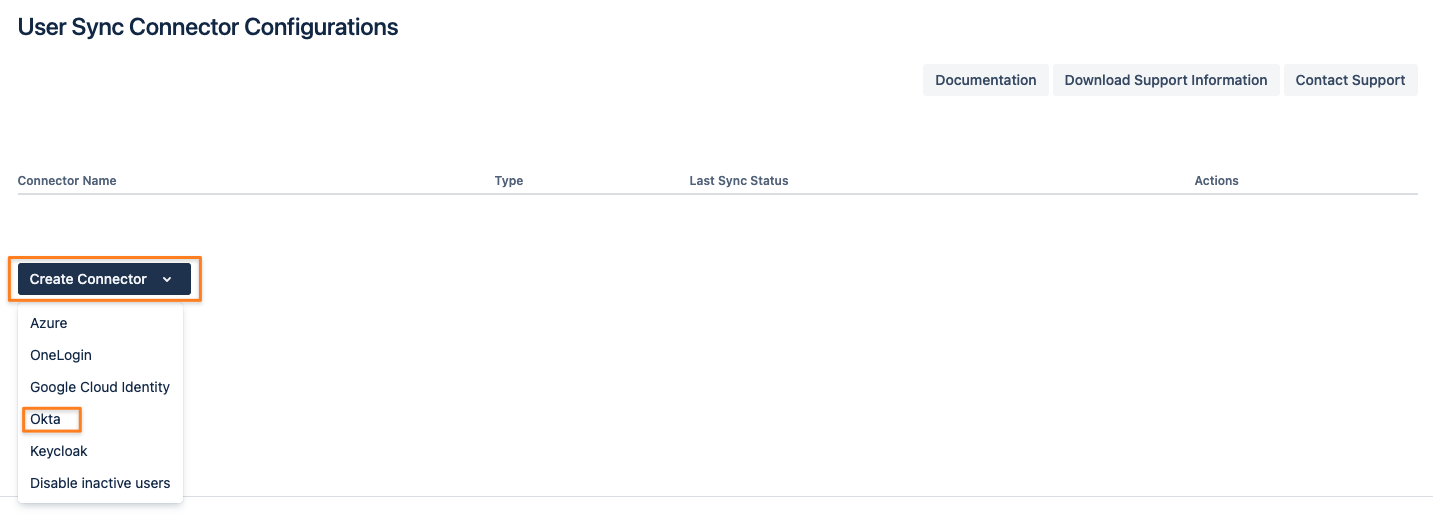
Click on Create Connector and select Okta
Enter Okta Domain and the token value.
Click Save. You are now ready to sync.
User guide
Log in to your Okta organization as a user with administrator privileges.
Any type of administrator role is fine. If you limit this administrator role to manage only specific groups, only users in those groups are synced.
API tokens have the same permissions as the user who creates them, and if the user permissions change, the API token permissions will also change.
Depending on the mode, the configuration interface looks different in Okta:
Create Okta API Token
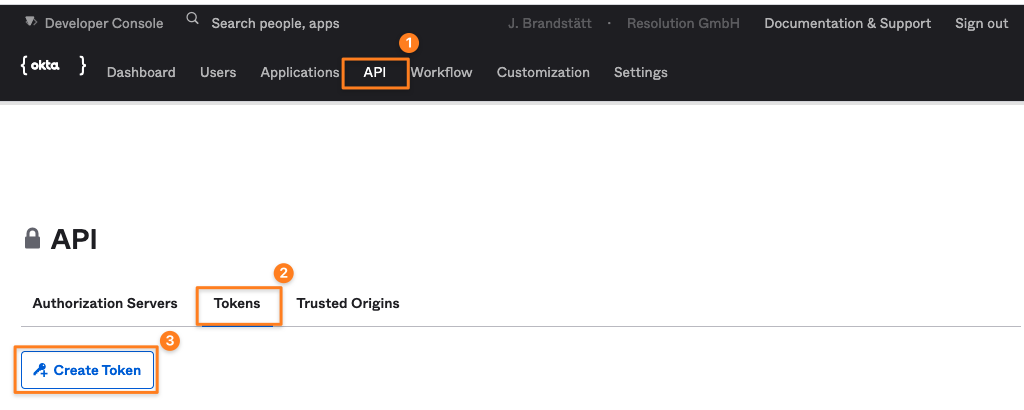
Regular UI
Click on API (2)
Click on Tokens (3)
Click on Create Token (4)
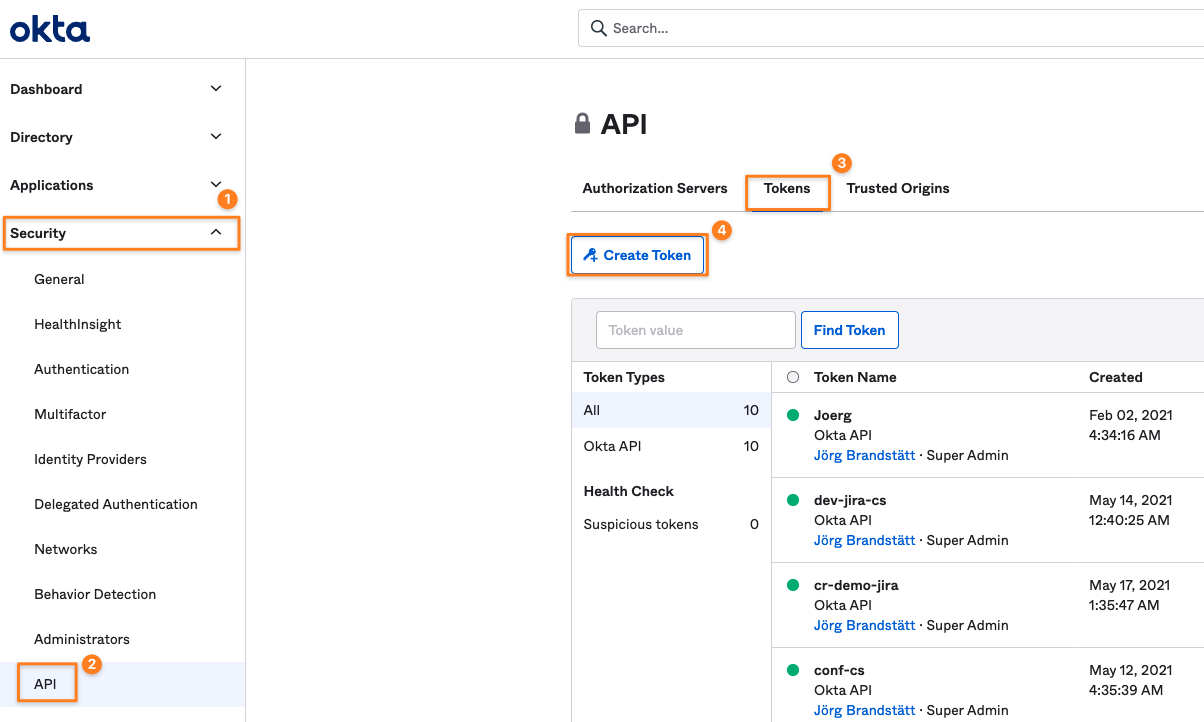
Developer Console/ Classic UI
Expand the Security node (1)
Click on API (2)
Click on Tokens (3)
Click on Create Token (4)
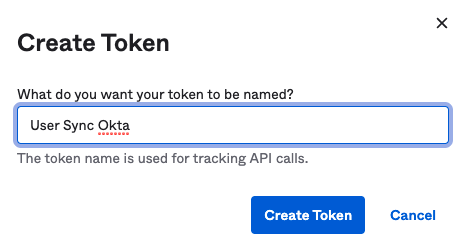
Name and Create Token
Name the token and create it
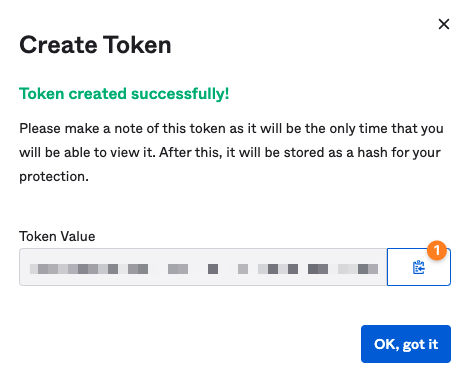
copy its value (1), it will be only displayed once. Of course, you can create a new token if you lost the old one
Create User & Group Sync Connector For Okta
Now it is time to configure User & Group Sync in your Atlassian product. Click on Create Connector and select Okta:
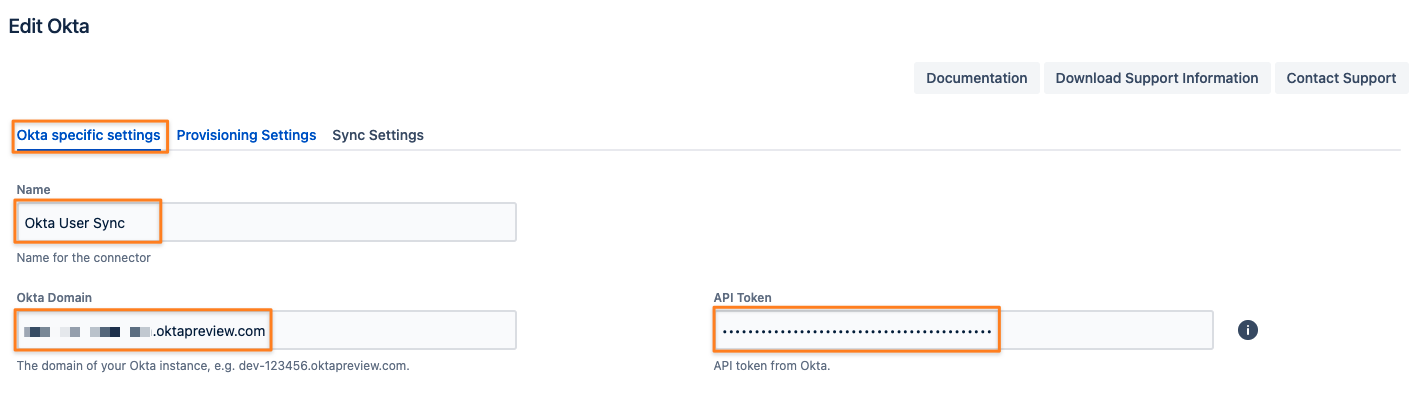
Set a Name, insert your Okta Domain without protocol (HTTPS://), and paste the token value to the API Token field
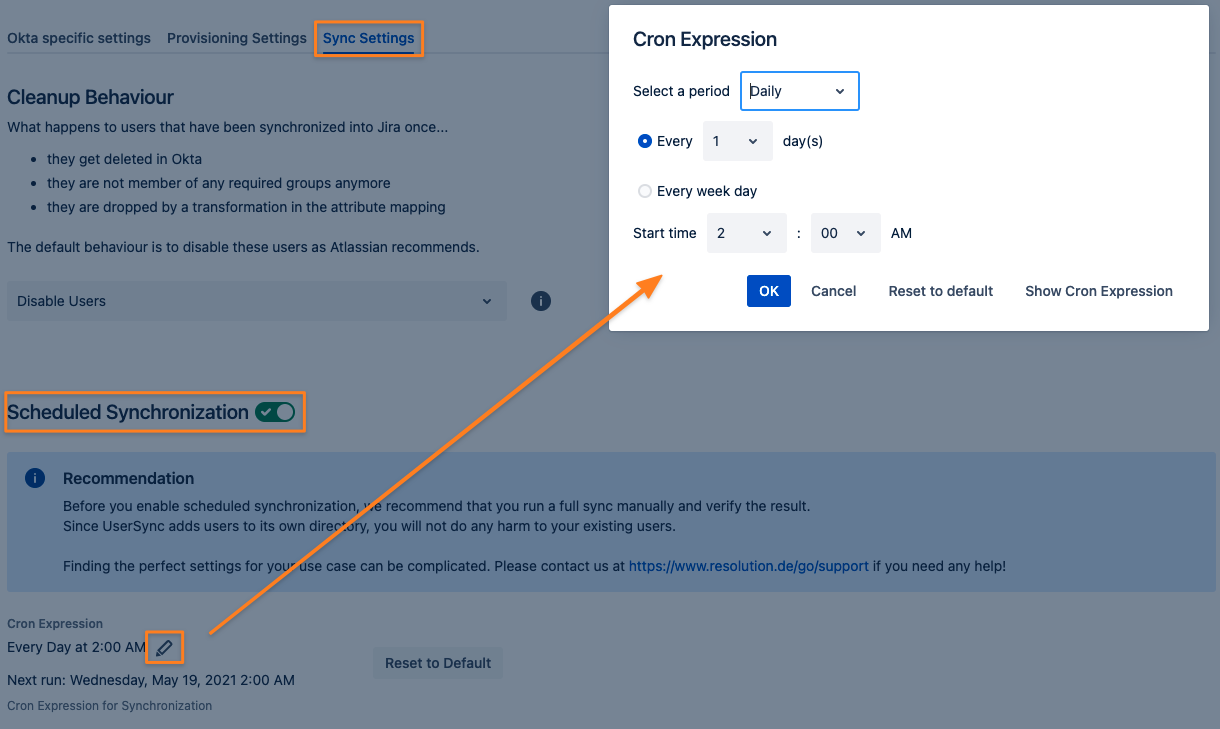
To take full advantage of User Sync, click on the Sync Settings tab and Enable Scheduled Synchronization.
You can control the sync interval with the modal but also by editing the Cron expression.
Do not forget to save your configuration. Scroll down to the bottom of the page and press Save or Save and Return.
Now you are ready to start your first full sync. Just click Sync in the Actions column.
Please read here, if you already have users in your system which you want to migrate, without losing their history.
Don't hesitate to reach out to https://www.resolution.de/go/support, if you need any help with achieving this.
