
Troubleshooting
This page contains information about how to retrieve information about your last sync(s), your User Sync configuration, and how to enable detail logging.
Video Guide to Troubleshooting
Download Sync Results
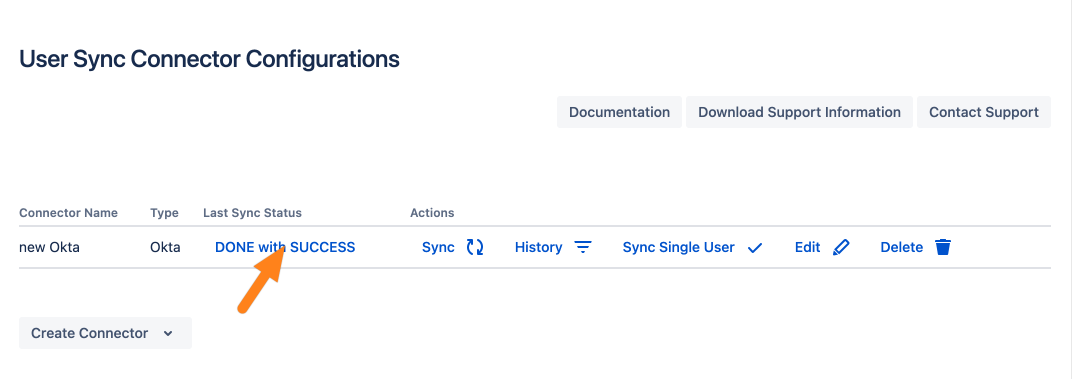
A sync result contains detailed information about a particular sync. To access it, please log in to your Jira/Confluence instance and navigate to the options page of User Sync. To retrieve your last sync status, please click on it in the Last Sync Status column.
In the sync status window, you can see detailed information about the sync. Please scroll down and to the Download Results section. With all users, you can download the results for all users while modified and failed users will not download the sync results for all users.
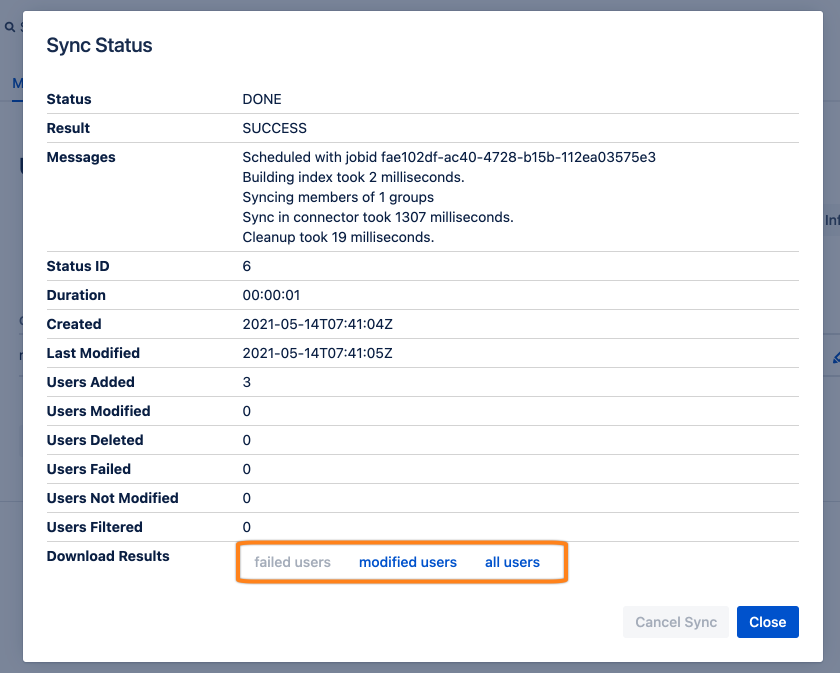
The resulting JSON file does not contain private information. In essence, it contains the same information as in the Sync status window.
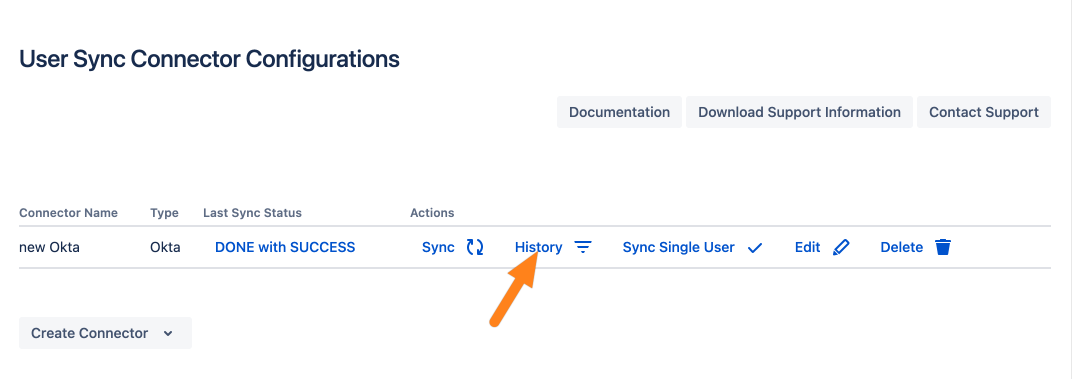
If you want to retrieve the sync status of an older sync, please click on History in the connector overview.
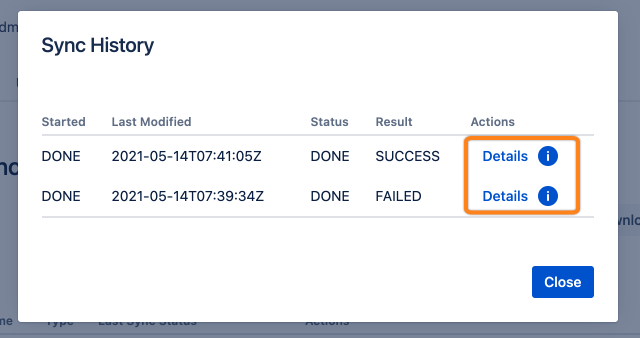
In the next window, you can find the sync results of the last seven days. Click on "Details" to display and download a sync status as described before.
Retrieve the User Sync Configuration
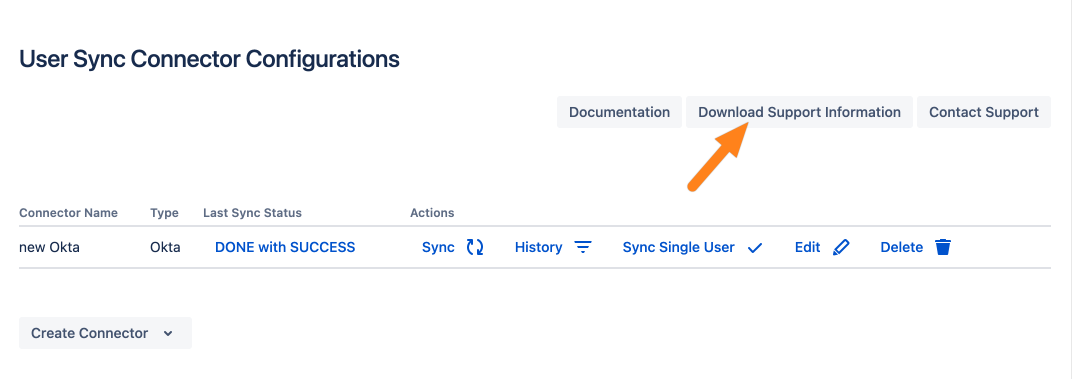
If you are using a SAML SSO newer than 3.1.7 for Jira and Confluence, please go to the User Sync settings and click Download Support Information:
If you have an older version installed, please do the following:
To retrieve your User Sync configuration, please log in into Jira/Confluence as an administrator and enter the following URL into your browser:
<Your baseURL>/rest/samlsso-admin/1.0/usersync/connector
Please copy & paste the configuration and attach it to your support ticket.
Your configuration contains private information like the application secret. Please be careful with saving and sending the file. Of course, our support treats all your files and messages confidentially.
Enable Detail Logging
If our support demands to enable detail logging for User Sync, here are information:
For JIRA and Confluence
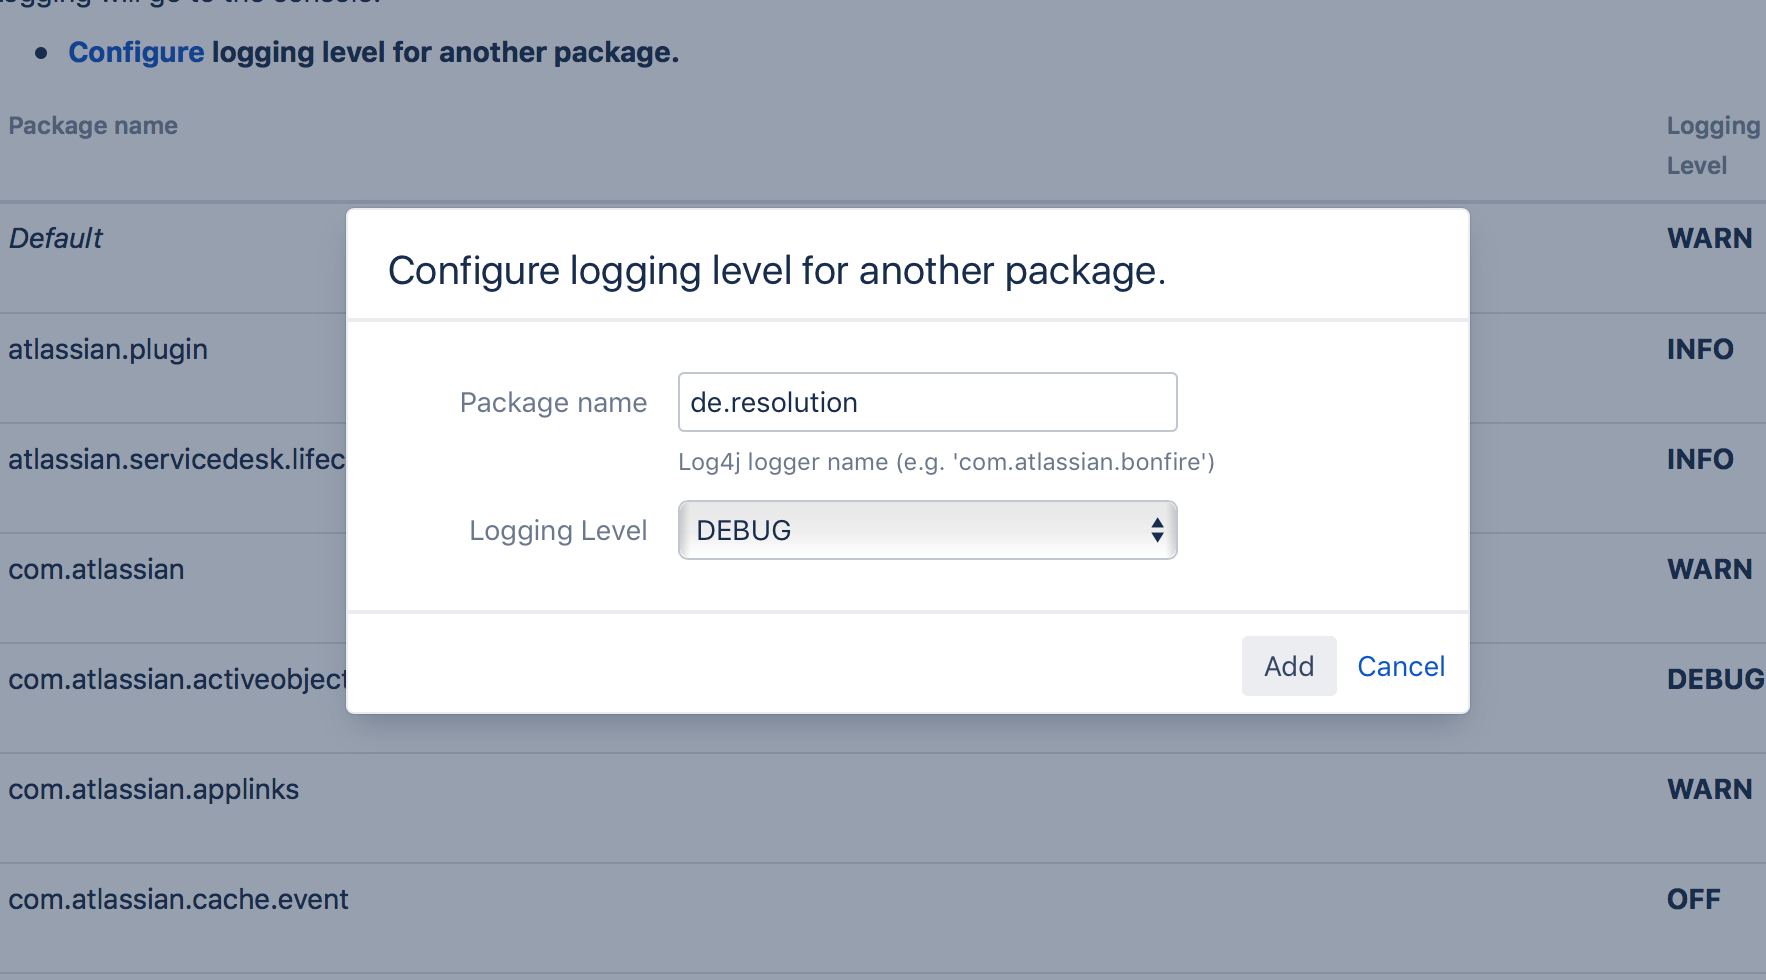
The logging level can be increased for troubleshooting. To do this, go to the JIRA/Confluence Logging and Profiling (in the Administration section) configuration and add the following new entry:
de.resolution with DEBUG level
If you are using the User Sync SCIM Connector, you can use the following package: de.resolution.usersync.builtin.scim
After that, the plugin starts detailed logging in the
<JIRA home directory>/log/atlassian-jira.log
<Confluence home directory>/log/atlassian-confluence.log
For Bitbucket
To increase the plugin logging level for the troubleshooting in Bitbucket, please follow the steps below:
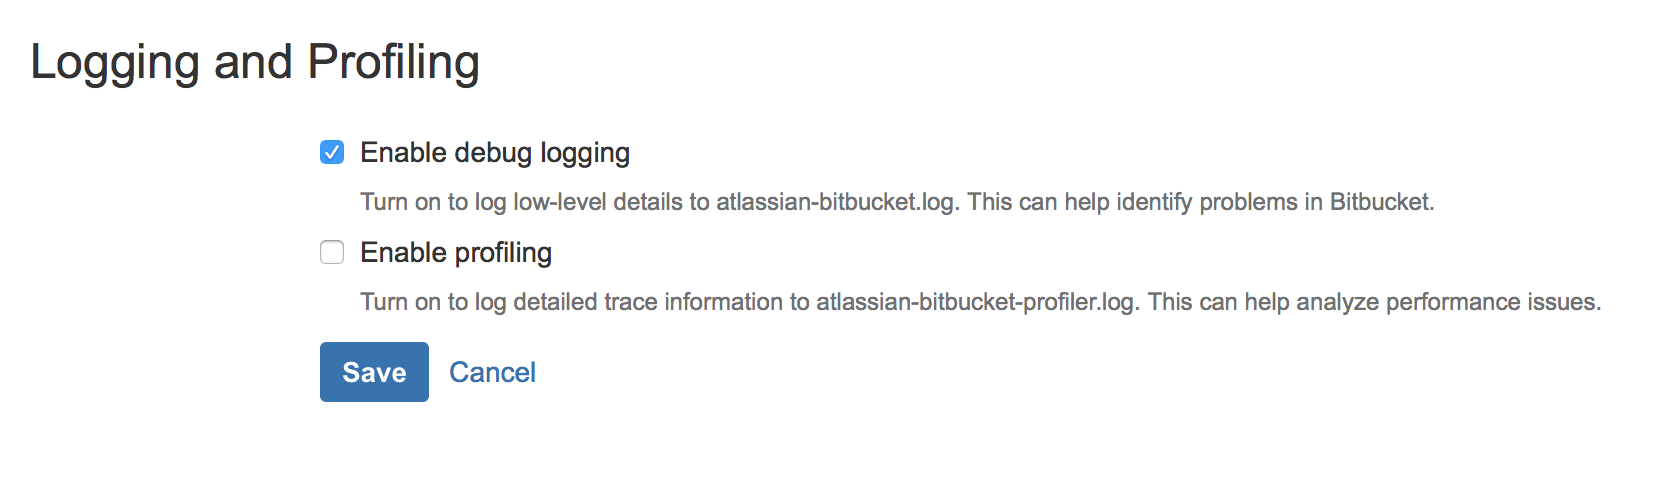
Mark the checkbox Enable debug logging in the Bitbucket Logging and Profiling configurations:
 Bitbucket logging and profiling
You can choose now between adding the plugin debug logging packages at startup or at runtime:
To enable plugin debug logging whenever Bitbucket Server is started, edit the
<Bitbucket home directory>/shared/bitbucket.propertiesfile (if this file doesn't exist then you should create it) and add the following line:logging.logger.de.resolution=DEBUGTo enable plugin debug logging once Bitbucket Server has been started, edit the
<ADMIN_USERNAME> and<BASE_URL>part with your informations and run the following command in your terminal:curl -u <ADMIN_USERNAME> -v -X PUT -d "" -H "Content-Type: application/json" <BASE_URL>/rest/api/latest/logs/logger/de.resolution/debug
After that, the plugin starts detailed logging in the <Bitbucket home directory>/log/atlassian-bitbucket.log.