
ADFS Setup Guide
Goal
Use OpenID Connect with AD FS to authenticate users who are
already existing with their AD FS account names in Jira and Confluence and are members
of the groups providing application access (jira-software-users or jira-servicedesk-users/ confluence-users)create users automatically, should they not exist already
instructions how to enable this feature can be found at the end of this tutorial
Prerequisites
Minimum version supporting Open ID: Windows Server 2016 AD FS - Windows Server 2016
Latest version of the Open-ID app, 3.3.3 as a minimum version
Setup Instructions
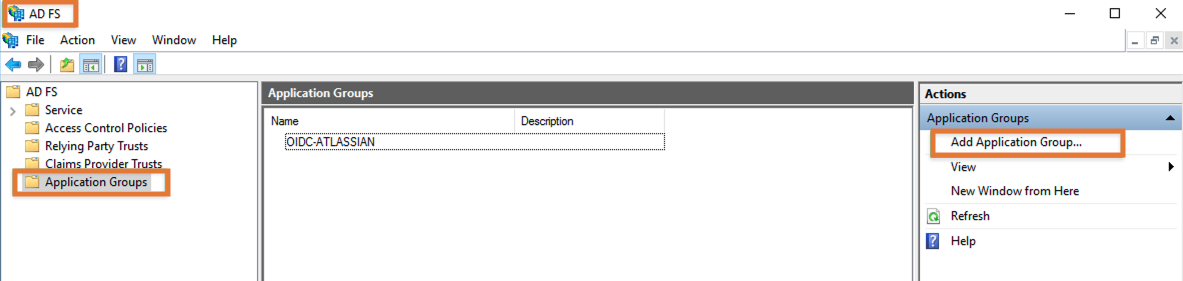
Open the AD FS administration console on your Windows Server and add a new Application Group:
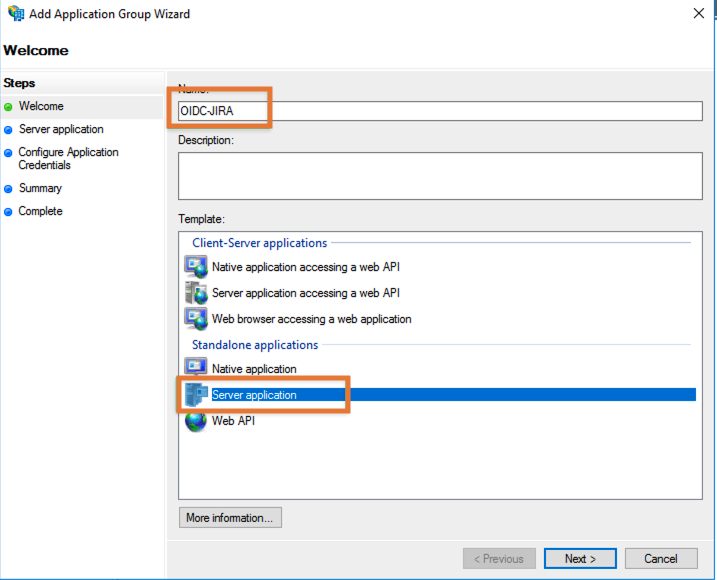
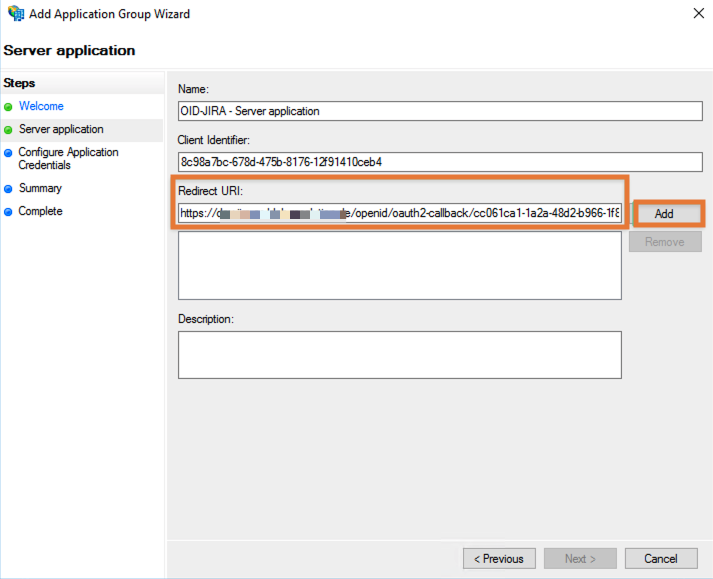
Provide a name for the integration, select Server Application from the Standalone applications section and click Next:
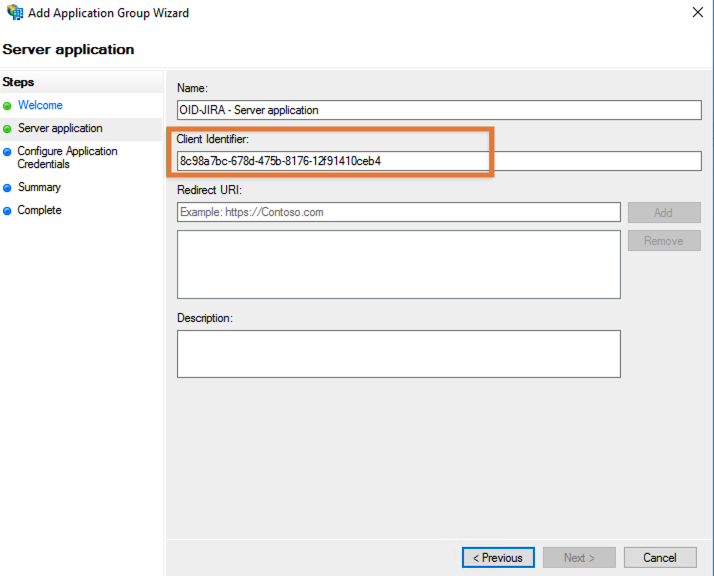
Copy the Client Identifier and leave the wizard for the moment:
In Jira or Confluence navigate to the User Management section and click on the OpenID Authentication link and click on the Add Provider button

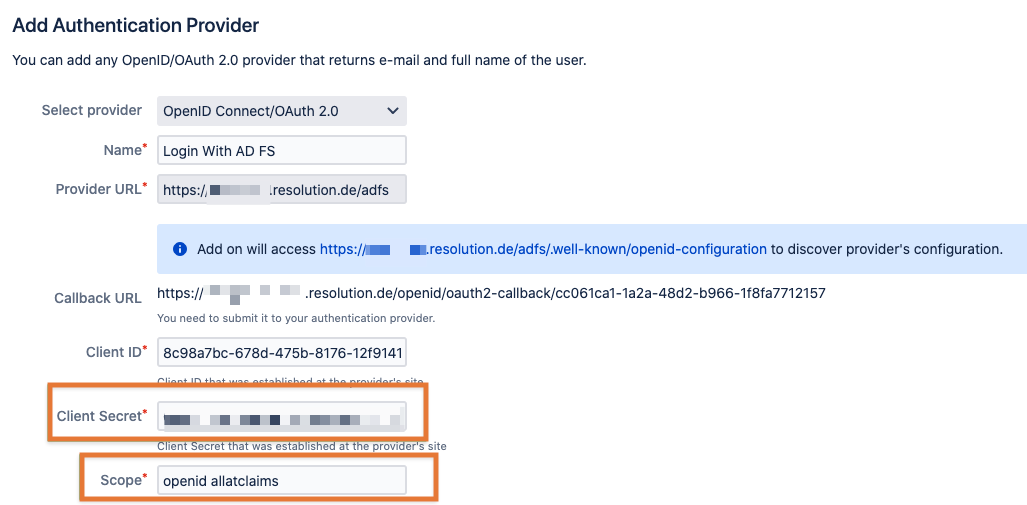
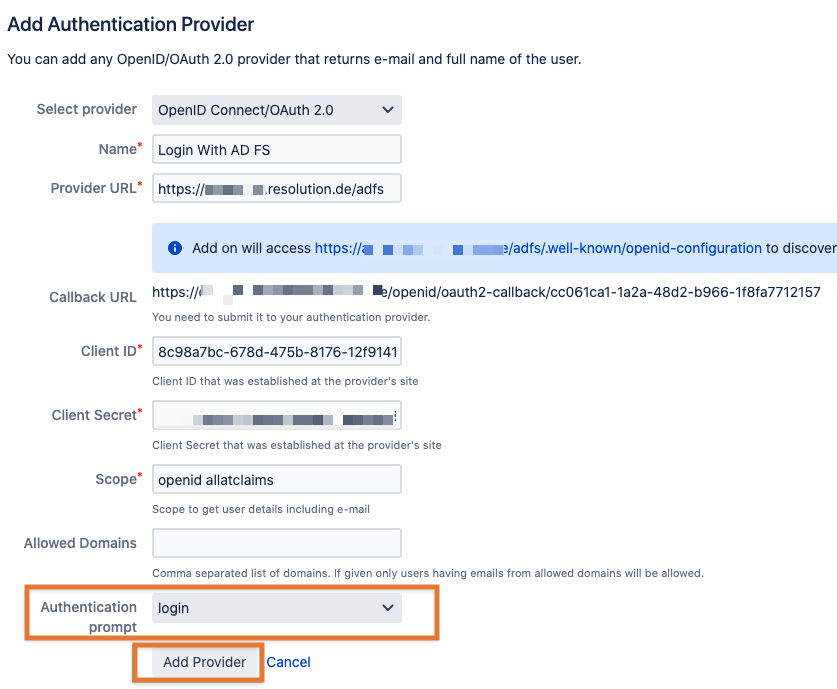
Select/ fill in all the values available to you already and copy the Callback URL for AD FS:
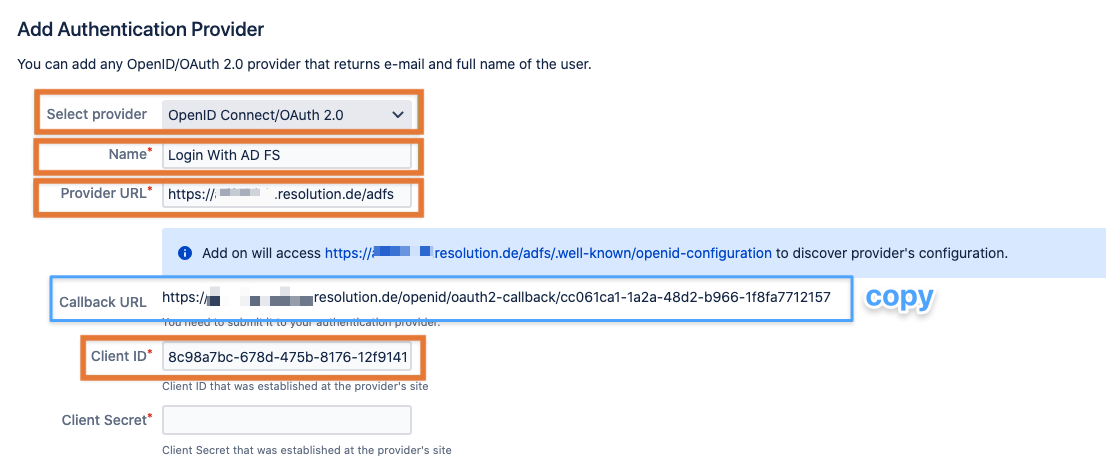
Select provider: OpenID Connect/OAuth 2.0
A Name for the integration (you can change that later, it will be shown on the login page on the button to login with OpenID and AD FS)
Provider URL: add your AD FS server URL, usually with /adfs as trailing path
your Jira/ Confluence server needs direct access to the server, the blue URL shown below the provider URL should be reachable from it
you can test this by using the curl command on the Jira/ Confluence server shell (Linux) or with Power Shell (Windows):
- curl https://your-adfs.com/adfs/.well-known/openid-configuration
it should return JSON data:
- {"issuer":"https:\/\/.....resolution.de\/adfs","authorization_endpoint":"https:\/\/.....resolution.de\/adfs\/oauth ... }
Copy the Callback URL
Paste the Client ID from the previous step in AD FS
Leave the configuration as it is, switch back to AD FS again, paste and Add the callback URL and click Next:
Check the Genrate a shared secret box, use the Copy to clipboard button to retrieve the secret and click Next.
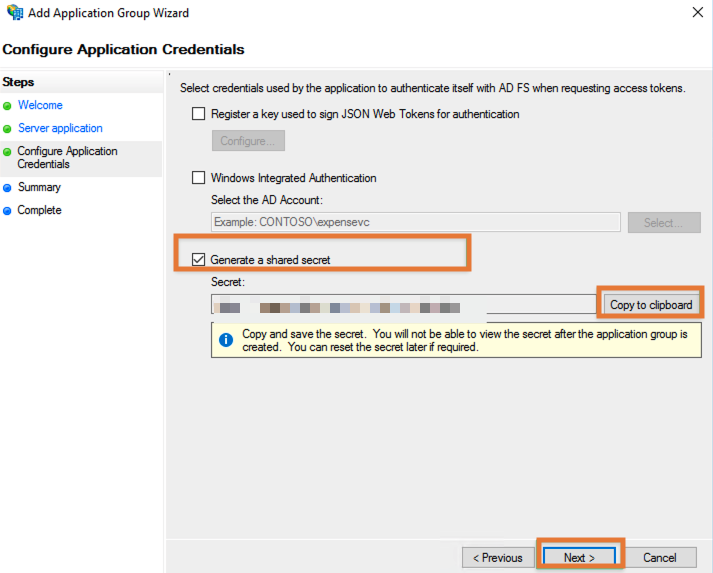
On the summary screen press Next again.
Paste the secret already into the Client Secret field in the provider configuration in Jira or Confluence.
Also add the following two values in the Scope field:
openid
allatclaims
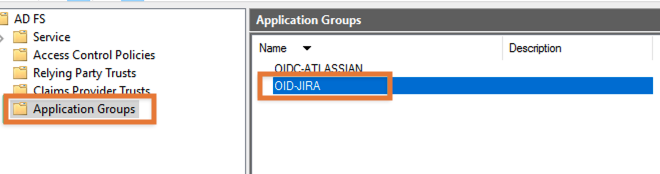
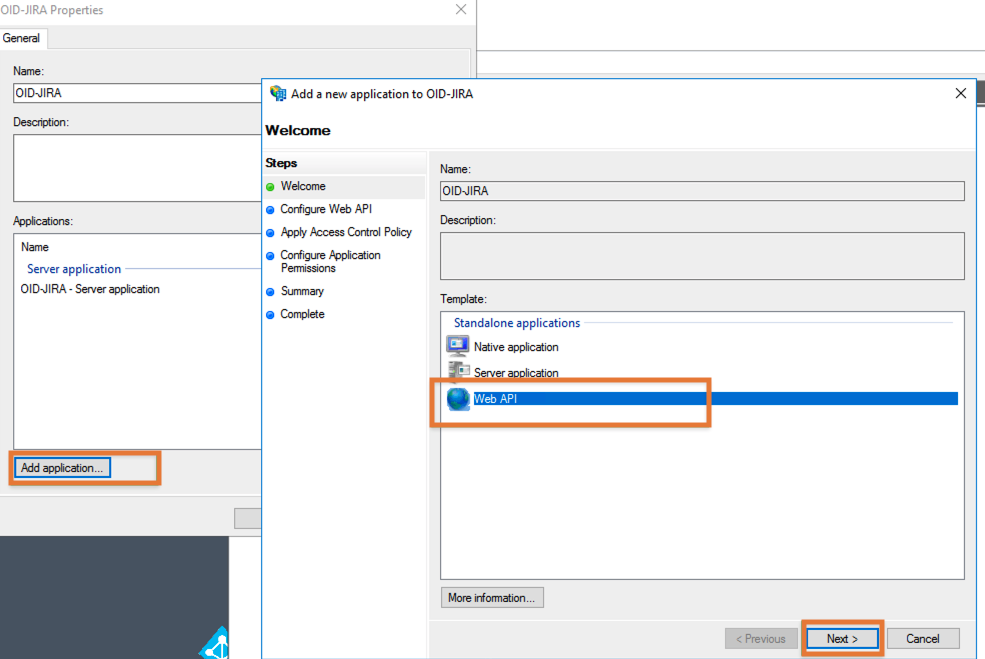
Time to head back to AD FS again and to double click on the new Application Group you've created:
Click on Add application again but this time select Web API and press Next:
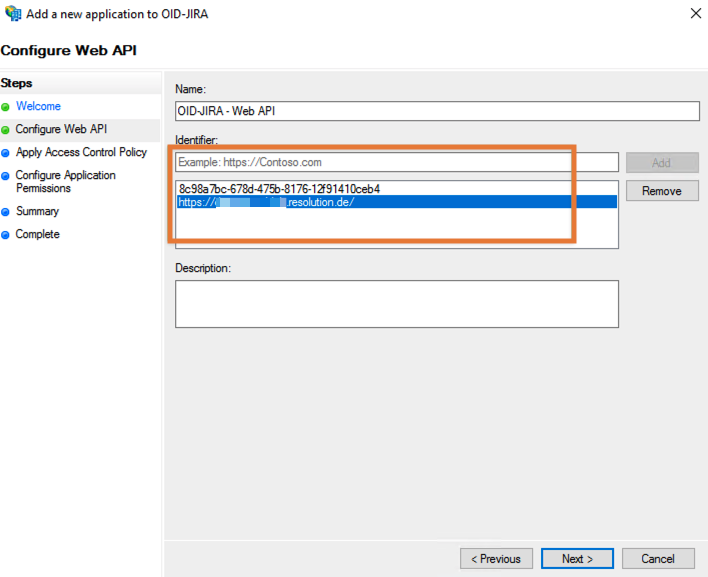
In Identifier, add the Base URL of your Jira or Confluence and the AD FS Server app client ID from earlier
(8c98a7bc-678d-475b-8176-12f91410ceb4 in this tutorial) and click Next:
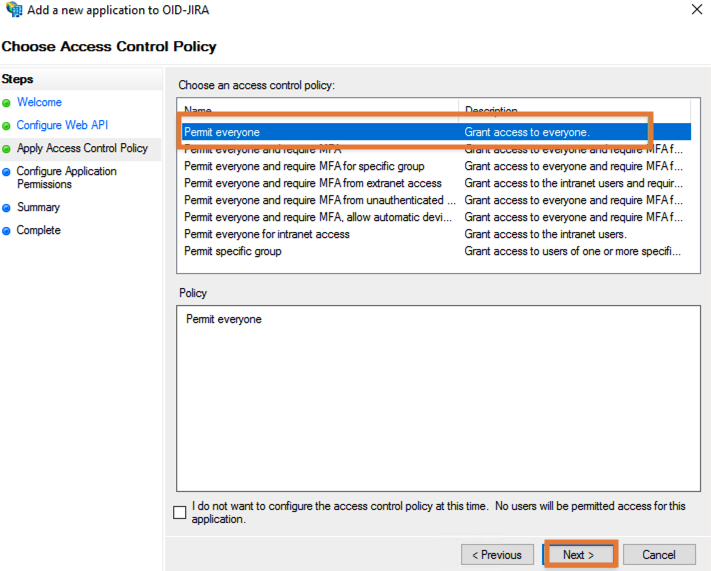
On the Access Control Policy screen, select the a policy, usually Permit everyone and click Next:
On the Configure Application Permissions screen, select two scopes: allatclaims and openid and press Next:

Confirm the summary screen and close the setup wizard.
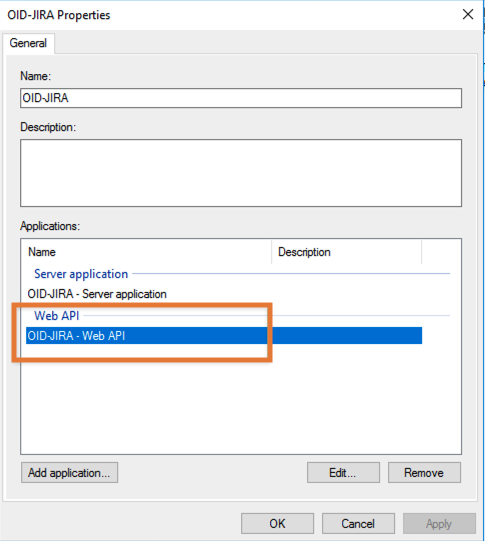
There is one more thing which needs to be changed now on the new Application group.
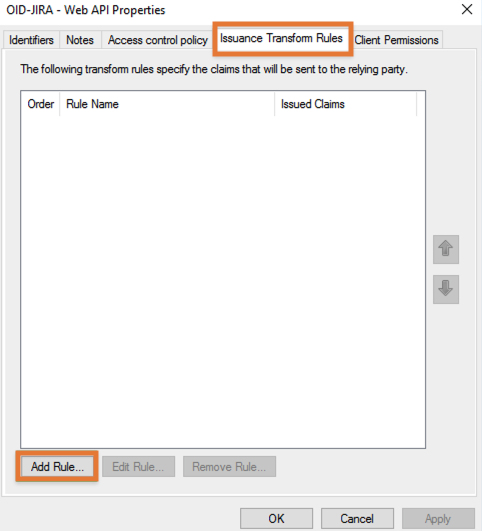
Open it again and double click on the Web-API entry
Open the Issuance Transform Rules tab and click on Add Rule:
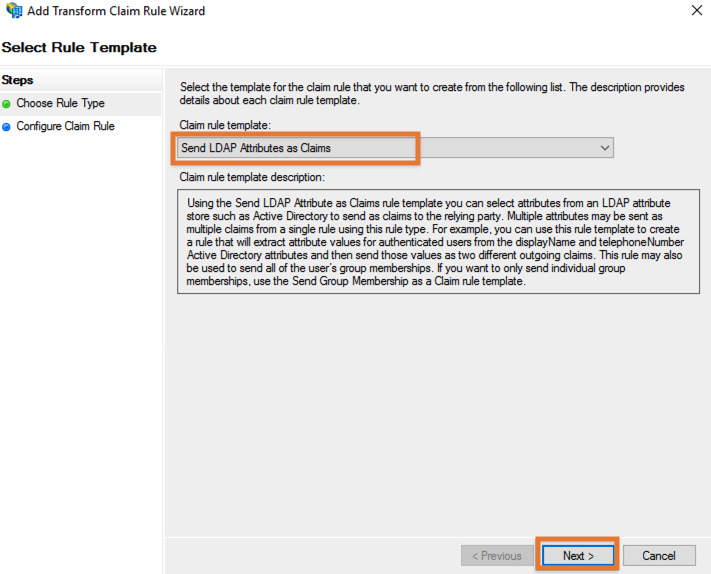
Select the Send LDAP Attributes as Claims template and click Next:
Give it a Claim rule name, select Active Directory as Attribute store, add E-Mail-Addresses as LDAP attribute
and map E-Mail-Address as Outgoing Claim Type against it:
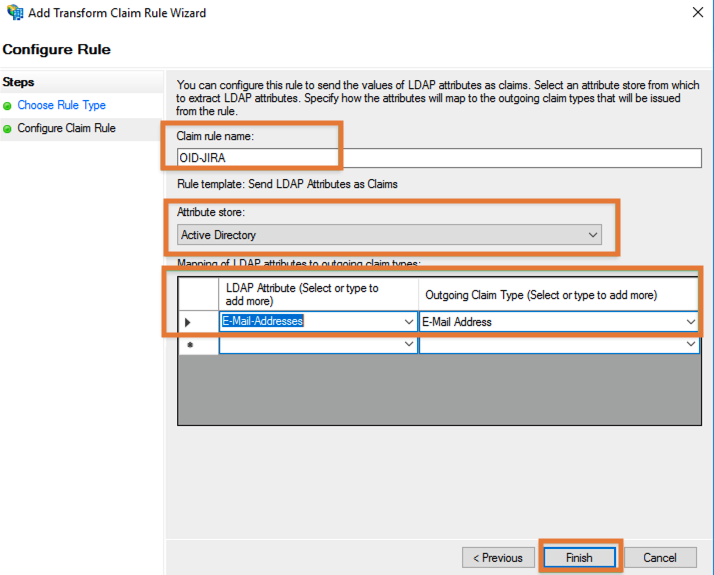
Click Finish/ OK/ OK to leave the configuration again.
Head back to Jira/ Confluence and select login as value for Authentication prompt at the end of the page and click on Add Provider
Now that the configuration is complete on both sides, it's time to test if everything works.
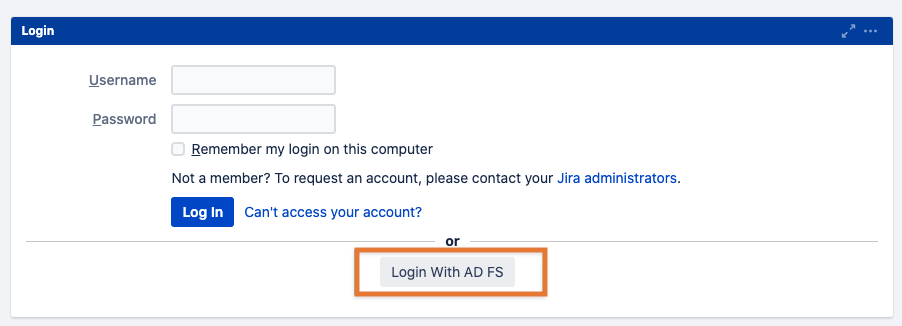
Open your Jira or Confluence login page and click on the button with the name you've provided earlier:
You will be redirected to the AD FS login screen and need to enter the domain and username and password.
You could also use the user principal name, instead of using the Domain\username format.
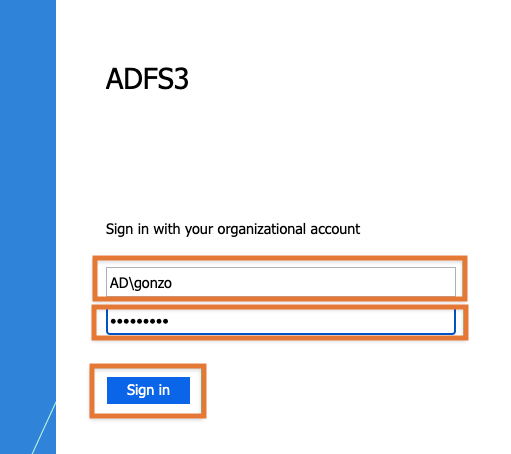
After logging in successfully, you'll be redirected to Jira or Confluence again.
Automatically Create Users
User creation can be enabled with the link below the provider list:
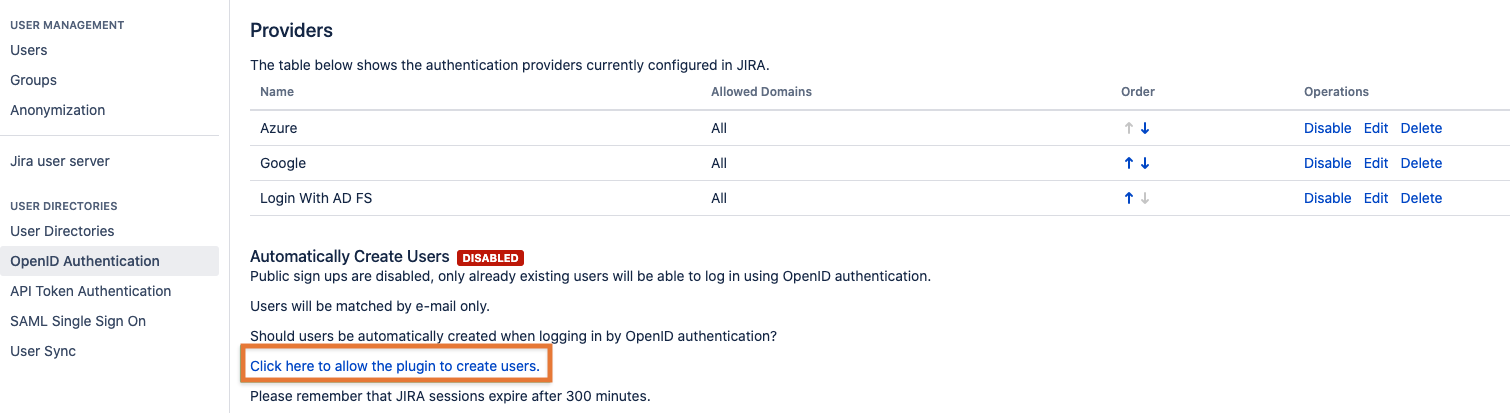
The app will create the user with the email address as username. If no email is set for the AD user account, it will be the user principal name.
The user is also automatically added to the group which provides application access to Jira or Confluence.